
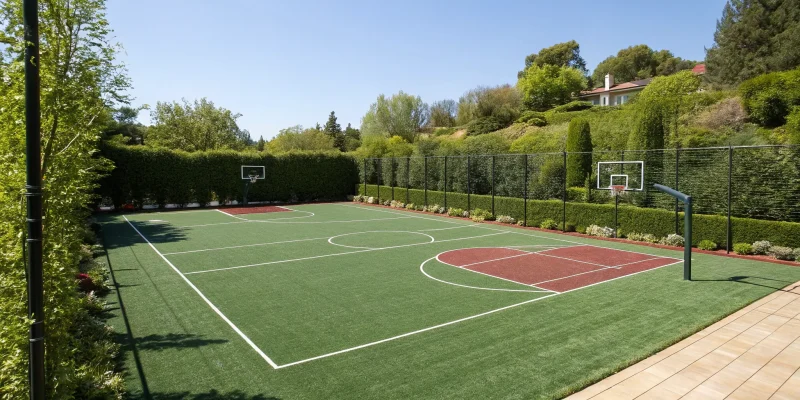
Why limit your backyard to a single activity? A simple basketball hoop is fun, but a true multisport game court transforms your space into a versatile arena for endless entertainment. One thoughtfully designed court can host a fast-paced pickleball match in the morning, a family volleyball game in the afternoon, and even a putting contest on an integrated turf green in the evening. This flexibility means the fun never gets old. As your family’s interests change, the court adapts right along with them. It’s the most innovative way to maximize your yard’s potential, giving you a dozen different ways to play without needing a dozen different spaces.
Key Takeaways
- Maximize Your Yard with a Single, Versatile Court: A custom multisport game court transforms one area into a hub for countless activities. By incorporating features like adjustable nets, custom line markings, and integrated turf, you create a flexible space that adapts to your family’s favorite games, from basketball to pickleball and even mini-golf.
- Invest in Pro-Grade Materials for a Better, Safer Game: The quality of your court’s surface and equipment directly impacts playability and safety. Professional-grade materials like interlocking tiles and rust-proof hardware provide superior shock absorption, consistent performance, and the durability to withstand years of play and harsh weather.
- A Smart Plan and Simple Upkeep Protect Your Investment: A successful court project begins with thoughtful planning that includes layout design, local permits, and a clear budget. Once built, a simple routine of regular cleaning and equipment checks is all it takes to keep your court in top condition, ensuring it remains a lasting source of family fun.
What Makes a Custom Multisport Game Court a Great Investment?
Adding a multisport game court to your backyard is about more than just creating a place to play—it’s an investment in your family’s lifestyle, health, and the long-term value of your home. Think of it as the ultimate backyard upgrade, a central hub for activity and connection that pays dividends for years to come. Instead of a space dedicated to a single activity, a custom court offers the flexibility to adapt to your family’s changing interests, from a fast-paced game of basketball one day to a friendly pickleball match the next.
This versatility is what makes a multisport game court so special. It’s a space that encourages everyone to get outside, stay active, and spend quality time together, away from screens. It becomes the go-to spot for after-school fun, weekend tournaments, and neighborhood get-togethers. Beyond the immediate enjoyment, a professionally designed game court is a significant asset. It enhances your property’s appeal, making your home stand out and adding tangible value should you ever decide to sell. It’s a feature that offers a unique blend of personal enjoyment and smart financial sense.
One Court, Endless Games
The beauty of a multisport game court lies in its incredible versatility. Why limit your backyard to just a basketball hoop or a tennis court when you can have a space that accommodates a wide range of activities? A single, thoughtfully designed court can host everything from basketball and volleyball to pickleball and badminton. This flexibility means the fun never gets old. As your kids grow and their interests change, the court adapts right along with them. It’s a smart use of space that maximizes your backyard’s potential, giving you endless options for recreation without needing a massive yard.
Fun for the Whole Family, All Year Long
A home sports game court is a powerful tool for bringing people together. It naturally encourages exercise, helps everyone burn off steam, and provides a healthy outlet for friendly competition. More importantly, it fosters connection and creates a space where lasting memories are made. Imagine your kids and their friends playing for hours, or hosting a weekend barbecue where the main event is a family volleyball tournament. These are the moments that matter. A custom court provides a safe, convenient, and endlessly entertaining reason for everyone to put down their devices and enjoy the fresh air together.
Add Lasting Value to Your Home
When it comes to home improvements, a multisport game court is a feature that truly adds value. It’s a unique amenity that can make your property much more attractive to potential buyers, especially families. In a competitive real estate market, having a professionally installed game court can set your home apart and justify a higher asking price. It’s not just a patch of asphalt; it’s a lifestyle feature that signals a home built for fun, activity, and family life. This kind of addition enhances your property’s overall appeal and can provide a solid return on your investment.
Key Features of a Modern Multisport Game Court
A modern multisport game court is so much more than just a slab of concrete with a basketball hoop. It’s a dynamic space designed for endless fun, activity, and friendly competition. The best courts are thoughtfully planned to accommodate a variety of sports and activities, making them a true centerpiece for your backyard. Think about it: one dedicated area that can host a pickup basketball game, a competitive pickleball match, and even a round of mini-golf, all in the same afternoon. This level of versatility is what makes a custom court a fantastic addition to any home. By combining smart design with high-quality materials, you can create a hub for family entertainment that will be enjoyed for years. It’s about creating a space that brings people together, encourages active lifestyles, and adds real value to your property. From the playing surface under your feet to the adjustable nets that switch between games, every element is chosen to maximize your enjoyment and the court’s functionality. Let’s look at the key features that transform a simple court into a premier athletic space that your family will love.
A Central Hub for Basketball
At the heart of most multisport game courts is a dedicated basketball area. This space often serves as the central hub, with other games and activities planned around it. A typical design includes two high-quality basketball hoops, one at each end, with court lines for regulation play. But the smart design doesn’t stop there. The same space can be striped for other games, like pickleball, creating a multi-use surface that’s always ready for action. This approach maximizes every square foot, allowing you to switch from a game of hoops to a pickleball match in minutes. It’s the perfect foundation for your family’s custom game court.
Integrating Turf for Mini Golf
Why limit your court to just ball sports? One of the most creative ways to enhance your court is by integrating a custom putting green. Imagine a mini-golf course wrapping around the perimeter of your basketball court. We can build this using different types of synthetic turf—a smooth putting green turf for the main area and a taller turf for the fringe. This adds an entirely different kind of activity to your backyard, perfect for a relaxing afternoon or for entertaining guests. It’s a fantastic way to add visual interest and even more fun without the constant maintenance of natural grass.
Adjustable Nets for More Ways to Play
Versatility is the name of the game, and nothing adds more flexibility than an adjustable net system. We can install a multiport netting system that easily changes height, instantly preparing your court for a new sport. In just a few moments, you can set it up for a fast-paced game of pickleball, raise it for badminton, or get it ready for a volleyball match. This simple feature dramatically expands the number of activities your family can enjoy. It ensures that your court appeals to everyone, regardless of their age or athletic interests, making it a truly inclusive space for play.
Professional-Grade Surface Materials
The surface you play on makes all the difference in terms of performance, safety, and durability. That’s why we use professional-grade materials like VersaCourt tiles. These tiles feature a patented interlocking system that creates an exceptionally uniform and durable surface, perfect for everything from basketball and tennis to shuffleboard. This type of surface provides better shock absorption than concrete, which is easier on your joints and helps reduce the risk of injury. Investing in a high-quality, durable surface ensures your court can handle intense play and all types of weather while providing a safe environment for years of fun.
How Adjustable Netting Unlocks Your Court’s Potential
A great multisport game court is all about versatility. While a basketball hoop is a fantastic centerpiece, the real magic happens when you can instantly transform the space for a completely different game. This is where a high-quality adjustable netting system comes in. It’s the feature that turns your court from a single-use area into a dynamic hub for endless activities. Instead of being locked into one sport, you have the freedom to play whatever you’re in the mood for, whenever you want. It’s about creating a space that grows with your family’s changing interests.
The versatility of adjustable netting maximizes your court’s functionality. Unlike rigid, permanent fixtures that can be limiting, a modern netting system can be easily modified to suit different sports, ensuring your court is always ready for action. This flexibility allows you to get the most out of your investment, creating a space that serves every member of your family, from young kids learning the basics to adults enjoying a competitive match. With a professional sports game court, you can host a neighborhood pickleball tournament one day and a family volleyball match the next, all in the same space. It’s the ultimate way to bring everyone together for some active fun.
Set Up for a Pickleball Match
Pickleball has become incredibly popular, and an adjustable net makes it easy to join the fun without building a dedicated court. The system allows for a quick and easy setup, so you can get a game going in minutes. Simply lower the net to the official pickleball height of 34 inches at the center, and you’re ready to play. This flexibility means you don’t have to commit precious yard space to a permanent, single-sport fixture. Instead, your court can adapt to your interests, making it easy to enjoy a spontaneous match with friends and family whenever the mood strikes.
Switch to a Game of Volleyball
Ready for a different challenge? With the right adjustable netting, transitioning from pickleball to volleyball is seamless. The net can be raised to accommodate the specific height requirements for volleyball, badminton, or any other net sport you enjoy. This simple adjustment completely changes the dynamic of your court, opening it up to a new world of games. It’s an ideal feature for families with diverse interests, ensuring there’s always something for everyone to play. The right fences and netting system is designed for durability and ease of use, so you can spend less time on setup and more time playing.
Adjust the Net Height for Any Sport
The true beauty of an adjustable net is its ability to adapt to any game or player. You can set the height for official tennis practice, lower it for the kids to invent their own game, or find the perfect level for a casual game of badminton. This versatility not only enhances the fun but also improves safety. Unlike rigid fencing, the soft netting is designed for active play environments. It ensures your court is always ready for action, no matter what game is on the agenda. This adaptability is what makes a multisport game court a lasting source of entertainment for your entire family.
What Games Can You Play on a Multisport Game Court?
One of the best things about designing a custom multisport game court is the sheer number of activities you can pack into one space. It’s not just a basketball court or a tennis court—it’s a flexible arena for whatever game your family is in the mood for. With smart design choices like adjustable nets, custom line markings, and versatile surfaces, your backyard can become the go-to spot for everything from intense competition to casual weekend fun. A single court can easily accommodate a wide range of sports, making it a dynamic hub for an active lifestyle.
Basketball, Tennis, and Other Court Classics
A multisport game court is the perfect foundation for all the classics. We can design a space with a central basketball court, complete with high-quality Dominator hoops for everything from a game of H-O-R-S-E to a full-court press. With the right dimensions and striping, that same area can host a tennis match or a fast-paced game of street hockey. The beauty of a custom game court is its versatility. You can easily switch from shooting hoops to practicing your backhand without needing separate spaces for each activity. It’s all about creating a layout that supports your family’s favorite sports.
Practice Your Putting on a Turf Green
Why limit your court to just bouncing balls? We can integrate a dedicated putting green right alongside your main court area. By using high-quality synthetic turf, we can create a realistic green that’s perfect for practicing your short game or enjoying a friendly putting competition with the family. This adds an entirely different kind of activity to your backyard, offering a more relaxed and focused way to enjoy the outdoors. It’s a fantastic feature for golf enthusiasts and a fun, low-impact game that everyone from kids to grandparents can play together.
Serve Up Some Pickleball and Volleyball
Pickleball has become incredibly popular, and a multisport game court is the ideal place to play. We can paint lines for both basketball and pickleball on the same surface, so you can switch games in an instant. With an adjustable net system, you can set the perfect height for a pickleball match and then raise it for a lively game of volleyball or badminton when friends are over. These net-based sports are incredibly social and perfect for backyard parties and family gatherings. Your court can quickly become the neighborhood hotspot for friendly competition.
Get Creative and Invent Your Own Games
Your multisport game court is a blank canvas for fun. Beyond the official rules of tennis or basketball, the durable, all-weather surface is perfect for classic kid-friendly games like hopscotch, four square, or just letting them zoom around on scooters. You can even invent your own family games. The customizable design allows you to create a space that truly fits your lifestyle. Because the surfaces we use are built for safety and durability, you can feel confident letting your family’s imagination run wild, creating memories that will last for years to come.
Why We Build with Dominator Products
When you invest in a custom multisport game court, the quality of the equipment is just as crucial as the surface you play on. After all, what’s a basketball court without a hoop that can handle a serious game, or a pickleball court with a sagging net? That’s why we partner with Dominator for our court equipment. We’ve seen firsthand how their products stand up to years of competitive play and the unpredictable Long Island weather. Their commitment to professional-grade quality means your court will be ready for action whenever you are.
Building exceptional turf and game courts is about more than just laying down a surface; it’s about creating a complete, long-lasting experience. Dominator’s focus on rugged construction and durable, rust-proof materials gives us—and you—confidence that your investment is built to last. From heavy-duty basketball hoops to pro-level pickleball posts, their equipment provides the reliability and performance needed to turn your backyard into the ultimate sports destination. We choose our partners carefully, and Dominator consistently delivers the quality our clients deserve.
Rust-Proof Aluminum for Durability
One of the biggest enemies of outdoor equipment is rust. Here on Long Island, with humid summers and wet winters, metal components can quickly corrode if they aren’t made from the right materials. Dominator solves this problem by constructing their in-ground posts from long-lasting, rust-proof aluminum. This means your basketball hoop and net posts won’t just look great on day one—they’ll maintain their structural integrity and clean appearance for years to come. You won’t have to worry about unsightly rust stains or weakening that could compromise safety. It’s a smart design choice that ensures durability and reduces long-term maintenance.
Heavy-Duty Hoops for Serious Play
If you have aspiring athletes in your family, a flimsy, store-bought basketball hoop just won’t cut it. Dominator’s in-ground basketball hoops are designed for players who are serious about their game. With professional specs and rugged construction, these hoops offer the stability and performance you’d expect from a professional court. The heavy-duty build can withstand aggressive play, from powerful shots to slam dunks, without rattling or wobbling. This creates a more authentic and satisfying playing experience, allowing you and your family to practice and compete on a hoop that feels just like the real thing.
Pro-Level Posts for Pickleball
Pickleball is a game of precision, and nothing disrupts a match faster than a droopy, unstable net. Dominator’s in-ground posts are engineered specifically for permanent pickleball courts, providing the perfect tension and stability for regulation play. These posts are set securely into the ground, ensuring your net stays at the correct height without sagging in the middle. This professional-level setup guarantees a consistent and fair playing surface every time you step onto the court. It’s this attention to sport-specific detail that makes a custom-built court feel truly premium and ready for competitive action.
Stainless Steel Hardware That Lasts
It’s often the small details that determine a product’s lifespan, and hardware is a perfect example. While the main posts might be aluminum, the nuts, bolts, and other fasteners that hold everything together can be weak points for rust. Dominator addresses this by using stainless steel hardware across their systems. This combination of rust-proof aluminum and corrosion-resistant stainless steel ensures that every single component is built to endure the elements. It prevents the hardware from seizing up or failing, making any future adjustments easy and keeping the entire structure secure and safe for years of play.
Why is Synthetic Turf a Perfect Fit for Your Court?
When you’re designing a multisport game court, the surface is everything. While hard surfaces are perfect for games like basketball and pickleball, integrating sections of synthetic turf can completely transform the space. Think of it as the ultimate utility player for your backyard. High-quality synthetic turf gives you a soft, green, and incredibly versatile area for everything from a personal putting green to a spot for soccer drills or field hockey practice. It’s a fantastic way to add more activities to your court without the constant work that a natural lawn demands.
Modern turf looks and feels remarkably like the real thing but comes with a long list of benefits that make it a smarter choice for an active family. It’s designed for performance, safety, and longevity, ensuring your court is ready for fun whenever you are. It blends seamlessly with other court surfaces and your surrounding landscape, creating a cohesive and professional look for your entire backyard entertainment space. Unlike natural grass, which can become a patchy, muddy mess under heavy use, synthetic turf maintains its pristine appearance year-round. This means you get a consistently beautiful and functional surface that adds real value and usability to your home, making it a worthwhile investment for any family that loves to play outdoors.
More Durable Than Natural Grass
Let’s be honest: natural grass just can’t keep up with the demands of a sports game court. The constant running, jumping, and scuffing would quickly turn a beautiful lawn into a patchy, muddy mess. Synthetic turf, on the other hand, is built for this. It’s engineered to withstand heavy, repeated use without showing signs of wear and tear. The fibers are resilient, so they won’t get matted down or ripped out, even during the most intense games. It also holds up beautifully against Long Island’s weather, from the summer sun to winter frosts. This durability means your court will look pristine and play perfectly for years, without the need for reseeding or patching.
Ready for Play in Any Weather
One of the biggest frustrations with a natural grass playing surface is its unreliability. A heavy rainstorm can leave your lawn soggy and unplayable for days. With synthetic turf, that’s a problem of the past. It’s designed with a sophisticated drainage system that allows water to pass through quickly, so the surface dries out almost immediately after the rain stops. This means no more canceled games or muddy footprints tracked into the house. Your court is always ready for action, whether it’s a sunny afternoon or a cool morning after a downpour. This all-weather accessibility ensures you get the maximum use and enjoyment out of your investment, all year long.
Less Time on Maintenance, More Time Playing
A natural lawn is a part-time job. It needs constant mowing, watering, fertilizing, and weeding to stay healthy and look good. When you install synthetic turf, you get all that time back. The maintenance is incredibly simple—an occasional rinse with a hose to clear off dust or a quick sweep to remove leaves is usually all it takes. You can say goodbye to your lawnmower and sprinkler system. Instead of spending your weekends doing yard work, you can spend them actually using your court, playing with your kids, and making memories. It’s a low-maintenance solution that fits perfectly into a beautifully designed landscape.
A Safer, More Comfortable Surface
When your family is playing hard, safety is a top priority. Modern synthetic turf is designed with safety in mind. Many systems include a cushioned underlayer that helps absorb impact, making falls and tumbles a little softer than they would be on hard-packed dirt or pavement. This can help reduce scrapes, bruises, and more serious injuries. The surface itself is also perfectly even and consistent, with no hidden divots or holes that could cause someone to trip or twist an ankle. This creates a reliable and comfortable playing field where everyone can feel confident giving it their all, from the youngest players to the adults.
How Custom Surfaces Improve Your Game
The surface of your multisport game court is more than just the ground you play on—it’s the foundation for every game. The right material directly impacts performance, safety, and how much you’ll enjoy your court for years to come. While concrete and asphalt were once the standard, they can be unforgiving on the joints and prone to cracking over time with Long Island’s weather cycles. Today’s advanced surfaces are engineered for sport, offering superior playability, shock absorption, and durability that old-school materials just can’t match. They transform a simple play area into a professional-feeling arena.
Choosing a high-quality, custom surface for your turf and game court is one of the most important decisions you’ll make in the design process. A premium surface ensures a consistent ball bounce for a true game feel, provides better cushioning to protect against injuries, and creates a safer environment for your family and friends. Think of it as an investment not just in your property, but in better play, more fun, and total peace of mind. With the right surface, you get a professional-grade experience that looks incredible and is built to last through countless seasons of play.
The Benefits of Top Court Met Flex Tiles
We use Top Court Met Flex tiles because their patented interlocking system creates an exceptionally uniform and durable surface. This seamless design ensures a consistent and predictable ball response, whether you’re shooting hoops, playing tennis, or starting a pickleball match. Unlike asphalt, there are no cracks or uneven spots to worry about. The tiles are engineered to provide the ideal balance of traction and give, allowing for quick pivots and movements without straining your joints. This professional-grade surface is perfect for a wide range of sports, giving you a reliable and high-performance court right in your backyard.
Designing Your Court’s Color Scheme
Your court should be an extension of your home’s style, not just a functional space. With custom court tiles, you can design a color scheme that complements your landscape and personal taste. Choose your favorite team colors, add permanent lines for different sports, or create a unique pattern that makes your court truly one-of-a-kind. Beyond aesthetics, these specialized surfaces are designed with safety in mind. They are made to handle the impact of intense play, absorbing shock to reduce stress on your body. This means you and your family can play longer and more comfortably, with less fatigue and risk of strain.
Built to Handle Any Weather
A great backyard court is one you can use whenever you want, without worrying about the weather. Our court surfaces are built to withstand Long Island’s diverse climate, from the hot summer sun to freezing winter temperatures. The materials are UV-stable to resist fading, so your court’s vibrant colors will last for years. The open-grid design allows water to drain through quickly, preventing puddles and letting you get back to playing soon after it rains. This durable, low-maintenance design means you’ll spend less time on upkeep and more time enjoying your court with family and friends, season after season.
Safe, Slip-Resistant Surfaces
Safety is always a top priority, especially when it comes to sports. Our court surfaces feature a slip-resistant texture that provides excellent grip, even in damp conditions. This significantly reduces the risk of falls and injuries, allowing everyone from young kids to adults to play with confidence. The tiles also offer slight vertical flex, which helps absorb impact and lessens the strain on players’ knees and ankles during high-energy games. This combination of shock absorption and secure footing creates a safer and more comfortable playing environment for athletes of all ages.
How to Plan Your Custom Multisport Game Court
Bringing a custom multisport game court to your backyard is an exciting project, and a little bit of planning is all it takes to make sure the final result is exactly what you dreamed of. Thinking through the key details ahead of time ensures a smooth process from the first measurement to the first game. We’ll walk you through the four essential steps to plan your perfect court: mapping out your space, understanding local rules, picking the right materials, and setting a clear budget and timeline.
Measure Your Space and Design the Layout
First things first, let’s look at your space. Grab a tape measure and get a clear idea of the available area in your yard. A multisport game court is brilliant because it uses a single playing surface with different colored lines to mark out various games, letting you get the most out of your space. Think about what sports your family will play most often. Is basketball the top priority, or are you a family of pickleball fanatics? Your answer will help guide the design. Our team can help you create a custom layout that fits your yard’s dimensions and your family’s favorite activities, ensuring every inch of your new game court is ready for action.
Understand Local Zoning and Permits
Before breaking ground, it’s important to check in on local regulations. Building a game court is a construction project, and most towns in Long Island have specific zoning laws and permit requirements you’ll need to follow. This might include rules about how far the court needs to be from your property line, drainage requirements, or even restrictions on lighting. You can typically find this information on your local municipality’s website. The good news is you don’t have to sort through this alone. As part of our process, we handle all the necessary building permits and applications, ensuring your project is fully compliant and hassle-free from the start.
Choose the Best Materials for Your Needs
The materials you choose for your court surface are a huge factor in its performance, safety, and longevity. You want a surface that can handle everything from intense games to Long Island’s changing seasons. We use high-performance materials like Top Court Met Flex tiles, which provide excellent traction and shock absorption to keep players safe. For surrounding areas or a dedicated putting green, our synthetic turf is a durable, low-maintenance option. Selecting the right materials is key to creating a court that not only looks professional but is also built to last for years of family fun.
Create a Realistic Budget and Timeline
Finally, let’s talk numbers and schedules. A custom multisport game court is an investment that adds incredible value and endless entertainment to your home. Having a clear budget in mind from the beginning helps guide decisions on the court’s size, materials, and special features. It’s also helpful to have a general timeline. The construction process can be affected by things like permit approvals, weather, and the complexity of your design. We believe in total transparency, so we’ll work with you to establish a detailed project plan and budget, ensuring there are no surprises along the way. You’ll know exactly what to expect and when you can start planning your first game.
How to Keep Your Court in Top Condition
Your new multisport game court is going to be the heart of your backyard, a place for countless games and memories. To make sure it stays in prime condition for years of fun, a little bit of regular maintenance is all you need. Think of it as a simple routine that protects your investment and keeps the court safe and ready for play at a moment’s notice. Consistent care prevents small issues from becoming bigger problems, ensuring your court looks and performs its best through every season.
Keeping your court clean and well-maintained is about more than just appearances. A clear surface is a safe surface, free from slippery wet leaves or debris that could cause a fall. Regular upkeep also preserves the integrity of the court materials, extending their life and saving you from more significant repairs down the road. By spending just a few minutes each week on simple tasks, you ensure that your court remains a source of joy and activity for your family, rather than another item on your to-do list. It’s a small commitment that pays off with every game played.
Simple, Regular Cleaning Tips
The foundation of great court care is keeping the surface clean. Debris like leaves, twigs, and dirt can hold moisture and become slippery, so it’s best to clear them away regularly. Once a week, a quick pass with a leaf blower or a soft-bristled broom is usually enough to do the trick. If you notice any standing water after it rains, sweep it off to prevent the surface from softening over time. A simple hosing down with clean water can also help wash away any fine dirt or dust that builds up, keeping your court’s colors vibrant and its surface ready for action.
How to Care for Your Court Seasonally
As the seasons change here on Long Island, your court’s needs will, too. In the fall, be extra diligent about clearing wet leaves, as they can stain the surface if left to sit for too long. It’s also a good idea to inspect the court after major storms or temperature shifts for any signs of wear. A proactive step you can take is to trim any overhanging tree branches. This not only reduces the amount of leaves and debris that fall onto the court but also prevents potential damage from falling limbs during a storm. A little seasonal attention ensures your court weathers the elements beautifully.
Maintaining Your Equipment
Your court’s surface isn’t the only thing that needs a check-up. Your equipment, from the basketball hoop to the pickleball net, plays a huge role in your family’s enjoyment and safety. Make it a habit to regularly inspect your gear. Check that net posts are secure, the basketball hoop is stable, and all hardware is tight. Wipe down surfaces to remove any dirt or grease that might have accumulated. Ensuring your equipment is in top shape means every game is played as it should be—safely and with gear that performs at its best.
Protecting Your Court’s Surface for Years to Come
To ensure the longevity of your court, it’s important to address any minor issues before they escalate. If you spot a small crack or see any paint starting to peel, getting it repaired promptly will prevent further deterioration. This proactive approach is the best way to protect the surface. Of course, starting with high-quality materials makes all the difference, as the durable surfaces used in our sports game courts are designed to withstand the elements. For any deeper cleaning or repairs, professional restoration and sealing services can revitalize your court and keep it looking brand new.
Related Articles
- MultiSports Game Courts For Pickleball And Tennis – Gappsi Group
- Mateflex Multi-Sport Pickleball Court Installation in Brookville, NY – Gappsi Group
- Transforming Backyards with Purpose: A Custom Multisport Game Court in Dix Hills, NY – Gappsi Group
- Multipurpose Sports Game Courts in Atlantic Beach, N.Y. – Gappsi Group
- Backyard Basketball Dreams Realized: Cutchogue’s Custom Sports Game Court – Gappsi Group
Frequently Asked Questions
How much space do I really need for a multisport game court? This is one of the most common questions we get, and the answer is more flexible than you might think. You don’t need a massive estate to create an amazing play area. The beauty of a custom court is that we design it to fit your specific yard and your family’s favorite activities. A compact space can be perfect for a dedicated pickleball court or a half-court for basketball, while a larger area can accommodate full-court games and even a surrounding putting green. It all starts with a smart layout that makes the most of what you have.
What makes a professional surface like Top Court tiles better than just painting lines on concrete? The difference is all about performance and safety. While concrete is a hard, unforgiving surface that can be tough on your joints, our tile systems are engineered for athletics. They have built-in shock absorption that cushions landings and reduces the strain on knees and ankles, which means you can play longer and more comfortably. These surfaces also provide a consistent ball bounce and superior traction, creating a safer and more authentic game experience that you just can’t get from a simple concrete slab.
Can we actually use the court during the winter on Long Island? Yes, you absolutely can. Our court surfaces are built to handle Long Island’s weather, including the freeze-thaw cycles of winter. The materials are incredibly durable and won’t crack like asphalt can. Plus, the open-grid design of the tiles allows for excellent drainage, so snowmelt and water don’t pool and create icy patches. As long as the surface is clear of snow, it’s ready for a game, giving you a place for outdoor activity all year long.
How long does the planning and installation process typically take? The timeline for a custom court can vary depending on a few factors, like the complexity of your design and the local permit process. We handle all the permit applications to make things as smooth as possible for you. Once we begin, we work efficiently to bring your design to life. During our initial consultation, we’ll give you a clear and realistic timeline based on your specific project so you know exactly what to expect from start to finish.
Is a multisport game court difficult to maintain? Not at all. In fact, it’s significantly easier to care for than a traditional lawn. The main task is simply keeping the surface clear of debris like leaves and twigs, which a quick pass with a leaf blower can handle. An occasional rinse with a garden hose will wash away any dust and keep the colors looking bright. Because the materials are so durable and designed for the outdoors, you’ll spend far less time on upkeep and much more time enjoying the court with your family.
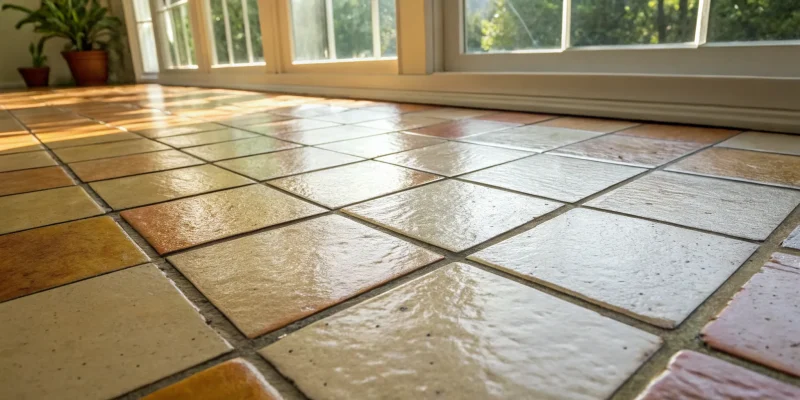
 Understanding the Original Surface: Cambridge Toffee Onyx Pavers
 Step 2: Creating Color Samples for Client Approval
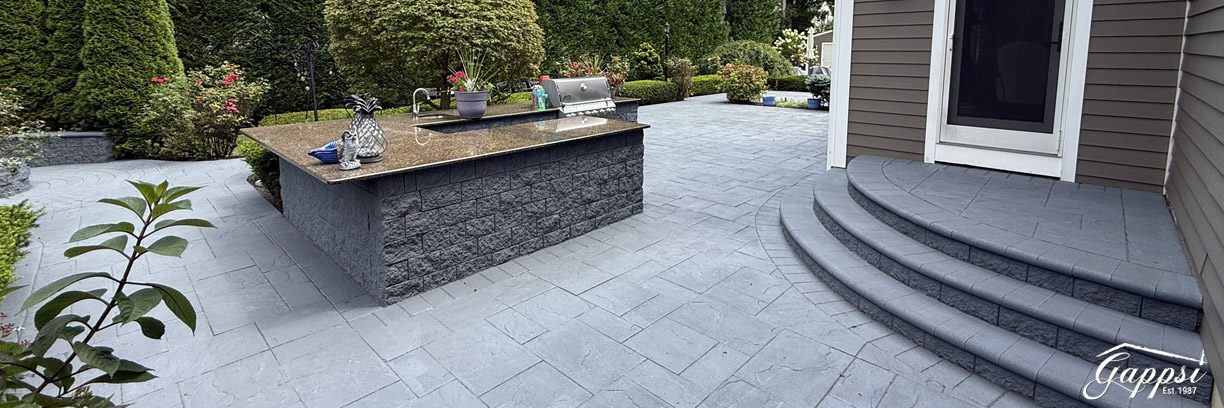 Step 4:
 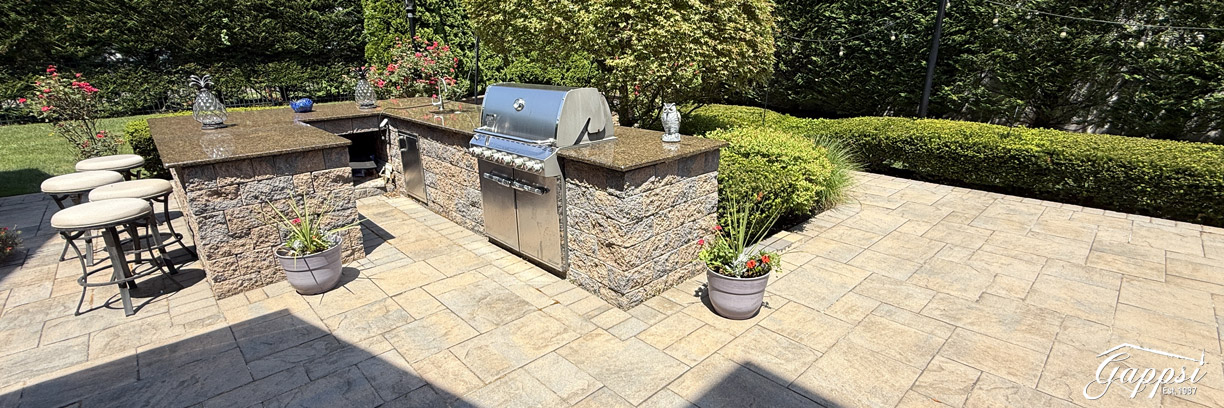 This project showcases what’s possible when homeowners want to update their outdoor living area without tearing out and replacing existing pavers. Through expert staining and sealing, Gappsi delivered a like-new surface at a fraction of the cost of rebuilding.
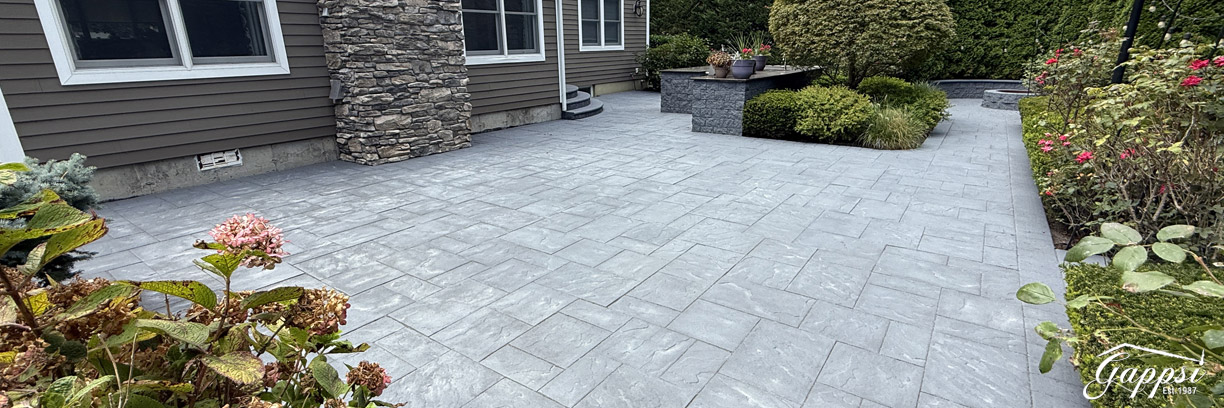 Transform Your Pavers Without Replacing Them
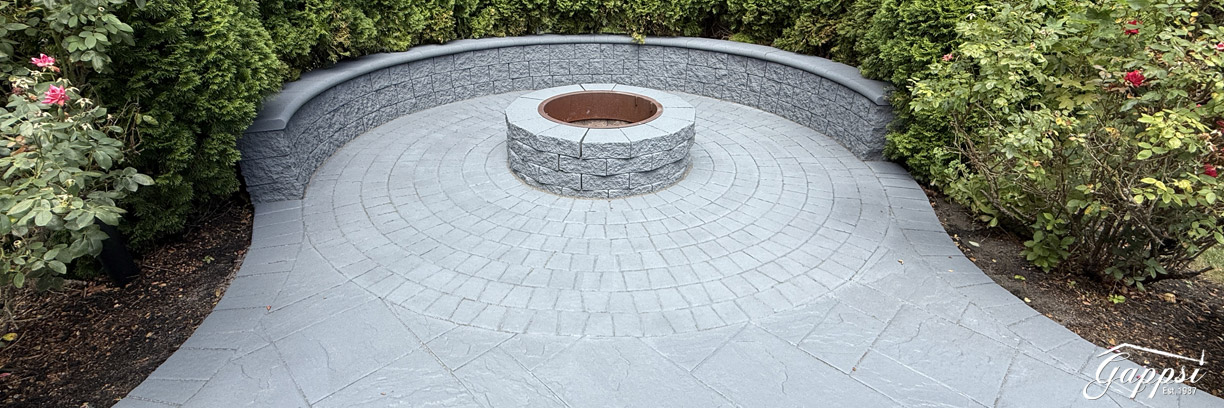
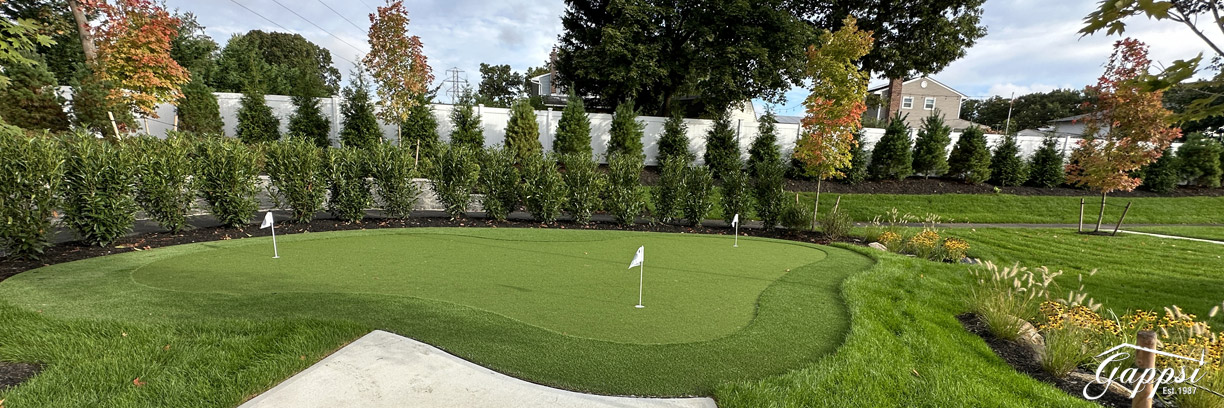 A Freeform Design That Feels Natural
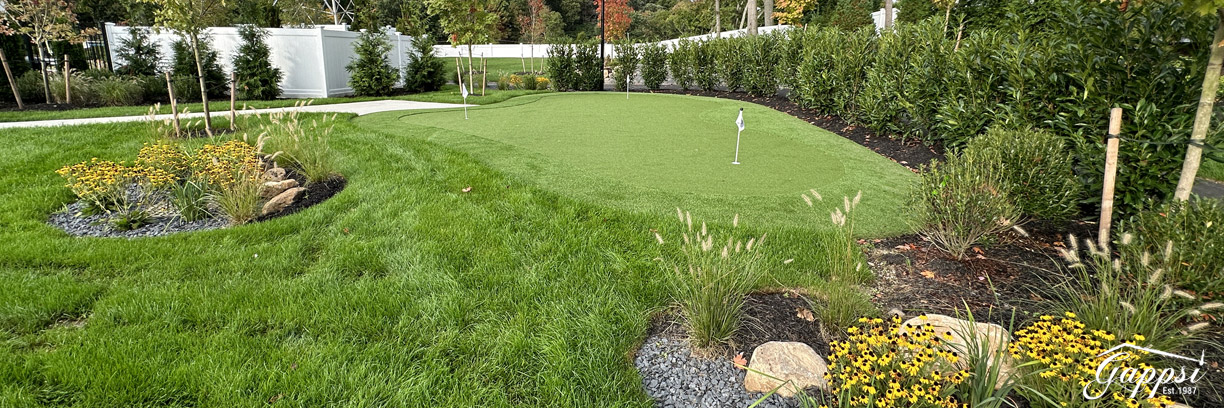 Why Choose Synthetic Turf for Your Putting Green or Sports Game Court
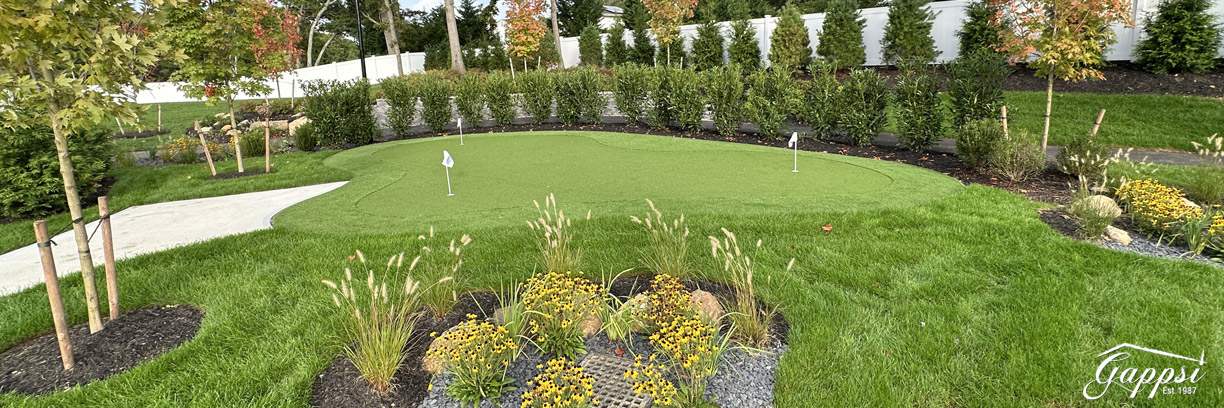 Choose Gappsi for Your Long Island Putting Green Installation
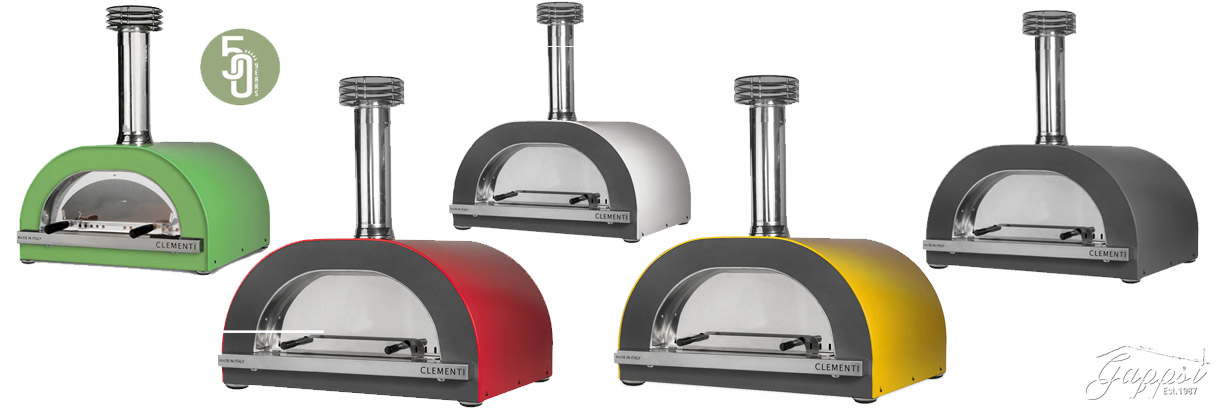 Clementi Gold Outdoor Countertop Oven is Designed for Convenience and Style
 Aesthetic Appeal That Complements Any Outdoor Space
 SCHEDULE A MEETING TODAY WITH GAPPSI