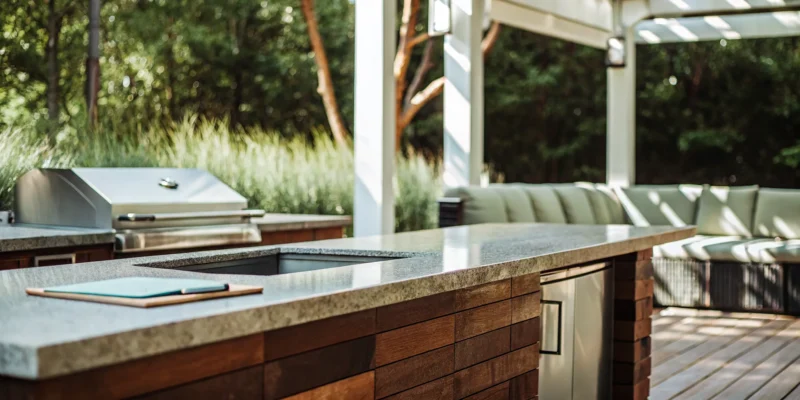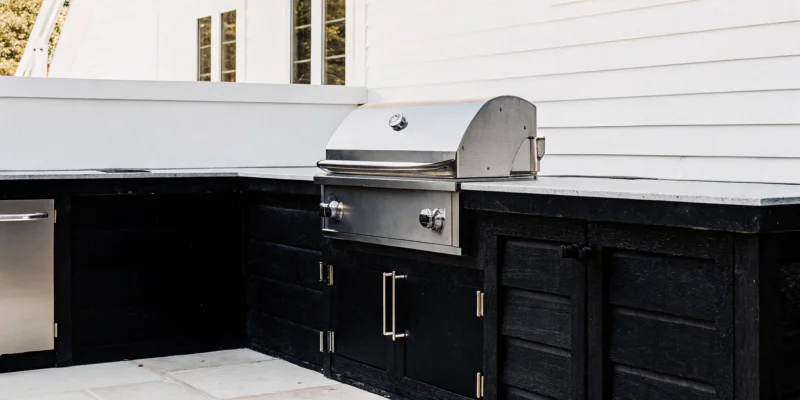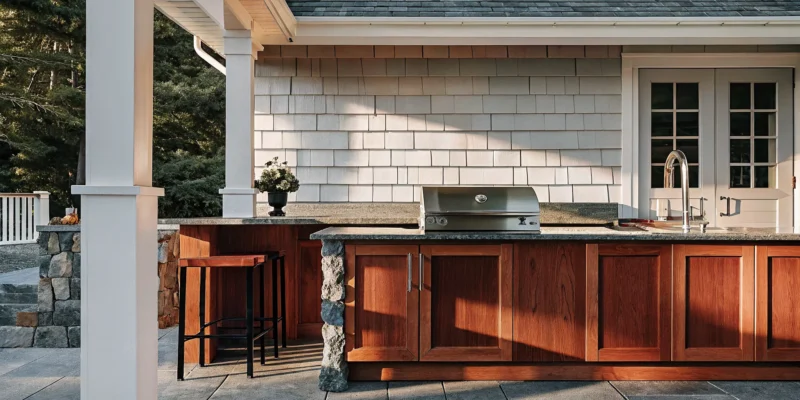
Elegant outdoor kitchen with natural stone island and built-in grill in a lush Long Island backyard

The Ultimate Outdoor Kitchen Planning Guide for Long Island

Long Island homeowners often find that a custom outdoor kitchen becomes the most used room in their home. This functional space extends your living area while providing a dedicated zone for social flow.

Our outdoor kitchen planning guide helps you build a useful and strong backyard cooking space. Success starts with a 3D plan that shows your layout and seating areas so you can move around easily. You should pick materials like natural granite, bluestone, or travertine that can handle the cold winter weather on Long Island. According to This Old House, these kitchens can return up to 80% of their cost in home value. Gappsi brings 38 years of Italian craftsmanship to every project. We fit appliances like gas grills and brick pizza ovens into a stone veneer base. Working with one team helps you avoid the stress of hiring many workers and ensures your permits are filed correctly.

Planning a great project requires you to look at how you will use the space each day. Think about your cooking style before you pick your stones. We will walk you through Step 1: Define Your Outdoor Kitchen Goals and Lifestyle Needs to make sure your new space fits your family. This journey starts with a clear vision of how you want to cook and entertain in your Long Island backyard.

Outdoor Kitchen Planning Guide: Step 1: Define Your Outdoor Kitchen Goals and Lifestyle Needs

Planning an outdoor kitchen starts with a clear vision. You must think about how you will use the space before you buy any parts. A solid Long Island outdoor kitchen layout guide helps you focus on your daily life and needs. Think about your current cooking habits. Do you want a small spot for family meals or a big space to host guests? Knowing your goals now will save you time and money later.

Check your cooking style

First, look at how you like to cook. Think about the meals you make most often. Do you want to do the same things outside, or do you want to try new styles? Some people want a simple grill for burgers. Others want a full space with a pizza oven, a smoker, and side burners. You should also think about prep space. You will need room to cut food and set down trays. A good plan includes enough counter space near your grill to make cooking easy.

Think about how many people you will host. Do you have small family dinners or large backyard parties? This will change the size of your grill and the amount of seating you need. If you often have more than ten people over, you might want a bar area. This gives guests a place to sit and talk while you cook. It keeps the social flow moving and keeps people out of the cooking zone for safety.

  1. Assess your cooking needs. List the meals you want to make and the tools you will need for them.
  2. Measure your yard space. Note the room you have for counters, seats, and walk ways.
  3. Watch the sun and wind. See how the light and air move through your yard during the day.
  4. Set your budget range. Decide what you can spend on parts, stone veneer, and labor.
  5. Think about the seasons. Plan for Long Island weather to make sure your space lasts for many years.

Plan your yard and space

Measure your open yard space well. You need to know how much room you have for a kitchen island. It is also wise to think about the path from your house to the yard. Most pros say to keep a space of 15 to 20 feet from your indoor kitchen. This is a short walk for moving food and tools. It is far enough to keep smoke away from your doors. It also helps keep the cost of gas and water lines low.

Watch the sun and wind ways in your yard. You do not want to cook in direct hot sun all day. You also do not want the wind to blow smoke from the grill into your dining area or home. Notice where the shade falls at many times. This can help you decide if you need a pavilion or a pergola for shade. Long Island weather can change fast. Having a plan for both sun and rain is a smart move.

Budget and home value

Your budget will guide your choices for parts and stone. A basic built-in grill setup on Long Island may start at about $5,000. Full custom kitchens with granite counters and stone veneer can cost $40,000 or more. While this is a big cost, it is also a great way to add value to your home. Most homeowners find that an outdoor kitchen can return 50 to 80 percent of the cost in home value.

When you plan your budget, think about the long term. Using strong stone like natural bluestone or travertine will save you money on fixes. These parts can handle the cold winters and salt air in Nassau and Suffolk counties. A well-built kitchen is a smart gain for your home and your life. It gives you a place to relax and have fun with your friends and family for a long time.

Step 2: Choose the Right Layout for Cooking and Social Flow

The layout you pick for your outdoor kitchen defines how you use the space. A good design keeps the person cooking close to the guests but out of the way of foot traffic. You should aim to keep the main cooking area about 15 to 20 feet from your indoor back door. This gap makes it easy to grab supplies without spending too much on utility lines. If you plan to add a cover, check local rules for outdoor grill exhaust needs to keep the space safe and clear of smoke.

Match Your Layout to Your Yard Size

Large yards on Long Island can support a full U-shape or a large island. These layouts offer the most counter space for prep work and serving. For smaller patios, a straight-line setup works best because it fits against an existing wall. If you want to maximize a corner, an L-shape design provides a natural workflow. Gappsi uses 3D design tools to help you see these Long Island outdoor kitchen layouts before any work starts in your yard.

Separate Your Work and Social Zones

Safety is the top goal when planning where to put your grill and sink. You want to keep hot surfaces away from where children play or where guests sit to talk. An island layout is great for this because it creates a clear line between the chef and the guests. This setup lets you stay part of the party while you work. Using a 3D plan helps ensure your outdoor kitchen pavilion or patio has enough room for everyone to move safely.

Layout Type Best Use Case Main Benefit
Straight-Line Small patios or tight decks. Saves space and keeps costs low.
L-Shape Corner spots with medium space. Offers separate prep and cook zones.
U-Shape Large yards for frequent hosts. Provides the most counter space.
Island Social cooking and open yards. Allows guests to sit near the chef.

When you choose a layout, think about the wind and sun. You do not want smoke blowing back into your house or the sun hitting you while you grill. Gappsi can help you find the best spot on your property to avoid these issues. Our team looks at your yard’s shape and your home’s style to build a kitchen that fits perfectly.

Step 3: Select Materials That Withstand Long Island Weather

Long Island weather changes a lot through the year. We have hot summers and very cold winters. The air near the water often has salt in it. These things can hurt your outdoor kitchen if you pick the wrong items. You need stones and tools that can take the heat and the ice.

Picking the right stones and pavers keeps your space looking new for a long time. It also helps your home stay in good shape. Choosing tough items now saves you money on fixes later.

Strong Bases With Stone Veneer

The base of your kitchen must be solid to hold heavy grills. Most people use a frame made of steel or stone blocks. Then, they cover it with stone veneer. This looks like a real stone wall but is faster to build. It stays strong in wet air and deep snow.

Gappsi uses many types of veneer to match your house. You can learn more in our stone veneer guide for outdoor rooms. These thin stone pieces stay on the base even when the ground moves in the cold months. Using veneer also lets you pick from many colors and textures.

Tough Stone Counters

Your counters are where you prep food and eat with friends. They must be easy to wash and hard to chip or break. Natural stone is a smart pick for our area because it lasts. Granite is a top choice because it does not stain from grease. It also does not fade when the sun is bright.

Colors like Blue Pearl, Uba Tuba, and Absolute Black look great in the yard. Some stones can break when they get wet and then freeze. Facts on freeze-thaw cycles in granite show that dense stones last long in cold spots. Other good picks are bluestone and travertine. These stones stay cool to the touch even on very hot days.

Safe Flooring and Pavers

The floor of your outdoor kitchen must be safe and very hard. Concrete pavers work well on Long Island. They are made to handle the ice that grows in the dirt during winter. This stops the floor from breaking or shifting out of place. Gappsi works with the best names in the field.

We use pavers from Cambridge, Nicolock, and Techo-bloc. We also have many options from Belgard and Unilock. These pavers come in many looks and tones to match your grill. They give you a flat spot for your stove and chairs. They also stand up to salt if you live by the sea.

See the Gappsi Showroom in Smithtown

Choosing the right stone is easy when you can feel it in your hands. We invite you to see the Gappsi showroom in Smithtown. It is at 1015 West Jericho Tpke and is easy to find. You can see all the stones, pavers, and counters in person.

We have a large space with over 10,000 square feet for you to walk through. Our team can help you pick the best match for your style and cost needs. Seeing the colors in the sun helps you find a look you will like. We can show you how stones look when they are side by side.

Step 4: Plan Your Must-Have Appliances and Cooking Features

The core of your outdoor kitchen planning guide is the list of tools you choose to install. These items decide how often you will use your new space for cooking and hosting. A built-in gas grill usually serves as the main piece for most Long Island homes. These grills offer a quick start and steady heat for burgers or steaks. Brands like Delta Heat and Twin Eagles are top picks for their strength. You should place the grill in a spot where the wind can carry smoke away from your guests.

Choosing Your Primary Grill and Cooking Surfaces

When you choose a grill, look for thick stainless steel parts that can resist rust. The salt air and wet weather on Long Island can wear down cheap metals fast. Adding a side burner is a smart move for your kitchen layout. It lets you simmer sauces or boil water without walking back to the indoor house. You can also add a flat-top griddle for cooking eggs or stir-fry dishes. These features help you do all your cooking in one spot.

For those who enjoy slow-cooked meals, a smoker is a great add to the yard. Gappsi carries brands like Fire Gear to give you good results for every meal. You must also plan for enough counter space next to your cooking tools. Leave at least 24 inches of workspace on one side of the grill to handle plates and trays. This keeps the cooking flow smooth and safe for the cook.

Adding Specialty Pizza Ovens and Power Burners

A brick pizza oven is a favorite for people who host many outdoor parties. These ovens reach very high heat and can cook a pizza in just a few minutes. Fontana Forni makes gas and wood-fired ovens that sit well on a stone base. These ovens are not just for pizza. You can use them to roast meats or bake bread with a rich wood-fired taste. They add a unique look and feel to your outdoor living space.

You may also want to look at outdoor kitchen appliances such as power burners. These big burners can hold heavy pots for boiling corn or lobsters for a summer feast. They are a must-have for large groups who spend a lot of time outdoors. Planning for these features early helps you set up the right gas and power lines during the build.

Selecting Durable Fridges and Sinks

An outdoor fridge is a key part of any well-planned kitchen. You need a unit that is outdoor-rated to handle the heat of a New York summer. Brands like SUMMIT build units with strong seals and tough motors to keep food safe. These units stay cold even on the hottest days of the year. You should also think about adding an ice maker to your plan. It saves you from making trips to the store for heavy bags of ice.

A sink is the final piece of a full outdoor setup. Having a sink with hot and cold water makes cleaning up after a meal very fast. It also lets you wash your hands or rinse fresh food right where you are working. Sinks should be made of thick stainless steel to avoid damage from the weather. You can see many of these outdoor rated appliances at the Gappsi showroom in Smithtown. Adding these features ensures your outdoor kitchen is both useful and fun for years to come. Building an outdoor kitchen can also add value to your home. Some experts say it can return up to 80 percent of its cost when you sell.

Step 5: Coordinate Utilities, Permits, and Professional Installation

A good outdoor kitchen planning guide covers more than just picking a grill or granite counters. You must plan gas, water, and power lines to create a safe and useful cooking space. Gappsi brings 38 years of local skill to this phase. We manage every utility link and permit rule to keep your project on track. Our design-build model is a big plus. You work with one team that handles everything from 3D design to the final stone build.

Safe and Expert Utility Links

Running gas lines is a job for a licensed plumber who knows local safety codes. This step ensures your built-in grill and brick pizza oven have a steady fuel source. Proper set up prevents leaks and ensures your gear works at its best. Power work is just as vital. You will need power for lights, fridges, and outlets. We use GFCI outlets to protect against shocks on wet days. Our team places pipes under your masonry design and construction made of natural bluestone or travertine to hide wires and protect them from weather.

Plumbing needs careful planning too. A useful sink needs hot and cold water lines and a solid drain system. We focus on proper slopes to ensure water moves away from your home and patio. This prevents puddles and keeps your outdoor kitchen clean and dry. We also plan for winter prep. Long Island freeze-thaw cycles can damage pipes if they are not drained before winter. Our team builds in easy access points. This lets you shut off and drain lines when the cold hits.

Navigating Permits in Nassau and Suffolk

Most towns in Nassau and Suffolk Counties require building permits for outdoor kitchens. This process often includes site plans and checks on how far the kitchen is from the yard edge. The Nassau County government and local Suffolk towns use these rules to keep people safe. We handle the permit work for our clients. This saves you from spending hours at town hall. It also keeps your build moving without delays.

Airflow is another key factor for covered kitchens. If you build an outdoor kitchen pavilion, you must have enough fresh air. Trapped smoke and heat can be dangerous. They can also damage your frame. We design custom vent systems and choose hoods that match the power of your grill. This ensures your cooking area stays safe for you and your guests. Using a design-build firm means these hard details are part of the main plan.

  1. Map out all utility lines during the 3D design phase to prevent costly changes later.
  2. Hire a licensed plumber to install gas lines and test for leaks before you finish the stone work.
  3. Set up a dedicated power panel with GFCI protection for all your cooking and cooling gear.
  4. Set up hot and cold water lines with frost-proof valves to make winter prep fast and simple.
  5. Submit clear site plans to your local building office to get the needed permits and signs.
  6. Plan for proper airflow if your kitchen will be under a roof or inside a pavilion frame.

Bringing It All Together: Why Gappsi Is Your Single-Source Partner

Planning an outdoor kitchen is a big job. You have to think about the layout, the parts you need, and the cooking tools. It can be hard to work with many other workers at the same time. This is why many people on Long Island look for a partner who can do it all. Gappsi is here to help you turn your yard into a great place for food and fun.

The Benefits of Design-Build Services

Our team uses a design-build model for every project. This means you only have to work with one firm from the start to the end. We handle the 3D design and the masonry work ourselves. We also set up your gas lines and power outlets.

Using one team helps keep your project on a clear timeline. You will have one contract and one point of contact for the whole build. This makes the outdoor kitchen planning guide process simple and stress free.

We also take care of the hard parts like getting permits. Most towns in Nassau and Suffolk Counties need a permit for gas, water, and power lines. Our team knows how to talk to local building offices to get your project done fast.

You can check the permit rules for your area on sites like the Smithtown Building Department page. Having an expert handle these steps saves you a lot of time and worry.

A History of Italian Skill

Gappsi has been serving Long Island homes since 1987. Our founder, Giuseppe Abbrancati, has more than 50 years of work in the trade. He started learning about building in Italy when he was only seven years old. He brings that old world care and skill to every project we do today.

This past helps us build spaces that look great and last for many years. We use the best ways to make sure your stone and pavers stay in place. We are proud of the work we have done over the last 38 years.

Our team has earned over 50 ICPI awards for our stone work and masonry. We also hold a patent for the Gappsi Edge Restraint System. This tool helps keep your patio and kitchen floors from moving over time.

We have 12 expert groups that work under one roof. This allows us to handle every part of your build without calling other firms. Our team works together to make sure every stone and pipe is set correctly.

Experience Our Smithtown Showroom

It is helpful to see and feel the items for your new space. We have a 10,000 square foot showroom in Smithtown where you can look at many choices. You can pick out natural stone veneer for your island or granite for your counters.

Seeing these items in person helps you make the best choice for your home. We can show you how different stones look next to each other in real light. This hands-on way is the best way to start your project.

Our work can be seen in many homes across the island. We have finished projects like this Dix Hills outdoor kitchen project for our happy customers.

You can also view our Merrick outdoor kitchen project to see a custom Wolf appliance setup. These projects show how we combine beauty and use in every build. We treat every yard like it is our own to give you the best results possible.

Frequently Asked Questions

How much does an outdoor kitchen cost on Long Island?

The price of an outdoor kitchen depends on the size and the materials you choose. A simple build with a grill and counter space often costs between $5,000 and $8,000. For a custom space with stone veneer, granite counters, and many appliances, costs can range from $15,000 to over $40,000. Your choice of natural bluestone or travertine and the cost of new gas lines will set the final price.

Do I need a permit for an outdoor kitchen in Nassau or Suffolk?

Most towns in Nassau and Suffolk Counties need building permits for outdoor kitchen projects. You will likely need a permit if you plan to install new gas lines, wires, or pipes. Each town has its own rules for where you can build on your land. Gappsi handles the permit process for our clients to make sure every project meets local laws. This saves you time and stops legal problems with your home building.

How long does it take to design and build an outdoor kitchen?

The time to build an outdoor kitchen depends on the design and permit wait times. A typical project starts with a 3D design and picking materials at our Smithtown showroom. Once the town approves the permits, the building work often takes two to four weeks. This time covers the stone work for the kitchen island, counter setup, and appliance tests. Bad weather and the size of the yard work can also change the final schedule.

Can I install standard indoor appliances in an outdoor kitchen?

You should not use indoor appliances in an outdoor kitchen. Indoor units cannot handle the rain, sun, or the deep cold of Long Island. Proper outdoor kitchen appliances use tough stone or stainless steel to stop rust. They also have strong cooling parts and tight seals to keep food and drinks safe in hot weather. Using indoor models outside is a safety risk and will end your repair coverage.

Ready to plan your custom outdoor kitchen on Long Island?

Waiting to start means more time in a yard that does not fit your needs and missing out on the layout you want. Each month you wait is more time you lose with friends and family. By starting now, you can beat the rush and make sure your new space is ready for the first warm days of spring. Our team handles the permits and utility plans for Nassau or Suffolk to make the stone veneer and appliance install easy. We use strong stones like natural bluestone and granite to build a space that lasts through the Long Island winters.

Ready to build? Schedule a free design consultation to walk through our Smithtown showroom and start your plan.

Beautiful Long Island backyard with lush green synthetic turf lawn and stone patio

10 Benefits of Synthetic Turf Long Island Homeowners Should Know

Long Island lawns often struggle with brown patches and high water bills during humid summers. Homeowners in Nassau and Suffolk counties now choose low-maintenance options that stay green all year.

synthetic turf Long Island is a durable yard choice that replaces natural grass with Italian-made synthetic fibers. Homeowners in Nassau and Suffolk Counties use these products to create green lawns that stay bright during hot summers and cold winters. Unlike normal grass, these surfaces do not need weekly mowing, heavy watering, or chemical treatments. This switch helps families save time and reduce water bills while protecting local water sources from chemicals. The setup process involves expert site prep with crushed stone bases to ensure proper drainage during heavy rain. Whether you want a backyard putting green, a safe playground for children, or a clean area for pets, these surfaces provide an even and soft space for outdoor living. By choosing this modern option, property owners get a beautiful yard that lasts for decades with very little work.

Schedule a Free Consultation with Gappsi

Homeowners often ask if making the switch is worth the first effort. Many local neighbors find that the long-term benefits of an easy-care lawn far outweigh the setup tasks.

Why Long Island Homeowners Are Choosing Synthetic Turf

Long Island homeowners face a tough lawn problem. The weather here brings hot humid summers and cold snowy winters. Natural grass often turns brown in July or goes dormant in January. Many people now look for a better option that stays green all year without constant work. Synthetic turf has become a top solution for families across Nassau and Suffolk Counties who want their yard to look good in every season.

The biggest reason for the switch is water savings. A typical Long Island lawn needs about 30,000 gallons of water each summer to stay green. With local water restrictions and rising utility costs, that adds up fast. Gappsi’s synthetic turf products eliminate the need for watering entirely. Homeowners can cut their outdoor water use by up to 70 percent. This helps save money and also protects the Long Island aquifer that supplies our drinking water.

Time is another big factor. The average homeowner spends more than 30 hours each year on mowing, trimming, edging, and blowing leaves. That is almost a full work week spent on yard work. With synthetic turf, those hours come back. You can use your weekends for family time, hobbies, or relaxing instead of pushing a mower. The turf stays neat with just an occasional rinse or brush.

Chemicals are also a concern for many Long Island families. Natural grass needs fertilizers, weed killers, and pesticides to stay healthy. These products can run off into our groundwater during rain storms. Synthetic turf needs no chemicals at all. It is a cleaner option for children, pets, and the local environment. This is especially important on Long Island, where we rely on groundwater for our drinking supply.

The freeze and thaw cycles of a Long Island winter can damage natural grass roots and create mud patches in spring. Synthetic turf with a proper crushed stone base handles these temperature swings without issue. The base allows water to drain through and prevents heaving when the ground freezes. This means your lawn looks the same in March as it did in August.

Long Island homeowners in towns like Smithtown, Commack, and Old Westbury have already made the switch. They enjoy green lawns that need no water, no mowing, and no chemicals. If you are tired of the weekly lawn care routine, turf offers a simple path to a great looking yard that lasts for decades.

Synthetic Turf Long Island: Year-Round Curb Appeal: How Synthetic Turf Stands Up to Long Island Weather

Synthetic turf in Long Island must face tough weather. From hot summers to cold winters, a lawn needs to stay green and strong. Natural grass often fails when the heat peaks or when the ground freezes. Expert setup of synthetic turf offers a better way to keep your home looking good in every season. This turf uses advanced tech to handle sun, rain, and snow without the hard work of a real lawn.

Lush synthetic turf lawn on Long Island with stone patio and outdoor furniture

UV protection for lasting color

One major worry for people who own homes is fading. The sun on Long Island can be strong in July and August. Modern synthetic turf products and installation services solve this with UV-stabilized fibers. These fibers have special built-in blockers. These blockers stop the sun from breaking down the color of the grass. This means your lawn stays a rich green even after years of direct sun.

Italian-manufactured turf is a top choice for color. These products use high-grade parts that resist the bleaching effect of the sun. You will not see the yellow or brown patches that happen with natural grass during a dry spell. Instead, you get a bright lawn that looks the same in winter as it does in summer. This lasting color helps keep your home’s curb appeal high with no extra effort.

Great drainage for heavy rain

Long Island gets a lot of wet weather. On average, the area sees about 44 inches of rain each year as shown by the U.S. Geological Survey. This much water can turn a real lawn into a muddy mess. It can also lead to puddles that ruin the grass. Synthetic turf handles heavy rain with ease because of its porous design. The backing allows water to flow through it quickly.

Proper setup is key for good drainage. An expert crew will use a crushed stone base under the turf. This base acts like a sieve. It lets water move away from the surface and into the ground. This stops water from sitting on top of your lawn. Even after a big storm, your yard stays dry and ready to use. This system is vital for keeping a clean look in the wet seasons on Long Island.

Strength in winter weather

Winter on Long Island brings ice and snow. The ground goes through many freeze and thaw cycles. This movement can crack poor parts or kill grass roots. Tough turf is built to handle these changes. The fibers stay soft even when the air is cold. They do not get brittle or snap when you walk on them in the winter.

The stone base also helps during the cold months. It prevents the ground from heaving as the frost comes and goes. This keeps the surface flat and safe for years. By choosing a tough product like Italian-manufactured turf, you ensure your yard can take the cold. Your lawn will look as good when the snow melts as it did in the fall.

What Is the Downside of Artificial Grass?

When you look at Gappsi’s synthetic turf products, you might wonder if there are any trade-offs. While synthetic turf Long Island homeowners choose offers many benefits, there are a few things to consider before you buy. Understanding these factors helps you make the best choice for your yard.

Managing heat in direct sun

One common concern is how turf reacts to summer heat. Synthetic blades can get hotter than natural grass when the sun is strong. This happens because the material does not have the natural cooling effect of water moving through a living plant. According to the National Institutes of Health, surface temperatures on synthetic fields can rise in peak summer months. We solve this by using lighter-colored infill or cooling infill tools. These materials help keep the surface comfortable for your feet and pets during July and August.

Upfront costs and long-term value

The first cost for a pro installation is higher than laying new sod. You have to pay for the digging, the stone base, and the Italian-manufactured turf itself. But this initial spending leads to long-term savings. You will no longer pay for weekly mowing, seasonal food for the grass, or high water bills. Most people find that the system pays for itself in a few years. You can learn more about the cost and design of artificial putting greens to see how these projects add value to a home.

Keeping your yard clean

Synthetic turf does not grow, but it still needs a little care. This is especially true if you have dogs or cats. Pet turf needs a quick rinse now and then to wash away waste. We use professional-grade turf with antimicrobial infill to keep smells from building up. You might also need to brush the blades once in a while to keep them standing tall. Following these simple steps ensures your lawn looks great for twenty years or more.

Backyard Putting Greens, Playgrounds, and Pet-Friendly Turf

Homeowners often use synthetic turf Long Island for more than just a standard lawn. Gappsi offers many types of Italian-manufactured turf to suit your needs. You can pick the right turf type for a fun play zone, a pet area, or a sports game court. These surfaces stay green all year and do not need water or mow time. They work well for small yards or large estates across the island.

Choosing a clear use for your turf helps you find the best pile height and weight. A turf made for a dog run will have different traits than one made for a soccer field. Gappsi helps you choose the right product based on how much foot traffic it will get. This ensures your yard stays in good shape for a long time.

Backyard putting green with synthetic turf on Long Island

Custom Backyard Putting Greens

You can bring the golf course to your home with a custom green. Gappsi builds these areas with 32 oz PP golf turf to give you a true roll every time you putt. We can add sand bunkers and multiple hole spots to make the game more fun. Many homeowners use these greens to work on their short game without leaving the house. You can find more tips in our complete backyard putting green guide for your next project.

Our team has set up these greens in towns like Old Westbury and Glen Cove. We use a deep base of crushed stone to keep the surface flat and dry. This stops the turf from shifting during the freeze and thaw cycles of a Long Island winter. A well-built green lets you practice your aim in any month of the year.

Safe Playground Surfaces

Safety is the top goal when you build a play spot for kids. Gappsi installs synthetic turf over a 2-inch ASTM-approved foam base to cushion falls. This foam sits on a layer of crushed concrete for a firm yet soft feel. This setup meets safety standards for playground surfaces to help keep children safe from harm. These areas also meet ADA rules so everyone can join the fun.

We have built many safe play zones in Smithtown and Commack. The turf is soft to the touch and does not get muddy when it rains. This means kids can go outside to play right after a storm. You will not have to worry about dirt or grass stains on their clothes after they spend time on the turf.

Durable Turf for Pets and Sports

Active pets and sports need tough turf that can handle hard use. Gappsi offers soccer 52 Double X and tennis HD 17 for these spots. We also have ZeroFill indoor turf for gyms or play rooms. These products handle the stress of paws, cleats, and quick turns. You can view Gappsi’s synthetic turf products to see which one fits your pet zone or sports game court.

Our pet turf lets water and waste drain through quickly. This keeps your yard clean and stops bad smells from building up in the sun. Many dog owners on Long Island like this because it keeps their pets clean too. There is no mud to track into the house after a run in the yard. These sports and pet zones stay green and fresh for many years with very little work.

Synthetic Turf vs. Natural Grass: Which Is Better for Long Island Lawns?

Long Island homeowners often struggle to keep natural grass green. Between summer water bans in Nassau County and the cold winters in Suffolk, a perfect lawn takes a lot of work. Synthetic turf has become a top choice for many people who want a nice yard without the stress. When you look at the two options side by side, the benefits of using a lawn made in Italy for the local climate become clear.

Water and time savings

Natural grass needs a huge amount of water to stay healthy during a dry Long Island summer. As noted by the EPA, outdoor water use can make up about 30 percent of a home’s total water bill. By switching to synthetic turf products, you can cut your outdoor water use by as much as 70 percent. This not only lowers your monthly bills but also helps protect the local groundwater and aquifers that serve our island.

Beyond the water savings, you also regain your weekends. A usual homeowner spends more than 30 hours each year on lawn care like mowing, edging, and leaf blowing. With synthetic turf, those chores disappear. You no longer need to worry about the weekly work or the noise of a gas powered mower. Instead, your yard stays neat and tidy with very little effort. Many owners use their extra time to practice their short game with a backyard putting green guide to help them plan.

Long term value and toughness

Natural grass often dies or turns brown during the cold winter months or hot summer weeks. Synthetic turf stays bright green in every season. It handles the freeze and thaw cycles of Long Island without heaving or creating mud. The turf has a strong drainage base. It can manage the 15 to 30 inches of rain we get each year without forming puddles or bare spots. This makes it a great choice for pet owners who want to avoid muddy paws in the house.

The long term value is also a big part of the choice. While a natural lawn costs $100 to $200 each month for upkeep, a professional turf setup lasts for 15 to 25 years. You also skip the cost and risk of lawn chemicals. Synthetic turf needs no fertilizers or pesticides, which keeps your yard safer for pets and children. It provides a tough surface that stands up to heavy foot traffic. It handles active play without needing costly sod repairs or new seed each spring.

Feature Natural Grass Synthetic Turf The Winner
Water Needs 30,000+ gallons per year Near zero usage Synthetic Turf
Work Time 30+ hours of mowing Zero hours of mowing Synthetic Turf
Lifespan Needs new seed each year Lasts 15 to 25 years Synthetic Turf
Yard Care Uses harsh chemicals Needs no chemicals Synthetic Turf
Winter Look Turns brown and thin Stays green all year Synthetic Turf
Toughness Mud and bare spots No mud or holes Synthetic Turf

Environmental benefits

Many people worry about the cost of artificial grass. While the first step costs more than laying sod, the savings over time are big. You will not have to pay for a lawn service, gas for a mower, or costly grass seed every spring. Most owners see the cost pay for itself in just a few years. Plus, the turf stays in good shape for two decades or more, while a natural lawn needs daily work just to stay alive.

Synthetic turf also helps the local earth. On Long Island, runoff from lawn chemicals can hurt our water supply. Since turf needs no weed killers or bug spray, it is a cleaner choice for the land. The base of crushed stone allows water to flow back into the ground on its own. This keeps your yard from flooding even after a heavy storm in Smithtown or Massapequa. Choosing this option shows you care about the long term health of the local area.

How Much Does Synthetic Turf Cost on Long Island?

The cost of synthetic turf on Long Island depends on several factors. Unlike buying a product off a shelf, turf installation is a custom project based on your yard’s size, shape, and condition. Gappsi provides project-based pricing after a site evaluation to ensure you get an accurate quote. Here are the main factors that affect the final cost.

Step 1: Measure the square footage. The size of your lawn is the biggest cost factor. A typical residential project ranges from 500 to 3,000 square feet. Larger projects cost more in materials but often have a lower cost per square foot because of efficiency in installation.

Step 2: Assess site preparation needs. Every yard is different. Some need simple grading while others require full excavation. If your yard has poor drainage, adding a crushed stone base will add to the cost but is essential for long-term performance. Removing existing grass, trees, or old hardscaping also adds to the prep work.

Step 3: Choose your turf grade. Gappsi offers multiple grades of Italian-manufactured turf. Standard residential turf works well for low-traffic lawns. Commercial-grade turf handles more foot traffic and sports use. Putting green turf has a different pile height and density for a true ball roll. The turf grade you choose directly affects the material cost.

Step 4: Select the infill type. Infill helps the turf blades stand up and provides cushioning. Silica sand is the most common option. Antimicrobial infill adds odor control for pet areas. Cooling infill reduces surface temperature in direct sun. Each infill type has a different cost.

Step 5: Account for access and logistics. If your yard has narrow gates, steep slopes, or limited access for equipment, the installation may take more time. This can increase labor costs. Most Long Island properties have standard access, but it is a factor the installer will check during the site visit.

Gappsi handles every step of the installation process. This includes excavation, grading, weed barrier, crushed stone base, compaction, turf installation, infill, and final brushing. The result is a finished lawn that looks natural and drains properly. Contact Gappsi at (631) 543-1177 to schedule a site evaluation and get a custom quote for your Long Island home.

The Gappsi Advantage: Italian Manufacturing and Long Island Expertise

Gappsi stands apart from other turf providers on Long Island for one key reason: the turf is manufactured in Italy. While many competitors use generic turf from mass-market sources, Gappsi brings Italian craftsmanship to every installation. The company was founded in 1987 by Giuseppe Abbrancati, who learned construction from his father and grandfather in Italy before moving to Long Island. This three-generation heritage of quality work is built into every project.

Gappsi’s Italian-manufactured turf comes in a wide range of styles. There are options for standard lawns, putting greens, sports game courts, playgrounds, and pet areas. The fibers hold their color through Long Island’s bright summer sun because they include UV stabilizers during the manufacturing process. This means your lawn stays green for years without fading or becoming brittle.

Beyond the turf itself, Gappsi brings 38 years of experience in the Long Island market. The company has earned more than 50 industry awards from the Interlocking Concrete Pavement Institute and other organizations between 1994 and 2008. This track record of recognition shows a commitment to quality that few local contractors can match.

Gappsi also holds a United States patent for its Edge Restraint System, invented in 2000. This system keeps the edges of your turf secure and prevents shifting over time. It is one example of how Gappsi thinks beyond basic installation to create better long-term results for homeowners.

The company operates 12 specialized divisions for outdoor living construction. This means your turf installation is coordinated with a team that also handles pools, patios, masonry, and landscaping. If you plan a complete backyard transformation, having one company manage all the work simplifies the process and ensures everything fits together. Gappsi’s showroom at 1015 West Jericho Turnpike in Smithtown lets you see and feel the turf options before making a decision.

For Long Island homeowners who want the best synthetic turf, Gappsi offers a combination that no other local provider can match: Italian-made materials. Nearly four decades of experience, patented innovation, and a full-service approach to outdoor design and construction. You can explore the full range of options on the synthetic turf service page.

Frequently Asked Questions About Synthetic Turf on Long Island

Frequently Asked Questions About Synthetic Turf on Long Island

How much does synthetic turf cost on Long Island?

The cost depends on several factors including the square footage, site preparation needs, turf grade, and infill type. A typical residential installation in Nassau or Suffolk County ranges based on the complexity of the project. Gappsi provides free site evaluations to give an accurate quote. Professional installation includes excavation, grading, stone base, compaction, turf, infill, and brushing.

How long does synthetic turf last on Long Island?

Professional synthetic turf installed with proper base preparation lasts 15 to 25 years depending on usage and UV exposure. The Italian-manufactured turf Gappsi uses includes UV stabilizers that prevent fading. The crushed stone base prevents heaving during freeze and thaw cycles, which helps the turf maintain a flat surface for its full lifespan.

Is synthetic turf safe for pets?

Yes. Synthetic turf is a popular choice for pet owners on Long Island. It drains quickly so urine does not pool on the surface. Antimicrobial infill helps control odors. There is no mud for dogs to track into the house. The turf is durable enough to handle running and digging without developing bare spots.

Does synthetic turf increase home value?

A well-installed synthetic lawn can increase curb appeal and property value. Buyers on Long Island are often attracted to low-maintenance landscaping that stays green year-round. A professional turf installation with proper drainage and base preparation is a durable upgrade that adds to the home’s usable outdoor space.

Can synthetic turf be installed on a slope?

Yes. Professional installers can grade and prepare sloped areas to ensure proper drainage and a stable surface. The crushed stone base is compacted to hold the turf in place. Drainage is built into the system to prevent water from running underneath the turf. This makes sloped yards usable spaces instead of hard-to-maintain areas.

Ready to Transform Your Lawn with Synthetic Turf?

If you are ready to enjoy a green, low-maintenance lawn all year, Gappsi can help. We design and install Italian-manufactured synthetic turf for Long Island homes in Nassau and Suffolk Counties. Our team handles every step from site evaluation to final brushing. Call us at (631) 543-1177 to schedule a free consultation. You can also visit our showroom at 1015 West Jericho Turnpike in Smithtown to see our turf options in person. Let us help you create the outdoor space you deserve.

Changing the Color of a Nicolock Paver Driveway in East Northport, NY with Professional Paver Staining

View Gappsi’s YouTube Channel to view Changing the Color of a Nicolock Paver Driveway in East Northport, NY with Professional Paver Staining

A beautiful driveway is one of the first things people notice about a home. Over time, however, even the highest-quality pavers can begin to show their age. Homeowners often expand their driveways to accommodate additional vehicles, but matching new pavers to older ones can be nearly impossible. Differences in manufacturing batches, years of weather exposure, and discontinued color options often result in a driveway that looks mismatched rather than seamless.

At Gappsi, we specialize in creating custom outdoor living spaces that not only function beautifully but also enhance curb appeal. One of our newest projects involved transforming a Nicolock paver driveway in East Northport, NY, where the homeowner wanted to unify an older driveway with a newly installed extension. Instead of replacing thousands of dollars’ worth of pavers, we used professional paver-staining techniques to completely change the driveway’s appearance, giving it a modern, elegant black finish.

The Challenge: Matching Old and New Nicolock Pavers

This homeowner originally had a Nicolock paver driveway that had served the home well for years. As their needs changed, they decided to enlarge the driveway to create an additional parking space.

While the expansion solved the functional issue, it created a new aesthetic problem.

Although new Nicolock pavers were installed, the color did not match the original driveway. This is a common situation because:

  • Older paver colors fade over time from UV exposure.
  • Manufacturers occasionally discontinue or modify color blends.
  • New production runs often vary slightly from previous batches.
  • Years of weathering create natural differences between old and new installations.

The result was a driveway with two noticeably different shades, making the addition stand out rather than blend naturally with the original installation.

Rather than replacing the entire driveway, the homeowner contacted Gappsi to explore a more practical and cost-effective solution.

A Better Alternative Than Replacing the Driveway

Many homeowners assume the only way to achieve a uniform appearance is to tear out the old driveway and install new pavers throughout.

Fortunately, that’s not the case.

Professional paver staining allows homeowners to completely transform the color of existing pavers while maintaining their structural integrity. This process provides several important benefits:

  • Eliminates mismatched paver colors
  • Refreshes faded surfaces
  • Creates a completely new appearance
  • Extends the life of existing pavers
  • Costs significantly less than replacement
  • Reduces demolition waste
  • Maintains the original driveway structure

For this East Northport project, paver staining offered the ideal solution.

The Original Plan: A Dark Brown Driveway

Initially, the homeowner selected a rich dark brown finish.

The goal was to create a warm, elegant appearance that would unify both the original driveway and the newly added section. Dark brown is a popular option because it complements many home styles and blends naturally with landscaping.

During planning, we discussed how the new color would create a consistent look while hiding the differences between the old and new Nicolock pavers.

However, as the project progressed, the homeowner envisioned something even more dramatic.

A Design Change That Made a Big Impact

Before the staining process began, the homeowner decided to switch from dark brown to black.

The decision wasn’t made randomly; it was part of a complete exterior design plan.

The home already featured a black roof, and the owners planned to paint both the garage door and front entry door black as well. By changing the driveway to black, they could establish a cohesive color palette throughout the property.

This modern design approach creates strong visual contrast while giving the home a sophisticated, upscale appearance.

Instead of having isolated black elements, every exterior feature now works together:

  • Black driveway
  • Black garage door
  • Black front door
  • Existing black roof
  • Coordinated trim accents

The result is a home with exceptional curb appeal and a clean, contemporary aesthetic.

changing-the-color-of-a-nicolock-paver-driveway-in-east-northport

More Than Just the Driveway

To ensure the entire entrance looked cohesive, Gappsi stained more than just the main driveway surface.

Additional areas included:

  • Front walkway
  • Bullnose edging
  • Stoop platform

Treating these surfaces together ensured every hardscape element shared the same rich black finish.

Rather than stopping at the driveway, the entire entrance now flows together seamlessly from the street to the front door.

Professional Paver Staining Requires Experience

Many homeowners are surprised to learn that staining pavers is a specialized process.

Unlike ordinary paint, professional paver stains are designed to penetrate and bond with masonry surfaces while allowing the pavers to maintain their natural texture.

Proper preparation is critical to achieving lasting results.

The process generally includes:

Thorough Cleaning

Every surface must be professionally cleaned to remove.  View our page to learn more about cleaning and sealing bricks.

  • Dirt
  • Mold
  • Algae
  • Efflorescence
  • Previous sealers
  • Oils and contaminants

This ensures proper adhesion.

Surface Preparation

Damaged joints or areas requiring repair are addressed before staining begins. Preparation helps ensure a uniform finish across the entire installation.

Professional Color Application

Specialized masonry stains are applied evenly across the pavers to achieve complete color consistency.  Experienced installers carefully control application techniques to avoid uneven coloring or blotchy finishes.

Protective Sealing

Once staining is complete, the driveway is sealed with a high-quality sealer.  The sealer helps:

  • Protect against UV rays
  • Resist stains
  • Enhance durability
  • Preserve color
  • Improve water resistance

The finished surface maintains its appearance for years with proper maintenance.

Blending Old and New Into One Beautiful Driveway

Perhaps the most satisfying aspect of this project was seeing how effectively the new addition disappeared.  Before staining, visitors could easily identify where the driveway had been expanded.  After staining, the distinction between the original driveway and the new section virtually disappeared.  Everything now looks like one continuous installation.  This is exactly what the homeowner hoped to accomplish. Instead of highlighting the addition, the project celebrates it by making the entire driveway appear as though it were installed at the same time.

Why More Homeowners Are Choosing Paver Staining

Replacing an entire paver driveway can be expensive, disruptive, and unnecessary.

Professional staining offers homeowners an opportunity to modernize their property without extensive demolition.

Popular reasons homeowners choose paver staining include:

  • Changing outdated colors
  • Matching driveway additions
  • Refreshing faded pavers
  • Increasing home value
  • Enhancing curb appeal
  • Coordinating with new exterior renovations
  • Extending the lifespan of existing hardscapes

As exterior design trends continue moving toward darker architectural colors, black driveways have become increasingly popular for both traditional and contemporary homes.

Another Quality Hardscape Project by Gappsi

This East Northport driveway is another example of how thoughtful design and skilled craftsmanship can completely transform a property’s appearance without requiring a full replacement.

By professionally staining the Nicolock pavers, Gappsi successfully unified the original driveway with its new extension while giving the home a bold, updated look. The addition of matching black accents, including the future garage door and front door, creates a sophisticated exterior design that dramatically improves curb appeal.

The project also included staining the front walkway, bullnose edging, and stoop platform, ensuring every hardscape element complements the overall aesthetic.

Whether you’re dealing with faded pavers, mismatched additions, or simply want to update your home’s exterior, professional paver staining can provide a durable, cost-effective solution that delivers stunning results.

At Gappsi, we specialize in custom hardscape construction, paver restoration, driveway renovations, outdoor living spaces, patios, walkways, pool decks, retaining walls, and professional paver staining throughout Long Island, including East Northport, Northport, Huntington, Smithtown, Commack, Dix Hills, and the surrounding communities.

Our latest paver staining and sealing project in East Northport, NY, demonstrates how expert craftsmanship and premium materials can completely transform an existing driveway into a modern architectural feature that looks as if it were built that way from day one. Whether you’re expanding your driveway or simply ready for a fresh new look, Gappsi can help bring your vision to life while protecting your investment for years to come.

Contact Gappsi Today

📍 Serving all of Long Island, NY — Nassau & Suffolk Counties
🌐 https://www.gappsi.com/
📞 Call now for a free consultation and estimate

SCHEDULE A MEETING TODAY WITH GAPPSI

Backyard multi-sport games court with synthetic turf, basketball hoop, and pickleball lines on a sunny day

Sports Games Courts: Essential Space Requirements and Material Guide

Homeowners on Long Island often struggle to fit multiple sports into a single backyard layout. Standard dimensions for basketball and pickleball require specific clearance zones to ensure safe play for the whole family.

Sports Games Courts provide a special area for basketball, pickleball, and volleyball. These multi-sport areas let you combine several games into one spot by using crossed lines and movable nets. Experts at EVstudio note that a half-court for basketball needs about 2,350 square feet. A pickleball court fits in a much smaller 880 square foot area. Choosing the right size depends on your open lawn space and the sports you play most.

A flat base of concrete or asphalt serves as the floor for the project. We finish this base with Matflex tiles or synthetic turf to create a smooth surface. Proper planning ensures you have enough buffer space for safe play during fast games on your new backyard court.

Determining how much room you have is the first step. You must factor in the dimensions of the court plus the clearance zones for player safety. Space Requirements for Your Backyard Sports Games Courts will vary based on your property size and the games you choose.

Space Requirements for Your Backyard Sports Games Courts

Fitting a court into your yard starts with your goals. Most yards in Nassau and Suffolk County can fit a multi-use area if you plan the layout well. You must think about the size of the play zone and the space around it. These game court designers help you map out these zones to match your property lines and local rules.

Small to medium property layouts

A court size of 30×60 feet works well for most small to medium yards. This footprint gives enough room for a standard pickleball court while leaving space to move safely. Gappsi built a court of this size for an East Islip project using Snap Sports tiles on a concrete base. As shown by USA Pickleball, the standard court is 20×44 feet, so a 30×60 layout adds a helpful buffer for safe play.

Medium to large yard options

If you have more room, a 36×60 foot layout is a great choice. This size adds extra buffer space which is helpful for tennis or half-court basketball. For homes with very large lots, a 50×100 foot area can fit a full tennis court. These large setups often include paths made of Nicolock Stone Ridge pavers around the edge to keep the area clean and easy to reach.

Safety and clearance buffers

Every court needs a safety zone beyond the play lines. These buffer zones keep players from hitting walls, fences, or plants during a fast game. Most plans need at least 5 to 10 feet of clear space around the main court lines. Experts at EVstudio note that total space needs must include these safe zones to prevent injury. Gappsi checks these zones during the design phase to make sure your court is both fun and safe for all ages.

Standard Court Dimensions for Popular Sports

To plan for backyard sports games courts, you need a clear map of your space. Each sport has its own size. Knowing these sizes helps you pick the right plan for your yard on Long Island. Gappsi has built many multi-sport setups in Nassau and Suffolk County. We recently finished a 30 by 60 foot court in East Islip. This size is a great choice for mid-sized yards.

Basketball and tennis needs

Basketball is a top choice for multi-sport plans. A full pro court is 94 feet by 50 feet. Most people pick a half-court to save space. A standard half-court is 47 feet long and 50 feet wide. If your yard is small, you can still play with a 30 by 30 foot area. This size fits a three-point line and gives you room to shoot. It is a smart way to add value to your home.

Tennis needs the most room of any home sport. The play area for doubles is 78 feet by 36 feet. But you must add extra space to move around. A full tennis court usually needs a total space of 120 feet by 60 feet. Game court experts can help you fit these large courts into your yard. They use smart grading and stone walls to make the land flat and ready for play.

Pickleball and net games

Pickleball is a fast-growing sport for home sports games courts. The court size is 44 feet by 20 feet. This is much smaller than a tennis court. It makes the game a great fit for yards in towns like Smithtown. The 44 by 20 foot size also works for badminton. Using one area for both games is a smart way to get more use from your yard. You can swap nets in just a few minutes.

Volleyball needs a bit more room than pickleball. A standard court is 60 feet by 30 feet. When you plan for volleyball, remember to leave extra room to serve. Playing these sports keeps your family active and fit. The CDC says that adults need at least 150 minutes of exercise each week. Having a court at home makes it easy to hit that goal without leaving your house.

Comparing popular game plans

Sport Court Size (Feet) Total Space Needed (Feet)
Full Basketball 94 x 50 100 x 56
Half Basketball 47 x 50 52 x 56
Pickleball 44 x 20 60 x 30
Tennis (Doubles) 78 x 36 120 x 60
Volleyball 60 x 30 80 x 50

When you mix sports, you can save space with lines that overlap. A combined basketball and tennis court often needs about 94 feet by 60 feet. This plan uses a net you can take down. You can switch from hoops to a tennis game quickly. Gappsi uses tough tiles like Matflex to make sure the surface works well for every game you play. This modular surface is easy to keep clean and looks great for years.

Expert setup makes sure your court is flat and drains well. Good base prep is the most vital part of any sports games courts job. Gappsi brings years of local skill to every build on Long Island. We handle the 3D design and the permits so you can just enjoy the play. Our team works with you to pick the best spot and size for your needs.

Choosing the Right Surface Material for Your Sports Games Courts

The base and top layers you pick for your backyard define how the game feels and how well water drains. For homeowners on Long Island, the local weather makes drainage a top priority. Most Sports Games Courts services start with a solid base like concrete or asphalt before they add the final play surface. Concrete provides a flat and permanent floor that lasts for decades but has a higher upfront cost. Asphalt is a common choice for a budget-friendly base, but it may need more care over time to prevent cracks from winter freezes.

Synthetic Turf and Grass Options

Synthetic turf is a top choice for a soft feel and easy upkeep. Gappsi uses the Italgreen line to give you a pro-level experience at home. You can choose from types like the Soccer 52 Double X for active games or the Green HD 17 for tennis. These surfaces allow for fast play while being easy on your joints.

Many homeowners also add a Golf or Putting Green section to their sports games courts for more variety. Synthetic turf helps with outdoor water use because it does not need a hose to stay green. It also drains well after a heavy storm in Nassau County.

Interlocking Tiles and Modular Systems

Modular tiles offer a versatile and fast way to finish your court. Products like Matflex tiles or Snap Sports polypropylene tiles are popular because they snap together over a hard base.

In a recent project in East Islip, NY, Gappsi Inc used Snap Sports tiles on a recycled concrete base to build a 30×60 foot court. These tiles are made to grip well even when they get wet. They come in many colors, which helps you mark lines for different sports. You can also mix in Nicolock Stone Ridge pavers around the court edge to create a clean look that matches your patio.

Performance and Maintenance Needs

Each material has a different trade-off between how it plays and how you care for it. Hard surfaces like concrete or asphalt provide a fast ball bounce that is great for basketball. Tiles add a bit of cushion which helps protect your knees during a long game of pickleball.

If you want a court that works for many sports, a mix of tiles and turf is often the best path. No matter which you pick, a professional setup ensures the ground is level. This stops water from pooling and keeps your game court designers happy with the final result. Proper care keeps the court safe for your family for many years.

Designing a Multi-Sport Layout for Maximum Versatility

A smart layout lets you play many games in a small space. By using one area for basketball, volleyball, and tennis, you get the most out of your yard. The key is to plan how each game fits on the same floor. You can use different colors for the lines so players know where to look. This makes your multisport court guide easy for everyone to use.

Marking multiple sports

You can fit a lot of fun on one surface with the right lines. Most people use a solid color for the main sport, like basketball. Then, you can add dashed lines for other games. Use one color for pickleball and another for badminton. This helps players stay in bounds without getting mixed up. Different colors make each game clear even when they overlap on the court floor.

It is helpful to follow rules from groups like USA Pickleball when you plan. They list the right sizes for courts and zones. When you know the exact space you need, you can fit more games into your plan. This helps you avoid mistakes and keep the play fair for all who use the area. Precise measurements from a map or survey help you fit everything in.

Adjustable gear and nets

Good gear makes it easy to switch between sports. Use hoops that you can raise or lower for different ages. Removable nets are also a must for a multi-use area. You can take them down for soccer or basketball and put them up for tennis in minutes. This keeps the space open and safe when you do not need the net for a specific game.

For an East Islip project, we used top gear to give the owners full use of their space. Strong posts can hold nets for many games. Some posts have holes at different heights for volleyball or tennis. This setup means you do not need many extra parts in your yard. One set of posts does the work of three.

How to plan your layout

Setting up your sports games courts takes a few clear steps. You must think about space and gear before you start to build. Here is a simple path to follow:

  1. Measure your yard to see how much room you have for the court.
  2. Pick which sports you want to play most to set the main size.
  3. Plan a striping scheme using colors that stand out from each other.
  4. Select gear like adjustable hoops and net posts that fit many games.
  5. Mark the lines on the surface once the base and floor are ready.

Planning the right way ensures you do not waste space or funds. A good design keeps the court fun for years as your family grows. If you need help, professional game court designers can find the best fit for your home.

Planning Your Sports Games Courts Installation on Long Island

Building Gappsi Inc sports games courts in your backyard takes careful work and a clear plan. We have helped people on Long Island for over 38 years to create play spaces. Our team at Gappsi manages every part of the job from start to finish. We work across both Nassau and Suffolk Counties from our main office in Smithtown.

Initial site review and 3D design

The first step is a full check of your yard to see what will work best. We look at the space you have and the slope of the land. We use 3D tools to show you how the court will look in your yard before we start. This helps you find the best spot for play and see how it fits with your home. You can also visit our showroom in Smithtown to see the court parts in person. Our 12 divisions work as one team to handle the court, walls, and lights all at once.

During the design phase, you can choose the sports you want to play most. Some owners want a space for basketball and tennis. Others may want a smaller spot for a pickleball court or volleyball games. We help you pick the right size for your yard and your needs. A good plan at the start saves time and helps you get the most out of your new space.

Permits and base prep

Most towns on Long Island need a permit before you build sports games courts. Rules vary between Nassau and Suffolk, but Gappsi and our team help with the papers. We provide the drawings and data needed for town sign off. This ensures everything follows local laws. Once we have the permit, our team starts the site work. This is a key part of the build that ensures the court lasts for many years.

Site prep starts with clearing the land and grading the soil. We level the ground so water drains away from the court area. Good drainage is vital on Long Island to prevent pools of water after a storm. Then, we put down a firm base made of asphalt or concrete. This solid floor acts as the spine of the court. It keeps the surface flat and stops it from sinking over time. A strong base is the best way to keep your court safe and fun for decades.

Surface installation and line markings

When the base is set, we add the top play surface. You can pick from Matflex tiles or synthetic turf for your court. These materials help stop slips and protect your joints during play. Our team fits the pieces together with care to ensure a smooth finish. After the surface is down, we paint the lines for your chosen sports. We use bright, long-lasting paint that stays clear through many seasons.

We can make a half-court for basketball or a space for three or four other games. Our East Islip project is a great case of a 30×60 ft court that fits a yard well. Once the lines are dry, we set up the hoops and nets so you can start playing.

How to Budget for Your Sports Games Courts Project

Building a custom area for play involves several cost factors that homeowners should consider early. The total price for sports games courts depends mostly on the size of the court and the materials you choose for the base and surface. Proper planning helps you avoid hidden costs while ensuring your new court lasts for decades.

Primary cost factors for construction

The size of your project is the biggest driver of the final price. Larger courts need more raw materials and more labor for grading. For example, a half-court basketball setup may range from $8,600 to $38,000 depending on the size and site needs. You also need to budget for professional site prep. This includes grading and drainage to keep the court level and dry. According to the EPA, managing runoff with proper drainage is vital for any large paved surface to prevent local water issues.

Choosing your base and surface materials

Your choice of base material impacts your budget. Concrete is a permanent and tough option but usually costs more than asphalt. A synthetic turf surface over a gravel base is another path to consider. For the top layer, many homeowners choose modular Matflex tiles or Snap Sports polypropylene tiles. These materials handle the local climate in Nassau County and Suffolk County while they help protect players from hard falls.

Permits and professional design value

Working with a full-service firm like Gappsi helps simplify the process. We manage the drawings and plans needed to get permits in your local town. Our team has served Long Island since 1987. We provide clear 3D designs so you see the value before work starts. You can reach our Smithtown showroom at 631-543-1177 to discuss a plan that fits your backyard and your budget.

Frequently Asked Questions About Sports Games Courts

How much does a backyard sports games court cost?

Cost depends on court size, base material, and surface type. A half-court basketball layout (30×30 ft) on an asphalt base costs less than a full-size multi-sport surface (50×100 ft) with synthetic turf and multiple striping. Your site conditions, grading needs, and permitting also affect the final price. A professional consultation provides an accurate estimate based on your specific property.

What is the best surface for a multi-sport court?

The best surface depends on the sports you play most. Synthetic turf from Italgreen offers excellent drainage and low maintenance while supporting basketball, pickleball, and volleyball. Matflex polypropylene tiles provide a modular, cushioned surface that handles multiple sports well. Concrete and asphalt offer the most durability for basketball-heavy use but lack the shock absorption of turf or tiles.

How much space do I need for a backyard sports games court?

A versatile court starts at 30×60 ft, which fits a regulation pickleball court with room for half-court basketball and volleyball. For tennis or full-court basketball plus other sports, plan for at least 50×100 ft. You also need buffer space around the court for safe movement. Gappsi offers free site evaluations to measure your available space and recommend the best layout.

Can you put a sports games court on a sloped yard?

Yes. Professional grading and drainage solutions can transform sloped properties into level court foundations. Gappsi’s design-build team includes excavation and grading expertise as part of every project. And the company’s landscape division handles any retaining walls or drainage systems needed to prepare your site.

How long does it take to install a sports games court?

Most residential installations take 1 to 3 days depending on complexity. A simple synthetic turf court on prepared ground may be installed in one day. Courts requiring concrete or asphalt base work, extensive fencing, or custom striping and equipment may take longer. Gappsi provides a clear timeline during the design phase.

What sports can I play on a single multi-sport court?

A well-designed multi-sport court can accommodate basketball (full or half court), pickleball, volleyball, badminton, tennis, bocce, shuffleboard, and soccer practice. Color-coded line markings and removable nets and hoops let you switch between sports in minutes.

Ready to Build Your Sports Games Courts?

Turn your backyard into a year-round destination for fun and fitness. Gappsi Group has been designing and building Sports Games Courts for Long Island homeowners since 1987. From the first site evaluation to the final line markings, our team handles every detail.

Call (631) 543-1177 or stop by our showroom at 1015 West Jericho Turnpike, Smithtown, NY 11787 to see material samples and discuss your project. Let us build a court your family will enjoy for decades.

Barrel sauna installation in progress on Long Island.

Your Guide to Barrel Sauna Installation Long Island

Your backyard has the potential to be more than just a space for summer barbecues. With the right additions, it can become a true extension of your home and a hub for year-round wellness. A barrel sauna is a perfect example, offering a cozy retreat during chilly autumn evenings and a place to unwind after a day by the pool. It’s a lifestyle upgrade that also adds tangible value to your property. This article explores how to choose the perfect model for your needs and what the process entails, giving you a clear picture of a professional barrel sauna installation Long Island.

Key Takeaways

  • Design creates efficiency: A barrel sauna’s unique cylindrical shape is more than just stylish; it creates a natural convection that heats the space quickly and evenly, making your wellness routine more energy-efficient.
  • Plan your personal retreat: Choosing the right sauna involves key decisions about wood type, size, and heater style, all of which will influence the final cost and your overall experience.
  • Prioritize professional work and upkeep: A proper installation handles critical details like the foundation, wiring, and local permits, while simple, regular maintenance protects your sauna from the elements and ensures it remains a lasting investment.

What Is a Barrel Sauna?

Imagine stepping into a personal wellness retreat right in your own backyard. That’s exactly what a barrel sauna offers. It’s a beautifully crafted outdoor structure, shaped like a barrel lying on its side, designed to be a dedicated space for relaxation, health, and recovery. Unlike a typical shed or outbuilding, its unique cylindrical design is both functional and visually striking, adding a touch of rustic elegance to any Long Island landscape. It can stand alone as a peaceful escape or become the centerpiece of a larger outdoor living area, complementing features like a swimming pool, patio, or garden.

These saunas are more than just a luxury item; they represent an investment in your daily well-being. Having one at home provides a convenient way to unwind after a long day, soothe sore muscles after a workout, or simply enjoy a quiet moment of mindfulness. Gappsi offers a range of high-quality saunas that can be integrated seamlessly into your property, creating a complete and cohesive outdoor oasis. Whether you envision it nestled among trees or positioned next to your deck, a barrel sauna transforms a simple backyard into a year-round sanctuary for health and relaxation.

How It Differs from a Traditional Sauna

The most obvious difference is the shape, but the barrel design is about more than just looks. The circular form allows for highly efficient heating. As the air warms, it rises, follows the curved walls, and circulates back down, creating a consistent and even temperature throughout the space. This natural convection means there are no “cold spots,” and everyone inside enjoys the same level of heat. While some think barrel saunas are only for one or two people, many models can comfortably fit small groups, making them perfect for socializing with family and friends.

Key Features and Health Benefits

The unique cylindrical shape is incredibly sturdy, allowing it to naturally shed rain and handle a heavy snow load, a perfect feature for Long Island’s coastal weather. Beyond its durable construction, the primary draw is the wealth of wellness advantages. Regular sauna use can help you relax, reduce stress, and ease muscle pain. Many people also find it helps improve circulation and promotes mental clarity. It’s a simple, effective way to build a healthy routine without ever having to leave home.

How to Choose the Perfect Barrel Sauna

Finding the right barrel sauna for your home is an exciting process. It’s about creating a personal retreat that fits your lifestyle, budget, and backyard space. From the type of wood to the style of heater, each choice shapes your future wellness experience. Let’s walk through the key decisions you’ll need to make to select the perfect sauna for your Long Island home.

Selecting Your Wood Type and Quality

The wood you choose for your barrel sauna does more than just look good; it defines the atmosphere and durability of your retreat. Cedar is a popular, high-end choice, known for its rich aroma, natural resistance to rot and insects, and excellent heat insulation. Spruce is another fantastic option that also insulates well, creating a cozy and comfortable sauna session. For a more budget-friendly alternative, you might consider Pine. While it’s more affordable, it’s important to weigh that against long-term durability. At Gappsi, we can help you explore the different saunas and materials available to find the one that best suits your home and preferences.

Finding the Right Size and Seating

Don’t let the cozy look fool you; barrel saunas come in various sizes. While some are perfect for solo relaxation, many can comfortably seat two, four, or even six people. Think about how you plan to use your sauna. Will it be a private escape or a social spot for family and friends? Choosing a slightly larger size can make a big difference in comfort, allowing for more room to stretch out and relax. When planning your backyard, consider how the sauna will fit into the overall landscape design. A well-placed sauna can become a beautiful focal point in your outdoor living space.

Picking a Heater: Electric vs. Wood-Burning

Your sauna’s heater is its heart, and you have a few great options. Electric heaters are the most common choice for their convenience. With the push of a button, you can set your desired temperature and enjoy a consistent, controlled heat. Wood-burning heaters, on the other hand, offer a more traditional, rustic experience with their soft light and crackling sounds. They don’t require electricity but do need a chimney and a bit more hands-on effort. Another modern option is an infrared heater, which warms your body directly instead of the air around you. Regardless of your choice, your sauna will need a solid, level foundation, which our masonry experts can prepare for you.

Considering Insulation and Energy Efficiency

One of the best things about the barrel sauna design is its natural efficiency. The cylindrical shape allows for better heat circulation, meaning it heats up faster and uses less energy. The thick staves of wood provide excellent insulation, and the curved roof naturally sheds rain and snow, making it a durable choice for Long Island’s weather. It’s also important to ensure your installation meets all local safety regulations for wiring, ventilation, and materials. Working with a professional installer like Gappsi ensures your sauna is not only energy-efficient but also completely safe, giving you peace of mind as you relax and unwind.

Breaking Down Barrel Sauna Costs on Long Island

Adding a barrel sauna to your Long Island home is an exciting investment in your wellness and property value. As you begin planning, one of the first questions you’ll likely have is about the cost. The final price tag can vary quite a bit, depending on the sauna’s size, materials, and features, as well as the installation process. Understanding these components will help you create a realistic budget for your backyard oasis.

Think of the total cost in a few key parts: the sauna kit itself, the labor to build it, and any site preparation or electrical work needed to get it running. Let’s walk through what you can expect for each of these categories so you can plan your project with confidence.

Material and Labor Cost Estimates

The price of the sauna unit is your starting point. An infrared barrel sauna might range from $3,200 to over $6,500, while a traditional model with a wood or electric stove typically costs between $4,000 and $10,000 or more. Beyond the unit, you’ll need to budget for professional sauna installation, which can add $400 to $1,500 to the total. Finally, most saunas require dedicated electrical work. A certified electrician will ensure your setup is safe and up to code, which generally costs between $300 and $800 for a basic infrared sauna, with more complex installations costing more.

DIY vs. Professional Installation: A Cost Comparison

If you’re handy, a DIY installation might seem like a great way to save on labor costs. However, it’s a project that requires careful planning. A barrel sauna needs a perfectly level and solid foundation that can support its weight and allow for proper drainage. While you can save money upfront, any mistakes during assembly could lead to costly repairs later. Opting for a professional installation from a team like Gappsi ensures your sauna is built correctly and safely from the ground up, giving you peace of mind and a flawless finish.

Factors That Influence the Final Price

Several key choices will shape the final cost of your barrel sauna. The type of wood, the size of the unit, and the heater you select (electric versus wood-burning) are major factors. The unique cylindrical design of a barrel sauna is not just for looks; it promotes efficient heating and can withstand heavy snow, but the craftsmanship involved is reflected in the price. Additionally, the location you choose for your sauna can influence costs, especially if it requires extensive site preparation, like building a new patio or deck from porcelain and natural stone pavers. Any custom features, like upgraded lighting or smart controls, will also affect the final price.

A Step-by-Step Guide to Barrel Sauna Installation

Installing a barrel sauna is an exciting project, and knowing the steps involved can make the process feel much more manageable. While the final assembly can be surprisingly quick, a successful installation starts with careful planning. Here’s a breakdown of what to expect when you bring a barrel sauna to your Long Island home.

Preparing the Site and Foundation

Your sauna’s longevity starts from the ground up. Before anything else, you need a perfectly level and stable foundation that can handle the sauna’s weight without shifting over time. While a simple gravel base might seem tempting, it can settle and become uneven, potentially causing issues for your sauna structure down the road.

A concrete slab or a patio built with porcelain and natural stone pavers is your best bet for a solid, long-lasting base. This ensures the sauna stays level and provides proper drainage away from the structure. Getting this step right is critical, so it’s often best to have professionals prepare the site to guarantee a flawless foundation for your new backyard retreat.

Assembling, Wiring, and Weatherproofing

Once your foundation is ready, the barrel sauna itself comes together fairly quickly. Most kits can be assembled by two adults in about four to eight hours. The staves and bands are designed to fit together logically, making the build process straightforward for those with a bit of DIY confidence.

The most critical part of this stage is the electrical work. Hiring a qualified electrician is essential to safely connect your heater and lighting, ensuring everything is up to code. This is not a step to take on yourself. Your installer will also make sure the sauna is properly weatherproofed and that you have adequate drainage planned to protect your investment from Long Island’s coastal weather.

Understanding Local Permits in Nassau and Suffolk County

Before you begin installation, it’s important to check with your local building department. Most towns and villages across Nassau and Suffolk County have specific rules for outdoor structures, and you will likely need a permit for your new sauna. The requirements and fees can vary, so a quick call to your town hall is a necessary first step.

This is where working with an experienced local installer really pays off. A team familiar with Long Island’s regulations, like Gappsi, can manage the entire permitting process for you. They ensure all paperwork is filed correctly and that your installation meets every local code, saving you from potential headaches and delays.

What to Expect for an Installation Timeline

While the hands-on assembly of a barrel sauna might only take a day, the full project timeline is a bit longer. The entire process, from initial planning to your first relaxing session, involves several key phases. It starts with selecting the right model and features for your home.

Next comes site preparation and securing any necessary permits, which can take a few weeks depending on your town. Once the site is ready and your sauna is delivered, the assembly and electrical hookup can typically be completed. Planning for these distinct stages helps set a realistic timeline and ensures your sauna installation goes smoothly from start to finish.

Barrel Sauna Maintenance Tips for Long Island Homes

A barrel sauna is a beautiful addition to your home, and with the right care, it will provide relaxation for decades. Proper maintenance is not just about keeping it looking good; it’s about ensuring it functions safely and efficiently for years to come. For homeowners on Long Island, our coastal climate presents unique challenges, from humid, salty summer air to cold, snowy winters. Protecting your investment means paying special attention to the wood, the interior, and the heating components.

Think of sauna maintenance as a simple, seasonal routine. A little effort goes a long way in preserving the natural beauty of the wood and the integrity of the structure. Regular cleaning prevents buildup and keeps the space feeling fresh, while periodic sealing protects the exterior from moisture and sun damage. It’s also important to perform safety checks on the heater and prepare your sauna for the winter months. Following these straightforward steps will ensure your barrel sauna remains a pristine and peaceful retreat in your backyard, ready for you to enjoy whenever you need a moment to unwind.

Protecting Exterior Wood from Coastal Weather

The charming, cylindrical shape of a barrel sauna is great at naturally shedding rain and snow. However, Long Island’s weather requires an extra layer of defense. The combination of salt in the air, intense summer sun, and winter moisture can be tough on any exterior wood. To keep your sauna’s wood from weathering prematurely, applying a high-quality stain or sealant is essential. This protective coat acts as a barrier against moisture and UV rays, preventing the wood from warping, cracking, or discoloring over time. We recommend reapplying a sealant every few years as part of a regular maintenance schedule. Our professional restoration and sealing services can ensure your sauna gets the durable protection it needs to withstand our coastal climate.

Cleaning, Sealing, and Refinishing

Keeping your sauna clean is simple. For the interior, use a damp cloth to wipe down benches and walls after use, and always sit on towels to minimize sweat stains. Avoid using harsh chemical cleaners, as the heat can release fumes. For the exterior, regular sealing is your best defense against the elements. Over many years, you might notice the wood’s color beginning to fade. Refinishing the exterior can restore its original luster and add another layer of protection, helping to maintain its structural integrity. With consistent care, you can easily protect your sauna investment and ensure it remains a beautiful, functional feature of your home for a very long time.

Inspecting Heating Elements and Winterizing

Safety and performance go hand in hand, especially when it comes to your sauna’s heater. Whether you have an electric or wood-burning model, it’s wise to have the heating elements and wiring inspected periodically. A qualified electrician should always handle the initial hookup to ensure everything is up to code and functions correctly. As winter approaches on Long Island, preparing your sauna for freezing temperatures is a critical step. If your heater uses water for steam, make sure to drain it completely to prevent pipes or internal components from freezing and cracking. This simple winterizing task can save you from costly repairs and ensure your sauna is ready for use when the cold weather hits.

Finding a Barrel Sauna Installer on Long Island

Finding the right person to build your backyard oasis is just as important as picking the perfect sauna. A great installation experience means you can relax and look forward to your first steam session without worrying about permits, wiring, or construction mishaps. The right partner will handle the details, ensuring your sauna is built safely and to last. On Long Island, you have options, so it’s smart to know what separates a good installer from a great one. Let’s walk through what to look for and why a full-service team can make all the difference in your project.

Why Partner with Gappsi

When you’re ready to install a barrel sauna, working with a local expert simplifies everything. At Gappsi, we manage the entire project from start to finish, serving homeowners across both Nassau and Suffolk County. We don’t just supply and deliver your sauna; our team handles the complete installation, including all the necessary electrical work. Because we are so familiar with Long Island, we ensure your project complies with all local codes, taking that stress right off your plate. Our goal is to provide a seamless experience so you can simply anticipate the moment you get to enjoy your beautiful new sauna.

What to Look for in a Professional Installer

Beyond finding a company that can do the work, you want a team you can trust. Look for an installer with a proven track record and deep experience specifically with sauna installations. Ask to see a portfolio of their work. It’s also critical that they are familiar with local building codes, which can vary between towns in Nassau and Suffolk County. A professional installer will understand these requirements and ensure your sauna is compliant. Don’t hesitate to ask about their process, the expected timeline, and what they need from you to prepare the site. A clear plan is always a sign of a professional team.

Is a Barrel Sauna a Good Investment for Your Home?

Deciding to add a barrel sauna to your Long Island home is about more than just a financial calculation; it’s an investment in your well-being and lifestyle. Think of it as creating your own personal wellness retreat, just steps from your back door. Having a dedicated space to unwind can help you relax, ease muscle pain, and improve circulation after a long day. It’s a wonderful way to build a healthy routine, whether you’re looking for a quiet moment alone or a new activity to share with family.

From a property standpoint, a well-installed sauna is a desirable feature that adds value to your property, much like a deck or a swimming pool. It shows potential buyers that a home has been cared for and thoughtfully improved. When you work with a company like Gappsi, you can seamlessly integrate your sauna into a larger backyard design. We can help you create a cohesive outdoor living space that includes everything from the sauna and patio to landscaping and even one of our custom swimming pools.

Barrel saunas are also a practical choice. Their unique design heats up efficiently, and the assembly process is straightforward for professionals. This means you can start enjoying your new oasis sooner than you might think. Ultimately, a barrel sauna is a fantastic investment because it pays you back daily in relaxation and health benefits, all while improving your home’s long-term value. When you’re ready to explore the possibilities, our team at Gappsi can guide you through our beautiful selection of saunas and manage the entire installation.

Related Articles

Frequently Asked Questions

How much space do I really need for a barrel sauna? The exact footprint depends on the model you choose, but a good rule of thumb is to plan for a level area that is at least two feet longer and wider than the sauna itself. This gives you enough clearance for assembly, maintenance, and safe entry and exit. It’s also important to have a solid foundation, like a concrete pad or a paver patio, to ensure the structure remains stable for years to come.

Can I use a barrel sauna year-round, even during a Long Island winter? Absolutely. Barrel saunas are designed for four-season use, and many people find they enjoy them most during the colder months. The efficient, circular design allows them to heat up quickly and maintain a consistent temperature, even when it’s freezing outside. Just remember to properly winterize your unit, especially if it has a steam function, to prevent any water from freezing in the components.

What’s the real advantage of the barrel shape over a standard square sauna? The unique barrel shape is about much more than just aesthetics. Its primary advantage is superior heat circulation. The curved walls create a natural convection current that distributes heat evenly throughout the space, eliminating the cold spots you might find in a square sauna. This design is also incredibly strong and naturally sheds rain and snow, making it a durable and efficient choice for our coastal weather.

Do I absolutely need a permit for a sauna in my backyard? In most cases on Long Island, yes. Nearly every town and village in Nassau and Suffolk County has regulations for outdoor structures, and a sauna typically requires a permit. The specific requirements and fees can vary, so it’s a critical first step to check with your local building department. Working with an experienced installer who knows the local codes can save you a lot of time and prevent potential issues.

How long does the entire installation process take, from start to finish? While the hands-on assembly of the sauna kit can often be done in a day, the total project timeline is longer. You should plan for a few weeks from start to finish. This includes the time it takes to select your sauna, prepare the site and foundation, file for and receive any necessary permits, and schedule the final delivery, assembly, and electrical work.