Winter frost heave on Long Island easily cracks poorly built patios and causes costly backyard damage. Choosing the wrong stone or concrete paver means your outdoor living space will crumble within a few seasons.
The best patio materials for Long Island are natural bluestone, travertine, and concrete pavers, which each provide homeowners with superb strength, great seasonal performance, and beautiful masonry results. Natural bluestone offers a classic cleft look that handles harsh freeze-thaw cycles well, while travertine stays very cool underfoot, making it the perfect choice for sunny pool decks. In contrast, concrete pavers from top local brands like Cambridge and Nicolock offer highly versatile design styles, low maintenance needs, and superb strength at an affordable overall cost. In the end, choosing the right material depends on your own budget, your maintenance needs, and how you plan to enjoy your new custom outdoor living space.
To select the best patio materials for Long Island backyards, you must first understand how our local weather patterns impact various stones over time. We will help you evaluate these options by first Understanding Long Island’s Unique Climate Challenges. This crucial decision begins with knowing how freeze-thaw cycles, coastal salt, and seasonal humidity affect each material’s performance over time.
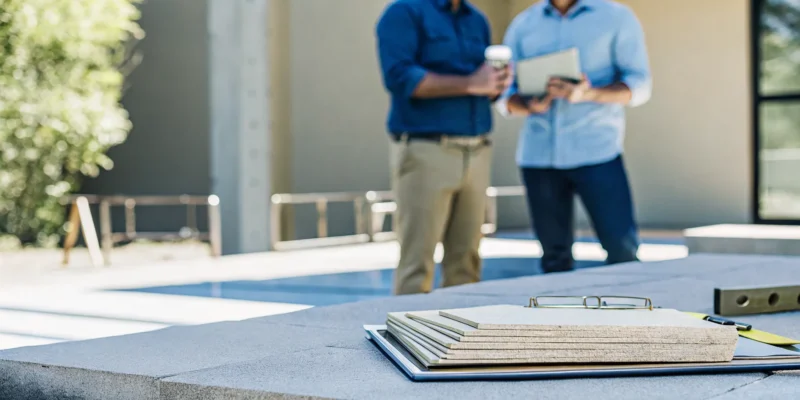
Schedule Your Free Design Consultation — Our team will help you choose the best patio materials for your Long Island home.
Best Patio Materials For Long Island: Understanding Long Island’s Unique Climate Challenges
Long Island weather is nice, but it can be harsh on outdoor living spaces. If you want a patio that lasts, you must plan for local weather. Stone that works in other states often fails here.
That is why picking the right option is key. But even the best stone is not enough on its own. Proper setup is needed to survive our climate.
The Freeze-Thaw Threat to Masonry
Winters on Long Island bring cold weeks and warm days. Water gets into porous stones and then freezes. When water freezes, it grows in size.
This growth pushes the stone apart and makes it crack. Scientists at Stony Brook University study how these cold freeze-thaw cycles harm local brick and stone. To stop this threat, you must select stones that do not soak up water.
When water turns to ice, it exerts immense pressure. Unsealed patios will flake and peel. Just one bad winter can ruin a poorly made stone floor. Using dense natural bluestone or travertine helps prevent this costly damage.
Coastal Salt and Humidity Realities
Long Island is surrounded by saltwater. This means that coastal salt air is a constant factor for Suffolk County and Nassau County homes. Salt can settle on your patio and slowly eat away at the stone. It also breaks down concrete bonds over time, making your stones weak and crumbly.
Damp summer air also creates water issues. Wet air slows down drainage and keeps your patio damp.
Damp stones can grow mold and moss, which look bad and make the surface slick. Sealing your stone blocks these threats. It keeps salt and water out so your patio stays clean and dry.
Base Preparation and Edge Restraints
The best paving stone will still fail if the ground beneath it moves. In our region, soil shifts often due to weather changes. To prevent this, you must have a proper base.
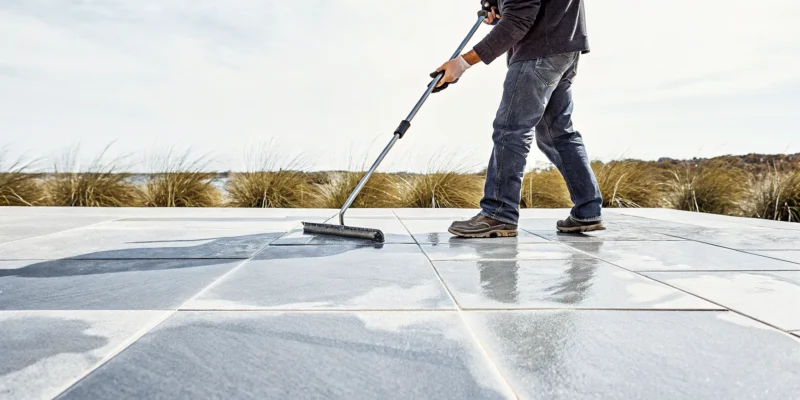
We use a base of six to eight inches of packed RCA or stone dust. This deep support layer keeps the patio level and lets water drain away.
Edge restraints are also needed to lock the stones in place. Without them, the outer stones will spread and push outward over time. We install our patented Edge Restraint System to keep every stone locked tight.
Our team has built many long-lasting patios across Long Island. You can view our work in our completed project portfolio to see how we handle these tough climate needs.
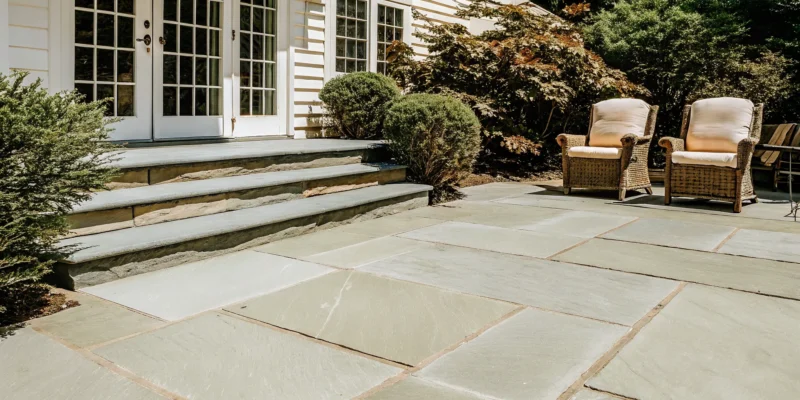
Bluestone: The Classic Natural Stone Choice for Long Island Patios
When you plan a new outdoor space, choosing the best patio materials for Long Island homes is a key choice. Natural bluestone stands out as a classic, time-tested option for local backyards. This quarried natural stone offers a rustic charm that fits both old and new homes. If you want a fine stone patio, Gappsi supplies and installs this stone through our professional masonry services.
Natural cleft texture and unique colors
This stone has a unique look because of how workers split it. A natural cleft surface shows the soft ridges and texture of the earth. The color range is also very broad, running from cool blue-gray to warm blue-brown tones. According to New York State mining records, this sandstone is mined from local beds. These color shades mean that no two stone patios look exactly the same.
Some homeowners prefer a smoother feel underfoot. You can choose a flamed bluestone or textured finish instead of a cleft surface. High heat is applied to the stone to create a flat, slip-free surface. This textured surface is best for wet areas like pool decks and steps. It prevents slips while keeping the natural look of the stone.
Freeze-thaw durability for cold winters
One big reason this stone is among the best patio materials for Long Island is its strength. This sandstone has great freeze-thaw durability to survive wet, cold winters. Builders have used this natural stone for centuries in northern climates. It will not crack or break when the ground freezes and thaws. This makes it a smart choice for long-term outdoor use.
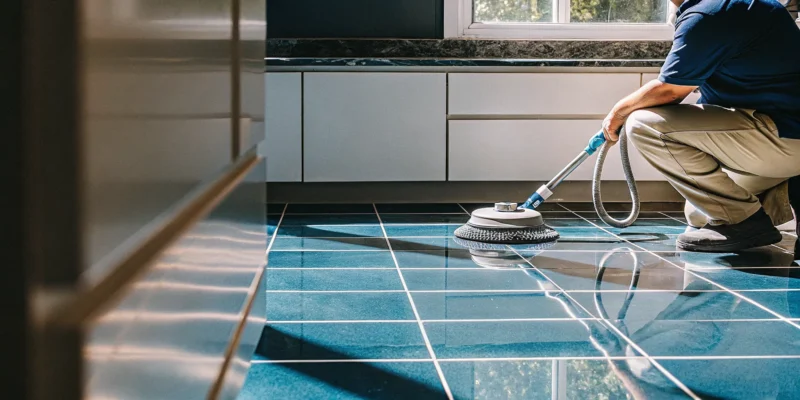
Our team lays natural bluestone on walkways, backyard patios, and pool decks. Installing them well is key to making sure the stones do not shift over time. Gappsi uses a deep, packed stone base to allow water to drain away. Good drainage stops water from pooling under the patio and causing damage. This careful work ensures your stone patio stays flat and beautiful for decades.
Sealing and maintenance requirements
While this stone is very tough, it is also porous. This means it can absorb water, oil, and grease from backyard grills. To prevent stains, you must apply a stone sealer after installation. Sealing keeps the deep colors bright and stops dirt from sinking in. You will need to clean the stone and coat it with this sealer every few years.
The usual cost of this stone runs from $25 to $40 per square foot installed. This is a higher price than most concrete pavers, but the classic look has no match. This stone is best for homeowners who want a timeless, natural look. It is a great fit if you do not mind doing a little routine work to keep the stone safe.
Travertine: A Timeless Option for Warm-Weather Entertaining
When you look for the best patio materials for Long Island, travertine is a strong contender. This natural stone brings warmth and classic style to any backyard design. It has a rich history of use in fine masonry. Gappsi supplies and installs travertine to help homeowners build beautiful outdoor spaces.
Natural beauty and thermal properties
Travertine is a form of natural limestone. It is a sedimentary rock formed from mineral spring deposits. This process leaves small, natural holes or pits on the surface. Homeowners can choose to leave these pits open for a rustic feel. They can also use filled travertine for a smoother finish.
This stone comes in warm, earth-toned hues. The most common colors are cream, ivory, beige, walnut, and gold. This range makes it easy to match with your home exterior.
The biggest benefit of travertine is its thermal performance. Carbonate rocks like limestone have unique thermal properties. Studies show that carbonate rocks limit heat buildup under the sun. This means travertine stays cool underfoot, even on hot summer days. This cool-surface comfort makes it excellent for pool decks. It is also a smart choice for outdoor kitchen areas.
Maintenance and climate considerations
But travertine is softer than other stones like bluestone. It needs proper care to handle the harsh local winter weather. Because of freeze-thaw cycles, water can get into unfilled pits and cause cracks.
To prevent this damage, you must seal the stone each year. Professional sealing keeps water and dirt out of the pores. It also stops stains from pool chemicals. Simple cleaning with soap and water will keep the stone clean. You should also sweep off leaves and debris to prevent stains.
If you want to compare bluestone and pavers, you must think about maintenance. Concrete pavers are durable and need little care. Bluestone is harder but can get hot. Travertine offers cool comfort but needs more hands-on care.
Ideal uses and cost ranges
Travertine is best for certain areas in your yard. It works well for pool decks, patios, and outdoor kitchen spaces. It is ideal for homeowners who want to walk barefoot without burning their feet.
The typical cost for travertine ranges from $25 to $45 per square foot. This price includes the stone and the work to lay it. The final cost depends on the stone grade and the prep work.
While it costs more than concrete, its beauty and cool feel add real value to your home. Gappsi can help you select the right grade for your project.
Concrete Pavers: The Versatile and Cost-Effective Workhorse
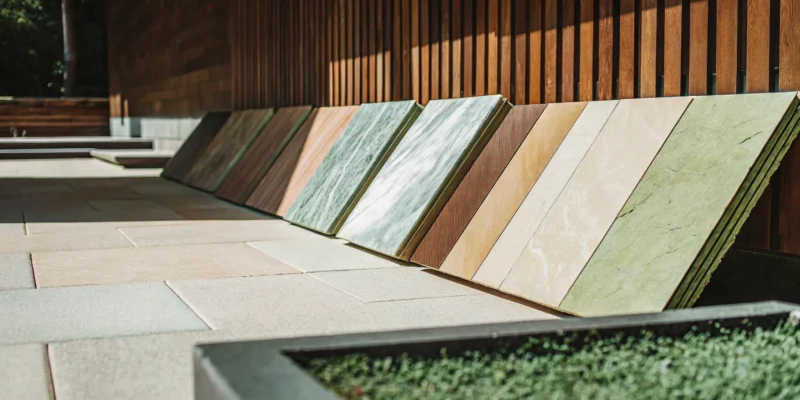
Concrete pavers are among the best patio materials for Long Island backyards. These units offer deep design choice at a fair price, making them a great fit for people on a budget. You can find them in many colors, shapes, and textures. Some styles are made to mimic natural stone, brick, or even wood. This choice lets you build a custom look that fits your home. If you want more high-end looks, you can check out natural stone paver options for your yard.
You can arrange these pavers in many patterns. Common choices include herringbone, basketweave, and running bond designs. These patterns do more than look nice. They also lock the pavers together to create a stronger surface. This keeps the patio stable under foot traffic and outdoor tables and chairs.
Top local brands and warranties
For the Northeast climate, local brand choice matters. Cambridge and Nicolock are two of the strongest brands for Long Island weather. Cambridge units feature ArmorTec to resist stains and color fade. They also come with a lifetime warranty. Nicolock uses a special through-color process called Paver-Shield. These pavers are made locally in Lindenhurst, which keeps shipping times short. Other brands like Belgard and Techo-Bloc also offer great design choices.
Base prep and lifetime durability
Concrete pavers are tough, but their lifespan depends on what lies underneath. A standard paver patio can last twenty-five to fifty years. To get this long life, you must prepare the ground. Long Island soil moves when the weather freezes and thaws. You need a six-to-eight-inch base of compacted aggregate or stone dust. We also set up solid edge restraints to hold the pavers in place. Proper drainage is key to stop shifting over time. You can learn more about permeable pavement designs that help water drain.
Many fast-working builders skip these steps. They use thin bases or bad edges to save time. When winter cold hits, these weak patios crack and sag. Gappsi uses a deep base and strong restraints on every build. This care ensures your yard stays flat and safe for decades.
Paving costs and home value return
Concrete pavers are the most low-cost option for most yards. Installed paver patios on Long Island often cost between twenty and thirty-five dollars per square foot. The final price depends on the style of the units and the layout shape. Simple square layouts cost less. Complex curved layouts with custom borders sit at the top of the price range. For example, a three-hundred-square-foot patio will cost about six thousand to ten thousand five hundred dollars.
This project is a smart money move. Paver patios offer a great return on investment, or ROI. You can expect to get back sixty to eighty percent of the build cost in home value. These patios also make your home sell faster if you decide to move. Buyers love seeing finished stone-look backyards. Because the units hold their color and shape, they keep their curb appeal for many years.
Bluestone vs. Travertine vs. Concrete Pavers: A Head-to-Head Comparison
Performance criteria and cost comparison
Finding the best patio materials for Long Island yards is a key step for your home. You must look at cost, strength, and looks before you build. Each material has its own pros and cons in our damp, cold climate. Homeowners should think about how each option holds up over many years.
How these stones and blocks react to water and frost is very important. In cold weather, wet stone can freeze and crack. The freeze-thaw cycle can split weak or unsealed stone, as shown in studies by the National Institutes of Health. Good base work and sealants will help prevent this damage.
| Feature | Bluestone | Travertine | Concrete Pavers |
|---|---|---|---|
| Cost per square foot | $25 to $40 | $25 to $45 | $20 to $35 |
| Freeze-thaw durability | Excellent (very dense natural stone) | Moderate (requires regular sealing) | Excellent (dense and flexible) |
| Lifespan | More than 50 years | More than 50 years | 25 to 50 years |
| Maintenance | Moderate (periodic sealing needed) | Moderate (sealing and crack checks) | Moderate (sealing and joint sand) |
| Slip resistance | Excellent (natural cleft texture) | Good to excellent (tumbled finishes) | Excellent (textured options) |
| Heat retention | High (can get hot in sun) | Low (stays cool underfoot) | Moderate (varies by shade) |
| Color options | Blue-gray and brown tones | Cream, beige, and gold hues | Wide range of custom blends |
| Best use | Traditional patios and walkways | Pool surrounds and patio areas | Driveways and high-traffic patios |
Distinct advantages of each material
As you compare bluestone and pavers, you will see that each has its own strengths. Concrete pavers offer great value and design choice because they come in many shapes. They work well for active homes that need a strong yard that is easy to fix if one block cracks.
By contrast, natural bluestone has a rustic look that manufactured blocks cannot match. Its deep blue and gray tones make it a top pick for classic paths. At the same time, travertine stays cool under hot sun. This makes it a great choice for pool decks and outdoor cooking spaces.
Making your final choice
To pick the right material, think about how you will use your space. A pool deck needs a cool surface like travertine so you do not burn your feet. A driveway needs the strength of concrete pavers to hold heavy cars. For a rustic, cozy backyard look, natural bluestone is hard to beat.
Which Patio Material Is Best for Your Long Island Home?
Choosing the best patio materials for Long Island depends on your specific goals. Each option has unique strengths for Nassau and Suffolk County backyards. Data from the National Weather Service shows our region faces cold winters with frequent temperature shifts. These shifts can stress your stone, so a proper choice is key.
Concrete pavers for custom designs and budget
If budget and design choices matter most, concrete pavers deliver the best value. They cost between $20 and $35 per square foot installed on Long Island. You can expect a long lifespan of 25 to 50 years. Homeowners also get a strong 60% to 80% return in home value.
Concrete pavers come in a wide range of shapes, colors, and textures. Some options can even mimic natural brick or wood. Local brands like Nicolock make their pavers in Lindenhurst to stand up to our climate.
Natural bluestone for classic appeal and strength
For timeless natural beauty and strength, natural bluestone offers unmatched character. This stone handles Long Island’s freeze-thaw cycles well because of its dense makeup. Quarried and split into classic flagstone shapes, bluestone features a natural cleft surface.
This rough texture is highly slip-resistant, making it great for walks and pool surrounds. While it costs more than concrete, natural bluestone gives a unique look that never goes out of style. It is the perfect choice for classic paths and main patios.
Travertine for poolside comfort and entertaining
If you want to entertain around a pool or outdoor kitchen, travertine is the top choice. This stone has a cool surface that stays pleasant on hot summer days. Its heat resistance means your guests can safely walk barefoot.
This natural limestone has small pitted holes for a unique texture. The soft cream, gold, and walnut hues blend well with any backyard design. It needs sealing every few years to protect its surface, but the stunning look is worth the effort.
Gappsi carries all three of these patio materials. Our team can help you select the right choice for your home. You can view our completed project portfolio to see how each material looks in real backyards. We also invite you to visit our showroom in Smithtown to see and feel these stones in person. Our masonry experts can guide you through the entire design process.
Frequently Asked Questions
How do concrete pavers hold up in Long Island weather?
Concrete pavers hold up very well because they flex with the freeze-thaw cycles of Nassau and Suffolk Counties. Leading local brands like Nicolock, made right in Lindenhurst, use special shields to resist fading and salt damage. When set on a properly compacted six-inch base, these pavers stop cracking and shifting, lasting twenty-five to fifty years.
Which patio material requires the least maintenance in Long Island?
Concrete pavers are the easiest patio material to maintain on Long Island. Unlike natural bluestone, they do not need frequent sealing to stop staining or water damage. Local pavers from brands like Cambridge feature tough finishes that resist spills, dirt, and heavy wear. If a single paver cracks, you can simply pull it out and replace it without rebuilding the whole patio.
Is bluestone a good choice for Long Island patios?
Yes, natural bluestone is a durable and classic choice for Long Island patios. This natural stone resists damage from harsh winter freeze-thaw cycles very well. However, bluestone absorbs water and needs proper sealing to stop staining from leaves, spills, or winter salt. Homeowners can compare bluestone and pavers to find the best option for their yard.
Are porcelain pavers a good option for Long Island patios?
Yes, porcelain pavers are a strong choice because they are very dense and do not absorb water. This means they will not crack during cold freeze-thaw cycles. They also resist stains, mold, and salt damage without needing any sealers. For help choosing the right stone, Gappsi offers professional masonry services to guide your design.
What is the most durable patio material for the Northeast?
Natural bluestone and concrete pavers are both very strong options for Northeast yards. Bluestone is a dense natural stone that withstands cold temperatures, while concrete pavers are made to expand and contract without cracking. Both materials need a solid six-inch base of compacted gravel to stop shifting during winter freezes.
Ready to Build the Best Patio for Your Long Island Home?
Choosing the wrong patio stone can lead to cracked masonry, shifting pavers, or pooling water after just one freezing cold winter on Long Island. If you delay your custom hardscape project now, you risk missing out on another beautiful warm season of outdoor parties and family cookouts with friends. Starting your masonry design and installation today ensures all yard work is completed before the ground freezes so your patio is ready by spring.
Ready to build? Contact Gappsi today to schedule a free design consultation. Our expert design-build team is ready to help you choose the best materials and start planning your custom backyard space. We look forward to working with you.