
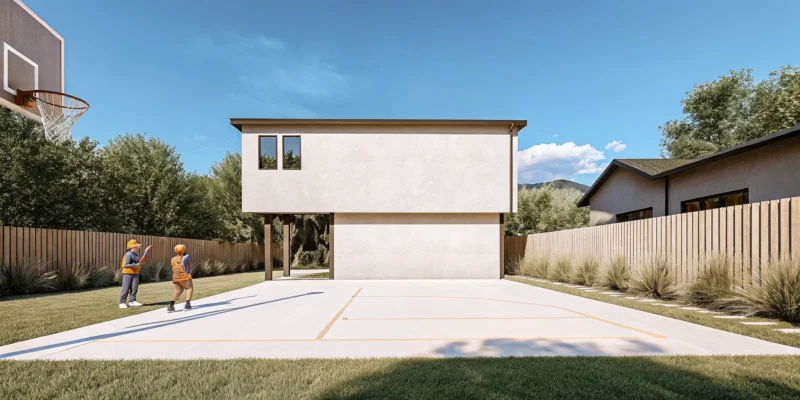
Turning an empty patch of your yard into the neighborhood’s favorite hangout spot is a powerful idea. A backyard basketball court offers a dedicated space for your family to get active, connect, and make memories that last far longer than a season. It’s a place for after-school games, weekend tournaments, and teaching your kids the perfect jump shot. This guide walks you through the entire process of a concrete basketball court backyard construction, from picking the right spot to pouring a durable foundation. We’ll cover the essential steps to ensure your court is built to last, providing a safe and professional-quality playing surface for years of enjoyment.
Key Takeaways
- Address Permits and Rules Upfront: Before starting, confirm local building codes, property line setbacks, and any HOA guidelines. Getting these approvals first saves you from costly issues and ensures your project is compliant from the beginning.
- Build a Foundation That Lasts: The success of your court depends on what’s underneath. Proper site preparation, including grading the area and laying a compacted gravel base, is critical before pouring a reinforced, four-inch concrete slab.
- Protect Your Court with Simple Maintenance: Keep your court in prime condition with a simple routine. Regularly sweep the surface, promptly fill any small cracks to prevent them from growing, and make sure drainage paths are clear to avoid water damage.
Why Build a Backyard Basketball Court?
Thinking about adding a basketball court to your backyard is more than just a home improvement project; it’s an investment in your family’s lifestyle. A personal court offers a dedicated space for fun, fitness, and making memories right outside your door. It transforms an underused part of your yard into a hub of activity that everyone can enjoy for years to come. From spontaneous after-school games to planned neighborhood tournaments, the benefits extend far beyond the court lines.
Get Active and Connect with Family
A backyard basketball court is the perfect excuse to get everyone off their devices and outside. It offers a fantastic way to stay active and healthy, providing a convenient spot for a quick workout or a full family game. Having a safe, private place to play means your kids can practice their skills and burn off energy without you having to drive them anywhere. It’s a space where you can teach, play, and connect, creating lasting memories through friendly competition. Gappsi designs and builds custom Sports Games Courts that become the heart of family fun.
Create a Go-To Spot for Gatherings
Imagine your home becoming the favorite hangout spot for friends and neighbors. A backyard basketball court naturally creates a fun, active space for social gatherings. It’s the perfect centerpiece for birthday parties, summer barbecues, or casual weekend get-togethers. You can even complete the space with comfortable seating or a shaded pavilion to create the ultimate outdoor entertainment zone. Your court will quickly become a go-to destination where people can connect, play, and enjoy the outdoors together, making your home the center of the action.
Add Value to Your Property
Beyond the immediate fun, a professionally installed basketball court is a smart investment that can add significant value to your property. For many potential buyers, especially families, a dedicated recreational space is a huge selling point. It’s a unique feature that makes your home stand out in the market. This kind of thoughtful home remodeling project enhances your property’s appeal by adding a functional and desirable amenity. It’s an investment in your family’s enjoyment now and your home’s financial value for the future.
Enjoy a Durable, Long-Lasting Court
When you decide to build a court, you want it to last. Using concrete as a base is an excellent choice because it provides a durable, high-performance playing surface that stands the test of time. A concrete court requires minimal maintenance and can withstand harsh weather, from hot Long Island summers to cold winters. With expert masonry and construction, your court will provide a consistent and reliable place to play for decades. You can spend more time enjoying the game and less time worrying about upkeep.
What Materials and Tools Do You Need?
Before you can break ground on your new backyard court, you need to gather the right supplies. Having everything on hand before you start makes the entire process smoother and helps you avoid last-minute trips to the hardware store. Think of it like prepping your ingredients before you start cooking; it just makes everything easier. This project requires some specific materials to ensure your court is durable, as well as some heavy-duty tools to get the job done right.
While a DIY approach can be rewarding, building a concrete court is a significant undertaking. If sourcing materials and handling equipment feels overwhelming, remember that a professional team can manage the entire process for you. Gappsi has decades of experience building custom Sports Games Courts that are built to last, ensuring a perfect finish without the hassle. Let’s walk through exactly what you’ll need if you decide to tackle it yourself.
Your Project Material Checklist
First up are the core materials that will form your court. This isn’t a long list, but each item is critical for a sturdy and functional playing surface. You will need concrete for the slab, rebar or wire mesh for reinforcement, a basketball hoop, and specialized paint for the lines. The concrete creates the smooth, hard surface, while the rebar provides internal strength to prevent cracking over time. Finally, a quality hoop and crisp court lines will give your space that professional feel. You can find many of these high-quality masonry supplies at specialty retailers.
Essential Tools and Equipment
Next, you’ll need the right tools to work with the concrete. This part of the job requires more than just a shovel and a wheelbarrow. You’ll need a concrete mixer to achieve the perfect consistency, a trowel for spreading the concrete, a screed to level the surface, and a bull float to create a smooth finish. These tools are essential for achieving a flat, even playing surface that’s safe and ready for action. Since you may not own this equipment, consider renting it from a local supplier to save on costs for a one-time project.
How to Choose the Right Basketball Hoop
Selecting the right hoop is a key decision. Your two main options are in-ground and portable hoops. In-ground hoops are permanently installed in concrete, offering superior stability and a more authentic playing experience, much like what you’d find on a professional court. Portable hoops have a base filled with sand or water and can be moved if needed, offering more flexibility. Consider how you’ll use the court and your long-term landscape design plans. An in-ground hoop is a permanent feature, so be sure you love its placement.
What to Know About Concrete and Reinforcement
Getting the concrete specifications right is crucial for the longevity of your court. For a durable surface, your concrete slab should be at least four inches thick. To prevent cracking and add strength, you’ll need to add reinforcement. You can use either a 6×6 inch welded wire mesh placed inside the concrete or a #5 rebar around the perimeter of the slab. This internal skeleton helps the concrete withstand temperature changes and the stress of regular play. Paying attention to these details ensures your investment lasts for years of enjoyment.
How to Prepare the Site and Pour the Foundation
Building a backyard basketball court is a major project, but breaking it down into clear steps makes it much more manageable. The foundation is the most critical part of the entire build. A properly prepared and poured concrete slab ensures your court will be level, durable, and ready for years of play. While it’s a big job, getting the foundation right sets you up for success. If you’re feeling overwhelmed, remember that our expert masonry team has been doing this for decades and can handle the entire process for you. Let’s walk through the key steps to creating a solid base for your court.
Select and Measure Your Court’s Location
First things first, you need to pick the perfect spot. Look for the flattest area in your yard with enough room for safe play around the perimeter. A regulation full court is 94 feet by 50 feet, which is pretty big for most backyards. A half-court is a more popular and practical choice, typically measuring around 47 feet by 50 feet. You can always adjust the dimensions to fit your space. Once you’ve chosen your location, measure it out and mark the corners with stakes and string. This gives you a clear visual of the court’s footprint and helps you confirm it fits comfortably in your yard.
Excavate and Grade the Area
With your court’s location marked, it’s time to prepare the ground. This step involves clearing everything inside the staked-out area, including grass, plants, rocks, and roots. The goal is to get down to the bare soil. Next, you need to make sure the ground is perfectly level and stable, a process called grading. Depending on the slope and condition of your yard, this can be a challenging task. For a truly professional and long-lasting result, you may want to bring in a team with the right equipment. Our landscaping and construction experts can ensure your site is perfectly graded for a flawless foundation.
Prepare the Base and Set Up Drainage
Once the area is graded, you’ll build the subgrade, which is the layer of material directly underneath the concrete. This base should be at least six inches deep and made of compacted gravel or crushed stone. It needs to be packed down tightly to create a solid, stable surface that won’t shift over time. Proper drainage is also essential to prevent water from pooling on your court. The best way to achieve this is to build a very slight slope into the court, about 0.5% to 1%. This gentle incline is barely noticeable but allows rain to run off naturally, keeping your court dry and ready for a game.
Pour and Finish the Concrete Surface
Now for the main event: pouring the concrete. You’ll want to build a wooden frame, or form, around the perimeter to hold the wet concrete in place. When you mix the concrete, follow the manufacturer’s instructions carefully to get a consistency like a thick batter. Pour the concrete into the form, making sure it’s spread evenly to a uniform depth of four inches. Use a long, straight board called a screed to level the surface. After leveling, use a bull float to smooth out any imperfections and push larger stones down, creating a perfect finish for your court.
Add Control Joints and Cure the Concrete
Concrete naturally expands and contracts with temperature changes, which can cause it to crack. To manage this, you need to add control joints. These are straight grooves cut into the surface that encourage the concrete to crack in a clean, predictable line. You can create these joints while the concrete is still wet or cut them with a saw within 18 hours of pouring. After that, the concrete needs to cure, which is the process of hardening and gaining strength. This takes time, so be patient. For a durable court, the concrete should cure for at least 28 days to reach its full strength.
What Permits and Rules Should You Know?
Before you break ground on your new basketball court, it’s important to handle the paperwork. Taking care of permits and understanding local rules from the start saves you from major headaches later on. Every town and village on Long Island has its own set of regulations for construction projects, and a backyard court is no exception. Getting everything in order ensures your project goes smoothly and meets all legal requirements. Think of it as building a strong foundation for your court, both literally and figuratively. This step protects your investment and makes sure your new favorite spot is built to last, without any unexpected issues from local authorities or your neighbors.
Check Local Building Permits and Zoning Laws
First things first, you’ll need to connect with your local planning department. Whether you’re in Nassau or Suffolk County, there are specific zoning laws that determine what you can build on your property. These rules cover things like the size and location of new structures, including Sports Games Courts. You’ll need to find out if a court is permitted in your area and what kind of building permits are required for the project. This process can feel a bit overwhelming, but it’s a critical step. A professional team can help you prepare and submit the necessary applications, making sure all your plans are compliant from day one.
Respect Property Lines and Neighbors
Knowing exactly where your property begins and ends is essential. Most areas have “setback” rules, which dictate how far any new construction must be from your property lines. Building too close can lead to disputes with neighbors or even an order to remove the court entirely. To avoid this, get a clear understanding of your property boundaries before finalizing your court’s location. Following these guidelines not only keeps you compliant with local ordinances but also helps maintain a good relationship with the people living next door. It’s all about creating a fun space for your family while being considerate of your community.
Review Your HOA’s Rules
If your home is part of a Homeowners’ Association (HOA), you have an extra layer of rules to consider. HOAs often have specific guidelines for outdoor structures, covering everything from fence height to the color of your basketball hoop’s backboard. Before you start planning, get a copy of your HOA’s covenants and restrictions. You will likely need to submit your plans for approval before any work can begin. Getting their sign-off ahead of time is non-negotiable and will prevent potential fines or conflicts down the road. It’s always better to ask for permission than to deal with the consequences later.
Plan for Safety and Proper Lighting
A great court is a safe court. Proper construction is key to preventing injuries and ensuring your court lasts for years. This includes planning for effective drainage to keep water from pooling on the surface, which can cause slips and damage the concrete over time. A slight slope or a perimeter drain system can make a huge difference. You should also consider adding lighting if you plan on playing after sunset. Good lighting not only extends your playing time but also improves safety for everyone using the court. Professional installation of Sports Games Courts will account for these crucial safety and design elements.
How to Maintain Your Concrete Basketball Court
You’ve built your dream court, and now the real fun begins. To keep your concrete basketball court in top shape for years of pickup games and friendly competition, a little routine care is all it takes. Consistent maintenance not only preserves the look and feel of the surface but also ensures it remains a safe place to play. By staying on top of cleaning, making small repairs, and managing drainage, you protect your investment and guarantee your court is always ready for action. While daily upkeep is simple, for bigger tasks like deep cleaning or sealing, our professional restoration and sealing services can handle the heavy lifting for you.
Follow a Regular Cleaning and Inspection Schedule
Think of this as simple housekeeping for your court. Start by regularly sweeping the surface with a push broom to clear away leaves, dirt, and other debris that can become slippery or stain the concrete. Beyond sweeping, your court will benefit from a deeper clean. According to industry experts, you should plan to pressure clean your court every one to two years to remove stubborn dirt and mildew. While you’re cleaning, take a moment to walk the court and inspect it for any small cracks, stains, or low spots where water gathers. Catching these issues early makes them much easier to fix.
Seal the Surface and Repair Cracks Promptly
Small cracks in your concrete can quickly turn into bigger problems if left alone. Water can seep in, freeze, and expand, widening the crack and compromising the court’s surface. As soon as you spot a minor fissure, it’s best to address it. For concrete, you can apply a patching compound to fill small defects and keep the surface smooth and safe. To give your court an extra layer of defense against weather and wear, consider applying a quality concrete sealer every few years. This protective barrier helps prevent stains, reduces moisture absorption, and keeps your court looking its best.
Maintain Drainage and Protect from Weather
Water is one of the biggest threats to any outdoor surface. Proper drainage is essential for preventing puddles, which can lead to slick spots, mildew growth, and long-term water damage. A well-designed court incorporates a slight slope, typically around 1%, to help water flow off the surface and allow it to dry faster after it rains. Make sure the edges of your court are clear of any built-up dirt or grass that could block water from draining away. In the winter, use a plastic shovel or a snowblower with a raised blade to clear snow, as metal shovels can scrape and damage the concrete.
Avoid These Common Maintenance Mistakes
When cleaning your court, gentle care is key. It can be tempting to use harsh chemicals or tools for tough stains, but these often do more harm than good. It’s important to avoid abrasive cleaning methods and products like steel wool, scouring powders, or cleaners containing solvents, as they can easily scratch or damage the concrete finish. Instead, stick to a pH-neutral cleaner, a stiff-bristle brush, and water. If you run into a stain that won’t budge with gentle cleaning, it’s better to consult a professional than to risk damaging the court’s surface.
Frequently Asked Questions
How much space do I actually need for a backyard court? While a regulation half-court is a great goal, you don’t need a massive yard to enjoy a game of basketball. A smaller, custom-sized court can be just as fun. A good starting point for a functional playing area, including a free-throw line, is around 20 feet by 25 feet. The most important thing is to choose a size that fits your yard comfortably while leaving enough safe space around the perimeter.
How long does it take to build a concrete basketball court? The timeline can vary depending on the site conditions and weather, but you can generally break it down into a few stages. Site preparation, including excavation and grading, might take a few days. Pouring the concrete itself is usually a one-day job. The most time-consuming part is the curing process; the concrete needs at least 28 days to fully harden and reach maximum strength before it’s ready for hoops and court lines.
Is concrete the only option for a court surface? Concrete is a fantastic choice because of its durability and minimal upkeep, providing a classic, high-performance playing surface. However, it isn’t the only option. Other popular choices include asphalt, which is also very durable, or modular court tiles that can be installed over a concrete base. Each material has its own feel and maintenance needs, but concrete remains a top pick for a long-lasting, professional-style court.
What’s the most common mistake homeowners make with a DIY court? The biggest pitfall is often improper site preparation. Many people underestimate the importance of creating a perfectly level and compacted base before pouring the concrete. An uneven or unstable foundation can lead to a sloped playing surface, poor drainage, and significant cracking down the line. Taking the time to get the groundwork right is the single most important step for a successful project.
Do I really need a permit for a basketball court? Yes, in most cases, you will. Most towns on Long Island classify a permanent backyard court as a significant construction project that requires a building permit. This process ensures your court meets local zoning laws, especially rules about how far it must be from property lines. Checking with your local building department before you start is a non-negotiable step that protects your investment and prevents legal issues.