
Taking on a big home improvement project can be incredibly rewarding, and installing your own artificial lawn is a challenge you can definitely conquer. While it requires some muscle and attention to detail, the process is straightforward when you have a clear plan to follow. Think of this guide as your expert partner, breaking down each stage into simple, actionable steps. We’ll cover the essential tools you’ll need, the right way to prepare your base, and the techniques for getting those seams perfectly invisible. This is your complete roadmap for how to lay artificial turf, giving you the confidence to create a beautiful, long-lasting lawn yourself.
Key Takeaways
- Focus on the Foundation First: The success of your entire project depends on proper ground preparation. Taking the time to clear, level, and compact a solid base is the best way to prevent future lumps, sinkholes, and drainage problems.
- Patience Pays Off During Installation: Don’t rush the process of laying and cutting your turf. Letting the material relax in the sun makes it more pliable, and carefully trimming edges and joining seams is what creates that flawless, professional look.
- Finish Strong for a Lasting Look: The final steps are just as important as the first. Securing the perimeter, adding infill for stability, and brushing the grass blades upright are essential for achieving a lush, natural appearance that will last for years.
Gather Your Tools and Materials
Before you can even think about unrolling that beautiful green turf, you need to get organized. Having all your tools and materials ready to go will make the entire installation process smoother and a lot less stressful. Think of it as setting yourself up for success. A little prep work now saves you from making frantic trips to the hardware store later. This preparation is the first step toward achieving a professional-looking lawn that you can be proud of.
Essential Tools You’ll Need
To get that seamless look, you’ll need a few key tools. Start with the basics for ground prep: a shovel and a wheelbarrow for moving soil and base materials. A turf cutter can be a lifesaver for removing your old lawn. For the installation itself, a sharp utility knife is crucial for cutting the turf to size, and a hammer will help you secure the edges. The most important piece of equipment is a plate compactor, which you can usually rent. This ensures your base is firm and level, preventing dips and bumps down the road. Having the right installation tools makes the job manageable and gives you a much better result.
Key Materials for a Solid Foundation
The longevity of your new lawn depends entirely on what’s underneath it. First, you’ll need your synthetic turf. Choose a high-quality option that fits the look and feel you want for your yard. Next is your base layer, typically made of crushed rock or a similar aggregate. This is vital for proper drainage and stability. Finally, don’t forget a good weed barrier. This fabric layer goes down before the turf to stop any persistent weeds from growing through. A solid foundation is truly the secret to a beautiful, low-maintenance lawn that lasts for years.
Optional Gear to Simplify the Job
While the essentials will get the job done, a few extra pieces of gear can make your life much easier. A power broom, for example, is fantastic for brushing up the turf fibers after you’ve laid them and added infill, giving your lawn a full, natural look. A carpet kicker can also be helpful for stretching the turf taut to eliminate any wrinkles before you secure it. These aren’t must-haves, but if you’re tackling a large area, investing in or renting these extra supplies can save you a lot of time and effort, helping you achieve that perfect finish with a little less elbow grease.
Prepare the Ground for a Flawless Finish
The secret to an artificial lawn that looks amazing for years isn’t just in the quality of the turf itself, but in the meticulous work you do before you even unroll it. Proper ground preparation is, without a doubt, the most critical part of the entire project. Think of it as building the foundation for a house; if the base isn’t solid, nothing on top will be either. This foundational work is what ensures your lawn stays smooth, drains correctly after a Long Island rainstorm, and won’t develop frustrating lumps or sinkholes over time.
Taking the time to create a stable, well-draining base will pay off with a durable, beautiful lawn that you can enjoy for years to come. While this process requires some muscle and attention to detail, following these steps carefully will set you up for a successful installation. It’s the difference between a lawn that looks professionally installed and one that shows its DIY roots. Of course, if you’re looking for a perfect result without the heavy lifting, our team has years of experience installing flawless synthetic turf and game courts and can handle the entire process for you.
Clear Out Old Grass and Debris
First things first, you need a clean canvas. This means removing every bit of the existing lawn, including grass, weeds, roots, and any large stones. For larger areas, renting a sod cutter is the most efficient way to get the job done. It slices right under the grass, allowing you to roll it up and remove it easily. If you’re working with a smaller patch, a sturdy shovel and some determination will work just fine. You’ll want to dig down about two to four inches to make sure you’ve removed the entire root system. Skipping this step can lead to old organic material decomposing under your new turf, creating an uneven and lumpy surface over time.
Excavate and Grade the Area
With the old lawn gone, it’s time to establish the proper depth and slope for your new turf. You’ll need to excavate the entire area to a uniform depth of about four inches. This creates enough room for the essential base layers that provide drainage and stability. As you dig, focus on grading the area. This means creating a very slight, consistent slope, about a one to two percent grade is ideal, that directs water away from your home’s foundation, patios, or walkways. You can use landscape stakes and a string line to help you maintain a consistent slope across the entire space. This step is absolutely vital for preventing water from pooling on your new lawn.
Lay Your Drainage Base
Now you can start building the foundation that will support your turf. This sub-base layer is crucial for both stability and drainage. We recommend using a crushed aggregate, such as Class II road base, crushed rock, or decomposed granite. You’ll need to fill the excavated area with a three to four-inch layer of this material. Use a wheelbarrow to transport the base material and a landscape rake to spread it as evenly as possible. This rock layer creates channels that allow water to flow through and drain away efficiently, keeping your turf from becoming waterlogged. It’s a similar foundational principle we use for projects like durable gravel driveways, ensuring long-term stability.
Level and Compact the Surface
Once your base material is spread evenly, the next step is to compact it into a hard, smooth surface. This is what prevents the ground from shifting or settling under your turf later on. For the best results, you should use a plate compactor, which you can rent from most home improvement stores. Go over the entire area several times, moving in different directions to ensure every inch is thoroughly compacted. The goal is to create a base that is firm to the touch and doesn’t leave deep footprints when you walk on it. For an even tighter compaction, you can lightly mist the aggregate with a hose before using the compactor.
Add a Weed Barrier
The final preparation step is laying down a weed barrier. This is a high-quality geotextile fabric that you’ll place directly on top of your compacted base. Its job is to stop any persistent weeds or old grass roots from growing up through the drainage holes in your artificial turf. At the same time, the fabric is permeable, so it won’t interfere with drainage. Roll out the fabric, making sure to cover the entire area. If you need to use multiple pieces, overlap the seams by at least six inches to prevent any gaps. Secure the barrier in place using landscape staples every few feet, paying special attention to the perimeter and the seams.
Lay and Cut Your Artificial Turf
Unroll and Position the Turf
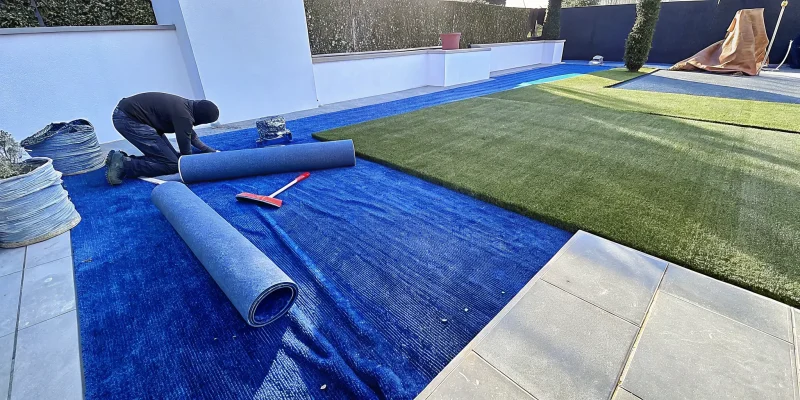
Once your base is perfectly prepped, it’s time for the main event. Carefully unroll your artificial turf over the area, making sure the grain of the grass blades all points in the same direction for a uniform look. Don’t worry about wrinkles or stiffness at first; the sun is your best friend here. Let the turf lay out under the sun for at least an hour. This little sunbath helps the material relax, making it more flexible and easier to work with. If you’re working with a large piece, grab a friend to help you position it, as the rolls can be quite heavy. This step is key for a smooth, professional-looking installation of your new synthetic turf.
Measure and Cut for a Perfect Fit
With your turf relaxed and in position, you can start trimming it to size. The golden rule here is to measure twice and cut once. When you make your initial cuts, always leave about four to five inches of extra material around the entire perimeter. This extra turf acts as a safety net, giving you plenty of room to make precise, final trims against sidewalks, patios, or garden beds later on. It’s much easier to trim a little more off than it is to patch a piece that’s been cut too short. Using a sharp utility knife will give you the cleanest cuts for a perfect fit.
Tackle Corners and Curves
Straight lines are simple, but most yards have curves and corners to work around. For these tricky spots, a sharp razor knife is essential. To get a clean edge, it’s best to trim the turf from the back side. This allows you to see your cutting lines clearly and follow the contours of your hardscaping or edging precisely. Many turf rolls come with a black or red manufacturing edge, often called salvage, which you’ll want to trim off completely to ensure your seams are invisible. Taking your time on these detailed cuts is what separates a good DIY job from a great one. A visual guide can be incredibly helpful for this part of the process.
Let the Turf Acclimate
After you’ve done your rough cuts, it’s time for another short break. Before you start securing anything, let the turf lay flat in the sun for at least two hours. This step is called acclimation, and it’s crucial for a flawless result. As the turf warms up, it becomes even more pliable, allowing it to conform perfectly to the shape of your prepared base. This flexibility makes it easier to stretch the turf taut, eliminating any remaining wrinkles and ensuring it lays completely flat before you secure the seams and edges. Patience during this stage will pay off with a lawn that looks lush and natural for years to come.
Secure Your Turf and Hide the Seams
With your turf perfectly cut and settled, it’s time for the finishing steps that truly transform it into a seamless, professional-looking lawn. This is where you’ll secure everything in place, hide any evidence of seams, and give the grass blades that lush, upright appearance. Taking your time here ensures your new lawn not only looks fantastic but is also durable enough to handle everything from backyard parties to family games. These final touches are what make all the difference.
Join Seams with Tape and Adhesive
Creating an invisible seam is the secret to a flawless artificial lawn. Start by carefully folding back the edges of the two turf pieces you need to join. Lay a strip of specialized turf seaming tape on the base layer, right down the center of the gap. Apply a quality turf adhesive evenly across the tape. Then, slowly and carefully, fold the turf edges back down onto the adhesive-coated tape, pressing them firmly together. It’s helpful to have a friend for this part to ensure the pieces meet perfectly without overlapping. This creates a strong bond that will keep your seams hidden and secure.
Secure the Edges and Perimeter
Once your seams are joined, you need to anchor the entire perimeter of your turf. This prevents the edges from lifting and keeps the surface stable and safe. Using 5-inch galvanized nails or U-shaped turf staples, fasten the turf to the base every six to ten inches around the outer edge. You should also add a few along your seams for extra reinforcement. This step is especially important for high-traffic areas or if you’re installing a personal sports game court. Properly securing the edges ensures your lawn stays put, no matter the weather or activity.
Add Infill for Stability
Infill is a crucial component that gives your artificial turf weight, helps the blades stand upright, and provides a soft, cushioned feel underfoot. Spread about one to two pounds of infill material, like silica sand, per square foot across the entire surface. You can use a drop spreader for even distribution. This material settles down to the base of the turf, adding stability and protecting the backing from sun exposure. For homeowners with pets, there are also specialized pet-friendly infills available. You can find high-quality synthetic turf and installation materials to complete your project.
Brush and Groom for a Natural Look
The final step is to brush the turf to bring it to life. Using a power broom or a stiff-bristled push broom, brush against the grain of the grass blades. This action helps the blades stand up tall, creating a full and natural appearance. It also works the infill down into the base of the turf, right where it needs to be. This grooming process removes any flatness from being rolled up and gives your new lawn a pristine, manicured look. A quick brush is all it takes to make your turf look its absolute best.
Keep Your New Lawn Looking Its Best
Now that your beautiful new lawn is installed, a little bit of upkeep will ensure it stays green and gorgeous for years to come. Unlike a natural lawn that demands constant mowing and watering, maintaining artificial turf is straightforward and simple. With just a few routine tasks, you can keep the blades standing tall and the surface looking pristine. Think of it as protecting your investment and ensuring your outdoor space is always ready for backyard barbecues, kids’ playtime, or just relaxing in the sun. We’ll walk through the easy steps for cleaning, handling pet messes, and managing your turf through the seasons.
Simple Cleaning and Brushing
To keep your turf looking lush and natural, give it a good brushing every so often. Using a stiff, non-metal brush, sweep the fibers against the direction they naturally lay. This simple motion helps the blades stand upright, giving your lawn that fresh, vibrant look. Regular brushing also prevents the blades from matting down in high-traffic areas and ensures the infill material stays evenly distributed. It’s a quick chore that makes a huge difference in maintaining the appearance of your synthetic turf installation.
Handle Pet Waste and Debris
If you have furry family members, you’ll be happy to know that artificial turf is incredibly pet-friendly. When accidents happen, simply remove any solid waste and rinse the area with a hose every few weeks to wash away any residue. For extra odor control, you can spread a layer of Zeolite over the base before the turf is installed. This natural mineral helps neutralize pet odors, keeping your yard smelling fresh. A clean lawn means a happy space for both you and your pets to enjoy, making your outdoor living area a true haven.
Your Seasonal Care Checklist
Keeping your artificial lawn in top shape is all about consistency. Make it a habit to periodically clear away leaves and debris with a leaf blower or rake, just as you would with any yard. A regular brushing schedule will keep the grass blades looking perky and full. Think of it as a simple seasonal to-do list that protects the look and function of your lawn over time. Consistent care ensures your turf remains a beautiful, low-maintenance feature of your home for many years, much like our approach to restoring and sealing patios and driveways to preserve their beauty.
Manage Heat on Hot Days
On those hot Long Island summer days, your artificial turf can absorb heat from the sun. While it cools down quickly once shaded, it’s something to be aware of. If you’re in the planning stages, you can select turf made from materials like nylon, which has a higher heat tolerance. Products with a higher face weight and longer pile height can also feel more comfortable underfoot. A quick spray with a garden hose can cool the surface down instantly, making it comfortable for bare feet. Choosing the right turf and game court materials from the start can make all the difference.
Related Articles
- Get a Quote for Turf Installation: A 5-Step Guide
- Installing New Artificial Turf Archives – Gappsi Group
- Expert Synthetic Turf Installation in Old Westbury, NY
- Synthetic Turf Archives – Gappsi Group
- Pile Height 1-3/4″ Archives – Gappsi Group
Frequently Asked Questions
How long does a typical DIY turf installation take? The timeline really depends on the size of your yard and how much help you have. For an average-sized backyard, you should set aside a full weekend. The majority of your time, probably about 70 percent of it, will be spent on the ground preparation. Clearing out the old lawn and creating a perfectly compacted base is the most labor-intensive part. Laying and securing the turf itself is much quicker, but you don’t want to rush the foundational work.
What’s the single most important step I shouldn’t mess up? Without a doubt, it’s the ground preparation. It might feel like the least glamorous part of the project, but creating a solid, compacted base is what guarantees your lawn will look great for years. If you skimp on this step, you’ll end up with lumps, dips, and poor drainage down the road. A flawless foundation is truly the secret to a professional-looking result that lasts.
Is artificial turf a good choice if I have dogs? Absolutely. Artificial turf is a fantastic solution for pet owners. It’s durable enough to withstand their playing, and you won’t have to worry about muddy paws or brown spots. Clean-up is also very simple. You can pick up solid waste just like you would on regular grass, and a quick rinse with a hose will take care of any liquid messes, keeping your yard fresh and clean.
How does artificial turf handle heavy rain? A properly installed artificial lawn handles rain beautifully. The turf itself has small drainage holes in the backing, and the crushed rock base you install underneath is designed to let water flow through and drain away from the surface. This system prevents puddles from forming, so your lawn stays usable even after a heavy Long Island downpour.
Can I just lay the turf directly on top of my existing soil or grass? I would strongly advise against it. Placing turf directly over soil or grass is a recipe for an uneven, lumpy lawn. The organic material underneath will decompose over time, creating soft spots and an unstable surface. More importantly, you would be skipping the crucial aggregate base layer, which is essential for proper drainage and long-term stability.