Dog enjoying a landscaped artificial turf run in a Long Island backyard

Artificial Grass for Dogs: Drainage and Care Guide

.

A dog-friendly backyard is easier to maintain when the surface, base, drainage path, and cleanup routine are planned together. Artificial turf is not simply a layer of green blades placed over an existing lawn. On Long Island, the right design must account for soil conditions, rain, urine flow, solid-waste removal, summer sun, and how the area connects to fencing, patios, and planting.

Call Gappsi Group at (631) 831-3177 to discuss your dog-friendly yard.

The best artificial grass for dogs is part of a complete system. It includes a properly prepared base, permeable backing, planned drainage, durable seams and edging, access for rinsing, and a realistic maintenance routine. Performance depends on site design, installation, product selection, sanitation, and heat management, so an odor-free or cool surface should never be assumed.

Whether you are planning a small dog run in Nassau County or a larger pet area in Suffolk County. Start by defining what the installation must handle every day. That begins with the turf surface and the layers beneath it.

What should artificial grass for dogs include?

A residential pet area should be planned as a complete surface and drainage system, not selected by blade appearance alone. The turf surface is only one part of the installation. A practical setup also accounts for the backing, compacted base, grading, drainage path, seams, edging, and access for routine cleaning. These details matter whether you are converting a small side yard in Smithtown or planning a larger dog run elsewhere in Nassau or Suffolk County.

The turf surface and backing should be appropriate for regular pet use and matched to the intended area. Pet-specific turf is available, but the right selection depends on how the space will be used. How much direct sun it receives, and how it connects to the rest of the backyard. Under the blades, a suitable backing needs to support water movement through the system. A permeable backing can allow urine to pass through, but it does not remove the need for proper grading, a suitable base, and an outlet or dispersal plan.

The base and drainage path are just as important as the finished turf. Ground preparation and topsoil grading help establish a stable surface and direct water where it belongs. The installation plan should consider existing soil, low spots, nearby structures, and whether water can disperse without collecting beneath the turf. Gappsi’s landscape division handles grading, drainage, irrigation, planting, and turf integration, which is useful when the pet area must work with the entire property. Homeowners can review the broader Long Island landscape design and construction scope when planning these connections.

Edges, seams, and transitions also deserve attention. Secure edging helps define the area, while properly planned seams reduce visible breaks and potential catch points. A dog run may transition to pavers, planting beds, a patio, or natural lawn. Those transitions should be comfortable to cross and positioned so they do not interfere with gates, mowing, irrigation, or cleanup.

Finally, include sanitation access in the design. Solid waste still requires prompt removal, and the surface may need rinsing or system-specific cleaning. Leave enough room to reach the area with a hose and cleaning tools. A full yard or constructed dog run can be designed around these needs. A portable potty mat may be convenient for a temporary use, but it does not solve property-wide grading, drainage, fencing, or access concerns. For a long-term residential project, those site decisions should be made before the turf is ordered.

How does drainage prevent dog-urine odor?

Odor control starts below the visible blades. In a properly designed system, permeable backing allows liquid to move through the turf rather than remain on the surface. A compacted, properly graded base then provides a path for that liquid to disperse or reach a planned drainage outlet. This can reduce the concentration of urine at the blade level, but it does not make artificial grass odor-free by itself.

Call Gappsi Group at (631) 831-3177 to discuss drainage, grading, and a dog-friendly turf layout for your Long Island property.

Why grading and the base matter

Water needs somewhere to go after it passes through the turf. If the area is flat where it should be sloped, or if the underlying base holds water, urine can remain in the system longer than intended. Poor drainage may also leave wet areas near edging, seams, fences, foundations, or other low points. During planning, the installation team should evaluate existing soil, surface grades, nearby structures, and the most practical route for dispersal.

The base is more than a layer that supports the turf. It helps create a stable, even surface while contributing to the drainage path. Excavation, aggregate selection, compaction, and grading all affect how the finished area handles liquid. A dog run beside a house may require a different drainage approach than a larger turf section in an open backyard. The design should account for both ordinary rainfall and the concentrated use of a pet bathroom area.

What drainage cannot solve alone

Drainage handles liquid, not solid waste. Remove feces promptly so residue does not remain on the blades or wash into the system. Regular rinsing can help move residue through the backing when the system and site drainage are designed for it. Focus additional attention on the places your dog uses most often. Spot cleaning and system-appropriate sanitation may also be needed, especially during warm weather or periods of frequent use.

Persistent odor is a reason to investigate, not a reason to apply stronger products at random. Possible causes include a blocked or undersized drainage path, a low area that stays damp. Contaminated infill, inadequate rinsing, or sanitation practices that do not match the turf system. Cleaning agents should be selected for the installed materials and used according to their directions. Harsh or unsuitable chemicals may affect turf components, nearby planting, or runoff.

For homeowners comparing artificial grass for dogs, ask how the complete system will manage urine, rainwater, solid waste, cleaning access, and future maintenance. A coordinated plan for the turf, base, grading, edging, and surrounding landscape gives odor control a stronger foundation than the turf surface alone.

How do you prepare the site for a dog-friendly turf area?

A dependable installation starts below the turf surface. For Long Island homeowners, the site plan should account for existing soil, runoff, access. Nearby foundations, and how the dog area will connect to the rest of the yard. Artificial grass for dogs performs as part of a complete system, including a prepared base, planned drainage, secure edges, and seams that can withstand regular use. Use this sequence to clarify the work before selecting a surface.

  1. Review the existing site. Identify low areas, compacted soil, standing-water patterns, tree roots, irrigation lines, downspouts, utilities, fences, gates, patios, and the route from the house. Note where the dog naturally enters, rests, plays, and relieves itself. This review helps determine whether the turf should occupy the full yard or a defined run. It also identifies conditions that could affect cleaning access and future landscape maintenance.
  2. Plan excavation and removal. Remove the existing lawn, unsuitable topsoil, roots, debris, and organic material to create a stable construction area. The required depth depends on the existing conditions and the planned turf system. So it should be established during the site assessment rather than guessed from a generic guide. Proper ground preparation limits settlement and gives the base room to perform as designed.
  3. Establish positive grading. Shape the subgrade so water moves away from the house, retaining walls, and other vulnerable structures. Grading should also respect adjoining planting beds, walkways, and paved areas. On Long Island, a drainage plan needs to respond to the specific property instead of assuming every Nassau or Suffolk site has the same soil or runoff behavior.
  4. Install and compact the aggregate base. Place the specified aggregate in controlled lifts, then compact it to form a firm, even foundation. The base supports the turf and helps manage water moving through the system. Check the finished surface for soft spots, abrupt changes, and areas that could hold water before the turf is installed.
  5. Confirm the drainage destination. Water needs a deliberate outlet or dispersal path. Review whether runoff can connect to an approved existing drainage feature, disperse appropriately on the property, or require another site-specific solution. Gappsi identifies synthetic turf backyard installation considerations for Long Island homeowners, while its landscape team coordinates grading and drainage with broader yard improvements.
  6. Protect equipment access and service routes. Decide how materials and installation equipment will reach the work area without damaging gates, planting, masonry, or neighboring property. Preserve practical access for rinsing, waste removal, repairs, and seasonal landscape work. A narrow side yard may influence the turf layout, staging plan, or gate design.
  7. Detail seams and edging. Lay turf so seams are planned away from high-turn areas when possible, then secure and finish them carefully. Use suitable edging where turf meets soil, fencing, planting, or hardscape. Loose edges and visible seams can become maintenance concerns, especially where dogs run, dig, or repeatedly turn.
  8. Design clean transitions. Connect the turf to pavers, patios, planting beds, gates, and other backyard features with transitions that are easy to cross and clean. A coordinated Long Island dog-run installation can address fencing, privacy screening, circulation, and the relationship between the pet area and the rest of the property. Confirm the final drainage, edges, and access before the surface is opened for use.

What maintenance does artificial grass for dogs require?

Artificial grass for dogs reduces some lawn chores, but it is not maintenance-free. A clean pet area depends on a simple routine that keeps solid waste off the surface. Moves residue through the drainage path, and catches small problems before they affect the whole installation. The exact cleaning schedule will vary with the number of dogs, the size of the area, weather, and the turf system selected.

Start with daily waste removal. Scoop solid waste as soon as practical, allowing softer material to firm up before lifting it if needed. Use a suitable scoop rather than dragging waste across the blades. Prompt removal keeps residue from being walked into the turf and gives rain or rinsing water a clearer path through the surface. Check the entire dog area, including corners near fencing, gates, edging, and places where a dog tends to return.

Water moving through a properly planned pet turf drainage area

Rinse the area regularly. A clean-water rinse can help move urine residue and loose debris through a permeable turf backing and into the planned base or drainage route. Rinse more often during periods of heavy use or limited rainfall, but avoid creating runoff toward a foundation, neighboring property, or area where water collects. The rinse should support the drainage design, not compensate for poor grading or a blocked outlet.

Remove leaves, soil, and other debris with a soft rake, leaf blower, or similar method that will not pull at seams or disturb the infill. Organic debris left in place can hold moisture and make spot cleaning more difficult. Inspect after storms, landscape work, and seasonal leaf drop, especially if the dog run sits below trees or beside planting beds.

For isolated spots, use the cleaning approach approved for the specific turf and infill system. Blot or lift residue first, then spot clean rather than applying an unverified chemical treatment to the entire area. Gappsi’s guide explains how homeowners can clean and maintain pet turf as part of a consistent sanitation routine. Follow product instructions and avoid mixing cleaning products.

Inspect the installation as you clean. Look for lifted edges, open seams, damaged sections, compacted areas, or places where water no longer drains as expected. Check around transitions to pavers, planting beds, and fencing, where soil and debris can accumulate. If rinsing leaves standing water, pause and identify whether the issue is surface grading, a blocked drainage route, or another site condition before adding more water.

When odor persists after scooping and rinsing, do not simply mask it. Persistent odor can indicate a sanitation issue, restricted drainage, airflow limitations, or a turf and infill combination that needs review. Note when the odor appears, where it is strongest, and whether water drains normally. A professional assessment can then focus on the actual cause and the appropriate system-specific response.

How can you manage heat and choose pet-turf features?

Direct summer sun can make artificial turf hot, including a surface selected for a dog area. Treat heat as a site-planning issue rather than assuming that any product will stay cool. A tree, pergola, shade sail, or other correctly positioned feature can give your dog a place to move out of the sun. Shade also needs to be balanced with drainage, visibility, planting, and access for cleaning.

Temporary water cooling can make the surface more comfortable before use, but it is not a permanent solution and does not replace a heat plan. On a sunny day, place your hand on the turf and check the surface before allowing your dog onto it. Your dog should also have access to drinking water and a shaded resting area. If the turf remains uncomfortable, limit use during the hottest part of the day and reassess the layout.

What should you ask about the turf surface?

Product selection should begin with how the area will be used. Pile height and density affect the look, feel, cleaning access, and way the blades respond to regular foot and paw traffic. A shorter pile may make waste removal and rinsing more straightforward, while a different profile may better match the surrounding lawn or landscape design. The right choice depends on the dog, the size of the area, whether people will use it too, and how it connects to the rest of the backyard.

Ask how the backing is constructed and whether it supports the drainage plan for the site. A pet-turf system should be evaluated as a complete assembly, including the prepared base. Permeable layers, seams, edging, and the path water will take after it passes through the surface. A product label alone cannot confirm that a poorly graded area will drain well.

How do infill and drainage choices affect daily use?

Infill can influence blade support, feel underfoot, and maintenance requirements. Do not select it solely because of a broad claim about odor, cooling, or sanitation. Ask what material is proposed, how it will be maintained, and whether it fits the needs of your dog and household. If a product discussion raises questions about recycled rubber or other infill materials, ask for clear product documentation instead of relying on an unsupported safety promise. The EPA notes that its federal research on tire crumb characterized constituents and potential exposure routes, while also stating that the reports were not themselves a risk assessment: read the EPA research context.

Gappsi identifies pet-specific turf products and specialized drainage systems for year-round use. Homeowners who want to review that option can see the Gappsi pet turf option. For a Nassau or Suffolk property, the practical evaluation should include shade, surface checks, cleaning access, grading, drainage, and the way the dog area fits the whole yard. That review is more useful than choosing based on a single feature or an unverified product promise.

How should a dog run connect to the rest of the backyard?

A dog run works better when it is planned as part of the backyard rather than placed as an isolated strip along a fence. The connection affects how dogs move, how owners clean the area, and how the rest of the landscape is used. A coordinated layout can place artificial grass for dogs near a convenient door while keeping gates, planting beds, patios, and drainage paths practical.

The goal is not to make every surface identical. It is to create clear transitions between pet turf, paving, lawn, and planting. The right arrangement depends on the property’s grade, existing drainage, fence lines, and the routines of the household.

Dog run connected to a landscaped backyard with paving and planting

Use the comparison below as a planning framework. An isolated pet area may be appropriate for a simple, dedicated run, but an integrated design leaves more options for daily use and future landscape changes.

Isolated pet area compared with coordinated dog-run design
Planning element Isolated pet area Coordinated dog-run design
Fencing Uses a defined enclosure with limited relationship to other outdoor spaces. Aligns fence runs with the yard, sightlines, planting, and service access.
Gates May have one basic entry point that serves both people and pets. Places gates where they support safe circulation, deliveries, cleaning, and access from the home.
Drainage Can be treated as a small surface area without resolving nearby runoff. Coordinates grading, the turf system, and drainage destinations so water does not collect at transitions or near foundations.
Transitions Often ends abruptly at soil, concrete, or an existing lawn edge. Uses considered edging and level changes between turf, pavers, lawn, and planting areas.
Planting May leave little room for screening, shade, or separation from dogs. Places planting where it can define the run without creating blocked sightlines, toxic-plant concerns, or hard-to-clean debris zones.
Patios Requires owners to cross the yard to reach seating or entertaining areas. Connects the run to patios with durable, cleanable walking surfaces and a deliberate route.
Maintenance access May be difficult to reach with a hose, cleaning tools, or replacement materials. Preserves practical access for rinsing, solid-waste removal, inspections, and future repairs.
Future use Serves one purpose and may limit later backyard changes. Leaves flexibility for play, seating, landscape improvements, and other household needs.

Transitions deserve particular attention. A hard edge can help contain turf and simplify sweeping, while a paver path can keep muddy or wet feet away from the house. Planting should provide structure without dropping excessive debris into the run or narrowing the cleaning route. Shade trees, structures, or other site features can also be considered when planning summer comfort.

For a full residential layout, review Long Island dog-run installation as a construction and design project, not only a turf purchase. A site-specific plan can coordinate fencing, grading, drainage, paving, planting, and the selected pet-turf system around how the family actually uses the backyard.

What should a Long Island pet-turf plan specify?

A useful pet-turf plan should describe the conditions below the grass as clearly as the visible surface. Before choosing artificial grass for dogs, ask the installer to document how water, waste, foot traffic, fencing, and future yard improvements will be handled. This checklist can help Nassau and Suffolk County homeowners compare complete installation plans rather than isolated turf products.

  1. Site conditions: Record existing soil, slopes, low areas, tree roots, irrigation lines, utilities, and the proposed dog-run dimensions. The plan should identify how the area relates to the house, foundation, planting beds, patios, and neighboring properties.
  2. Drainage destination: Show where rainwater and liquid waste will go. The design may include grading, a permeable backing, a prepared base, an outlet, or an appropriate dispersal area. It should not simply assume that water will disappear. Confirm that the finished grade directs water away from foundations and does not create a nuisance for adjacent areas.
  3. Base preparation: Specify excavation depth as determined by the site, aggregate or other base materials, compaction, and the finished slope. Ground preparation and topsoil grading are important parts of performance, especially where Long Island soils hold water or the existing yard is uneven.
  4. Turf system: Identify the pet-specific turf product, pile characteristics, backing, infill if used, and intended application. Ask how the selected system supports drainage and routine cleaning. Avoid treating a portable potty mat and a constructed dog run as the same scope of work.
  5. Seams and edging: Show seam locations, fastening methods, perimeter restraint, and transitions to pavers, concrete, planting, or existing lawn. Clean edges reduce trip points and help keep the turf system in place during everyday use.
  6. Cleaning access: Include enough room to remove solid waste, rinse the surface, clear leaves, and inspect drains or outlets. The plan should state what routine sanitation the homeowner will perform and which cleaning products are appropriate for the selected system.
  7. Heat plan: Note the direction of direct summer sun and identify possible shade from structures, trees, or planned features. Water can provide temporary cooling, but homeowners should check the surface before allowing pets onto it.
  8. Fence and gate: Specify fence location, gate swing, latch position, privacy screening, access from the house, and clearance for maintenance. These details affect safety, convenience, and how naturally the dog run fits the backyard.
  9. Coordination and exclusions: Clarify responsibility for permits, utility locating, demolition, irrigation changes, fence work, drainage connections, planting, hardscape, and disposal. A coordinated plan prevents assumptions between separate trades.
  10. Maintenance: List expected scooping, rinsing, spot cleaning, debris removal, seam inspection, and drainage checks. Explain how persistent odor or standing water will be assessed instead of promising an odor-free result.

Gappsi Group can coordinate grading, drainage, synthetic turf integration, fencing, planting, hardscape, and 3D design as part of a broader design-build plan for homeowners across Nassau and Suffolk Counties. That approach helps the pet area work with the rest of the property, rather than becoming an isolated patch in the yard.

Call (631) 831-3177 to discuss your Long Island pet-turf plan

Frequently Asked Questions

Is artificial grass safe for dogs?

It can be a practical surface for a dog area when the turf, infill, base, drainage, edges, and cleaning plan are selected for the site. Safety is not determined by the blades alone. Ask what materials are included, how waste and rinse water will move, and how the surface will be managed in direct sun. The EPA notes that research on recycled tire crumb explored possible exposure routes, but its reports were not themselves a risk assessment: EPA research on recycled tire crumb.

Can dogs pee and poop on artificial grass?

Yes, but each type of waste needs a different response. In an appropriate system, urine can pass through a porous backing and into the drainage path. Solid waste remains on the surface, so it must be removed promptly and the area rinsed as appropriate for the installed system. Grading and the underlying base are part of the sanitation plan, not optional details.

How do you control dog-urine odor?

Start with a permeable system and a drainage design that does not trap moisture below the turf. Then remove solid waste, rinse routinely, and follow the system-specific cleaning guidance. Drainage, sanitation, airflow, infill choice, and routine cleaning all affect odor control. Persistent odor can indicate a drainage or sanitation problem, so it should be assessed rather than covered with a deodorizer.

What maintenance does artificial grass for dogs require?

Plan for regular waste removal, rinsing, debris clearing, and spot cleaning. Inspect seams, edging, and low areas periodically, especially after heavy rain or frequent use. Cleaning frequency depends on the number of dogs, the size of the area, weather, and the turf system. Artificial grass reduces some lawn tasks, but it is not maintenance-free.

Can fleas and ticks live in artificial grass?

Artificial grass does not provide the same soil and plant environment as a natural lawn, but it cannot guarantee complete elimination of fleas or ticks. Leaves, organic debris, shaded edges, and nearby planting can still create pest concerns. Keep the area clear, maintain the surrounding landscape, and follow your veterinarian’s guidance for pet parasite prevention. This cautious distinction is consistent with published pet-turf guidance: pet-turf pest guidance.

Ready to plan a dog-friendly backyard?

A well-planned pet-turf area can bring drainage, cleaning access, shade, and the rest of your backyard design into one practical plan. Gappsi Group can discuss the site conditions and layout for a residential pet-turf or dog-run project in Long Island.

Call Gappsi Group at (631) 831-3177 to discuss your project.

Share this page:
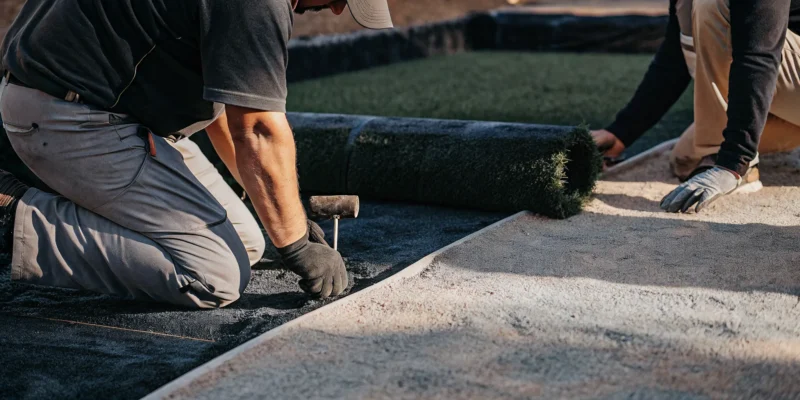
A leveled ground base is prepared with a wheelbarrow for artificial turf installation.

How to Prepare Ground for Artificial Turf in 4 Steps

So, you’re ready to trade your lawnmower for a pristine green lawn that looks perfect year-round. Taking on a synthetic turf installation yourself is an ambitious project, and the success of it hinges on one key phase: the ground preparation. This is by far the most labor-intensive part of the job, requiring digging, leveling, and compacting. Before you decide to go the DIY route, it’s important to understand exactly what’s involved. This article will give you a realistic, step-by-step look at how to prepare ground for artificial turf, helping you make an informed decision on whether to tackle it yourself or bring in a professional team.

Key Takeaways

  • A Perfect Foundation is Crucial: Your turf’s final look and longevity depend on the initial prep work. This means completely clearing the area of old grass, digging down about four inches, and grading the ground with a slight slope to ensure proper water runoff.
  • The Right Base Material Matters: For a stable and durable surface, use a three to four-inch layer of crushed aggregate. This material must be spread evenly and compacted firmly with a plate compactor to prevent your turf from sinking or developing lumps.
  • Plan for Your Specific Needs: Always consider drainage, especially for flat yards where a French drain might be necessary. If you have pets, it is best to skip the weed barrier, which can trap odors, and rely on a thick, compacted base to stop weeds instead.

What is Ground Prep for Artificial Turf?

Before you can roll out that beautiful green lawn, you have to get the ground ready. Ground preparation is the process of creating a perfectly smooth, stable, and well-draining foundation for your artificial turf. It’s the most critical phase of the entire installation, involving clearing the area, excavating soil, adding a base layer, and compacting everything until it’s solid. Think of it as building the perfect foundation for your new lawn. A flawless installation is impossible without it, which is why we’re going to walk through exactly what it takes to get it right.

Why this first step is so important

Putting in the effort now saves you from major headaches later. Proper ground prep is essential because it directly impacts how your new lawn looks, feels, and lasts. A well-prepared base ensures your synthetic turf lies perfectly flat without any lumps or bumps. It also guarantees that water drains away efficiently, preventing puddles and soggy spots after it rains. Without a solid foundation, you might see sinking areas, weed growth, or seams pulling apart over time. Taking this step seriously is the best way to protect your investment and make sure your turf stays beautiful and functional for years to come.

How long does ground preparation take?

Honestly, this isn’t a quick afternoon job. The time it takes to prepare the ground depends on the size of your yard, the current condition of the soil, and how many obstacles like rocks or roots you need to remove. For a typical DIY project, plan on dedicating at least a full weekend to the task. As experts will tell you, it’s crucial not to rush the digging and leveling steps. This is by far the most labor-intensive part of installing artificial turf. The heavy lifting and meticulous leveling are why many homeowners decide to hire a professional team to ensure the foundation is flawless from the start.

Step 1: Clear the Area

Before you can roll out that gorgeous green turf, you need to create a clean slate. This first step is all about removing the existing lawn and any other organic material to prepare a perfectly clear foundation. Think of it like prepping a canvas before you paint. A smooth, clear surface is the key to a professional-looking installation that will last for years. Rushing this stage can lead to lumps, bumps, and drainage problems later on, so it’s worth taking the time to get it right from the start. This initial cleanup sets the stage for everything that follows.

Remove old grass, weeds, and roots

Your first task is to get rid of all the existing grass, weeds, and their root systems. You want to clear the area down to the bare soil. If you leave any grass or roots behind, they will eventually decompose under your turf, creating soft spots and an uneven surface. This can compromise the entire installation.

For most lawns, the most efficient way to do this is with a sod cutter. You can rent one from a local hardware store, and it makes removing large sections of grass much easier than digging by hand. Set the blade to cut about one to two inches deep to ensure you get the bulk of the root system. Once the sod is cut, you can roll it up and remove it from the area, leaving you with a clean patch of dirt to begin your synthetic turf project.

Herbicide or manual removal: Which is best?

When it comes to clearing the area, you have two main options: manual removal or using an herbicide. Using a sod cutter, as we just discussed, is a form of manual removal. It’s effective, immediate, and avoids the use of chemicals, which is a big plus for many homeowners. This method is perfect if you want to get started on the next step right away.

Alternatively, you can use a non-selective herbicide to kill the existing grass and weeds. This approach is very thorough but requires more patience. You’ll likely need to apply it two or three times over a couple of weeks, and it works best in warmer weather. If you choose this route, always read and follow the manufacturer’s instructions carefully for your own safety and to protect surrounding plants. This is just one part of a total yard transformation, which often involves comprehensive landscape design.

What to do with your sprinkler system

This is a critical step that’s easy to overlook. If you have an in-ground sprinkler system, you must address any sprinkler heads or pipes located within the planned turf area. You cannot simply leave them and install the turf over them. An old pipe that cracks or a sprinkler head that leaks can saturate the base layer under your turf, causing it to sink and become unstable.

You’ll need to cap any sprinkler lines that run into the area and remove the heads. In some cases, you might choose to reroute the plumbing around the perimeter of your new turf lawn. If you’re not comfortable working with irrigation lines, this is a great time to call in a professional. An expert can ensure your system is properly modified without causing future issues, protecting your investment in a beautiful new lawn.

Step 2: Excavate and Grade

Once your project area is completely clear, it’s time to start shaping the foundation for your new lawn. This step involves some serious digging and careful leveling, but it’s one of the most important parts of ensuring your turf looks professional and lasts for years. Proper excavation and grading create a stable, even surface and, most importantly, prevent water from pooling where it shouldn’t. Think of it as building the perfect canvas before the masterpiece is laid down. Getting this right means you won’t have to worry about lumps, bumps, or soggy spots later on. While it requires a bit of muscle, taking your time here will pay off in a big way.

How deep to dig for your turf base

For a stable and durable artificial turf installation, you’ll need to excavate the area to a depth of about three to four inches. This might seem deep, but this space is essential for the base material we’ll add in the next step. This crushed rock base provides the structural support for your entire turf system, keeping it level and secure through all seasons. Removing this amount of soil ensures your new synthetic turf will sit flush with surrounding patios or walkways, creating a seamless and professional look. Use a shovel or a sod cutter for this process, and make sure the depth is consistent across the entire area.

Grade the area for proper drainage

After you’ve excavated the soil, the next task is to grade the area. Grading simply means shaping the underlying ground to create a gentle slope that directs water away from your house, patio, or other structures. Proper drainage is absolutely critical for the health and longevity of your turf. Without it, rainwater can collect underneath, leading to a squishy surface, unpleasant odors, and potential damage to the base. A subtle slope of about 2% (a quarter-inch drop for every foot) is usually enough to guide water effectively. This small adjustment ensures your investment stays dry and stable, protecting your home’s foundation and your beautiful new masonry.

Remember to call 811 before you dig

Before you break ground with that first shovel, please make this essential phone call. Dial 811 at least a few days before you plan to start digging. This is a free, nationwide service that contacts local utility companies to mark the approximate location of underground lines, including gas, water, and electrical cables. Accidentally hitting one of these lines is incredibly dangerous and can cause serious injury, service outages for your neighborhood, and expensive repairs. The Call 811 service is simple to use and is a non-negotiable safety step for any excavation project, big or small. It’s the smartest way to protect yourself and your property.

Step 3: Add the Base Layer

With the old lawn gone and the ground properly graded, you’re ready to build the foundation for your new turf. This base layer is what gives your artificial grass its structure, ensuring it stays smooth, drains correctly, and feels solid underfoot for years to come. Think of it as the unsung hero of your project. A well-installed base prevents sinking, shifting, and puddles, creating a durable and beautiful surface for everything from backyard lounging to energetic games. Getting this step right is non-negotiable for a professional-looking result.

The goal is to create a porous yet firm layer that can support the turf and withstand regular use and changing weather. We use a specific blend of materials to achieve this balance, providing a stable foundation that also allows rainwater to drain through efficiently. This prevents your beautiful new lawn from turning into a swamp after a storm. For homeowners looking to install a putting green or one of our custom sports games courts, a perfectly prepared base is even more critical for proper performance. A solid base ensures the ball rolls true on a putting green and provides the consistent, safe surface needed for athletic activities. It’s the difference between a good DIY project and a great, long-lasting investment in your home.

Your options for base materials

The best base material for artificial turf is a type of crushed stone aggregate. At Gappsi, we typically use a blend of ¾ inch clean stone and stone dust, often referred to as RCA or crushed aggregate base. This mixture is ideal because it compacts into a very firm, stable surface while still having enough space between the particles for water to drain through effectively. You want to avoid materials like sand or plain topsoil, which can shift over time and hold too much moisture, leading to dips and mold growth.

Choosing a high-quality aggregate ensures your turf installation will last. The right base material provides the strength needed to support foot traffic, patio furniture, and play equipment without developing low spots. You can find these materials at landscape supply stores, and they are the same types of products we use for creating solid foundations for patios and walkways.

How thick should the base layer be?

For most residential lawns, your base layer should be about three to four inches deep. This thickness provides the perfect balance of stability and drainage for typical Long Island soil and weather conditions. A base this deep creates a solid foundation that won’t heave during freeze-thaw cycles and can easily manage heavy rainfall. It’s substantial enough to prevent the turf from developing wrinkles or depressions over time, keeping your lawn looking pristine.

If your yard has particularly poor drainage or is made of heavy clay, you might consider going a bit deeper, perhaps up to five inches. However, for the vast majority of projects, three to four inches is the sweet spot. This depth ensures a long-lasting, durable surface that feels great to walk on and performs exactly as it should.

Spread and level the materials

Once you have your base material on site, it’s time to spread it evenly across the excavated area. Use a wheelbarrow to move the aggregate and a sturdy landscape rake or shovel to distribute it. Your goal is to create a consistent layer that matches the depth you decided on, typically three to four inches. As you work, pay attention to maintaining the gentle slope you established during the grading step to ensure water continues to flow away from your home.

After the material is spread, use the back of the landscape rake to smooth the surface as much as possible. This process, called screeding, helps create a flat plane. For a truly professional finish, you can drag a 2×4 across the surface to find and fill any low spots. Taking your time here is key, as any imperfections in the base will be visible once the turf is installed.

A Closer Look at Proper Drainage

Getting your drainage right is one of the most important parts of preparing the ground for artificial turf. Without a proper plan for water, you can end up with puddles, a squishy base, and even damage to your home’s foundation. Good drainage ensures that rainwater flows away from the surface, through the turf’s backing, and into the sub-base, where it can be safely directed away. This is crucial for the longevity and performance of your new lawn, keeping it usable and beautiful no matter the weather.

Whether you’re installing a small patch of green for your pets or a full backyard putting green, thinking about water flow from the start will save you major headaches later. A well-drained base keeps your turf looking and feeling great for years, preventing mold, mildew, and unpleasant odors from developing. It’s the unseen foundation of a successful installation, and taking the time to do it correctly makes all the difference. The right landscape design incorporates drainage as a fundamental element, not an afterthought, ensuring your entire outdoor space functions as beautifully as it looks.

Shape the ground to guide water away

The easiest way to manage water is to use gravity. By shaping the underlying soil, you can create a gentle slope that naturally guides water away from your home, patio, or walkways. You don’t need a steep hill; a subtle grade of just one or two percent is usually enough to keep water moving in the right direction. Think of it as creating a slight, almost unnoticeable tilt across the area. This simple step is a proactive way to prevent water from pooling on your turf or seeping toward your foundation, protecting your entire property.

Drainage solutions for flat spots

What if your yard is completely flat? You still need a strategy for drainage. If your property doesn’t have a natural slope, you may need to install a drainage system beneath the turf. A common solution is a French drain, which is a perforated pipe in a gravel-filled trench that collects and redirects water away from the area. This is especially important on Long Island, where heavy rain can quickly overwhelm a flat yard. The main goal is always to move water away from your house to prevent any risk of basement flooding or foundation issues.

Should you use a weed barrier?

A weed barrier, or geotextile fabric, can be a great addition under your base layer to stop stubborn weeds from growing through your turf. It’s an effective way to keep your lawn looking pristine. However, if you have pets, you might want to skip it. Weed barriers can trap moisture and pet urine, which can lead to persistent odors that are very difficult to get rid of. So, if your furry friends will be using the turf as their bathroom, it’s often best to rely on a thick, well-compacted base to prevent weeds instead of using a barrier.

Tips for pet-friendly turf areas

If you’re creating a space for your pets, a few extra steps will ensure it stays fresh and clean. First, choose the right infill. There are special pet-friendly infills designed to neutralize odors from urine and are completely safe for animals. This type of infill helps the turf blades stand up while also absorbing and fighting odors. Additionally, a proper synthetic turf installation for pets often includes a membrane that promotes maximum drainage. Regular rinsing with a hose will also help wash away any residue and keep your turf looking and smelling great for everyone to enjoy.

Step 4: Compact the Base

Why you can’t skip this step

You’ve made it to the final and most critical step of ground preparation: compaction. It might be tempting to rush through this part, but creating a firm, solid base is essential for a beautiful and long-lasting lawn. Proper compaction ensures your synthetic turf has excellent drainage, a smooth surface, and the durability to withstand years of foot traffic and fun. Skipping this step can lead to an uneven, lumpy surface or areas that sink over time, which is definitely not the look you’re going for. Taking the time to compact the base properly is your best insurance for a professional-looking result that you’ll be proud of for years to come.

How to use a plate compactor correctly

A plate compactor is the best tool for this job. You can typically rent one from a local hardware store if you don’t own one. Start at one edge of your project area and slowly guide the compactor across the entire surface. The machine’s weight and vibrations will do the heavy lifting, pressing the base material down firmly. You’ll want to make several passes over the whole area, overlapping each pass slightly to ensure consistent compaction. The goal is to create a base that feels completely solid underfoot, with no soft or spongy spots. This process prevents the ground from shifting or settling unevenly after your turf is installed.

Check for a solid, even surface

Once you believe the area is fully compacted, it’s time for a quality check. Grab a spirit level or a long, straight board to verify that the surface is flat and maintains the gentle slope you created for drainage. Place the level on different parts of the base to look for any high or low spots. If you find any uneven areas, you can easily fix them. Just add a small amount of your base material to the low spots or scrape away excess from the high spots, then tamp it down and recheck with your level. This final check ensures your turf will lay perfectly flat without any visible imperfections.

Install edging to lock in the base

Edging acts as a sturdy frame for your artificial turf, holding the base material in place and creating a clean, defined border. If your turf area is next to a concrete patio, driveway, or walkway, that existing structure can serve as a natural edge. However, if your turf meets up with a garden bed, fence, or another part of your lawn, you will need to install a dedicated border. Bender board is a popular choice, but you can also use decorative pavers or stones. This not only secures the installation but also creates a beautiful transition to other landscape elements, like a patio built with expert masonry.

DIY or Hire a Pro for Ground Prep?

After learning what goes into a proper ground preparation, you might be wondering if this is a project you can tackle yourself. While a DIY approach can be tempting, the base of your artificial turf is not the place to cut corners. The success and longevity of your entire project depend on a perfectly prepared foundation. Before you grab a shovel, it’s worth considering what a professional team brings to the table. The decision often comes down to weighing upfront cost savings against the guarantee of a flawless, long-lasting result.

What a professional installation includes

When you hire a professional, you’re getting more than just an extra set of hands. A professional installation begins with a comprehensive site assessment. An expert will evaluate your soil, check for proper drainage, and ensure the area is perfectly graded to prevent water issues down the line. They have the knowledge to make any necessary adjustments to irrigation systems before laying the turf. This expert oversight ensures that every detail, from clearing roots to establishing the perfect slope, is handled correctly from the start. This is a key part of Gappsi’s process for installing synthetic turf and Sports Games Courts.

The value of expert tools and experience

Professionals arrive with specialized, high-grade equipment like plate compactors and power brooms that are essential for a smooth, durable installation. More importantly, they bring years of experience. An experienced installer can spot potential issues a DIYer might easily miss, like subtle dips in the ground that could lead to puddles or areas that require extra reinforcement. This foresight is invaluable. Their training ensures the base is compacted to the perfect density for a stable, even surface that will support your turf for years to come. This level of construction expertise is what separates an okay result from a truly exceptional one.

Related Articles

Frequently Asked Questions

Do I really need to dig up my old lawn? Can’t I just lay the turf on top? I know it’s tempting to look for a shortcut, but you absolutely must remove the old lawn. If you lay turf directly over existing grass, the organic material underneath will decompose, creating soft spots and an uneven, lumpy surface. Proper ground preparation involves creating a stable, non-organic base of crushed stone. This is the only way to ensure your new lawn looks perfectly smooth and stays that way for years.

What’s the most common mistake people make when preparing the ground themselves? The biggest mistake I see is underestimating the importance of drainage and compaction. Many people don’t create a sufficient slope during the grading phase, which leads to puddles and a soggy base after it rains. The other major issue is not compacting the base layer enough. Simply tamping it down by foot isn’t enough; you need a plate compactor to create a rock-solid foundation that won’t sink or shift over time.

My yard is completely flat. How do I handle drainage? Even on a flat property, you still need to guide water somewhere. The best approach is to create a very subtle slope (about a quarter-inch drop per foot) during the excavation and grading steps, directing water toward a safe runoff area away from your house. If creating a slope isn’t possible, you may need to install a drainage system, like a French drain, beneath the turf to collect and carry water away.

I have a dog. Should I do anything differently for the ground prep? Yes, there are a couple of key adjustments for a pet-friendly installation. I strongly recommend skipping the weed barrier fabric. While it’s great for preventing weeds, it can trap pet urine and lead to persistent odors. Instead, rely on a thick, well-compacted base to block weeds. Also, be sure to choose a specialized pet-friendly infill, which helps neutralize odors and keeps the area fresh.

How firm does the base need to be, and is a plate compactor essential? The base needs to be incredibly firm and solid, almost like the foundation for a stone patio. A plate compactor is absolutely essential to achieve this. The machine’s weight and vibrations lock the crushed stone particles together, creating a stable surface that won’t settle or develop low spots. Using a hand tamper or just walking on it won’t provide nearly enough force, and you’ll likely end up with an uneven lawn down the road.

Share this page:
Backyard lawn-grade synthetic turf bordered by natural stone pavers and raised planting beds

Synthetic Turf Backyard Installation Guide on Long Island

A backyard lawn has to do more than look green. It needs to feel comfortable underfoot, shed rain without staying soggy, meet paver edges cleanly, and hold up around planting beds, pets, and everyday use. That is why the right turf system matters as much as the visible blades.

Call (631) 831-3177 to schedule a consultation for your synthetic turf backyard.

A well-designed synthetic turf backyard starts with lawn-grade fibers, a porous backing, the right infill, and a properly compacted drainage base. Paver borders, restrained planting beds, and carefully finished seams then turn the turf into part of the landscape rather than a surface laid over it.

The best choices depend on how your family uses the space and how the surrounding hardscape moves water. Pile height, backing construction, infill material, edging, and sub-base preparation each affect comfort, drainage, appearance, and service life. Start by separating the needs of a residential lawn from those of a specialized athletic surface, then build the installation around the way your backyard actually works.

What Makes a Backyard Synthetic Turf Lawn Different From Sports Turf?

A backyard lawn and an athletic field may both use synthetic fibers, but they are engineered for different priorities. Backyard synthetic turf is selected to look and feel like a residential lawn, support daily household use, and coordinate with patios, planting beds, and walkways. Sports turf is designed around repeated running, cleat traffic, ball response, and field safety. Treating the two systems as interchangeable can lead to the wrong pile, backing, infill, and maintenance expectations.

Lawn-like appearance instead of field performance

Residential turf is typically chosen for its visual proportion and comfortable hand-feel. A designer can specify different pile heights and fiber densities for a quiet side yard, a children’s play area, a pool surround, or a more heavily used backyard zone. The goal is a consistent green surface with a natural-looking blade profile, not a surface tuned for speed, traction, or ball roll.

Sports systems often use taller, denser fiber assemblies and substantial infill to help the blades stand upright under concentrated athletic traffic. Cornell’s description of infill turf fields notes nylon or polyethylene fibers attached to a porous polyethylene backing. With crumb rubber infill and, in some installations, a polyurethane cushioning pad beneath the backing. Those components serve a field-performance purpose. A residential lawn does not automatically need the same construction or the same amount of rubber infill. Cornell’s synthetic turf overview provides useful background on how field systems are built.

Different backing and infill priorities

For a home, porous backing is important because rain and routine cleaning water need a clear path into the prepared base. Pet areas also benefit from drainage-focused construction that helps reduce the chance of waste and odor remaining at the surface. The backing should be matched to the site, including its soil conditions, drainage plan, and expected use, rather than copied from a sports specification.

Infill affects how turf feels, how well fibers remain upright, and how much heat the surface can retain in direct sun. Crumb rubber can provide cushioning and help maintain fiber uprightness on fields. While sand or silica-based options may be used in place of, or alongside, crumb rubber in other systems. For a residential installation, the selection should account for barefoot comfort, children, pets, shade, sun exposure, and the desired lawn appearance. These details matter more than simply choosing the most athletic-looking product.

Designed as part of the backyard

A residential lawn must finish cleanly against natural stone, porcelain pavers, steps, fences, and planting beds. Proper edge restraint keeps the turf boundary stable and preserves the crisp lines that make the installation look intentional. That integration is one reason to work with a synthetic turf and sports game courts specialist who can separate lawn-grade recommendations from athletic-surface requirements. The right system is the one that fits how your household uses the space, not the one with the most aggressive field specification.

Should You Choose a Synthetic Turf Backyard With Pavers?

A synthetic turf backyard does not have to look like one uninterrupted field of green. Pairing turf with a paver patio, walkway, or defined seating area creates useful zones while keeping the overall landscape cohesive. The contrast between soft-looking turf and the firm texture of stone or porcelain gives the yard more structure. Especially around outdoor kitchens, fire features, pool areas, and transitions from the house.

Start by deciding how people will move through the space. A paver path can connect a rear door to a patio or pool without forcing foot traffic across the entire lawn. A larger paved terrace can hold dining furniture, while turf remains available for play, lounging, or pets. The most successful layouts treat each material as part of one plan rather than adding pavers randomly after the turf area has been designed.

Contact Gappsi to discuss your synthetic turf backyard layout.

synthetic turf lawn meeting natural stone pavers

Use pavers to define how the backyard functions

Paver patios are practical anchors for seating and dining because they provide a stable surface under tables, chairs, and grills. Walkways can be sized around actual use, such as carrying food from the kitchen or moving between a patio and a pool. Natural-stone pavers bring variation in color and texture, while porcelain pavers can create a more uniform architectural appearance. Review the available porcelain and natural stone pavers to compare material directions before finalizing the layout.

Plan the boundary before installation

The transition between turf and pavers needs more than a visually straight cut. Specialized edging separates the materials, helps maintain stability, and keeps the turf from migrating into the hardscape. Edge restraints may use pressure-treated wood, composite material, or another durable system selected for the site. The choice depends on the paver thickness, soil conditions, drainage plan, and the desired finished line.

A well-defined edge also makes maintenance simpler. Leaves and soil can be cleared from the pavers without pulling at the turf perimeter, and the boundary is easier to inspect over time. Curved edges can soften a large patio, while straight edges often suit a formal walkway or contemporary planting design. In either case, the base beneath each material must be prepared so the pavers remain level and the turf does not settle unevenly beside them.

Before choosing the final pattern, consider water movement, furniture placement, sun exposure, and the route from the home into the yard. With those details resolved, turf and pavers can provide separate functions while reading as one intentional outdoor living space.

Which Backing and Infill Choices Suit a Backyard Lawn?

A backyard lawn needs more than green fibers. The backing must move water into the prepared base, while the infill helps support the fibers, shape the way the surface feels, and influence how much heat it holds in direct sun. Synthetic turf systems commonly use fibers attached to a porous polyethylene backing, with infill worked between the fibers for support and cushioning. Cornell’s synthetic turf guidance describes this basic material structure.

For a synthetic turf backyard, specify the system around how the space will be used. A play lawn, a dog run, and a mostly decorative side yard do not place the same demands on the surface. Infill also needs to be distributed correctly. Without adequate coverage, heavy foot traffic can cause fibers to mat or lie down prematurely.

Backyard infill options at a glance.
Infill Feel Heat Drainage Best for
Crumb rubber Resilient and cushioned. Can retain heat and may produce odor in hot conditions. Depends on the backing and base beneath it. Active play areas where cushioning and fiber support are priorities.
Silica sand Firm, stable, and natural underfoot. Can feel warmer in direct sun. Works with a properly porous system. General lawn areas that need weight and fiber stability.
Acrylic-coated pet infill Controlled, low-dust feel. Often selected when odor and surface comfort need attention. Pair with pet-friendly porous backing. Dog runs and lawns where waste drainage and odor management matter.

How does the backing affect drainage?

A porous backing allows water to pass through the turf rather than collecting at the surface. That design only works when the layers below it are prepared to receive and move the water. A typical synthetic turf drainage system may use an 8- to 12-inch gravel-and-sand sub-base with drains, according to Cornell’s reference on synthetic turf construction. The exact base and outlet plan should reflect the site’s slope, soil, existing drainage, and proximity to structures.

Pet areas deserve particular attention. A specialized porous backing can help waste liquids drain through the surface and reduce odor buildup. But it does not replace regular removal of solid waste or appropriate rinsing. Ask the installer to explain the full drainage path instead of treating the backing as a stand-alone solution.

How does infill change feel and fiber performance?

Crumb rubber is associated with cushioning and helps keep fibers upright. Sand or silica alternatives can be used instead of, or together with, crumb rubber to support fiber performance and address heat-management preferences. The infill choice can change the feel underfoot and the surface’s heat retention characteristics in sunny conditions. Coverage and grooming matter as much as the material itself, because evenly distributed infill helps protect the lawn’s shape over time.

There is no universal best infill. Review the expected foot traffic, pets, shade, irrigation runoff, and the amount of direct afternoon sun before choosing. A qualified installer can match the infill to the backing and base so the lawn drains. Feels appropriate, and remains visually upright rather than selecting a material in isolation.

How to Integrate Synthetic Turf With Planting Beds

The transition between turf and planting beds should look intentional from every angle. A straight, stable boundary keeps mulch, soil, and leaves from spreading onto the lawn while stopping turf edges from drifting into the bed. It also gives the landscape a finished framework, especially where a synthetic turf backyard meets natural stone, shrubs, ornamental grasses, or seasonal color.

Start by setting the bed shape before the turf is installed. Broad curves can soften a large lawn, while simpler geometric lines complement paver patios and other hardscape. The edge should follow the design rather than trace small irregularities in the soil. Once the line is established, the installer can excavate and prepare both surfaces without leaving a narrow strip of unstable material between them.

Choose an edge restraint that holds the line

Composite or metal edging creates a clean separation between the turf and planting bed and helps prevent the turf from migrating into the soil. These materials are useful where a slim, discreet profile matters. In other designs, a pressure-treated wood or composite edge restraint provides a more substantial boundary and helps maintain the integrity of the installation. The restraint should be anchored securely and set at an appropriate height so it does not become a trip hazard or interfere with mowing adjacent natural areas.

Edging also protects the visual transition. Without a defined boundary, loose soil can work into the turf backing, and bed material can wash across the lawn during heavy rain. Specialized edging is commonly used to separate landscape materials and support stability at the joint. Gappsi’s landscape services can help coordinate that edge with the surrounding hardscape and planting plan.

Allow space for roots and seasonal growth

Do not press turf directly against aggressive or spreading plants simply to maximize the green area. A narrow buffer zone, filled with decorative stone or another defined material, gives roots and stems room to develop while making maintenance easier. Where plantings have invasive or vigorous root systems, an appropriate root barrier can help prevent intrusion beneath the turf and disruption at the edge. The barrier should be selected and installed as part of the bed construction, not added after roots have already reached the lawn.

Plan for the mature width of shrubs and perennials, not just the size of the nursery containers. Keep irrigation emitters aimed at the planting bed rather than the turf edge and shape the grade so water drains away from the boundary instead of carrying soil onto the lawn. With a stable restraint, a practical buffer, and room for root growth, the planting bed and turf read as one landscape while remaining easier to maintain independently.

Drainage: Why Proper Base Preparation Matters

The surface you see is only one part of a successful synthetic turf backyard. Beneath it, the installation needs a stable, free-draining foundation that moves rainwater away from the lawn instead of allowing it to collect between the turf and soil. This substructure is especially important on Long Island, where heavy storms. Compacted soils and flat backyard grades can quickly turn a poorly prepared lawn into a muddy or uneven area.

Build the base to move water away

A typical synthetic turf drainage system uses an 8- to 12-inch gravel and sand sub-base, along with drainage channels or sideline drains where the site requires them. Cornell’s synthetic turf guidance identifies this combination as a common approach for managing water beneath turf surfaces: Cornell turf drainage guidance. The exact depth depends on existing soil, slope, anticipated use, and local site conditions. A qualified installer should evaluate those factors before excavation rather than applying one depth to every backyard.

After unsuitable soil is removed, the crushed stone base must be spread in controlled lifts and compacted thoroughly. Compacted crushed stone creates a firm plane for the turf while limiting settlement, soft spots, and irregular depressions. Proper base preparation is also central to long-term stability and service life, not just to the appearance on installation day. If the aggregate is loose or uneven, foot traffic and weather can gradually create low areas where water and debris collect.

Pair a porous backing with a planned drainage route

Most synthetic turf systems use a porous backing that allows water to pass through the finished surface. Cornell describes synthetic turf fibers attached to a porous polyethylene backing, which helps water move into the prepared base rather than remaining on top. That backing cannot solve a drainage problem by itself. Water still needs a path through the aggregate and away from the installation.

Depending on the property, that path may include a gentle finished slope, perforated drainage pipe. Channel drains along a hardscape edge, or a connection to an approved drainage area. Sideline drains can be useful where runoff concentrates beside a patio, retaining wall, or property boundary. The objective is to prevent ponding, waterlogging, and mud, while protecting nearby pavers, planting beds, and the home’s foundation from redirected runoff. Drainage is a critical consideration because the system must manage both water passing through the turf and water arriving from surrounding surfaces.

For a backyard with pets or frequent activity, careful drainage design also helps keep transition zones cleaner after rain. The right base, backing, and outlet work together. A turf product placed over an unstable or poorly drained surface may look finished at first. But it cannot compensate for missing excavation, inadequate compaction, or an outlet that has nowhere to carry collected water.

How Long Does a Synthetic Turf Backyard Last?

A well-designed synthetic turf backyard can have a useful life of 20 years or more when the turf is made for outdoor use, installed over a stable base, and maintained routinely. The material alone does not determine how long the lawn performs well. Site preparation, drainage, seam work, edge restraints, fiber quality, and infill maintenance all affect whether the surface still looks even and functions comfortably years after installation. This is why longevity should be evaluated as a complete landscape system, not simply as a product warranty.

What protects the turf from everyday wear?

Backyard turf experiences concentrated traffic around patio doors, outdoor kitchens, play areas, pool decks, and pathways. A properly joined installation keeps adjoining sections aligned and helps minimize visible seams and tripping hazards as the surface is used over time. Seams should be secured carefully, with the turf stretched and joined so the sections do not separate or develop raised edges. This detail matters most where people move between pavers, planting beds, and the lawn.

Fiber selection also influences appearance. Outdoor turf with UV-resistant fibers is engineered to resist fading from ultraviolet exposure, helping the color remain consistent through sunny seasons. That does not mean the surface is unaffected by weather or neglect. Debris, heavy traffic, poor drainage, and inadequate maintenance can shorten the period when the lawn looks its best. The installation should therefore match the backyard’s actual use, rather than treating every area as identical.

How does infill help synthetic turf last longer?

Infill supports the fibers and helps them remain upright under foot traffic. If infill becomes uneven, frequently used areas can begin to look flattened or matted before the turf itself has reached the end of its useful life. Maintaining even infill distribution is therefore an important part of protecting the lawn’s appearance and feel. Periodic brushing or professional servicing can redistribute material where traffic has displaced it.

The appropriate infill depends on the setting and the performance goals. Sand or silica-based options may be used in place of, or alongside, other infill materials to support fiber performance and address heat considerations. Cornell’s synthetic turf guidance describes infill as part of a larger system that includes fibers and a porous backing, rather than as an isolated surface layer: review the turf construction guidance. With sound seam joining, UV-resistant fiber, proper drainage, and consistent infill care. A synthetic turf backyard can remain a durable, usable part of the landscape for two decades or longer.

Caring for Your Synthetic Turf Backyard and Pets

A synthetic turf backyard is not maintenance-free, but its routine care is straightforward. Remove leaves, twigs, and other organic debris before they settle into the fibers. Periodic sweeping also helps prevent moisture-trapping buildup that can encourage algae, particularly in shaded or damp areas. Use a stiff, non-metal brush and work against the direction of the fibers so the lawn keeps a natural, upright appearance.

  • Remove leaves and organic debris before they settle into the fibers.
  • Brush periodically, working against the fiber direction to keep blades upright.
  • Rinse pet-use zones and inspect seams, edges, drains, and edging.

Brushing also redistributes infill, which helps support the fibers under regular foot traffic and reduces premature matting. Pay special attention to walkways, play areas, and the routes your family and pets use most often. If a section begins to look flat, targeted brushing can restore its appearance, but persistent matting may indicate that the infill level or installation needs professional attention. Research from Cornell describes infill as a material placed within the fibers, where it contributes to surface performance and fiber support: Cornell’s synthetic turf guidance.

What makes synthetic turf suitable for pets?

For homes with dogs, drainage and odor control should be considered during design, not after installation. A pet-friendly porous backing allows liquid to pass through the turf rather than remaining trapped at the surface. A properly prepared base and an appropriate drainage path are equally important. Solid waste should still be removed promptly, followed by a rinse when needed. These simple habits help keep the lawn more comfortable for pets and reduce odor buildup around frequently used areas.

Choose the turf system, infill, and base together. Infill affects how the surface feels and can influence heat retention and odor in sunny conditions. Sand or silica-based options may be used instead of, or in combination with, crumb rubber, depending on the intended use and design goals. This matters because synthetic turf can retain more heat in direct sunlight than natural grass, an honest tradeoff for homeowners considering a sunny yard. Provide shaded rest areas, use umbrellas or shade structures where appropriate, and check the surface temperature before encouraging pets to spend extended time on it. See landscaping synthetic turf for the broader system options.

How much lawn maintenance can you eliminate?

Unlike natural grass, synthetic turf requires no mowing, fertilizer, or pesticide applications. It also eliminates routine irrigation, which can reduce residential landscape water use. You will still need occasional cleaning, brushing, and inspection around seams, edges, drains, and pet-use zones. A maintenance plan should also include checking that edging remains secure and that leaves do not accumulate along low-flow areas.

The goal is not to ignore the lawn. It is to replace repetitive weekly chores with occasional, purposeful care that protects drainage, keeps fibers standing, and maintains a cleaner backyard for people and pets.

Call (631) 831-3177 to schedule your synthetic turf backyard installation.

Frequently Asked Questions

Is synthetic turf a good choice for a backyard?

It can be a practical choice for play areas, shaded sections, and high-traffic paths where natural grass struggles. A porous backing allows water to pass through, while the selected pile height and fiber density can be matched to how the space will be used. It also removes routine mowing, fertilizing, and pesticide applications.

How should synthetic turf connect to pavers and planting beds?

Use a defined edge restraint, such as composite, metal, or pressure-treated wood edging, wherever turf meets another material. A properly secured boundary keeps the turf from shifting and creates a deliberate transition. Around planting beds, include a buffer or root barrier to reduce the chance of invasive roots reaching beneath the turf.

What drainage preparation does a backyard turf installation need?

The turf surface is only as reliable as the base below it. A compacted crushed-stone base supports stability, and the drainage design should direct water away from low areas instead of allowing ponding. Synthetic turf systems commonly use an 8- to 12-inch gravel and sand sub-base with drains, although the appropriate build-up depends on existing soil and site conditions. Source: Cornell University.

How long can synthetic turf last in a backyard?

Outdoor turf can last 20 years or more when the product is suited to the site, the seams and edges are installed correctly, and routine maintenance is performed. Periodic sweeping removes debris, while redistributing infill helps fibers remain upright in busy areas. UV-resistant fibers also help the color withstand prolonged sun exposure. Source: Cornell University.

Ready to Plan Your Synthetic Turf Backyard?

A thoughtful installation can bring the turf, pavers, planting beds, and drainage into one cohesive backyard design. Gappsi can help you evaluate the site conditions and choose details that fit how you want to use the space.

Schedule a consultation for your synthetic turf backyard installation:

(631) 831-3177

Share this page:
Lush artificial grass lawn beside a natural bluestone paver patio on a Long Island backyard

Artificial Grass Installation Cost on Long Island Guide

Artificial turf can keep a Long Island yard green through changing weather, but the installation price depends on far more than the roll of grass. The condition of the existing lawn, the slope of the property, drainage needs, equipment access, and the intended use of the space all shape the final scope. Homeowners in Nassau and Suffolk Counties who budget only for the turf material often underestimate the base work that sits beneath the finished surface.

Call Gappsi Group at (631) 831-3177 for a free consultation and a site-specific artificial grass installation quote tailored to your property.

As a starting point, artificial grass installation cost in the United States averages about $8 to $12 per square foot. A Long Island project may move above or below that range based on excavation, grading, drainage, turf selection, and infill. A site-specific estimate is the reliable way to plan the budget because it accounts for the individual conditions of your yard rather than a blanket per-foot price.

For homeowners in Nassau and Suffolk Counties, the most useful comparison is not simply one contractor’s price per square foot. It is what the proposal includes and how the installation is engineered to handle the property. Understanding those cost drivers makes it easier to compare options and avoid paying twice for preventable drainage or base-work problems. The sections below break down turf pricing, base preparation, drainage and pet-friendly choices, long-term maintenance, and the DIY-versus-professional decision so you can plan a realistic budget.

What Drives Artificial Grass Installation Cost on Long Island

The final artificial grass installation cost for a Long Island property depends on the conditions beneath and around the turf, not only on the roll of grass selected. A straightforward replacement over a level, prepared surface requires less work than a yard with compacted soil, uneven grades, poor drainage, or established sod. For homeowners in Nassau and Suffolk Counties, an accurate estimate should account for the full installation system and the specific demands of the site.

How does yard size affect the estimate?

Contractors measure the usable lawn area in square feet before calculating materials and labor. A larger yard requires more turf, base aggregate, infill, seams, edging, and hauling. Smaller or irregularly shaped areas can also require careful cutting and produce more material waste. Curved borders, planting beds, walkways, patios. And multiple turf sections add layout time because the installation must be fitted around existing features rather than rolled out as one rectangle.

Why does existing sod removal matter?

Natural grass usually cannot remain beneath a synthetic lawn. Site preparation commonly includes removing the existing sod, excavating to the required depth, and installing a stable drainage base. The amount of labor and disposal involved depends on how much lawn must be removed. How compacted the soil is, and whether roots, rocks, old edging, or other debris are present. Proper base preparation is critical to turf longevity because it creates the support layer beneath the finished surface.

What do excavation, grading, and drainage add?

Changes in elevation are a major cost variable. Grading creates the slope needed to direct water away from the home and prevents low spots from developing under the turf. If the existing ground is uneven, additional excavation, fill, compaction, or retaining work may be needed. Drainage improvements may include correcting the base, adding drainage materials, or addressing areas where water tends to collect. Proper site drainage helps prevent pooling, which protects the turf system and the surrounding landscape.

Long Island soil and climate conditions make this evaluation especially important. A professional installation should be tailored to local soil types, slope, and expected weather so the base remains stable over time. These factors can vary between properties in Nassau and Suffolk, even when the lawns appear similar from the street. Material grade also changes the estimate. Turf varies in fiber construction, density, color, backing, and intended use. So the appropriate product depends on whether the area is a front lawn, play space, pet area, or another application. Comparing quotes is most useful when each one clearly separates turf, site preparation, grading, drainage, installation, and infill.

Artificial Grass Cost per Square Foot: What to Expect

For planning purposes, artificial grass installation cost commonly falls around $8 to $12 per square foot in the United States, according to industry pricing data from Gitnux. That range is a starting point, not a guaranteed Long Island quote. The final number depends on the turf construction, the intended use, the size and shape of the area, and the preparation required below the surface.

The table below separates the turf material ranges most homeowners encounter. It is useful for comparing products, but it does not represent a complete installed price. Excavation, base stone, drainage work, edging, seams, labor, and infill may be quoted separately or included in a project total.

Artificial grass material cost ranges by turf grade
Turf Grade Cost per Sq Ft Best For
Lawn standard $4 to $8 General lawns, play areas, and dog runs
Mid-tier turf $4 to $7 Everyday residential use with a fuller appearance
Premium-grade turf $7 to $10+ Higher-use lawns and projects needing denser fibers
Putting green or specialty turf $8.50 to $12.50 Putting greens and purpose-built recreational areas

These material bands are consistent with published comparisons. A NexGen Lawns calculator places lawn or dog grass at approximately $4 to $8 per square foot and putting green installations at $8.50 to $12.50. Another pricing breakdown lists mid-tier turf at $4 to $7 and higher-grade turf at $7 to $10 or more. Those figures help explain why two products that look similar in a small sample can produce different estimates once the entire yard is measured.

Close-up of natural-looking artificial grass turf with infill granules

Material selection should follow the way you use the space. A lawn that receives occasional foot traffic may not need the same fiber density or backing as a busy dog area. A putting green also requires a different surface specification and installation approach than a landscape lawn. Infill helps stabilize the turf, adds ballast, and keeps fibers upright, so it is part of the system rather than a cosmetic extra. The right product also has to work with the planned drainage and base.

For a realistic project budget, compare the complete scope instead of multiplying the turf price by square footage alone. On Long Island, a professional installer should account for existing sod, soil conditions, grading, drainage, transitions, and the finished edge. Ask whether each item is included in the proposal, then compare warranties, installation details, and materials on equal terms. That approach gives you a clearer view of the true artificial grass installation cost before work begins.

Call (631) 831-3177 to review your projected square footage and get a detailed, site-specific estimate from Gappsi Group.

Site Prep and Base Work: The Hidden Cost of Artificial Grass

The visible turf is only one part of an installation. Beneath it, the crew must create a stable, well-draining surface that can handle rain, foot traffic, and seasonal changes. That preparation is why two projects with similar square footage can have very different totals when homeowners compare artificial grass installation cost.

On Long Island, the first step may be removing existing sod, roots, and organic soil. Leaving that material beneath synthetic turf can create an unstable layer as it settles or decomposes. Depending on the property, preparation can also require excavating to the correct depth, clearing construction debris, and hauling the removed material away. These tasks add labor and disposal costs before the turf is ever unrolled.

Why excavation and grading matter

A level-looking yard is not always ready for turf. The subgrade must be shaped so water moves away from the home, retaining walls, patios, and other structures rather than collecting beneath the lawn. Proper grading is especially important on properties with existing low spots, transitions between hardscape and planting areas, or slopes that direct runoff toward the house.

Long Island soil and weather conditions make this assessment more than a cosmetic step. Local soil characteristics affect how quickly water moves through the site, while heavy rain and freeze-thaw cycles can expose weak areas. A base designed without those conditions in mind may settle unevenly or leave water pooling under the turf. Gappsi notes that understanding local soil and climate is important for base longevity and drainage performance across Nassau and Suffolk Counties.

What does the compacted base add to the project?

After excavation and grading, installers typically place crushed stone or gravel to form a compacted stone base. The material is spread in lifts, moistened as needed, and compacted into a firm layer. This base supports the turf system, helps maintain the finished grade, and creates a path for water to move through the installation. Proper drainage is essential because standing water can lead to soft spots, odors, and premature wear.

Base preparation commonly adds about $1.50 to $3.00 per square foot, depending on the existing site, depth required, access, disposal needs, and drainage corrections. That range is an allowance for the work, not a universal price. A small yard with clean, accessible soil may need less preparation than a larger property with compacted ground, buried debris, poor slope, or a failed existing lawn.

When reviewing a proposal, ask whether sod removal, excavation, grading, disposal, drainage, and compaction are included. A detailed scope makes the quote easier to compare and helps prevent a low initial price from becoming a series of added charges. Professional synthetic turf installation services should address the base as carefully as the turf selected for the surface.

Drainage, Infill, and Pet-Friendly Artificial Grass Options

A turf system performs best when the layers beneath the blades are designed for the site. On Long Island, that means treating drainage as part of the installation rather than an afterthought. Soil, slope, and local weather conditions can affect how quickly water moves through the area, so the base and drainage design should be planned together.

How does the drainage layer prevent pooling?

After the existing lawn is removed and the area is excavated, the installer can build a compacted base that allows water to move away from the surface. A drainage layer may include a perforated material or planned gaps that give water a path through the turf system. The goal is to prevent water from sitting below the backing or collecting in low spots. Proper site drainage is essential because pooling can create odors, soft areas, and premature wear. It is also one reason local soil conditions matter when evaluating an artificial grass installation cost. A simple, well-draining site may need less corrective work than an area with poor grading or slow-draining soil.

Drainage details should also account for nearby patios, planting beds, downspouts, and walkways. A professional assessment can identify where runoff is likely to collect and tailor the base to the slope and drainage requirements. Gappsi serves Nassau and Suffolk Counties, where familiarity with local site conditions helps support a durable base.

What does infill do for artificial grass?

Infill is spread between the turf fibers after the grass is secured. Materials such as silica sand and rubber add ballast, stabilize the surface, and help keep the fibers upright. Infill also gives the turf a more natural feel underfoot instead of leaving the blades unsupported and flat. The correct material and application depend on how the area will be used, including whether it is a lawn, play space, or pet area.

For homes with dogs, consider a pet-focused turf system paired with a sanitary infill designed to support cleaning and odor control. These options can make routine maintenance easier, but they do not eliminate the need to remove solid waste and rinse the surface as needed. Homeowners comparing artificial grass for pets should review drainage, backing, infill, and cleaning requirements together rather than choosing by blade appearance alone.

Artificial grass can provide a consistent surface without watering or mowing, while the right drainage and infill details help preserve that performance. Ask for an installation plan that explains the base, water path, infill material, and maintenance approach before comparing quotes.

How Much Do Artificial Grass Maintenance Costs Run?

One of the clearest differences between artificial grass and a natural lawn appears after installation. Synthetic turf does not need regular watering, mowing, or fertilization, so the ongoing work is limited to basic cleaning and occasional grooming. Industry estimates place annual maintenance for artificial grass at roughly $0.10 to $0.20 per square foot. That estimate gives Long Island homeowners a useful starting point when comparing the full cost of an artificial grass installation with the recurring cost of caring for living grass.

For a 500-square-foot area, that range equals approximately $50 to $100 per year for routine maintenance. A larger 1,000-square-foot lawn would be about $100 to $200 annually. Actual upkeep depends on how the space is used, the amount of debris it receives, and whether pets regularly use the turf. Removing leaves, rinsing dust or residue, brushing high-traffic areas, and addressing spills promptly can help the surface remain clean and comfortable.

Where do the savings come from?

Natural lawns bring several repeating expenses. Watering adds to utility costs, particularly during dry summer periods. Mowing requires equipment, fuel, service, or a landscaping crew. Fertilizer, weed control, reseeding, and repairs for bare or muddy areas add more over time. Artificial grass removes those routine lawn-care categories from the maintenance budget. It also helps conserve water, which is an important consideration for homeowners who want to reduce their outdoor water use. Available industry research identifies water reduction as a major benefit of synthetic turf systems.

The surface stays green through every season without the uneven growth, bare spots, and mud that can develop on natural grass. That consistency can reduce both maintenance spending and the time a homeowner gives to lawn care. The installation still needs to be done correctly, however. Proper grading, drainage, a stable base, secure seams, and suitable infill help prevent avoidable repairs. Gappsi’s synthetic turf installation services account for those site conditions during planning and construction.

How should homeowners measure the return?

Evaluate the project across an eight- to twelve-year planning period rather than looking only at the initial artificial grass installation cost. Add the expected annual maintenance, then compare it with the cumulative cost of water, mowing, fertilizer, seasonal repairs, and your own time for a natural lawn. The difference shows the potential return on investment over the life of the project. A professionally installed system may also continue providing a usable, attractive surface throughout the year, giving the savings a practical benefit beyond the spreadsheet.

DIY vs Professional Artificial Grass Installation: Which Saves More?

DIY artificial grass installation can look less expensive at first. For a straightforward lawn, material and basic installation costs may run about $4 to $8 per square foot. That figure does not automatically include every step required for a stable turf system, however. Removing sod, excavating to the right depth, building a compacted drainage base, joining seams, securing the edges, and applying infill all affect the finished result. A homeowner who skips one of those steps may save on the initial invoice while creating a larger repair expense later.

Professional installation costs more upfront because the work addresses the entire site, not only the visible turf. Proper grading and drainage help prevent water pooling, while accurate cuts and seam work reduce visible joins and premature wear. Those details are particularly important on Long Island, where local soil and climate conditions can affect base stability and drainage. Gappsi’s guidance emphasizes durability, proper grading, and site preparation as part of a complete installation.

  • DIY may make sense when: the area is small, accessible, relatively flat, and the homeowner has the tools and time to complete excavation, base compaction, cutting, seaming, and infill application correctly.
  • Professional installation is usually the safer choice when: the site has a slope, drainage concerns, compacted soil, multiple turf areas, curved edges, pets, or transitions to patios and walkways.
  • The overlooked DIY costs include: equipment rental, disposal of excavated material, replacement turf after cutting errors, additional base material, seam repairs, and time spent correcting an uneven surface.
  • The professional value includes: a properly prepared base, secured edges, consistent seams, suitable drainage, and installation methods designed to support a longer service life.

Pet-friendly synthetic grass backyard with a dog playing on the lawn

For pet areas, drainage and infill deserve additional attention. Infill helps stabilize the turf, keep fibers upright, and improve comfort underfoot. Poor drainage can leave odors, standing water, or muddy edges around the installation. These problems are difficult to correct after turf has been glued and secured. So the cheapest path is not always the lowest artificial grass installation cost over the life of the project.

Professional installation can also be more cost-effective when the comparison includes reduced watering, mowing, and fertilization expenses. Synthetic turf requires far less annual maintenance than a natural lawn, with estimated maintenance costs of roughly $0.10 to $0.20 per square foot. The right decision depends on the site, but a careful installation protects the materials and helps the system deliver its expected durability. Review how to lay artificial turf before deciding whether your project is suitable for DIY work.

Is Artificial Grass Worth the Investment for Your Home?

The right artificial grass project is more than a lawn replacement. It can create a consistent, usable outdoor area for entertaining, pets, and everyday family time while reducing the recurring work associated with mowing, watering, and fertilizing. That combination makes the investment easier to evaluate than the installation price alone.

Professional turf installation can also support property value by improving the appearance and function of an outdoor space. A neat, low-maintenance lawn is especially useful when it is designed as part of a larger plan rather than installed as an isolated rectangle. Gappsi’s project guidance identifies attractive, functional outdoor entertainment areas as a potential benefit of professional turf installation. The result depends on the property, design, and workmanship, so artificial grass should not be treated as a guaranteed return.

Where does the long-term value come from?

Durability and predictable upkeep are central to the cost-benefit calculation. A properly built turf system includes the appropriate base, secure edges, drainage, and infill. These details help reduce problems such as visible seams, premature wear, and water pooling. Artificial grass also eliminates routine mowing and can reduce water use, while annual maintenance is generally limited to cleaning and occasional care. Industry research estimates synthetic turf maintenance at approximately $0.10 to $0.20 per square foot annually, although actual costs vary by use and site conditions.

Long Island homeowners should also account for the value of correct site preparation. Local soil, slopes, and drainage conditions affect how well the base performs over time. Paying for a plan that addresses those conditions can be more cost-effective than choosing the lowest initial bid and later correcting settlement, runoff, or drainage failures.

How can turf improve the whole outdoor layout?

Turf becomes more valuable when it works with the rest of the property. It can transition cleanly into landscape design, patios, walkways, planting beds, and outdoor structures. Curved edges and coordinated materials may add design complexity, but they can produce a more natural connection between the lawn and entertainment areas. Gappsi’s complete outdoor transformation model brings planning, material supply, and construction together under one provider, which can simplify coordination across those elements.

Gappsi also uses 3D design visualization before construction so homeowners can review the proposed layout, transitions, and usable areas in advance. This helps clarify what the artificial grass installation cost includes and reduces surprises during construction. Serving Nassau and Suffolk Counties, Gappsi can evaluate the specific site before recommending a turf system. Visit the Gappsi homepage to review the broader design-build approach and decide whether artificial grass fits your property’s long-term goals.

Gappsi’s team can review your site, layout, and drainage before you commit to a turf system, so you understand exactly what the artificial grass installation cost includes.

Call Gappsi Group at (631) 831-3177 for a free consultation

Frequently Asked Questions

How much does it cost to have an artificial lawn installed?

Artificial grass installation cost depends on the turf system, square footage, site access, excavation, grading, drainage, infill, and design details. A broad U.S. reference range is $8 to $12 per square foot, but a Long Island project may fall outside that range when the existing lawn needs substantial base work. A site evaluation provides a more useful estimate than a material-only price. Industry pricing reference.

How much is 1,000 square feet of artificial grass?

Using the broad $8 to $12 per-square-foot reference, 1,000 square feet would represent approximately $8,000 to $12,000 before project-specific adjustments. The final quote should account for sod removal, excavation, drainage, edge restraints, seams, infill, labor, and disposal, not just the rolls of turf.

What factors influence artificial grass installation cost on Long Island?

The largest variables are the condition of the existing lawn, the amount of excavation and grading required. Drainage needs, turf selection, project shape, access for equipment, and integration with pavers or planting beds. Long Island soil and weather conditions also make a properly designed base and drainage plan important for long-term performance.

Is professional artificial grass installation worth the cost?

Professional installation can be worthwhile when durability, drainage, and a clean finish matter. The work includes preparing the base, securing and tensioning the turf, managing seams, and adding infill. These steps help reduce pooling, visible seams, wrinkles, and premature wear, issues that can make a low initial price more expensive to correct later.

Ready to Plan Your Artificial Grass Installation?

A site-specific review can help you choose the right turf, base preparation, and drainage approach for your Long Island property. Gappsi’s team can discuss your project, answer your questions, and prepare a free consultation and artificial grass installation quote.

Call Gappsi Group at (631) 831-3177 to get started

Share this page:
Synthetic turf installation showing the base layers and materials that factor into the final cost.

Synthetic Turf Installation Cost: A Full Breakdown

Thinking about a perfect, green lawn often brings up images of weekend chores: mowing, watering, and fighting off weeds. For many Long Island homeowners, the reality of natural grass is a constant battle against dry spells, pests, and muddy patches. Synthetic turf offers a beautiful alternative, a consistently pristine lawn without the endless upkeep. But before you can enjoy a maintenance-free backyard, the big question is always about the budget. Understanding the total synthetic turf installation cost is the first step toward making this dream a reality. It’s not just a single price tag; it’s a combination of materials, site preparation, and expert labor that creates a durable, long-lasting investment for your home.

Key Takeaways

  • Budget Beyond the Turf Itself: The price per square foot for turf is only one part of the equation; a complete budget should also account for essential costs like site preparation, base materials, infill, and professional labor.
  • Professional Installation Protects Your Investment: The success of your lawn depends on expert groundwork, as proper grading and drainage are critical for preventing an uneven surface and ensuring your turf lasts for years.
  • Consider the Long-Term Savings: While the initial cost is higher than natural grass, a synthetic lawn pays for itself over time by eliminating recurring expenses for watering, mowing, and fertilizing.

How Much Does Synthetic Turf Cost Per Square Foot?

When you start looking into synthetic turf, one of the first things you’ll notice is that the price can vary quite a bit. A big piece of your total project cost comes down to the turf material itself, which typically ranges from $2 to more than $6 per square foot. Think of it like choosing flooring for your home; different materials come at different price points because they offer unique benefits in terms of look, feel, and durability.

The three most common materials used to make artificial grass are polypropylene, polyethylene, and nylon. Each one has a distinct set of characteristics that makes it suitable for different applications and budgets. Polyethylene is often the go-to for its balanced performance, while polypropylene is a more budget-conscious choice, and nylon stands out as the premium option for durability. Understanding the differences will help you select the perfect synthetic turf for your Long Island home, whether you’re creating a simple green space, a play area for the kids, or a personal putting green. Keep in mind these prices are just for the turf roll; your total investment will also include base preparation, infill, and labor, which we’ll get into later.

Polypropylene

Polypropylene is the most affordable turf material, with prices generally falling between $2 and $6.35 per square foot. If you’re looking to add a patch of green without a major financial commitment, this can be an attractive option. Because it’s not as resilient as other materials, polypropylene is best suited for low-traffic areas where it won’t see a lot of wear and tear. It’s a popular choice for decorative strips, balconies, or indoor-outdoor spaces. It also works well for home putting greens, where its finer texture can create a smooth surface for the ball. However, it has a lower tolerance for high temperatures, so it may not be the best fit for a yard that gets intense, all-day sun.

Polyethylene

Priced between $2.20 and $4.10 per square foot, polyethylene turf hits the sweet spot for many homeowners. It’s the most popular material for residential lawns because it offers an excellent combination of softness, realism, and durability. The fibers are non-porous, so they don’t absorb moisture or hold onto pet odors, making it a great choice for families with furry friends. Its soft, pliable texture feels comfortable underfoot, which is perfect for play areas and general backyard use. This versatility makes polyethylene a reliable foundation for any landscape design, giving you a lush, green lawn that can handle everyday life while still looking fantastic.

Nylon

Nylon is the strongest and most resilient turf material available, and its price reflects that, ranging from $5 to $6.40 per square foot. While it’s the most expensive option, its exceptional durability makes it a worthwhile investment for high-traffic applications. Nylon fibers can withstand heavy foot traffic and crushing weight without losing their shape, and they have a very high melting point, so they won’t get matted or damaged in the summer heat. This makes nylon the top choice for commercial properties, playgrounds, and backyard sports games courts. It’s also often used in putting greens where a stiff, true-rolling surface is essential. If longevity and performance are your top priorities, nylon is unmatched.

What Factors Influence Your Total Installation Cost?

When you start budgeting for a synthetic turf project, it’s helpful to know that the price tag involves more than just the turf itself. The total cost is a combination of materials, site preparation, and the skilled labor required to create a beautiful, long-lasting lawn. Think of it like any other home renovation project; the final price depends on the unique conditions of your space and the specific features you choose. From the initial groundwork to the finishing touches, several key factors will shape your overall investment.

Understanding these elements will help you plan your budget and ensure there are no surprises along the way. The size and complexity of your yard, the amount of prep work needed, and the materials used beneath the surface all play a significant role. A professional installation of synthetic turf accounts for every detail, ensuring your new lawn is not only green and pristine but also durable and well-drained for years to come. Let’s walk through the main factors that contribute to your total installation cost.

Your Yard’s Size and Shape

The most direct factor influencing your cost is the square footage of the area you want to cover. The larger your yard, the more material and labor will be required. The average cost to install artificial grass typically falls between $6.50 and $15.00 per square foot, depending on the turf quality and project specifics. While a simple, rectangular lawn is straightforward, an irregularly shaped yard with curves, slopes, or obstacles like trees and garden beds will require more intricate cutting and fitting. This additional complexity increases labor time and can raise the overall project cost, as it demands more precision from the installation team to achieve a seamless look.

Removing the Existing Lawn

Before your new synthetic turf can be installed, your existing lawn must be completely removed. This process, known as excavation, is a critical first step to creating a stable and level base. The cost to remove existing grass and soil generally ranges from $0.88 to $1.84 per square foot. This fee covers the labor needed to clear the area and the disposal of the old sod and dirt. While it might seem like an extra expense, skipping this step can lead to an uneven surface, poor drainage, and weed growth, so it’s an essential part of a professional installation that ensures the longevity of your new lawn.

Ensuring Proper Drainage

One of the most important parts of a successful turf installation is ensuring your yard has proper drainage. Without it, water can pool on the surface after heavy rain, creating a soggy, unpleasant space. On Long Island, where we see a mix of rain and snow, this step is non-negotiable. A professional team will assess your yard’s natural slope and soil conditions. In some cases, the ground may need to be regraded or specialized drainage systems installed beneath the turf. This preparation prevents water damage, mold, and mildew, protecting your investment and keeping your lawn usable in all weather conditions.

Base Materials and Edging

What lies beneath your synthetic turf is just as important as the turf itself. A solid foundation is key to a smooth, durable, and comfortable surface. Installation requires a sub-base of compacted stone, which allows water to drain through, followed by a layer of sand or finely crushed granite to create an even plane. The quality and depth of these base materials directly impact the performance and feel of your lawn. Edging is another crucial element, as it creates a clean, finished border and secures the turf in place. You can choose from simple plastic edging or upgrade to decorative stone or pavers for a more custom look.

Installation Timing

The duration of your project will also influence the final cost, primarily through labor. A small, straightforward turf installation might take only one or two days, while larger or more complex projects can take a week or more to complete. The timeline depends on factors like the size of the area, the amount of site preparation needed, and the intricacy of the design. For example, a simple backyard lawn will be quicker to install than a custom putting green or a yard with integrated pathways and garden beds. Your installation team can provide a more accurate timeline after evaluating your specific property and project goals.

What Other Costs Should You Plan For?

When you’re budgeting for a synthetic turf installation, the price per square foot of the turf itself is only part of the equation. A successful, long-lasting project involves several other crucial elements that contribute to the final cost. Thinking about these factors ahead of time helps you create a realistic budget with no surprises. From the materials that sit beneath the turf to long-term care, planning for the complete scope of the project ensures your new lawn is beautiful and durable for years to come. The total expense includes not just the turf material and installation labor, but also essential additions like infill, proper ground preparation, and any special upgrades you might need for pets or high-heat areas. Understanding these components will help you see the full picture of your investment and appreciate the value that goes into a professional installation. It’s easy to focus on the visible green surface, but the unseen layers and long-term considerations are what truly make or break the quality of the final result. Let’s walk through the other costs you should expect so you can plan with confidence.

Infill Materials

Infill is the granular material that’s brushed down in between the synthetic grass blades, and it’s a non-negotiable part of any installation. It plays a few important roles: it weighs the turf down, protects the backing from sun damage, helps the blades stand up straight for a more natural look, and provides a soft, cushioned feel underfoot. The total expense for your project will include the turf material, installation labor, and these essential additions like infill. Different types of infill, such as silica sand or specialized coated sands, come at different price points and offer unique benefits for performance and longevity.

Ground Preparation and Weed Barriers

The success of your synthetic turf lawn starts with what’s underneath. Proper ground preparation is perhaps the most critical step for ensuring your turf looks great and lasts for decades. This process involves excavating the existing soil and grass, grading the area to ensure proper drainage, and installing a compacted base of crushed stone. A vital part of this foundation is the weed barrier, a durable fabric laid down before the turf. This barrier is your best defense against pesky weeds trying to grow through your beautiful new lawn. Skipping this step can lead to problems down the road, so it’s an essential cost to include in your plan.

Upgrades for Pets or High Heat

A one-size-fits-all approach doesn’t always work when it comes to synthetic turf. Depending on your family’s needs and your yard’s environment, you may want to consider specialized upgrades. If you have pets, investing in a pet-friendly turf system is a great idea. These systems often feature turf with superior drainage capabilities and antimicrobial infill to help prevent odors. Likewise, if your backyard gets a lot of direct sunlight, you can choose turf with built-in heat-reduction technology to keep the surface cooler for bare feet. While these specialized turf options can add to the initial cost, they make your lawn much more comfortable and functional for your specific lifestyle.

Long-Term Maintenance

While synthetic turf is famously low maintenance, it isn’t “no maintenance.” To keep your lawn looking lush and new, you’ll need to plan for some minor, ongoing care. This typically involves brushing the turf fibers periodically, especially in high-traffic zones, to prevent them from matting down. You’ll also want to rinse the lawn occasionally to clear away dust, pollen, and any pet messes. Over many years, you might need to add a small amount of new infill to keep it performing well. Factoring in these small maintenance tasks or professional restoration services will protect your investment for the long haul.

Planning Your Synthetic Turf Project

A successful synthetic turf project is all about smart planning. Before you even think about installation, taking the time to map out your vision will ensure the final result is something you’ll love for years to come. A beautiful, low-maintenance lawn doesn’t happen by accident. It’s the outcome of careful consideration of your yard’s specific needs, your design goals, and the quality of the materials you choose.

Think of it as building a foundation for your investment. The difference between a turf lawn that looks incredible for over a decade and one that shows problems within a few months often comes down to this initial planning phase. By focusing on a few key areas, you can set your project up for success from the very beginning. We’ll walk through the three most important elements to consider: preparing your site, creating a functional design, and selecting a high-quality product. Getting these right is the secret to a flawless and durable synthetic lawn.

Site Preparation and Drainage

This is the single most important step for a long-lasting installation. Proper site preparation involves clearing the area of all existing grass and debris, then grading the land to create a stable, even surface. A solid base layer, usually made of crushed stone, is then compacted to prevent sinking or shifting over time.

Just as crucial is planning for drainage. Without a proper system, water can pool on the surface or saturate the base, leading to odors, mold, and an unstable foundation. On Long Island, where we can get heavy rain, a well-designed drainage plan is non-negotiable. We ensure your yard has the right slope and base materials to effectively manage water runoff, keeping your turf pristine in any weather.

Layout and Overall Design

Once you have a plan for the groundwork, you can focus on the fun part: the design. Think about how you want to use the space. Will it be a play area for kids, a spot for the dog to run, a personal putting green, or a lush green accent for your patio? The layout should reflect its purpose.

Consider how the turf will integrate with your existing landscape. A thoughtful design creates a seamless flow between your new lawn and other elements like stone walkways, garden beds, or a pool deck. This is your chance to create a truly cohesive outdoor living area. A professional landscape designer can help you visualize the possibilities and craft a layout that is both beautiful and functional for your family’s lifestyle.

Product Quality and Warranty

Not all artificial grass is the same, and the type of turf you choose plays a huge role in the look, feel, and longevity of your lawn. High-quality products are essential for a yard that stands up to sunlight, foot traffic, and pets. Look for turf that is UV-stabilized to prevent fading from the sun and has a durable backing with a high stitch rate for a fuller, more resilient surface.

A strong warranty is a great indicator of product quality. Manufacturers who stand behind their turf for 10 years or more are confident in its performance. When you select your turf, we’ll walk you through the best options for your specific needs, ensuring you get a product that is safe, durable, and beautiful.

DIY vs. Professional Installation: Which Is Right for You?

Deciding between a DIY project and hiring a professional is a big part of planning your new lawn. While rolling up your sleeves can be rewarding, synthetic turf installation is a precise process where expertise makes a visible difference. Let’s look at both paths so you can choose the one that best fits your project, budget, and desired outcome.

The DIY Approach: Costs and Common Pitfalls

The biggest draw for a DIY installation is usually the potential cost savings on labor. However, it’s easy to underestimate the complexity of the job. Many DIY attempts run into trouble with improper ground preparation. If you don’t get the base layer perfectly graded and compacted, you can end up with an uneven, lumpy surface that wears out quickly. Another common mistake is forgetting to install a weed membrane, which leads to pesky plants poking through your new lawn. Even the direction of the turf blades matters, as incorrect placement can make the lawn look unnatural. These small details are what separate an okay result from a stunning one.

The Professional Approach: What’s Included

When you hire a professional team, you’re paying for more than just labor. A professional quote typically includes the cost of the turf itself, the base materials, necessary infill, and the disposal of your old lawn. Experts handle every step, from excavation and grading to ensuring proper drainage, which is critical for preventing water pooling. For an average 500-square-foot yard, a professional installation provides a complete, turnkey solution. This approach takes the guesswork out of the equation and ensures every component of your new synthetic turf lawn is installed correctly from the ground up.

The Value of Hiring an Expert

Hiring an expert is an investment in the quality and lifespan of your turf. A professional installer not only gets the job done right but also helps you select the best materials for your specific needs, whether it’s for a backyard, a putting green, or a custom sports game court. Professionals understand how to create seamless connections between turf sections and secure the edges for a polished, durable finish. While the upfront cost is higher, a professional installation often pays for itself over time through lower maintenance and a longer-lasting lawn. You can see examples of high-quality work on the Gappsi YouTube channel to understand the difference expertise makes.

Is Synthetic Turf a Good Long-Term Investment?

When you look at the initial numbers, it’s easy to wonder if synthetic turf is worth the price. It’s a significant home improvement project, and the upfront cost is higher than rolling out natural sod. But when you look beyond the initial installation, you start to see the real financial picture. A synthetic lawn is more than just an aesthetic upgrade; it’s an investment in your property and your lifestyle that pays you back over time.

Savings on Water and Upkeep

Imagine your weekends without a lawnmower. A synthetic lawn frees you from the constant cycle of mowing, fertilizing, and weeding. Beyond getting your time back, you’ll see real savings add up. Artificial turf conserves water, which can make a noticeable difference on your utility bills, especially during Long Island’s dry summer months. Forget spending money on fertilizers, pesticides, and lawn care equipment. With synthetic turf, your lawn stays green and pristine with minimal effort, requiring little more than an occasional rinse to stay looking its best. The long-term savings on maintenance and utilities can be significant.

Durability and Lifespan

High-quality synthetic turf is built to last. While the initial investment is a factor, a professionally installed lawn can have a lifespan of 15 to 25 years. It’s designed to withstand everything from harsh weather and UV rays to constant foot traffic from kids and pets. Unlike a natural lawn that can develop brown spots, muddy patches, and uneven wear, a synthetic lawn maintains its lush, uniform appearance year after year. This durability makes it a reliable, long-term solution for your yard, backyard putting green, or even custom Sports Games Courts. It’s a one-time installation that provides decades of enjoyment.

Comparing Costs: Turf vs. Natural Grass

Let’s be direct: the upfront cost of turf is higher than natural grass. For an average yard, the installation can be a considerable expense. However, a natural lawn comes with its own set of recurring costs that continue for as long as you own your home. When you add up the annual expenses for watering, seeding, fertilizer, aeration, and lawn care services or equipment, the numbers start to climb. Although turf installation costs more at the start, you can reach a break-even point in just a few years. After that, the money you save on maintenance continues to accumulate, making it a financially savvy choice for the long haul.

Why Choose Gappsi for Your Long Island Turf Installation?

Choosing the right team for your synthetic turf installation is the most critical step in ensuring your investment pays off. Here on Long Island, you need a team that understands the local environment and has a proven track record. With decades of experience serving Suffolk and Nassau counties, Gappsi brings unparalleled expertise to every project. We handle the entire process, from initial design to final installation, making sure every detail is managed with precision. Our goal is to create a beautiful, functional lawn that stands the test of time, avoiding the common installation mistakes that can lead to costly repairs down the road.

The quality of the turf material itself is just as important as the installation. We help you select the perfect product for your specific needs, whether you want a soft, lush lawn for your family to enjoy, a durable surface for pets, or a professional-grade putting green. Gappsi offers a complete range of services to complement your new lawn, from creating custom Sports Games Courts to integrating turf with beautiful masonry patios and walkways. We manage everything, including proper ground preparation and drainage solutions, to ensure your new turf looks great and performs perfectly for years to come. With Gappsi, you’re not just hiring an installer; you’re partnering with a dedicated team committed to adding lasting value to your home.

Related Articles

Frequently Asked Questions

What is the real all-in cost for a synthetic turf installation? The price per square foot for the turf material is just the starting point. Your total investment includes several key components that work together to create a lasting lawn. Think of it as a complete package that covers the turf itself, the crucial ground preparation like excavation and creating a stable base, the infill material that helps the blades stand up, and the skilled labor to ensure everything is installed perfectly. The final cost will depend on your yard’s size, the specific turf you choose, and any unique site challenges.

Is synthetic turf a good choice for a family with kids and pets? Absolutely. Modern synthetic turf is designed with families in mind. The materials are non-toxic and lead-free, creating a safe surface for everyone to play on. For pets, we can install a specialized system with enhanced drainage and antimicrobial infill. This helps rinse away messes easily and prevents odors from building up, so your yard stays fresh and clean for both your two-legged and four-legged family members.

How long will a synthetic lawn actually last, and what makes it durable? A professionally installed, high-quality synthetic lawn can last anywhere from 15 to 25 years. Its longevity really comes down to two factors: the quality of the turf and the quality of the installation. A durable product will have built-in UV protection to prevent fading and a strong backing to withstand foot traffic. Just as important is the expert installation, which ensures a solid, well-drained base that prevents sinking, shifting, and drainage problems for decades.

Why is professional installation so important if I’m trying to stick to a budget? While a DIY approach might seem cheaper upfront, professional installation is an investment in getting the job done right the first time. So much of a turf lawn’s success is in the details you can’t see, like a perfectly graded base for drainage, invisible seams between turf rolls, and securely fastened edges. Professionals prevent common pitfalls that can lead to a lumpy, weed-filled, or poorly draining lawn, saving you from costly headaches and repairs in the future.

What does “low maintenance” really mean for a turf lawn? Low maintenance means you can officially retire your lawnmower and stop spending money on fertilizer and water. The upkeep is simple and straightforward. You will want to occasionally use a stiff brush to fluff up the fibers in high-traffic areas to keep them looking perky. You should also plan to rinse the lawn with a hose periodically to wash away dust, pollen, and any pet messes. It’s about occasional, simple care, not constant weekend work.

Share this page: