


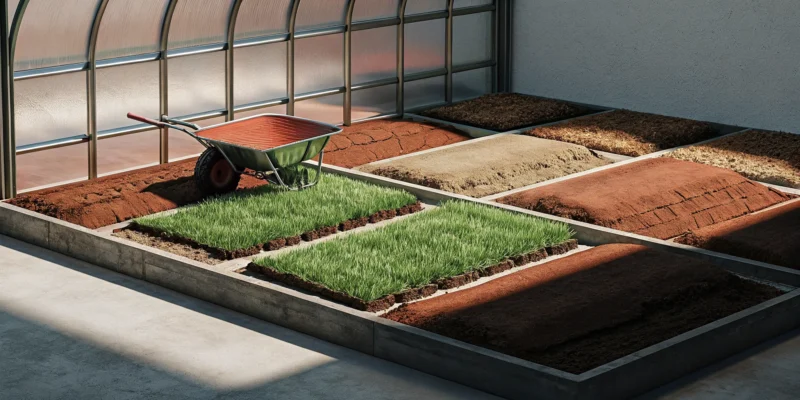
So, you’re ready to trade your lawnmower for a pristine green lawn that looks perfect year-round. Taking on a synthetic turf installation yourself is an ambitious project, and the success of it hinges on one key phase: the ground preparation. This is by far the most labor-intensive part of the job, requiring digging, leveling, and compacting. Before you decide to go the DIY route, it’s important to understand exactly what’s involved. This article will give you a realistic, step-by-step look at how to prepare ground for artificial turf, helping you make an informed decision on whether to tackle it yourself or bring in a professional team.
Key Takeaways
- A Perfect Foundation is Crucial: Your turf’s final look and longevity depend on the initial prep work. This means completely clearing the area of old grass, digging down about four inches, and grading the ground with a slight slope to ensure proper water runoff.
- The Right Base Material Matters: For a stable and durable surface, use a three to four-inch layer of crushed aggregate. This material must be spread evenly and compacted firmly with a plate compactor to prevent your turf from sinking or developing lumps.
- Plan for Your Specific Needs: Always consider drainage, especially for flat yards where a French drain might be necessary. If you have pets, it is best to skip the weed barrier, which can trap odors, and rely on a thick, compacted base to stop weeds instead.
What is Ground Prep for Artificial Turf?
Before you can roll out that beautiful green lawn, you have to get the ground ready. Ground preparation is the process of creating a perfectly smooth, stable, and well-draining foundation for your artificial turf. It’s the most critical phase of the entire installation, involving clearing the area, excavating soil, adding a base layer, and compacting everything until it’s solid. Think of it as building the perfect foundation for your new lawn. A flawless installation is impossible without it, which is why we’re going to walk through exactly what it takes to get it right.
Why this first step is so important
Putting in the effort now saves you from major headaches later. Proper ground prep is essential because it directly impacts how your new lawn looks, feels, and lasts. A well-prepared base ensures your synthetic turf lies perfectly flat without any lumps or bumps. It also guarantees that water drains away efficiently, preventing puddles and soggy spots after it rains. Without a solid foundation, you might see sinking areas, weed growth, or seams pulling apart over time. Taking this step seriously is the best way to protect your investment and make sure your turf stays beautiful and functional for years to come.
How long does ground preparation take?
Honestly, this isn’t a quick afternoon job. The time it takes to prepare the ground depends on the size of your yard, the current condition of the soil, and how many obstacles like rocks or roots you need to remove. For a typical DIY project, plan on dedicating at least a full weekend to the task. As experts will tell you, it’s crucial not to rush the digging and leveling steps. This is by far the most labor-intensive part of installing artificial turf. The heavy lifting and meticulous leveling are why many homeowners decide to hire a professional team to ensure the foundation is flawless from the start.
Step 1: Clear the Area
Before you can roll out that gorgeous green turf, you need to create a clean slate. This first step is all about removing the existing lawn and any other organic material to prepare a perfectly clear foundation. Think of it like prepping a canvas before you paint. A smooth, clear surface is the key to a professional-looking installation that will last for years. Rushing this stage can lead to lumps, bumps, and drainage problems later on, so it’s worth taking the time to get it right from the start. This initial cleanup sets the stage for everything that follows.
Remove old grass, weeds, and roots
Your first task is to get rid of all the existing grass, weeds, and their root systems. You want to clear the area down to the bare soil. If you leave any grass or roots behind, they will eventually decompose under your turf, creating soft spots and an uneven surface. This can compromise the entire installation.
For most lawns, the most efficient way to do this is with a sod cutter. You can rent one from a local hardware store, and it makes removing large sections of grass much easier than digging by hand. Set the blade to cut about one to two inches deep to ensure you get the bulk of the root system. Once the sod is cut, you can roll it up and remove it from the area, leaving you with a clean patch of dirt to begin your synthetic turf project.
Herbicide or manual removal: Which is best?
When it comes to clearing the area, you have two main options: manual removal or using an herbicide. Using a sod cutter, as we just discussed, is a form of manual removal. It’s effective, immediate, and avoids the use of chemicals, which is a big plus for many homeowners. This method is perfect if you want to get started on the next step right away.
Alternatively, you can use a non-selective herbicide to kill the existing grass and weeds. This approach is very thorough but requires more patience. You’ll likely need to apply it two or three times over a couple of weeks, and it works best in warmer weather. If you choose this route, always read and follow the manufacturer’s instructions carefully for your own safety and to protect surrounding plants. This is just one part of a total yard transformation, which often involves comprehensive landscape design.
What to do with your sprinkler system
This is a critical step that’s easy to overlook. If you have an in-ground sprinkler system, you must address any sprinkler heads or pipes located within the planned turf area. You cannot simply leave them and install the turf over them. An old pipe that cracks or a sprinkler head that leaks can saturate the base layer under your turf, causing it to sink and become unstable.
You’ll need to cap any sprinkler lines that run into the area and remove the heads. In some cases, you might choose to reroute the plumbing around the perimeter of your new turf lawn. If you’re not comfortable working with irrigation lines, this is a great time to call in a professional. An expert can ensure your system is properly modified without causing future issues, protecting your investment in a beautiful new lawn.
Step 2: Excavate and Grade
Once your project area is completely clear, it’s time to start shaping the foundation for your new lawn. This step involves some serious digging and careful leveling, but it’s one of the most important parts of ensuring your turf looks professional and lasts for years. Proper excavation and grading create a stable, even surface and, most importantly, prevent water from pooling where it shouldn’t. Think of it as building the perfect canvas before the masterpiece is laid down. Getting this right means you won’t have to worry about lumps, bumps, or soggy spots later on. While it requires a bit of muscle, taking your time here will pay off in a big way.
How deep to dig for your turf base
For a stable and durable artificial turf installation, you’ll need to excavate the area to a depth of about three to four inches. This might seem deep, but this space is essential for the base material we’ll add in the next step. This crushed rock base provides the structural support for your entire turf system, keeping it level and secure through all seasons. Removing this amount of soil ensures your new synthetic turf will sit flush with surrounding patios or walkways, creating a seamless and professional look. Use a shovel or a sod cutter for this process, and make sure the depth is consistent across the entire area.
Grade the area for proper drainage
After you’ve excavated the soil, the next task is to grade the area. Grading simply means shaping the underlying ground to create a gentle slope that directs water away from your house, patio, or other structures. Proper drainage is absolutely critical for the health and longevity of your turf. Without it, rainwater can collect underneath, leading to a squishy surface, unpleasant odors, and potential damage to the base. A subtle slope of about 2% (a quarter-inch drop for every foot) is usually enough to guide water effectively. This small adjustment ensures your investment stays dry and stable, protecting your home’s foundation and your beautiful new masonry.
Remember to call 811 before you dig
Before you break ground with that first shovel, please make this essential phone call. Dial 811 at least a few days before you plan to start digging. This is a free, nationwide service that contacts local utility companies to mark the approximate location of underground lines, including gas, water, and electrical cables. Accidentally hitting one of these lines is incredibly dangerous and can cause serious injury, service outages for your neighborhood, and expensive repairs. The Call 811 service is simple to use and is a non-negotiable safety step for any excavation project, big or small. It’s the smartest way to protect yourself and your property.
Step 3: Add the Base Layer
With the old lawn gone and the ground properly graded, you’re ready to build the foundation for your new turf. This base layer is what gives your artificial grass its structure, ensuring it stays smooth, drains correctly, and feels solid underfoot for years to come. Think of it as the unsung hero of your project. A well-installed base prevents sinking, shifting, and puddles, creating a durable and beautiful surface for everything from backyard lounging to energetic games. Getting this step right is non-negotiable for a professional-looking result.
The goal is to create a porous yet firm layer that can support the turf and withstand regular use and changing weather. We use a specific blend of materials to achieve this balance, providing a stable foundation that also allows rainwater to drain through efficiently. This prevents your beautiful new lawn from turning into a swamp after a storm. For homeowners looking to install a putting green or one of our custom sports games courts, a perfectly prepared base is even more critical for proper performance. A solid base ensures the ball rolls true on a putting green and provides the consistent, safe surface needed for athletic activities. It’s the difference between a good DIY project and a great, long-lasting investment in your home.
Your options for base materials
The best base material for artificial turf is a type of crushed stone aggregate. At Gappsi, we typically use a blend of ¾ inch clean stone and stone dust, often referred to as RCA or crushed aggregate base. This mixture is ideal because it compacts into a very firm, stable surface while still having enough space between the particles for water to drain through effectively. You want to avoid materials like sand or plain topsoil, which can shift over time and hold too much moisture, leading to dips and mold growth.
Choosing a high-quality aggregate ensures your turf installation will last. The right base material provides the strength needed to support foot traffic, patio furniture, and play equipment without developing low spots. You can find these materials at landscape supply stores, and they are the same types of products we use for creating solid foundations for patios and walkways.
How thick should the base layer be?
For most residential lawns, your base layer should be about three to four inches deep. This thickness provides the perfect balance of stability and drainage for typical Long Island soil and weather conditions. A base this deep creates a solid foundation that won’t heave during freeze-thaw cycles and can easily manage heavy rainfall. It’s substantial enough to prevent the turf from developing wrinkles or depressions over time, keeping your lawn looking pristine.
If your yard has particularly poor drainage or is made of heavy clay, you might consider going a bit deeper, perhaps up to five inches. However, for the vast majority of projects, three to four inches is the sweet spot. This depth ensures a long-lasting, durable surface that feels great to walk on and performs exactly as it should.
Spread and level the materials
Once you have your base material on site, it’s time to spread it evenly across the excavated area. Use a wheelbarrow to move the aggregate and a sturdy landscape rake or shovel to distribute it. Your goal is to create a consistent layer that matches the depth you decided on, typically three to four inches. As you work, pay attention to maintaining the gentle slope you established during the grading step to ensure water continues to flow away from your home.
After the material is spread, use the back of the landscape rake to smooth the surface as much as possible. This process, called screeding, helps create a flat plane. For a truly professional finish, you can drag a 2×4 across the surface to find and fill any low spots. Taking your time here is key, as any imperfections in the base will be visible once the turf is installed.
A Closer Look at Proper Drainage
Getting your drainage right is one of the most important parts of preparing the ground for artificial turf. Without a proper plan for water, you can end up with puddles, a squishy base, and even damage to your home’s foundation. Good drainage ensures that rainwater flows away from the surface, through the turf’s backing, and into the sub-base, where it can be safely directed away. This is crucial for the longevity and performance of your new lawn, keeping it usable and beautiful no matter the weather.
Whether you’re installing a small patch of green for your pets or a full backyard putting green, thinking about water flow from the start will save you major headaches later. A well-drained base keeps your turf looking and feeling great for years, preventing mold, mildew, and unpleasant odors from developing. It’s the unseen foundation of a successful installation, and taking the time to do it correctly makes all the difference. The right landscape design incorporates drainage as a fundamental element, not an afterthought, ensuring your entire outdoor space functions as beautifully as it looks.
Shape the ground to guide water away
The easiest way to manage water is to use gravity. By shaping the underlying soil, you can create a gentle slope that naturally guides water away from your home, patio, or walkways. You don’t need a steep hill; a subtle grade of just one or two percent is usually enough to keep water moving in the right direction. Think of it as creating a slight, almost unnoticeable tilt across the area. This simple step is a proactive way to prevent water from pooling on your turf or seeping toward your foundation, protecting your entire property.
Drainage solutions for flat spots
What if your yard is completely flat? You still need a strategy for drainage. If your property doesn’t have a natural slope, you may need to install a drainage system beneath the turf. A common solution is a French drain, which is a perforated pipe in a gravel-filled trench that collects and redirects water away from the area. This is especially important on Long Island, where heavy rain can quickly overwhelm a flat yard. The main goal is always to move water away from your house to prevent any risk of basement flooding or foundation issues.
Should you use a weed barrier?
A weed barrier, or geotextile fabric, can be a great addition under your base layer to stop stubborn weeds from growing through your turf. It’s an effective way to keep your lawn looking pristine. However, if you have pets, you might want to skip it. Weed barriers can trap moisture and pet urine, which can lead to persistent odors that are very difficult to get rid of. So, if your furry friends will be using the turf as their bathroom, it’s often best to rely on a thick, well-compacted base to prevent weeds instead of using a barrier.
Tips for pet-friendly turf areas
If you’re creating a space for your pets, a few extra steps will ensure it stays fresh and clean. First, choose the right infill. There are special pet-friendly infills designed to neutralize odors from urine and are completely safe for animals. This type of infill helps the turf blades stand up while also absorbing and fighting odors. Additionally, a proper synthetic turf installation for pets often includes a membrane that promotes maximum drainage. Regular rinsing with a hose will also help wash away any residue and keep your turf looking and smelling great for everyone to enjoy.
Step 4: Compact the Base
Why you can’t skip this step
You’ve made it to the final and most critical step of ground preparation: compaction. It might be tempting to rush through this part, but creating a firm, solid base is essential for a beautiful and long-lasting lawn. Proper compaction ensures your synthetic turf has excellent drainage, a smooth surface, and the durability to withstand years of foot traffic and fun. Skipping this step can lead to an uneven, lumpy surface or areas that sink over time, which is definitely not the look you’re going for. Taking the time to compact the base properly is your best insurance for a professional-looking result that you’ll be proud of for years to come.
How to use a plate compactor correctly
A plate compactor is the best tool for this job. You can typically rent one from a local hardware store if you don’t own one. Start at one edge of your project area and slowly guide the compactor across the entire surface. The machine’s weight and vibrations will do the heavy lifting, pressing the base material down firmly. You’ll want to make several passes over the whole area, overlapping each pass slightly to ensure consistent compaction. The goal is to create a base that feels completely solid underfoot, with no soft or spongy spots. This process prevents the ground from shifting or settling unevenly after your turf is installed.
Check for a solid, even surface
Once you believe the area is fully compacted, it’s time for a quality check. Grab a spirit level or a long, straight board to verify that the surface is flat and maintains the gentle slope you created for drainage. Place the level on different parts of the base to look for any high or low spots. If you find any uneven areas, you can easily fix them. Just add a small amount of your base material to the low spots or scrape away excess from the high spots, then tamp it down and recheck with your level. This final check ensures your turf will lay perfectly flat without any visible imperfections.
Install edging to lock in the base
Edging acts as a sturdy frame for your artificial turf, holding the base material in place and creating a clean, defined border. If your turf area is next to a concrete patio, driveway, or walkway, that existing structure can serve as a natural edge. However, if your turf meets up with a garden bed, fence, or another part of your lawn, you will need to install a dedicated border. Bender board is a popular choice, but you can also use decorative pavers or stones. This not only secures the installation but also creates a beautiful transition to other landscape elements, like a patio built with expert masonry.
DIY or Hire a Pro for Ground Prep?
After learning what goes into a proper ground preparation, you might be wondering if this is a project you can tackle yourself. While a DIY approach can be tempting, the base of your artificial turf is not the place to cut corners. The success and longevity of your entire project depend on a perfectly prepared foundation. Before you grab a shovel, it’s worth considering what a professional team brings to the table. The decision often comes down to weighing upfront cost savings against the guarantee of a flawless, long-lasting result.
What a professional installation includes
When you hire a professional, you’re getting more than just an extra set of hands. A professional installation begins with a comprehensive site assessment. An expert will evaluate your soil, check for proper drainage, and ensure the area is perfectly graded to prevent water issues down the line. They have the knowledge to make any necessary adjustments to irrigation systems before laying the turf. This expert oversight ensures that every detail, from clearing roots to establishing the perfect slope, is handled correctly from the start. This is a key part of Gappsi’s process for installing synthetic turf and Sports Games Courts.
The value of expert tools and experience
Professionals arrive with specialized, high-grade equipment like plate compactors and power brooms that are essential for a smooth, durable installation. More importantly, they bring years of experience. An experienced installer can spot potential issues a DIYer might easily miss, like subtle dips in the ground that could lead to puddles or areas that require extra reinforcement. This foresight is invaluable. Their training ensures the base is compacted to the perfect density for a stable, even surface that will support your turf for years to come. This level of construction expertise is what separates an okay result from a truly exceptional one.
Related Articles
- How to Install Artificial Grass in Old Westbury, NY
- How to Lay Artificial Turf: A Step-by-Step Guide
- Expert Synthetic Turf Installation in Old Westbury, NY
- Get a Quote for Turf Installation: A 5-Step Guide
Frequently Asked Questions
Do I really need to dig up my old lawn? Can’t I just lay the turf on top? I know it’s tempting to look for a shortcut, but you absolutely must remove the old lawn. If you lay turf directly over existing grass, the organic material underneath will decompose, creating soft spots and an uneven, lumpy surface. Proper ground preparation involves creating a stable, non-organic base of crushed stone. This is the only way to ensure your new lawn looks perfectly smooth and stays that way for years.
What’s the most common mistake people make when preparing the ground themselves? The biggest mistake I see is underestimating the importance of drainage and compaction. Many people don’t create a sufficient slope during the grading phase, which leads to puddles and a soggy base after it rains. The other major issue is not compacting the base layer enough. Simply tamping it down by foot isn’t enough; you need a plate compactor to create a rock-solid foundation that won’t sink or shift over time.
My yard is completely flat. How do I handle drainage? Even on a flat property, you still need to guide water somewhere. The best approach is to create a very subtle slope (about a quarter-inch drop per foot) during the excavation and grading steps, directing water toward a safe runoff area away from your house. If creating a slope isn’t possible, you may need to install a drainage system, like a French drain, beneath the turf to collect and carry water away.
I have a dog. Should I do anything differently for the ground prep? Yes, there are a couple of key adjustments for a pet-friendly installation. I strongly recommend skipping the weed barrier fabric. While it’s great for preventing weeds, it can trap pet urine and lead to persistent odors. Instead, rely on a thick, well-compacted base to block weeds. Also, be sure to choose a specialized pet-friendly infill, which helps neutralize odors and keeps the area fresh.
How firm does the base need to be, and is a plate compactor essential? The base needs to be incredibly firm and solid, almost like the foundation for a stone patio. A plate compactor is absolutely essential to achieve this. The machine’s weight and vibrations lock the crushed stone particles together, creating a stable surface that won’t settle or develop low spots. Using a hand tamper or just walking on it won’t provide nearly enough force, and you’ll likely end up with an uneven lawn down the road.