
For many homeowners, the battle against weeds sprouting between patio pavers is a constant chore. Just when you think you’ve pulled them all, new ones appear. This frustrating cycle is often a sign that the joint filler isn’t doing its job. If you’re tired of the endless maintenance, it’s time to learn about polymeric sand for pavers. This innovative product creates a hardened barrier that makes it nearly impossible for weed seeds to take root. It also prevents insects from burrowing underneath and stops erosion from washing out the joints during heavy rain. It’s a simple upgrade that delivers powerful, long-term results, letting you spend less time on upkeep and more time enjoying your beautiful outdoor living area.
Key Takeaways
- Choose performance over price: Polymeric sand is a smart upgrade from regular sand because its polymer additives harden when wet. This process locks pavers in place, creating a durable barrier that effectively stops weeds and resists erosion.
- Master the application details: A flawless finish depends on careful preparation. Start with a completely dry surface, fill joints to the correct depth, and use a leaf blower to remove all sand residue from paver tops before activating with a gentle mist of water.
- Recognize when to reapply or call a pro: Expect to refresh your sand every few years, especially if you see weeds or wobbly pavers. If your patio has deeper issues like an uneven base, hiring a professional ensures a lasting fix and a perfect result.
What Is Polymeric Sand and How Does It Work?
If you’ve ever admired a perfectly smooth paver patio and wondered how the stones stay so neatly in place, the secret is likely polymeric sand. Think of it as the high-performance glue that holds your outdoor masterpiece together. It’s a special type of sand used to fill the joints, or gaps, between pavers, natural stones, and bricks. Unlike the loose sand you’d find at the beach,
This process not only locks your pavers in place but also adds a clean, finished look to your patio, walkway, or driveway. It’s a crucial final step in any professional masonry project that ensures your investment looks great and lasts for years. Understanding how it works is the first step to achieving a flawless, long-lasting finish for your outdoor space.
Breaking Down the Ingredients
So, what exactly is in this special sand? At its core, polymeric sand is a simple mixture of fine sand and polymer additives. These polymers are the key ingredient. They act as a powerful binding agent that remains dormant until it comes into contact with water. When you wet the sand according to the product’s instructions, the polymers activate and begin to harden.
This chemical reaction creates a firm yet flexible bond that locks the pavers together, transforming individual stones into a single, interconnected surface. It’s this unique formula that gives your patio or walkway its stability and resilience against the elements, preventing shifting and maintaining that crisp, professional appearance.
Polymeric Sand vs. Regular Sand: What’s the Difference?
You might be wondering if you can just use regular sand from the hardware store. While regular sand can fill the gaps, it simply can’t compete with the performance of polymeric sand. The biggest difference is durability. Polymeric sand’s binding agents help stop weeds from growing through the cracks and keep pesky insects from burrowing underneath your pavers.
Unlike regular sand, which can easily wash out during a heavy rainstorm, properly installed polymeric sand stays put. This hardened joint is specifically designed to withstand foot traffic, weather, and erosion, keeping your stone pavers secure for years to come. It’s a small upgrade that makes a huge difference in the longevity and maintenance of your outdoor living area.
Why Use Polymeric Sand for Your Pavers?
If you’ve invested in a beautiful paver patio or walkway, the last thing you want is for it to be overrun with weeds or become uneven. The secret to a long-lasting, pristine paver surface lies in the joints, and that’s where polymeric sand comes in. This isn’t just ordinary sand; it’s a high-tech mix of fine sand and polymer binders that hardens when activated with water. Using it to fill the gaps between your pavers offers some major advantages over traditional joint sand, transforming your outdoor space from high-maintenance to hassle-free.
Say Goodbye to Weeds and Pests
One of the biggest headaches for paver owners is the constant battle against weeds sprouting up in the joints. Polymeric sand creates a solid, durable barrier that stops weed seeds from taking root. When the sand hardens, it forms a firm bond that’s almost impossible for weeds to penetrate. This also means you can say goodbye to pesky ants and other insects that love to build their homes in the soft sand between pavers. You’ll spend less time on your knees pulling weeds and more time actually enjoying your beautiful masonry work. It’s a simple step that provides a powerful, long-term defense for your patio or driveway.
Keep Your Pavers Stable and Strong
Have you ever walked across a paver patio and felt a few stones wobble under your feet? That’s often a sign that the joint sand has washed away, leaving the pavers loose. Polymeric sand solves this problem by acting like a flexible yet firm grout, locking each paver securely in place. This interlocking bond distributes weight more evenly and prevents the pavers from shifting over time. It’s also highly resistant to erosion from heavy rain or power washing. While regular sand can easily wash out, polymeric sand stays put, ensuring your paver surfaces remain stable, safe, and level for years to come.
Enjoy a Flawless Finish and Easy Maintenance
Beyond its structural benefits, polymeric sand gives your paver project a clean, polished look. It fills the joints completely, creating a smooth and uniform surface that highlights the beauty of the stones themselves. With various colors available, you can even choose a sand that complements your pavers perfectly. This flawless finish also makes maintenance a breeze. Since the joints are sealed, dirt and debris tend to sit on the surface instead of getting lodged in the cracks, making cleanup as simple as a quick sweep or rinse. For a perfect application without any leftover haze, professional restoration and sealing can ensure your patio looks its best from day one.
Choosing the Right Type of Polymeric Sand
Walking into a home improvement store and seeing a wall of different polymeric sand options can feel a bit overwhelming. They aren’t all created equal, and picking the right one is key to getting that durable, beautiful finish you’re looking for. The best choice for your project depends on a few things: the type of traffic your paver surface will get, the look you want to achieve, and the specific size of the joints between your pavers. Thinking through these factors beforehand will help you select the perfect sand for a long-lasting, professional-looking result.
Standard vs. Premium: Which Is for You?
Think of polymeric sand as a special blend of sand mixed with a glue-like polymer. When you add water, it activates and hardens, locking your pavers tightly in place. While any polymeric sand is a big step up from regular sand, you’ll usually find two main grades: standard and premium. Standard-grade sand is great for projects with less foot traffic, like a garden walkway or a small patio. Premium options contain stronger polymers, offering more flexibility and durability. This makes them ideal for high-traffic areas like driveways or pool decks, wider paver joints, and places exposed to harsh weather. If you want maximum protection against weeds and erosion, investing in a premium product is often worth it.
Finding the Perfect Color Match
The color of your polymeric sand plays a huge role in the final look of your project. It can either blend in seamlessly with your pavers or create a striking contrast that makes the pattern pop. Most brands offer a range of neutral colors like gray, beige, and black to complement different paver styles. To find the perfect match, take a sample of your paver with you when you shop, or bring a few sand color samples home. Seeing the colors together in the natural light of your outdoor space is the best way to decide. A well-chosen color will tie the whole look together, giving your patio or walkway a polished, cohesive finish.
Making Sure It Fits Your Paver Joints
Polymeric sand is designed to work within a specific range of joint widths, typically between 1/8 of an inch and up to 4 inches, depending on the product. Before you buy, measure the gaps between your pavers. If the joints are too narrow, the sand won’t be able to fill them properly, leading to a weak bond. If they’re too wide for the product you chose, it may wash out or crack over time. Always check the manufacturer’s instructions on the bag to see the recommended joint width and depth. Getting the right fit ensures the sand can compact properly and create a strong, flexible bond that will last for years. If you’re unsure, our masonry experts can always help.
How to Apply Polymeric Sand: A Step-by-Step Guide
With the right polymeric sand in hand, you’re ready for the most important part: the application. Getting this right is key to achieving that durable, professional-looking finish for your paver patio, walkway, or driveway. The process isn’t complicated, but it does require attention to detail. By following these steps carefully, you can ensure your pavers stay locked in place and free from weeds for years to come. Let’s walk through exactly how to get it done.
Prep and Clean Your Paver Surface
A successful application starts with a clean slate. Before you even open the bag of sand, your paver surface and joints must be completely clean and, most importantly, bone dry. Any moisture can activate the polymers prematurely, leaving a hazy film on your pavers that’s tough to remove. Start by clearing out any old sand, dirt, or weeds from the joints. A pressure washer on a gentle setting or a sturdy utility knife can work well for this. Once the joints are clear, sweep the entire surface thoroughly. If you’re dealing with stubborn stains or an older patio, professional restoration and sealing services can get your pavers back to their original condition.
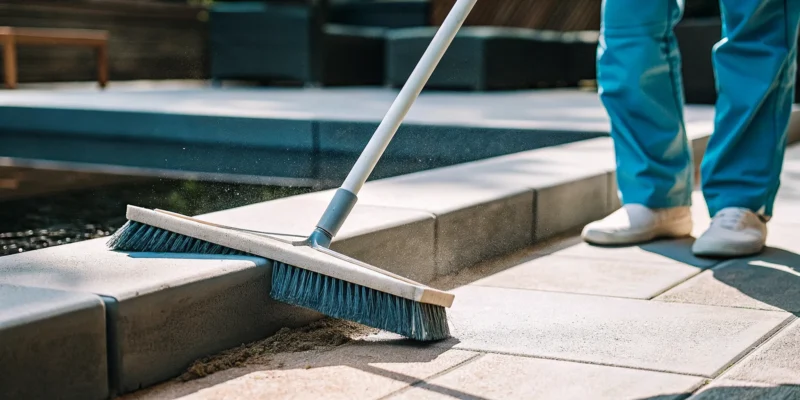
The Right Way to Install Polymeric Sand
Once your surface is perfectly dry, pour the polymeric sand directly onto the pavers. Using a push broom with stiff bristles, sweep the sand across the surface, guiding it into the joints from multiple angles. Your goal is to fill each joint to the very bottom. After the initial fill, you need to compact the sand to eliminate any air pockets. You can do this by gently tapping the pavers with a rubber mallet or by using a plate compactor for larger areas. This vibration helps the sand settle deep into the joints. Add more sand and repeat the process until the joints are filled to about 1/8 inch below the paver’s edge. Finally, use a leaf blower on a low setting to remove every last grain of sand from the paver surfaces.
Activating and Curing for a Perfect Set
Now it’s time to activate the polymers with water. Set your garden hose nozzle to a gentle “shower” or “mist” setting. A strong jet of water will wash the sand right out of the joints. Start at the highest point of your paved area and work your way down, watering in small sections. Lightly spray each section for about 20-30 seconds, let the water soak in, and then repeat two or three more times until the joints are saturated. You’ll know they’re done when the water starts to pool slightly on top. Once you’ve watered the entire area, the curing process begins. Check the manufacturer’s instructions, but most products need 24-48 hours to fully harden. During this time, it’s crucial to keep all foot and vehicle traffic off the pavers.
Common Polymeric Sand Mistakes to Avoid
Applying polymeric sand can give your patio or walkway a professional, long-lasting finish. But a few simple mistakes can turn your dream project into a frustrating mess. Getting the details right is key to avoiding issues like a hazy film on your pavers or joints that wash out in the first rainstorm. Let’s walk through the most common slip-ups so you can get a flawless result the first time. By paying close attention to the weather, your application technique, and how you water, you’ll ensure your hard work pays off with a beautiful, durable surface that stands the test of time.
Don’t Ignore the Weather Forecast
Think of yourself as a fair-weather friend to your polymeric sand project. The polymers in the sand need a specific set of conditions to cure properly, and moisture is the main variable you need to control. Before you even open the bag, check the forecast. You need a solid 24-48 hours of dry weather after you finish the job. Rain can wash the sand out of the joints before it has a chance to harden, creating a mess and weakening the bond. It’s also important that your pavers and the joint base are completely dry before you start. Any existing moisture can cause the sand to clump and cure unevenly. If your patio has low spots that tend to collect water, you’ll want to address those drainage issues first. Proper masonry installation is foundational to good drainage and a long-lasting paver surface.
Avoid Overfilling and Hazy Surfaces
One of the most common frustrations with polymeric sand is “poly-haze,” a white, cloudy film that can linger on your paver surfaces. This happens when sand residue is left on top of the pavers when you add water. To avoid this, be meticulous about cleaning. After sweeping the sand into the joints, use a leaf blower on a low setting to blow all the excess dust and grains off the surface. Make sure the joints are filled correctly, leaving the sand about 1/8 inch below the paver’s edge. This small gap prevents the sand from smearing onto the surface during activation. Overfilling is a primary cause of hazing. If you do end up with a hazy finish, don’t panic. There are cleaners available, but prevention is always easier. For stubborn haze or older stains, professional restoration and sealing services can bring your pavers back to life.
Using the Right Amount of Water
Activating the sand with water is the final, and arguably most critical, step. This is where the magic happens, as the water causes the polymers to bind and harden. However, using the wrong amount of water can ruin the entire application. Too little water will only harden the top layer, leaving the sand below loose and unstable. Too much water can wash the binding polymers right out of the joints, resulting in a weak bond that won’t stand up to weeds or weather. The best method is to use a hose with a spray nozzle set to a gentle “shower” setting. Mist the pavers in a sweeping motion, allowing the water to soak in slowly. Repeat this two or three times until the joints are saturated but not flooded. You want the water to penetrate to the bottom of the joint without dislodging the sand. This careful approach ensures a strong, consistent bond from top to bottom.
How Long Does Polymeric Sand Last?
When you put your time and energy into a paver project, you want the results to last. So, how long can you expect your polymeric sand to hold up? Generally, a good application of polymeric sand will last between three to five years. However, with the right conditions and a top-notch installation, it’s not uncommon for it to last up to 10 years.
The biggest factor influencing its lifespan is the quality of the initial application. A job done right from the start will always perform better. Other elements also play a part, like the amount of foot traffic the area receives and the local weather. Here on Long Island, our patios and walkways face freeze-thaw cycles, which can be tough on any jointing material. Proper drainage is also crucial; if water constantly pools on your patio, it can shorten the sand’s life.
Ensuring your pavers are installed on a solid base with good drainage is the first step toward a long-lasting finish. When every step is handled correctly, from the base preparation to the final curing of the sand, you give your project the best possible chance to reach that 10-year mark. For complex projects, working with a professional masonry team can make all the difference in maximizing durability.
What Makes Polymeric Sand Last Longer?
The secret to polymeric sand’s durability is right in its name: polymers. These are binding agents mixed in with the fine sand particles. Think of it as a special sand blended with a powerful, water-activated adhesive. When you introduce water, these polymers create a glue-like reaction, causing the sand to harden into a firm yet flexible joint.
This hardened material locks your porcelain and natural stone pavers in place, preventing them from shifting over time. Unlike regular sand, which can easily wash away with heavy rain or get displaced by foot traffic, polymeric sand stays put. This solid barrier is what gives it its staying power, resisting erosion and effectively blocking weeds and insects from making a home between your pavers.
Signs It’s Time for a Reapplication
Your patio will give you a few clear signals when it’s ready for a refresh. Catching these signs early can prevent small issues from turning into bigger problems. Here’s what to look for:
- Empty or Low Joints: If you notice the sand between your pavers looks sunken or washed out, it’s a sign of erosion.
- Weeds and Moss: Are little green sprouts popping up? This is a clear indication that the sand’s protective barrier has weakened, allowing seeds to take root.
- Loose Pavers: If a few pavers have started to wobble underfoot, the sand is no longer doing its job of locking them securely in place.
- Ant Hills: Tiny mounds of sand are a telltale sign that insects have found a way to tunnel through the joints.
If you’re seeing any of these issues, it might be time to consider Gappsi’s restoration and sealing services to bring your patio back to life.
Tips to Extend Its Lifespan
A little care goes a long way in getting the most out of your polymeric sand. To help it last as long as possible, follow these simple tips.
First, preparation is everything. If you’re reapplying, make sure you remove all the old, failed sand and any debris from the joints. Clean the paver surfaces thoroughly and let them dry completely before you begin.
Next, pay close attention to the curing process. After activating the sand with water, keep all foot traffic off the area for at least 24 hours and vehicles off for 72 hours. If heavy rain is in the forecast, protect the surface with a tarp to allow the sand to set properly without being disturbed.
Polymeric Sand vs. Other Joint Fillers
When you’re finishing a paver project, you have a few options for filling the joints. The most common alternative to polymeric sand is regular jointing sand, sometimes called paver sand. While it’s less expensive, it doesn’t offer the same long-term benefits. Think of regular sand as a simple filler, while polymeric sand is an active bonding agent that works to protect and stabilize your entire patio or walkway.
So, how do they really stack up against each other? Let’s compare their performance and look at whether the extra cost for polymeric sand is a smart investment for your home.
Comparing Durability and Performance
The biggest difference between polymeric sand and regular sand comes down to its composition. Polymeric sand is a special mix of fine sands and polymer additives. When you add water, these polymers activate and harden, creating a firm, durable joint. According to the experts at Sakrete, this hardened material is much better than regular sand because it helps stop weeds from growing, resists washing out during heavy rain, and keeps insects from burrowing between your pavers.
Regular sand, on the other hand, stays loose. It can easily be washed away by rain or a hose, creating a mess and leaving your paver joints empty. This means you’ll have to reapply it often. More importantly, polymeric sand locks the pavers together, adding stability to the entire surface. This is a crucial part of any quality masonry project and ensures your investment looks great for years.
Is It Worth the Investment?
It’s true that polymeric sand costs more upfront than regular sand, which might make you pause. However, it’s a worthwhile investment that pays for itself over time. Because it creates a durable, semi-solid joint, you won’t have to spend your weekends pulling weeds or sweeping away anthills. It provides long-lasting stability and a much cleaner, more polished look for your pavers.
Think of it this way: the higher initial cost saves you money and time on maintenance down the road. You won’t need to buy bags of replacement sand every year or spend hours on upkeep. The demand for polymeric sand is rising in both residential and commercial construction for this very reason. It delivers a professional-grade finish that protects your patio, driveway, or walkway, making it a smart choice for any homeowner who values durability and a pristine appearance.
When to Call in the Pros for Your Project
Tackling a home improvement project yourself can be incredibly satisfying. But sometimes, what looks like a simple weekend task can reveal deeper issues that need an expert eye. Applying polymeric sand is often straightforward, but knowing when to step back and call a professional can save you time, money, and a lot of frustration. It’s the key to ensuring your patio or walkway not only looks great but is also structurally sound for years to come.
Deciding between DIY and hiring a pro often comes down to the complexity of the job and the quality of the finish you’re after. If your pavers are in rough shape or you simply want the peace of mind that comes with a flawless, long-lasting result, bringing in an experienced team is a smart move. Let’s walk through a few signs that indicate your project might be bigger than it seems.
Assessing Your Project’s Complexity
Take a good look at your paver surface. Is it mostly level with just a few weeds, or are you seeing more significant problems? If your pavers are very broken, tilted, or uneven, this usually points to an issue with the foundation beneath them. Simply sweeping in a new layer of polymeric sand won’t fix the root cause. A professional will need to lift the pavers, re-level the base, and replace any damaged stones before application. Ignoring these underlying problems means you’ll likely face the same issues again in a year or two. A professional restoration and sealing service can properly diagnose and fix these foundational issues for a lasting repair.
The Advantages of a Professional Touch
Even if your pavers are in good condition, there are still great reasons to hire a professional. Reapplying polymeric sand might seem like a minor maintenance task, but it plays a big role in extending the life and look of your hardscape. Professionals have the right equipment, like commercial-grade plate compactors, to ensure the sand settles deep into the joints for maximum stability. They also have the experience to avoid common DIY mistakes, such as leaving a hazy residue on the paver surface or using the wrong amount of water during activation. Hiring an expert masonry team guarantees the job is done efficiently and correctly the first time, giving you a perfect finish without the guesswork.
Related Articles
- What type of Sand material is best to fill the joints in between pavers? – Gappsi Group
- Polymeric Sand for Pavers: A Complete Guide
- Best Sand for Paver Joints: Expert Guide | Gappsi Inc
- FAQ about Swimming pools, Landscape, masonry, carpentry, natural stone. – Gappsi Group
- clean and seal driveway pavers Archives – Gappsi Group
Frequently Asked Questions
Can I just add new polymeric sand on top of the old stuff? It’s tempting to take a shortcut, but for the best results, you really need to remove the old, failed sand first. The new sand needs to fill the entire joint from bottom to top to create a strong, stable bond. If you just top it off, the new layer will be too thin to harden properly and will likely crack or wash away, leaving you back where you started. Taking the time to clean out the joints completely ensures a durable, long-lasting finish.
What should I do if it unexpectedly rains after I’ve applied the sand? An unexpected rain shower is a common worry. If you can, cover the area with a plastic tarp as soon as you see rain coming. If the area does get wet before the sand has had a chance to cure, the best thing to do is wait. Let it dry out completely for a day or two and then check the joints. Sometimes, a light shower won’t cause major issues, but a heavy downpour can wash the polymers out. If the sand is loose or washed out after drying, you will likely need to re-do the application.
Is polymeric sand a good choice for around a swimming pool? Absolutely. In fact, it’s an excellent choice for pool decks. The area around a pool sees a lot of water and foot traffic. Polymeric sand creates a solid joint that won’t wash out from splashes or rain. It also helps keep the paver surface stable and prevents weeds from growing, which keeps your pool area looking clean and well-maintained with less effort.
Why did my polymeric sand crack or wash out so quickly? If your polymeric sand failed soon after application, it usually points to an issue with the installation process. The most common reasons are applying it when the pavers were not completely dry, not compacting the sand enough to fill all the air pockets, or using too much or too little water during the final activation step. Poor drainage under the pavers can also cause problems, as constant moisture can weaken the bond over time.
How do I clean my paver patio without damaging the polymeric sand? Regular, gentle cleaning is the best way to maintain your patio. You can sweep it with a broom or use a leaf blower on a low setting to clear away debris. For dirt or stains, use a paver-safe cleaner and a brush with soft bristles. It’s best to avoid using a high-pressure washer, as the intense spray can blast the sand right out of the joints. If you must use one, use a wide-angle nozzle and keep a safe distance from the surface.