


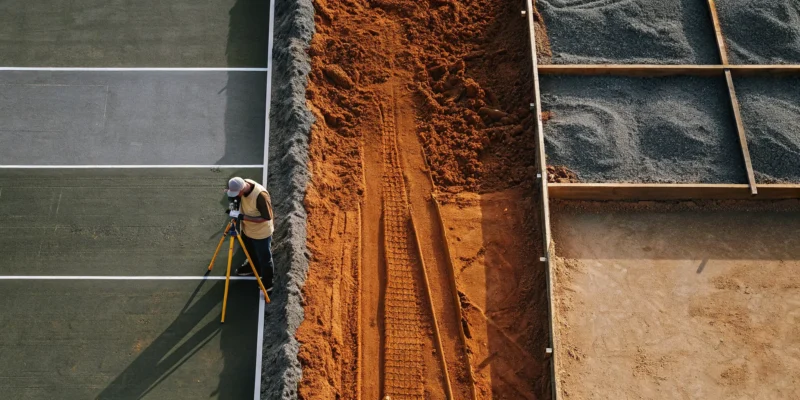
The sound of a pickleball game is becoming as common in Long Island backyards as the sizzle of a barbecue. What was once a niche sport played at community centers has exploded into a mainstream obsession, and homeowners are now bringing the fun home. Adding a court is the ultimate upgrade for family fun, friendly competition, and active outdoor living. But turning that vision into a reality involves more than just pouring a slab of concrete. This guide breaks down the entire process of professional pickleball court construction, from choosing the perfect spot in your yard to selecting the right surface, so you can build a court that’s ready for years of enjoyment.
Key Takeaways
- Plan your court with precision: Before you build, confirm the official 20×44 foot playing area, allow for a larger 30×60 foot total space for safety, and orient the court north-to-south to avoid sun glare.
- Build a strong foundation for longevity: A lasting court requires a proper concrete base with a vapor barrier, a full 28-day curing period, and a professional acrylic surface to achieve the right grip and bounce.
- Budget for the complete project and hire a pro: Remember that the total cost includes site prep, materials, and extras like fencing and lighting; partnering with a specialized builder ensures every detail is handled correctly, from permits to the final net installation.
What Are the Official Pickleball Court Dimensions?
Before you can start enjoying a game of pickleball in your backyard, you need to get the layout just right. Building a court with official dimensions ensures you have an authentic playing experience, whether you’re practicing for a tournament or just having fun with family. The measurements are precise, but they are straightforward to understand when you break them down into the playing area, the total space required, and the specific zones marked by the lines. Getting these details correct from the start is the foundation of a great court.
From the net height to the location of the “kitchen,” every line and measurement serves a purpose in the game. A properly built court not only allows for fair play but also contributes to player safety by providing enough room to move without restriction. We’ll walk through the exact specifications defined by USA Pickleball so you can plan your project with confidence. These are the same dimensions used for professional matches, so you’ll be playing like the pros.
Understanding Court Size and Net Height
The official playing surface of a pickleball court measures 20 feet wide by 44 feet long. This rectangular area covers the space from baseline to baseline and sideline to sideline. The net bisects the court at the middle, creating two equal sides of 22 feet each. When you hire a professional to build your court, they will ensure these measurements are exact.
The net itself has specific height requirements. It should be 36 inches tall at the sidelines and hang 34 inches tall at the center. This slight sag in the middle is an intentional part of the game’s design. Achieving this precise setup is crucial for regulation play, and it’s a detail that our expert teams at Gappsi pay close attention to when installing sports games courts.
Planning for the Total Playing Area
While the court itself is 20 by 44 feet, you need additional space around the perimeter for safe and enjoyable gameplay. This is known as the total playing area. The recommended minimum size for the entire area is 30 feet by 60 feet. This provides a 5-foot runoff on the sides and an 8-foot runoff at the ends, giving players room to chase down shots without running into a fence or landscaping.
For an even better experience, a preferred total playing area of 34 feet by 64 feet is ideal. This larger footprint gives players more freedom of movement and enhances safety, especially during fast-paced games. When planning your backyard court, it’s important to assess your property to see if you have enough level ground to accommodate at least the minimum recommended size.
Key Court Zones: The Kitchen, Service Areas, and Baselines
Within the main 20-by-44-foot rectangle, several lines create distinct zones that are critical to gameplay. The most famous of these is the Non-Volley Zone, or “the kitchen.” This is a 7-foot area on each side of the net, extending from sideline to sideline. Players are not allowed to hit a volley (hitting the ball out of the air) while standing in the kitchen.
The area between the kitchen and the baseline is divided in half by a center line, creating two service areas on each side. These boxes, each measuring 10 feet wide by 15 feet long, are where serves must land. The baselines mark the back of the court, while the sidelines define the side boundaries. Our masonry experts can precisely paint these lines to ensure your court is ready for regulation play.
Where Should You Build Your Pickleball Court?
Picking the perfect spot for your pickleball court is just as important as choosing the right materials. The location affects everything from the quality of your game to the long-term durability of your court. Before you break ground, you need to think about the lay of the land, the path of the sun, and how the court will fit into your backyard ecosystem. A little planning goes a long way in creating a space that’s fun, safe, and built to last. Getting these details right from the start ensures your new court will be a favorite gathering spot for years to come, not a source of constant maintenance headaches. Let’s walk through the key factors to consider when scouting the ideal location on your property.
Finding Level Ground and Ensuring Proper Drainage
The foundation of a great pickleball court is, quite literally, the ground it’s built on. Starting with a level site is non-negotiable. An uneven surface not only makes for unpredictable gameplay but also poses a safety risk. More importantly, a flat base is essential for proper water management. Water is the number one enemy of any outdoor court surface, leading to cracks, puddles, and slippery spots. An ideal location will have good natural drainage, but don’t worry if your yard isn’t perfectly flat. A professional team can perform the necessary site preparation and landscape design to create a stable, level base and install a drainage system that directs water away from your court, protecting your investment.
Orienting Your Court to Avoid Sun Glare
Have you ever tried to return a serve with the sun directly in your eyes? It’s nearly impossible. This is why the orientation of your court is a small detail that makes a huge difference. For outdoor courts, the best practice is to align the court lengthwise from north to south. This simple step ensures that no player has to stare directly into the rising or setting sun during a match. By positioning the court this way, the sun will cross over the court from the side, keeping the glare out of everyone’s line of sight. It’s a pro tip that guarantees a more enjoyable and fair playing experience for everyone, from morning games to late afternoon matches.
Considering Noise, Access, and Amenities
A pickleball court is a hub of activity, and that comes with a bit of noise. The distinct “pop” of the ball hitting the paddle is part of the fun, but it’s something to consider for your family and your neighbors. Placing the court a comfortable distance from homes can help keep the peace. You can also get creative with sound-dampening solutions, like installing attractive fencing and netting or planting a buffer of lush landscaping. Think about access, too. You’ll want a clear, safe path for players and spectators. To complete the experience, consider adding amenities like benches for seating, a water fountain, or even a shaded pavilion or pergola to create a comfortable viewing area.
What Are the Best Materials for a Pickleball Court?
The foundation and surface of your pickleball court are the most critical elements for performance, safety, and longevity. Choosing the right materials from the start ensures your court will play well and last for years with minimal issues. The base provides stability, while the surface dictates ball bounce and player grip. A professional installation considers how these materials work together to create the perfect playing experience. At Gappsi, we specialize in building high-quality sports games courts using materials designed to withstand Long Island’s weather while delivering exceptional playability. Let’s walk through the best options for your court’s foundation and finish.
Concrete or Asphalt: Choosing Your Base
Your court’s base is its structural backbone, and you generally have two choices: concrete or asphalt. While asphalt is often the cheaper option upfront, it’s less durable and can develop cracks over time, especially with temperature fluctuations. This means you’ll likely have to resurface it every few years. Concrete is the most common and recommended choice for a long-lasting court. A standard concrete slab will include saw cuts, which are lines cut into the surface to help manage tension and prevent random cracking. For the highest level of durability, post-tension concrete is the premium option. This method involves installing and tightening a grid of steel cables within the concrete, which fortifies the slab and makes it incredibly strong and crack-resistant. Our masonry experts can help you decide which base is right for your property and budget.
Selecting Acrylic Coatings and Finishes
Once your base is set, the next step is applying the playing surface. For pickleball, 100% acrylic coatings are the industry standard. These specialized paints are designed to be breathable, allowing moisture to escape from the concrete base, which prevents bubbling and peeling. They also provide the ideal texture for consistent ball bounce and excellent player grip. A great benefit of acrylic surfaces is that they are very low-maintenance; outdoor courts are often cleaned sufficiently by wind and rain. The finish includes multiple layers, including resurfacer coats to smooth the base and color coats that create the final look. This multi-layer system ensures a vibrant, durable, and uniform playing field.
Surfacing for Indoor vs. Outdoor Courts
The great news is that the best surfaces for outdoor courts are also recommended for indoor ones. A concrete base with an acrylic finish provides the best performance whether your court is in your backyard or part of an indoor facility. While some indoor spaces might have existing wood or rubber gym floors, these surfaces can be too slippery for the quick, lateral movements in pickleball, increasing the risk of injury. If you are planning an indoor court as part of a larger project, like a finished basement or a custom outbuilding, installing a proper concrete and acrylic surface is the safest bet. This ensures the game plays the same inside and out. Our home remodeling team can integrate a dedicated court into your indoor space.
Balancing Surface Texture for Grip and Safety
Getting the surface texture just right is a delicate balance. If the surface is too smooth, the ball will skip unpredictably, and players won’t have enough traction, leading to slips and falls. On the other hand, if the surface is too gritty or abrasive, it will excessively wear down pickleballs and players’ shoes. It can also be rough on the skin if a player takes a tumble. The goal is to achieve a specific grit that offers the perfect amount of grip for player safety and movement while allowing for a true, consistent ball bounce. This is where professional expertise makes a huge difference, as experienced installers know how to apply the acrylic layers to achieve that perfect, playable texture.
How to Build a Pickleball Court: A Step-by-Step Guide
Building your own pickleball court is an exciting project, but it’s definitely a process with a few important stages. Getting it right from the start is key to creating a court that lasts. By breaking the construction down into clear, manageable steps, you can see how it all comes together. Each phase, from preparing the ground to installing the final net, builds on the one before it to create a durable, professional-quality playing surface. Following this guide will help you understand what it takes to build a court that looks great and provides a safe, fun experience for years to come. When you invest in creating dedicated sports games courts, you’re adding a fantastic feature that brings activity and entertainment right to your Long Island backyard.
Step 1: Prepare the Site
First things first, you have to prepare the ground where your court will be. This means excavating the area and leveling the soil to create a stable, compacted base. A solid foundation is absolutely essential for the long-term health of your court. At this stage, it’s also important to build in a slight slope, usually about 1 degree, so rainwater can run right off instead of pooling on the surface. Proper site preparation and expert landscape design are your best defense against future problems like cracking or sinking, ensuring a great playing surface from the start.
Step 2: Plan for Drainage and Install a Vapor Barrier
Next, you need to protect your court from moisture coming up from the ground. A vapor barrier, which is a heavy-duty plastic sheet, is laid over the prepared soil before the base material goes down. This barrier stops ground moisture from seeping into the concrete and causing damage over time. This step works together with your surface drainage plan to keep the entire area stable and dry. Integrating effective solutions like GravelFix can also help manage water around the court’s perimeter, protecting your investment from water damage.
Step 3: Form and Pour the Concrete Base
With the site prepped, it’s time to pour the foundation. Wooden or metal forms are set up around the perimeter to create the exact shape of the court. Then, concrete is poured into the forms and spread evenly to create a smooth, flat slab. This step requires a high degree of precision, since any imperfections in the concrete will directly affect how the ball bounces. Professional masonry work is critical here to ensure the base is strong, level, and ready for the next stages of construction.
Step 4: Cure the Concrete Surface
Now for the hardest part: waiting. Freshly poured concrete needs time to cure, which is the chemical process where it hardens and gains its full strength. This usually takes about 28 days. While you might be able to walk on it after a few days, you must wait the full curing period before applying any coatings or paint. Rushing this step can lead to a weak surface that’s prone to cracking and peeling down the road. Proper curing is a small investment of patience that pays off with a durable, long-lasting court.
Step 5: Apply Coatings and Paint the Lines
Once the concrete is fully cured, you can add the finishing touches that turn a slab into a real pickleball court. The process starts with sanding the surface to smooth out any minor imperfections, followed by a thorough pressure washing. A primer is then applied to help the acrylic court paint stick properly. Finally, multiple layers of specialized, non-slip paint are applied to create the playing surface, and the official court lines are painted with precision. This is what gives the court its color, texture, and professional appearance.
Step 6: Install the Net, Fencing, and Lights
The final step is installing all the essential equipment. The pickleball net is set up at the center of the court and tightened to the correct height. Fencing is installed around the perimeter to contain the ball and ensure safety during play. It’s a good idea to choose durable, rust-proof fences and netting that can withstand the elements. If you plan to play after sunset, installing proper lighting is also crucial for visibility. With these elements in place, your pickleball court is officially ready for its first match.
Avoid These Common Pickleball Court Construction Mistakes
Building your own pickleball court is an exciting project, but a few missteps can lead to costly repairs and a less-than-perfect playing experience. Getting the details right from the start ensures your court will last for years and play beautifully. When you invest in a project like this, you want it done correctly the first time. Let’s walk through some of the most common construction mistakes so you can be sure to avoid them. A well-built court is a long-term asset for your home, providing endless fun for family and friends. From the foundation to the final coat of paint, every step is crucial. Overlooking a seemingly small detail, like the slope for drainage or the type of surface material, can compromise the entire structure and lead to ongoing maintenance issues. That’s why understanding the process is so important for homeowners. Partnering with experienced builders who understand the nuances of proper construction is the best way to guarantee a professional result and protect your investment for the long haul.
Forgetting the Vapor Barrier
One of the most critical, yet often overlooked, steps is installing a vapor barrier. This is a large plastic sheet that goes down before the base is poured. Its job is to stop moisture from the ground from seeping up into the concrete. Without it, that moisture can cause the concrete to expand and contract, leading to large, unsightly cracks over time. Some mass-produced court kits skip this step to cut costs, but it’s a shortcut that can seriously compromise the court’s foundation and longevity. Proper masonry work always accounts for ground moisture to ensure a stable and durable final product.
Picking the Wrong Surface Material
The surface you choose has a huge impact on both playability and durability. It’s tempting to go with a cheaper option, but inferior materials just don’t hold up to the constant foot traffic and weather exposure. Low-quality acrylics can crack, fade, and become uneven, creating a poor and potentially unsafe playing surface. Investing in high-quality materials for your sports game courts from the beginning prevents these issues. A premium surface provides the right amount of grip and ball bounce, ensuring a fantastic game every time and saving you from expensive resurfacing projects down the road.
Measuring the Court Dimensions Incorrectly
Precision is everything when it comes to court layout. A regulation pickleball court is 20 feet wide and 44 feet long, but that’s just the in-bounds area. For comfortable and safe play, the total recommended playing surface is at least 30 feet by 60 feet. This extra space is essential for players to safely return deep shots or move around the court without feeling cramped. Getting the measurements wrong can make the court feel tight and limit gameplay. Accurate planning is a cornerstone of any successful home remodeling project, and building a court is no different.
Neglecting Proper Drainage and Slope
No one wants to wait days for their court to dry after it rains. Proper drainage is essential for keeping your court playable and protecting its surface. A common mistake is building a perfectly flat court, which allows water to pool. Instead, the court should be constructed with a very slight slope, typically around 1 degree, to guide rainwater off the surface and into a designated drainage area. This small detail makes a huge difference in maintaining the court’s integrity and usability. Thoughtful landscape design always incorporates effective water management to protect your outdoor investments.
Not Letting the Concrete Cure Properly
After the concrete is poured, the waiting game begins. It’s tough to be patient when your new court is right there, but concrete needs about 28 days to fully cure and reach its maximum strength. Rushing this process is a major mistake. Applying paint, sealants, or other surface treatments before the concrete is fully cured can trap moisture, leading to bubbling, peeling, and a weak foundation. Allowing the concrete to cure properly is a non-negotiable step for a durable, long-lasting court. It ensures that any future restoration or sealing treatments will adhere correctly and perform as expected.
How Much Does It Cost to Build a Pickleball Court?
One of the first questions everyone asks is, “What’s the final bill going to look like?” The truth is, the cost of building a pickleball court can vary quite a bit. Think of it like building a custom home, just on a smaller scale. The final price depends on the materials you choose, the condition of your site, and how many extra features you want to include. A basic court will cost less than one with professional lighting, spectator seating, and custom colors.
Building a pickleball court is an investment in your home and your family’s fun. To give you a clearer idea of what to expect, we can break down the costs into a few key categories. From the concrete foundation to the final net and fence, each element has its own price tag. Understanding these components will help you create a realistic budget for your dream court.
Breaking Down Base and Slab Costs
The foundation, or slab, is the most critical part of your court and usually the largest single expense. A solid base ensures a level playing surface that will last for years. The cost for a professionally installed slab can range from $10,000 to $30,000, depending on the material. You generally have three options. Asphalt is the most affordable but is less durable and may require more maintenance. Standard concrete is the most popular choice, offering a great balance of durability and cost. For the ultimate in longevity, post-tension concrete includes a grid of steel cables that prevent cracking, saving you money on future repairs. Our expert masonry team can help you decide which option is best for your property.
Factoring in Surface Coatings and Lines
Once your slab is cured, it’s time for the finishing touches that make it a real pickleball court. This involves applying a specialized acrylic surface and painting the lines. While some people try to do this themselves, hiring a professional is the best way to get that signature gritty texture and perfectly straight lines. A professional surfacing job typically costs between $3,000 and $6,000. This coating isn’t just for looks; it provides the ideal grip for player safety and ensures a consistent ball bounce. We use high-quality, durable court paints to create a playing surface that stands up to intense games and Long Island weather. This is a key part of building high-performance Sports Games Courts.
Budgeting for Fencing, Nets, and Lighting
Beyond the court surface, you’ll need to budget for the essential equipment that makes the game possible. Fencing is a must to keep the ball in play and prevent you from constantly chasing it down the yard. A rust-proof chain-link or vinyl fence is a smart investment. A quality net system is also crucial for proper gameplay. If you plan to play in the evening, professional lighting is a game-changer. Good lighting should be bright and evenly distributed to minimize glare and shadows, ensuring you can track the ball easily. These elements are vital for creating a complete and functional court.
How Extra Features Impact Your Budget
If you want to create a truly premium backyard destination, there are plenty of extra features to consider. Adding benches for players, a shaded seating area with a beautiful pavilion or pergola, or a water fountain can transform your court into a complete entertainment space. You can also customize your court with unique color combinations or logos. If you have an old, unused tennis court, you have a great head start. Resurfacing an existing court is much more affordable than building a new one from the ground up. Our restoration and sealing services can bring an old surface back to life, ready for years of pickleball action.
What Factors Influence the Cost of a Pickleball Court?
When you start planning your dream pickleball court, it’s helpful to understand what goes into the final price. The total cost is more than just the playing surface; it’s a combination of your property’s unique conditions, the court’s size, the materials you choose, and any extra features you add. Think of it like building any other part of your home. The choices you make at each step will shape your budget.
The biggest variables include site preparation, the type of base you install, and the quality of the surface finish. Do you need to level a sloped yard? Do you prefer a classic concrete base or something more advanced? These decisions play a huge role. At Gappsi, we guide you through every option to create a court that fits your vision and budget. We manage the entire project, from initial design to the final net installation, so you can focus on practicing your dinks and serves. Our expertise in building custom synthetic turf and Sports Games Courts ensures your project is handled professionally from start to finish.
How Site Conditions and Court Size Change the Price
The first two factors that affect your budget are the location and the size of your court. Before any construction begins, we need to prepare the site. If your yard is sloped, uneven, or needs trees cleared, this initial excavation and grading work will add to the cost. Proper site prep is critical for ensuring your court has the correct drainage and a stable foundation for years to come.
While a regulation pickleball court is 20 feet by 44 feet, the total playing area needs to be larger for safety and comfortable play. The minimum recommended size is 30 by 60 feet, but many homeowners prefer the gold standard of 34 by 64 feet for a more spacious feel. A larger footprint requires more materials and labor for the base, surfacing, and fencing, which naturally increases the overall project cost.
The Impact of Material and Surface Quality
The materials you choose for your court’s base and surface are another major cost factor. The base, or slab, is typically made of either asphalt or concrete. While asphalt is often a less expensive option upfront, it may require more maintenance over time. Standard concrete is a popular and durable choice for residential courts. For the highest level of durability, post-tensioned concrete offers superior strength and crack resistance, making it a premium investment.
The playing surface itself consists of acrylic layers applied over the base. These layers provide the court’s color, texture, and bounce. The number of layers and the quality of the acrylic system will influence the final price. As experts in masonry and hardscaping, we can help you select the best combination of materials for Long Island’s climate and your expected level of play.
Understanding Labor and Permitting Costs
Building a pickleball court is a specialized skill that goes beyond a simple concrete pour. It requires a team with expertise in achieving the precise slope for drainage, applying multi-layer surface coatings, and painting crisp, accurate lines. The cost of this skilled labor is a key part of your budget. Hiring an experienced builder ensures the job is done right and your court performs perfectly.
Additionally, most construction projects on Long Island, including pickleball courts, require permits from your local town or village. The process of obtaining these permits involves submitting plans and ensuring the project meets all local codes. This step comes with its own fees and administrative time. When you work with a full-service company like Gappsi, we handle the entire permitting process as part of our comprehensive home remodeling and construction services, giving you one less thing to worry about.
Designing for Safety and Great Gameplay
A well-built pickleball court is more than just a slab of concrete with lines painted on it. The real magic lies in the details that make every game safe, fair, and incredibly fun. When you invest in a backyard court, you want a space that not only meets official standards but also provides a professional-quality playing experience. This means thinking carefully about everything that surrounds the playing area, from the fence that keeps the ball in play to the surface under your feet and the lights that let you play after dark.
Thoughtful design choices in fencing, net installation, surfacing, and lighting work together to create the ultimate pickleball environment. A secure fence prevents you from chasing stray balls down the block, while a properly installed net ensures every game is consistent. The right surface gives you the grip you need for quick movements, and good lighting lets the fun continue long after the sun goes down. Getting these elements right is the difference between a court you occasionally use and one that becomes the centerpiece of your outdoor entertainment. At Gappsi, we focus on these critical elements to build beautiful and functional Sports Games Courts that your family and friends will enjoy for years to come.
Choosing the Right Fence for Safety and Play
The right fence does more than just set a boundary, it’s a key safety feature that keeps the action contained. A good pickleball court fence should be smooth and rust-proof to prevent scrapes and injuries during a fast-paced game. While there are many options, chain link is a popular and effective choice. To keep the pickleball from squeezing through, it’s best to use a small mesh size, like 45mm or 55mm links. This ensures the ball stays in the court, so you can spend more time playing and less time retrieving. Gappsi offers a variety of fencing and netting solutions that provide security without sacrificing the look of your backyard.
Installing Your Net Correctly
For a game to be fair and fun, the net needs to be installed to precise, regulation standards. According to the official USA Pickleball guidelines, the net posts should be placed 22 feet apart from center to center. The net itself should hang 36 inches high at the sidelines and dip to 34 inches in the middle. These specific measurements might seem minor, but they are critical for authentic gameplay and ensure that every shot is judged fairly. Getting the net height and tension just right creates a consistent playing experience, whether you’re practicing your dinks or hosting a neighborhood tournament. It’s a small detail that makes a huge difference in the quality of every match.
Ensuring a Safe, Non-Slip Surface
The surface of your pickleball court is where the action happens, and it directly affects both player safety and the quality of the game. While a standard concrete or asphalt base provides a solid foundation, the finish is what truly matters. We recommend using 100% acrylic coatings, which are designed specifically for athletic surfaces. These coatings create the ideal texture, offering enough grip to prevent slips and falls during quick lateral movements while also allowing for a true and consistent ball bounce. A properly finished surface helps reduce stress on your joints and gives you the confidence to play your best. Regular maintenance, like the services offered by our restoration and sealing team, can keep your court in top condition.
Planning Your Lighting for Night Games
Why let the sunset end a great game? With the right lighting, your pickleball court can be ready for action day or night. Because pickleball is such a fast-moving sport, quality lighting is essential for visibility and safety. The goal is to achieve even light distribution across the entire court, with minimal glare that won’t interfere with your vision. Modern LED lighting is the perfect solution. LEDs last for tens of thousands of hours, are more energy-efficient than traditional bulbs, and require very little maintenance. They also provide excellent color rendering, making it easy to track the ball as it flies over the net, so you can keep the competition going well into the evening.
How to Maintain Your Pickleball Court
You’ve built your dream pickleball court, and now it’s time to play. The good news is that a professionally installed court is designed for durability and requires minimal upkeep. With just a little routine care, you can keep your court in top condition for years of fun. Proper maintenance protects your investment, ensures a safe playing surface, and keeps your court looking its best. Here’s a simple breakdown of what you need to do to care for your court through the seasons.
Simple Tips for Routine Cleaning
Keeping your pickleball court clean is easier than you might think. For the most part, a leaf blower is your best friend for quickly clearing away leaves, dirt, and other debris. If you notice scuff marks or spills, you can spot-clean them with a soft-bristle broom and a simple mix of mild detergent and water. For a deeper clean, a pressure washer on a low setting can work wonders, but be gentle. Using too much pressure or a stiff brush can damage the acrylic surface. If you’d rather leave it to the pros, our team offers professional cleaning and sealing services to restore your court’s pristine look without any risk.
Managing Water and Drainage
Proper drainage is the unsung hero of a long-lasting pickleball court. When we build a court, we grade the site with a slight slope, usually around one degree, so that rainwater naturally runs off the surface. This prevents puddles from forming, which can damage the acrylic coating and create slippery, unsafe spots. Your main job is to simply keep an eye on the perimeter of the court. Make sure any surrounding drainage channels are clear of leaves or debris so water has a clear path to flow away. This simple step is key to preventing water-related wear and tear and protecting the court’s foundation. It’s a perfect example of how thoughtful court design makes long-term care a breeze.
Knowing When to Reseal or Resurface
Even the best-built courts need a refresh eventually. Think of it like painting your house; over time, the elements take a toll. You should plan on resurfacing your pickleball court every four to eight years. Key signs that it’s time include faded lines, visible cracks, or a surface that feels slick and has lost its grip. Resurfacing does more than just make the court look new. It restores the textured, non-slip finish essential for safe play and adds a protective layer that shields the underlying base from damage. When you start to notice these signs of wear, it’s time to call in a professional to give your sports games courts a new lease on life and get it ready for many more games.
Why Work With a Professional Pickleball Court Builder on Long Island?
You might be tempted to tackle your pickleball court as a DIY project or hand it off to a general contractor. While that can seem like a way to save money, building a court is a highly specialized task. It’s not the same as pouring a patio. Getting the details wrong, like choosing a poor site or using incorrect dimensions, can lead to expensive mistakes that are difficult to fix later. A professional builder brings specific expertise in court construction, ensuring your project is done right the first time. They understand the nuances of creating a perfect playing surface, which is key to protecting your investment and enjoying your court for years.
Working with a professional also means you get expert guidance on materials and local requirements. A seasoned builder will help you select the right base and surface materials that can withstand Long Island’s weather, from hot summers to freezing winters. They also handle the critical, and often overlooked, aspects of the build. A professional ensures your court meets all necessary regulations, including proper drainage and surface preparation, which USA Pickleball highlights as essential for a long-lasting court. This isn’t just about following rules; it’s about building a durable and safe playing area. Gappsi’s experience with synthetic turf and sports games courts means we know exactly what it takes to build a court that performs beautifully in our local climate.
Beyond the court itself, a professional builder manages the entire project from start to finish. This includes everything from initial site planning and design to coordinating the final touches. Instead of you having to juggle multiple contractors for fencing, lighting, and landscaping, a full-service company handles it all. This integrated approach ensures every element of your new backyard space works together seamlessly. For example, we can incorporate beautiful masonry retaining walls or landscape features to make your pickleball court a true centerpiece of your property, not just an add-on. This holistic project management saves you time and ensures a cohesive, high-quality result.
Related Articles
- Pickleball Court Construction & Conversion Experts | Gappsi Inc
- Pickleball Courts Archives – Gappsi Group
- Pickleball Archives – Gappsi Group
Frequently Asked Questions
How long does it take to build a pickleball court from start to finish? The entire process typically takes about five to six weeks, but the biggest factor is patience. The actual construction, including site prep and pouring the concrete, is relatively quick. The longest part of the timeline is waiting for the concrete to cure properly, which takes about 28 days. This curing period is essential for the court’s long-term durability, so it’s a step you definitely can’t rush.
Can I save money by converting my old tennis court into a pickleball court? Absolutely. If you have an existing tennis court, you have a significant head start since the base is already in place. The process usually involves repairing any cracks, thoroughly cleaning the surface, and then applying new acrylic coatings and painting the lines for pickleball. It’s a much more cost-effective option than starting from scratch and a great way to bring new life to an underused space.
Do I really need all that extra space around the court? Yes, that extra space, known as the runoff area, is crucial for safety and enjoyable gameplay. While the official playing lines create a 20 by 44-foot rectangle, the recommended total area of at least 30 by 60 feet gives players room to safely chase down shots without running into a fence or landscaping. In a fast-paced game, having that buffer zone makes a huge difference and helps prevent injuries.
What’s the single biggest mistake to avoid when building a court? The most costly mistakes happen at the foundation stage. Cutting corners on the base by skipping the vapor barrier, failing to plan for proper drainage, or not letting the concrete cure for the full 28 days can lead to major problems like cracking and moisture damage. These issues are very difficult and expensive to fix later on, which is why getting the foundation right from the very beginning is so important.
How often will I need to resurface my court? Even with the best materials, an outdoor court surface will eventually show signs of wear from weather and play. You should plan to resurface your court every four to eight years. You’ll know it’s time when you see significant color fading, small cracks appearing, or if the surface starts to feel slick and loses its grip. Resurfacing restores the court’s safety, playability, and appearance.