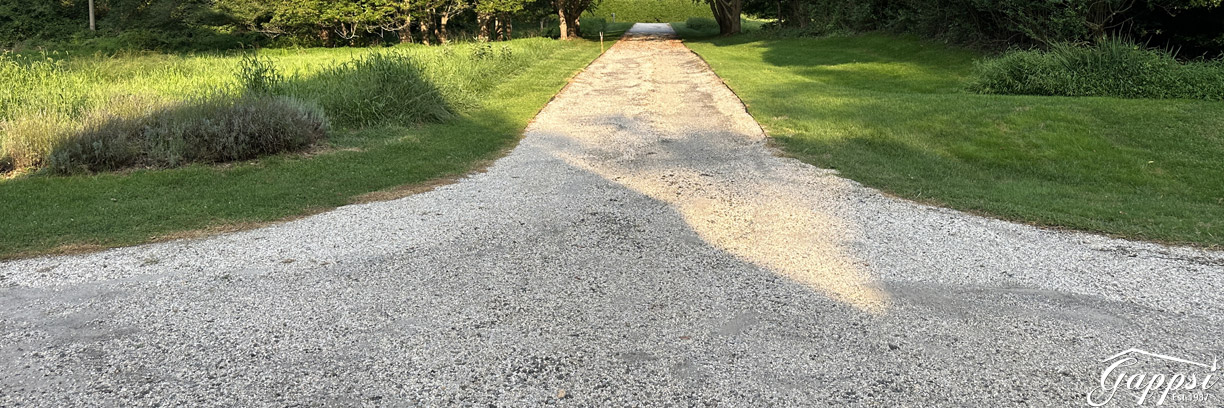
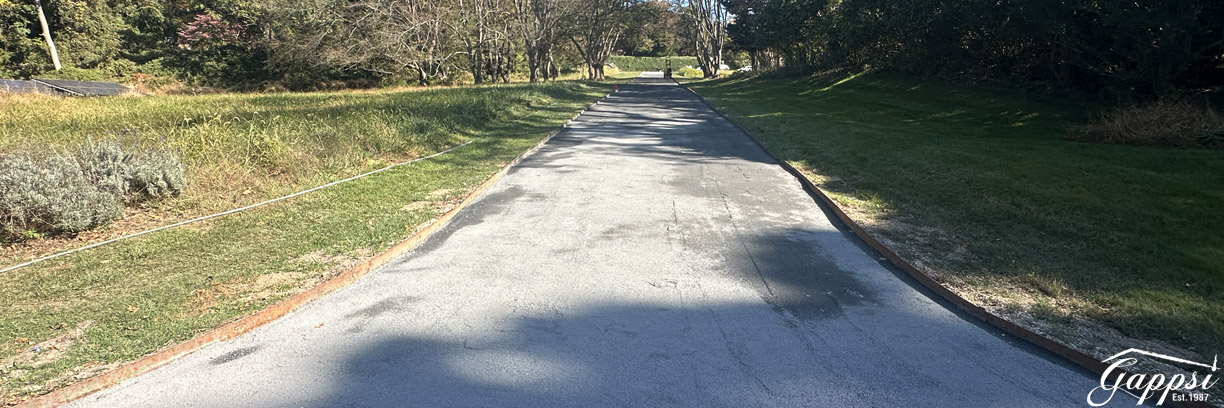
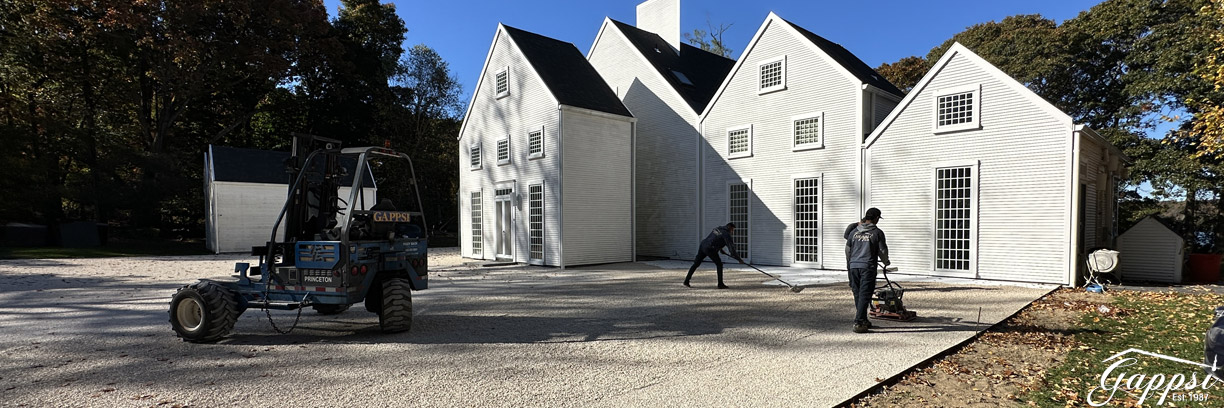
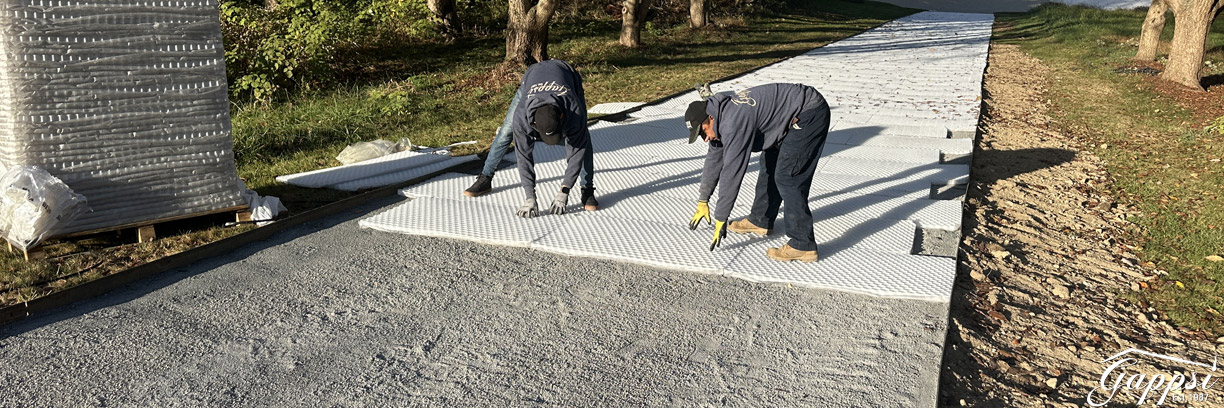
Cost of Brick Driveway Paving in Rockville Centre

A new driveway is one of the most impactful upgrades you can make to your home’s exterior. It’s much more than just a place to park; it’s a statement piece that sets the tone for your entire property and can significantly increase its value. Whether you’re drawn to the classic, structured look of brick driveway paving in Rockville Centre or the durable, low-maintenance finish of porcelain, the right choice enhances your home’s curb appeal. This article explores the top material options, helping you understand the costs, benefits, and aesthetic possibilities for creating a welcoming entrance you’ll love for years.

https://youtu.be/TrHbundqY3k

Choosing the Right Material for Your Rockville Centre Driveway

Your driveway is one of the first things people see, so choosing the right material is a big decision. It’s not just about looks; it’s about durability, maintenance, and how it complements your home’s style. From the classic charm of brick to the sleek finish of porcelain, each option has its own set of benefits. Think about your daily life, the Long Island weather, and your long-term budget. Do you want something that makes a bold statement or a surface that’s practical and stands the test of time? Let’s walk through the most popular choices to help you find the perfect fit for your Rockville Centre home.

Brick Pavers: Timeless Appeal and Design Flexibility

There’s a reason brick driveways have been a classic choice for so long. They bring a certain charm and structure that can instantly add value to your home. The real fun with brick is in the design flexibility. You can create a look that’s uniquely yours, with patterns like the popular herringbone and basket weave, or even a completely custom layout. Beyond their good looks, brick pavers are practical. They offer better water drainage than a solid slab of concrete. Plus, if a single brick ever gets damaged, it’s simple to replace just that one piece, which keeps your driveway looking great for years without a major overhaul.

Porcelain Pavers: A Modern, Low-Maintenance Choice

If you’re looking for a modern aesthetic combined with incredible durability, porcelain pavers are an excellent choice. They are known for being tough and highly resistant to stains, making them a fantastic low-maintenance option for busy homeowners. Because they come in a wide variety of colors and finishes, you can easily find a style that complements your home’s design. A key benefit, especially in our climate, is their non-porous surface. This means they are less likely to absorb water, which significantly reduces the risk of cracking during those cold Long Island winters. It’s a smart, stylish choice that’s built to last.

Why Gappsi recommends porcelain pavers

Here at Gappsi, we often recommend porcelain pavers to our clients because they represent a smart long-term investment. Their longevity and ease of maintenance mean you spend less time worrying about upkeep and more time enjoying your home. We also appreciate that they are an eco-friendly option. Made from natural materials, porcelain pavers can be recycled, which aligns with a more sustainable approach to home improvement. For homeowners who want a blend of modern style, durability, and peace of mind, porcelain is tough to beat.

Concrete Driveways: Strength and Longevity

When it comes to sheer strength and longevity, concrete is a heavyweight champion. A properly installed and maintained concrete driveway can last for an incredibly long time—some even for over 100 years. While you might picture a plain gray slab, modern concrete offers much more. It can be designed with many different patterns, textures, and finishes to create a custom look that suits your property. Whether you prefer a smooth, modern finish or a stamped pattern that mimics stone or brick, concrete provides a solid and durable foundation that will serve your home for decades to come.

Asphalt Driveways: A Practical and Affordable Option

For many homeowners, asphalt is the go-to choice for a practical and budget-friendly driveway. It’s one of the most affordable materials, with installation costs typically ranging from $5 to $12 or more per square foot. To put that in perspective, a common 20-foot by 20-foot asphalt driveway might cost between $2,000 and $4,800. Asphalt is also relatively quick to install and can be driven on soon after. While it may require more maintenance over time, like sealing every few years, its initial low cost makes it an attractive and functional option for many Rockville Centre homes.

Breaking Down Driveway Paving Costs

Understanding the costs involved in a new driveway is key to planning your project without any surprises. The final price tag is more than just the cost of the materials; it includes labor, site preparation, and any extra features you might want. Budgeting effectively starts with knowing what to expect. From the price per square foot of different materials to the factors that can cause costs to vary, having a clear picture of the financial side of things will help you make informed decisions and find a solution that fits both your vision and your wallet. Let’s get into the numbers.

Average Costs for Popular Driveway Materials

The cost of a new driveway can vary quite a bit based on the material you choose. On average, paving a standard 30-square-meter driveway (large enough for two cars) can fall somewhere between $6,000 and $6,700. If you’re leaning toward pavers, you can expect different price points. For example, classic brick pavers typically cost around $70 to $90 per square meter. These figures give you a general baseline, but remember that your specific project details will ultimately determine the final cost. It’s always a good idea to get detailed quotes for the materials you’re most interested in.

Factors That Influence Your Project’s Price

Several key factors will influence the final price of your driveway project. The material you choose is the most significant, but the size of the driveway is just as important—a larger area will naturally require more materials and labor. The condition of the existing ground also plays a role; for instance, a driveway on a steep slope may require more extensive prep work, adding to the cost. Because of these variables, it’s crucial to get at least three price quotes from different local paving experts. This allows you to compare not just the price but also the scope of work each contractor includes.

Understanding Labor and Material Expenses

When you receive a quote for your driveway, it will be broken down into two main categories: labor and materials. Material costs are fairly straightforward, but labor costs can vary significantly. The complexity of the installation is a major factor here. For example, laying an intricate paver pattern will require more time and skill than pouring a simple concrete slab. It’s essential to factor in both of these expenses when you plan your budget. A reputable contractor will provide a clear breakdown so you know exactly what you’re paying for.

Planning for Extras: Removal, Drainage, and More

Beyond the basic installation, there are often additional costs to consider. If you have an old driveway that needs to be removed, that will be an extra line item on your quote. Proper drainage is another critical element that might add to the cost but will save you from expensive water damage down the road. You might also need to account for any landscaping work required to blend the new driveway seamlessly with your yard. Thinking about these potential extras ahead of time will help you create a more realistic and comprehensive budget for your project.

What to Expect During Driveway Installation

Once you’ve chosen your material and contractor, it’s time for the installation. Knowing what to expect can make the process feel much smoother. A professional installation is a multi-step process that starts long before the first paver is laid. It involves careful planning, site preparation, and attention to detail to ensure your new driveway not only looks fantastic but also performs well for years. From preparing the base to managing water flow, each step is crucial for a successful outcome. Let’s look at what a typical driveway installation entails so you can feel confident as your project gets underway.

The Critical First Step: Site and Base Preparation

A beautiful, long-lasting driveway starts with what’s underneath. The first and most critical step is preparing the site and building a solid base. A good contractor will begin with a detailed design and layout plan to ensure the installation goes smoothly and the final product looks and functions perfectly. They will then excavate the area and prepare a strong base, typically using layers of gravel and sand. This foundation is essential for the driveway’s performance, providing stability and ensuring proper drainage to prevent shifting or sinking over time. Rushing this step is a recipe for problems later on.

Managing Water with Proper Drainage Solutions

Water is one of the biggest enemies of any paved surface. That’s why managing drainage is a non-negotiable part of a quality driveway installation. Proper drainage is crucial to prevent water from pooling on the surface or seeping into the base, which can lead to cracks, heaving, and other damage. A skilled contractor will assess the slope of your property and incorporate effective drainage solutions, such as channel drains or a slight grade, during the installation. Investing in good drainage from the start is one of the best ways to protect your driveway and save yourself from costly repairs in the future.

Can You Install New Pavers Over an Old Driveway?

It’s a common question: can you save time and money by installing new pavers directly over an old concrete or asphalt driveway? The answer is sometimes, but it’s not always the best idea. In some cases, if the existing driveway is structurally sound and free of major cracks, an overlay is possible. However, a thorough professional assessment is necessary to ensure the old surface can provide a stable base. At Gappsi, we can evaluate your existing driveway to determine if an overlay is a viable option or if a full removal and replacement is the better long-term solution.

Driveway Lifespan and Long-Term Maintenance

A new driveway is a significant investment, so you’ll want to know how long it will last and what it takes to keep it looking its best. The lifespan of your driveway depends heavily on the material you choose, the quality of the installation, and how well you maintain it over the years. Some materials are naturally more durable and require less upkeep than others. Understanding the long-term commitment before you make your final decision will help you choose a driveway that fits your lifestyle and ensures you get the most value from your investment for years to come.

How Long Will Your New Driveway Last?

The durability of your new driveway varies significantly by material. A properly installed brick driveway can last a solid 25 to 50 years, offering decades of reliable service and curb appeal. If you opt for high-quality pavers, you can expect an even longer lifespan, often 50 years or more. These materials are designed to withstand traffic and the elements, making them a lasting investment. Of course, reaching these impressive lifespans depends on a quality installation and consistent maintenance, but starting with a durable material gives you a major head start on longevity.

Simple Maintenance for Each Driveway Type

Every driveway needs a little TLC to stay in top shape. Regular maintenance, such as periodic cleaning and sealing, can significantly extend the life of your driveway and keep it looking new. The specific care required will depend on the material. For instance, an asphalt driveway benefits from resealing every few years, while paver driveways may need to have sand swept into the joints occasionally. It’s always best to follow the maintenance recommendations for your specific material. If you need help, services like Gappsi’s restoration and sealing can handle the upkeep for you.

More Than Just a Driveway: The Added Benefits

A new driveway does more than just give you a place to park your car. It’s a key feature of your home’s exterior that can have a surprisingly big impact. A well-designed and professionally installed driveway can dramatically improve your home’s curb appeal, making a great first impression on guests and potential buyers alike. It also plays a role in safety, providing a smooth and stable surface for walking and driving. When you invest in a new driveway, you’re not just improving functionality—you’re adding value and enhancing the overall quality of your home.

Enhancing Curb Appeal and Home Value

Never underestimate the power of a great driveway. As one of the most prominent features of your home’s exterior, it has a major effect on curb appeal. A cracked, stained, or outdated driveway can detract from an otherwise beautiful home, while a fresh, stylish one can tie the whole look together. A well-installed paver driveway, in particular, can make your home much more attractive to potential buyers and can actually increase its market worth. It’s an upgrade that offers both immediate aesthetic enjoyment and a solid return on investment when it’s time to sell.

A Safer Surface for Your Family

Beyond aesthetics, the right driveway material can also improve the safety of your property. Uneven surfaces, cracks, and potholes can be tripping hazards, especially for children and older adults. Choosing a durable, well-installed material creates a smooth, reliable surface for everyone. Additionally, many modern materials, like certain types of pavers, can be selected for their non-slip properties. This provides better traction for both walking and driving, offering extra peace of mind for your family and guests, particularly during wet or icy weather conditions here on Long Island.

Finding the Right Paving Contractor on Long Island

Choosing the right material is only half the battle; finding the right contractor to install it is just as important. The quality of the installation will determine how your driveway looks, performs, and lasts. On Long Island, you have many options, so it’s important to do your homework to find a reputable, experienced, and reliable professional. A great contractor will guide you through the process, answer your questions, and deliver a final product that meets your expectations. Taking the time to vet your options will ensure your project is in good hands from start to finish.

The Importance of Comparing Quotes

When you’re ready to hire a contractor, don’t just go with the first one you talk to. It’s a standard best practice to get at least three quotes from different companies. This isn’t just about finding the lowest price. Comparing quotes allows you to see how different contractors approach the project, what materials they recommend, and what’s included in their scope of work. A detailed quote should break down the costs for labor, materials, and any additional services. This process helps you find a fair price and a contractor who is thorough and transparent.

Checking Credentials, References, and Warranties

Before you hire anyone, do a little digging. Ensure that any contractor you consider has the necessary licenses and insurance to work in Rockville Centre. This protects you in case of accidents or property damage. Ask for references from previous clients and, if possible, go see their work in person. Positive reviews and a portfolio of quality projects are great signs; you can often see examples of a company’s work on their website or social media. Also, be sure to ask about warranties. A reputable contractor will stand behind their work with a warranty that covers both materials and labor.

Key Questions to Ask Before Signing a Contract

When you’re meeting with potential contractors, come prepared with a list of questions. Ask about the specific materials they recommend for your project and why. Inquire about their installation process from start to finish, including how they handle site preparation and drainage. It’s also crucial to ask about the project timeline and what warranties they offer on their work. A professional contractor will be happy to answer all your questions in detail. Clear communication from the beginning is key to a successful project and a positive working relationship.

View Gappsi’s YouTube Channel for Videos on Porcelain Driveway and Walkway Pavers Supplied & Installed in Rockville Center on Long Island, NY

Are you looking to upgrade your outdoor space and create a stunning hardscape that combines style, durability, and versatility? Porcelain pavers are the perfect solution. Due to their numerous benefits and striking aesthetics, porcelain pavers are gaining popularity in outdoor design.

Here at Gappsi, we genuinely care about your project. Regardless if you’re interested in porcelain pavers for your driveway or patio, we want you to fall in love with them. We take the time to understand your project goals and aesthetic preferences. Our team never steers you wrong; we want you to trust us to help you make the right choice.

Why Porcelain Pavers Are the Perfect Solution

While beautiful, natural stone has steadily risen in cost, making it nearly impossible to use to update your driveway, patio, pool deck, or other outdoor space. Porcelain pavers are the perfect solution.

porcelain-driveway-and-walkway-pavers1Due to their composition, porcelain pavers can match classic natural stone options and exotic wood paneling in appearance and texture. Today, we can offer you a robust collection of wood and natural stone that guarantees your home will benefit from our porcelain driveway, patio, and pool deck pavers.

Whereas traditional paver materials such as concrete have long since been one of the more sought-after materials due to their cost and general accessibility, porcelain pavers supersede it in every way. Whether it be driveway porcelain pavers or porcelain pavers for pool decks and patios, Gappsi pavers offer a wealth of benefits including, but not limited to:

  • Tremendous Durability
  • Resistance To Stains, Fading, Slipping, & Moisture
  • Little To No Maintenance
  • Unbeatable Aesthetic Enhancements

Porcelain pavers offer an attractive alternative to clay brick and concrete paving. The pavers will need to be laid over a prepared concrete base, but one of the significant advantages is that you’ll have an unmatched range of colors. Plus, porcelain pavers are exceptionally resistant to staining, even from oil and grease, and are not subject to freeze/thaw cracking in cold climates, like concrete pavers.

porcelain-driveway-and-walkway-pavers2Why Choose Porcelain Pavers from the Gappsi Porcelain and Natural Stone Collection

Porcelain pavers are popular for outdoor paving because they offer many advantages over other materials, such as concrete or natural stone. They are durable and require far less maintenance while resisting weather-related damage and aesthetic wear. Their superior lifespan and minimal maintenance make them an innovative, cost-effective choice for residential and commercial applications.

  • Durability: Porcelain pavers withstand freeze-thaw cycles, fire, and thermal shock. They can also support more than 2,200 pounds per slab. They are extremely durable and resistant to cracks.
  • Low maintenance: Porcelain pavers are non-porous and require little maintenance. They don’t need to be sealed and can be cleaned with a damp cloth.
  • Stain resistant: Porcelain pavers are resistant to stains, mold, and mildew. They also don’t show efflorescence, a salt coating that can form on porous materials.
  • UV resistant: Porcelain pavers are UV resistant and won’t fade over time.
  • Cost: Porcelain pavers can be cheaper than natural stone or wood.
  • Variety: Porcelain pavers come in many colors, finishes, and textures. Thanks to their many different colors, patterns, and finishes, porcelain pavers offer a wide variety of design options. Depending on your preferences, they can be used to create an elegant, modern look or a rustic, natural feel.
  • Slip-resistant: Porcelain pavers can have a slip-resistant surface, making them ideal for pool decks and walkways.
  • Heat-resistant: Porcelain pavers are heat resistant and do not get hot in the sun.
  • Versatile: Porcelain pavers are a good solution for overlay applications.
  • Environmental Impact: If you want to reduce your footprints, opt for porcelain pavers. They are fully recyclable and have minimal environmental impact. With porcelain, you can contribute to creating an environmentally friendly outdoor space.

porcelain-driveway-and-walkway-pavers6Porcelain Driveway and Walkway Pavers Supplied & Installed | Long Island, NY

For this project, we are redesigning the driveway and front walkway. We replaced the driveway with porcelain pavers in sizes 8×8, 4×8, and 4×4. The porcelain pavers are finished to look like an old porphyry stone.  Porphyry stones are desirable for their durability, extreme pressure and chemical attack resistance, non-slip properties, and color variety. They are considered an extrusive equivalent to Granite and are among the safest building surfaces.

The new porcelain pavers will look very nice with this old-style home. It will be one of the few porcelain paver driveways installed on Long Island, NY, and the finished product will be very beautiful and impressive.

We utilized porcelain pavers that were two inches thick and porphyry in color. This porcelain has a rustic finish resembling a natural stone and is in three different size combinations: 8×8, 4×4, and 4×8, all two inches thick.

porcelain-driveway-and-walkway-pavers8Belgian Natural Stone

We utilized Belgian pavers selected from the Gappsi Natural Stone Collection for the border. The Belgian pavers are grayish limestone split-faced and tumbled. They are rich silver, and the borders are many shades of gray. We also outlined the edges of the steps and the risers. This stone combination fits perfectly with the house’s style and color.

This is the latest porcelain driveway paver installation supplied and installed by Gappsi in Rockville Center, Long Island, NY.

Whether you can visit our porcelain paver showrooms in person or tour our virtual showroom, you’ll immediately see what separates us from other porcelain paver suppliers: we’re here to make a difference. Gappsi products are designed to make an impact both in their production and application. We strive to provide you with a wealth of knowledge so you can be well-informed in your decision and be happy with your new home exterior for decades to come. If you’re interested in porcelain pavers for your home, look no further than Gappsi.

SCHEDULE A MEETING TODAY WITH GAPPSI
porcelain-driveway-and-walkway-pavers3

Frequently Asked Questions

Which driveway material holds up best against Long Island’s freeze-thaw cycles? Porcelain pavers are a standout choice for our climate. Because they are non-porous, they don’t absorb water, which is the main culprit for cracking when temperatures drop and ice forms. While brick and concrete can also be very durable, their performance through harsh winters heavily depends on a flawless installation with excellent drainage. Porcelain simply has a natural advantage against moisture-related damage.

I’m trying to balance my budget. Is the cheapest material upfront always the most affordable choice in the long run? Not usually. While asphalt has a lower initial installation cost, it requires more maintenance over its lifespan, like resealing every few years, to prevent cracks and wear. Materials like brick or porcelain pavers have a higher upfront cost, but they can last for 50 years or more with very little upkeep. If a single paver gets damaged, you only have to replace that one piece, which is a simple and inexpensive fix compared to resurfacing an entire driveway.

How long will my property be a construction zone during a driveway installation? The timeline really depends on the size of your driveway, the material you choose, and the amount of prep work needed. If we’re removing an old driveway first, that adds time. Generally, you can expect the project to last from a few days to a little over a week. A professional contractor will give you a clear schedule so you know exactly what to expect and can plan accordingly.

My current driveway has a lot of cracks. Can it be repaired, or do I need a full replacement? It depends on the severity and cause of the cracks. Minor surface cracks can often be repaired, but widespread, deep cracking usually points to a problem with the foundation underneath. Simply patching over a failing base is a temporary fix at best. The most effective way to know for sure is to have a professional assess the situation to determine if a replacement is the better long-term investment.

Why are porcelain pavers so highly recommended? We often suggest porcelain because it offers a fantastic combination of modern style, incredible strength, and minimal maintenance. They are highly resistant to stains, scratches, and fading, so they keep their good looks for years without much effort from you. For homeowners who want a durable, high-end finish without signing up for a lot of future upkeep, porcelain is one of the smartest choices you can make.

Key Takeaways

  • Your material choice impacts more than just looks: The right material, whether it’s classic brick or modern porcelain, should fit your home’s style, your budget, and the amount of maintenance you’re willing to do.
  • Look beyond the material price tag: A complete project budget includes costs for labor, site preparation, proper drainage, and removing your old driveway. Getting multiple detailed quotes is the best way to avoid surprises.
  • A great driveway starts from the ground up: The long-term durability of your driveway depends entirely on a solid, well-drained base. Investing in a quality contractor who nails this first step is essential for a lasting result.

Related Articles

Share this page:

What to Know Before an Artificial Turf Field Install

If your only experience with artificial turf is from decades-old sports fields, you might be surprised by how much the technology has changed. Today’s synthetic materials are incredibly realistic, soft, and safe, offering the lush look of natural grass without any of the drawbacks. Modern systems are engineered for superior drainage, durability, and player safety. This guide explores the latest innovations in turf technology, showing you why a modern artificial turf field is a fantastic, high-performance choice. We’ll cover the different materials, infill options, and safety features to help you make an informed decision for your home.

https://youtu.be/zdddUUZMe5I

View Gappsi’s YouTube Channel for Videos on Synthetic Sports Turf Replacement | Gappsi Long Island, NY

There comes a time in the lifespan of all sports fields when they begin to age and wear out. This recent indoor soccer field job in Ronkonkoma, NY, was installed initially and completed 20 years ago.  Sometimes, a sports field requires some maintenance to be restored to the glory days of its former self. The technology of the synthetic surface we use on sports fields today is remarkably different from that used just five years ago. Gappsi can introduce sports field owners to new synthetic turf technology to make older sports fields appear new again.

Our artificial turf sports fields are durable, dependable, safe, and suitable indoors and outdoors. This synthetic option offers unlimited play, low maintenance, and performance found only in the best-kept grasses. Our proven sports field turf grass surfaces are ideal for soccer fields, football fields, baseball fields, multi-purpose fields, lacrosse fields, field hockey fields, bocce courts, croquet courts, and more.

Benefits of Gappsi’s Synthetic Turf Grass

Consistent Performance: Our field turf provides a consistent and reliable playing surface suitable for heavy use and all weather conditions. This makes it an ideal choice for use year-round in sports fields.

Durable: Our field turf is made from synthetic fibers that are resistant to wear and tear, making it long-lasting and cost-effective. It is also low maintenance, requiring minimal effort to keep your sports field in excellent condition.

Environmentally Friendly: Besides its practical benefits, our field turf is also environmentally friendly. Synthetic turf requires less water and maintenance than natural grass, making it a sustainable choice for all sports fields.

synthetic-sports-turf-replacement1We Make Synthetic Turf Removal Look Easy

Synthetic turf significantly affects game performance and user comfort. The turf’s elastic memory and fiber structure tend to deteriorate over time due to play. When this happens, the turf must be replaced to avoid injuries and ensure perfect playability.

Artificial turf fields are robust and can take a beating for quite some time, but nothing lasts forever. After years of heavy use, you will see signs on and around the field suggesting you should consider replacing the turf field playing surface.

Here are some of the “red flags” to look out for:

  • Inlays and seams start loosening up and need repair more frequently
  • The turf field surface color fades from bright green to grey-green
  • Loose turf fibers scattered around the pitch, infill granules piling up on the sides of the turf field
  • An uneven overall look and splitting turf fibers all around the field

Removing artificial grass is a process. To get started, you need a team of highly skilled professionals and a range of equipment. Gappsi has streamlined this process over the years and is one of the most reliable companies on Long Island.

Synthetic Sports Turf Replacement Process

Planning: A detailed site plan and timeline are necessary to deconstruct the turf efficiently. Precise planning and professional site management are essential.

Removing the old system: The actual work of deconstruction begins with removing the turf and separating it from the infill granules and sand. The artificial turf, infill granules, and sand must be removed and separated.

Transporting, disposing of, and recycling waste material: Now that the turf system is removed, the last task is to recycle what you can and dispose of the rest.

Installing the new synthetic turf field surface: Last but not least, the chosen new turf surface is installed on top of the base layer, and a new infill is distributed on top of the turf.

synthetic-sports-turf-replacement2Things to Consider Before Installing New Artificial Turf

Artificial Turf Style

There are so many turf styles to choose from, so select a type that fits your desired aesthetic—short pile, longer pile, all green, etc. We recommend looking at different styles and samples to see what suits your needs.

→ VISIT OUR SYNTHETIC TURF PAGE ←

The new turf we used is manufactured in Italy. This company supplies and builds most sports courts and soccer fields throughout Europe and the world. This turf is a special turf specifically made for indoor use. It requires no infill; we only used silica sand to create weight over the turf. The turf has different sizes, pile heights, and shapes, making it very tight. synthetic-sports-turf-replacement3 With a fast-moving, high-intensity sport like soccer, you want a smooth surface that feels great under the feet and the ball. Plus, a consistent and resilient surface can reduce the risk of injuries. Gappsi’s Synthetic Turf by Italgreen gives you the best of both worlds: a natural underfoot feel like playing on real grass and a premium synthetic turf system’s smooth consistency, durability, and safety.

Italgreen soccer turf represents the maximum technological expression of its genre. It guarantees easy maintenance, exceptional aesthetic appearance, and exceptional performance for soccer and all its derivations, such as futsal and 8-a-side courts.

Italgreen synthetic soccer turf is designed and produced according to the most severe international regulations to guarantee maximum safety, shock absorption, and non-allergenic properties. The constant research and innovation that distinguish the Italgreen model has allowed the Italian company to obtain meaningful certifications such as FIGC and FIR. The artificial soccer turf produced by Italgreen is approved according to the most recent European standard. It is 100% recyclable and environmentally friendly.

NEXT – Underfelt

We are laying down Next. It is a suspension product that keeps the grass elevated from touching the concrete. It also works as a suspension system, separating the turf from the concrete.  

NEXT optimizes the synthetic turf system’s anti-shock performance, improving performance during sports practice. Thanks to its reticular structure, it also offers draining support integrated into the artificial turf system, which is primarily studied for horizontal drainage underfelts, as demonstrated by laboratory reports issued by LABOSPORT ITALIA.

The shock pad has high performance and excellent draining capacities, complies with international regulations, and is 100% recyclable. The product is fully recyclable and in full conformity.

Innovative Natural Infill

Italgreen’s best system is Geofill®, the prestigious natural infill patented by Italgreen. It consists mainly of plant fibers. Approved by the most relevant teams, its unique and innovative organoleptic properties give this synthetic turf system a touch of incredible naturalness.  This is the infill Italgreen uses in most fields in Italy and abroad.

How Long Can Turf Last?

The duration of synthetic turf depends on various factors, such as the quality of the materials used, the occupancy rate of the courts or fields, and the type of courts, indoor or outdoor.

To keep your synthetic grass flooring performing, periodically clean, brush, and fill any sand that needs to be removed. This is the latest indoor soccer sports game court built by Gappsi in Ronkonkoma, Long Island, NY.

Planning Your Artificial Turf Field Project

Bringing a sports court or turf field to your backyard is an exciting project, but it requires careful planning to get it right. Before the first roll of turf is laid, there are a few key steps to think through. From understanding the timeline to choosing the right team for the job, a solid plan ensures your new space is built to last and ready for years of enjoyment. Let’s walk through the essential considerations for your project.

Project Timeline from Start to Finish

Once construction begins, you can expect a new turf field to take about three to six months to complete. However, this timeline doesn’t account for the crucial planning phase that comes first. This initial stage involves finalizing your design, securing any necessary local permits, and preparing the site for installation. Working with an experienced team can help you anticipate these steps so there are no surprises. A clear understanding of the full project scope, from initial consultation to final walkthrough, helps set realistic expectations and ensures a smooth process from start to finish.

Hiring a Certified Professional

The success of your turf field depends heavily on the quality of the installation, which starts from the ground up. It’s wise to hire a single, experienced company to manage both the base preparation and the turf installation. This approach creates clear accountability and prevents issues down the line where one contractor might blame the other for problems. When vetting professionals, look for a team with a proven track record in creating high-quality game courts and turf fields. A company like Gappsi, which handles the entire project from design to completion, ensures every layer of your field is constructed correctly for optimal performance and durability.

Considering Natural Grass Alternatives

Before committing to artificial turf, it’s worth evaluating all your options. For some homeowners, improving the maintenance routine of their existing lawn can make a significant difference. However, for those seeking a consistently playable and low-maintenance surface, synthetic turf is an excellent solution. A quality turf field typically lasts between eight and ten years, so choosing a durable, well-made product is key to getting the most out of your investment. A thorough consultation with a professional can help you weigh the benefits of turf against natural grass for your specific needs, ensuring you make the best choice for your home and lifestyle.

Choosing the Right Turf for Your Sport

The type of turf you choose should be directly influenced by the sport you plan to play on it. Think about it—the demands of a football field are vastly different from those of a backyard putting green or a field hockey pitch. High-contact sports require incredibly tough, resilient turf with a system designed to absorb impact and withstand constant stress. On the other hand, sports that rely on precise ball roll, like bocce or field hockey, benefit from shorter, denser turf fibers that provide a smooth and consistent surface. Selecting the right material isn’t just about aesthetics; it’s crucial for player performance, safety, and ensuring your investment lasts. At Gappsi, we help you find the perfect turf and game court solution tailored to your favorite activities.

Key Materials and Features

The quality of your sports field comes down to the materials used. Modern synthetic turf is engineered with advanced features that make it a fantastic choice for durability and performance. The synthetic fibers are designed to be incredibly resistant to wear and tear, which means less maintenance and a longer lifespan for your court. Over time, turf fibers can lose their “elastic memory”—their ability to spring back up after being stepped on. This is why starting with high-quality synthetic turf is so important. Top-tier options, like the Italgreen turf we use, are produced to meet strict international standards for safety, shock absorption, and even non-allergenic properties, ensuring a safe and enjoyable playing surface for everyone.

Understanding Warranties and Industry Certifications

When you invest in a synthetic turf field, you want assurance that it’s built to last. A strong manufacturer’s warranty is your first line of defense, protecting you against defects and premature wear. Beyond the warranty, look for industry certifications. For example, some top-tier turf manufacturers are part of programs like the FIFA Quality Programme, which means their products meet rigorous standards for performance, safety, and durability. These certifications are a clear indicator that you’re choosing a high-quality material. Working with an experienced installer is just as important, as they can help you select products with the best warranties and ensure the installation meets the manufacturer’s precise specifications to keep that warranty valid.

Understanding the Cost of an Artificial Turf Field

Installing an artificial turf field is a significant home improvement project, and the cost can vary quite a bit. The final price tag depends on the size of your space, the quality of the materials you choose, and the complexity of the installation. While it’s a notable upfront investment, it’s helpful to think about it in terms of long-term value, including years of enjoyment and savings on lawn maintenance. To get a clear picture, it’s best to break down the costs into a few key categories, from the turf itself to the necessary site preparation and the long-term financial benefits you can expect.

Breaking Down the Initial Investment

The initial price of your turf project covers more than just the green surface you see. The total investment includes the cost of the turf material, the labor for installation, and crucial groundwork that ensures your field is stable and drains properly. Think of it as a complete system. Each component, from the base layer of crushed stone to the infill that provides cushioning, plays a vital role in the performance and longevity of your new space. Understanding these different elements will help you budget effectively and appreciate what goes into a professional-grade installation.

Turf Material and Installation Costs

The cost of a professional sports field provides a useful, large-scale benchmark. For example, a full-size artificial turf football field can cost anywhere from $530,000 to over $1,500,000, depending on the specifics. For a standard 80,000-square-foot field, the total can approach $2,000,000 when you factor in all materials and labor. Of course, a residential project like a backyard putting green, bocce court, or a personal sports game court will be on a much different scale. The best way to determine the cost for your unique space is to get a detailed quote that accounts for your property’s specific needs and your vision for the project.

Additional Expenses to Budget For

A successful turf installation is built on a solid foundation. As the Motz Group notes, a turf field is a complete system that includes the ground underneath and proper drainage. Before the turf is even unrolled, your yard needs to be prepared. This often involves excavation, grading the land for a level surface, and installing a base layer of compacted aggregate. A robust drainage system is also essential to prevent water from pooling on the surface. These elements are critical for the field’s longevity and are important costs to include in your initial budget.

Factors That Affect the Total Price

Several key factors will influence the final cost of your artificial turf project. The overall size of the area is the most obvious driver—the more square footage you cover, the higher the material and labor costs will be. The specific type and quality of the turf you select also play a major role, as premium materials with advanced features come at a higher price point. Additionally, the current condition of your yard matters. A sloped or uneven site that requires extensive grading and site preparation will be more costly than a flat, easily accessible area. Finally, your choice of infill material will also affect the budget.

Calculating Long-Term Value and Exploring Financing

While the initial cost is a key consideration, the long-term value of synthetic turf is where the investment truly shines. Think of the annual savings from eliminating watering, mowing, fertilizing, and pest control. Over the typical 8-to-10-year lifespan of a turf field, these savings can add up significantly. Beyond the financial return, you gain a consistently beautiful and usable space for your family to enjoy year-round, regardless of the weather. At Gappsi, we can walk you through the costs and help you understand the lasting benefits, ensuring you feel confident in your decision to enhance your outdoor living space.

Health, Safety, and Environmental Factors

Beyond the aesthetics and cost, it’s important to consider the health, safety, and environmental aspects of artificial turf. Modern turf technology has evolved significantly, addressing many of the concerns associated with older products. When planning your project, it’s wise to be informed about factors like surface temperature on hot days, player safety, the materials used in the infill, and the turf’s overall environmental footprint. Understanding these elements will help you choose the right system for your home and family, ensuring a space that is not only beautiful but also safe and responsible.

Managing High Surface Temperatures

It’s true that artificial turf can get hotter than natural grass in direct sunlight. On peak summer days, this can lead to uncomfortable surface temperatures. However, there are effective ways to manage the heat. Choosing a lighter-colored turf can help reflect more sunlight, and some modern turf systems are designed with heat-reducing technology. The type of infill also makes a difference, as some materials retain less heat than others. For added comfort, you can incorporate shade solutions like trees or even a custom-built pavilion or pergola to provide a cool retreat near your new lawn or game court.

Player Injuries and Turf Burn

Concerns about skin abrasions, or “turf burn,” have been associated with older generations of artificial turf. These abrasions can be a risk factor for infections if not cared for properly. Thankfully, turf technology has advanced considerably. Modern synthetic turf is softer and less abrasive, designed to mimic the feel and performance of natural grass more closely. A professionally installed system with a quality shock-absorbing underlayer and the correct type of infill can significantly reduce the risk of impact injuries and skin irritation, creating a safer playing surface for everyone from toddlers to competitive athletes.

A Closer Look at Infill and Harmful Chemicals

One of the biggest concerns for many homeowners is the infill material, particularly the use of crumb rubber made from recycled tires, which can contain unwanted chemicals. The good news is that you have many other options today. Innovative, non-toxic alternatives are widely available, including natural plant-based fibers, cork, and coated silica sand. For instance, the Geofill® system uses plant fibers to create a completely natural infill that is safe for kids and pets. When you work with a knowledgeable provider, you can select a safe and high-performing infill that gives you complete peace of mind.

Environmental Impact and Sustainability

The environmental footprint of artificial turf is an important conversation. While older turf systems often ended up in landfills after their 8-to-10-year lifespan, the industry has made significant strides in sustainability. Many modern turf products, like the ones offered by Italgreen, are now 100% recyclable. Furthermore, the everyday environmental benefits are substantial. An artificial lawn eliminates the need for constant watering, which is a major advantage in preserving local water resources. It also means no more fertilizers or pesticides washing into the groundwater and no carbon emissions from lawnmowers, making it a cleaner, greener choice in the long run.

synthetic-sports-turf-replacementConsider Signing Up for Our Professional Turf Field Maintenance Program

Without regular care and maintenance, damage to the pitch will be its undoing sooner than the club and, above all, the players would like. As is often the case, the more often the field is used, the more you should invest in the maintenance and ongoing upkeep of the turf system.

Synthetic turf field maintenance is divided into permanent care, maintenance, and intensive cleaning. Gappsi offers these services using specialized turf maintenance equipment.

If you lack previous experience and know-how in artificial turf field maintenance, we highly recommend contacting our team at Gappsi. It’s the best way to protect the field’s users from injuries and the long-term financial value of your asset.

SCHEDULE A MEETING TODAY WITH GAPPSI

synthetic-sports-turf-replacement4

Frequently Asked Questions

How long will my new artificial turf field actually last? A high-quality synthetic turf field is a long-term investment, typically lasting between eight and ten years. The exact lifespan depends on a few things, like the quality of the turf you choose and how much foot traffic it gets. A field used for intense, daily sports will wear differently than a backyard putting green. Proper installation and occasional maintenance are also key to making sure you get the most out of your turf for years to come.

Is synthetic turf a safe choice for my kids and pets? Absolutely. Modern turf technology has made safety a top priority. The old concerns about harsh materials and chemical-filled infills are a thing of the past. You can now choose from a variety of non-toxic, natural infill options, like plant-based fibers, that are completely safe for everyone in the family. While the surface can get warm in direct sun, selecting a lighter-colored turf or incorporating some shade can easily manage the temperature.

What does regular maintenance for a turf field involve? Compared to a natural lawn, turf maintenance is incredibly simple. Your main tasks will be to periodically remove leaves and debris and to brush the fibers to keep them standing upright, especially in high-traffic areas. This ensures the surface stays clean, looks great, and performs well. It completely eliminates the need for mowing, watering, and fertilizing, giving you more time to actually enjoy your yard.

Why is it better to hire one company for the entire turf installation? Having a single, expert team handle your project from the ground up is the best way to ensure a flawless result. A turf field is a complete system, and the base preparation is just as important as the turf itself. When one company manages everything, there’s clear accountability. You avoid any potential issues where one contractor might blame another for problems with drainage or an uneven surface, giving you total peace of mind.

I’m worried it will look fake. How realistic is modern turf? If your only experience is with old-school astroturf, you will be amazed by how far the technology has come. Today’s synthetic turf is designed to look and feel incredibly natural. It comes in various pile heights, textures, and color blends that mimic the subtle variations of a real lawn. The materials are softer and less abrasive, creating a lush, green space that is both beautiful and functional.

Key Takeaways

  • Modern Turf is a Complete Performance System: High-quality synthetic turf is much more than a simple ground cover. It’s an engineered system combining durable, sport-specific fibers, shock-absorbing underlayers, and safe infill options to create a surface built for performance and longevity.
  • Expert Installation is Non-Negotiable: The success of your turf field starts from the ground up. Entrusting the entire project—from site preparation and drainage to the final installation—to a single, experienced team ensures a flawless result and clear accountability.
  • Consider the Long-Term Value and Safety: While there’s an initial investment, a turf field pays off through years of reduced maintenance and increased usability. Prioritize your peace of mind by choosing systems with safe, non-toxic infill and understanding the long-term environmental benefits like water conservation.

Related Articles

Share this page:

Custom Splash Pad Water Playground New Product at Gappsi Long Island NY

View Gappsi’s YouTube Channel for Videos on Custom Splash Pad Water Playgrounds |
Gappsi Long Island, NY

Custom splash pad water playground is a new product at Gappsi Long Island, NY.  A splash pad is an immersive, zero-depth aquatic water attraction that provides endless fun and can be installed in various locations. It is ideal for city parks, RV parks, HOA community parks, apartment complexes, hotels, resorts, amusement parks, child care facilities, and more. Splash pads feature an array of spray jets and above-ground spray elements, creating an interactive and refreshing play environment for all ages. Depending on your requirements, they can operate on recirculation, freshwater/pass-through, or pool tie-in systems.

Several features and different water sensations can be added as an immersive, zero-depth aquatic play area.  The splash pad equipment attracts a broader demographic, boosts engagement, prolongs stays, and increases return visits. Gappsi’s splash pad solutions are also ​sustainable; they conserve water with their state-of-the-art water management systems and are built to last season after season.

Let Gappsi help transform your imagination into new dimensions in water play with dynamic, custom-designed water parks that deliver adventure, visual excitement, and imaginative fun. We offer a full line of water play equipment, including above-ground and below-ground sprayground/splash park features, slides, and structures.

Kiddie Pool Turned Splash Pad

Gappsi recently redesigned a kiddie pool area at the Engineers Country Club in Roslyn Harbor, NY.  We removed the old kiddie pool and replaced it with a new, fun, and exciting splash pad for the kids.  The universal design project offers form and function that are inherently accessible to everyone without modifying the items to be accessible.

The New Water Playground – Splash Pads

Splash pads, or water playgrounds, can be a fun and safe pool alternative. They can be built more quickly than pools, and they offer many benefits, including:

  • Accessibility – Splash pads are accessible to people of all ages and abilities. Their level surfaces and sensory aspects can make them fun for children and families with disabilities.
  • Safety – Splash pads are safer than pools because they have little or no standing water. As a result, there is no risk of drowning. Motion sensors often trigger the nozzles that spray water, and the decks are usually textured or surfaced with non-slip materials.
  • Cost – Water playgrounds can fit most communities’ budgets because they have lower capital costs. They also reduce maintenance requirements more than pools and require less support infrastructure, like changing rooms and admission gates.
  • Water – Water playgrounds can be flexible about water use and can even recycle water back into the spray mechanism to conserve water.
  • Design – Splash pads can offer various design features, and you can easily change the spray features to appeal to the area or time of year.
  • Socialization – Splash pads can bring communities together and provide a fun, interactive space for socialization.

custom-splash-pad-water-playground-new-product-at-gappsi-long-island-ny3Does a Splash Pad Need a Pump

Some splash pads use pumps, while others can use water pressure from a garden hose.  Most splash pads use low-flow recirculating pumps to provide a continuous water supply. The pumps fill an underground storage tank with water, which is filtered and disinfected before being sprayed onto the play area. The water then drains back into the tank to be reused. This system is good for larger splash pads or regions where water conservation is essential.

The other option is a flow-through system.  These systems use the same water pressure as your tap to power the water features.  The water drains into the municipal sewer system. Flow-through systems have low up-front costs because they don’t require pumps, filters, or other equipment, but ongoing costs are associated with using fresh water.  Some backyard splash pad kits can use water pressure from a garden hose, which can reduce maintenance, too.

The new splash pad at Engineers Country Club used the flow-through system without a pump, which made more sense. Without pumps, you do not need electricity or mechanical parts.  The water is fed just the water pressure from the water line.  

The water is used and sent to a drain. It was calculated that using the water without filtering or adding chemicals and chlorine to maintain the water system was cheaper. In addition to the cost savings by not using a pump, permits were not required, and no additional plumbing was needed.

We built this very functional splash pad for the club simultaneously with the gunite pool. Kids love it; it is like a miniature water park. For the floor, we used rubberized material mixed with resin, which makes it very hard but soft to walk on.

custom-splash-pad-water-playground-new-product-at-gappsi-long-island-ny1Synthetic Turf For Splash Pad Area

Gappsi installed all synthetic turf surrounding the splash pad. Artificial turf can be a good choice for areas near splash pads because it can be safer, more durable, and lower maintenance than natural grass:

  • Safety – Synthetic turf is slip-resistant and cushioned for bare feet, helping reduce the risk of injury. It is also universally accessible, allowing wheelchairs and other mobility devices to roll easily.
  • Durability – Synthetic turf lasts for years and requires little maintenance. Unlike natural grass, it can be laid in any shape or design and is not susceptible to design challenges.
  • Drainage – Synthetic turf is engineered to be free-draining, so it can dry quickly without becoming muddy or slippery. This allows the surface to be used sooner than natural grass.
  • Pests – Synthetic turf can create a pest-free environment, which is safer to walk on and reduces the risk of summer bugs.

It is a lovely and functional miniature water park.  The system goes in a circle and then shuts down. Then, the kids can just hit the button, which will go through another cycle. This is the latest miniature water park by Gappsi for the kids to enjoy. I am sure even grown-ups will come and make use of this. This is the newest park water feature built by Gappsi in Roslyn, NY.

SCHEDULE A MEETING TODAY WITH GAPPSI

custom-splash-pad-water-playground-new-product-at-gappsi-long-island-ny2

Share this page:

Paver Stain Before and After: A Homeowner’s Guide

Are you looking at your patio and feeling like its color is stuck in the past? Many Long Island homes have pavers in shades of pink, peach, or brown that no longer fit a modern aesthetic. Instead of tearing everything out, you can achieve a complete transformation by changing the color. Staining allows you to shift from warm, earthy tones to sophisticated cool grays and charcoals, instantly updating your entire backyard. This process gives you the power to customize your space without the expense of a full renovation. Seeing the paver stain before and after photos shows just how powerful a color change can be. Let’s explore how to choose the right products and techniques to give your pavers a fresh, new identity.

https://youtu.be/KD7E9iipEKo

View Gappsi’s YouTube Channel for Videos on Staining and Restoring Brick Pavers | Long Island, NY

Bring life back to your driveway or patio pavers by staining and restoring brick. Few things add so much to a landscape than a beautiful set of pavers, whether installed in your driveway, around the pool, or on your patio. One of the things that makes them so popular is the countless ideas of patterns and even colors you can choose from.

What To Do if Your Paver Color is Faded or Ugly?

Brick pavers must be maintained and sealed regularly to protect them from obvious staining. What might not be obvious to most is their gradual fade. If pavers are not sealed, they can fade to look like bare cement in as little as seven years!

Staining pavers can help protect them from water damage and erosion and increase their lifespan. Stains can also restore faded pavers to look almost new again. Some say that staining pavers is easy and affordable. It can transform a patio into a beautiful extension of a home.  Here are some reasons why you might want to stain your pavers:

  • Protect from water damage—Water can cause pavers to crack and stain over time. Sealing pavers with a water-repellent sealer can help keep water from penetrating the surface, reducing the likelihood of damage and prolonging the life of the pavers.
  • Restore faded pavers—If pavers aren’t sealed, they can fade to look like bare cement in as little as seven years. Staining can restore faded pavers to look almost new again.
  • Longer-lasting color—Stains penetrate into the concrete rather than just building up on the surface like paint, resulting in a longer-lasting color that won’t fade as quickly.
  • Better look – Stains can give pavers depth of color, making them look better than paint and less fake. The stain won’t be all one consistent color, so some darks or lighter colors will still be visible.

staining-and-restoring-brick-pavers-long-island-ny1Paver Staining – Power Washing & Polymetric Sand

Recently, Gappsi completed a patio paver stain from Crab Orchard (pink/peach color) from Nicolock to gray. The client chose to stain the pavers in gray and the coping in black, changing the color of the backyard to a gray tone

The paver staining process starts first by pressure washing the stones.  Then, new gray polymeric sand is added and swept between the joints.  Polymeric sand is a mixture of sand and additives that can fill the joints between pavers and other hardscape materials. It can be a good choice for paver joints because it has many benefits, including:

  • Durability – Polymeric sand is more durable than regular sand and can help increase the lifespan of your hardscape. It’s also resistant to erosion from heavy rain and water runoff.
  • Weed and insect prevention – Polymeric sand can help prevent weeds like moss, grass, and dandelions from growing between pavers, and it can also deter ants from burrowing into cracks.
  • Easy application – Polymeric sand is quick and easy to apply, and it doesn’t require perfectly dry pavers.
  • Aesthetics – Polymeric sand comes in many colors, so choose a shade that matches your pavers or walkway.
  • Polymeric sand can cost more than regular sand, but it is worth the investment in the long term. With proper care, polymeric sand can last up to 15 years.

staining-and-restoring-brick-pavers-long-island-ny2Paver Staining – First Coat of Color Sealant

Once the polymetric sane has dried, we apply the first coat of colored sealer. It takes a few passes to achieve the gray color we want. It is going to be a huge transformation. Changing the color from a beige pink to a gray stone is a challenge. With each pass, we increase the color we apply as we add to the multiple coats. We are putting an extra coat of black on the coping.

Before You Begin: Planning Your Paver Project

Seeing a paver transformation take shape is exciting, but a successful project starts long before the first coat of stain is applied. Proper planning is the key to getting results you’ll love for years to come. Think of it as creating a roadmap for your project. You need to consider your budget, the timeline, the specific materials your pavers are made of, and the weather. While some small DIY paver staining jobs can be a great weekend project, restoring an entire patio or driveway is a significant undertaking. For larger spaces or intricate designs, working with professionals can ensure a flawless and lasting finish. Experts can help you manage the complexities of product selection and application, ensuring your investment not only looks beautiful but is also properly protected. A professional restoration and sealing service can save you time and prevent costly mistakes.

Understanding Project Timelines and Costs

One of the best things about staining pavers is that it can be a very budget-friendly way to refresh your outdoor space. A simple walkway refresh can be a small, affordable project. However, the cost will naturally scale with the size and complexity of the area. When planning your budget, remember to account for cleaning supplies, the stain itself, a quality sealer, and any application tools you might need. For a larger area like a driveway or an entire pool surround, the investment will be greater, but so will the impact on your home’s curb appeal. Think of it as an investment in the longevity and beauty of your masonry, protecting it from the elements while giving it a fresh, modern look.

Weather Considerations for Application

Here on Long Island, we know how unpredictable the weather can be. When it comes to staining pavers, timing is everything. You’ll need to plan your project for a stretch of clear, dry weather. The entire process, from cleaning and drying to staining and sealing, requires several consecutive dry days. Applying stain or sealer when it’s about to rain can lead to a washed-out, uneven finish, wasting both your time and money. The products need adequate time to penetrate the pavers and cure properly without moisture interference. Aim for a clear forecast with moderate temperatures for the best possible results.

Choosing the Right Products for Your Pavers

The products you choose will make or break your paver project. It’s not as simple as grabbing any can of stain off the shelf. The best choice for your project is a semi-transparent stain that is rich in color pigment. This type of stain adds a beautiful layer of color but is sheer enough to let the natural texture of the pavers show through. This avoids the flat, painted-on look that can make a surface look artificial. A quality stain enhances the material, giving it depth and dimension. Understanding the different types of porcelain and natural stone options available can also help you appreciate why specific products are recommended for different surfaces, ensuring a compatible and beautiful finish.

Is Staining Suitable for Your Paver Type?

Before you get your heart set on a specific color, it’s critical to identify what your pavers are made of. Staining is specifically designed for porous surfaces like concrete pavers, which can absorb the pigment. If you have clay brick or natural stone pavers, they will not absorb the stain correctly. Attempting to stain these materials will likely result in a blotchy, uneven mess that’s difficult to fix. For non-porous surfaces like clay or stone, a specialized tinted sealer is the appropriate product to use. This is a crucial distinction that ensures you’re using the right method for your specific material.

Paver Stain vs. Paver Sealer: What’s the Difference?

People often use the terms “stain” and “sealer” interchangeably, but they serve very different functions. A paver stain is all about color. It contains pigments that penetrate deep into the pores of the concrete. Because the color becomes part of the paver itself rather than just sitting on top, it results in a much more durable, long-lasting finish that won’t chip or peel like paint. A sealer, on the other hand, is a protective clear coat. Its primary job is to form a barrier on the surface to protect against moisture, UV rays, and wear and tear. You often apply a sealer after staining to lock in the new color and give it an extra layer of defense.

What to Look for in a Quality Sealer

Once your pavers are stained and you’re happy with the color, the final step is to protect your work with a high-quality sealer. Not all sealers are created equal. For the best protection, look for a sealer that has a high acrylic content, ideally 25% or more. This robust formula provides superior defense against fading from the sun and damage from foot traffic or vehicles. This is especially important for high-use areas like driveways and main walkways. Investing in a premium sealer is the best way to ensure your beautifully stained pavers stay vibrant and protected for as long as possible, making the entire restoration project a lasting success.

Preparing Your Pavers for Staining

Proper preparation is the most important step to ensure your paver stain looks great and lasts for years. Think of it like painting a room; you wouldn’t just slap a new color on a dirty wall. The same principle applies here. Taking the time to prep the surface correctly will prevent peeling, ensure even color absorption, and give you a professional-looking finish. Before you even think about opening a can of stain, you need to get your pavers ready for their makeover. This involves a few key checks and cleaning steps that you absolutely cannot skip. A little bit of effort now will save you a lot of headaches later and make the final result something you can be proud of.

Checking for Existing Sealer

Before you start, you need to figure out if your pavers already have a sealer on them. An existing sealer can prevent the new stain from penetrating the paver surface, leading to a blotchy and uneven finish. Luckily, there’s a simple way to check. Just pour a small amount of water onto a few different pavers. If the water beads up or sits on the surface for a while before soaking in, you likely have a sealer. If the water absorbs into the paver almost immediately, the surface is probably unsealed and ready for the next step. If you do find an old sealer, it will need to be stripped before you can apply a new stain, which can be a tough job. For projects like this, calling in a professional for restoration and sealing services can ensure the job is done right.

Treating Efflorescence Before You Stain

Have you ever noticed a white, chalky powder on the surface of your pavers? That’s called efflorescence. It’s a natural phenomenon caused by mineral salts migrating to the surface as water evaporates from the paver. While it’s harmless, it’s not very attractive and it will prevent your stain from adhering properly. You must remove it completely before staining. The most effective way to get rid of efflorescence is with a pressure washer. A strong stream of water will typically wash the salt deposits away. Make sure the pavers are completely clean and free of this white powder before you move on to applying any stain. This ensures the color penetrates deeply and evenly across the entire surface for a flawless look.

Specific Cleaning Requirements

A thoroughly cleaned surface is your best friend when it comes to paver staining. Start by removing any weeds or moss growing between the joints. A stiff-bristled brush can help with this. Next, sweep away all loose dirt, leaves, and debris. Once the area is clear, it’s time for a deep clean. For general grime, a pressure washer is often sufficient. However, if you have stubborn stains from things like oil, grease, or fallen leaves, you may need to use a specialized paver cleaner or degreaser. Applying stain over a dirty paver is a recipe for disappointment, as the color will look uneven and won’t last. A pristine surface is the foundation for a beautiful, long-lasting finish.

A Note on Newly Installed Pavers

If you have brand-new pavers, you might be eager to stain and seal them right away. However, it’s best to be patient. We recommend waiting at least 60 to 90 days after installation before applying any stain or sealer. This waiting period is crucial for a couple of reasons. First, it allows the pavers to fully cure and settle. Second, it gives time for any potential efflorescence to appear and be cleaned off. Staining too soon can trap moisture and salts within the pavers, leading to discoloration and sealer failure. When we complete a new masonry project, we always advise our clients on the proper timeline for care to ensure their investment looks beautiful for years to come.

Always Test Your Stain Color First

You would never paint an entire room without testing the color on a small patch of wall first, right? The same rule applies to paver stain. The final color can look different depending on the original shade and porosity of your pavers. To avoid any surprises, always test the stain on an inconspicuous area, like a corner of your patio or a spot that’s usually covered by furniture. Apply the stain just as you would for the full project and let it dry completely to see the true color. This simple step allows you to confirm you love the shade before committing to the entire surface. It’s a small bit of effort that guarantees you’ll be happy with the final transformation.

Application Process and Technique

Staining your pavers is a manageable project that can completely transform their look. The process starts with a deep clean to get rid of any dirt, grime, or old sealer. Once the surface is prepped and dry, you can begin applying the stain. The key is to apply a specialized masonry stain that penetrates the paver, followed by a protective sealer to lock in the new color and shield it from the elements. While many homeowners tackle this themselves, achieving a flawless, long-lasting finish requires precision. For larger patios or driveways, or if you simply want to guarantee a professional result, our team has the tools and expertise to restore and seal your pavers perfectly.

Keeping the Stain Mixed for a Consistent Finish

One of the most important tips for getting an even, consistent color is to keep your stain mixed throughout the entire application. The color pigments in the stain are heavier than the liquid and can settle at the bottom of your container. If you don’t mix it regularly, you might start with a rich color and end with a much lighter, diluted shade. As one expert source notes, “If using a sprayer, shake the stain often to make sure the color stays even.” This advice holds true whether you’re using a sprayer, a roller, or a brush. Give the container a good shake or stir every few minutes to keep those pigments suspended and ensure your patio has a uniform, beautiful finish from edge to edge.

How Many Coats of Stain Should You Apply?

The number of coats you’ll need depends on the color depth you’re aiming for. Generally, one coat will provide a subtle tint, while multiple coats will create a richer, more saturated look. If you want a deeper color, you can add more layers, but it’s best not to apply more than three. Applying too many coats can cause the stain to build up on the surface instead of soaking in, which might prevent it from sticking well over time. After your final coat of stain has completely dried, applying a high-quality sealer is the final step. This not only protects the pavers but also enhances the depth of the new color, giving it a vibrant, finished appearance that will last for years.

VISIT OUR KITCHEN & BATHROOM CLEANING & SEALING PAGE TO LEARN MORE

How to Stain Pavers?

To stain pavers, you can use either sprayers or brushes. A brush can provide better penetration of the coloring agents, but you must be careful not to leave brush marks. Remember to protect surrounding areas to prevent unintentional stains.

You can feel compelled to stain your pavers in a different color for several reasons. Let’s list below some of them:

  • You can create unique patterns using different colors.
  • Staining your pavers in different colors can add that new, fresh look you’re looking for in your landscape.
  • The result has a more natural look than painted pavers.
  • It is relatively easy compared to other options (replacing pavers).

We will blend it in with the existing Cambridge patio. The color staining for this backyard in Smithtown NY has been completed.  We transformed the color of the patio and the coping from the crab orchard, a combination of beige brown and peach colors, to a light gray for the patio and charcoal for the borders.

staining-and-restoring-brick-pavers-long-island-ny3The homeowners have changed the color of the backyard to be more gray-toned throughout the years. The existing old patio did not match the style, so they decided to color stain the pavers to blend in. This color that we used is also a sealer that stains the stones. This is the latest stone staining project done by Gappsi in Smithtown, NY.

Aftercare and Long-Term Maintenance

Durability and Lifespan of Paver Sealers

Think of paver sealant as a shield for your beautiful patio or driveway. It’s an essential step that protects the stone from stains, harsh UV rays that cause fading, and water damage from Long Island’s unpredictable weather. Without it, your pavers are exposed and can quickly show signs of wear. Regular sealing is the key to keeping your outdoor space looking pristine and ensuring your investment lasts for many years. A professional restoration and sealing service not only applies the product correctly but also ensures the surface is perfectly prepped, which is crucial for the sealer to bond effectively and provide maximum protection.

Your Paver Resealing Schedule

So, how often do you need to reapply this protective layer? A good rule of thumb is to reseal your pavers every two to three years. However, this can vary. The type of sealant used plays a big role; glossy, film-forming sealants might need attention sooner than penetrating sealers, which soak into the paver itself. Instead of just marking a date on the calendar, it’s smart to observe how your pavers are holding up. If you notice water is soaking in rather than beading on the surface, or if the color looks a bit dull, it’s probably time to think about resealing.

Factors That Affect Sealer Longevity

Several factors influence how long your paver sealant will last. The local climate is a major one; Long Island’s combination of strong summer sun, heavy rain, and freezing winters puts any outdoor surface to the test. The amount of traffic your pavers receive also matters. A driveway or a main walkway will see more wear than a secluded garden path. Even the type of sealant and how often you clean the area can affect its lifespan. Understanding these elements helps you create a realistic maintenance plan to keep your pavers in top condition.

The Final Step: Applying Joint Sand Correctly

After cleaning and sealing, there’s one final, crucial step: applying joint sand. Using polymeric sand between your pavers is a game-changer. This special sand mixture hardens to lock pavers firmly in place, which prevents shifting and wobbling over time. It also creates a durable barrier that stops weeds from sprouting and deters ants from making a home in the cracks. Proper application is everything. The sand must be swept carefully into the joints and activated with just the right amount of water. When done correctly, it provides a clean, finished look and can last for years, making it an essential part of any professional paver restoration project.

SCHEDULE A MEETING TODAY WITH GAPPSI

staining-and-restoring-brick-pavers-long-island-ny

Frequently Asked Questions

My pavers are a dated pink color. Can I really stain them gray? Yes, you absolutely can. Staining is a fantastic way to completely change the color of your concrete pavers from warm, earthy tones like pink or peach to modern cool shades like gray and charcoal. The stain penetrates the paver, creating a rich, durable color that looks natural, not painted on. It’s a transformative process that updates your entire outdoor space without the cost and hassle of a full replacement.

What’s the difference between staining and sealing my pavers? Think of it this way: stain is for color, and sealer is for protection. A stain contains pigments that soak into the pores of the concrete to change its color from the inside out. This is why it lasts so long and doesn’t chip. A sealer is a clear, protective topcoat applied after staining. Its job is to shield the pavers from water, UV rays, and stains, locking in the new color and making it last.

How do I know if staining is right for my type of pavers? Staining works best on porous materials like concrete pavers because they can absorb the pigment. If you have non-porous pavers, such as clay brick or certain types of natural stone, the stain won’t soak in correctly and will likely look blotchy. An easy way to check is to pour a little water on them; if it soaks in quickly, they are porous and good candidates for staining.

How long will the new stain color last on my patio? When done correctly with high-quality products, a paver stain can last for many years. The color itself becomes part of the paver, so it won’t peel or flake like paint. The key to longevity is finishing the job with a high-quality sealer and reapplying that sealer every two to three years. This protective layer is what defends the color against fading from sun exposure and general wear.

Can I do this project myself, or should I hire a professional? Staining pavers can be a DIY project, especially for a small area like a walkway. However, for larger spaces like a full patio or driveway, hiring a professional is often the best choice. Proper preparation, including deep cleaning and potentially stripping old sealer, is critical for a good result. Professionals have the right equipment and expertise to ensure the application is even and the finish is durable, saving you from costly mistakes and ensuring a beautiful, long-lasting transformation.

Key Takeaways

  • Staining offers a modern update without replacement: You can completely change the look of your patio or driveway by staining the pavers. This is a cost-effective way to shift from dated, warm colors to contemporary grays and charcoals, avoiding the expense of a full renovation.
  • Proper preparation is the most critical step: For the stain to look professional and last for years, you must start with a thoroughly prepped surface. This involves pressure washing, removing any old sealer, treating white mineral deposits (efflorescence), and always testing the stain color in a small, inconspicuous area first.
  • Product selection is key to success: Use a semi-transparent stain specifically designed for porous concrete pavers to ensure the color absorbs correctly. After staining, apply a high-quality sealer with at least 25% acrylic content to protect the new color from fading and wear, ensuring a durable, long-lasting finish.

Related Articles

Share this page:

Laykold Tennis Court at Breeze Oceanfront Rental Living in Long Beach, NY

laykold-tennis-court-at-breeze-oceanfront-rental-living-in-long-beach-3Gappsi installs and provides Laykold Tennis Court surfaces.  Laykold offers top-quality tennis court surfacing, to help create more advanced tennis courts that support athletes and their game. Laykold tennis court surfaces are found at professional venues, including the U.S. Open. This is due to the many benefits their industry-leading tennis court surfacing has to offer.

Laykold from Advanced Polymer Technology is a cutting-edge tennis court surfacing material that helps make court surfaces better than ever. Their goal in creating and providing this surfacing to athletes, their coaches, and casual tennis players is to provide a surface that supports them by helping to reduce fatigue and the risk of injury. In doing so, their tennis court surfacing can help enable you to compete and train better, and longer. It is also available in a multitude of color options, from traditional green to canary yellow and U.S. Open blue to New York Open black.

Constructing a tennis court offers a long-term value to your property. Gappsi recently completed a concrete tennis court in Long Beach NY on top of the roof of a parking garage of Breeze Oceanfront Rental LivingThe initial step in constructing a tennis court involves planning and design. This sets the foundation for the project.  Below are the steps taken in designing and installing a tennis court.

laykold-tennis-court-at-breeze-oceanfront-rental-living-in-long-beach-4Planning and Designing Tennis Sports Game Courts

  • Site Selection: Identify a suitable area for your tennis court.
  • Size and Dimensions: A standard tennis court requires a playing area of 78 feet by 36 feet for singles matches and 78 feet by 42 feet for doubles. Including the overrun areas, a total area of 120 feet by 60 feet is typically necessary.  The space must be planned on or adjusted to accommodate drainage, fencing, and landscaping.
  • Obtaining Permits: Research and adhere to local zoning laws and building codes.
  • Surface Selection: Choosing the right surface for your tennis court is crucial for player performance and safety. There are three main types of tennis court surfaces: hardcourts, clay courts, and grass courts. Each surface offers unique characteristics and requires specific maintenance. Consider factors such as climate, budget, and intended usage when selecting the surface type.  Laykold is a brand of tennis hardcourt constructed over an asphalt or concrete base that was chosen for this court construction.

Prepare the Ground for the Tennis Court

Ground preparation is crucial for creating a stable and level base for your tennis court.

  • Clearing and Excavation: Excavation involves leveling the ground and grading it for proper drainage.
  • Sub-Base Installation: The sub-base provides a stable foundation for your court and assists with drainage.

This court was built with 5 to 7 inches of 5000 psi poured concrete reinforced with fiber and wire mesh. The concrete was installed over 2 inches of structural foam and Marafi paper. Once the concrete cured we primed the concrete with the bond kote and applied two layers of resurfacer and two layers of paint.

laykold-tennis-court-at-breeze-oceanfront-rental-living-in-long-beach-5Fencing and Drainage

Fencing and drainage are essential for the functionality and longevity of your court.

  • Fencing: Surround your court with high-quality fencing to keep tennis balls within the playing area and ensure safety. Chain-link fences are common due to their durability and visibility.  The recommended height for a tennis court fence is 10–12 ft (3.05–3.66 m), with 10 ft being the most common. The fence should be 10 ft high at each end of the court, and extend along the sides for at least 20 ft, as most tennis balls bounce to the corners or ends
  • Drainage: Proper drainage prevents water accumulation that can damage the court surface and interfere with play.

VIEW OUR SPORTS GAME COURT GALLERYlaykold-tennis-court-at-breeze-oceanfront-rental-living-in-long-beach-6

Accessories and Tennis Court Markings

  • Net and Posts: The net divides the court into two halves.  We installed premier Douglas tennis netting with subs-mounted poles.  Douglas makes the most durable, long-lasting USA-made tennis products in the industry. Douglas® has been perfecting tennis court facility equipment for over 50 years and offers a wide variety of tennis nets, tennis net posts, and custom products to accommodate any facility. 
  • Line Marking: Apply durable, visible paint to outline the boundaries, service boxes, and center marks of your court.  The court was painted with Laykold products.  Markings play a vital role in defining the boundaries and lines on a tennis court. The standard markings include baseline, singles sidelines, doubles sidelines, service lines, and center service lines.  The tennis inlay was painted with a light blue color and the out-of-bounce perimeter was painted with a silver-gray color. The court was striped with white lines.
  • Accessories: Consider additional features such as benches, scorekeepers, and storage for equipment. These enhance the usability and enjoyment of your court.

laykold-tennis-court-at-breeze-oceanfront-rental-living-in-long-beach-ny2Constructing a tennis court is a significant project that, when done correctly, can provide endless hours of enjoyment and add substantial value to your property.  This court located at an apartment complex built by Engel Berman was constructed on the second floor over the parking garage leveled with the beach.  This is the latest Gappsi Tennis Court Sports Curt installation project in Long Beach NY.

SCHEDULE A MEETING TODAY WITH GAPPSI

View Gappsi’s YouTube Channel for Videos on Laykold Tennis Court at Breeze Oceanfront Rental Living in Long Beach, NY

Share this page: