View Gappsi’s YouTube Channel to view Elevating the Game: A Custom Racquetball Court Installation in Long Beach, NY
When it comes to home improvement and outdoor recreation, few things add as much value and excitement as a professional-grade sports game court. At Gappsi, we take pride in transforming underutilized spaces into world-class athletic environments. Our latest project takes us to the beautiful coastal community of Long Beach, NY, where we recently completed a stunning custom racquetball court that blends high-performance engineering with sleek, modern aesthetics.
This project is a testament to how Gappsi can take an existing, aging footprint and revitalize it into something spectacular. If you’ve been dreaming of a backyard arena but aren’t sure how to handle existing concrete or irregular yard shapes, this Long Beach installation serves as the perfect blueprint.
The Foundation: Breathing New Life into Existing Concrete
One of the most common questions we receive from homeowners in Long Beach and across Long Island is: “Do I need to rip out my old concrete patio or basketball pad to build a new court?” The answer, as demonstrated by this project, is a resounding no.
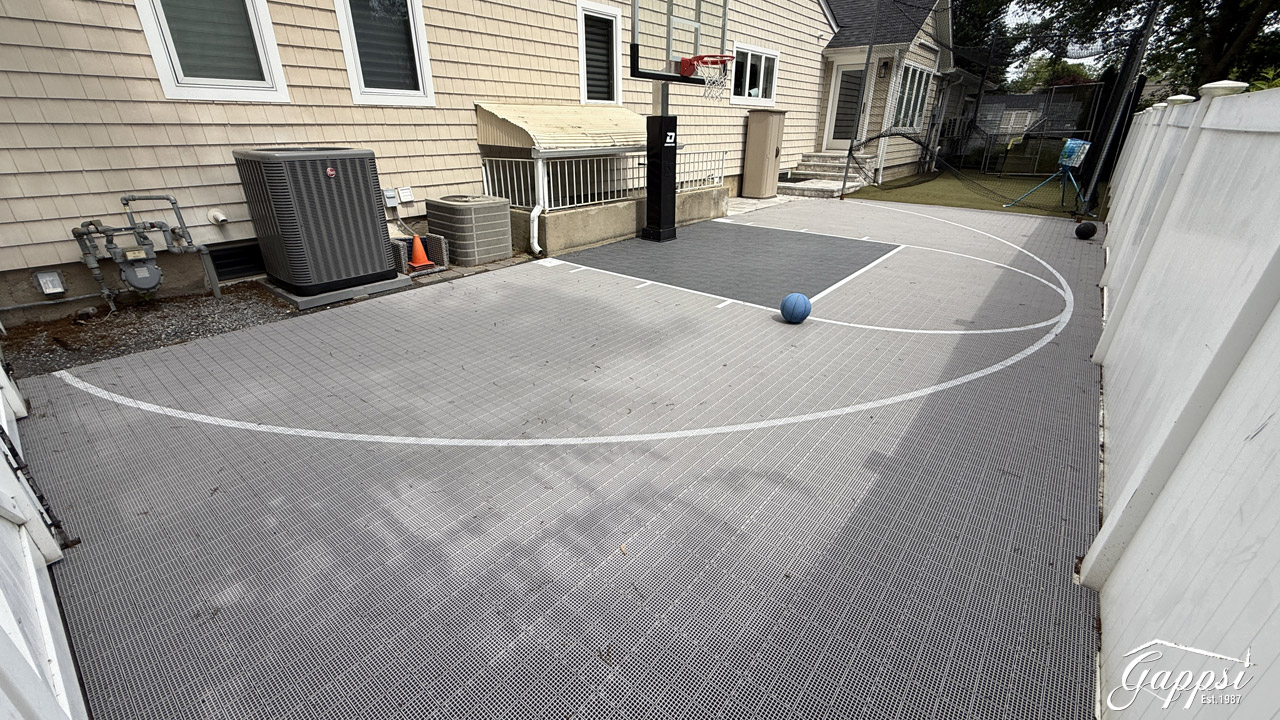
For this specific installation, the client had an existing concrete slab. While the concrete was structurally sound, it was aesthetically dated and lacked the shock absorption required for high-impact sports like racquetball. Instead of the costly and invasive demolition process, Gappsi used the existing slab as a sub-base.
By working with the existing foundation, we saved the client time and minimized the project’s environmental impact. However, installing over old concrete requires a keen eye for precision, especially when that concrete isn’t perfectly square.
The Surface: Mateflex Tiles and “Top Court” Style
To achieve a professional feel, we utilized Mateflex modular tiles for this custom racquetball court. Mateflex is the industry standard for outdoor sports surfacing for several reasons:
-
Drainage: The open-grid design allows water to flow through the tiles and off the concrete, ensuring the court dries quickly after a Long Beach rain shower.
-
Safety: These tiles offer excellent lateral forgiveness, reducing the strain on players’ knees, ankles, and lower backs compared to playing directly on concrete.
-
Durability: They are UV-stabilized, meaning the vibrant colors we chose will stay bright despite the constant exposure to salt air and sun.
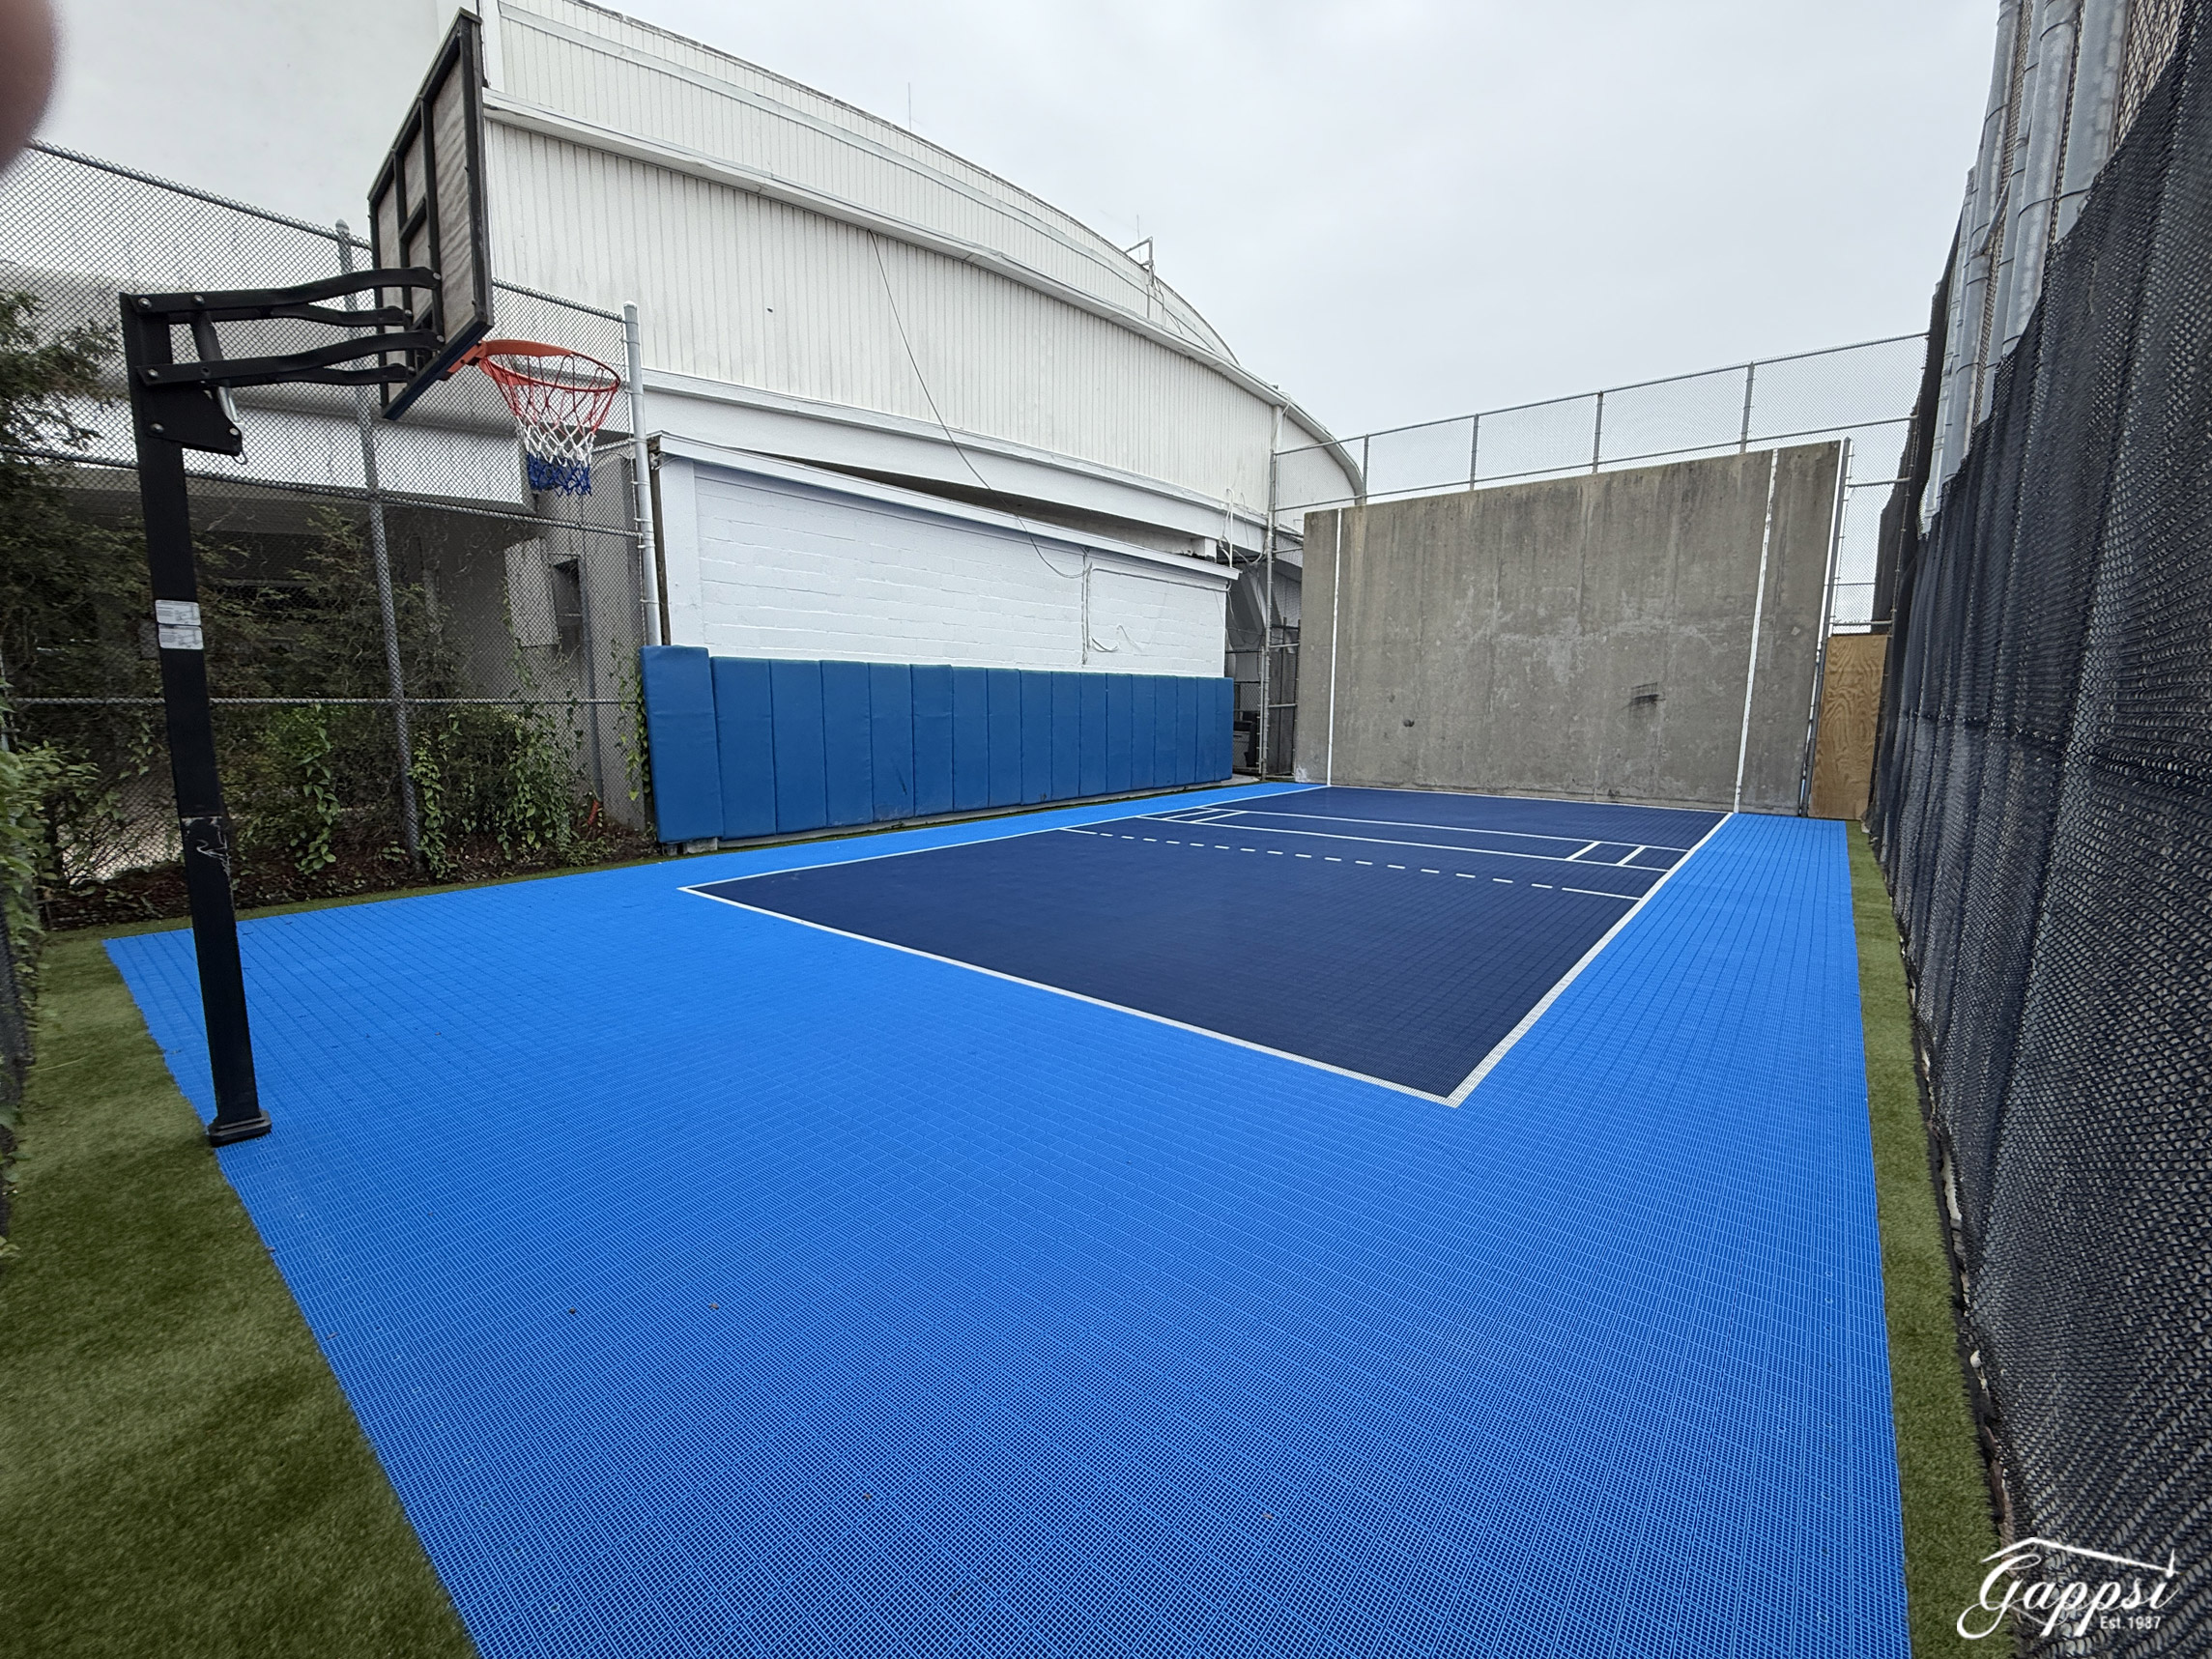
For this project, we opted for the “Top Court” style. This specific tile configuration is designed for multi-sport versatility and provides the consistent ball bounce and traction necessary for the fast-paced nature of racquetball.
Aesthetic Excellence: The Blue Gradient
Visual appeal is a hallmark of a Gappsi court. For this Long Beach residence, we moved away from the traditional green or red surfaces and leaned into a sophisticated, aquatic-inspired color palette that fits perfectly with the South Shore vibe.
-
The Center: We used a deep Navy Blue for the primary playing area in the custom racquetball court. This dark hue provides a high-contrast background, making it easier for players to track the fast-moving racquetball.
-
The Perimeter: To create a sense of depth and boundary, we used a vibrant Royal Blue for the out-of-bounds areas.
-
The Markings: To tie it all together, the court was professionally striped with crisp White Lines. The result is a sharp, “pro-league” look that stands out as a focal point of the backyard.
Seamless Integration: Keeping the Hoops
At Gappsi, we believe in functional design. The client had an existing basketball hoop already anchored into the site. Rather than removing it, we meticulously installed the Mateflex tiles and the synthetic turf border around the existing pole. This allows the space to remain a multi-functional “Sport Game Court,” where the family can transition from a high-intensity racquetball match to a casual game of HORSE without needing separate facilities.
A Mirror Image: The Gappsi Legacy
One of the most distinctive aspects of this job is its history. Just on the other side of the property wall sits another sports game court that Gappsi installed several years ago.
Standing between the two, it feels like looking at a mirror image of excellence. Seeing the older court still in fantastic condition is a testament to the longevity of our materials and the quality of our craftsmanship. The new racquetball court complements its “older brother” perfectly, creating a massive, contiguous sports complex within the property that is truly a rare find in Long Beach.
The Finishing Touch: Synthetic Turf Framing
Perhaps the most important detail for “curb appeal” was the decision to frame the court with high-quality synthetic turf.
As mentioned earlier, the original concrete slab was not perfectly square. This is a common issue with older construction. If we had simply laid the tiles and left them, the “crooked” edges of the concrete would have been an eyesore.
Our solution was to use synthetic turf to “square up” the visual field. We framed the entire court with a lush green border, which serves several purposes:
-
Separation: It creates a clean, distinct border between the athletic court and the perimeter fence.
-
Problem Solving: In areas where the concrete was narrow, we used a thin strip of turf; in areas where the concrete fell short of the fence line, we used more turf to fill the gap.
-
Maintenance: The turf provides a “buffer zone” that prevents grass clippings or dirt from blowing onto the court surface, keeping the Mateflex tiles cleaner for longer.
The contrast between the Royal Blue tiles and the vibrant green turf gives the entire backyard a manicured, resort-like feel.
Why Choose Gappsi for Your Long Beach Sports Game Court?
This Long Beach racquetball court is the latest example of why Gappsi remains the leader in outdoor sports environments on Long Island. We don’t just “lay down tiles”, we engineer solutions. Whether it’s dealing with non-square foundations, integrating existing equipment, or matching the aesthetic of a previous installation, our team handles every detail from concept to completion.
Long Beach residents know that the salt air and coastal weather can be tough on outdoor structures. By choosing Gappsi and materials like Mateflex and premium synthetic turf, you are investing in a court that is built to withstand the elements while providing endless hours of fitness and fun.
Ready to Build Your Dream Court?
From racquetball and basketball to pickleball and tennis, Gappsi is ready to transform your backyard. This latest project in Long Beach shows that no matter the shape of your existing space, we can create a professional, beautiful, and durable court tailored to your style.
Contact Gappsi Today
📍 Serving all of Long Island, NY — Nassau & Suffolk Counties
🌐 https://www.gappsi.com/
📞 Call now for a free consultation and estimate
 The turf features: