When you think about upgrading your home, you might picture a new patio or a remodeled kitchen. But what about an addition that enhances your lifestyle all year long? A sauna provides a warm, restorative escape during chilly Long Island winters and a perfect way to relax after a summer day by the pool. It’s a unique feature that adds significant value and appeal to your property. Building a custom cedar sauna Long Island home means creating a beautiful, functional space that complements your backyard oasis. This guide will walk you through the essential steps for turning this idea into a lasting home improvement.
Key Takeaways
- Think of a Sauna as a Wellness Investment: A custom cedar sauna is more than a luxury; it’s a lasting addition that improves your daily well-being and adds significant value to your home. Cedar is the ideal material for its natural durability and relaxing aroma.
- Personalize Your Sauna to Fit Your Needs: The best sauna is one designed just for you. You get to make the key decisions, such as choosing an indoor or outdoor location, selecting a traditional or infrared heater, and adding features like custom lighting and sound systems.
- Hire a Builder Who Manages the Details: A successful project depends on a builder who can handle everything from start to finish. Your builder should manage local permits, help with design, and ensure all electrical and ventilation requirements are met for a safe and seamless installation.
Why Invest in a Custom Cedar Sauna?
Adding a custom sauna to your home is more than just a luxury; it’s an investment in your personal well-being. It creates a private retreat where you can decompress and recharge, just steps from your back door. A custom build means you get a sauna that fits your space and your lifestyle perfectly, turning a corner of your home into a year-round sanctuary. It’s a feature that not only enhances your daily life but also adds unique value to your property.
Unwind and Improve Your Health
Imagine having a personal escape to melt away the day’s tension. A custom cedar sauna offers exactly that. The gentle, consistent heat helps relax your muscles and calm your mind, making it a powerful tool for stress reduction. Regular sauna sessions also promote sweating, which is your body’s natural way of flushing out toxins. This process can leave your skin feeling refreshed and rejuvenated. It’s a simple, enjoyable way to improve your overall well-being without ever leaving home. This small addition can make a huge difference in your daily routine.
Why Cedar Is the Best Wood for Your Sauna
There’s a reason cedar is the top choice for high-quality saunas. First, it’s beautiful. The rich tones and natural grain of cedar create a warm, inviting atmosphere. It also releases a subtle, pleasant aroma when heated, which adds another layer to the relaxing experience. Beyond aesthetics, cedar is incredibly practical. It naturally resists moisture and decay, so it holds up beautifully in the hot, humid environment of a sauna. Plus, cedar doesn’t absorb much heat, meaning the benches stay comfortable to the touch. At Gappsi, we prioritize using the best porcelain and natural stone for our outdoor projects, and we apply that same quality-first mindset to our saunas.
How Long Does a Custom Cedar Sauna Last?
When you invest in a home improvement project, you want it to last. A well-built cedar sauna is a durable addition that will serve your family for decades. With proper care, a sauna made from quality cedar can easily last 15 to 30 years, and premium grades of clear cedar can last even longer. The key is expert construction and consistent, simple maintenance. Think of it as a lasting feature of your home, much like a well-built patio or a sturdy fence. We build our projects to stand the test of time, and our restoration and sealing services show our commitment to long-term durability.
Types of Custom Cedar Saunas for Your Long Island Home
Choosing the right sauna for your home comes down to your personal preferences, your space, and how you envision using it. Whether you want a private escape inside your home or a natural retreat in your backyard, there’s a custom cedar sauna design that will fit your lifestyle perfectly. Understanding the main types available is the first step in planning your personal wellness sanctuary.
Indoor Cedar Saunas
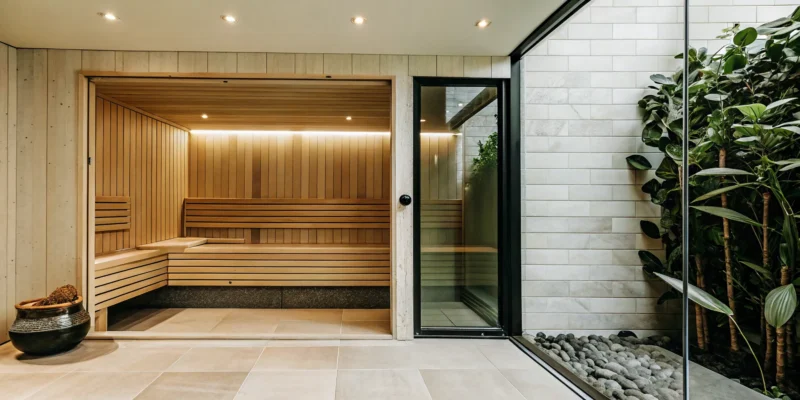
An indoor sauna offers the ultimate convenience, creating a private wellness retreat just steps from your living space. These saunas are perfect for year-round use, providing a warm escape during cold Long Island winters. Because they are built inside, they can be seamlessly integrated into your home’s existing footprint. We can design a custom indoor sauna to fit into a spacious master bathroom, a finished basement, or even a converted walk-in closet. Our expertise in home remodeling ensures your new sauna will feel like it was always meant to be there, adding both value and a touch of daily luxury to your home.
Outdoor Cedar Saunas
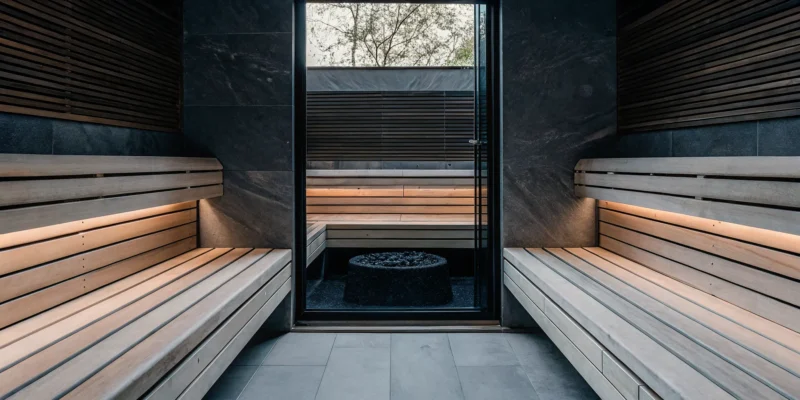
An outdoor cedar sauna transforms your backyard into a destination for relaxation and rejuvenation. Imagine enjoying a steamy session while surrounded by the beauty of your garden, even on a snowy day. These standalone structures are built to withstand the elements and can become the centerpiece of a complete backyard oasis, perfectly complementing a patio or swimming pool. An outdoor sauna allows you to connect with nature while enjoying a spa-like experience, creating a unique and tranquil escape right on your own property. It’s an amazing way to make the most of your outdoor space throughout the year.
Infrared vs. Traditional Finnish Saunas
The heating system is the heart of your sauna, and you have two main options: traditional or infrared. A traditional Finnish sauna uses an electric or wood-fired stove to heat rocks, warming the air to temperatures between 150°F and 195°F. You can pour water over the rocks to create a burst of steam for a more intense experience. In contrast, an infrared sauna uses special heaters to emit infrared light, which warms your body directly at a lower temperature, typically 120°F to 140°F. Many find this gentle heat more comfortable for longer sessions. Both styles offer incredible wellness benefits, and our team can help you select the perfect sauna for your home.
How Much Does a Custom Cedar Sauna Cost in Long Island?
When you’re planning to add a custom cedar sauna to your Long Island home, it helps to have a budget in mind. For most custom projects, you can expect to invest between $20,000 and $30,000. Of course, this is a general range. The final price tag can shift depending on the size of your sauna, the specific features you choose, and the complexity of the installation. Think of it as a long-term investment in your home’s value and your personal wellness. A custom sauna is more than just a hot room; it’s a personal retreat built right into your home. It’s a space to de-stress after a long day, soothe sore muscles, and spend quiet moments focused on your health.
At Gappsi, we create beautiful, high-quality saunas designed to fit your space and lifestyle perfectly. We can walk you through all the options to create a detailed quote that matches your vision and budget, ensuring there are no surprises along the way. The best way to get an accurate number is to discuss your dream sauna with a professional who can tailor the project to you. A well-planned project ensures you get the exact features you want without overspending, resulting in a beautiful and functional addition to your home that you’ll enjoy for years.
What Determines the Final Cost?
Several key factors influence the final cost of your custom sauna. The size is the most obvious one, as a larger sauna requires more materials and a more powerful heater. The type of cedar and other materials you select also play a big role. Your quote will typically include essential components like bench lumber, wall and ceiling boards, a foil vapor barrier, and the sauna heater with its controls.
Beyond the basics, your choice of heater (electric, wood-burning, or infrared) and any special design features will affect the price. It’s also smart to think about your home’s existing infrastructure. For example, you may need to assess your home’s electrical panel to ensure it can handle the sauna’s power requirements, especially in older homes. Planning for these elements from the start helps create a realistic budget.
Understanding Your Installation Quote
A good installation quote is much more than just a final number; it’s a complete roadmap for your project. It should clearly outline the scope of work, including the specific materials, the type of sauna being installed, and a projected timeline. This transparency is key to a smooth and stress-free process. Your quote should also reflect that your builder understands local Long Island building codes and will handle any necessary permits, so you don’t have to worry about the paperwork.
When you review your quote, make sure you understand every line item. Don’t hesitate to ask questions about the sauna installation process and what’s included. A reputable builder will be happy to explain everything. This ensures that you and your builder are on the same page from day one, which is the best way to make sure your project stays on schedule and within budget, resulting in the perfect custom sauna for your home.
How to Personalize Your Custom Sauna
Building a custom sauna means every detail can be tailored to your lifestyle and wellness goals. This is your chance to create a personal retreat that looks and feels exactly right. From the layout to the lighting, customizing your sauna is what makes it a truly special addition to your home. At Gappsi, we guide you through these choices to ensure the final result is a perfect fit. Let’s walk through the key areas where you can add your personal touch.
Plan the Size, Layout, and Benches
First, think about how you’ll use your sauna. Will it be a quiet escape for one or two people, or a social spot for family and friends? The size of your sauna will determine its capacity and influence the overall cost. Most custom projects on Long Island fall into a general price range that depends heavily on room size and features. Once you have a size in mind, you can plan the bench layout. Multi-level benches are a popular choice, as they allow you to experience different heat intensities. An L-shaped design can create a more conversational atmosphere. We can help you design a layout that maximizes your available space and creates a comfortable, functional interior for your new sauna.
Select a Heating System and Interior Features
The heater is the heart of your sauna, and you have several options. Traditional Finnish heaters use heated rocks to create a wave of enveloping steam, while infrared heaters use light to heat your body directly. Many homeowners are choosing low EMF carbon far infrared heaters for their effective and safe heating. To make your experience seamless, consider adding modern controls. A digital keypad gives you precise command over temperature and session length, so your sauna is always ready when you are. These thoughtful interior features are what transform a simple hot room into a sophisticated wellness tool that’s part of your daily routine.
Choose Lighting, Sound, and Finishes
This is where you can truly set the mood. The right lighting can make your sauna feel calming and restorative. Many people incorporate color light therapy, also known as chromotherapy, to create a specific ambiance. You can also integrate an enhanced audio system with Bluetooth, allowing you to listen to calming music, guided meditations, or your favorite podcast. Finally, the wood finish is a critical choice for both beauty and durability. While cedar is a fantastic option, it’s important to select a type of cedar that can withstand heat and moisture over time. These finishing touches are essential for creating a complete sensory experience in your personal oasis.
Where Should You Put Your Sauna?
Deciding where to place your new sauna is one of the most important steps in the process. The right spot depends on your home’s layout, your lifestyle, and whether you envision a private indoor retreat or a stunning backyard feature. You’ll need to think about practical things like available space, ventilation, and access to power. Whether you’re tucking it into a quiet corner of your home or making it the centerpiece of your outdoor living area, careful planning ensures your sauna is both beautiful and functional. Let’s walk through the key factors to help you find the perfect location.
Planning for Space and Ventilation
You can install a sauna in many places, including a spacious primary bathroom, a finished basement, a garage, or even a converted spare room. The most important factor is ensuring the area has proper ventilation to manage heat and moisture. A nearby window can help, but a dedicated ventilation system is often the best solution. Before you commit to a location, measure the area carefully to confirm the sauna will fit comfortably, leaving enough clearance around it. A professional can assess your chosen spot and determine if any modifications, like adding framing or improving airflow, are needed for a safe and effective home remodeling project.
Connecting to Water and Power
Your sauna will need a dedicated electrical circuit, so it’s crucial to plan for power. Before you get started, have a licensed electrician check your home’s electrical panel to make sure it can handle the additional load, as older homes may require an upgrade. Most infrared saunas need a 15 or 20-amp outlet, while traditional Finnish saunas with electric heaters often require more powerful 240-volt wiring. While most saunas don’t need a direct water line, having a nearby shower for rinsing off is a great convenience. Gappsi manages all utility connections, ensuring your installation is seamless and up to code, just as we do for complex swimming pools and spa projects.
Choosing Between an Indoor or Outdoor Sauna
An indoor sauna offers the ultimate convenience and privacy, letting you slip away for a relaxing session anytime. It’s protected from the elements and becomes a seamless part of your daily wellness routine. On the other hand, an outdoor sauna transforms your backyard into a year-round escape. Imagine stepping out into the crisp Long Island air before warming up in your cedar sanctuary. An outdoor sauna can be a stunning focal point, especially when integrated with a deck, patio, or pool area. You can even place it under one of our custom pavilions and pergolas to create a complete, sheltered wellness zone.
How to Choose a Sauna Builder in Long Island
Finding the right builder is the most important step in bringing your dream sauna to life. You need a partner who not only has technical skill but also understands your vision and can handle the entire project from start to finish. A great builder makes the process feel seamless, guiding you through design choices, local regulations, and the installation itself. They act as your single point of contact, which saves you the stress of coordinating different contractors for electrical, plumbing, and construction work. When you start vetting potential builders on Long Island, it helps to have a clear framework. Focus on four key areas to make your decision: their experience with local codes, their design quality, their installation process, and the support they offer for long-term maintenance. Getting these right ensures you end up with a beautiful, safe, and long-lasting addition to your home.
Handling Local Permits and Codes
Navigating building permits and local codes can feel like a major headache, but with the right builder, it’s a hands-off process for you. Every town in Nassau and Suffolk County has slightly different rules for construction, electrical work, and placement. An experienced local builder will already know what’s required in your area and will manage the entire permitting process on your behalf. When you interview a builder, ask them how they handle permits. A confident, clear answer is a great sign that they are professional and well-versed in local regulations, ensuring your sauna installation is done correctly and to code from day one.
Evaluating Design Options and Build Quality
This is where you get to see a builder’s craftsmanship shine. Before committing, take a close look at their portfolio. Do their past projects reflect the quality and style you envision for your home? A top-tier builder will offer extensive design flexibility, allowing you to create a sauna that is perfectly integrated with your property. They should also be transparent about what your project will cost. On Long Island, custom saunas often range from $20,000 to $30,000, depending on the size, wood species, heater, and other features. A great partner will work with you to select high-quality materials and finishes that fit your budget and aesthetic.
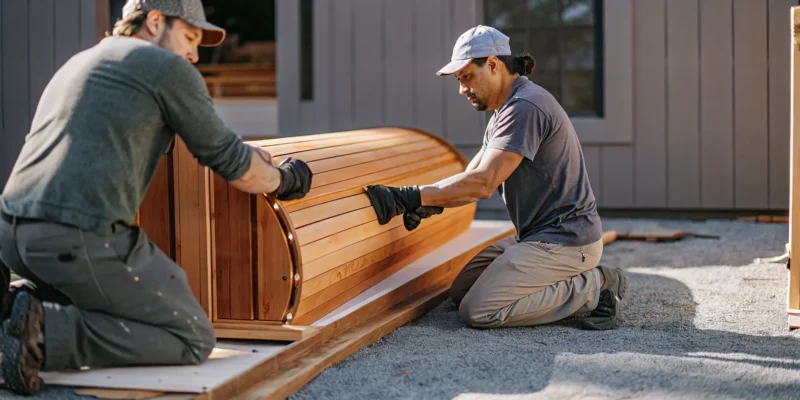
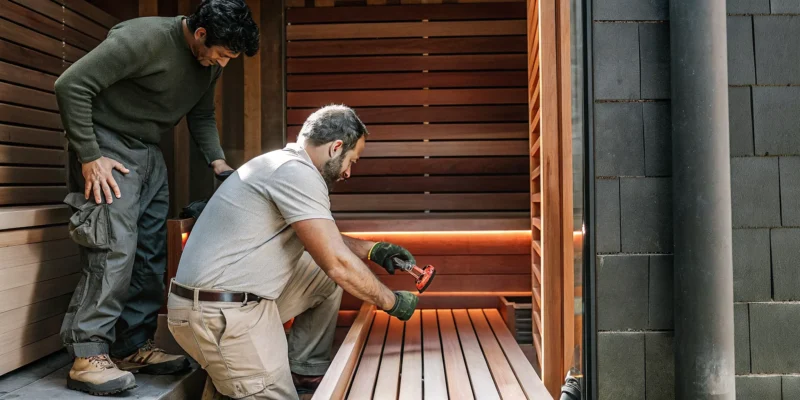
What to Expect During Installation
A professional installation is about more than just construction; it starts with careful planning. Your builder should begin with a thorough site assessment, which includes checking your home’s electrical panel to ensure it can handle the new heater. This is a critical step, especially for older homes that might need an electrical upgrade. The installation process itself is methodical. It involves framing the room, installing a foil vapor barrier, carefully fitting the wall and ceiling boards, and assembling the benches. Finally, the team will install the heater and controls. Your builder should keep you informed throughout the project, so you always feel confident and clear on the progress.
Simple Maintenance for Your New Sauna
Your custom cedar sauna is an investment in your home and your well-being, and a little routine care will keep it looking and functioning beautifully for years. A good builder will provide you with clear instructions for upkeep before they consider the job done. The most important habit is to wipe down the benches and interior surfaces with a clean, damp cloth after each session to keep the wood fresh. You should also do a quick monthly check of the components. With an electric heater, the heating elements may need to be replaced every five to seven years. Following these simple guidelines ensures your sauna remains a perfect retreat.
Build Your Dream Sauna with Gappsi
Bringing a custom sauna to your Long Island home is an exciting project, and our team at Gappsi is here to handle every detail from start to finish. We believe the process should be as relaxing as the final result. We combine our deep expertise in design and construction with your personal vision to create a sauna that perfectly fits your lifestyle. Whether you envision a cozy indoor retreat or a stunning outdoor feature, we manage the entire build so you can focus on the dream. Our goal is to make your ideal sauna a reality, ensuring it integrates seamlessly with your home and provides a sanctuary for years to come.
How We Design and Build Your Sauna
Our process begins with you. We listen to your ideas and help you design a custom sauna that supports how you want to relax and recharge. We consider your space, your aesthetic preferences, and how you plan to use it. From private homes to commercial wellness spaces, every sauna we build is tailored for long-term performance and comfort. Our team personally oversees each project from the initial design sketches to the final installation, ensuring every element aligns with our high standards and your vision for the perfect wellness retreat.
Explore Our High-Quality Materials and Features
The right materials make all the difference. We build our saunas with premium cedar, a wood celebrated for its rich appearance, pleasant aroma, and natural resistance to moisture. It feels comfortable even in high heat, making it the ideal choice for a lasting and luxurious experience. Beyond the wood, we help you select the perfect features to complete your sauna. You can choose from different heating systems, bench layouts, interior lighting, and sound systems. Our commitment to using high-quality porcelain and natural stone in our other projects extends to every material we use for your sauna.
Complete Your Backyard Oasis
A sauna can be a standalone feature or the final piece of your dream backyard. Imagine stepping out of your sauna and into a beautifully designed outdoor living space. At Gappsi, we specialize in creating cohesive backyard environments. We can integrate your new sauna with a custom swimming pool, a stylish patio, or a complete landscape transformation. Whether you have a small corner or a large property, we can design a project that fits your space and budget. If you’re thinking about a build, the best time to start the conversation is now.
Related Articles
- Outdoor Cabin Sauna Long Island: A Buyer’s Guide
- The Ultimate Long Island Sauna Installation Guide
- Long Island Sauna Installation: A Complete Guide
- Custom Sauna Builder Long Island: A Buyer’s Guide
- cedar sauna exterior Archives – Gappsi Group
Frequently Asked Questions
How do I decide between a traditional Finnish sauna and an infrared one? The best way to choose is to think about the kind of heat you enjoy most. A traditional Finnish sauna gives you that classic, intense wave of heat and steam, which many people find deeply cleansing. An infrared sauna provides a gentler, radiant heat that warms your body directly, which can feel more comfortable for longer sessions. Both offer wonderful health benefits, so the decision really comes down to personal preference for the experience you want to create.
How much upkeep does a cedar sauna actually require? You’ll be happy to know that maintaining a cedar sauna is surprisingly simple. The most important step is to wipe down the benches and backrests with a damp cloth after you use it to keep the wood fresh. Beyond that, a quick monthly check of the heater and interior is a good habit. Cedar is naturally durable and resistant to moisture, so a little bit of consistent care is all it takes to keep your sauna beautiful for decades.
My house is on the older side. Can it handle a new sauna? This is a very common and smart question. The main consideration for any home, especially an older one, is the electrical panel. A sauna requires a dedicated circuit, and we always start with a professional assessment to see if your current panel can support it. If an upgrade is needed, it’s a straightforward part of the installation process that our team handles, ensuring everything is safe and up to code.
How long does the entire process take, from our first conversation to the finished sauna? The timeline can vary depending on the complexity of your design and whether any permits are required. Generally, once the design is finalized and materials are ordered, the on-site construction and installation can take anywhere from a few days to a couple of weeks. We provide a clear and detailed timeline in our project quote, so you will know exactly what to expect before we begin any work.
Can a sauna be part of a larger backyard renovation? Absolutely. A sauna is a fantastic element to include in a complete backyard transformation. We often design saunas to work in harmony with other features like a swimming pool, a stone patio, or a new landscape design. Since we manage all aspects of outdoor construction, we can create a cohesive plan where your new sauna feels like a natural and integrated part of your dream backyard oasis.