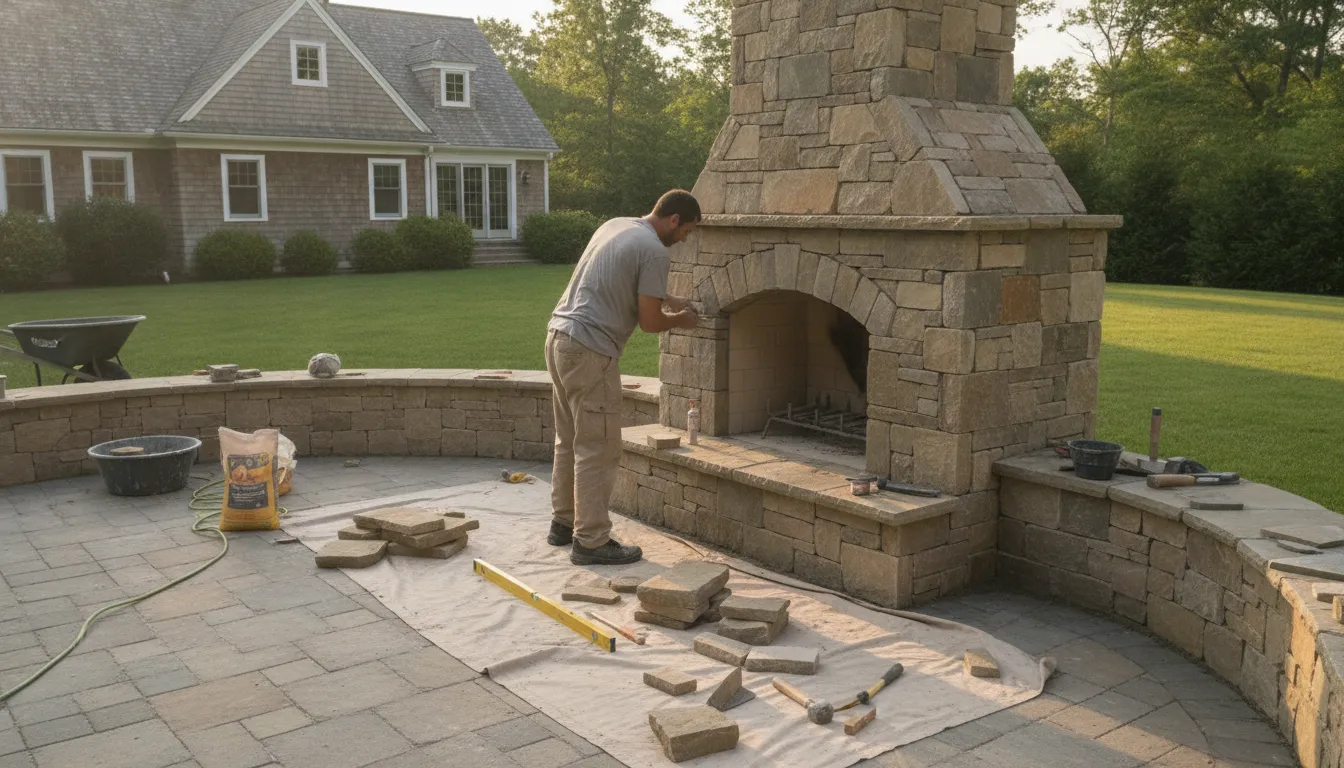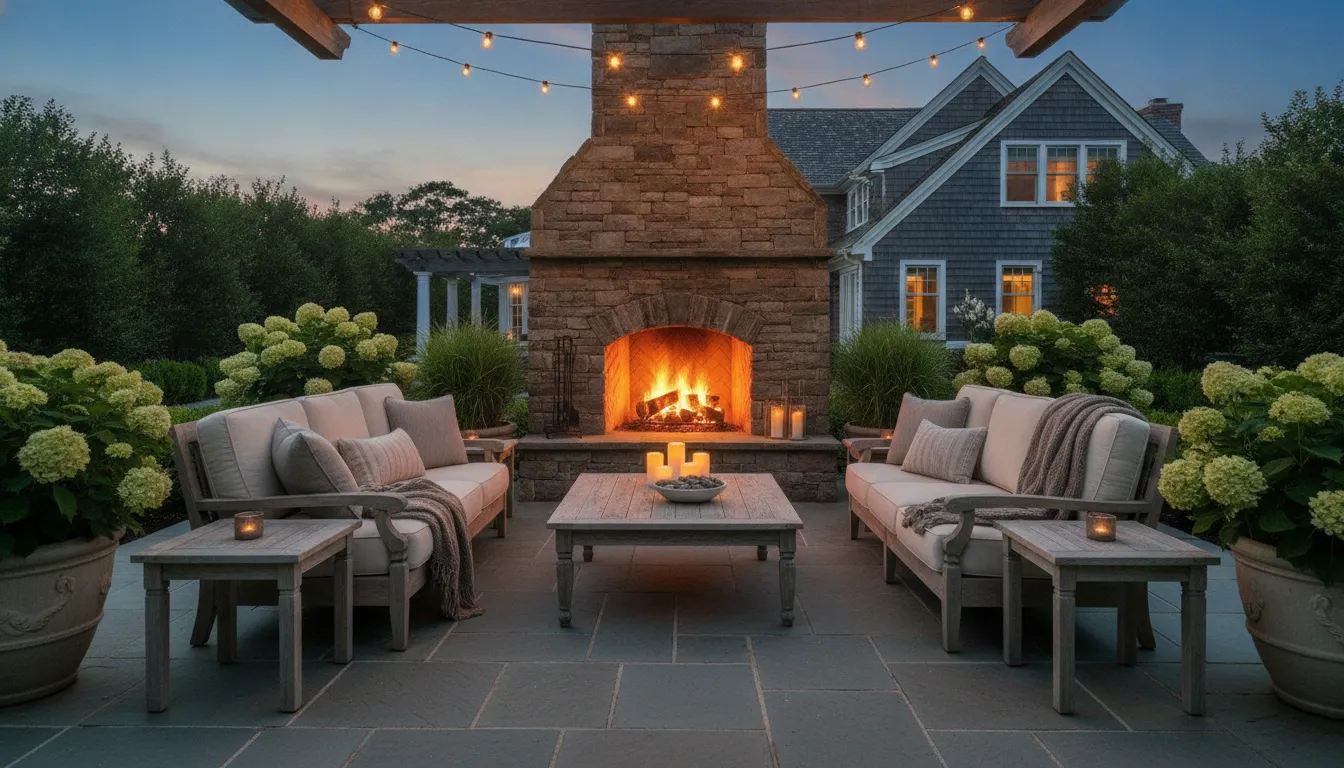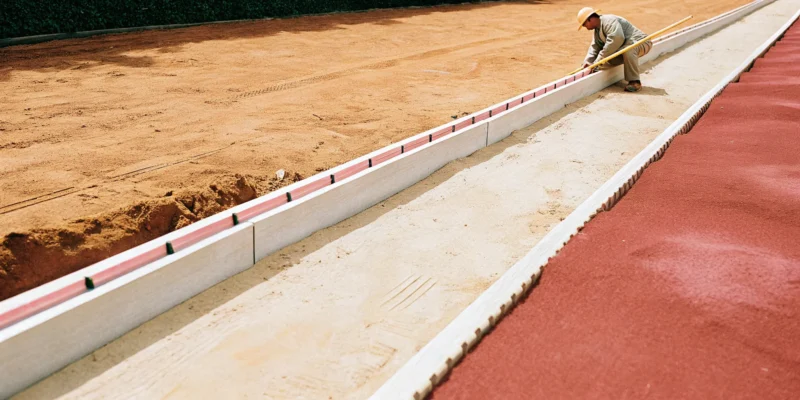
Masonry contractor in Long Island, NY, installing stone pavers on a driveway.

Your Guide to Masonry Contractors in Long Island, NY

We’ve all heard stories about home renovation projects that went wrong. A contractor who disappears, a budget that doubles, or a finished product that starts crumbling after one season can be a homeowner’s worst nightmare. Knowing the red flags to watch for is the best way to avoid these pitfalls. When it comes to a significant investment like masonry, you deserve peace of mind. This guide will give you the essential questions to ask and the warning signs to spot, helping you confidently choose from the many masonry contractors Long Island NY has available.

Key Takeaways

  • Partner with a true professional: A trustworthy contractor will readily provide their license and insurance, share a portfolio of their work, and give you a detailed, itemized estimate that explains all costs upfront.
  • Think beyond the bricks: A great masonry contractor is a design partner who transforms your vision into reality. Their skills include creating custom patios, building structural retaining walls, and working with materials like natural stone to add lasting beauty and function to your home.
  • Choose materials built for Long Island: Your project’s durability depends on selecting the right materials for our local climate. An experienced contractor will guide you to options, like natural stone or porcelain, that resist our freeze-thaw cycles and keep your investment beautiful for years.

What Does a Long Island Masonry Contractor Do?

When you hear the term “masonry contractor,” you might picture someone simply laying bricks. While that’s part of the job, their role is much broader and more creative. A skilled masonry contractor is an artisan who uses materials like stone, brick, and concrete to build beautiful and long-lasting structures that define your home’s character. From foundational work that ensures stability to decorative details that add curb appeal, their craftsmanship is essential for many home improvement projects. They are the experts who turn a pile of raw materials into a stunning patio, a sturdy retaining wall, or an elegant stone fireplace.

Building with Brick and Block

One of the primary jobs of a masonry contractor is building with brick and concrete blocks. These materials are incredibly versatile and can be used for both structural and decorative purposes. Structurally, a contractor uses them to construct strong foundations, load-bearing walls, and durable retaining walls that hold back soil. This work is the backbone of many outdoor living projects, ensuring everything is safe and built to last.

On the decorative side, a mason can use brick to create classic veneers for your home’s exterior, build charming garden walls, or construct the base for a beautiful outdoor kitchen. The pattern of the bricks, known as the bond, and the color of the mortar can be customized to create a unique look that complements your home’s style. Gappsi’s expert masonry services cover everything from simple repairs to complex new constructions.

Installing Custom Stonework

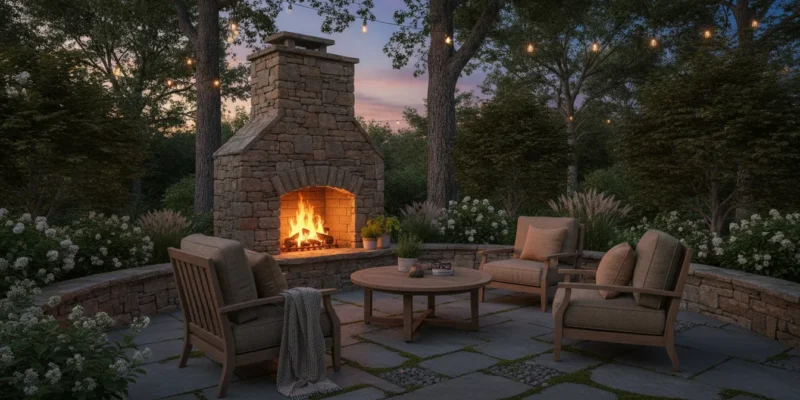
Installing custom stonework is where a masonry contractor’s artistry truly comes to life. Working with natural stone requires a keen eye for detail and a deep understanding of how to cut, shape, and fit each unique piece. This skill allows them to create one-of-a-kind features that become focal points of your property. A contractor can apply stone to a wide range of applications, from exterior facades that give your home a rustic or modern look to cozy indoor fireplaces that anchor a living room.

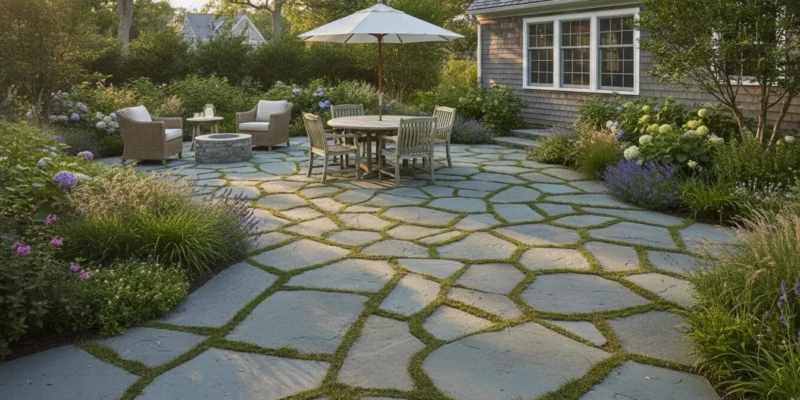
Imagine a winding garden path made of bluestone, a grand entryway framed with granite, or an outdoor patio perfect for entertaining. These are all projects a masonry contractor can bring to reality. By using high-quality porcelain and natural stone, they can craft surfaces and structures that are not only beautiful but also incredibly durable and timeless.

Pouring Concrete and Paving Surfaces

Beyond building walls, masonry contractors are also experts at creating flat, functional surfaces through concrete work and paving. This includes essential groundwork like pouring concrete foundations for home additions, sheds, or pavilions. They also install driveways, walkways, and patios that need to withstand daily use and Long Island’s changing weather. A contractor can work with poured concrete, asphalt, or install elegant and durable pavers to create the perfect surface for your needs.

Proper installation is critical for these surfaces to prevent cracking, shifting, and drainage issues down the road. A professional ensures the ground is properly prepared and graded before any materials are laid. Whether you’re looking for a classic concrete patio or interested in modern, permeable gravel driveways, a masonry contractor has the expertise to get the job done right.

Restoring and Protecting Masonry

A masonry contractor’s work doesn’t always involve new construction. A crucial part of their job is restoring and protecting existing masonry to preserve its beauty and structural integrity. Over time, exposure to the elements can cause mortar to crumble, bricks to crack, and stone to stain. A skilled contractor can diagnose these issues and perform necessary repairs, like repointing, which involves replacing old mortar to strengthen the wall.

They can also help protect your investment from future damage. An experienced contractor can identify potential problems like water intrusion or shifting and recommend solutions. Services like professional cleaning can remove years of dirt and grime, while applying a high-quality sealant can protect your patios, driveways, and walls from moisture, salt, and stains. These restoration and sealing services are key to extending the life of your masonry and keeping it looking its best.

Key Services from a Long Island Masonry Contractor

A great masonry contractor does more than just lay bricks. They are craftsmen who shape the look, feel, and function of your property. From creating stunning outdoor entertainment areas to building essential structural elements, their work adds lasting value and beauty. A full-service company can handle a wide range of projects, ensuring a cohesive design across your entire property. Understanding the key services they offer is the first step in planning your home improvement project.

Patios and Outdoor Living Spaces

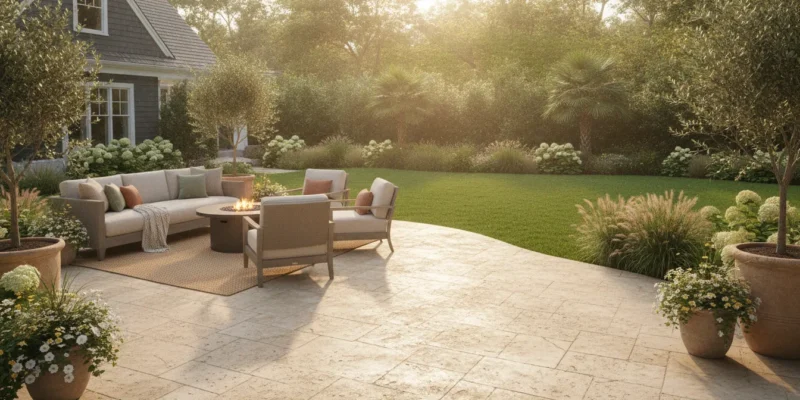
A skilled masonry contractor can completely transform your backyard into a functional and beautiful outdoor living area. This goes far beyond just laying down a few pavers. They work with you to design a custom patio that fits your lifestyle, whether you envision a cozy spot for morning coffee or a sprawling space for entertaining guests. Using materials like natural stone or elegant porcelain pavers, they create surfaces that are as durable as they are stunning. A great mason helps you think about the entire space, ensuring your new patio integrates perfectly with your home, garden, and other features like a pool or outdoor kitchen.

Walkways and Retaining Walls

Masonry plays a huge role in your home’s curb appeal and overall structure. Well-crafted walkways guide visitors to your door and connect different zones of your landscape, while sturdy retaining walls can turn a sloped, unusable yard into a terraced garden or level lawn. A professional contractor understands how to build these features to withstand Long Island’s changing seasons, preventing cracks and shifting. Beyond their practical function of managing soil and water, retaining walls and walkways add texture, definition, and value to your property. They are foundational elements of a thoughtful landscape design that can truly complete your home’s exterior look.

Driveways and Pool Decks

Your driveway and pool deck are high-traffic areas that demand expert installation. A properly built masonry driveway not only looks great but also withstands daily use without developing cracks or drainage problems. For pool decks, the right material and construction are essential for safety and comfort. A masonry expert can help you choose slip-resistant surfaces that stay cooler under the summer sun. From classic pavers to modern porcelain, they ensure your swimming pool area is a safe and inviting oasis. These projects are about more than just looks; they are about creating durable, long-lasting surfaces that protect and enhance your property.

Residential and Commercial Projects

Top masonry contractors on Long Island serve both homeowners and businesses. While the scale might differ, the core principles of quality craftsmanship, durable materials, and smart design remain the same. For a homeowner, this could mean a beautiful new stone veneer on their house or a custom-built outdoor fireplace. For a commercial property, it might involve creating an inviting entryway or a durable parking area. Finding a versatile contractor who has experience with a wide range of home remodeling and commercial projects ensures they have the skills to handle any challenge, whether it’s a small repair or a large-scale installation in Suffolk or Nassau County.

Common Materials Used in Long Island Masonry

Choosing the right materials for your masonry project is a big decision. It’s about more than just looks; it’s about ensuring your new patio, walkway, or wall can handle everything Long Island’s climate throws at it. From coastal moisture to harsh freeze-thaw cycles, the materials you select will determine the beauty and longevity of your investment. A professional masonry design considers both aesthetics and durability to give you the best result.

Brick and Concrete Blocks

Brick and concrete blocks are the foundational workhorses of masonry, and for good reason. They are incredibly versatile, serving both structural and decorative roles. You’ll find them used for everything from sturdy retaining walls and home foundations to beautiful brick veneers and classic patios. Their uniform shape makes for a clean, timeless look that complements many architectural styles. For homeowners looking for a reliable and proven material, brick and concrete blocks offer a durable and cost-effective solution that has stood the test of time in countless Long Island homes.

Natural Stone, Including Bluestone

If you want a one-of-a-kind look with unmatched character, natural stone is an excellent choice. Materials like granite, travertine, and especially bluestone are not only beautiful but also incredibly resilient. They are perfectly suited to withstand Long Island’s freeze-thaw cycles, making them ideal for outdoor spaces. Each stone has unique colors and textures, adding a touch of organic elegance to patios, pool decks, and garden paths. Gappsi offers a wide selection of porcelain and natural stone to create a truly custom outdoor living area that feels both luxurious and grounded.

Porcelain Pavers and Cast Stone

For a more modern and uniform appearance, many homeowners are turning to porcelain pavers and cast stone. Porcelain is a fantastic option due to its incredible durability and low maintenance. It’s non-porous, which means it resists stains, mold, and water damage, making it a perfect choice for pool surrounds and outdoor kitchens. Cast stone, a type of precast concrete, can be molded to look like natural stone but often comes at a more accessible price point. These engineered materials provide a sleek, contemporary finish while offering predictable performance and strength for your project.

How Your Material Choice Impacts Durability

Your choice of material directly affects how long your masonry will last and how much maintenance it will need. Long Island’s coastal air and seasonal temperature swings can be tough on outdoor surfaces. An unsuitable material might crack, chip, or fade over time. This is why it’s so important to work with an experienced contractor who understands which materials perform best locally. Selecting the right stone or paver is an investment in your property’s future, preventing costly repairs and ensuring your outdoor space remains beautiful for years. Proper installation and finishing, including restoration and sealing, also play a crucial role in protecting your investment.

Finding the Right Masonry Contractor in Long Island

Choosing the right contractor is the most important step in bringing your masonry project to life. The quality of their work determines whether your new patio or walkway looks beautiful for decades or starts crumbling within a few years. For Long Island homeowners, this means finding a team with local expertise, a solid reputation, and the skill to execute your vision perfectly.

Why Choose a Full-Service Company like Gappsi?

When your masonry is part of a larger vision, like a new patio connected to a swimming pool, working with multiple contractors can get complicated. This is where a full-service company shines. Instead of you coordinating between different teams, a single company handles everything, ensuring your entire project flows together seamlessly. A full-service team can manage the landscaping, pool installation, and stonework with a unified approach. A skilled masonry contractor protects your property from cracking, water intrusion, and long-term structural damage. A company like Gappsi, which oversees the entire process, brings comprehensive expertise to ensure a cohesive and durable result for your whole outdoor space.

What to Look for in a Specialized Contractor

Finding a qualified professional in Suffolk or Nassau County requires knowing what separates experienced pros from operators who might leave you with problems. Always look for a contractor who understands Long Island’s unique challenges, from our coastal weather to local soil conditions. Before you discuss design ideas, verify that any contractor you consider holds valid licenses and insurance. An experienced masonry contractor will also have an extensive portfolio of completed work. Ask to see projects similar to yours. This is the best way to gauge their skill and ensure they can deliver results that last, preventing issues like cracked pavers or poor drainage down the road.

How to Vet Your Masonry Contractor

Choosing a masonry contractor is a big decision, and it’s one you want to get right the first time. You’re not just hiring someone to lay bricks or stones; you’re trusting them with a significant investment in your home’s value and your family’s enjoyment. Taking the time to properly vet your options is the best way to ensure your project runs smoothly and the final result is something you’ll love for years to come. A great contractor will be a partner in your project, guiding you from the initial design to the final walkthrough and making sure your vision comes to life exactly as you imagined.

To find that perfect partner, you need to do a little homework. This process isn’t about finding the cheapest or fastest option. It’s about finding the right fit for your specific vision and needs. By checking for the right credentials, looking at past work, and getting clear estimates, you can move forward with confidence. It’s the difference between a stressful, drawn-out process and a seamless, exciting home transformation. Let’s walk through the essential steps for vetting a masonry contractor in Long Island, so you can avoid common pitfalls and hire a true professional.

Verify Their License and Insurance

First things first: any contractor you consider must be properly licensed and insured. This is non-negotiable. A license proves they have met local and state requirements to operate legally in Long Island. Insurance, including liability and worker’s compensation, protects you from any financial responsibility if an accident happens on your property. Don’t just take their word for it; ask to see the documents. A reputable masonry company will provide them without hesitation. Be wary of anyone who suggests you don’t need permits for a major project. This is a huge red flag and could lead to serious legal and structural problems down the road.

Read Online Reviews and Ask for References

Online reviews and personal references give you a glimpse into what it’s like to work with a contractor. Look at reviews on Google, Yelp, and other local directories to see what past clients are saying. Pay attention to how the company responds to both positive and negative feedback. While you’re researching, remember that a few negative reviews aren’t necessarily a dealbreaker, but a pattern of similar complaints is. To get a fuller picture, ask the contractor for a list of recent references. Speaking directly with former clients allows you to ask specific questions about their experience with communication, timelines, and the quality of the finished masonry work.

Review Their Portfolio of Work

A picture is worth a thousand words, especially when it comes to masonry. A contractor’s portfolio is your window into their craftsmanship, style, and experience. Look for a gallery of high-quality photos and videos showcasing a wide range of completed projects. Do they have experience with the specific materials you want to use, like natural stone or porcelain pavers? Can you see examples of projects similar in scope to yours? A robust portfolio with plenty of before-and-after shots demonstrates a history of successful work and helps you visualize what they can do for your own home. It’s the best way to confirm their style aligns with your vision.

Request and Compare Detailed Estimates

Once you’ve narrowed your list to a few top contenders, it’s time to request detailed written estimates. Avoid contractors who give you a single number over the phone. A professional estimate should be a comprehensive document that breaks down all the costs, including labor, materials, permits, and any other potential fees. Get at least three bids to compare, but remember that the lowest price isn’t always the best choice. A suspiciously low bid could indicate subpar materials or inexperienced labor. A good contractor will walk you through their estimate, explain the scope of work, and provide a clear project timeline, ensuring you understand exactly what you’re paying for.

What to Compare When Choosing Your Contractor

Once you have a shortlist of potential contractors, it’s time to compare them. Looking beyond the price tag is key to finding the right partner for your project. The best fit will be a company that not only understands your vision but also has the local knowledge and skill to bring it to life beautifully and durably. Focus on a few core areas: their experience in Long Island, their design flexibility, how they communicate, and the quality they promise. This approach helps you find a contractor who will deliver a final product you’ll love for years.

Experience and Local Expertise

When you’re investing in your home, you want a contractor who knows their stuff, especially in our unique Long Island environment. A skilled masonry contractor with years of local experience can anticipate and prevent common issues like cracking, shifting, and water intrusion caused by our specific climate and soil conditions. Ask contractors about their experience working in your town. A team that has been building patios, walkways, and retaining walls in Suffolk and Nassau County for decades will understand the local building codes and environmental factors, ensuring your project is built to last.

Design and Customization Options

Your home is a reflection of your style, and your outdoor space should be no exception. The right contractor will work with you to create a custom design that fits your vision and lifestyle. Look for professionals who offer a variety of design and customization options, from different materials and patterns to unique layouts. Whether you’re dreaming of a rustic stone patio or a sleek, modern pool deck, your contractor should be a creative partner, helping you select the perfect materials and finishes to achieve the look you want. Don’t settle for a one-size-fits-all approach.

Communication Style and Project Timeline

Clear and consistent communication is the foundation of a successful project. A great contractor will listen to your goals, ask thoughtful questions, and explain the process clearly from start to finish. They should provide a detailed project timeline and be upfront about pricing and any potential challenges. Pay attention to how they communicate during the initial consultation. Are they responsive and easy to talk to? A company that manages the entire project effectively will keep you informed every step of the way, making the entire experience smoother and less stressful.

Quality of Materials and Workmanship

The long-term beauty and durability of your masonry project depend entirely on the quality of the materials and the skill of the installation. A low bid might be tempting, but it could mean subpar materials that will degrade quickly. Ask potential contractors what types of materials they use and why. A reputable company will be proud to showcase their portfolio and explain how their excellent workmanship ensures a lasting result. The difference between a project that looks great for a few years and one that lasts for decades often comes down to a contractor’s commitment to quality.

Understanding Masonry Project Costs in Long Island

When you’re planning a new patio, walkway, or retaining wall, the budget is always a top consideration. The final cost of a masonry project in Long Island can vary quite a bit, and it’s helpful to know what you’re paying for. The price reflects not just the materials you see but also the skill, preparation, and expertise that ensure your investment lasts for decades. A well-executed project prevents headaches like cracked pavers and drainage issues down the road. Let’s break down the factors that shape the price tag so you can approach your project with confidence.

What Influences the Final Price?

Several key elements determine the total cost of your masonry work. The materials you choose are a major factor; durable and beautiful options like natural stone will have a different price point than classic concrete pavers. The size and complexity of your project also play a significant role. A simple, straight walkway is less labor-intensive than a multi-level patio with custom inlays and curves. Finally, the quality of the contractor you hire is crucial. An experienced masonry team invests time in proper site preparation, which is essential for a stable, long-lasting installation that can withstand Long Island’s weather cycles.

What Should Be in Your Project Estimate?

A professional project estimate should be more than just a single number. Look for a detailed, itemized document that clearly outlines the entire scope of work. It should include a breakdown of costs for materials, labor, and any necessary permits for your town in Nassau or Suffolk County. The estimate should also specify the exact materials being used, from the pavers to the base aggregate and jointing sand. A clear payment schedule and a projected timeline for completion are also signs of a trustworthy contractor. This transparency helps you understand exactly what you are getting and allows you to compare different proposals accurately.

Common Pricing Myths to Avoid

It’s easy to fall for a few common myths when comparing project costs. The biggest one is that the lowest bid is always the best choice. An unusually low price can be a red flag for subpar materials, inexperienced labor, or a contractor who isn’t properly licensed or insured. Another misconception is that all contractors offer the same level of quality. In reality, expertise varies widely. It’s also important to remember that while masonry is incredibly durable, it isn’t completely maintenance-free. Over time, your patio or driveway may require professional attention, so it’s wise to partner with a company that also offers restoration and sealing services.

How to Handle Common Project Challenges

Even the most carefully planned home improvement project can hit a few bumps. The key to a smooth and stress-free experience is working with a contractor who anticipates these challenges and has a clear plan to address them. From unpredictable weather to coordinating different work crews, being prepared is half the battle. When you know what to expect, you can work with your masonry team to keep your project on track and on budget. Here’s how to handle some of the most common hurdles you might face.

Planning for Long Island’s Weather

Here on Long Island, we know the weather can be a wild card. A week of unexpected rain or a sudden cold snap can affect masonry work, as materials like mortar and concrete need specific conditions to cure properly. An experienced local contractor understands this. They will build flexibility into the project schedule from the start, creating contingency plans for weather delays. This proactive approach ensures that work only proceeds when conditions are right, protecting the quality and longevity of your investment. A seasoned team will monitor the forecast closely and communicate any necessary schedule adjustments, so you’re never left guessing.

Coordinating with Other Project Teams

Your dream backyard might involve more than just beautiful stonework. If your project includes landscape lighting, an outdoor kitchen, or a new swimming pool, multiple specialized teams will need to work together. Without a single point of contact, coordinating these efforts can become a major headache, leading to delays and miscommunication. This is where a full-service company truly shines. By handling all aspects of the project, from masonry to landscaping and electrical, they ensure every team is perfectly synchronized. This integrated approach simplifies the entire process for you and keeps the project running like a well-oiled machine.

Managing Your Budget and Avoiding Extra Costs

Sticking to a budget is a top priority for any homeowner. The best way to prevent unexpected costs is to start with a detailed and transparent estimate. A trustworthy contractor will walk you through every line item and discuss potential unknowns, like discovering difficult soil during excavation. While it’s always wise to have a small contingency fund for true surprises, a professional team will work to minimize them. They should provide clear options and pricing for any changes you decide to make along the way. This open communication about your masonry project builds trust and ensures you stay in control of the final cost.

Setting a Realistic Project Timeline

It’s exciting to imagine your finished project, but a realistic timeline is crucial for managing expectations. Be wary of any contractor who promises an impossibly quick turnaround. A professional timeline accounts for more than just construction days; it includes time for ordering materials, securing permits, and potential weather delays. A great contractor will provide a clear schedule and keep you informed about progress and any adjustments that need to be made. This transparency helps manage expectations and ensures a more predictable and enjoyable experience as you watch your vision for a new pavilion or pergola come to life.

Red Flags to Watch For When Hiring a Contractor

Choosing a contractor is a big decision, and you want to feel confident you’re putting your home in the right hands. While most professionals are honest and hardworking, knowing a few warning signs can help you avoid a project nightmare. Think of it as doing your due diligence to protect your investment. Keep an eye out for these common red flags when you start meeting with potential masonry contractors for your Long Island home.

No License or Insurance

This is the biggest and brightest red flag of them all. A professional contractor will always be properly licensed and insured, and they won’t hesitate to provide proof. When you hire a masonry contractor, verifying their license should be your first step. If a contractor suggests that a major project doesn’t require permits, consider it a dealbreaker. Insurance is just as critical. Without it, you could be held financially responsible if a worker gets injured on your property. Don’t take that risk. A legitimate business protects both its team and its clients.

Vague Contracts or Timelines

A handshake and a promise might sound nice, but they won’t protect you if things go wrong. A detailed, written contract is a sign of a true professional. Be cautious of anyone who offers a vague contract or timeline, as this can signal a lack of accountability. Your contract should clearly outline the full scope of work, the specific materials being used, a payment schedule, and an estimated start and completion date. This document sets clear expectations for everyone involved and serves as your guide throughout the home remodeling project. If a contractor is hesitant to put everything in writing, it’s best to walk away.

Pressure Tactics or Unusually Low Bids

If an offer seems too good to be true, it probably is. Be very careful with unusually low bids, which often point to hidden costs, low-quality materials, or inexperienced labor down the line. A quality project using durable porcelain and natural stone has real costs, and a drastically low price means corners are being cut somewhere. Also, be wary of pressure tactics. A reputable contractor will understand this is a major decision and will give you the space to review your estimate and contract. Anyone pushing you to sign on the spot or offering a “today only” deal is not looking out for your best interests.

Key Questions to Ask Before You Sign

You’ve done your research and have a shortlist of masonry contractors. Before you sign a contract, it’s time to ask a few final, critical questions. Getting clear answers now will help you feel confident in your choice and ensure your project runs smoothly from start to finish. Think of this as your final checklist before committing to a partner for your home improvement project.

First, always ask: Are you licensed and insured for work in Long Island? This is non-negotiable. A licensed contractor is accountable to local standards, and proper insurance protects you and your property from any accidents or damages during construction. A reputable contractor should have no problem providing you with proof of their liability insurance and license number for Nassau or Suffolk County.

Next, inquire about their experience: Can I see a portfolio of your work and speak with a few references? Looking at photos is great, but seeing completed projects in person is even better. Ask to see examples that are similar to what you have in mind. A contractor who is proud of their work will happily provide a portfolio and testimonials from past clients. This is your chance to hear directly about their professionalism, communication, and the quality of their craftsmanship.

Finally, get specific about logistics: How do you handle permits, and what does the project timeline look like? A professional knows that significant masonry projects require permits. If a contractor suggests skipping them, you should treat that as a serious warning sign. They should be able to explain the permitting process and provide a detailed timeline for your project, including who your main point of contact will be. This clarity upfront prevents misunderstandings and keeps everyone on the same page.

Related Articles

Frequently Asked Questions

Is it really worth paying more for a high-end masonry contractor? Think of it this way: quality masonry is an investment in your home’s future. A lower price often means cutting corners, whether it’s with subpar materials or rushed site preparation. Those shortcuts can lead to cracks, drainage problems, and shifting surfaces within a few years, costing you much more in repairs. A professional contractor’s price reflects their expertise, proper insurance, high-quality materials, and a commitment to building something that will last for decades. You’re paying for peace of mind and a beautiful result that truly adds value to your property.

What’s the best material for a patio on Long Island? The “best” material really depends on your style and how you plan to use the space. Natural stone like bluestone is a classic choice that offers timeless, organic beauty and stands up well to our freeze-thaw cycles. If you prefer a more modern look with very little maintenance, porcelain pavers are a fantastic option. They are incredibly dense and non-porous, so they resist stains, mold, and fading, which is perfect for areas around a pool or an outdoor kitchen. A good contractor can walk you through the pros and cons of each to find the perfect fit for your home.

My project is small, just a simple walkway. Do I still need to vet a contractor so carefully? Absolutely. The size of the project doesn’t change the importance of quality craftsmanship. Even a small walkway can cause major headaches if it’s not installed correctly. Poor preparation can lead to uneven stones, drainage issues that send water toward your foundation, or cracks after the first winter. Taking the time to check for a license, insurance, and references ensures that even a small job is done right the first time, protecting your property and saving you from future hassles.

How long does a typical masonry project take from start to finish? The timeline can vary quite a bit based on the project’s size, complexity, and even the weather. A simple patio might take a week or two, while a larger project with retaining walls and custom features could take several weeks. A professional contractor should give you a detailed schedule that accounts for every step, including ordering materials, securing permits for your town, preparing the site, and allowing for proper curing time. They will also build in some flexibility for potential weather delays and keep you updated throughout the process.

Why should I choose a full-service company instead of just hiring a specialized mason? If your masonry is part of a bigger backyard vision, like a new pool deck connected to a landscaped garden, a full-service company can be a lifesaver. Instead of you having to coordinate between the mason, the landscaper, and the pool installer, one team manages everything. This ensures a seamless process and a cohesive design where all the elements work together perfectly. It simplifies communication, prevents scheduling conflicts, and makes sure everyone is working toward the same final goal.

Share this page:
Professional workers installing interlocking pavers on a prepared crushed stone base for a paver patio on Long Island

How to Plan Your Paver Patio Installation Long Island

A paver patio is easier to enjoy when the decisions are made before excavation begins. Start by defining how your household will use the space, then account for drainage, property lines, access, materials, and the base needed for Long Island’s freeze-thaw conditions. A clear plan helps prevent costly changes after installation begins.

Contact Gappsi for a free consultation.

A complete paver patio installation Long Island plan covers design, material selection, site preparation, an 8- to 10-inch excavation, a compacted crushed-stone base, laying patterns, edge restraints, joint sand, and sealing. Depending on the patio’s size and complexity, installation commonly takes about 3 to 14 days.

From concrete pavers and Italian porcelain to natural bluestone, granite, travertine, limestone, or sandstone, each material affects the patio’s appearance, maintenance, and construction details. The first step is matching those choices to your space, daily use, and overall property design.

Step 1: Designing Your Paver Patio and Selecting Materials

Begin by measuring the proposed patio area, noting property lines, existing trees, doors, steps, drainage paths, and the transition from the house to the yard. Then define how your household will use the space. A dining patio needs room for chairs and circulation, while a lounge area may be organized around seating, a pool view, or a fire pit. Sketching these uses before selecting a pattern helps create a layout that works in daily life, not just on paper.

Call Gappsi at 631-543-1177 to discuss your patio plans and schedule a design consultation.

Allow for the actual footprint of furniture, grills, planting beds, and walkways. When estimating material quantities, add about 5% to the measured square footage for cuts around curves and irregular spaces, as recommended by Oregon State University Extension (paver planning guidance). Your plan should also account for a gradual slope that directs water away from the home and prevents pooling.

Gappsi can develop a 3D design so you can review proportions, circulation, colors, borders, and material combinations before construction begins. The design-build-supply model keeps planning, product selection, and installation coordinated through one provider. Homeowners can also visit the Gappsi showroom at 1015 W Jericho Turnpike in Smithtown to compare samples in person and see how surface texture and color change under different lighting. For broader guidance, review these best patio materials for Long Island.

Material selection should reflect the patio’s use, exposure, maintenance expectations, and architectural style. Natural bluestone provides a distinctive blue-gray surface and works well for formal entertaining areas. Travertine offers a textured natural-stone appearance that is often used around pools and outdoor living spaces. For flexible color, shape, and pattern choices, consider concrete pavers from manufacturers such as Cambridge, Nicolock, Techo-bloc, or Belgard. Italian porcelain pavers provide another option for homeowners seeking a crisp, contemporary surface with large-format design possibilities.

Gappsi also supplies other natural stone choices, including granite, limestone, and sandstone. Its masonry design and construction services on Long Island can coordinate the patio with retaining walls, outdoor kitchens, steps, or other masonry features. Confirm the selected material, pattern, edge detail, drainage plan, and any town permit requirements before moving to excavation.

Step 2: Preparing the Site and Building a Solid Paver Base

A paver patio performs only as well as the surface beneath it. On Long Island, the base must support the patio while managing water and seasonal movement. Careful layout, excavation, and compaction help reduce the risk of settling, pooling, and uneven pavers after repeated freeze-thaw cycles.

  1. Mark the patio area. Use stakes, string lines, or marking paint to define the finished footprint, including curves, steps, seating areas, and transitions to existing walkways. Check the measurements before excavation and confirm that the planned patio will direct water away from the house. The layout should include a deliberate slope because standing water can damage a paver surface over time. Oregon State University Extension explains why paver areas need a gradient for runoff.
  2. Excavate to the required depth. Remove topsoil, roots, organic material, and unstable soil from the marked area. For a typical patio, excavation should reach approximately 8 to 10 inches, allowing room for the compacted stone base, bedding layer, and pavers. The exact depth can vary with soil conditions, drainage needs, and the selected paver thickness. A shallow excavation may leave the patio vulnerable to movement when wet soil freezes and expands.
  3. Build the crushed-stone foundation. Install approximately 6 inches of 3/4-inch crushed stone across the excavated area. Spread the material evenly rather than placing the full depth in one loose layer. The stone should be compacted in lifts, with each lift thoroughly consolidated before the next is added. A plate compactor helps lock the angular stone together and creates a stable foundation for the bedding material.
  4. Verify drainage and grade. Check the slope with a level and string line as the base is shaped and compacted. Direct runoff away from the foundation and avoid creating low spots that can hold water. Proper drainage is especially important for Long Island’s freeze-thaw cycles because trapped moisture can contribute to heaving, shifting, and joint deterioration. For a deeper material overview, review Gappsi’s guide on how to install a paver base.
  5. Inspect the finished base before moving on. The surface should be firm, evenly graded, and free of soft areas. Correct weak spots before installing bedding sand and pavers. Gappsi’s patented Edge Restraint System is also planned as part of the installation, helping define and secure the patio perimeter once the pavers are laid.

How Do You Choose the Right Paver Pattern for Your Patio?

The pattern you select should fit the patio’s shape, intended use, and the material you want to see underfoot. Start by measuring the space and marking key features, such as a dining area, walkway, steps, or fire pit. A simple layout helps reveal where full pavers will work and where cuts will be necessary. For curves and unusual corners, plan for about 5% extra material to cover required cuts.

Match the pattern to the patio’s style

Running bond uses rows with each joint offset from the next. Its straightforward lines can make a narrow patio feel longer and work well with rectangular concrete pavers or brick-shaped units. Herringbone places pavers at a repeating angle, usually 45 or 90 degrees. The interlocking layout gives the surface a more directional appearance and is a practical choice for concrete pavers, especially where the patio connects to a frequently used walkway.

Basket weave groups pairs of rectangular pavers into repeating blocks. It creates a traditional look that suits older homes and smaller sitting areas without adding a complicated visual grid. Ashlar, sometimes called a random rectangular pattern, combines several rectangular sizes for a more varied layout. It is especially well suited to natural bluestone, where variations in color and texture can complement the changing sizes.

Consider material size before finalizing the layout

Material choice limits or expands the patterns available. Concrete pavers are manufactured in coordinated sizes that support running bond, herringbone, and basket weave. Bluestone can be cut into an ashlar arrangement or installed in more uniform courses. Travertine and porcelain may also be available in coordinated modular sizes, but the supplier should confirm the exact dimensions before the design is finalized.

For a cleaner contemporary patio, consider large-format 24×24 pavers. Fewer joints create a calmer visual field, while careful base preparation and precise installation remain essential because larger units make unevenness more noticeable. Review these large-format paver options before choosing a layout.

During a paver patio installation on Long Island, the pattern should also account for drainage, property lines, and transitions to the home. A design-build team can test several layouts in a plan, then confirm the pattern works with the selected stone or paver before ordering materials.

Step 3: Installing Edge Restraints and Laying the Pavers

Once the base is compacted and the layout is confirmed, the installation moves from preparation to precision. This stage determines whether the patio keeps its lines, joint spacing, and level surface over time. Gappsi’s patented Edge Restraint System, developed in 2000, provides a defined perimeter that helps hold the pavers in position.

  1. Install the perimeter restraint

    Set the Edge Restraint System along the planned patio boundary, including curves, corners, and transitions to walkways or steps. Secure the restraint according to the site conditions and confirm that its top edge matches the planned paver elevation. A stable perimeter limits lateral movement when the patio is exposed to foot traffic, water, and seasonal freeze-thaw cycles. For homeowners comparing installation approaches, Gappsi’s masonry design and construction services on Long Island include the planning and construction details that support this step.

  2. Establish reference lines and elevations

    Run string lines across the work area to establish the intended direction, slope, and finished height. Use a level or laser level to check the lines against fixed points such as the house, drainage structures, and adjoining paving. The surface should shed water appropriately without creating abrupt changes in elevation. Check the lines throughout installation rather than waiting until the final pavers are in place.

  3. Lay the field pavers

    Place each paver on the compacted bedding layer, following the approved pattern. Set pavers carefully instead of dragging them across the base, which can disturb the prepared surface. Maintain consistent joint spacing as you work, and use a rubber mallet for minor adjustments. Periodically check several rows with a straightedge and level. Small corrections made early prevent uneven joints or a visible alignment problem across the finished patio.

  4. Cut the perimeter pieces

    Measure and mark pavers for edges, curves, posts, steps, drains, and other obstacles only after the surrounding field pattern is established. A wet saw produces controlled cuts through many paver materials, while a paver splitter may suit certain concrete units. Keep cut edges oriented toward the restraint or another less visible boundary when the layout allows. Order approximately 5% extra material to account for these cuts and normal installation breakage.

Step 4: Applying Joint Sand and Sealing the Patio

Once the pavers are set and the edge restraints are secure, the joints need to be filled and stabilized. This finishing stage helps keep the surface connected, limits movement, and prepares the patio for routine maintenance.

How is polymeric sand applied?

Polymeric sand is swept across the dry patio so it settles into every joint between the pavers. The installer works in multiple directions and uses a broom to remove excess material from the surface. Any remaining sand on top of the pavers should be cleared before water is added, because residue can harden and leave a visible film.

After the joints are filled, a plate compactor passes over the patio to settle the sand deeper into the joint spaces. A protective pad may be used to reduce the risk of scratching the paver surface. The joints are then topped up where needed and lightly activated with water according to the sand manufacturer’s instructions. Controlled watering allows the binding agents to set without washing sand out of the joints.

Regular sand can shift, wash away, and leave open spaces where weeds can take hold. In contrast, polymeric sand helps stabilize the joints after activation and reduces weed growth when it is installed correctly. For a closer look at the material and its use, see this guide to polymeric sand for pavers.

What type of sealer should you choose?

Sealing is a finish decision as well as a maintenance consideration. A wet-look sealer deepens color and creates a more pronounced appearance, while a natural-look sealer preserves a subtler, closer-to-original finish. The right choice depends on the paver material, exposure, desired appearance, and whether the patio needs added resistance to staining.

Sealer should be applied only after the joint sand has fully set and the surface is clean and dry. On Long Island, many homeowners plan for a resealing cycle of approximately two to three years, although weather exposure, foot traffic, drainage, and the product used can change that timing. Review the process for sealing concrete pavers before selecting a product or scheduling maintenance.

What Permits Do You Need for a Paver Patio on Long Island?

Permit requirements for a paver patio can change from one Long Island municipality to another. A project in a Nassau County village may follow different procedures than one in a Suffolk County town. So homeowners should confirm requirements with the local building department before excavation begins.

Which patio projects may require approval?

Local officials commonly evaluate the patio’s total square footage, its distance from property lines, and whether the work changes existing drainage patterns. A larger patio, a patio close to a side or rear property line, or a design that redirects water may require a permit, site plan, or additional review. Rules can also depend on whether the project includes related features such as retaining walls, steps, covered structures, lighting, or changes to grading.

Do not assume that a patio is automatically exempt because it sits at ground level. The applicable building code, zoning rules, setbacks, drainage requirements, and village or town procedures all matter. The building department may also ask for a property survey or drawing showing the proposed layout and distances from lot lines.

How can a contractor help with the permit process?

An experienced local contractor can identify the approvals that may apply, prepare the project information, and coordinate questions with the appropriate municipality. This local knowledge helps prevent avoidable delays, especially when the design includes grading changes or sits near a setback. Gappsi includes permit expediting within its design-build service, helping homeowners move from the initial patio plan to a properly reviewed installation.

Before choosing materials or finalizing the layout, ask who will verify approvals and coordinate submissions. Gappsi’s masonry design and construction services on Long Island bring design, construction, and permit coordination into one process. That approach gives the project team a clearer view of site conditions and local requirements before work starts.

How Much Does a Paver Patio Installation Cost on Long Island?

For homeowners comparing paver patio installation on Long Island, a practical installed range is about $20 to $35 per square foot. The final estimate depends on the material, layout, access, and condition of the site. These planning ranges can help you compare options before scheduling a detailed design consultation.

Estimated installed paver patio costs by material tier
Tier Typical materials Estimated installed cost
Basic or classic Standard concrete pavers with a straightforward layout $20 to $24 per square foot
Mid-range Natural stone or travertine with added color and texture options $24 to $29 per square foot
Large-format Large-format pavers, multi-pattern fields, or more detailed layouts $29 to $35 per square foot

What changes the cost of a patio?

Patio size affects the total investment, but square footage is only one part of the estimate. A compact patio with several curves, steps, or borders can require more labor per square foot than a larger, simple rectangle. Material choice also matters. Concrete pavers, travertine, natural bluestone, and large-format products each have different material and installation requirements.

Site preparation is another major variable. The crew may need to remove an existing concrete slab or patio, excavate unsuitable soil, address drainage, or correct grading before installing the base. Poor access for equipment, steep changes in elevation, retaining elements, fire features, and outdoor kitchen pads can also increase labor and preparation costs. A proper slope helps move water away from the patio and reduces the risk of long-term pooling.

How does Gappsi’s design-build-supply model help?

Gappsi manages design, material supply, and installation through one design-build-supply model. That means homeowners work with one provider instead of coordinating separate designers, suppliers, and installers, which helps reduce handoff problems and middleman markup. Gappsi also provides free consultations so the team can review measurements, access, grading, material preferences, and demolition needs before preparing an accurate quote.

How Do You Maintain Your Paver Patio After Installation?

Consistent care keeps a paver patio attractive and helps protect the joints, surface, and drainage system through Long Island’s changing seasons. A simple maintenance routine is usually enough when it is performed before small problems become larger repairs.

Start with regular sweeping using a stiff outdoor broom. Removing leaves, soil, and food debris prevents buildup in the joints and reduces the conditions that encourage weeds or staining. Sweep more often during fall and after storms, especially beneath trees. For stuck-on dirt, use occasional power washing on a gentle setting. Keep the spray at a reasonable distance and avoid directing high pressure straight into the joints, because it can wash out the sand that supports the pavers.

Inspect the joints periodically. If heavy rain, cleaning, or normal wear has removed sand, reapply polymeric sand according to the product instructions. The joints should be clean and dry before new sand is installed and activated. Polymeric sand helps lock the pavers together while limiting weed growth, but it is not a substitute for correcting drainage or movement beneath the patio.

Sealing every two to three years can help protect the patio from moisture, staining, and repeated freeze-thaw exposure during Long Island winters. The right schedule depends on the paver material, traffic, shade, and condition of the existing sealer. Review the process for sealing concrete pavers before choosing a product or application method.

How Should You Protect Pavers in Winter?

Use a plastic shovel or a broom to clear snow without scraping the surface. Avoid deicing salt when possible, since it can damage some pavers and affect nearby landscaping. For traction, use clean sand instead. After the season, sweep away the remaining sand and inspect for loose joints, cracked pieces, or areas where water collects. Addressing those issues in spring helps keep the patio stable before the next cycle of heavy use and weather.

Frequently Asked Questions

How much does a paver patio cost on Long Island?

The total cost depends on the patio’s size, layout, material, access to the site, drainage needs, excavation, and base preparation. Concrete pavers, natural stone, and porcelain pavers each have different material and installation considerations. A site review and itemized design-build estimate provide a more useful figure than a broad online average.

What is the best base material for a paver patio?

A properly compacted base of 3/4-inch crushed stone is a practical choice for patio construction. The stone should be installed in compacted lifts over the prepared subgrade, with drainage planned before the surface materials are placed. Base depth depends on site conditions, soil, drainage, and the intended use of the patio.

Do I need a permit for a paver patio installation?

Permit requirements vary by town in Nassau and Suffolk Counties. Setbacks, patio size, grading, drainage, and proximity to property lines can affect the review. Check with the local building department before construction, or work with a contractor who can confirm the requirements and coordinate permit expediting.

How long does a paver patio installation take?

The schedule depends on the patio’s size, design complexity, excavation, material availability, weather, and any permit requirements. The work typically includes layout, excavation, base preparation, paver installation, joint sand, and finishing. Your contractor should provide a project schedule after reviewing the property and design.

Is polymeric sand better than regular sand for paver joints?

Polymeric sand is generally better suited to finished paver joints because it helps stabilize the joints when properly installed and activated. The joints must be clean and dry, and the product must be compacted and watered according to its instructions. Routine maintenance still helps protect the joint system over time.

Ready to start planning your paver patio installation on Long Island? Call Gappsi at 631-543-1177 to schedule a free consultation and discuss your project.

Share this page:
Natural bluestone patio with cleft surface texture on Long Island

Best Patio Materials for Long Island: Bluestone vs Travertine vs Concrete Pavers

Winter frost heave on Long Island easily cracks poorly built patios and causes costly backyard damage. Choosing the wrong stone or concrete paver means your outdoor living space will crumble within a few seasons.

The best patio materials for Long Island are natural bluestone, travertine, and concrete pavers, which each provide homeowners with superb strength, great seasonal performance, and beautiful masonry results. Natural bluestone offers a classic cleft look that handles harsh freeze-thaw cycles well, while travertine stays very cool underfoot, making it the perfect choice for sunny pool decks. In contrast, concrete pavers from top local brands like Cambridge and Nicolock offer highly versatile design styles, low maintenance needs, and superb strength at an affordable overall cost. In the end, choosing the right material depends on your own budget, your maintenance needs, and how you plan to enjoy your new custom outdoor living space.

To select the best patio materials for Long Island backyards, you must first understand how our local weather patterns impact various stones over time. We will help you evaluate these options by first Understanding Long Island’s Unique Climate Challenges. This crucial decision begins with knowing how freeze-thaw cycles, coastal salt, and seasonal humidity affect each material’s performance over time.

Schedule Your Free Design Consultation — Our team will help you choose the best patio materials for your Long Island home.

Best Patio Materials For Long Island: Understanding Long Island’s Unique Climate Challenges

Long Island weather is nice, but it can be harsh on outdoor living spaces. If you want a patio that lasts, you must plan for local weather. Stone that works in other states often fails here.

That is why picking the right option is key. But even the best stone is not enough on its own. Proper setup is needed to survive our climate.

The Freeze-Thaw Threat to Masonry

Winters on Long Island bring cold weeks and warm days. Water gets into porous stones and then freezes. When water freezes, it grows in size.

This growth pushes the stone apart and makes it crack. Scientists at Stony Brook University study how these cold freeze-thaw cycles harm local brick and stone. To stop this threat, you must select stones that do not soak up water.

When water turns to ice, it exerts immense pressure. Unsealed patios will flake and peel. Just one bad winter can ruin a poorly made stone floor. Using dense natural bluestone or travertine helps prevent this costly damage.

Coastal Salt and Humidity Realities

Long Island is surrounded by saltwater. This means that coastal salt air is a constant factor for Suffolk County and Nassau County homes. Salt can settle on your patio and slowly eat away at the stone. It also breaks down concrete bonds over time, making your stones weak and crumbly.

Damp summer air also creates water issues. Wet air slows down drainage and keeps your patio damp.

Damp stones can grow mold and moss, which look bad and make the surface slick. Sealing your stone blocks these threats. It keeps salt and water out so your patio stays clean and dry.

Base Preparation and Edge Restraints

The best paving stone will still fail if the ground beneath it moves. In our region, soil shifts often due to weather changes. To prevent this, you must have a proper base.

We use a base of six to eight inches of packed RCA or stone dust. This deep support layer keeps the patio level and lets water drain away.

Edge restraints are also needed to lock the stones in place. Without them, the outer stones will spread and push outward over time. We install our patented Edge Restraint System to keep every stone locked tight.

Our team has built many long-lasting patios across Long Island. You can view our work in our completed project portfolio to see how we handle these tough climate needs.

Bluestone: The Classic Natural Stone Choice for Long Island Patios

When you plan a new outdoor space, choosing the best patio materials for Long Island homes is a key choice. Natural bluestone stands out as a classic, time-tested option for local backyards. This quarried natural stone offers a rustic charm that fits both old and new homes. If you want a fine stone patio, Gappsi supplies and installs this stone through our professional masonry services.

Natural cleft texture and unique colors

This stone has a unique look because of how workers split it. A natural cleft surface shows the soft ridges and texture of the earth. The color range is also very broad, running from cool blue-gray to warm blue-brown tones. According to New York State mining records, this sandstone is mined from local beds. These color shades mean that no two stone patios look exactly the same.

Some homeowners prefer a smoother feel underfoot. You can choose a flamed bluestone or textured finish instead of a cleft surface. High heat is applied to the stone to create a flat, slip-free surface. This textured surface is best for wet areas like pool decks and steps. It prevents slips while keeping the natural look of the stone.

Freeze-thaw durability for cold winters

One big reason this stone is among the best patio materials for Long Island is its strength. This sandstone has great freeze-thaw durability to survive wet, cold winters. Builders have used this natural stone for centuries in northern climates. It will not crack or break when the ground freezes and thaws. This makes it a smart choice for long-term outdoor use.

Our team lays natural bluestone on walkways, backyard patios, and pool decks. Installing them well is key to making sure the stones do not shift over time. Gappsi uses a deep, packed stone base to allow water to drain away. Good drainage stops water from pooling under the patio and causing damage. This careful work ensures your stone patio stays flat and beautiful for decades.

Sealing and maintenance requirements

While this stone is very tough, it is also porous. This means it can absorb water, oil, and grease from backyard grills. To prevent stains, you must apply a stone sealer after installation. Sealing keeps the deep colors bright and stops dirt from sinking in. You will need to clean the stone and coat it with this sealer every few years.

The usual cost of this stone runs from $25 to $40 per square foot installed. This is a higher price than most concrete pavers, but the classic look has no match. This stone is best for homeowners who want a timeless, natural look. It is a great fit if you do not mind doing a little routine work to keep the stone safe.

Travertine: A Timeless Option for Warm-Weather Entertaining

When you look for the best patio materials for Long Island, travertine is a strong contender. This natural stone brings warmth and classic style to any backyard design. It has a rich history of use in fine masonry. Gappsi supplies and installs travertine to help homeowners build beautiful outdoor spaces.

Natural beauty and thermal properties

Travertine is a form of natural limestone. It is a sedimentary rock formed from mineral spring deposits. This process leaves small, natural holes or pits on the surface. Homeowners can choose to leave these pits open for a rustic feel. They can also use filled travertine for a smoother finish.

This stone comes in warm, earth-toned hues. The most common colors are cream, ivory, beige, walnut, and gold. This range makes it easy to match with your home exterior.

The biggest benefit of travertine is its thermal performance. Carbonate rocks like limestone have unique thermal properties. Studies show that carbonate rocks limit heat buildup under the sun. This means travertine stays cool underfoot, even on hot summer days. This cool-surface comfort makes it excellent for pool decks. It is also a smart choice for outdoor kitchen areas.

Maintenance and climate considerations

But travertine is softer than other stones like bluestone. It needs proper care to handle the harsh local winter weather. Because of freeze-thaw cycles, water can get into unfilled pits and cause cracks.

To prevent this damage, you must seal the stone each year. Professional sealing keeps water and dirt out of the pores. It also stops stains from pool chemicals. Simple cleaning with soap and water will keep the stone clean. You should also sweep off leaves and debris to prevent stains.

If you want to compare bluestone and pavers, you must think about maintenance. Concrete pavers are durable and need little care. Bluestone is harder but can get hot. Travertine offers cool comfort but needs more hands-on care.

Ideal uses and cost ranges

Travertine is best for certain areas in your yard. It works well for pool decks, patios, and outdoor kitchen spaces. It is ideal for homeowners who want to walk barefoot without burning their feet.

The typical cost for travertine ranges from $25 to $45 per square foot. This price includes the stone and the work to lay it. The final cost depends on the stone grade and the prep work.

While it costs more than concrete, its beauty and cool feel add real value to your home. Gappsi can help you select the right grade for your project.

Concrete Pavers: The Versatile and Cost-Effective Workhorse

Concrete pavers are among the best patio materials for Long Island backyards. These units offer deep design choice at a fair price, making them a great fit for people on a budget. You can find them in many colors, shapes, and textures. Some styles are made to mimic natural stone, brick, or even wood. This choice lets you build a custom look that fits your home. If you want more high-end looks, you can check out natural stone paver options for your yard.

You can arrange these pavers in many patterns. Common choices include herringbone, basketweave, and running bond designs. These patterns do more than look nice. They also lock the pavers together to create a stronger surface. This keeps the patio stable under foot traffic and outdoor tables and chairs.

Top local brands and warranties

For the Northeast climate, local brand choice matters. Cambridge and Nicolock are two of the strongest brands for Long Island weather. Cambridge units feature ArmorTec to resist stains and color fade. They also come with a lifetime warranty. Nicolock uses a special through-color process called Paver-Shield. These pavers are made locally in Lindenhurst, which keeps shipping times short. Other brands like Belgard and Techo-Bloc also offer great design choices.

Base prep and lifetime durability

Concrete pavers are tough, but their lifespan depends on what lies underneath. A standard paver patio can last twenty-five to fifty years. To get this long life, you must prepare the ground. Long Island soil moves when the weather freezes and thaws. You need a six-to-eight-inch base of compacted aggregate or stone dust. We also set up solid edge restraints to hold the pavers in place. Proper drainage is key to stop shifting over time. You can learn more about permeable pavement designs that help water drain.

Many fast-working builders skip these steps. They use thin bases or bad edges to save time. When winter cold hits, these weak patios crack and sag. Gappsi uses a deep base and strong restraints on every build. This care ensures your yard stays flat and safe for decades.

Paving costs and home value return

Concrete pavers are the most low-cost option for most yards. Installed paver patios on Long Island often cost between twenty and thirty-five dollars per square foot. The final price depends on the style of the units and the layout shape. Simple square layouts cost less. Complex curved layouts with custom borders sit at the top of the price range. For example, a three-hundred-square-foot patio will cost about six thousand to ten thousand five hundred dollars.

This project is a smart money move. Paver patios offer a great return on investment, or ROI. You can expect to get back sixty to eighty percent of the build cost in home value. These patios also make your home sell faster if you decide to move. Buyers love seeing finished stone-look backyards. Because the units hold their color and shape, they keep their curb appeal for many years.

Bluestone vs. Travertine vs. Concrete Pavers: A Head-to-Head Comparison

Performance criteria and cost comparison

Finding the best patio materials for Long Island yards is a key step for your home. You must look at cost, strength, and looks before you build. Each material has its own pros and cons in our damp, cold climate. Homeowners should think about how each option holds up over many years.

How these stones and blocks react to water and frost is very important. In cold weather, wet stone can freeze and crack. The freeze-thaw cycle can split weak or unsealed stone, as shown in studies by the National Institutes of Health. Good base work and sealants will help prevent this damage.

Feature Bluestone Travertine Concrete Pavers
Cost per square foot $25 to $40 $25 to $45 $20 to $35
Freeze-thaw durability Excellent (very dense natural stone) Moderate (requires regular sealing) Excellent (dense and flexible)
Lifespan More than 50 years More than 50 years 25 to 50 years
Maintenance Moderate (periodic sealing needed) Moderate (sealing and crack checks) Moderate (sealing and joint sand)
Slip resistance Excellent (natural cleft texture) Good to excellent (tumbled finishes) Excellent (textured options)
Heat retention High (can get hot in sun) Low (stays cool underfoot) Moderate (varies by shade)
Color options Blue-gray and brown tones Cream, beige, and gold hues Wide range of custom blends
Best use Traditional patios and walkways Pool surrounds and patio areas Driveways and high-traffic patios

Distinct advantages of each material

As you compare bluestone and pavers, you will see that each has its own strengths. Concrete pavers offer great value and design choice because they come in many shapes. They work well for active homes that need a strong yard that is easy to fix if one block cracks.

By contrast, natural bluestone has a rustic look that manufactured blocks cannot match. Its deep blue and gray tones make it a top pick for classic paths. At the same time, travertine stays cool under hot sun. This makes it a great choice for pool decks and outdoor cooking spaces.

Making your final choice

To pick the right material, think about how you will use your space. A pool deck needs a cool surface like travertine so you do not burn your feet. A driveway needs the strength of concrete pavers to hold heavy cars. For a rustic, cozy backyard look, natural bluestone is hard to beat.

Which Patio Material Is Best for Your Long Island Home?

Choosing the best patio materials for Long Island depends on your specific goals. Each option has unique strengths for Nassau and Suffolk County backyards. Data from the National Weather Service shows our region faces cold winters with frequent temperature shifts. These shifts can stress your stone, so a proper choice is key.

Concrete pavers for custom designs and budget

If budget and design choices matter most, concrete pavers deliver the best value. They cost between $20 and $35 per square foot installed on Long Island. You can expect a long lifespan of 25 to 50 years. Homeowners also get a strong 60% to 80% return in home value.

Concrete pavers come in a wide range of shapes, colors, and textures. Some options can even mimic natural brick or wood. Local brands like Nicolock make their pavers in Lindenhurst to stand up to our climate.

Natural bluestone for classic appeal and strength

For timeless natural beauty and strength, natural bluestone offers unmatched character. This stone handles Long Island’s freeze-thaw cycles well because of its dense makeup. Quarried and split into classic flagstone shapes, bluestone features a natural cleft surface.

This rough texture is highly slip-resistant, making it great for walks and pool surrounds. While it costs more than concrete, natural bluestone gives a unique look that never goes out of style. It is the perfect choice for classic paths and main patios.

Travertine for poolside comfort and entertaining

If you want to entertain around a pool or outdoor kitchen, travertine is the top choice. This stone has a cool surface that stays pleasant on hot summer days. Its heat resistance means your guests can safely walk barefoot.

This natural limestone has small pitted holes for a unique texture. The soft cream, gold, and walnut hues blend well with any backyard design. It needs sealing every few years to protect its surface, but the stunning look is worth the effort.

Gappsi carries all three of these patio materials. Our team can help you select the right choice for your home. You can view our completed project portfolio to see how each material looks in real backyards. We also invite you to visit our showroom in Smithtown to see and feel these stones in person. Our masonry experts can guide you through the entire design process.

Frequently Asked Questions

How do concrete pavers hold up in Long Island weather?

Concrete pavers hold up very well because they flex with the freeze-thaw cycles of Nassau and Suffolk Counties. Leading local brands like Nicolock, made right in Lindenhurst, use special shields to resist fading and salt damage. When set on a properly compacted six-inch base, these pavers stop cracking and shifting, lasting twenty-five to fifty years.

Which patio material requires the least maintenance in Long Island?

Concrete pavers are the easiest patio material to maintain on Long Island. Unlike natural bluestone, they do not need frequent sealing to stop staining or water damage. Local pavers from brands like Cambridge feature tough finishes that resist spills, dirt, and heavy wear. If a single paver cracks, you can simply pull it out and replace it without rebuilding the whole patio.

Is bluestone a good choice for Long Island patios?

Yes, natural bluestone is a durable and classic choice for Long Island patios. This natural stone resists damage from harsh winter freeze-thaw cycles very well. However, bluestone absorbs water and needs proper sealing to stop staining from leaves, spills, or winter salt. Homeowners can compare bluestone and pavers to find the best option for their yard.

Are porcelain pavers a good option for Long Island patios?

Yes, porcelain pavers are a strong choice because they are very dense and do not absorb water. This means they will not crack during cold freeze-thaw cycles. They also resist stains, mold, and salt damage without needing any sealers. For help choosing the right stone, Gappsi offers professional masonry services to guide your design.

What is the most durable patio material for the Northeast?

Natural bluestone and concrete pavers are both very strong options for Northeast yards. Bluestone is a dense natural stone that withstands cold temperatures, while concrete pavers are made to expand and contract without cracking. Both materials need a solid six-inch base of compacted gravel to stop shifting during winter freezes.

Ready to Build the Best Patio for Your Long Island Home?

Choosing the wrong patio stone can lead to cracked masonry, shifting pavers, or pooling water after just one freezing cold winter on Long Island. If you delay your custom hardscape project now, you risk missing out on another beautiful warm season of outdoor parties and family cookouts with friends. Starting your masonry design and installation today ensures all yard work is completed before the ground freezes so your patio is ready by spring.

Ready to build? Contact Gappsi today to schedule a free design consultation. Our expert design-build team is ready to help you choose the best materials and start planning your custom backyard space. We look forward to working with you.

Share this page:

Resin Bond Stone Joint Restoration for a Natural Pool Patio in Setauket, NY

View Gappsi’s YouTube Channel to view Resin Bond Stone Joint Restoration for a Natural Pool Patio in Setauket, NY

When an older natural stone pool patio begins to show signs of wear, homeowners often assume the only solution is a complete replacement. Fortunately, that isn’t always the case. At Gappsi, we specialize in restoring and preserving beautiful outdoor living spaces while enhancing their durability and appearance. One of our latest projects in Setauket, NY, demonstrates how innovative materials and expert craftsmanship can breathe new life into an aging patio without sacrificing its original character.

For this project, Gappsi restored the deteriorating joints of a natural stone pool patio using Italian-imported resin-bond stones. At the same time, we remodeled the swimming pool with a fresh gray marble dust finish that complements the landscape and maintains the property’s natural, pond-like aesthetic.

Restoring an Aging Natural Stone Pool Patio

Natural stone patios have a timeless beauty that blends seamlessly with outdoor landscapes. Unlike manufactured pavers, irregular stone patios create an organic appearance that is difficult to replicate. However, over time, the cement joints between the stones can deteriorate due to exposure to weather, water infiltration, freeze-thaw cycles, and years of foot traffic.

The homeowner’s patio had reached this point. The original cement joints had become loose and were beginning to crumble, creating several problems:

  • Loose stones throughout the patio
  • Unsightly cracks and missing joint material
  • Increased weed and moss growth
  • Water penetration beneath the patio surface
  • Safety concerns from uneven stones

Although the stones themselves remained in excellent condition, the failing joints threatened the structural integrity of the entire patio.

Instead of replacing the beautiful natural stone, Gappsi recommended restoring the joints with a modern resin-bond stone system to preserve the patio while significantly improving its performance.

resin-bond-stone-joint-restoration-for-a-natural-pool-patio-in-setauket

Removing the Failed Cement Joints

Every successful restoration begins with proper preparation.

Our first step was to carefully remove all the deteriorated cement between the stones. This process requires precision to avoid damaging the surrounding stone while completely eliminating loose material that could weaken the new installation.

By thoroughly cleaning every joint, we created a solid foundation for the new resin bond to adhere properly and perform for years to come.

This preparation stage is one of the most important parts of any patio restoration project because the longevity of the finished installation depends on the quality of the base beneath it.

Why Resin Bond Stones Are a Superior Solution

Traditional cement joints have been used for decades, but today’s resin technologies offer significant advantages for outdoor stone patios.

For this project, Gappsi installed resin-bond stones imported from Italy, combining decorative stone aggregate with a premium one-component urethane binder.

Once mixed, the materials create an attractive, durable joint that locks the stones in place while remaining more flexible than conventional cement.

Some of the benefits include:

Increased Flexibility

Unlike rigid cement joints, resin-bond materials can better accommodate slight movement caused by seasonal temperature changes. This flexibility helps minimize cracking over time.

Excellent Drainage

The resin-bound stone system allows water to drain naturally while maintaining the patio’s stability. Proper drainage helps reduce standing water and minimizes freeze-thaw damage during Long Island winters.

Long-Lasting Performance

Premium urethane binders create strong adhesion between the decorative stone aggregate, producing joints that resist erosion, cracking, and weathering far better than traditional mortar.

Natural Appearance

Because the joints are made of decorative stone rather than gray cement, they blend seamlessly with natural stone patios. This was especially important for maintaining the landscape’s organic design.

Imported Italian Materials Deliver Premium Results

At Gappsi, we believe exceptional outdoor spaces deserve exceptional materials.

For this Setauket project, we selected a premium resin-bond stone product imported directly from Italy. Italian manufacturers have long been recognized for producing some of the highest-quality hardscape materials available, combining durability with elegant design.

The one-component urethane binder creates a strong bond while allowing the decorative stones to retain their natural texture and appearance.

The finished joints look as though they have always been part of the original patio while offering dramatically improved performance.

Preserving the Natural Landscape Design

One of the homeowner’s primary goals was to preserve the property’s unique character.

This swimming pool was originally designed to resemble a natural pond, with irregular stonework blending into the surrounding landscape. Rather than replacing the patio with modern pavers, Gappsi carefully maintained the existing stone layout that gives the backyard its distinctive appearance.

By restoring instead of replacing, we preserved:

  • The original natural stone patio
  • The organic shape of the landscape
  • The rustic charm of the outdoor living space
  • The established character of the property

The new resin-bond joints provide a fresh, clean appearance while remaining true to the original design vision.

Pool Remodeling Completes the Transformation

In addition to restoring the patio, Gappsi remodeled the swimming pool.

The pool received a brand-new gray marble dust finish, replacing the aging interior surface.

Gray marble dust has become increasingly popular because it creates a sophisticated appearance while enhancing the water’s natural color. Instead of the bright blue look associated with traditional plaster finishes, gray marble dust produces subtle tones that resemble a tranquil pond or natural lagoon.

The result perfectly complements the surrounding stone patio and creates a cohesive outdoor environment.

The refreshed pool finish also improves:

  • Surface durability
  • Water appearance
  • Swimming comfort
  • Overall property value
  • Long-term performance

Why Restoration Can Be Better Than Replacement

Many homeowners believe that older patios must be demolished once the joints begin failing. In reality, restoration is often the smarter investment.

When the existing natural stones remain structurally sound, restoring the joints provides numerous advantages:

  • Lower overall project cost
  • Faster installation
  • Less disruption to the property
  • Preservation of mature landscaping
  • Retention of original craftsmanship
  • Improved durability using modern materials

For homeowners who appreciate the beauty of natural stone, restoration allows them to enjoy the same timeless appearance with significantly improved performance.

Expert Hardscape Restoration by Gappsi

Every restoration project requires careful planning, quality materials, and experienced craftsmanship.

At Gappsi, we specialize in restoring patios, walkways, pool decks, driveways, retaining walls, and outdoor living spaces throughout Long Island. Whether your project involves natural stone, travertine, porcelain pavers, concrete pavers, or custom masonry, our experienced team evaluates every detail to recommend the best long-term solution.

We combine traditional masonry expertise with innovative products, such as imported resin-bond systems, to deliver beautiful, durable results that stand the test of time.

A Beautiful Backyard Revitalized in Setauket, NY

This latest Gappsi project in Setauket, NY, showcases how thoughtful restoration can completely transform an aging outdoor space. By removing deteriorated cement joints, installing premium Italian resin-bond stones, and refinishing the pool with elegant gray marble dust, we preserved the backyard’s natural beauty while dramatically improving its durability and functionality.

The homeowner now enjoys a refreshed pool patio that maintains its original pond-inspired design while benefiting from today’s advanced restoration materials.

If your natural stone patio has loose joints, cracked mortar, or signs of aging, Gappsi can help restore its beauty without unnecessary replacement. Our experienced team provides custom hardscape restoration and pool remodeling solutions that enhance both the appearance and longevity of your outdoor living space throughout Long Island.

Contact Gappsi Today

📍 Serving all of Long Island, NY — Nassau & Suffolk Counties
🌐 https://www.gappsi.com/
📞 Call now for a free consultation and estimate

SCHEDULE A MEETING TODAY WITH GAPPSI

Share this page:
Italian-inspired stone patio with natural stone pavers and outdoor kitchen on Long Island

Italian Masonry Craftsmanship: Why It Matters for Your Patio

Precision stonework from a trained Italian mason turns a simple patio into a permanent piece of art. Giuseppe Abbrancati began learning these skills in Italy at age seven before bringing his work to Long Island.

Ready to bring Italian masonry craftsmanship to your Long Island home? Call (631) 486-4662 or schedule your free consultation with Gappsi today.

Italian masonry craftsmanship is the unique blend of precision engineering and artistic vision that makes outdoor structures both beautiful and strong. This tradition relies on centuries of refined skills passed through generations of master builders. These methods create patios, walkways, and fireplaces that stand up to harsh Long Island weather while maintaining their beauty for decades. Gappsi carries this heritage forward with stonework that adds lasting value to home remodel projects across Suffolk and Nassau Counties.

Many homeowners wonder why certain stone structures stay perfect for years while others crumble after a few seasons. The answer lies in the deep history and rigorous training required to master these timeless building methods.

What Makes Italian Masonry Craftsmanship Different from Standard Construction?

Italian masonry craftsmanship stands apart through its emphasis on structural intelligence and artistic precision. Unlike standard construction that prioritizes speed, Italian-trained masons cut every stone to create tight bonds with clean lines. This method prevents gaps where water might settle and cause freeze-thaw damage, which is essential for Long Island’s climate.

The difference comes down to training and technique. Italian masons learn to balance load distribution, material density, and geometric precision from the start of their careers. This produces structures that not only look refined but also resist cracking, shifting, and weathering far longer than conventional builds.

  • Precision cutting: Each stone is shaped by hand to fit its neighbors with minimal mortar gaps
  • Load distribution: Weight is spread evenly through the structure to prevent stress points
  • Material selection: Only dense, low-absorption stones are chosen for outdoor use
  • Foundation depth: Proper excavation and compacted bases prevent settling over time

These principles trace back to rules documented by Italian architects like Carlo Fontana in 1694. Fontana used mathematical formulas to determine how shapes affect structural strength. Bernardo Antonio Vittone later expanded these rules in 1760 to allow taller and steeper dome designs. According to research from MDPI Applied Sciences, these same geometric methods underpin the stability of iconic structures like Brunelleschi’s Dome in Florence, which has remained intact since 1436.

The Heritage of Italian Masonry Craftsmanship

The history of Italian masonry craftsmanship goes back hundreds of years. This legacy bonds art and hard science together. For generations, master builders in Italy have refined their trade, passing down secrets from fathers to sons. These skills changed how we approach stone and brick construction today.

Italian masonry heritage is rooted in an unbroken chain of apprenticeship that stretches back to the Renaissance. Master builders like Brunelleschi developed techniques that allowed massive stone structures to support themselves without internal framing. Modern builders on Long Island still apply these same engineering principles to patios, outdoor kitchens, and fireplaces.

The science of Renaissance domes

One of the best demonstrations of Italian masonry skill appears in the great domes of the Renaissance. Builders created massive curved roofs without using wooden centering frames to hold the weight during construction. They used a double-helix brick pattern that lets the dome support itself as it rises. This technique combines sophisticated geometry with meticulous hand craftsmanship.

The science relies on the way bricks lock together at specific angles. Masons tilted each brick to create a self-supporting curve, eliminating the need for huge timber scaffolds. A 2021 study in Applied Sciences confirmed that Brunelleschi’s design distributes thrust evenly through supporting piers, keeping all sections compressed at safe stress levels. The UNESCO World Heritage Centre recognizes the Historic Centre of Florence for preserving these original building techniques and traditional materials like pietra serena stone.

Bringing Italian skills to America

In the late 1800s and early 1900s, skilled Italian masons brought their tools and knowledge to the United States. Their work appears in the stone facades of historic downtown buildings and the cobblestone paths of older neighborhoods. They taught their children the value of precise cutting and patient craftsmanship, keeping the tradition alive across generations.

Today, this heritage guides how Gappsi builds outdoor spaces on Long Island. Whether constructing a custom patio or a stone fireplace, the old rules still apply. Modern masons combine power tools with old-world care to ensure each project meets the quality standards established centuries ago.

How Italian Craftsmanship Elevates Outdoor Masonry Design

Italian masonry craftsmanship produces structures that are both structurally superior and visually striking. The method requires exact cutting to create stone surfaces that look refined and last for decades.

Italian-trained masons apply geometric principles to every project, ensuring that retaining walls, patios, and fireplaces distribute weight correctly and resist shifting. This engineering mindset, combined with an artistic eye for stone color and texture, produces outdoor spaces that function flawlessly while enhancing the home’s appearance.

Natural stone patio with Italian-style precision stonework and outdoor kitchen on Long Island

Precision in every stone cut

In Italian design, masons shape each stone to create tight bonds and clean lines. This level of detail prevents gaps where water might settle and cause freeze-thaw damage during Long Island winters. By following geometric rules first established by Renaissance architects, masons ensure that every arch and wall remains stable for generations.

Strength through smart engineering

Building for the Long Island climate demands durability above all else. Italian-trained masons use techniques that allow walls to support their own weight without relying solely on mortar adhesion. This self-supporting approach was first perfected in the great domes of Italy, which have stood for over 500 years without structural failure.

Research from MDPI Applied Sciences confirms that Brunelleschi’s brick-herringbone pattern creates self-bracing during construction. When applied to residential masonry, these same principles ensure that patios and fireplaces remain stable through decades of freeze-thaw cycles, heavy rain, and seasonal ground movement.

Premium Materials Define the Italian Masonry Standard

The heart of Italian masonry craftsmanship lies in the quality of the materials used. To meet enduring standards, builders must select stones and bricks that offer both beauty and strength.

Gappsi uses premium natural stone like bluestone, travertine, and granite alongside top paver brands such as Cambridge, Nicolock, Techo-Bloc, Belgard, and Renox. These materials are chosen for their density, low water absorption, and resistance to Long Island’s freeze-thaw climate.

Authentic Italian bricks and stone

High-end masonry projects often start with materials that have deep historical roots. Biscotto di Sorrento bricks, sourced from the Sorrento region of southern Italy, are prized for their heat retention and durability under thermal stress. These bricks have been used for centuries in Italian pizza ovens and fireplaces.

For patios and walkways, homeowners can choose from marble, travertine, granite, and bluestone. Each stone offers distinct texture and color that adds depth to an outdoor space. Granite provides exceptional hardness and longevity, while travertine stays cool under direct sun. According to Corsino Construction’s research on natural stone patios in Suffolk County, properly installed natural stone can last 30 to 50 years when base preparation and drainage are handled correctly.

Partnerships with top paver brands

Gappsi works with leading paver manufacturers to give clients a wide range of options. These partners include Cambridge Pavers, Nicolock, Techo-Bloc, Belgard, and Renox. These brands offer many colors and shapes that replicate the look of natural stone while providing consistent sizing for easier installation across large areas.

Each paver is engineered to handle heavy loads and resist weather damage. They are formulated to withstand road salt and ice melt, which is critical for Long Island driveways and walkways. A properly built base with compacted gravel layers and correct drainage slope prevents the settling and shifting that causes premature failure in lesser installations.

  • Cambridge Pavers: Known for large-format stones with tight joint systems
  • Nicolock: Wide color selection with high compressive strength
  • Techo-Bloc: Premium textures that mimic natural cleft stone
  • Belgard: Interlocking designs for superior edge retention
  • Renox: European-style pavers with antique finishes

The Gappsi Difference: Italian Craftsmanship on Long Island

The Gappsi story began in Italy long before the company opened its doors in Smithtown. Giuseppe Abbrancati started learning the trade at seven years old in 1974, working alongside his father and grandfather to master traditional masonry skills.

With over 38 years of experience, Gappsi bridges old-world Italian training with modern construction methods. The company’s 10 divisions handle everything from initial 3D design through permitting and final installation. The Smithtown showroom displays the full range of materials and design options available to Long Island homeowners.

A legacy of skilled masonry

Giuseppe founded Gappsi at age 21 with a focus on quality and trust. The company has since grown to include 10 divisions, offering full-service coverage from the first 3D design concept through obtaining municipal permits and final construction. The Smithtown showroom lets homeowners see premium masonry and paver installations in person before making decisions about their own projects.

True Italian masonry relies on precise cutting and engineered strength to last for decades. Renaissance architects like Fontana and Vittone used mathematical rules to create stone structures that remain standing today. Gappsi applies these same core principles to ensure every patio, outdoor kitchen, and fireplace is both beautiful and structurally sound.

Built for the Long Island climate

Long Island’s weather can be extremely hard on outdoor stonework. Salty coastal air and repeated freeze-thaw cycles cause cheap masonry to crack, shift, or spall within a few years. This is why proper drainage, deep base preparation, and dense materials are non-negotiable for lasting results.

Choosing the right materials is central to the Gappsi process. The team uses top paver brands alongside natural stone, combining old-world installation methods with modern material science. Every project balances artistic vision with the structural strength needed to survive many seasons of coastal weather.

Italian outdoor kitchen and stone fireplace with travertine and bluestone on Long Island

What Sets Italian-Trained Masonry Apart for Patios and Fireplaces

Italian masonry craftsmanship takes years to master. It starts with deep respect for the stone and the tools used to shape it. For homeowners on Long Island, this means choosing a team that values artistry as much as structural integrity.

Italian-trained masons bring generational knowledge that standard crews cannot replicate. The difference shows in tight stone joints, thoughtful material selection, and structures that remain level and crack-free for decades. Investing in proper training and technique produces outdoor spaces that add lasting value to the home.

Focus on precision and artistry

True Italian masonry is defined by exact cutting and artistic stone placement. Each piece is selected for its color, shape, and fit within the overall design. This attention to detail ensures that patios and fireplaces function as cohesive works of art that complement the landscape.

When a mason understands the natural flow and grain of the stone, the result is a structure with tight joints and balanced visual weight. This level of craftsmanship is increasingly rare in an industry that often prioritizes speed over quality.

Feature Italian-Trained Masonry Standard Masonry Approach
Attention to Detail Hand-cut stone with precision fitting Power tools with批量 cuts and wider joints
Longevity Designed for 30-50 year service life Often needs repairs within 5-10 years
Material Selection Natural stone and premium imported brick Standard pavers and common concrete
Visual Integration Custom designs matched to the home’s architecture Template layouts reused across projects
Quality Control Master mason oversees every stage Split between multiple crews with less oversight

Training and the legacy of the craft

A mason’s training directly affects the quality of the finished work. In Italy, the craft has traditionally been passed from master to apprentice over many years. This stands in contrast to standard crews that prioritize speed over precision. Research from Oxford Brookes University documents that traditional drystone walling in Italy relies on apprenticeship-style transmission where knowledge is passed through hands-on practice rather than written manuals alone.

Gappsi’s founder learned directly from his father and grandfather, starting at age seven. This type of generational training instills a sense of pride that appears in every finished project. When homeowners choose a mason with this background, they get more than a contractor. They get a craftsman who treats every stone patio and fireplace as a legacy piece.

How to Choose the Right Masonry Contractor for Long Island

Selecting the right contractor determines whether your outdoor investment lasts for decades or needs replacement within a few years.

The best masonry contractor for Long Island combines old-world training with local climate knowledge. Look for a team that sources premium materials, manages projects from design through completion. And has a portfolio of work that demonstrates precision stone joints and thoughtful material selection.

Heritage and background

When evaluating masonry contractors, start with their training roots. A mason who understands Italian masonry craftsmanship brings a level of care developed over generations. This style of work is more than laying stones. It reflects centuries of refined technique passed down through families and apprenticeships.

In Italy, masons learn to balance artistry and structural engineering from the beginning of their training. A true expert will explain how their background influences every cut and joint. They treat each project as a bespoke creation rather than a routine job.

Portfolio and material knowledge

A reliable contractor should show a portfolio of completed projects. Look for stone patios, outdoor kitchens, retaining walls, and fireplaces with tight joints and balanced proportions. Pay attention to the stone types used and how they have weathered over time.

A skilled mason knows which materials work best for Long Island’s specific conditions. Some stones resist freeze-thaw damage better than others. Granite and bluestone have very low water absorption rates, making them ideal for outdoor use in cold climates. Travertine stays cooler underfoot for pool surrounds. A knowledgeable contractor will explain why each material suits its intended location.

Key questions to ask

  • How do you prepare the base for freeze-thaw resistance?
  • What stone types do you recommend for Long Island’s climate and why?
  • Can you show examples of projects that are 5+ years old and still in good condition?
  • Do you handle permits, 3D design, and project management in-house?
  • What warranty do you offer on materials and workmanship?

A contractor who answers these questions with specific, technically grounded answers is more likely to deliver lasting results than one who gives vague assurances.

Frequently Asked Questions

What is Italian masonry craftsmanship?

Italian masonry craftsmanship is a building tradition that combines precise stone cutting, structural engineering, and artistic design. It emphasizes tight joints, load-balanced construction, and the use of dense natural materials. The methods trace back to Renaissance builders like Brunelleschi and have been preserved through family apprenticeships over centuries.

How long does an Italian-style stone patio last on Long Island?

A properly installed natural stone patio with Italian masonry techniques can last 30 to 50 years on Long Island. The key factors are deep base preparation, correct drainage slope, dense stone selection, and precise joint work that prevents water infiltration and freeze-thaw damage.

What makes Gappsi different from other masonry contractors on Long Island?

Gappsi was founded by Giuseppe Abbrancati, who began his Italian masonry training at age seven under his father and grandfather. With over 38 years of experience and 10 in-house divisions covering design, permitting, and installation, Gappsi provides full-service project management rooted in multi-generational Italian craftsmanship. The Smithtown showroom lets clients view materials in person before construction begins.

What materials are best for Italian masonry on Long Island?

The best materials for Long Island’s climate include bluestone, granite, and travertine for natural stone, plus premium pavers from Cambridge, Nicolock, Techo-Bloc, Belgard, and Renox. These materials offer the density and low water absorption needed to resist freeze-thaw cycles and salt air exposure.

Do Italian masonry techniques work for outdoor kitchens and fireplaces?

Yes. Italian masonry techniques are especially suited for outdoor kitchens and fireplaces because they emphasize heat management, structural stability, and weather resistance. Biscotto di Sorrento bricks are commonly used for pizza oven interiors due to their heat retention, while natural stone surrounds provide durability and aesthetic appeal.

Ready to Start Your Italian Masonry Project?

Italian masonry craftsmanship delivers outdoor spaces that are built to last for generations. Gappsi brings three generations of Italian building heritage to every project on Long Island, from custom patios and outdoor kitchens to stone fireplaces and retaining walls. Visit the Smithtown showroom to explore materials, view completed projects, and speak with the design team.

Call (631) 486-4662 or schedule a free consultation online to discuss your custom masonry project. From the first 3D rendering to the final stone placement, Gappsi handles every detail so you can start enjoying your outdoor living space sooner.

Share this page: