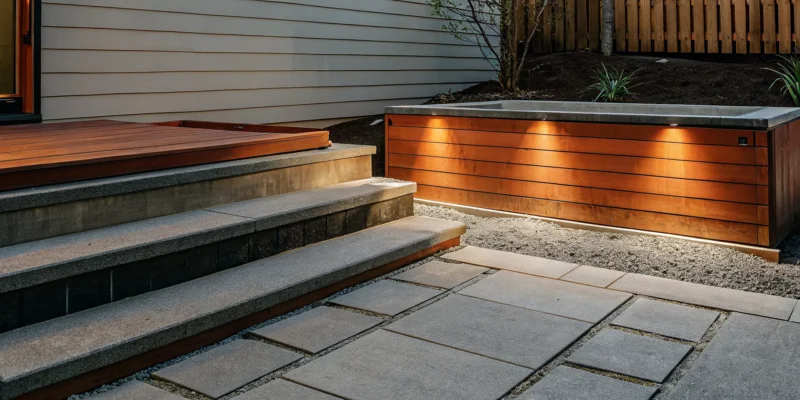
A light-colored travertine pool deck surrounding a modern swimming pool.

Travertine Pool Deck: The Pros, Cons & Costs

As a Long Island homeowner, you know any outdoor material has to be tough. It needs to handle hot summers, freezing winters, and everything in between. When it comes to your pool deck, you need something that is not only durable but also safe and beautiful. This is why so many people consider a travertine pool deck. This natural stone is incredibly resilient, capable of withstanding our freeze-thaw cycles without cracking or fading. Beyond its strength, it offers practical benefits that are perfect for poolside living: it stays cool to the touch and provides a naturally slip-resistant surface for your family’s safety. This guide breaks down the pros and cons, helping you understand if investing in a travertine pool deck is the right long-term decision for your home.

Key Takeaways

  • Choose travertine for comfort and safety: This natural stone stays cool on bare feet even in direct sun and provides a naturally slip-resistant surface, making your pool area safer and more enjoyable for everyone.
  • Commit to simple, long-term care: Travertine is durable, but it needs to be sealed every three to five years. This maintenance step is key to protecting the stone from stains and weathering, preserving its beauty for years to come.
  • Invest in professional installation: The beauty and longevity of a travertine deck depend entirely on proper installation. Hiring an expert masonry team ensures a stable foundation is built, preventing future issues like shifting or cracking.

What is a Travertine Pool Deck?

If you’re dreaming of a pool deck that feels both luxurious and grounded in nature, travertine is a material you need to know. Simply put, travertine is a type of natural limestone that is cut into pavers or tiles for outdoor projects. It’s formed in mineral springs around the world, giving it a unique, slightly porous texture that has been prized for centuries. When used for a pool deck, it creates a surface that is elegant, durable, and full of character. It’s a fantastic choice for homeowners who want to build a truly timeless outdoor living space.

Where Does Travertine Come From?

Travertine has a rich history, famously used as a building material by the ancient Romans for everything from aqueducts to the Colosseum. Its story begins in nature, where it forms as a sedimentary rock around mineral spring deposits. This process creates the stone’s signature fibrous and concentric appearance. Because it’s a product of the earth, every single piece is unique. Gappsi sources high-quality natural stone to ensure your pool deck has a beautiful and authentic look that connects your backyard to the natural world. This ancient stone brings a sense of history and permanence to any design, making your outdoor space feel established and grand.

Popular Finishes for Pool Decks

One of the best parts of designing with travertine is choosing the finish and pattern that fits your style. A very popular option is the “French pattern,” which uses a mix of different-sized rectangular and square pavers to create an intricate, non-repeating design. This gives the surface a charming, rustic feel. For a more uniform look, you can have the pavers laid in a standard running bond, similar to classic brickwork. The stone itself can also be finished in different ways. A tumbled finish provides soft, rounded edges for a weathered, antique look, while a honed finish is smooth and matte. Our masonry experts can walk you through these options to find the perfect combination for your home.

Finding Your Perfect Color and Style

Travertine is known for its warm, earthy color palette that feels incredibly inviting. You’ll find it in beautiful shades of ivory, beige, gold, tan, and walnut. These neutral tones blend seamlessly with landscaping and create a sophisticated backdrop for your swimming pool. Because it’s a natural stone, there are subtle variations in color and pattern from one paver to the next, so your deck will have a one-of-a-kind look. This natural variation adds depth and visual interest, ensuring your pool area looks elegant and feels completely custom to your home. It’s a timeless choice that complements almost any architectural style, from Mediterranean to modern.

The Pros and Cons of a Travertine Pool Deck

Choosing the right material for your pool deck is a big decision. You want something that looks beautiful, feels great, and holds up for years to come. Travertine is a popular choice for good reason, but it’s smart to weigh its benefits against its drawbacks. Understanding both sides will help you decide if this classic stone is the perfect fit for your Long Island backyard oasis. Let’s walk through what you can expect from a travertine pool deck.

Benefit: It Stays Cool Underfoot

One of the best features of a travertine pool deck is how comfortable it is on bare feet, even on the hottest summer days. Unlike darker materials or concrete that can absorb the sun’s heat and become scorching, travertine naturally stays cooler. It reflects sunlight and draws coolness from the ground beneath it, so you and your family can walk around the pool without worrying about burning your feet. This simple comfort makes a huge difference in how much you’ll enjoy your outdoor space.

Benefit: It’s Naturally Slip-Resistant

Safety is always a top priority around a swimming pool, and travertine delivers. The stone is naturally porous, meaning it has tiny, microscopic holes across its surface. When the deck gets wet from splashes or rain, these pores absorb the water instead of letting it puddle on the surface. This creates a slip-resistant texture that provides better grip and helps prevent accidental falls. This feature makes travertine an excellent, family-friendly choice for any swimming pool area, giving you valuable peace of mind.

Benefit: It’s Built to Last

Travertine is an incredibly durable natural stone that has been used in construction for centuries. It’s strong enough to withstand the freeze-thaw cycles of a Long Island winter and the intense heat of summer without cracking or fading. This resilience means your investment will last for decades with proper care. When you choose a high-quality travertine, you’re getting a material that can handle heavy foot traffic, poolside furniture, and whatever else life throws at it, all while maintaining its structural integrity and beautiful appearance.

Benefit: It Offers Timeless Beauty

There’s an undeniable elegance to travertine that can transform any pool area into a luxurious retreat. Used since the days of ancient Rome, this stone offers a classic, sophisticated look that never goes out of style. Each paver has unique patterns, tones, and textures, so no two travertine decks are exactly alike. Whether you prefer the warm, earthy tones of a Mediterranean villa or the clean, bright look of a modern patio, you can find a style that fits your vision. Gappsi offers a wide selection of porcelain and natural stone to help you achieve that perfect, high-end finish.

Drawback: It Needs Regular Sealing

Because travertine is porous, it can absorb spills and trap dirt if it isn’t protected. To keep your deck looking its best and prevent stains from setting in, it needs to be sealed. A high-quality penetrating sealer will protect the stone without making it slippery. This isn’t a one-time task; you’ll need to plan on having it done every three to five years. While it is an extra maintenance step, Gappsi’s restoration and sealing services can handle the job for you, ensuring your deck stays protected and beautiful.

Drawback: It’s Sensitive to Acidic Spills

The calcium carbonate in travertine makes it sensitive to acids. Spills from things like citrus juice, soda, wine, or certain cleaning products can etch the surface if they aren’t wiped up quickly. An etch mark is not a stain but rather a dull spot where the acid has eaten away a tiny bit of the stone’s finish. While sealing provides a good first line of defense, it’s still important to clean up acidic spills as soon as you notice them. A little bit of caution during backyard barbecues goes a long way.

Drawback: Installation Can Be Complex

Proper installation is everything when it comes to a lasting travertine deck. If the base isn’t prepared correctly or the pavers aren’t set properly, you can end up with an uneven surface, shifting stones, or drainage problems down the line. This is not a simple DIY project. Hiring an experienced team is critical to ensure the ground is graded correctly and a solid foundation is laid. Professional masonry experts understand how to work with natural stone to create a stable, level, and beautiful deck that will stand the test of time.

Travertine vs. Other Pool Deck Materials

Choosing the right material for your pool deck is just as important as designing the pool itself. The surface you walk on sets the entire mood for your backyard oasis and impacts everything from safety to maintenance. While travertine is a fantastic option, it helps to see how it compares to other popular materials. Let’s look at how it stacks up against concrete, porcelain, and brick to help you find the perfect fit for your Long Island home. Each material has its own set of benefits, and the best choice depends on your budget, style preferences, and long-term goals for your outdoor space.

Travertine vs. Concrete

Concrete is often the default for pool decks because it’s budget-friendly. However, the trade-off is often in comfort and longevity. Travertine looks much more luxurious and, more importantly, stays cooler under your feet on hot summer days. Concrete, on the other hand, can get uncomfortably hot in direct sun. While concrete’s initial cost is lower, it’s also prone to cracking over time, especially with Long Island’s freezing and thawing cycles. A travertine deck, with proper installation from a masonry expert, offers a more durable and elegant solution that holds its value and enhances your home’s appeal for years to come.

Travertine vs. Porcelain Pavers

This is a common comparison, as both are premium materials. The choice often comes down to aesthetics. Travertine provides a warm, organic beauty with unique patterns that only natural stone can offer, creating a soft, earthy feel around your pool. In contrast, porcelain pavers deliver a sleek, uniform look perfect for modern designs. While porcelain is incredibly dense and easy to clean, it doesn’t have the same natural texture and can feel hotter underfoot. We work with a wide range of porcelain and natural stone, so we can walk you through samples of both to help you see and feel which one speaks to your personal style.

Travertine vs. Brick

Brick has a classic, traditional charm, but when it comes to a pool deck, durability is key. Travertine is a tough natural stone that stands up beautifully to hot weather, heavy rain, and even sleet; it’s simply built for the job. While brick is also a strong material, it can be more susceptible to wear and moisture absorption in a poolside environment, which can lead to issues over time. Aesthetically, travertine’s larger pavers create a more seamless and upscale look, making your pool area feel more spacious and resort-like. It’s a durable choice that complements the sophisticated design of a custom swimming pool.

What’s the Budget for a Travertine Pool Deck?

Planning your budget is one of the most important steps in any home improvement project, and a new pool deck is no exception. While travertine is a premium material, its price can vary quite a bit. The final cost of your project will depend on three main things: the stone you choose, the complexity of the installation, and the specific details of your design.

Think of it as an investment in your home’s value and your family’s enjoyment. To give you a clear picture of what to expect, let’s break down the costs. Understanding these components will help you create a realistic budget for the beautiful, long-lasting swimming pool area you’ve been dreaming of.

Breaking Down Material Costs

The first part of your budget is the stone itself. Travertine pavers typically cost between $3 to $8 per square foot, but this price reflects only the material. The final cost depends on the grade, color, and finish you select. Higher-grade travertine with fewer natural imperfections or a rarer color will be at the upper end of that range.

At Gappsi, we source a wide variety of porcelain and natural stone pavers, giving you plenty of options to match your budget and aesthetic goals. While the initial material cost is a key factor, remember that it’s just one piece of the overall project price.

Understanding Installation Costs

Travertine requires a skilled hand to install correctly, which is why labor is a significant part of the budget. Unlike a simple concrete slab, laying travertine pavers requires careful ground preparation, precise placement, and expertise to ensure proper drainage and a level surface that will last for decades. You’ll pay for both the stone and the skilled workers needed to install it correctly.

This is not a weekend DIY project. Investing in professional masonry services ensures your beautiful new deck won’t shift, crack, or settle over time. The peace of mind that comes with expert installation is well worth the upfront cost.

Factors That Influence the Final Price

Several other details can affect your final project cost. The quality and finish of the stone, the thickness and size of the tiles, and any special features like the coping (the stone edge around the pool) all play a role. Extensive site preparation, like removing an old deck or leveling a sloped yard, will also add to the total.

Finally, don’t forget about sealing. Sealing your new deck is a crucial step that protects the stone from stains and weathering. This service helps keep the stone looking clean by preventing dirt from getting trapped in its pores. Factoring in professional cleaning and sealing services from the start will help you protect your investment.

How to Choose the Best Travertine for Your Pool

Once you’ve decided on travertine, the next step is picking the right stone for your project. It might seem like all travertine is the same, but there are key differences that can impact the look, safety, and longevity of your pool deck. Thinking through a few important factors will help you select a material that not only looks beautiful but also performs perfectly for years to come. From the stone’s density to its finish, every detail matters. Let’s walk through what you need to look for to make a confident choice.

Check the Stone’s Grade and Density

When you’re looking at travertine, you’ll often hear about different “grades.” A higher grade of travertine typically has fewer natural holes and a more uniform color, which points to a denser, stronger stone. For a pool deck, you want to choose travertine pavers, which are specifically cut to be thick and durable. This ensures your deck can handle everything from patio furniture being moved around to constant foot traffic without chipping or cracking. A denser stone is also less porous, meaning it will be more resistant to stains and weathering over time. We can help you source high-quality natural stone pavers that have the right density and durability for a Long Island climate.

Prioritize Slip Resistance

Safety is always the top priority around a swimming pool, and the surface of your deck plays a huge role in preventing accidents. One of travertine’s best features is its natural slip resistance. The stone has tiny, inherent pores that help absorb water on the surface, providing better grip even when it’s wet. This is a major advantage over other materials that can become slick. To maximize safety, opt for a tumbled or brushed finish instead of a highly polished one. These textured finishes enhance the stone’s natural grip, giving you extra peace of mind while your family and friends enjoy the swimming pool.

Ensure Color and Finish Consistency

Travertine is loved for its warm, earthy tones like ivory, beige, and walnut, which create a timeless and elegant look. Because it’s a natural stone, no two pieces are exactly alike. This variation is part of its charm, but you still want a consistent overall look. We always recommend viewing samples in person, preferably in natural light, to see the true color. It’s even better if you can see a larger selection or a completed project to understand the range of tones. At the Gappsi Store, you can explore different options and we’ll ensure your order comes from a consistent batch for a beautifully cohesive result.

Why Professional Installation Matters

The most beautiful, high-grade travertine in the world will fail if it isn’t installed correctly. Proper installation is just as important as the material itself. We’ve all heard stories of decks that become uneven or sink over time due to a poor foundation. A professional installation ensures the ground is properly prepared, a stable base is laid, and each paver is set perfectly. This meticulous masonry work prevents shifting, cracking, and water issues down the road. Investing in an experienced team protects your investment and guarantees your stunning new pool deck will last for decades.

Maintaining Your Travertine Pool Deck

One of the best things about a travertine pool deck is its durability, but a little routine care will keep it looking pristine for years. Think of it less like a chore and more like protecting your beautiful investment. Keeping your travertine clean and sealed not only preserves its classic look but also ensures it remains a safe, inviting space for your family and friends. With a simple maintenance plan, you can easily manage spills, prevent stains, and keep your outdoor oasis in top condition through every season on Long Island.

Your Simple Cleaning Routine

Because travertine is a porous stone, it has natural little pockets where dirt and debris can settle. A simple cleaning routine is your best defense. Start by sweeping the deck regularly with a soft-bristle broom to clear away leaves, dirt, and anything else that gets tracked in. This simple step prevents grime from building up. For a deeper clean, you can rinse the area with a garden hose. If you notice tougher spots, a gentle wash with a pH-neutral cleaner and water will usually do the trick. While pressure washing is an option for a seasonal deep clean, always use a low-pressure setting to avoid damaging the stone’s surface.

How Often to Seal Your Travertine Deck

Sealing is the most important step in protecting your travertine from the elements. We recommend applying a high-quality, breathable penetrating sealer every three to five years. This type of sealer soaks into the stone, creating a protective barrier that helps prevent water, pool chemicals, and potential stains from getting trapped in its pores. Sealing not only keeps your deck looking clean and beautiful but also helps preserve its natural color and texture over time. If you’re unsure what your deck needs, our professional restoration and sealing services can help you protect your investment for the long haul.

Dealing with Stains, Chips, and Cracks

Accidents happen, but most are easy to fix if you act quickly. Acidic things like fallen leaves, bird droppings, or a spilled glass of lemonade can cause discoloration if left to sit. Try to clean up spills as soon as you see them. For stubborn organic stains, a poultice or a designated stone cleaner can often lift them out. While travertine is very strong, a heavy dropped object could cause a chip. Small imperfections can sometimes be repaired with color-matched epoxy. For larger cracks or widespread damage, it’s best to call in an expert to ensure a seamless repair that maintains the integrity of your beautiful masonry work.

Design Inspiration for Your Long Island Pool Deck

Once you’ve decided on travertine, the fun part begins: designing the look and feel of your backyard oasis. Travertine is incredibly versatile, so it works beautifully with a wide range of styles. Whether you’re dreaming of a rustic escape or a sleek, modern hangout, here are a few ideas to get your creativity flowing.

The Classic Mediterranean Oasis

To create a timeless, old-world feel, think warm and earthy. Choose travertine pavers in shades of gold, walnut, or cream and have them laid in a French pattern. This classic arrangement uses a mix of different-sized tiles to create a beautiful, interlocking design that feels both rustic and elegant. We can help you select the perfect combination of stones to achieve this look. Complement the warm stone with lush greenery, terracotta pots, and wrought-iron details for a space that feels like a permanent vacation to the Italian countryside.

The Modern Minimalist Retreat

If clean lines and a sophisticated vibe are more your style, travertine can deliver a stunning modern look. For a minimalist retreat, opt for large-format tiles in cooler tones like ivory, silver, or soft gray. Using large, uniform pavers creates a smooth, seamless surface that makes your pool area feel more spacious and open. Keep the landscaping simple with structured garden beds and ornamental grasses. This approach turns your swimming pool into the undisputed centerpiece of a chic, uncluttered backyard.

Pairing Travertine with Other Materials

Don’t be afraid to mix and match. Combining travertine with other materials adds visual interest and helps define different zones in your outdoor living space. You could create a border around your pool deck with darker stone pavers or use wood-look porcelain planks to transition from the pool area to a dining patio. Our landscape design team loves getting creative with textures and colors to build a truly custom look that reflects your personal style and the unique character of your home.

Adding Complementary Outdoor Features

A travertine pool deck is the perfect foundation for a complete outdoor living environment. Its natural beauty pairs wonderfully with other high-end features. Imagine stepping from your cool travertine deck into a shaded, custom-built pavilion or pergola for an afternoon break. You could also incorporate a cozy fire pit built with matching masonry for cool evenings, or even add a pathway leading to a private sauna. Integrating these elements creates a cohesive and functional backyard that you’ll enjoy for years to come.

So, Is a Travertine Pool Deck the Right Choice for You?

Deciding on the perfect material for your pool deck really comes down to weighing beauty, function, and maintenance. Travertine is a fantastic option if your vision for a backyard oasis includes timeless elegance and a touch of luxury. It delivers a beautiful, high-end look that can completely transform your pool area. If you prioritize a surface that feels comfortable and stays cool even on the hottest Long Island summer days, travertine is hard to beat. Its natural ability to stay cool underfoot means more comfortable poolside lounging for you and your family. Plus, its porous texture provides excellent slip resistance, which is a huge plus for safety around the water.

Of course, this premium experience comes with a few practical considerations. The upfront cost for travertine is higher than for materials like concrete pavers, as you are investing in both a high-quality natural stone and the skilled labor required for a flawless installation. It also requires a bit of upkeep. Because it’s a porous stone, you’ll need to commit to sealing it every couple of years to protect it from stains and water absorption. This regular restoration and sealing is key to preserving its beauty for decades to come.

Ultimately, the decision rests on your priorities and lifestyle. If you’re looking for a durable, stunning, and comfortable pool deck and are prepared for the investment and maintenance, travertine is an exceptional choice that adds significant value and enjoyment to your home. It’s a material that creates a truly special outdoor living space. When you’re ready to explore the different colors and finishes, looking at a gallery of porcelain and natural stone options can help you visualize the final result for your own backyard.

Related Articles

Frequently Asked Questions

How hot does a travertine deck get in the summer? This is one of travertine’s best features. It naturally stays much cooler to the touch than concrete or many other paver materials. Because it’s a lighter-colored stone, it reflects a lot of sunlight instead of absorbing it. You can comfortably walk on it with bare feet, even on a hot, sunny day, which makes a huge difference for enjoying your pool area.

Is travertine slippery when it gets wet? No, it’s actually known for being very slip-resistant. Travertine is a porous stone, which means it has tiny, microscopic holes that absorb water instead of letting it pool on the surface. This natural texture provides excellent grip for wet feet, making it a very safe and family-friendly choice for a swimming pool surround.

How much maintenance does a travertine deck actually need? The maintenance is quite manageable. The most important task is sealing the stone every three to five years to protect it from stains and weathering. For day-to-day care, a simple sweep to clear off leaves and dirt is usually enough. If you need to wash it, just use a pH-neutral stone cleaner and water. A little routine care goes a long way in keeping it beautiful.

What happens if I spill something like lemonade or wine on it? Because travertine is a calcium-based stone, it can be sensitive to acids. A spill like citrus juice or wine can cause an “etch,” which is a dull spot on the surface. The key is to wipe up these spills as soon as you notice them. A good sealer provides a strong layer of protection and gives you more time to clean up before any damage occurs.

Why is professional installation so important for travertine? Proper installation is critical for the longevity of your deck. Travertine pavers need a perfectly prepared and compacted base to prevent them from shifting, cracking, or becoming uneven over time. An expert mason understands how to grade the area for proper drainage and set each stone correctly. This is not a DIY-friendly project; professional work ensures your beautiful investment will last for decades.

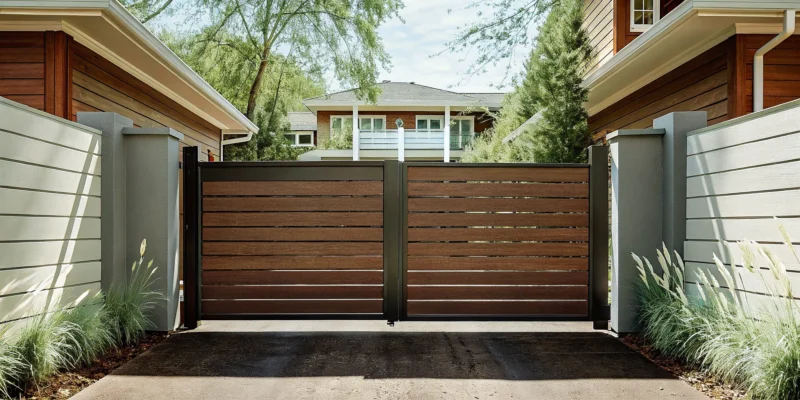
Modern horizontal aluminum privacy fence securing a backyard pool area.

Aluminum Privacy Fence: The Complete Guide

A fence should do more than just mark your property line; it should be a statement piece that enhances your home’s curb appeal. If you think a privacy fence means a boring, solid wall, think again. The modern aluminum privacy fence is a game-changer for design-savvy homeowners. With options for horizontal or vertical slats, a range of sophisticated colors, and even realistic woodgrain finishes, you can create a look that is uniquely yours. This article explores the exciting customization possibilities that allow you to design a fence that perfectly complements your home’s architecture and your personal style.

Key Takeaways

  • Enjoy a Durable, Low-Maintenance Solution: An aluminum privacy fence combines modern style with incredible resilience. It stands up to Long Island weather without rusting or rotting, saving you from the endless cycle of painting and repairs common with wood.
  • Customize Your Fence to Match Your Style: Aluminum is not a one-size-fits-all solution. You can personalize your fence by choosing the slat orientation (horizontal or vertical), color, and even realistic woodgrain finishes to perfectly complement your home’s aesthetic.
  • Make a Smart Long-Term Investment: Although the upfront cost can be higher than wood, aluminum fences save you significant money and time in the long run by avoiding maintenance and replacement costs. Professional installation is crucial for a secure, long-lasting result.

What Exactly Is an Aluminum Privacy Fence?

When you picture an aluminum fence, you might think of the classic black picket style that outlines a front yard. An aluminum privacy fence, however, is designed with a different goal in mind: to create a secluded and personal retreat in your outdoor space. It combines the modern look and incredible durability of aluminum with the solid screening of a traditional privacy fence. Instead of spaced-out pickets, these fences use solid panels, often constructed with interlocking slats that can run either horizontally or vertically, to form a complete visual barrier. This design choice immediately sets it apart and offers a sleek, contemporary aesthetic.

This style is perfect for enclosing a patio, securing a swimming pool, or simply creating a quiet corner away from the neighbors. It offers the best of both worlds, providing the strength and weather resistance that aluminum is known for while giving you the complete seclusion you want. Choosing the right fencing and netting is a key step in designing a backyard that feels like a true extension of your home. Before you can decide if it’s the right fit for your property, it’s helpful to know what makes it different from a standard aluminum fence and why the material itself is so well-suited for creating privacy.

How It’s Different from a Standard Aluminum Fence

The main difference comes down to construction and purpose. A standard aluminum fence is built for boundary marking and security, featuring vertical pickets with open spaces between them. While effective, this design offers little to no privacy. An aluminum privacy fence, on the other hand, is specifically engineered to block the line of sight. It uses wide, interlocking “tongue and groove” slats that fit together tightly, leaving no gaps. This creates a solid, uniform panel that ensures your backyard remains your own private space. While you could add fill-in panels to a standard fence, a true privacy fence provides a much cleaner and more integrated look from the start.

Why Aluminum Is a Great Material for Privacy

Aluminum is an ideal material for a privacy fence because it’s surprisingly tough and built to last. Unlike wood, which can warp, rot, or attract pests over time, aluminum stands strong. It doesn’t rust or corrode, making it a perfect match for Long Island’s humid summers and snowy winters. This resilience means your private oasis will maintain its clean lines and structural integrity for years without demanding constant repairs or treatments. You get the solid, secure feeling of a privacy fence without the high-maintenance headaches that come with other materials. This lets you spend more time enjoying your yard and less time working on it.

Why Choose an Aluminum Privacy Fence?

When you’re deciding on a privacy fence, you want something that checks all the boxes: security, style, and simplicity. An aluminum privacy fence does just that, offering a modern solution that stands apart from traditional materials like wood or vinyl. It’s a smart investment for your property, providing a perfect blend of form and function. Let’s look at the key benefits that make aluminum a top choice for Long Island homeowners.

Enjoy Durability and Rust Resistance

One of the biggest advantages of aluminum is its incredible durability. Unlike iron, aluminum doesn’t rust, and unlike wood, it won’t rot or warp. This makes it a fantastic choice for Long Island’s climate, as it can handle everything from humid summers and salty air to heavy snow and intense sun without corroding or fading. The material is surprisingly tough, so you can trust your fence installation to stand strong for years, securing your yard without showing its age. It’s a reliable barrier that keeps its integrity through every season.

Spend Less Time on Maintenance

If you love the idea of a beautiful fence but dread the upkeep, aluminum is for you. Wood fences require regular painting or staining to prevent rot and maintain their appearance, which is a time-consuming chore. With an aluminum privacy fence, you can forget about all that. These fences are finished with a protective powder coating that seals the surface. All you need to do is occasionally wipe it down with soap and water to keep it looking brand new. This low-maintenance quality means you get to spend more time enjoying your backyard and less time working on it.

Get Security Without Losing Curb Appeal

A privacy fence should make you feel secure, but it shouldn’t have to look like a fortress. Aluminum fencing offers the best of both worlds. It provides a solid barrier for your property, creating a secluded and private oasis for your family. At the same time, its clean lines and smooth finish offer a sleek, modern aesthetic that can actually improve your home’s curb appeal. It pairs beautifully with other high-end outdoor features, like a porcelain patio or a landscaped garden, helping you create a cohesive and sophisticated outdoor living space.

Choose an Eco-Friendly Fencing Option

For homeowners who prioritize sustainability, aluminum is an excellent choice. It is one of the most recycled materials on the planet, and your fence is likely made from a significant amount of recycled content. Even better, aluminum can be recycled completely at the end of its life, which minimizes its environmental impact. Because these fences last for decades without needing replacement, you also consume fewer resources over time compared to materials with shorter lifespans. Choosing aluminum is a responsible decision that’s good for your home and the planet.

Find Your Style: Customizing Your Aluminum Fence

One of the best parts about choosing an aluminum privacy fence is that you don’t have to settle for a generic, off-the-shelf look. These fences are incredibly versatile, giving you the creative freedom to design a barrier that perfectly reflects your personal taste and complements your home’s unique character. Think of it less as just a fence and more as a key architectural element of your property. From the orientation of the slats to the final color, every detail can be tailored. At Gappsi, we guide you through all the possibilities to create a fence that feels like a natural extension of your home, enhancing both its beauty and its privacy.

Horizontal vs. Vertical Slats

The first major design choice you’ll make is the orientation of the slats. This decision sets the entire tone for your fence’s appearance. A traditional vertical slat design offers a timeless, classic look that works well with many architectural styles. It’s a familiar and elegant choice that provides a strong sense of security. For a more contemporary feel, you can opt for horizontal slats. This modern orientation creates clean, long lines that can make your property feel wider and more spacious. Both styles are designed to give you privacy or semi-privacy, so the choice really comes down to the aesthetic you want to achieve for your outdoor space.

Slat Widths, Spacing, and Panel Designs

Once you’ve decided on an orientation, you can get into the finer details of the panel design. You can customize the width of the aluminum slats, often choosing between wider slats for a bold look or narrower ones for a more delicate pattern. Some designs even allow you to mix different slat widths to create a unique, textured appearance. You also have control over the spacing between the slats. A smaller gap, such as 3/8 of an inch, provides maximum privacy, while a wider gap of an inch or more allows more light and air to pass through. This level of customization ensures your fence delivers the exact balance of privacy and style you’re looking for.

Colors, Finishes, and Powder-Coat Options

Aluminum fences are not limited to a single metallic color. Thanks to a durable powder-coating process, they are available in a variety of sophisticated colors, including textured black, monument gray, and classic white. This tough finish protects the aluminum from the elements and ensures the color won’t chip, fade, or peel. For homeowners who love the look of wood but not the upkeep, woodgrain finishes are a fantastic option. These specialty coatings mimic the appearance of natural wood with remarkable realism. You can explore our selection of fences and netting to see how different colors can transform a property.

Match Your Fence to Your Home’s Aesthetic

All these custom options work together to create a fence that seamlessly integrates with your home’s aesthetic. A modern, clean, and stylish fence does more than just secure your property; it can make your home stand out and add to its value. Consider matching the fence color to your home’s window trim, front door, or roofing for a cohesive look. The right fence becomes part of a holistic landscape design, framing your yard and complementing your garden and patio. By carefully selecting each element, you can ensure your new fence is a beautiful and functional addition to your Long Island home.

Breaking Down the Cost: Aluminum vs. Other Fences

When you’re planning a home improvement project, the budget is always a top consideration. Fencing is no different. While it’s tempting to focus only on the initial price tag, a true cost comparison looks at the bigger picture, including installation, maintenance, and how long the fence will last. An aluminum privacy fence is a significant investment in your home’s security and curb appeal, so it’s important to understand how its cost breaks down compared to other popular materials like wood and vinyl. Let’s walk through the numbers so you can feel confident in your decision.

Comparing Material Costs

The price of fencing materials can vary quite a bit, and aluminum is no exception. Generally, you can expect material costs for an aluminum fence to range from about $15 to over $70 per linear foot. This price depends on the fence’s height, style, and grade. For example, a simple, shorter fence will be more affordable than a tall privacy fence with custom powder-coating and intricate designs. Compared to wood, aluminum often has a higher upfront material cost. However, it’s usually priced competitively with high-quality vinyl fencing. At Gappsi, we can walk you through our diverse fencing and netting options to find a style that fits your home and your budget.

Understanding Installation Costs

Installation is a critical piece of the cost puzzle, and it’s where professional craftsmanship really pays off. The complexity of your property, like dealing with slopes or navigating around existing landscaping, will influence the final price. While large-scale commercial projects can give you an idea of the investment, a residential installation is tailored specifically to your yard’s size and challenges. Proper installation involves securely setting posts, ensuring every panel is perfectly level, and installing gates that function smoothly for years. Opting for a professional team like Gappsi for your fence installation ensures your fence is not only beautiful but also structurally sound and built to withstand Long Island weather.

Calculating Long-Term Value and Savings

Here’s where aluminum fencing truly shines. While the initial cost might be higher than wood, its long-term value is unmatched. Wood fences require constant upkeep, including staining, sealing, and eventually replacing boards that warp or rot. Over the years, these maintenance costs add up. Aluminum, on the other hand, is a different story. It doesn’t rust or corrode and holds up for decades with very little attention, giving you much more value for your dollar. You won’t need to budget for the regular restoration and sealing services that other materials demand. When you factor in the money and time saved on maintenance over the life of the fence, aluminum often proves to be the most economical choice.

A Guide to Top Aluminum Fence Brands

Once you’ve decided on aluminum, the next step is choosing a brand. The manufacturer you select will influence the style, durability, and overall quality of your fence. While there are many great options on the market, a few names consistently stand out for their commitment to excellence and innovation. At Gappsi, we partner with top-tier brands to ensure your project is built to last. Here’s a look at some of the leading aluminum fence manufacturers to help you make an informed choice for your Long Island home.

Jerith

Jerith is a name many homeowners trust for high-quality aluminum fencing that beautifully merges strength with style. Known for its durable products, Jerith offers a wide variety of designs and colors, making it simple to find a fence that complements your property’s unique character. Their commitment to quality means you get a fence that not only looks great on day one but also withstands the test of time. Whether you’re enclosing a garden or defining your property line, Jerith provides reliable and attractive fencing solutions that enhance your home’s curb appeal.

Ameristar

If you’re looking for strength and elegance, Ameristar is a fantastic choice. This brand provides a broad range of aluminum fencing, including beautiful ornamental and residential styles that add a sophisticated touch to any property. Their products are engineered for exceptional strength and longevity, giving you peace of mind that your investment is secure. Ameristar also backs its fences with a solid warranty, so you can feel confident in the durability of your choice. Their ornamental designs are perfect for creating a distinguished look for your home’s exterior.

Knotwood

Knotwood stands out with its innovative aluminum privacy fence systems that offer the warm, stylish look of wood without the demanding upkeep. Their designs are engineered for minimal maintenance, freeing up your weekends for relaxation instead of fence repairs. Knotwood’s systems are also highly customizable, allowing you to create a truly unique fence that meets your specific privacy and design needs. This is a perfect option if you want to integrate your fence seamlessly with other landscape and masonry elements for a cohesive outdoor living space.

Ultra Aluminum

Recognized for its durable and incredibly versatile fencing solutions, Ultra Aluminum is another top contender. The brand offers a diverse array of styles that cater to both residential and commercial properties, ensuring you can find the perfect match for your project. This versatility makes their fences ideal for everything from securing swimming pools to creating a safe play area for kids and pets. With Ultra Aluminum, you get a product that is as functional as it is attractive, providing a reliable barrier that fits your lifestyle and property layout perfectly.

Onguard

Onguard is celebrated for its high-quality construction and thoughtful design features. One of its signature details is the beveled edges on its horizontal rails, an innovative touch that adds a refined look while also improving functionality. Homeowners often choose Onguard for its reputation as a reliable and well-made fencing solution that you can count on for years to come. If you’re looking for a fence that combines proven performance with subtle aesthetic enhancements, Onguard delivers a product that feels both sturdy and thoughtfully designed for your property.

Your Guide to the Installation Process

Installing an aluminum privacy fence is a project that requires precision from start to finish. While it might seem like a straightforward weekend task, a flawless and long-lasting installation depends on getting every detail right. From checking property lines to ensuring each post is perfectly set, the process has several critical steps. A professional installation not only saves you from potential headaches but also guarantees your fence looks great and stands strong for years.

At Gappsi, our team has been managing these projects for decades, so we know exactly what it takes to get the job done right. We handle all the complexities, so you can simply enjoy the final result. Here’s a look at the key stages involved in a successful aluminum fence installation.

Check Property Lines and Local Permits

Before a single post hole is dug, it’s essential to confirm your property lines. Many homeowners accidentally install a fence outside their property, which can lead to costly disputes and the need to reinstall it completely. Getting a professional land survey is the best way to establish your exact boundaries. You also need to check the local regulations in your Long Island town and any rules set by your homeowners association (HOA). These can dictate fence height, style, and placement. Our team is familiar with local codes and can help ensure your project is fully compliant from the start, making the fencing process smooth and stress-free.

Prepare the Site and Set the Posts

Once the paperwork is sorted, it’s time to prepare the site. The first step is to mark out the fence line using stakes and a string line to ensure everything is perfectly straight. This line guides where the corner, end, and gate posts will go. Post holes need to be dug to the correct depth, which is especially important on Long Island to get below the frost line and prevent shifting. Each hole is then filled with concrete to create a solid foundation for the posts. This step is crucial, as the strength of your entire fence relies on how well the posts are set. Our masonry experts ensure every post is secure and perfectly aligned.

Handle Slopes and Install Gates

Long Island properties are not always perfectly flat, but a quality aluminum fence can handle sloped terrain with ease. This is achieved through a technique called “racking,” where the fence panels are designed to adjust to the angle of the ground. Most standard panels can accommodate gentle slopes, creating a smooth, continuous line without awkward gaps. For steeper inclines, special double-punched panels can be used. Gate installation is another area where precision is key. A poorly installed gate can sag, stick, or fail to latch properly. We make sure every gate is perfectly hung to swing smoothly and securely for years of reliable use.

Avoid Common Installation Pitfalls

One of the biggest mistakes in fence installation is rushing the process. When homeowners or inexperienced installers try to save time, it often results in uneven panels, poor alignment, and a weak foundation that won’t stand up to the elements. Taking the time to measure correctly, set posts properly, and attach panels with care makes all the difference. An improperly installed fence not only looks unprofessional but can also compromise your home’s security and curb appeal. By partnering with an experienced team, you can avoid these common pitfalls and feel confident that your investment is protected. You can see examples of our meticulous work on our Gappsi YouTube channel.

How to Care for Your Aluminum Privacy Fence

One of the best things about an aluminum privacy fence is how little you have to think about it once it’s installed. Unlike wood fences that demand regular staining and sealing, aluminum is incredibly low maintenance. With just a little attention now and then, you can keep your fence looking brand new for years. Proper care starts with a quality installation, but these simple routines will ensure your fence remains a beautiful and functional part of your home. Following these steps will protect your investment and keep your outdoor space looking sharp.

Simple Cleaning and Inspection Routines

Keeping your aluminum fence clean is surprisingly easy. For routine cleaning, just mix a little mild soap with water and wipe the panels down with a soft cloth or sponge. A quick rinse with your garden hose is all it takes to wash away any soap residue and dirt. We recommend doing this once or twice a year, or whenever you notice it looking a bit dusty. While you’re cleaning, take a moment to inspect the fence. Check for any loose hardware or scratches on the finish. Addressing small issues early is the best way to prevent them from becoming bigger problems down the road.

How Long Island Weather Affects Your Fence

Long Island’s weather can be tough on outdoor structures, from humid summers and salty air to winter storms. Fortunately, aluminum is perfectly suited for our coastal climate. It’s naturally resistant to moisture and rust, so you won’t have to worry about the decay or corrosion that plagues wood and iron fences. The durable powder coating on Gappsi’s aluminum fences adds another layer of protection, helping the material withstand everything from intense sun to freezing temperatures without fading or chipping. This resilience makes aluminum a smart, long-lasting choice for any Long Island property.

Partner with Gappsi for Flawless Installation

The easiest fence to care for is one that was installed correctly from the start. A flawless installation prevents common issues like sagging panels, wobbly posts, and gate misalignment. When you partner with Gappsi, our team ensures every detail is handled with precision. We use high-quality aluminum privacy fence panels made from a durable aluminum alloy to guarantee both strength and style. Our expert installers prepare the site properly and set each post securely, creating a stable and beautiful fence that will stand strong for decades with minimal upkeep required from you.

Related Articles

Frequently Asked Questions

How much privacy do these fences actually provide? The level of privacy is completely up to you. These fences are designed with interlocking slats that can be fitted together with almost no gaps, creating a solid visual barrier. If you prefer a little more light or airflow, you can choose a design with slightly wider spacing between the slats. This customization ensures you get the exact amount of seclusion you want for your yard.

I love the look of wood but hate the maintenance. Is there an aluminum option for me? Absolutely. Many top brands offer specialty powder-coat finishes that realistically mimic the look of natural wood. You can get the warm, classic appearance of a wood fence without ever having to worry about staining, sealing, or rot. It’s the perfect way to get the aesthetic you love with the long-lasting, low-maintenance benefits of aluminum.

How well does an aluminum fence hold up to Long Island’s weather, like strong winds and salty air? Aluminum is an ideal material for our coastal climate. It naturally resists rust and corrosion, so the salty air and humidity won’t cause it to degrade. When installed correctly, with posts set deep in concrete, the fence is incredibly sturdy and can withstand strong winds. The durable powder-coat finish also protects it from sun, snow, and rain, ensuring it looks great for decades.

Is an aluminum fence a good choice for around my swimming pool? It’s an excellent choice for enclosing a swimming pool. Because aluminum doesn’t rust, it holds up perfectly against splashes and moisture. The solid privacy panels also help create a secluded and secure pool area. Most importantly, these fences can be installed to meet local safety codes for pool enclosures, providing a secure barrier that keeps your family safe.

Why is professional installation so important for an aluminum fence? Professional installation is the key to a fence that lasts. An expert team ensures that property lines are respected, posts are set below the frost line to prevent shifting, and every panel is perfectly level and secure. This prevents common problems like sagging gates or wobbly sections down the road. A proper installation guarantees your fence is not only beautiful but also structurally sound enough to handle anything the weather throws at it.

Elegant paver driveway of a Long Island estate home with interlocking stone pattern and manicured landscaping

Paver Driveways Long Island: Materials Comparison Guide

Choosing a driveway material on Long Island involves more than comparing colors in a showroom. Freeze-thaw cycles, coastal salt, drainage, traffic, and the character of your home’s architecture all affect how a surface performs over time. The right choice should balance appearance with a properly engineered base and practical maintenance.

Ready to start your paver driveway project? Schedule a free design consultation with Gappsi today and get expert guidance on the right materials for your Long Island home.

For paver driveways Long Island homeowners can choose concrete pavers for flexible design and value, porcelain for a uniform, low-maintenance finish, travertine for natural texture, bluestone for regional character, or granite for exceptional load-bearing strength. The best material depends on your site’s conditions, desired style, and long-term priorities.

Concrete pavers are often the starting point because their interlocking construction, broad selection of patterns, and ability to handle local freeze-thaw conditions make them adaptable for many homes. Begin by looking at how their strength, design range, and value compare with the other options.

Concrete Pavers for Long Island Driveways: Strength, Design, and Value

For many Nassau and Suffolk homeowners, concrete pavers balance driveway performance with design flexibility. Installed pricing commonly falls around $20 to $35 per square foot, depending on excavation, base preparation, pattern, access, and selected product. With proper installation and maintenance, a concrete paver driveway can provide an expected service life of roughly 25 to 50 years. For a broader breakdown of project variables, review this paver driveway cost guide.

Concrete pavers are also a practical response to Long Island’s freeze-thaw cycles. Unlike a monolithic concrete slab, an interlocking pavement system can flex slightly as the base and soil respond to seasonal temperature changes. That movement helps distribute vehicle loads and reduces the risk of one large crack spreading across the entire driveway. The result depends on the foundation beneath it, so excavation, drainage, and compaction matter as much as the visible paver.

What thickness should a driveway paver have?

Driveway installations should use vehicular-rated pavers at 60mm or thicker, selected for the expected passenger-vehicle traffic. Thickness alone does not make a driveway durable. A properly compacted aggregate base, a stable bedding layer, and secure perimeter restraints keep the paving units from shifting under turning wheels and repeated loading. The installation plan should also account for water movement rather than allowing runoff to collect beneath the surface.

How do the joints protect the driveway?

Polymeric sand joints lock the individual pavers together while retaining a degree of flexibility. When installed correctly, the material helps stabilize the surface, limit erosion between units, and discourage weed penetration. Routine cleaning and appropriate joint maintenance preserve that performance over time. If a paver is damaged by a vehicle, oil, or a severe impact, an individual unit can usually be lifted and replaced without removing the surrounding driveway.

Homeowners can choose from a wide range of colors, shapes, textures, and laying patterns. Common product lines available for Long Island projects include Cambridge, Nicolock, Techo-Bloc, Belgard, Unilock, EP Henry, and Rinox. That range makes it possible to coordinate the driveway with brick, stucco, natural stone, or other masonry details rather than settling for a single plain surface. Explore Gappsi’s masonry design and construction services to see how material selection can fit into a complete exterior plan.

What Makes Porcelain Pavers a Premium Choice for Driveways?

Porcelain pavers bring a clean, contemporary finish to a driveway while reducing the maintenance demands associated with more porous materials. Fully installed pricing typically falls between $28 and $45 per square foot, depending on the product, site preparation, layout, and installation conditions. That places porcelain above many concrete paver options, but the material offers a distinct combination of appearance, durability, and day-to-day simplicity.

A dense surface built for Long Island weather

Outdoor porcelain has a water absorption rate below 0.5%, making it virtually non-porous. Water, salt, oil, and other driveway contaminants have fewer opportunities to penetrate the surface. Porcelain is also frost-resistant, an important consideration for Nassau and Suffolk properties exposed to freeze-thaw cycles. Because the color and pattern are fired through the material rather than applied only to the surface, the installation maintains a consistent appearance across the driveway.

For vehicle areas, homeowners should specify a 20mm vehicular-rated product, not a thinner pedestrian paver. These systems are engineered for residential vehicle traffic when installed over the appropriate base. Some porcelain pavers can also be installed over an existing concrete slab when that slab is sound, which may reduce removal work and shorten the project timeline.

Modern scale with less upkeep

Porcelain is made in Italy and is available in large-format sizes, including options up to 48 by 48 inches. Larger modules create fewer visible joints and support the streamlined geometry often associated with modern and contemporary homes. The consistent color and texture also make it easier to coordinate a driveway with architectural concrete, stucco, stone veneer, or minimalist landscaping.

Unlike many natural stone applications, porcelain does not require sealing. Its stain-resistant surface usually needs only routine washing, while an R11 or higher slip-resistance rating can provide added traction in wet conditions. Review the full selection of Italian porcelain pavers available at the Gappsi showroom to compare formats, colors, and surface finishes before choosing a driveway system.

Natural Stone Driveway Options: Bluestone, Travertine, and Granite Compared

Natural stone gives a Long Island driveway a material character that manufactured products cannot reproduce. The right choice depends on the home’s architecture, how the driveway will be used, and how much variation and maintenance the homeowner is comfortable accepting. Each option also requires a properly prepared base and periodic sealing to protect the surface in a vehicle-access area.

Natural stone paver materials including bluestone, travertine, and granite arranged for comparison on a residential driveway

Natural stone driveway comparison for Long Island homes
Material Typical installed cost Expected lifespan Best characteristics Planning considerations
Bluestone $25 to $40 per square foot 50 or more years Blue-gray color, traditional appeal, flexible pattern options Choose from a classic cleft finish or a smoother thermal finish. Color can vary between batches.
Travertine $25 to $45 per square foot 50 or more years Stays cool underfoot and has naturally formed pitting that gives the stone character Its porous surface needs sealing, and the sub-base must be well compacted for driveway loads.
Granite or Belgian block $30 to $50 per square foot 100 or more years Hardest material, naturally slip-resistant, resistant to salts, chemicals, and oils Hand-laid installation and difficult cutting can increase labor. The look suits formal properties, including Gold Coast estates.

Bluestone for traditional Long Island architecture

Bluestone is quarried in New York and Pennsylvania and is often selected for its blue-gray tones, which complement colonial and other traditional Long Island homes. A natural cleft finish provides a more textured face, while a thermal finish creates a more controlled surface. NYSDOT specifications identify thermal finishes for certain bluestone pavers, along with durability and absorption standards: review the referenced bluestone specifications. Because the stone is natural, expect meaningful color variation. Herringbone and running-bond layouts can change the visual weight of the same material.

Travertine’s texture and granite’s endurance

Travertine brings a softer, warmer appearance and remains relatively cool in direct sunlight. Its natural pits are part of the material’s identity, but they also make sealing and routine care important in a driveway. Granite and Belgian block take the opposite approach. They provide dense, durable surfaces for heavy traffic and can handle exposure to road salt and common driveway chemicals. Granite is also hand-laid in many formal installations, creating a tailored edge or field pattern. For a project that must coordinate paving, masonry, drainage, and finish details, explore Gappsi’s masonry design and construction services.

Not sure which natural stone fits your home? Call Gappsi for a free consultation and material selection walkthrough for your Long Island driveway.

How Does Long Island’s Climate Affect Your Driveway Paver Choice?

Long Island driveways face more than vehicle traffic. Seasonal freezing, thawing, rain, coastal air, and regional soil conditions all influence how a paving system performs. The material matters, but drainage and base preparation matter just as much. Gappsi’s guidance notes that proper drainage helps prevent water from pooling and damaging driveway materials in Long Island’s variable climate.

Plan for freeze-thaw movement

When water enters porous stone or the joints beneath a driveway and then freezes, it expands. Repeated freeze-thaw cycles can gradually loosen units, widen joints, and create uneven areas. That does not automatically rule out natural stone, but it makes the installation system important. Concrete pavers are a practical option because they provide durability through Long Island’s freeze-thaw cycles. Materials should be selected with their absorption, finish, and intended vehicle use in mind.

Account for salt air and soil conditions

Homes near the North Shore, South Shore, and coastal communities also experience salt-laden air and winter deicing exposure. Salt can contribute to surface wear and weaken the performance of poorly protected materials or installation components over time. In Nassau and Suffolk, clay soils may drain slowly, so water needs a deliberate path away from the paved surface. A site evaluation should address slope, runoff, and any areas where water tends to collect.

Build flexibility into the driveway

A durable driveway typically needs a 6- to 8-inch compacted gravel base, adjusted to site conditions and expected loads. The base is the foundation of longevity, regardless of whether the surface is concrete pavers, porcelain, or natural stone. Interlocking pavers can distribute pressure and accommodate small movements more effectively than a monolithic concrete slab. Which is more likely to develop a single visible crack when the underlying surface shifts.

Polymeric sand joints add another layer of protection. The sand binds between the units, helps resist erosion, discourages weed penetration, and still allows the interlocking surface to retain some flexibility. For paver driveways Long Island homeowners expect to use for years. Matching the material to the climate and installing the drainage, base, and joint system correctly is the essential decision.

Paver Driveway Installation: What Long Island Homeowners Should Know

A durable driveway begins below the visible surface. For Long Island properties, the installation plan must account for drainage, soil conditions, vehicle loads, and the final design. Gappsi develops the project through complete 3D design services, stamped architectural drawings, and permit expediting, so the construction team can work from a clear, coordinated plan.

  1. Excavate and grade the site. The crew removes unsuitable soil and existing surface material to the required depth, then establishes the correct elevations and slope. Careful grading directs water away from the home and prevents low spots from holding moisture.
  2. Install and compact the gravel base. A properly prepared base is the most important factor in the longevity of a paver driveway, regardless of the material selected. Gappsi installs a compacted 6- to 8-inch gravel base in controlled lifts, creating a stable foundation for passenger vehicles and changing weather conditions.
  3. Secure the perimeter with edge restraints. The edge restraint system keeps the installation from spreading under repeated wheel loads. Gappsi’s patented Gappsi Edge Restraint System is incorporated at the perimeter before bedding material and pavers are placed.
  4. Place and screed the sand bedding layer. A consistent layer of bedding sand is screeded over the compacted base. This layer provides a level setting surface while allowing the pavers to lock together during final compaction.
  5. Set the pavers according to the design. Installers place each unit in the approved pattern, maintaining consistent alignment and joint spacing. Interlocking pavers distribute heavy loads more effectively than a solid paving surface, reducing the likelihood of the cracking associated with traditional concrete slabs. Review paver driveway design ideas for pattern and border inspiration.
  6. Cut edges and complete the detailing. Field cuts are measured and made along curves, steps, drains, and other transitions. This stage gives the driveway clean lines and ensures that perimeter pieces fit the design rather than relying on narrow or unstable fragments.
  7. Fill the joints with polymeric sand. Dry polymeric sand is swept into the joints and activated according to the product requirements. It binds the stones together, creating a solid yet flexible surface and helping limit erosion between pavers.
  8. Complete final plate compaction. The finished surface is compacted with the appropriate plate and protection method, seating the pavers into the bedding layer and locking the joints. If a natural stone detail such as bluestone is included, the specified finish matters too. NYSDOT specifications, for example, identify a thermal finish on the top face of bluestone unit pavers for texture.

This sequence gives homeowners a practical way to evaluate installation proposals: ask how the base, drainage, restraints. Cuts, and joint system will be handled, not only which paver will be visible at the surface.

Sealing and Maintenance: How to Protect Your Paver Driveway Investment

A thoughtful maintenance plan helps a Long Island driveway retain its color, joint stability, and drainage performance through salt air, winter freezing, and everyday vehicle traffic. The right schedule depends on the paving material, because concrete, natural stone, and porcelain do not respond to sealers in the same way.

When should a paver driveway be sealed?

For a new concrete paver driveway, wait at least one year before the first sealing. This gives the installation time to finish curing and allows residual moisture to escape. After that, most driveways benefit from resealing every two to three years, although exposure, traffic, and the condition of the surface should guide the final timing. Professional sealing commonly costs about $0.75 to $2.50 per square foot.

Preparation matters as much as the product. The surface should be pressure washed to remove dirt, organic growth, and residue, then allowed to dry fully. Damaged or low joints should be addressed before sealer is applied. For concrete pavers, polymeric sand replenishment may be needed every few years. Polymeric sand stabilizes the joints, helps limit weed penetration, and reduces erosion between stones.

Which sealer fits each driveway material?

Natural stone generally requires a penetrating sealer that enters the stone without leaving a heavy surface film. Travertine driveway pavers especially benefit from a quality sealant because their natural porosity can make them more vulnerable to staining in high-traffic areas. Bluestone, travertine, and granite typically need periodic evaluation and resealing, with the exact interval depending on absorption and wear.

Concrete pavers can use a film-forming sealer when the goal is to enhance color and add surface protection. However, the finish should be selected carefully to avoid an overly glossy appearance or a slippery surface. In coastal Nassau and Suffolk settings, salt air and freeze-thaw cycles can accelerate sealer breakdown, so inspect for fading, peeling, or water no longer beading on the surface.

Porcelain pavers have the lowest maintenance profile. They are non-porous and typically do not require sealing, needing regular washing instead. For a more detailed service plan, review Gappsi’s guide to cleaning and sealing stone patios and driveways.

Concrete pavers offer moderate maintenance, porcelain offers the least, and natural stone ranges from moderate to higher maintenance. Choosing the right sealer and maintaining the joints helps protect the installation without treating every material as if it were the same.

Frequently Asked Questions

Which materials work best for a Long Island driveway?

Concrete pavers offer flexible patterns and a practical balance of cost and performance. Porcelain provides a consistent, non-porous surface with low upkeep. Bluestone adds regional character, travertine brings natural texture, and granite suits homeowners who want a dense stone with strong load-bearing performance. The right choice depends on the home’s architecture, drainage, traffic, and preferred maintenance routine.

How much do different driveway paver materials cost?

Installed pricing varies with material, site preparation, access, pattern, edging, and drainage. The research range is about $20-$35 per square foot for concrete pavers, $28-$45 for porcelain, $25-$40 for bluestone, $25-$45 for travertine, and $30-$50 for granite or Belgian block. Treat these as planning ranges, not a project quote, because excavation and base work can materially change the total.

Can paver driveways withstand Long Island weather?

Yes, when the system is designed for freeze-thaw cycles, coastal moisture, and proper drainage. A compacted base is essential, and interlocking units can distribute vehicle pressure rather than concentrating it in one slab. Bluestone used in New York infrastructure projects is specified for absorption and durability standards by the New York State Department of Transportation.

What maintenance does each material require?

Regular sweeping, prompt stain removal, and inspection of joints help every driveway. Concrete pavers benefit from stable polymeric sand, while travertine and bluestone generally need periodic sealing. Porcelain typically needs only routine washing because it is non-porous and stain-resistant. Granite resists salt and oil, but it still deserves cleaning after winter exposure.

Can these pavers support cars and heavier vehicles?

Yes, provided the selected units and base are rated for vehicular use. Concrete pavers should have an appropriate driveway thickness, porcelain must be a vehicular-rated product, and natural stone needs a properly compacted sub-base. Granite is especially suited to heavy-load areas because its dense stone structure provides strong load-bearing capacity.

Ready to Choose the Right Driveway Pavers?

Material selection affects how your driveway looks, performs through Long Island weather, and fits your home’s design. Gappsi can help you compare concrete pavers, porcelain, travertine, bluestone, and granite based on your property and priorities.

Schedule your free design consultation.

A wooden outdoor barrel sauna installed in a residential backyard.

The Buyer’s Guide to an Outdoor Barrel Sauna

On Long Island, we love our backyards, but too often, we only use them for a few months of the year. An outdoor barrel sauna changes that, turning your property into a year-round destination for relaxation. Think of stepping into a warm, fragrant cedar haven on a crisp autumn day or finding a cozy escape from the winter chill. This simple addition allows you to embrace every season, offering a powerful wellness ritual that’s always just a few steps away. This guide explains how a sauna can fit into your lifestyle and help you get the most out of your home, no matter the weather.

Key Takeaways

  • The Barrel Design Is Smart, Not Just Stylish: Its circular shape promotes efficient, even heating, which is the foundation for its many health benefits, including stress relief and improved circulation. This smart design means it heats up faster and uses less energy.
  • Personalize Your Sauna to Fit Your Lifestyle: Key decisions like the type of wood, the choice between a wood-burning or electric heater, and the overall size allow you to tailor the sauna experience for your specific needs, whether for quiet escapes or social wellness.
  • A Solid Plan Ensures a Lasting Retreat: Proper installation is crucial for safety and longevity. This involves preparing a level foundation, planning for electrical needs, and following local codes. A little routine maintenance afterward will keep your sauna in perfect condition for years.

What Is an Outdoor Barrel Sauna?

If you’re dreaming of adding a touch of spa-like luxury to your backyard, an outdoor barrel sauna might be the perfect fit. These unique saunas are exactly what they sound like: cylindrical, barrel-shaped structures designed for outdoor use. The design isn’t just for looks, though it certainly adds a beautiful, rustic element to any landscape. The circular shape is engineered for efficiency, creating an intimate and deeply relaxing experience right in your own backyard.

Imagine stepping out of your home and into a warm, therapeutic retreat. Gappsi offers a range of high-quality saunas that can transform your outdoor space into a year-round wellness destination. The barrel design is specifically crafted to withstand the elements while providing an authentic sauna experience. But what makes this shape so special, and how does it compare to a traditional sauna? Let’s explore the details so you can decide if a barrel sauna is the right addition to your Long Island home.

Why the Barrel Shape Is So Effective

The barrel shape is a masterclass in simple, effective design. Its curved walls allow heat to circulate naturally and evenly. In a square sauna, heat can get trapped in the corners, but the cylindrical shape of a barrel sauna encourages a continuous flow of warm air. This means the space heats up faster and uses less energy to maintain the desired temperature. The sturdy construction, with its tight-fitting staves, also makes the structure incredibly durable and weather-resistant. This efficient and robust design ensures you get the most out of every session, providing consistent and enveloping heat.

Barrel Sauna vs. Traditional Sauna: What’s the Difference?

The most obvious difference between a barrel sauna and a traditional one is the shape, but the distinction goes deeper. Traditional saunas are typically square or rectangular, often with multi-level benches that allow you to experience different heat intensities. Barrel saunas, with their curved design, usually have benches on a single level. However, this unique shape promotes better heat circulation, which can make them more energy-efficient. A barrel sauna is a standalone feature that enhances your yard’s aesthetic, while a traditional sauna can be built into a larger home remodeling project or outdoor structure. Both offer incredible health benefits, so the choice often comes down to your personal style and backyard layout.

Clearing Up Common Barrel Sauna Myths

Let’s tackle a few common misconceptions about barrel saunas. One myth is that they provide an inferior experience because they lack the tiered seating of a box sauna, which prevents you from sitting higher up where the heat is more intense. While the seating is different, the efficient, rolling heat of a barrel sauna creates a consistent and immersive warmth throughout the space. Another concern is that the design leads to uneven heating, leaving your feet cold while your head gets too hot. A properly designed barrel sauna with a quality heater and good ventilation completely avoids this, ensuring a comfortable and balanced experience from head to toe.

The Health Benefits of a Barrel Sauna

Adding a barrel sauna to your backyard is more than just an aesthetic upgrade; it’s a powerful investment in your long-term health and daily well-being. Think of it as your personal wellness retreat, just steps from your door. The simple act of sitting in the gentle, enveloping heat can have profound effects on your body and mind. From supporting your cardiovascular system to providing a quiet space for mental clarity, the benefits are extensive. Regular sauna use becomes a simple, enjoyable ritual that helps you feel your best. Let’s explore some of the specific health advantages you can expect when you bring one of these beautiful saunas home.

Support Your Heart and Blood Pressure

Regular sauna sessions can be a game-changer for your cardiovascular health. Studies have shown that using a sauna just two to three times a week can significantly lower the risk of heart-related issues, while increasing that to four to seven times a week can cut the risk even further. The science is straightforward: the heat helps your blood vessels relax and widen, a process which can lead to lower blood pressure and improved circulation throughout your body. This isn’t just a temporary feeling of relaxation. It’s an active way to support one of your body’s most vital systems. It’s a relaxing, enjoyable ritual that does something great for your heart, making it a cornerstone of a healthy lifestyle.

Find Stress Relief and Mental Clarity

In our busy lives, finding a true moment of peace can feel like a challenge. A barrel sauna offers a sanctuary where you can disconnect from the noise and reconnect with yourself. The penetrating warmth helps soothe tired muscles and release physical tension you might not even realize you’re holding. As your body unwinds, the quiet, enclosed space encourages your mind to slow down. This powerful combination is incredibly effective for reducing stress and promoting mental clarity. Many people find that regular sauna use improves their sleep quality, helping them fall asleep faster and wake up feeling more refreshed. It’s a simple practice that can have a huge impact on your overall mood and daily resilience.

Improve Your Respiratory and Skin Health

The benefits of a sauna extend to your respiratory system and skin. The warm, steamy air can help open up your airways, which may provide welcome relief from congestion and reduce the risk of certain pulmonary diseases. It’s a natural way to help you breathe a little easier, especially during seasons when you might feel stuffed up. At the same time, the heat induces a deep sweat that cleanses your pores from the inside out. This process helps flush out impurities and dead skin cells, leaving your skin looking clearer and more radiant with a healthy glow. It’s like getting a mini-facial and a respiratory treatment all in one deeply relaxing session.

Invest in Cognitive Health and Long-Term Wellness

Making a sauna part of your routine is also an investment in your future cognitive health. Compelling research indicates a strong link between regular sauna use and a significantly reduced risk of developing dementia and Alzheimer’s disease later in life. While it’s not a cure, it is a powerful, proactive step you can take for your long-term brain health. By promoting healthy blood flow and reducing inflammation throughout the body, sauna bathing supports your body’s natural processes for staying sharp. It’s a commitment to your future self that you can start enjoying today as part of your complete home remodeling wellness plan.

How to Choose the Right Wood for Your Sauna

Picking the right wood for your barrel sauna is one of the most important decisions you’ll make. It’s not just about looks, although that’s certainly part of the fun. The type of wood you choose directly impacts your

Think of it as choosing the foundation for your wellness retreat. You want something that will last for years and provide a consistent, high-quality experience every time you step inside. The two most popular and reliable options you’ll come across are Western Red Cedar and Nordic Spruce. Each has its own unique character and benefits, so let’s get into what makes them special. Understanding the differences will help you select the perfect material for the sauna that fits your backyard and your lifestyle.

Western Red Cedar

Western Red Cedar is a top-tier choice for barrel saunas, and for good reason. It’s naturally resistant to moisture and decay, which is a huge plus for an outdoor structure that will face all four seasons. This wood is incredibly durable and provides excellent insulation, helping your sauna maintain a consistent temperature. One of its most beloved features is the rich, pleasant aroma it releases when heated, which adds a wonderful layer of aromatherapy to your experience. Its beautiful reddish-brown tones also give it a warm, rustic look that blends seamlessly into any backyard design.

Nordic Spruce

Nordic Spruce is another fantastic, high-grade wood used in quality saunas. It’s known for its strength, stability, and a bright, clean aesthetic. This wood has a light color and a fine, tight grain, creating an inviting and airy feel inside the sauna. Nordic Spruce is great at heating up quickly and retaining that heat effectively, making your sauna sessions more energy-efficient. If you prefer a more modern, Scandinavian look for your outdoor space, the bright and uniform appearance of Nordic Spruce is an excellent fit that complements any landscape design.

What to Look for in Quality Sauna Wood

When you’re ready to choose, focus on a few key factors: moisture resistance, heat retention, and aroma. High-quality woods like Western Red Cedar and Nordic Spruce are specifically suited for the sauna environment because they heat up quickly and create a truly relaxing experience. It’s also wise to ensure the wood is sourced responsibly. At Gappsi, we prioritize using the best materials, so you can feel confident that your sauna is built to last. By focusing on quality from the start, you invest in years of reliable wellness and enjoyment right in your own backyard.

Choose Your Heater: Wood-Burning vs. Electric

The heart of your sauna is its heater, and you have two main options: traditional wood-burning or modern electric. This is one of the most important decisions you’ll make, as it shapes the entire sauna experience. Think of it as choosing between the rustic charm of a crackling fireplace and the sleek efficiency of a smart home device. Both will give you the heat and steam you’re looking for, but the path to get there is quite different. Your choice will come down to your personal preferences, your lifestyle, and what you want to get out of your sauna sessions.

Each type of heater offers a unique atmosphere and level of involvement. A wood-burning heater connects you to a timeless tradition, while an electric heater provides push-button simplicity. The heat itself can even feel different, with wood stoves providing a deep, radiant warmth and electric heaters offering a more consistent, enveloping heat. Before you decide, it’s helpful to explore the different saunas and heater combinations available. Understanding the benefits of each will help you select the perfect engine for your backyard retreat, ensuring every session is exactly what you imagined. Let’s look at what makes each option special so you can find the right fit for your Long Island home.

The Appeal of Wood-Burning Heaters

A wood-burning heater is for the purist who loves the ritual of a traditional sauna. It offers a multi-sensory experience that an electric heater can’t replicate: the gentle crackle of the fire, the soft glow of the flames, and the earthy aroma of burning wood. This type of heater creates a deep, radiant heat that many sauna enthusiasts swear by. It does require more hands-on effort, like starting the fire and adding logs to maintain the temperature. For many, however, this process is a meditative part of the experience, helping them disconnect from a busy world and connect with a classic wellness practice.

The Convenience of Electric Heaters

If you value simplicity and speed, an electric heater is an excellent choice. With the flip of a switch or the press of a button, your sauna begins to heat up, often reaching your desired temperature much faster than a wood-burning stove. Electric heaters also provide precise temperature control, allowing you to set and maintain the perfect climate for your session. This convenience makes it easy to fit a sauna session into a busy schedule. You can even find models with timers or Wi-Fi controls, so your sauna is ready and waiting for you the moment you get home.

Which Heater Is Right for You?

The best heater for your barrel sauna ultimately depends on your lifestyle. Ask yourself what you truly want from the experience. Do you look forward to the hands-on ritual of building a fire and tending to it? If so, the authentic ambiance of a wood-burning heater will be deeply rewarding. Or, is your main goal to get the health benefits of a sauna with as little fuss as possible? If you prioritize quick, convenient access and precise control, then an electric heater is likely the better fit. There’s no wrong answer, only the one that aligns with how you plan to enjoy your personal oasis.

What Size Barrel Sauna Do You Need?

Choosing the right size for your barrel sauna is one of the most important decisions you’ll make. The perfect size depends entirely on how you plan to use it. Are you dreaming of a quiet, personal retreat for yourself and a partner? Or do you envision your sauna as a social hub for family and friends after a dip in the pool? Thinking about your ideal sauna session will help you find the right fit. A smaller sauna offers an intimate setting and heats up quickly, while a larger model provides ample space for socializing and stretching out.

Barrel saunas typically come in sizes designed to fit anywhere from two to eight people. It’s helpful to consider not just your current needs but also how you might use the sauna in the future. If you love to entertain, a slightly larger model might be a wise investment. At Gappsi, we can help you explore the different sauna options available and find one that perfectly matches your lifestyle and backyard space. Remember, the goal is to create a wellness sanctuary that you’ll love for years to come, so choosing the right capacity is key to that long-term enjoyment.

For 2 to 4 People

A barrel sauna built for two to four people is a fantastic choice for couples or small families. This size creates a cozy, intimate atmosphere perfect for quiet relaxation and personal wellness routines. Because of the smaller volume, it heats up faster and is more energy-efficient, making it easy to hop in for a spontaneous session. This compact footprint is also ideal for smaller Long Island backyards, as it can be tucked into a garden corner or placed on a deck without overwhelming your space. We can even help you integrate it beautifully into your existing landscape design.

For 4 to 6 People

If you’re looking for a versatile option that works for both private relaxation and small social gatherings, a four to six-person barrel sauna is the perfect middle ground. It offers enough room for your family to enjoy a session together or for you to host a few friends. Even when you’re using it alone, the extra space allows you to stretch out comfortably. This size strikes an excellent balance between social capacity and operational efficiency. It’s a popular choice for homeowners who want the flexibility to do a little bit of everything, creating a wonderful addition to an outdoor entertainment area next to a pavilion or pergola.

For 6 to 8 People

For the ultimate host, a six to eight-person barrel sauna is the clear winner. This is the largest standard size available, providing plenty of space for entertaining groups of friends and family. Imagine hosting wellness gatherings or relaxing with loved ones after a summer barbecue. A large sauna can become the centerpiece of your backyard resort, especially when paired with other features like one of our custom swimming pools. Keep in mind that a larger model will take more time and energy to heat, but for those who love to share their space, the social benefits are well worth it.

How Much Does a Barrel Sauna Cost?

Investing in a barrel sauna is an investment in your home and well-being, so it’s natural to wonder about the price tag. The cost of a barrel sauna can vary quite a bit, depending on several key factors. Think of it like designing any other part of your home; the final price reflects your specific choices in size, materials, and features.

Generally, you can expect a quality barrel sauna to be a significant purchase, but one that adds lasting value. The main elements that will shape your final quote are the sauna’s size, the type of wood you choose, and any customizations you add to make it uniquely yours. We’ll break down these components so you can get a clear picture of what to expect and build a budget that works for you.

How Size and Materials Affect Price

The most significant factors determining the cost of a barrel sauna are its size and the wood it’s made from. A cozy sauna built for two people will naturally cost less than a larger model designed to accommodate six or eight guests, simply because of the difference in materials required. As you think about how you’ll use your sauna, whether for quiet personal relaxation or for entertaining friends, you can start to narrow down the right size for your needs.

The type of wood also plays a crucial role. Premium woods like Western Red Cedar are highly sought after for their durability, beautiful aroma, and natural resistance to decay, but they come at a higher price point. Other excellent options, like Nordic Spruce, offer a different aesthetic and cost. At Gappsi, we can walk you through the benefits of each material to help you find the perfect fit for your backyard and budget. You can explore our various saunas to see what options are available.

Factoring in Customizations and Add-Ons

Beyond the basic structure, customizations and add-ons are where you can truly personalize your sauna experience, and these choices will also influence the total cost. Many barrel saunas can be enhanced with features like a front porch area, which provides a charming space to cool down between sessions. You might also consider adding windows to let in natural light or upgrading to a more powerful heater.

These features allow you to tailor the sauna to your exact preferences. Perhaps you want it to blend seamlessly with your existing patio or become a standout feature in your yard. By working with a design team, you can integrate your sauna into a complete landscape design, ensuring it complements your home’s overall aesthetic. Each addition contributes to the final price, but it also makes the sauna more functional and enjoyable for you.

Exploring Financing and Discount Options

A barrel sauna is a worthwhile addition to your home, and there are often ways to make the purchase more manageable. Many suppliers offer financing plans that allow you to pay for your sauna over time, sometimes with low or no interest for a promotional period. This can make it much easier to invest in a high-quality model without needing to pay the full amount upfront. It’s always a good idea to ask about available payment options.

You should also inquire about any current promotions or package deals. If you’re planning other backyard projects, you might find savings by bundling your sauna installation with a new patio or pool deck. The best first step is to get a detailed, personalized quote. Contacting a professional at the Gappsi Store will give you a clear understanding of all costs involved and help you explore any available financing or discounts to bring your dream sauna home.

Breaking Down the Barrel Sauna Installation Process

So, you’ve picked out the perfect barrel sauna. Now what? The installation process might seem a little intimidating, but it’s quite manageable when you know what to expect. Thinking through the project in stages, from the ground up, helps simplify everything. It all starts with creating a solid spot for your sauna to live, getting the necessary utilities in place, and making sure everything is up to code.

While some homeowners love a good DIY project, installing a sauna involves electrical work and site preparation that are often best left to the pros. A professional installation ensures your sauna is safe, functional, and built to last. At Gappsi, our team handles every detail, from preparing the site to connecting the final wire. We make sure your journey to owning a sauna is completely stress-free, so you can focus on the fun part: enjoying your first steam. We will walk through the key steps so you feel confident and prepared for your new backyard addition.

Prepare Your Foundation and Site

Your barrel sauna needs a perfectly level and stable home. A solid foundation is non-negotiable, as it prevents the structure from shifting or settling over time, which could damage the wood and create gaps in the staves. Outdoor saunas require a foundation like a concrete slab, a paver patio, or a reinforced wooden deck. It’s also important to choose a spot with good drainage. You’ll want to avoid placing your sauna on soft soil or in an area where water tends to pool, as this can lead to moisture issues. Our expertise in masonry means we can build the ideal patio or base that not only supports your sauna but also integrates beautifully into your landscape design.

Plan for Electrical, Ventilation, and Drainage

Proper planning for your sauna’s utilities is essential for safety and performance. If you’ve chosen an electric heater, a licensed electrician will need to run a dedicated circuit to the sauna’s location. This work must comply with local electrical codes. Just as important is ventilation. An adequate ventilation system allows fresh air to circulate, prevents moisture buildup, and keeps the sauna from feeling stuffy. Proper drainage around the sauna’s exterior will also protect the wood from rot and water damage. Thinking through these technical details beforehand ensures your sauna will function flawlessly for years to come.

Check for Local Permits and Codes

Before any work begins, it’s important to check with your local town or village about building permits and codes. Requirements can vary across Long Island, so you’ll need to know what your specific municipality expects. Some areas may have rules about how close a structure can be to your property line or require inspections for electrical work. Taking care of this step early on prevents potential fines or the need to make costly changes later. An experienced contractor can be a huge help here, as they are typically familiar with local regulations and can manage the entire permitting process on your behalf, making your home remodeling project much smoother.

How to Maintain Your Outdoor Barrel Sauna

One of the best things about a barrel sauna is how beautifully it weathers the seasons, becoming a natural part of your landscape. While they are built to last, a little bit of care will go a long way in protecting your investment and ensuring it remains a beautiful, functional retreat for years to come. Think of it less as a chore and more as a simple routine to keep your personal oasis in perfect shape.

Proper maintenance ensures your sauna is always ready for you, providing a safe, clean, and relaxing experience every time you step inside. With a few easy steps, you can protect the wood, keep the interior fresh, and make sure the heater is working efficiently. We install stunning and durable saunas designed for the Long Island climate, and we want to help you keep yours looking and feeling brand new.

Your Guide to Routine Cleaning

Keeping your sauna clean is simple and doesn’t require any harsh chemicals. After a session, it’s a great practice to leave the heater on for an extra 20 to 30 minutes with the door propped open. This helps dry out any moisture from the steam, which is key to keeping the wood fresh and preventing mildew. For general cleaning, a soft brush and a bucket of clean water are usually all you need to wipe down the benches and walls.

If you notice any water spots or scuffs, you can lightly sand them away. For a deeper clean, a mild solution of baking soda and water works wonders. Once a year, take a moment to inspect your heater stones. Over time, they can crack from repeated heating and cooling. You can just remove any broken pieces and rearrange the remaining stones to ensure good airflow.

Protect Your Sauna’s Wood from the Elements

Your barrel sauna is built with durable wood, but protecting it from the sun and moisture will preserve its beauty. It all starts with the right base. Your sauna needs a level, stable foundation, like a gravel pad or a concrete slab, to prevent shifting. Proper site preparation is something we handle with every installation, ensuring good drainage and a solid footing. You can learn more about our expert masonry services that create the perfect base for any outdoor structure.

To protect the exterior wood, we recommend applying a quality exterior stain with UV inhibitors. This shields the wood from sun damage and helps it repel water, which is especially important during our wet Long Island winters. You don’t need to treat the interior, as the heat will naturally preserve it. Reapplying the exterior stain every few years is a simple weekend project that keeps your sauna looking its best.

Plan for Annual Inspections and Long-Term Care

A quick annual check-up can catch small issues before they become bigger problems. Take a walk around your sauna and inspect the metal bands, making sure they are snug but not overly tight. Check the door to ensure it opens and closes smoothly, and tighten any loose hinge screws. Inside, look for any signs of excessive moisture, especially around the floor and lower walls. Good ventilation is crucial for managing humidity and preventing the wood from deteriorating over time.

If you notice any significant issues, like warped boards or signs that the structure has shifted, it’s best to consult a professional. Our team has decades of experience in home remodeling and construction, so we know how to handle any structural repairs. A little proactive care ensures your sauna will be a source of wellness and relaxation for your family for a very long time.

Is a Barrel Sauna Right for Your Long Island Home?

You’ve learned about the benefits, materials, and heaters. Now comes the big question: Is a barrel sauna the right addition to your Long Island property? Deciding to add a sauna is about more than just wellness, it’s about creating a lifestyle. It’s about having a personal retreat just steps from your back door. Let’s look at how a barrel sauna can fit into your home and life, from the changing seasons to your overall backyard design.

Enjoy Your Sauna Year-Round on Long Island

Imagine stepping into your warm, fragrant sauna on a crisp autumn evening or finding a cozy escape during a chilly winter day. A barrel sauna isn’t just a summer luxury, it’s a year-round wellness sanctuary. Regular use offers significant health advantages. For instance, studies show that using a sauna just two to three times a week can lower the risk of heart disease by over 20%. For those who use it more frequently, the benefits are even greater. Adding one of our saunas to your home is an investment in your long-term health and provides a peaceful space to unwind any day of the year.

Add Beauty and Value to Your Backyard

A barrel sauna is more than a functional wellness tool, it’s a beautiful architectural feature that enhances your outdoor space. These saunas have a classic, elegant look and are built from quality woods designed to last. This addition can do more than just improve your quality of life, it can also add real value to your home. When you integrate a feature that is both beautiful and beneficial, it becomes a strong selling point. By working with a professional landscape designer, you can ensure your sauna complements your property’s aesthetic, turning your backyard into a true showpiece.

Pair Your Sauna with Other Outdoor Features

One of the best things about a barrel sauna is how well it integrates with other backyard elements to create a complete outdoor living experience. For installation, your sauna will need a level surface, which could be a simple platform or a custom-designed concrete or stone patio. Consider placing it near your swimming pool for a refreshing cold plunge after your session. You could also nestle it beside a garden or under a custom pergola for added privacy and ambiance. Thinking about the location and how it connects you with nature is key. A well-placed sauna can be the centerpiece of a backyard designed for relaxation, entertainment, and year-round enjoyment.

Related Articles

Frequently Asked Questions

How long does it take for a barrel sauna to heat up? The time it takes to get your sauna to the perfect temperature depends on a few things: the size of your sauna, the type of heater you choose, and the weather outside. Generally, you can expect an electric heater to warm up a sauna in about 30 to 45 minutes. A traditional wood-burning heater might take a bit longer, closer to an hour, as you build the fire and let the heat build. Part of the fun with a wood-burning model is the ritual itself.

Can I install a barrel sauna on my existing deck or patio? Yes, you absolutely can, as long as your existing structure can support the weight. A barrel sauna is heavy, so a standard deck might need extra reinforcement to ensure it’s safe and stable for the long term. A solid paver or concrete patio is often an ideal foundation. We always recommend a professional site assessment to make sure your chosen spot is perfectly prepared for a secure installation.

How much maintenance does a barrel sauna really need? You’ll be happy to know that they are surprisingly low-maintenance. The most important habit is to let the sauna air out and dry completely after each use to keep the wood fresh. For cleaning, a simple wipe-down with water and a soft cloth is usually enough. To protect the exterior from the Long Island weather, you’ll want to apply a quality stain every few years. It’s a simple routine that keeps your sauna looking beautiful.

Do I need a special permit for a barrel sauna on Long Island? Permit requirements can differ from one town to another across Suffolk and Nassau counties. Some municipalities may require a permit for any new outdoor structure, while others may not. It’s always best to check with your local building department before starting the installation. Working with an experienced team can make this process much easier, as they are typically familiar with local codes and can help manage any necessary paperwork for you.

What is the difference in the feeling between a wood-burning and an electric heater? This really comes down to the kind of atmosphere you want to create. A wood-burning heater offers a very traditional, rustic experience. It provides a deep, radiant heat that feels soft and enveloping, accompanied by the gentle crackle and earthy smell of a real fire. An electric heater, on the other hand, offers modern convenience. It creates a consistent, powerful heat that you can control precisely, making it perfect for those who want to get their session started with just the flip of a switch.

Vinyl liner pool installation with a new liner being set over wall panels.

Vinyl Liner Pool Installation: Costs & Steps

After decades of building outdoor living spaces across Long Island, we know that a successful pool project is all about the details. Homeowners often ask us what it really takes to build a pool that will last for years to come. The answer is a combination of high-quality materials and expert technique, especially when it comes to the installation itself. A perfect vinyl liner pool installation ensures a smooth, wrinkle-free finish and a watertight seal that protects your investment. We created this guide to share our process with you, breaking down each step so you can understand what goes into creating a truly exceptional backyard pool.

Key Takeaways

  • Budget for the Complete Project: A realistic budget goes beyond the pool’s initial price. Remember to factor in long-term costs like liner replacements, plus immediate needs such as safety fencing, permits, and surrounding features like a patio or landscaping.
  • Success Lies in the Small Details: A flawless, wrinkle-free finish depends on careful preparation. This means ensuring the pool surface is perfectly smooth, taking precise measurements for a custom fit, and always using new gaskets to prevent future leaks.
  • Hire a Pro for a Stress-Free Process: Installing a vinyl liner is a complex job where small mistakes can lead to big problems. An experienced team handles every step with precision, from site planning to the final fill, giving you a beautiful pool without the headache.

What Is a Vinyl Liner Pool?

If you’re dreaming of a backyard pool, you have likely come across the term “vinyl liner.” So, what exactly is it? Think of a vinyl liner pool as a two-part system. First, we build a sturdy frame, typically using steel or polymer wall panels, to create the pool’s shape and structure. Then, a custom-fitted sheet of durable vinyl is placed inside this frame. This liner is the smooth, waterproof surface you see and feel, and it’s what holds the water. It’s a brilliant design that combines structural integrity with a flexible, comfortable finish.

Installing a vinyl liner is a precise process that our team has perfected. After the pool structure is in place, we carefully clean the floor and walls. The new liner is then set, and we use a special vacuum to suck out all the air between the liner and the pool walls. This ensures a wrinkle-free, perfect fit before we begin filling it with water. This method allows for a huge range of shapes and sizes, making it one of the most versatile swimming pools you can choose for your Long Island home. Whether you want a classic rectangle or a freeform lagoon, a vinyl liner can make it happen.

Vinyl vs. Concrete and Fiberglass: What’s the Difference?

When choosing a pool, you’ll mainly decide between vinyl, concrete (also called gunite), and fiberglass. Vinyl liner pools have the lowest initial installation cost, typically ranging from $25,000 to $65,000. The trade-off is that the liner needs to be replaced every 5 to 15 years. In contrast, concrete pools have a higher upfront cost and require more maintenance, including resurfacing. Fiberglass pools are pre-molded shells with a higher initial price than vinyl but very low long-term maintenance. Each has its pros and cons, but vinyl often hits the sweet spot for many homeowners. Gappsi’s expertise in masonry also allows us to create stunning patios and features to complement any pool type you choose.

Why Long Islanders Love Vinyl Liner Pools

There’s a reason vinyl liner pools are so popular here on Long Island. They offer the best of both worlds: customization and value. You can get a gorgeous, custom-shaped backyard oasis without the premium price tag of a gunite pool. The design possibilities are nearly endless, allowing us to create a pool that fits your yard and your vision perfectly. Plus, the smooth surface of a vinyl liner is gentle on your feet, making it a comfortable choice for families with kids. With today’s beautiful patterns and colors, a vinyl liner pool can be the stunning centerpiece of your entire landscape design.

Breaking Down the Cost of a Vinyl Liner Pool

Understanding the full financial commitment of a new pool is the first step toward making your backyard dream a reality. Vinyl liner pools are often a more budget-friendly option compared to concrete or fiberglass, but the total price involves more than just the initial installation. From the pool itself to long-term upkeep and essential add-ons, a clear budget will help you plan a project without any surprises. Let’s break down the numbers so you know exactly what to expect when investing in a vinyl liner pool for your Long Island home.

The final cost of your swimming pool depends on your vision. A simple, standard-sized pool will have a different price tag than a large, freeform design with custom steps and lighting. At Gappsi, we work with you to design a pool that fits both your lifestyle and your budget, ensuring every dollar is well spent. We believe in transparency, which is why we lay out all the potential costs from the very beginning. This approach helps you make informed decisions and feel confident in your investment for years to come.

Cost of a New Installation

When you start pricing out a new inground vinyl liner pool, you’ll find a fairly wide range. A basic installation can start around $25,000, while a large, custom-designed pool with high-end features can exceed $120,000. For most homeowners, the final cost typically lands somewhere between $45,000 and $75,000. This variation comes down to your specific choices in size, shape, and features. A simple rectangular pool will cost less than a custom shape with built-in benches, waterfalls, or advanced lighting systems. Think of it as building a custom piece for your home; the more unique the design, the more it will influence the final price.

Cost of a Liner Replacement

One of the key long-term costs associated with a vinyl liner pool is the liner itself. Over time, exposure to sun and chemicals will cause the liner to fade and wear out. You can generally expect to replace your pool’s vinyl liner every 5 to 15 years. The cost for this replacement typically ranges from $3,000 to $7,500, depending on the size of your pool and the quality of the new liner. While it’s an added expense to plan for, it’s also an opportunity to give your pool a fresh look. Proper maintenance and water chemistry can help extend your liner’s life, but it’s wise to factor this eventual replacement into your long-term pool budget.

Don’t Forget These Hidden Costs

Beyond the pool itself, several other expenses are necessary to complete your project. Local permits and inspections can add anywhere from a few hundred to a thousand dollars to your total. Fencing is another major consideration; it’s often required by law for safety and can cost between $1,000 and $12,000 or more. Then there are the features that transform your pool from a simple swimming hole into a true backyard oasis. Things like masonry patios, surrounding landscaping, an automatic pool cover, or a heater can add $5,000 to $30,000 or more to the project. Planning for these elements from the start ensures your budget covers the entire vision for your outdoor space.

Gathering Your Tools and Materials

Getting your tools and materials in order before you start is one of the most important steps for a smooth installation. Think of this as your pre-project checklist to make sure you have everything you need on hand. A well-organized project is a successful project, and taking the time to gather these items now will save you from frustrating mid-installation trips to the store. From the liner itself to the smallest tube of sealant, each component plays a crucial role in creating a beautiful and long-lasting pool. Let’s walk through exactly what you’ll need to get the job done right.

How to Choose the Right Vinyl Liner

Your vinyl liner is the star of the show, so choosing the right one is key. A high-quality, precision-fit liner can last 10 to 15 years, keeping its smooth surface and vibrant color for seasons to come. When you’re selecting a liner, focus on the thickness (measured in mils) and the quality of the vinyl. Thicker liners generally offer more durability and puncture resistance. At Gappsi, we help homeowners select the perfect liner that not only fits their aesthetic but is also built to withstand years of fun in the sun. Our expertise in swimming pools ensures you get a product that’s both beautiful and durable, giving you peace of mind.

Essential Wall and Support Materials

Beyond the liner itself, you’ll need a few key materials to protect it and ensure a perfect fit. Pool wall foam is a great addition, as it provides a soft, cushioned layer between the liner and the pool walls, preventing rust and corrosion from affecting the vinyl. You’ll also want a liner pad for the pool floor to protect against punctures from any rocks or roots underneath. Most importantly, always buy new gaskets and faceplates for your skimmer, returns, and drains. Reusing old ones is a common cause of leaks, so starting fresh is a must for a watertight seal. Proper restoration and sealing techniques are vital here.

Your Must-Have Installation Toolkit

Having the right tools on hand will make the installation process much easier. Your basic toolkit should include a submersible pump to drain the old pool, a shop vacuum to help set the new liner, and a utility knife for trimming. You’ll also need screwdrivers, duct tape, a broom, and a garden hose. For getting the liner bead into the track, a specialized liner installation tool can be a lifesaver, especially when paired with a hairdryer to make the vinyl more pliable. You can often see our teams using these tools on our Gappsi Group YouTube channel. Gathering these items ahead of time ensures you’re ready for every step of the process.

How to Prepare Your Pool Site

Before you can even think about that first cannonball, you need to get your backyard ready. Proper site preparation is the single most important factor for a pool that lasts for decades. It’s not the most glamorous part of the process, but getting the groundwork right prevents major headaches down the road. A perfectly level base, good drainage, and a smooth surface are the unsung heroes of a flawless pool installation. Taking the time to prepare your site correctly ensures your investment is built on a solid foundation.

Select, Grade, and Level the Site

Choosing the right spot for your pool is your first big decision. You’ll want an area with plenty of sunlight that’s also clear of trees to minimize leaves and debris. Once you’ve picked the perfect location, the ground needs to be professionally graded and leveled. This is a critical step that ensures your pool structure is stable. During excavation, a professional team will dig out the area, often creating a small 6-inch ledge around the inside edge. This gives the crew room to work and set up the forms that will shape your pool. A perfectly flat and compacted base is essential for the wall panels to sit correctly and for the pool floor to be smooth under the liner.

Manage Drainage and Soil Issues

What’s happening underground is just as important as the work you see on the surface. Long Island soil can vary, and poor drainage can put pressure on your pool walls, causing them to bulge or even crack over time. A professional assessment of your yard’s soil and grading is a must. If your property has drainage challenges, a French drain or other system might be installed around the pool’s perimeter to channel water away from the structure. Proper masonry work, like a small retaining wall, can also help manage sloped yards. Addressing these issues from the start prevents unexpected and costly problems once construction is underway.

Inspect and Repair the Pool Surface

If you’re replacing an old liner, this step is for you. Before the new liner goes in, the pool’s existing shell needs a thorough inspection. Carefully check the walls and floor for any cracks, rust, rough patches, or other damage. Even small imperfections can be felt underfoot and can potentially puncture your new liner over time. Any issues should be repaired with pool-specific cement or patches to create a completely smooth surface. Taking care of this ensures your new liner fits snugly and has a clean slate. For older pools, considering professional restoration and sealing services can bring the underlying structure back to pristine condition before the new liner is installed.

Your Step-by-Step Installation Guide

Seeing your dream pool come to life is an exciting process, but it involves several precise steps to get it right. While this guide breaks down the technical side of a vinyl liner pool installation, turning your backyard vision into a reality requires skill, the right equipment, and a deep understanding of how all the pieces fit together. From the initial dig to the final fill, each stage builds upon the last. A small mistake early on can lead to bigger headaches down the road.

That’s why many Long Island homeowners choose to work with a professional team. At Gappsi, our swimming pool experts manage the entire project, ensuring every detail is handled with care. We coordinate everything from the excavation and plumbing to the final landscaping touches that make your pool a true backyard oasis. Understanding the installation process will help you feel confident and informed, whether you’re planning the project with us or just exploring your options. Let’s walk through the key stages of building a beautiful and durable vinyl liner pool.

Step 1: Excavate and Lay Out the Ground

The first major step is digging the space for your new pool. This isn’t just about creating a hole; it requires precision to ensure the pool’s structure is sound. The excavation needs to be slightly larger than the pool itself, creating a 6-inch ledge, or “lip,” around the inside edge. This extra space is crucial because it gives the installation team room to properly set up the concrete forms for the walls. Accurate digging and leveling at this stage prevent structural issues later on. Our team at Gappsi handles all the necessary site preparation and grading, ensuring the foundation for your pool is perfectly established from the very beginning.

Step 2: Install the Wall Panels and Frame

Once the ground is excavated, it’s time to build the pool’s skeleton. This involves setting up the wall panels and frame that will form the shape of your pool. The process starts by carefully laying out the forms for the pool steps, followed by the wall forms for both the inside and outside perimeter. These panels create the rigid structure that will support the entire pool and hold the vinyl liner in place. Getting the alignment and securing of these panels just right is essential for a straight, sturdy pool. This framework is the backbone of your installation, providing the strength needed for years of enjoyment.

Step 3: Add Wall Foam and Cove

With the walls in place, the next step is to prepare the interior surface for the vinyl liner. To do this, a layer of wall foam is applied to the concrete or steel panels. This foam acts as a protective cushion between the liner and the hard wall structure. It creates a smoother surface, which helps prevent punctures or abrasions and can extend the life of your liner. At the base of the wall, a “cove” is created. This is a gentle, curved transition from the floor to the wall, which prevents the liner from stretching into a hard 90-degree angle and becoming damaged over time.

Step 4: Set and Secure the Vinyl Liner

This is the step where your pool really starts to look like a pool. The custom-fitted vinyl liner is carefully unfolded and draped into the pool structure. The top edge of the liner, known as the “bead,” is clipped into a track that runs along the top of the pool walls. To get that perfectly smooth, skin-tight fit, a heavy-duty shop vac or a specialized liner vac is used. The vacuum’s hose is placed between the liner and the wall, sucking out all the air. This pulls the liner snugly against the walls and floor, removing wrinkles before any water is added.

Step 5: Connect Plumbing and Filtration

Before the surrounding area is finished with concrete or pavers, it’s critical to install and double-check all the plumbing. This includes the water inlets, skimmers, main drains, and any housing for underwater lights. Ensuring every connection is secure and properly sealed at this stage is vital for the pool’s long-term operation. A small leak or a poorly placed fitting can be a major problem to fix once the pool is filled and the deck is complete. Our Gappsi team meticulously handles all plumbing and filtration connections, making sure your pool runs efficiently from day one.

Step 6: Fill the Pool and Make Final Adjustments

With the liner secured by the vacuum and the plumbing in place, you can finally start filling the pool with water. The vacuum should keep running until the water is at least a foot deep in the shallow end, as the water’s weight will then be enough to hold the liner in place. As the pool fills, you can install the faceplates for the skimmer, returns, and lights. Once the water level is correct, you can shut off the vacuum and cut out the vinyl inside the faceplates. This final step completes the installation, leaving you with a perfectly fitted liner and a pool that’s ready for its first swim.

Common Installation Mistakes to Avoid

Installing a vinyl liner pool can be a rewarding project, but it’s one where small mistakes can lead to big headaches. A flawless installation is the key to a beautiful, long-lasting pool, and avoiding common pitfalls is half the battle. Whether you’re tackling this yourself or just want to know what to watch for, understanding these potential errors will help you get the best possible result. From preparing the ground to managing your budget, a little extra care at each stage makes all the difference.

Many homeowners are drawn to vinyl liners for their affordability and design flexibility, but a successful outcome depends heavily on the quality of the installation. A poorly installed liner can lead to wrinkles, leaks, and a significantly shorter lifespan, turning your dream pool into a source of frustration. By familiarizing yourself with the most frequent missteps, you can ensure your project goes smoothly. We’ll walk through everything from the importance of a perfectly prepped surface to the critical step of vacuum-sealing the liner, giving you the insights needed for a professional-grade finish.

Skipping Surface Preparation

Think of your pool’s walls and floor as the canvas for your new liner. If that canvas is bumpy, rough, or damaged, the final picture will be flawed. Before you even think about unrolling the liner, the pool surface needs to be perfectly smooth and clean. This means repairing any cracks, patching rust spots, and sanding down any rough areas. Any debris or imperfections left behind can be felt underfoot and may even puncture the liner over time. Taking the time for proper masonry repairs and surface smoothing ensures your liner fits snugly and lasts for years.

Getting the Measurements Wrong

When it comes to vinyl liners, precision is everything. An “almost right” measurement can result in a liner that’s too loose, causing wrinkles, or too tight, putting it under constant strain and shortening its lifespan. Many pools, especially older ones, aren’t perfectly symmetrical. You need to measure everything: the length, width, depths, and the specific radius of each corner. A liner that is custom-made to your pool’s exact dimensions will install more easily and look professionally finished. This is one area where hiring an expert for your swimming pool installation can save you from a costly ordering mistake.

Ignoring Temperature During Installation

Vinyl is a material that responds to temperature, and this can work for or against you during installation. If you try to install a liner on a cold day, the vinyl will be stiff and difficult to stretch into place. If the weather is too hot, the liner can become overly pliable and may stretch too much, leading to a loose fit once the pool is filled and the water cools. Most professionals aim for a temperate, sunny day, typically between 70 and 80 degrees Fahrenheit. This temperature range makes the liner flexible enough to work with but not so soft that it overstretches.

Neglecting to Use a Vacuum When Setting the Liner

You can’t just hang the liner in the pool and start filling it with water. A critical step for achieving a smooth, wrinkle-free finish is using a shop vacuum or a specialized liner vac. By placing the vacuum hose behind the liner and sealing off the skimmer openings, you can suck all the air out from between the liner and the pool walls. This suction pulls the liner tightly against the pool structure, creating a perfect fit. As the air is removed, you can work from the center out, smoothing any remaining wrinkles by hand or with a soft push broom before you add any water.

Underestimating Your Budget

While the initial cost of a vinyl liner is often lower than other pool types, it’s easy to overlook the additional expenses that come with a full installation. Your budget should account for more than just the liner itself. You’ll need to factor in costs for excavation, potential retaining walls, electrical work for the pump and filter, and water to fill the pool. Don’t forget about the finishing touches, like creating a beautiful patio or landscape design around your new oasis. A comprehensive plan will help you avoid surprise costs and ensure your project stays on track financially.

How to Handle Common Installation Challenges

Even with the most careful planning, you can run into a few bumps during a pool installation. The key is knowing how to handle them without letting them derail your project. From a stubborn wrinkle in the liner to unexpected soil issues, most challenges have a straightforward solution, especially when you have experience on your side. Think of these as puzzles to solve rather than project-ending problems.

Successfully managing these issues often comes down to having the right techniques and tools ready before you even start. A professional installer anticipates these potential hurdles and builds the solutions right into their process. Whether you’re tackling this yourself or working with a team, understanding how to fix common problems will give you peace of mind and ensure a beautiful, long-lasting pool. We’ll walk through a few of the most frequent challenges and how to solve them.

Fixing Wrinkles, Gaps, and Misalignment

Seeing wrinkles in your brand-new liner can be disheartening, but it’s usually a fixable issue. The secret is to remove the air between the liner and the pool walls. You can do this with a heavy-duty shop vac or a specialized liner vac. Place the vacuum hose behind the liner to suck out the air, which will pull the material tight against the pool’s structure.

As the air is removed, you can use your hands or a soft push broom to gently smooth the liner against the walls and floor, working any remaining wrinkles out. This step is critical for achieving that sleek, professional finish. Getting the liner perfectly smooth ensures it wears evenly and looks great for years to come.

Dealing with Tricky Soil Conditions

The ground in Long Island can be unpredictable, but tricky soil doesn’t have to stop your pool project. A smart excavation technique can make all the difference. When digging the pool area, creating an extra six-inch ledge, or “lip,” around the inside edge gives your team room to work. This space is essential for setting up the concrete forms that create the pool’s foundation.

Once the main structure is in place, this extra ledge is simply cut away as the deep end of the pool is shaped. This bit of foresight prevents issues with unstable soil and ensures your pool’s walls are secure and perfectly aligned. It’s a professional touch that makes the entire masonry and construction process much smoother.

Solving Plumbing and Equipment Issues

Your pool’s plumbing and filtration system are its lifeline, and getting this part right is non-negotiable. Because these systems are complex and vital to your pool’s function, we always recommend engaging professional contractors for the job. Improperly installed plumbing can lead to leaks, poor water circulation, and equipment failure down the road.

A great pro tip is to install foam padding on the pool walls before placing the liner. This simple step provides an extra layer of protection for your liner, preventing potential damage from the wall panels and improving its overall longevity. When you hire an experienced team for your swimming pool installation, they handle these critical details to ensure everything works perfectly from day one.

Pro Tips for a Flawless Installation

Getting the big steps right is crucial, but the difference between a good installation and a great one often comes down to the details. After years of building beautiful swimming pools across Long Island, we’ve learned a few tricks that ensure a perfect, long-lasting finish. These are the pro tips that prevent common headaches and help you get the most out of your new pool liner. Think of this as insider knowledge to help you achieve a truly flawless result. Paying attention to the weather, properly sealing your liner, and replacing a few small parts can save you a lot of time and money down the road.

Plan Around Weather and Seasonal Conditions

Timing your installation day is more important than you might think. Vinyl liners are best installed on a warm, sunny day with temperatures between 70 and 80 degrees Fahrenheit. The warmth makes the vinyl more pliable and flexible, allowing it to stretch smoothly into place without wrinkles. Trying to install a liner when it’s too cold can make the material stiff and difficult to work with, increasing the risk of a poor fit. On the other hand, extreme heat can make the liner too soft and easy to overstretch. We often schedule installation days around this ideal temperature range to get the best fit and finish.

Seal Edges and Check for Leaks Before Filling

Once your liner is in place, take a moment to secure the edges before you start filling the pool. After the liner is set in the coping track, you can install a liner lock. This is a thin plastic strip that wedges into the track over the liner bead, holding it securely and preventing it from popping out later. It’s a simple step that adds extra peace of mind. Before you completely fill the pool, carefully inspect all the fittings for leaks. Check around the skimmer, return jets, and lights to ensure every seal is watertight. It’s much easier to fix a small drip now than to deal with water loss later.

Always Replace Gaskets and Faceplates

When you’re installing a new liner, always replace the gaskets and faceplates on your skimmer, return jets, and main drain. It might be tempting to reuse the old ones if they look like they’re in decent shape, but this is a risky shortcut. Over time, gaskets compress and lose their ability to create a perfect seal. Reusing them is one of the most common causes of slow, hard-to-find leaks behind the liner. New gaskets and faceplates are inexpensive and provide the best defense against future water loss. We recommend replacing them with every liner change to ensure a proper seal and extend the life of your new liner.

When to Replace Your Vinyl Liner

A vinyl liner is the heart of your pool, giving it that smooth finish and beautiful color. While modern liners are built to last, they don’t have an infinite lifespan. Knowing when it’s time for a replacement is key to protecting your pool’s structure and keeping your backyard oasis looking its best. Waiting too long can lead to leaks that may damage the pool walls or wash out the supportive base, turning a straightforward liner swap into a much bigger project.

Think of it like any other major component of your home, it requires attention and eventual replacement to prevent more significant issues down the road. Being proactive and recognizing the early warning signs will save you time, money, and stress. If your liner is getting on in years or starting to show its age, it’s smart to begin planning for a replacement. Our team at Gappsi can help you assess your current liner’s condition and guide you through the process of choosing and installing a new one, ensuring your swimming pool remains a source of enjoyment for years to come.

Signs It’s Time for a New Liner

The most straightforward indicator is age. A high-quality vinyl liner, when installed correctly, can last between 10 and 15 years. If your liner is approaching this age range, it’s time to start paying closer attention. You should also look for visible signs of wear and tear. Significant fading or stubborn staining from chemicals and sun exposure can indicate the vinyl is breaking down. More critically, watch for any cracks or tears, no matter how small, as these will inevitably lead to leaks. If you notice the liner feels brittle, is pulling away from the corners, or has developed wrinkles it didn’t have before, it’s losing its plasticity and fit. And of course, if you find yourself constantly adding water, you likely have a leak that needs immediate attention.

How Liner Quality Affects Its Lifespan

Not all vinyl liners are created equal, and the quality of the material directly impacts how long it will last. A premium, thicker liner made from 100% virgin vinyl will resist fading, tearing, and chemical damage far better than a lower-grade alternative. While a top-tier liner might have a higher upfront cost, it often proves more economical over time. The lifespan can vary widely, with some liners needing replacement in as few as five years, while others last for 15. Considering a full replacement can cost several thousand dollars, investing in a durable, professional-grade product from the start means you’ll be replacing it less frequently. This is why we prioritize using only the most durable materials for our pool installations, giving you peace of mind and a longer-lasting, beautiful pool.

Why You Should Hire a Pro for Your Long Island Pool

While a DIY project can be satisfying, installing a vinyl liner pool is a massive undertaking with a lot of moving parts. A small mistake can lead to costly repairs and major headaches down the road. Hiring a professional team ensures your investment is protected and the final result is a backyard oasis, not a source of stress. Think of it as the difference between simply having a pool and having a perfectly crafted outdoor experience. A professional swimming pool installation brings a level of precision and coordination that guarantees a beautiful, long-lasting result.

Expertise in Planning and Coordination

A successful pool installation begins long before the first scoop of dirt is moved. Professionals start with a detailed planning phase, which includes everything from site assessment and securing permits to coordinating with electricians and plumbers. Homeowners often underestimate just how many steps are involved. An experienced team manages this entire process, making sure every detail is accounted for. This level of preparation helps prevent unexpected setbacks once construction begins, keeping your project on schedule and within budget. It’s this comprehensive oversight that sets a professional job apart.

Flawless Execution and Attention to Detail

The difference between an amateur and a professional installation often comes down to the small details. A pro knows exactly how to prepare the pool floor for a smooth finish and how to position the liner perfectly to avoid wrinkles and stretching. This careful attention to detail is what creates that polished, high-end look. Professionals also use specialized equipment, like vacuums, to hold the liner tightly against the walls while the pool fills, ensuring a secure fit. This meticulous workmanship not only enhances the pool’s appearance but also contributes to the liner’s longevity, which you can see in our project showcases.

A Stress-Free Process from Start to Finish

Let’s be honest, your goal is to relax by the pool, not spend your summer managing a complex construction project. When you hire a professional, you can enjoy the process without the stress of overseeing every step. You get to focus on the fun decisions, like choosing your liner pattern or planning your new patio furniture, while the experts handle the logistics. A professional team provides peace of mind, allowing you to sit back and watch your dream backyard come to life. This lets you enjoy the benefits of a thoughtfully constructed pool without the burden of managing it all yourself.

Related Articles

Frequently Asked Questions

How long does the entire vinyl liner pool installation process take? From the first day of excavation to the final fill, a typical installation can take anywhere from two to five weeks. The exact timeline depends on a few factors, like the complexity of your pool design, the time it takes to secure local permits, and of course, the weather. We coordinate every step to make the process as efficient as possible, but we never rush the critical stages like site preparation and plumbing.

Are vinyl liners durable enough for a family with kids and pets? Absolutely. Modern vinyl liners are surprisingly tough and designed to handle the wear and tear of an active family. The smooth surface is comfortable for feet and paws, and it resists algae growth, which is a nice bonus. While you should still be mindful of very sharp objects, a high-quality liner can easily withstand years of splashing, games, and fun.

Besides replacing the liner, what kind of regular maintenance does a vinyl pool need? Maintaining a vinyl liner pool is quite straightforward. Your main tasks will be testing and balancing the water chemistry weekly to keep it safe and clean. You will also need to skim the surface, vacuum the floor, and brush the walls regularly to prevent debris buildup. It’s also a good habit to periodically check the area around your skimmer and jets to ensure there are no small leaks.

Can I really get a custom-shaped pool with a vinyl liner? Yes, and that’s one of the biggest advantages of choosing vinyl. Because the pool’s structure is built on-site with wall panels, we can create almost any shape you can imagine. Whether you want a classic rectangle, a curvy freeform lagoon, or a unique design with built-in benches and tanning ledges, a vinyl liner can be custom-made to fit it perfectly.

Why is the temperature so important on installation day? The temperature plays a huge role in getting a perfect, wrinkle-free fit. Vinyl becomes stiff and hard to work with when it’s too cold, making it difficult to stretch into place. In extreme heat, the material can become too soft and may overstretch, leading to a loose fit later on. An ideal, sunny day between 70 and 80 degrees makes the liner just pliable enough for our team to achieve that flawless, skin-tight finish.