
Are you noticing weeds popping up between your pavers? Or maybe a few stubborn stains from last summer’s barbecue that just won’t budge? Without a protective layer, your beautiful pavers are exposed to everything from spilled drinks to harsh sun, which can lead to permanent damage. The good news is there’s a straightforward solution: paver sealing. This simple process creates a barrier that locks out stains and prevents fading. In this guide to paver sealing for beginners, we’ll walk you through every step, ensuring your hardscape stays as stunning as the day it was installed.
Key Takeaways
- Sealing is essential protection: Think of sealer as a shield for your investment. It guards your pavers against stains, prevents color fading from the sun, and makes routine cleanups much easier.
- Preparation determines the result: A beautiful, long-lasting finish starts with proper prep. Your pavers must be completely clean and dry, with joints properly filled, before you apply the first drop of sealer.
- Work with the weather, not against it: For a successful application, choose a mild day with no rain in the forecast. The right conditions are crucial for preventing a cloudy finish and ensuring the sealer cures properly.
What Is Paver Sealing and Why Is It Important?
Think of paver sealing as the final, protective touch for your beautiful patio, walkway, or driveway. It’s a simple step that makes a huge difference in how your outdoor spaces look and how long they last. A sealer is a liquid coating that you apply over your pavers, creating an invisible shield that guards against the elements. It’s one of the best ways to protect your investment and keep your hardscaping looking as good as the day it was installed. Let’s walk through exactly why it’s such a crucial part of paver maintenance.
The benefits of sealing your pavers
Sealing your pavers is one of the smartest things you can do to protect your outdoor living area. This protective coating helps your pavers resist stains from things like spilled drinks, oil, and fallen leaves. It also shields them from the sun’s harsh UV rays, which prevents their beautiful colors from fading over time. Beyond protection, a sealer can enhance the look of your pavers, bringing out their rich tones and giving them a clean, finished appearance. Plus, it makes cleanup a breeze. A quick sweep or a rinse with soap and water is usually all it takes to keep sealed pavers looking fresh, saving you time and effort on maintenance.
What happens if you don’t seal your pavers?
If you decide to skip the sealer, your pavers are left exposed to everything nature throws at them. Without that protective layer, they can easily absorb spills, leading to permanent stains. Over time, you might notice mildew or rust spots appearing, and the vibrant color of your pavers can start to look dull and faded from sun exposure. Harsh weather can also take a toll, causing pavers to degrade more quickly. While you might choose to leave pavers unsealed in a very low-traffic area to preserve their natural texture, for most patios and driveways, sealing is the best way to protect your beautiful masonry and avoid difficult repairs down the road.
How to Choose the Right Paver Sealer
Choosing the right sealer can feel overwhelming, but it boils down to your paver type and the look you want. The right product protects your investment and enhances the beauty of your outdoor space. Before you buy, let’s break down the key factors to help you make a confident choice.
Water-based vs. solvent-based sealers
Your first choice is between water-based and solvent-based formulas. Water-based sealers are eco-friendly, low-odor, and a great match for concrete pavers. They create a breathable film that helps lock joint sand in place while allowing any trapped moisture to escape. Solvent-based sealers contain more acrylic solids and are known for deeply enhancing the color and texture of pavers. They are often the top choice for bringing out the rich tones in porcelain and natural stone pavers or clay bricks, providing a vibrant finish and excellent UV protection against the sun.
Pick your finish: matte, satin, or gloss
The sealer’s finish determines the final look of your pavers, much like picking a paint sheen. If you love the natural, unaltered appearance of your stone, a matte finish provides protection without adding shine. For a bit more flair, a satin or semi-gloss finish offers a subtle sheen that makes the colors pop. If you want a bold, dramatic effect, a high-gloss or “wet look” sealer will give your pavers a dark, reflective surface, as if they were just rained on. This choice is all about personal style, so consider how it complements your home’s overall aesthetic and the masonry work you want to feature.
Match the sealer to your paver type
Using the right sealer for your specific paver material is non-negotiable. Porous concrete pavers, for example, need a “breathable” sealer that lets moisture escape to prevent a cloudy film from forming. Denser materials like clay brick or certain natural stones require a sealer that can bond properly to their less porous surface. A good seal also helps harden any polymeric sand in the joints, keeping it from washing away during the next downpour. Always check the product label for compatibility to avoid issues. If you’re unsure, our professional restoration and sealing services can ensure the job is done right with the perfect product for your pavers.
Gather Your Tools and Materials
Getting your supplies together before you start is one of the best things you can do to make this project go smoothly. Think of it like preparing a recipe; having everything measured and within reach makes the actual process much more enjoyable and efficient. A little prep work now saves you from making frantic trips to the store mid-project. You’ll need three main categories of items: supplies for cleaning, tools for applying the sealer, and gear to keep you safe. Let’s break down exactly what you should have on hand before you apply that first drop of sealer.
Cleaning supplies
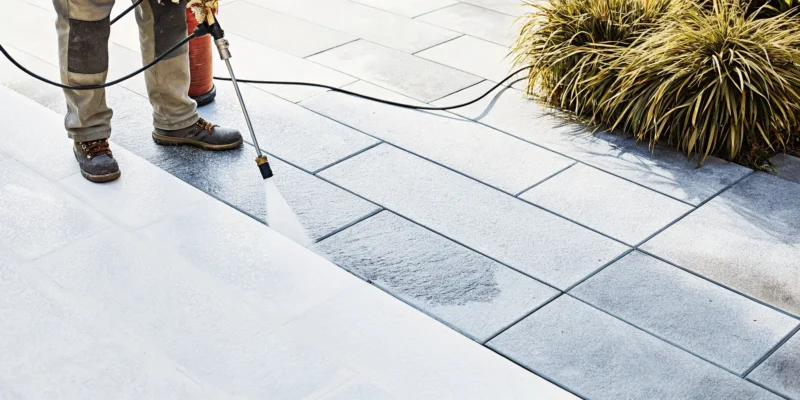
Your pavers need to be completely clean for the sealer to adhere properly and last as long as possible. A pressure washer is fantastic for lifting dirt and grime, but be gentle if you have sand in your paver joints, as you don’t want to blast it all out. For stubborn oil spots or leaf stains, a stiff-bristled deck brush and a good paver cleaner will be your best friends. You can also create a simple solution of dish soap and water for general cleaning. Taking the time for a thorough cleaning is a non-negotiable step for a professional-looking finish. If you run into tough stains, our restoration and sealing services can get your surface ready for sealing.
Application tools
When it’s time to apply the sealer, having the right tools makes all the difference in achieving an even, consistent coat. A garden pump sprayer is often the easiest and fastest method, allowing you to apply a thin, uniform layer across a large area. Alternatively, you can use a roller with a thick nap, about 3/4 to 1 inch, attached to an extension pole. This method is great for working the sealer into the texture of the pavers and ensuring full coverage. It’s also a good idea to have a small paintbrush handy for cutting in along edges or walls where a sprayer or roller can’t reach.
Safety gear
Please don’t skip this part. Working with chemical sealers requires you to protect yourself. At a minimum, you should have chemical-resistant gloves to keep the sealer off your skin and safety glasses to protect your eyes from any splashes. If you are working with a solvent-based sealer or are sensitive to strong smells, a respirator mask is a very good idea. It’s also smart to wear old clothes you don’t mind getting stained, along with closed-toe shoes. These simple DIY safety precautions are easy to take and ensure your paver sealing project is safe from start to finish.
Find the Best Time to Seal Your Pavers
Timing is just as important as technique when sealing pavers. Applying sealer under the wrong conditions can ruin the finish and waste your effort. To get that perfect, durable coat, you need to work with the weather, not against it. Here’s how to pick the best time for the job.
Ideal temperature range
When it comes to sealing your pavers, think of it like Goldilocks: you need the temperature to be just right. The sweet spot is between 50 and 90 degrees Fahrenheit, with 75 degrees being pretty much perfect. If you try to apply sealer when it’s too hot, it can dry too quickly, leading to a blotchy or peeling finish. On the other hand, if it’s too cold, the sealer won’t cure properly. Before you start, check the forecast for the day and the next couple of days to make sure you have a good window. Getting the timing right is a huge part of achieving a professional look, but if you’re ever unsure, our restoration and sealing services team can handle it for you.
Weather and moisture checks
Moisture is the enemy of a fresh coat of sealer. You’ll want to work on a clear, sunny day with no rain in the forecast for at least 24 to 48 hours after you finish. Any rain can wash away the sealer or create a cloudy, uneven look. Also, if your pavers are new, you might notice a hazy white film on the surface. This is called efflorescence, and it’s just natural salts coming out of the stone. It’s best to wait for this to disappear on its own before sealing, which can take a few months. Trying to seal over it will only trap the white film underneath. Patience here will pay off with a much cleaner result for your beautiful natural stone pavers.
Sun exposure and time of day
The time of day you choose to seal your pavers matters, too. It’s generally best to start your project in the morning. This gives the sealer plenty of time to dry before the evening dew sets in, which can add unwanted moisture. You should also try to avoid working in direct, intense sunlight, as it can heat the paver surface too much and cause the sealer to dry too fast. Another thing to watch out for is wind. A windy day can blow dust, leaves, and other debris onto your wet sealer, getting trapped in the finish. Picking a calm, clear morning is your best bet for a smooth, flawless application.
How to Prepare Your Pavers for Sealing
Proper preparation is the secret to a flawless, long-lasting paver seal. Skipping these steps can trap dirt, moisture, and stains under the sealer, leading to a cloudy finish and potential damage down the road. Think of it like painting a room; you would not just paint over a dirty wall. Taking the time to prep your patio, walkway, or driveway ensures the sealer adheres correctly and gives you that beautiful, protective finish you’re looking for. Follow these six steps to get your pavers ready for their new coat.
Step 1: Clear the area
First things first, you need a completely empty canvas. Move all patio furniture, grills, planters, and outdoor decor off the paver surface. This gives you unobstructed access to every inch of the area, ensuring you do not miss any spots during the cleaning and sealing process. It also protects your belongings from cleaning solutions and sealer overspray. Find a temporary home for these items on your lawn or in the garage. A clear space not only makes the job easier and safer but also guarantees a more uniform and professional-looking result when you’re finished.
Step 2: Deep clean the surface
With the area clear, it’s time to give your pavers a thorough cleaning. Start by using a stiff-bristle broom to sweep away all loose debris like leaves, dirt, and twigs. Next, you’ll want to wash the surface. A pressure washer is very effective for this, but a garden hose with a high-pressure nozzle can also work. Spray the pavers at a slight angle, working in sections and overlapping your passes to lift away ground-in dirt and grime. This deep clean is essential for allowing the sealer to bond directly with the paver material. If the job feels too big, professional cleaning and sealing services can handle the deep cleaning for you.
Step 3: Remove stains, weeds, and efflorescence
Now, inspect the surface for any lingering issues. Pull any weeds that have sprouted up between the paver joints. For stubborn oil, grease, or rust stains, you may need a specialized paver cleaner designed for that specific type of spot. You might also notice a white, chalky film on the surface, which is called efflorescence. This is just salt residue that has migrated out of the pavers. You can typically remove it by scrubbing the area with an efflorescence cleaner. Addressing these specific problems now prevents them from being permanently trapped under the new layer of sealer.
Step 4: Fill joints with polymeric sand
After a deep clean, you may find that some of the sand between the paver joints has washed away. Refilling these gaps is crucial for stabilizing the pavers and preventing future weed growth. Polymeric sand is the best choice for this job. It’s a fine sand mixed with a binding agent that hardens when activated with water. Sweep the sand across the dry paver surface until all the joints are completely full. Then, use a leaf blower on a low setting to blow any excess sand off the paver tops. This step ensures your masonry work remains stable and secure for years to come.
Step 5: Let the pavers dry completely
Patience is key for this step. Before you even think about opening a can of sealer, the pavers and the sand in the joints must be bone dry. Applying sealer to a damp surface can trap moisture, resulting in a hazy, white finish that is very difficult to fix. In dry, sunny weather, you should wait at least 24 hours after cleaning or a rainstorm. If it’s humid or overcast, it’s safer to wait 48 hours or more. To be certain, you can touch the joints to feel for any dampness. It’s always better to wait an extra day than to rush and ruin the entire project.
Step 6: Do a spot test first
Before you commit to sealing the entire area, perform a small spot test. Choose an inconspicuous spot, like a corner behind a planter, and apply the sealer according to the manufacturer’s directions. Let it dry completely so you can see the final result. This simple test allows you to check two important things: the color and the finish. Some sealers can slightly darken or enrich the color of your pavers, and this test ensures you like the change. It also confirms the sealer dries clear and does not have any adverse reactions with your specific paver material. This little bit of due diligence can save you from a big headache later.
Apply the Sealer: A Step-by-Step Guide
Now for the main event: applying the sealer. With your pavers clean, dry, and ready, you’re on the final stretch. This is where your hard work pays off, creating a protective shield that will keep your patio or driveway looking fantastic. The key is to work methodically with thin, even coats. A little patience ensures a beautiful finish without streaks. If you decide this part is better left to the experts, Gappsi offers professional restoration and sealing services to handle it for you.
Step 7: Apply the first coat in sections
To avoid painting yourself into a corner, start applying the sealer at the farthest point from your exit. Working in small, manageable sections of about four-by-four feet helps maintain a wet edge and prevent overlap marks. Use a roller for large areas and a small paintbrush for edges and corners. Apply a thin, even coat, making sure not to let the sealer pool in the joints. A good strategy is to outline your section first, then fill in the middle. This approach ensures complete coverage and a smooth finish across your beautiful porcelain and natural stone pavers.
Step 8: Let it dry and apply a second coat
Patience is your best friend during the drying phase. Most sealers require at least two coats, and you need to let the first coat dry completely before applying the next. Rushing this can trap moisture between the layers, resulting in a cloudy appearance that’s difficult to fix. Check the manufacturer’s instructions, but a good rule is to wait a full day between coats, as humidity can slow drying time. Once the first coat is dry to the touch and no longer tacky, you can apply the second coat using the same technique.
Step 9: Understand the curing process
Drying and curing are two different things. While the sealer might feel dry in a few hours, it needs more time to cure, which means it’s fully hardening and bonding to the paver. This is a critical period for long-term durability. As a guideline, wait at least 24 hours before allowing light foot traffic. For driveways, wait at least 72 hours before parking on them. During this time, keep the area completely dry, so turn off any nearby sprinklers. Properly protecting your pavers now ensures they’ll stand up to years of enjoyment.
Avoid These Common Paver Sealing Mistakes
Sealing your pavers seems straightforward, but a few common missteps can lead to a finish you’re not happy with. Taking the time to get it right ensures your patio, walkway, or driveway looks great and stays protected for years. By avoiding these simple mistakes, you can achieve a professional-quality result that preserves the beauty of your outdoor space. Think of it as the final, protective touch that locks in the investment you’ve put into your hardscape. If you’re ever in doubt or just want to ensure a perfect finish without the hassle, remember that a professional restoration and sealing service can handle the job for you.
Sealing pavers that are wet or dirty
This is the most common mistake, and it’s a big one. Applying sealer over dirt, stains, or grime will trap them against the paver’s surface, making them a permanent feature. Before you even think about opening a can of sealer, you need to make sure your pavers are spotless. More importantly, the surface must be completely dry. Sealing damp pavers can trap moisture, leading to a cloudy, hazy finish or causing the sealer to peel away later. Plan for at least 24 to 48 hours of dry weather after cleaning to let your pavers air out entirely. A little patience here goes a long way.
Applying too much sealer
When it comes to paver sealer, more is definitely not better. The goal is to apply a thin, even coat that absorbs into the paver’s pores. Drenching the surface with too much product can create a thick film on top that looks blotchy and feels sticky. An overly thick coat can also make your pavers dangerously slippery when wet, which is a major safety concern for pool decks and walkways. Stick to the “less is more” approach. A light, uniform layer is all you need for effective protection and a beautiful finish. You can always add a second thin coat if needed.
Working in direct sun or extreme temperatures
The weather plays a huge role in how well your sealer applies and cures. Sealing in the scorching midday sun or on a very hot day can cause the sealer to dry too quickly, before it has a chance to properly bond with the paver. This can result in streaks, bubbles, or a peeling finish. On the other hand, applying it in temperatures that are too cold can prevent it from curing correctly. The ideal temperature is typically between 50 and 90 degrees Fahrenheit. Always check the forecast and plan your project for a mild, overcast day if possible for the best application conditions.
Sealing over white, chalky residue
Have you ever noticed a white, chalky film on your pavers? This is a natural phenomenon called efflorescence, caused by mineral salts migrating to the surface. If you apply sealer over this residue, you’ll trap it, leaving a permanent white haze on your beautiful pavers. While efflorescence often fades on its own over several months, you can also remove it with a specialized cleaner before sealing. Don’t seal until every trace of that white powder is gone. This ensures your sealer enhances the true color of your porcelain and natural stone, rather than obscuring it.
Ignoring the manufacturer’s instructions
Every sealer formula is slightly different, with its own specific application methods and drying times. It might be tempting to just get started, but skipping the instructions on the product label is a recipe for failure. The manufacturer provides the best guidelines for everything from the ideal application temperature to how long you should wait between coats. Following these directions is the single best thing you can do to ensure a successful project. You can find professional-grade products and expert advice at the Gappsi Store to get you started on the right foot and answer any questions you might have.
How Often Should You Reseal Your Pavers?
Sealing your pavers is a fantastic way to protect your investment, but it’s not a one-and-done task. The sealer acts as a shield for your patio or driveway, and over time, it wears down from traffic and weather. Knowing when to reapply it is key to keeping your pavers looking great. The good news is your pavers will give you clear signals when they need attention.
Signs it’s time for a fresh coat
As a general rule, plan to reseal your pavers every three to five years. Your pavers might tell you they need it sooner, though. The most obvious sign is that their color looks dull or faded. The vibrant look they had when the sealer was fresh will start to disappear. You can also do a quick water test: splash a little water on the surface. If it beads up, your sealer is still working. If the water soaks in and darkens the paver, it’s time for a new coat. You might also notice a hazy white film, called efflorescence, which should clear up before you apply a new seal.
Factors that affect resealing frequency
The three-to-five-year timeline is a great starting point, but several factors can change how often you’ll need to reseal. High-traffic areas, like your driveway, will naturally wear down faster than a secluded garden path. Long Island’s weather also plays a big role; constant exposure to sun, rain, and winter ice can break down the sealer more quickly. The type of paver matters, too. Different porcelain and natural stone materials may have unique requirements. Ultimately, it also comes down to personal preference and how much you want to maintain that enhanced, just-installed look.
Tips to maintain your sealed pavers
A little upkeep can go a long way in extending the life of your paver sealer. The best thing you can do is keep the surface clean. Sweep away leaves and dirt regularly so they don’t get ground into the sealer. For a deeper clean, a simple mix of mild soap and water with a gentle scrub is all you need. It’s also smart to clean up spills like oil or wine as soon as you spot them to prevent staining. If you’re ever unsure about tackling tough stains or feel the job is too big, professional restoration and sealing services can get your pavers looking brand new again.
Should You DIY or Hire a Pro?
Deciding whether to seal your pavers yourself or call in a pro is one of the biggest questions you’ll face. A DIY project can be really satisfying, but paver sealing isn’t just a simple weekend task. It requires specific tools, some technical know-how, and a decent amount of time. Being honest about the job’s complexity and your own comfort level is key. A misstep could leave you with a finish you don’t love or even cause damage to your beautiful pavers. Let’s walk through the details so you can make the best choice for your home.
When to call a professional
If you’re an experienced DIYer with a small patio, you might feel totally comfortable taking this on. But if you’re short on time, don’t have the right equipment, or are looking at a large area like a long driveway, calling a professional is usually the smarter move. Experts come with commercial-grade tools and the experience to get the job done right and efficiently. They know how to avoid common mistakes, like applying sealer unevenly or trapping moisture underneath, which can save you from some major headaches later. A professional touch ensures your investment is protected and looks fantastic for years.
What a professional service includes
Hiring a professional means you’re getting a complete service, not just a quick coat of sealant. A full package ensures every step is handled with expertise. It usually starts with a thorough, deep cleaning using pressure washers to get rid of all the built-up dirt, grime, and moss. The team will also take care of any necessary repairs and refill the joints with sand. Professionals use high-quality sealants that offer much better protection and longevity. Plus, many reputable companies provide a detailed assessment before starting and a warranty on their work, giving you complete peace of mind.
How Gappsi can help Long Island homeowners
For those of us on Long Island, our pavers put up with a lot, from humid summers to freezing winters. Gappsi offers expert restoration and sealing services tailored to our local climate. Our team knows exactly how to treat different types of natural stone and pavers to protect them from the harsh elements. We start with a detailed evaluation of your patio, walkway, or driveway, followed by a professional cleaning and the application of premium sealants. We handle all the details, taking the guesswork out of the process and leaving you with a durable, beautiful finish for your outdoor space.
Related Articles
- Paver Sealer: Everything You Need to Know
- Cleaning and Sealing Pavers Suffolk County
- Paver Stone Sealing
Frequently Asked Questions
Can I seal my brand new pavers immediately after they’re installed? It’s best to wait a few months before sealing brand new pavers. New pavers often release natural mineral salts, which can create a temporary white, chalky film on the surface called efflorescence. If you seal them too soon, you will trap that white haze underneath the sealer. Giving your pavers some time to breathe and weather naturally ensures you get a clear, beautiful finish when you finally apply the sealer.
Will sealing my pavers make them slippery, especially around my pool? This is a great question and a common concern. A properly applied sealer should not make your pavers dangerously slippery. The key is to apply it in thin, even coats. Slipperiness usually happens when too much sealer is applied, creating a thick film on the surface instead of soaking into the paver. For extra peace of mind in wet areas, you can also look for sealers that contain anti-slip additives.
How long does the entire paver sealing process take from start to finish? You should plan for this to be a multi-day project, mostly due to drying times. After a deep cleaning, you need to let the pavers dry completely, which takes at least 24 to 48 hours. Applying the sealer itself is relatively quick, but you will need to wait for the first coat to dry before adding a second. After the final coat, the surface needs to cure for 24 to 72 hours before it can handle foot traffic or cars.
What happens if I mess up? Can a bad sealing job be fixed? Fixing a bad sealing job is possible, but it is a difficult process. If the sealer was applied incorrectly and looks cloudy or blotchy, the only solution is to chemically strip it all off and start over. This is a labor-intensive task that requires harsh chemicals and a lot of scrubbing. It’s a big reason why taking your time, doing a spot test, and following all the prep steps is so important.
Is it really worth the cost to hire a professional for this? Hiring a professional is a great choice if you want to guarantee a perfect finish without the stress. A pro has the commercial-grade equipment for deep cleaning and the experience to choose the exact right sealer for your specific stone. They know how to avoid all the common pitfalls, like applying too much product or sealing over a damp surface. It takes the guesswork out of the project and ensures your investment is protected correctly from the start.