


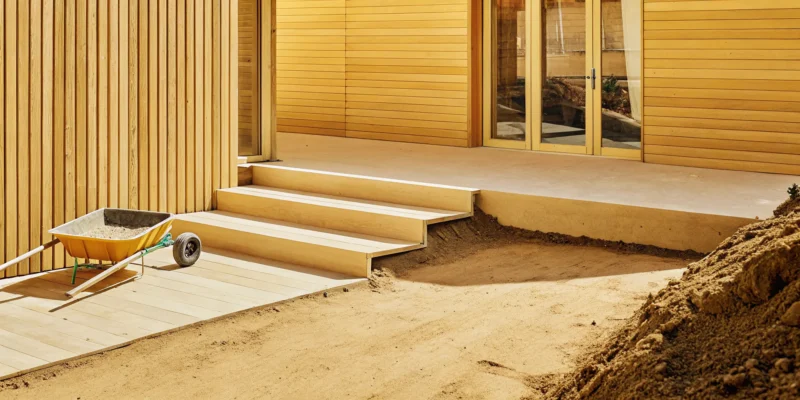
A natural stone patio does more than just add value to your home; it creates a timeless foundation for your outdoor life. It’s the spot for morning coffee, family barbecues, and quiet evenings under the stars. While the idea of building one yourself might seem daunting, it’s a project that’s well within reach for a dedicated DIYer. This guide is designed to walk you through every step of how to install a natural stone patio, from choosing the perfect bluestone or travertine to locking the final stone in place. We’ll cover the essential techniques that our own masonry experts use, giving you the confidence to create a beautiful, durable space you can be proud of for years to come.
Key Takeaways
- Prioritize a Solid Foundation: A deep, compacted gravel base and a slight drainage slope are non-negotiable. This preparation is the most important step for preventing sinking stones and protecting your home from water damage.
- Choose Your Installation Method Wisely: A dry-set installation using sand is more forgiving and budget-friendly for DIY projects. A wet-set installation with mortar offers permanence but is less forgiving and often requires professional skill.
- Secure and Seal Your Patio for Longevity: Filling the joints with polymeric sand or grout is what locks the stones together. Applying a quality sealer afterward protects your patio from stains and weather, preserving its beauty for years to come.
What You’ll Need: Materials and Tools
Getting your materials and tools organized before you break ground is one of the most important steps. A well-stocked and organized worksite makes the entire installation process feel less overwhelming and helps you avoid last-minute trips to the store. Think of it as your project’s foundation, setting you up for a smooth and successful build.
Choose Your Natural Stone
Natural stone gives your patio a character that manufactured materials just can’t replicate. Each piece has unique colors and textures, ensuring your outdoor space is one-of-a-kind. Popular choices include flagstone, bluestone, travertine, and slate. Before you decide, I highly recommend seeing the materials in person. Visiting a showroom lets you feel the textures and see how the colors look in natural light. At Gappsi, we have a wide selection of porcelain and natural stone pavers to help you find the perfect match for your home’s style. Consider the stone’s thickness for durability and its surface for slip resistance, especially if your patio is near a pool.
Gather Your Essential Tools
Once you’ve picked your stone, it’s time to assemble your toolkit. A successful installation depends on having the right equipment on hand. For the base, you’ll need crushed gravel, coarse sand, and polymeric sand to fill the joints later. You’ll also want some sort of edging to keep your patio contained. Your tool list should include a measuring tape, stakes and string, a shovel, a wheelbarrow, a 4-foot level, a straight 2×4 board for leveling the sand, a rubber mallet, and a hand tamper or plate compactor. You can often rent larger equipment like a plate compactor. Having everything ready before you start makes the whole process go much smoother. Our masonry construction experts rely on these same foundational tools for a flawless finish.
Don’t Forget Your Safety Gear
This step is non-negotiable. Working with heavy stones and power tools requires proper protection. When you’re cutting stone with an angle grinder, it creates a lot of dust and noise, so you absolutely need safety glasses, a dust mask, and earplugs. A good pair of heavy-duty work gloves will save your hands from scrapes and calluses, and steel-toed boots are a smart idea to protect your feet from accidental drops. Think of your safety gear as part of your essential toolkit. It’s what allows you to focus on the project without worrying about injuries. Taking these simple precautions ensures your DIY project is a positive experience from start to finish. If you’d rather leave the heavy lifting and cutting to the pros, our teams are always equipped for safe and efficient patio restoration and sealing.
Dry-Set vs. Wet-Set: Which Method Is Right for You?
When it comes to installing a natural stone patio, one of the first big decisions you’ll make is choosing the installation method. The two primary techniques are dry-set and wet-set, and your choice will shape the entire project. Each has its own process, benefits, and ideal applications. Your decision will depend on your budget, timeline, the type of natural stone you’ve selected, and your comfort level with DIY projects.
A dry-set installation offers flexibility and is generally more forgiving, making it a popular choice for weekend projects. A wet-set installation, on the other hand, provides a more rigid and permanent surface, but it requires a higher level of skill. Understanding the key differences between them will help you decide which path is the right one for your new outdoor space. For complex projects, a professional masonry designer can provide invaluable guidance on the best method for your specific design and property.
What Is a Dry-Set Installation?
A dry-set installation involves laying your natural stones on a compacted base of gravel and a layer of sand, rather than using mortar. This method is often called a flexible installation because the stones are not permanently bonded to the base. Once the stones are arranged, you sweep a special material called polymeric sand into the joints. A light spray of water activates the polymers in the sand, causing it to harden. This locks the stones together, creating a stable surface that also helps prevent weeds from growing through the cracks. Because it’s easier to adjust and repair, the dry-set method is a fantastic option if you’re tackling this project yourself.
What Is a Wet-Set Installation?
A wet-set installation is a more permanent and rigid method where stones are set into a bed of mortar over a concrete slab. This process creates an incredibly durable, solid surface that’s perfect for high-traffic areas or more formal patio designs. To do this, you spread a layer of wet mortar onto the concrete base and press each stone firmly into place. A special primer is often brushed onto the back of the stone to ensure a strong bond. Because the stones are permanently fixed, this method requires precision and skill. It’s less forgiving of mistakes, which is why many homeowners choose to hire a professional for a wet-set installation.
Comparing Cost, Time, and Skill
Deciding between a dry-set and wet-set patio often comes down to three things: cost, time, and skill. A dry-set installation is typically more budget-friendly because it uses fewer materials and you can save on labor by doing it yourself. It’s also a faster process since you don’t have to wait for mortar or concrete to cure.
A wet-set installation costs more due to the additional materials like cement and the need for a concrete foundation. It’s also more time-consuming. In terms of skill, dry-set is much more approachable for beginners. If your design is complex, with curves or multiple levels, the precision required for a wet-set patio often makes it a job best left to those with professional design and construction expertise.
Step 1: Plan Your Patio Design
Before a single stone is laid, your patio project begins with a plan. This is where you get to translate your vision for a beautiful outdoor space into a concrete blueprint. Taking the time to think through the details now will save you headaches and ensure the final result is exactly what you dreamed of. From the overall footprint to the specific materials, every choice you make in this phase is a step toward creating a patio you’ll love for years. Let’s walk through the three most important parts of planning your design.
Map Out the Dimensions and Shape
First, decide on the size and shape of your patio. Grab some stakes and string or a can of marking paint to outline the area in your yard. This simple step helps you visualize the space and see how it fits with your home and landscape. Think about how you want to use your patio. Will it be a cozy spot for morning coffee or a larger area for dining and entertaining? Consider the furniture you plan to use and make sure you have enough room to walk around comfortably. A well-planned layout is the foundation of a functional and inviting outdoor living area. Our masonry design experts can help you create a layout that maximizes your space.
Choose a Stone That Fits Your Style
Now for the fun part: selecting your stone. The material you choose sets the entire tone for your patio. Pavers made from natural stones like bluestone, travertine, and flagstone are very popular for their timeless, elegant look. Think about your home’s architectural style and the surrounding landscape. Do you want a rustic, natural feel or something more sleek and modern? We have a wide selection of porcelain and natural stone to match any aesthetic. Seeing and feeling the textures in person can make all the difference, so consider visiting a showroom to find the perfect material that speaks to you.
Do You Need a Permit?
Before you get too far into the process, it’s essential to do your homework on local regulations. Always check with your local town or city office, whether you’re in Suffolk or Nassau County, to see if you need a permit for your patio project. Requirements can vary depending on the size of the patio, its proximity to property lines, and whether it alters drainage. While it might seem like an extra step, securing the proper permits protects you from potential fines and legal issues. It ensures your project is built to safe, approved standards, giving you peace of mind.
Step 2: Prepare the Site
With your design finalized, it’s time to get your hands dirty and prepare the ground for your new patio. This stage is all about creating a safe, stable, and properly graded area. Taking your time here will prevent major headaches down the road and ensure your patio lasts for years to come.
Call 811 Before You Dig
Before you pick up a shovel, your first and most important action is to call 811. This free national service alerts local utility companies to come and mark the location of any underground lines, like gas, water, and electrical. Accidentally hitting one of these lines is extremely dangerous and can cause serious injury or costly service outages for your neighborhood. The process is simple and is required by law in most places. A few days of waiting for the markings is a small price to pay for ensuring a safe work environment for your project. Don’t skip this step.
How Deep Should You Excavate?
Once the area is cleared for safety, you can begin excavating. The depth of your foundation is crucial for the stability and longevity of your patio. For a durable base, you should plan to dig out the entire patio area to a depth of 7 to 9 inches. This depth allows for a 4 to 6-inch layer of compacted gravel base, a 1-inch layer of sand, and the thickness of your stones. This solid foundation is what supports the beautiful natural stones and prevents them from shifting or sinking over time, which is a key principle of professional masonry.
Create the Proper Drainage Slope
A common mistake is building a perfectly flat patio. For your patio to last, it needs proper drainage to guide rainwater away from your home’s foundation. As you excavate, you need to create a gentle slope. The standard guideline is a drop of about 1/4 inch for every foot of distance away from your house. For example, a patio that extends 10 feet from your home should be about 2.5 inches lower at its outer edge. This slight grade ensures water runs off the surface instead of pooling or seeping into your foundation, which can prevent the need for future patio restoration.
Step 3: Build the Foundation
Think of your patio’s foundation as its unsung hero. You’ll never see it once the project is finished, but this underground structure does all the heavy lifting to keep your beautiful stonework from shifting, sinking, or cracking. This step is arguably the most physically demanding part of the entire project, but it’s also the most critical for a long-lasting result. Cutting corners here will only lead to headaches and costly repairs down the road. In a place like Long Island, where we experience freeze-thaw cycles, a poorly built base can cause the ground to heave and ruin your patio in just a few seasons.
The goal is to create a stable, multi-layered base that can support the weight of the stones and withstand the elements. This involves excavating the soil, then building it back up with layers of gravel and sand. Each layer has a specific job, from providing structural support to creating a perfectly level surface for setting the stones. Taking your time to get the foundation right ensures your patio will remain a beautiful and functional part of your home for decades. If you’re feeling unsure about this crucial stage, our masonry experts have built countless foundations designed to last a lifetime.
Lay and Compact the Gravel Base
With your site excavated, it’s time to build the structural core of your foundation. You’ll be using a crushed stone aggregate, often called dense grade aggregate or crusher run. This material locks together tightly when compacted to form a rock-solid base. Start by spreading a 2 to 3-inch layer of gravel evenly across the excavated area. Lightly mist the gravel with a garden hose, as a little moisture helps the particles settle and compact more effectively.
Next, using a plate compactor (which you can typically rent from a local tool supplier), go over the entire area several times until the base feels completely solid underfoot. Repeat this process, adding gravel in 2 to 3-inch layers and compacting each one, until you’ve built up a base that is 4 to 6 inches deep. This layered approach is key to achieving maximum compaction and stability.
Add and Level the Sand Layer
Once your gravel base is firm and compacted, you’ll add a layer of sand to create a smooth, level bed for setting the stones. For this, you need about one inch of coarse, washed concrete sand. To get it perfectly level, a technique called “screeding” is your best friend. Place two parallel metal pipes or straight boards across the gravel base. Pour the sand between them, then pull a long, straight 2×4 across the tops of the pipes. This will drag the excess sand away, leaving a perfectly flat and smooth surface.
After screeding the entire area, carefully remove the pipes and fill in the empty channels with a bit more sand, smoothing it over with a trowel. This sand layer provides a forgiving surface that makes it easier to set your beautiful natural stones to their final height.
Check Your Level and Slope
Before you get caught up in the excitement of laying stones, pause for one final, crucial check. Your patio must have a slight slope away from your house to ensure proper drainage. Without it, rainwater and snowmelt can pool on the surface or, even worse, run back toward your home’s foundation, leading to potential water damage. The standard rule is to create a slope of about 1/4 inch for every foot of distance.
Use a long level to verify the slope across the entire sand bed. You can also run a string line from a stake near the house to one at the outer edge of the patio, using a line level to ensure you have the correct drop. Confirming your slope now will save you from major issues later and is a key step in preventing the kind of damage our patio restoration team often has to fix.
Step 4: Lay the Natural Stones
Now for the most satisfying part: bringing your patio to life. Laying the stones is like putting together a beautiful, one-of-a-kind puzzle. This is where your careful planning and foundation work pay off. Take your time with this step, as the placement of each stone contributes to the final look and durability of your new outdoor space. With a bit of patience and an eye for detail, you can create a stunning surface that looks professionally installed.
Create a Test Layout
Before you permanently set any stones, do a dry run. Think of this as a rehearsal for your patio. First, lay out the border stones, choosing ones with straight edges to create a clean frame for your design. Then, fill in the middle like a jigsaw puzzle, finding stones that fit together nicely. This test layout helps you see the final design and ensures everything fits well before you commit. It’s much easier to swap a stone now than after it’s been set in place. This is your chance to play with the arrangement and find a pattern you love.
Arrange Your Pattern and Borders
Once you have a general idea, it’s time to refine your pattern. Dry fit all your stones on the sand base without setting them permanently. This process helps you plan the pattern and make any necessary adjustments for a balanced and attractive layout. Pay attention to the colors, shapes, and textures of your porcelain and natural stone pavers to create visual interest. You can aim for a random, organic look or a more structured pattern. Remember to leave consistent gaps between the stones, which you’ll fill later.
Cut Stones for a Perfect Fit
Inevitably, you’ll have spots where a full stone just won’t fit, especially around the edges. For this, you’ll need to cut some stones. Make sure you have your safety gloves and glasses on. To cut a stone, mark your line with a pencil. Use a grinder to score a shallow cut along the line, then use a hammer and a good chisel to carefully break off the unwanted piece. It takes a bit of practice, but this technique gives you clean edges for a snug fit. If you’re not comfortable with this part, our masonry construction team has the expertise to make precise cuts for a flawless finish.
Set the Stones in Place
With your layout planned and your cuts made, you can start setting the stones. Place each stone into the sand bed, leaving a consistent gap of about 3/8 to 1/2 inch between them. This space is crucial for the jointing material you’ll add later. Once a stone is in position, tap it gently with a rubber mallet to settle it firmly into the sand. Use your level to check that each stone is even with its neighbors and follows the slope you established. This ensures your patio will be stable and comfortable to walk on.
Step 5: Add the Finishing Touches
You’ve laid the stones and your new patio is really taking shape. Now it’s time for the final steps that will lock everything in place and protect your work for years to come. This stage is all about securing the joints between the stones and applying a protective seal. Think of it as the finishing polish that transforms your project from a collection of stones into a solid, unified surface. Whether you chose a dry-set or wet-set installation will determine your approach, but either way, these finishing touches are what separate a good patio from a great one. Taking your time here ensures your patio will not only look beautiful but will also stand up to weather, foot traffic, and backyard parties, preventing shifting stones and pesky weeds down the line. This is where the true craftsmanship of the project shines through, giving your outdoor space a professional and long-lasting quality.
Fill Joints with Polymeric Sand
If you have a dry-set patio, polymeric sand is your best friend. This special sand is swept into the joints between your stones and, when activated with a light mist of water, its polymers create a firm, durable bond. This locks the pavers together, creating a stable surface while also preventing weeds from popping up and insects from burrowing through.
To start, pour the sand over your dry patio and use a push broom to sweep it across the surface, guiding it into every crack and crevice. Once the joints are full, use a leaf blower on a low setting or a soft brush to remove all the excess sand from the top of the stones. Finally, gently mist the entire patio with a garden hose. This activates the hardening agent. Be careful not to spray too hard, as you could wash the sand out of the joints. Let it cure completely, and you’ll have a beautifully finished, low-maintenance surface. You can find all the high-quality materials you need at the Gappsi Store.
Apply Grout for a Wet-Set Patio
For a wet-set patio where the stones are secured with mortar, you’ll use grout to fill the joints for a more permanent, solid finish. Before you begin, make sure the mortar base has had at least a full day to dry. The grout is typically a mix of sand and Portland cement, similar to the setting bed but with a bit more water to make it easier to work with.
Using a grout float, press the mixture firmly into the joints, making sure to fill them completely. Work in small sections so you can clean up as you go. As the grout begins to set, use a damp sponge to carefully wipe any excess off the face of the stones. This is a critical step, as dried grout can be very difficult to remove later and can stain your beautiful natural stone. This process requires a bit of patience and skill, which is why many homeowners rely on professional masonry services to get it just right.
Seal Your New Stone Patio
Sealing is the final step to protect your investment, regardless of the installation method you used. A good quality sealer will shield your natural stone from stains, water absorption, and fading caused by the sun. It also makes cleaning much easier and can enhance the natural colors of the stone, making them look richer and more vibrant. Before you apply any sealer, your patio must be completely clean and dry, and the polymeric sand or grout must be fully cured.
Choose a sealer that offers the finish you want, whether it’s a natural look or a wet-look enhancer. Apply it evenly with a roller or a pump sprayer, following the product’s specific instructions. Typically, you’ll want to apply a thin, even coat and avoid letting it puddle. This final layer of defense is key to keeping your patio looking pristine for years. For long-term care, professional restoration and sealing can keep your outdoor space in top condition.
How to Maintain Your Natural Stone Patio
You’ve put in the work, and now you have a beautiful natural stone patio. Congratulations! The good news is that maintaining it is much easier than installing it. With a little routine care, your patio will continue to be a stunning feature of your home for decades. Keeping your stone looking its best comes down to a simple cycle of regular cleaning, periodic sealing, and seasonal prep. Think of it as a simple rhythm that protects your investment and ensures your outdoor space is always ready for relaxation or entertaining.
Your Regular Cleaning Checklist
The easiest way to keep your patio looking fresh is with simple, consistent cleaning. Don’t let dirt and grime build up, as it will only make the job harder later. A quick sweep every week or so can make a world of difference, especially after a storm or during the fall when leaves are abundant.
For a more thorough clean, start by clearing off furniture and sweeping away all loose debris. Then, rinse the entire patio with a garden hose. For any stubborn spots, use a pH-neutral cleaner mixed with water and a soft-bristle brush. Avoid using a pressure washer, which can be too harsh and damage the stone’s surface or the joint material between them.
When and How to Reseal Your Patio
Sealing your natural stone is like applying sunscreen; it provides a vital protective layer against moisture, stains, and fading from the sun. Most patios benefit from being resealed every one to three years, but this depends on the type of stone and how much foot traffic it gets. An easy way to check is to sprinkle some water on the surface. If it beads up, your sealer is still working. If the stone darkens and absorbs the water, it’s time to reseal.
Before you begin, clean the patio thoroughly and allow it to dry completely for at least 24 hours. If you’re unsure about tackling this yourself, professional restoration and sealing services can ensure the job is done right.
How to Handle Weeds, Moss, and Stains
Even with the best care, you might occasionally find weeds, moss, or a stubborn stain on your patio. The key is to act quickly. Pull any weeds that pop up in the joints by hand to prevent them from taking root. For moss or algae in damp, shady areas, a scrub with a stiff brush and a solution of equal parts white vinegar and water can work wonders.
When spills happen, blot them immediately with a clean cloth to prevent them from soaking in. For grease stains from the grill, apply a poultice or a dedicated stone degreaser. By addressing these minor issues as they appear, you can prevent them from becoming bigger problems.
Prepare Your Patio for Every Season
Preparing your patio for the changing seasons is crucial, especially on Long Island. In the spring, give your patio a deep clean to wash away winter grime. In the fall, make sure to sweep away fallen leaves promptly, as they can leave stains if left to decompose.
Winter requires the most care. Never use rock salt or chemical deicers on your natural stone, as they can cause pitting and permanent damage. Instead, use sand for traction on ice. If you need to shovel snow, use a plastic shovel instead of a metal one to avoid scratching the stone. A little seasonal attention ensures your patio weathers every storm and is ready for you to enjoy year after year.
Common DIY Mistakes to Avoid
Taking on a natural stone patio project yourself can be incredibly rewarding. You get to build something beautiful with your own hands. However, a few common missteps can turn your dream patio into a source of frustration. Knowing what to watch out for ahead of time can save you from wobbly stones, pooling water, and wasted effort. Let’s walk through some of the most frequent mistakes homeowners make so you can get a professional-looking result that lasts for years. By avoiding these pitfalls, you’ll be well on your way to creating an outdoor space you can be proud of.
Mistake #1: An Unstable Base
The most critical part of your patio isn’t the stone you see on top, it’s the foundation you don’t. An unstable base is the number one reason patios fail. The layers of gravel and sand underneath the stones must be deep enough and compacted thoroughly to create a solid, unmoving platform. If this base is shallow or loose, your stones will shift, sink, and become uneven over time. Think of it as the foundation for your house; if it’s not solid, everything on top of it will have problems. This step is where expert masonry skills truly make a difference, ensuring the patio remains stable through every season.
Mistake #2: Forgetting About Drainage
Water is a patio’s worst enemy if it has nowhere to go. A common DIY error is creating a perfectly flat surface, which unfortunately invites water to pool or, even worse, run back toward your home’s foundation. Proper drainage is essential. Your patio needs a slight, almost unnoticeable slope (about a quarter-inch drop per foot) that directs water away from your house and other structures. Forgetting this step can lead to a waterlogged base, moss growth, and potential water damage to your home. A professional installation always accounts for drainage from the very first measurement, protecting both your patio and your property.
Mistake #3: Uneven Stones and Gaps
Nothing ruins the look of a stone patio faster than a wobbly, uneven surface with inconsistent gaps. This often happens when the sand layer isn’t perfectly level or when stones are placed without being checked. Each stone should be set firmly into the sand base and tapped with a rubber mallet until it’s secure and level with its neighbors. Use a long level across multiple stones as you work to maintain a consistent surface and the correct drainage slope. Inconsistent gaps can also look messy and make the joints harder to fill. If you find your existing patio has these issues, you may need to restore and seal the surface to correct them.
Mistake #4: Working in Bad Weather
Building a stone patio is a physically demanding job, and fighting the elements only makes it harder. Many DIYers underestimate how much the weather can impact their project. Trying to work in the rain is a recipe for disaster, as it can turn your carefully prepared sand base into a muddy mess. Extreme heat can be draining and even dangerous, while strong winds can make handling materials difficult. Before you start, check the forecast for a clear stretch of days. This will give you a comfortable and effective window to work in, ensuring the conditions don’t compromise the quality of your installation. You can see our teams in action to get a better sense of the workflow and project scope.
Know When to Call a Professional
Taking on a DIY project can be incredibly rewarding, and building your own stone patio is a fantastic way to save on labor costs. While a simple, flat patio can be a great weekend project, it’s just as important to recognize when a project’s complexity calls for an expert. Knowing your limits is key to avoiding costly mistakes and ensuring you get the beautiful, long-lasting patio you’ve been dreaming of. If you want a perfect result, especially when it comes to the critical foundation, bringing in an expert is a smart choice.
Your project might be better suited for a professional if your design is anything but straightforward. For instance, patios with intricate curves, multiple levels, or built-in features like seating and retaining walls require a high level of skill. These complex masonry designs demand specialized tools and an expert’s touch to ensure structural integrity and a polished finish. A professional team has the experience to execute these features flawlessly.
Beyond the design itself, consider the logistics. A stone patio installation is a very labor-intensive project that involves heavy lifting and precise measurements. Professionals not only have the right equipment for the job, but they also handle the entire process from start to finish, including securing any necessary permits for your town. If you’re facing a complicated design or simply want the peace of mind that comes with guaranteed quality, it’s time to call a professional. Think of it less as giving up on a DIY dream and more as making a wise investment in your home’s value and your own enjoyment.
Related Articles
Frequently Asked Questions
How long does a DIY patio project usually take? The timeline really depends on the size of your patio, the complexity of the design, and how much time you can dedicate to it. For a straightforward, medium-sized patio, you should probably set aside two or three full weekends. The first weekend will likely be spent on excavation and building the foundation, which is the most physically demanding part. The next weekend can be for laying the stones and finishing the joints. Remember to factor in weather, as you’ll need a good stretch of dry days to get the job done right.
What’s the biggest difference between a dry-set and a wet-set patio? Think of it this way: a dry-set patio is like a flexible puzzle laid on a bed of sand, while a wet-set patio is like tile permanently glued to a concrete floor. The dry-set method uses a gravel and sand base, with polymeric sand locking the stones together. It’s more forgiving and easier to repair. A wet-set installation involves setting the stones in mortar on a concrete slab, creating a rigid, solid surface. This method is less forgiving of mistakes and generally requires a higher level of skill.
Do I really need to create a slope for drainage? Yes, this is one of the most important steps and it’s absolutely not one you should skip. A patio that looks perfectly flat will actually hold water, which can cause a lot of problems. That standing water can seep back toward your home’s foundation, encourage moss and algae growth, and even cause the base of your patio to fail during freeze-thaw cycles. A gentle slope of about a quarter-inch per foot is all you need to guide water away and protect your hard work.
Can I use a pressure washer for cleaning my stone patio? I would strongly advise against it. While it might seem like a quick way to clean, the high-pressure stream can be too aggressive for natural stone. It can erode the surface of the stone itself and, more importantly, it can blast the polymeric sand right out of the joints. This leaves your stones vulnerable to shifting and creates a perfect place for weeds to grow. A garden hose, a pH-neutral cleaner, and a soft-bristle brush are much safer and more effective options.
My yard has a significant slope. Can I still build a patio myself? Building on a steep slope adds a whole new layer of complexity to the project. A slight grade is one thing, but a significant slope often requires building retaining walls to create a level surface, which involves soil engineering and a deep understanding of structural loads. If not done correctly, the patio could fail or cause serious erosion issues. For these types of challenging sites, I always recommend calling a professional. They have the expertise to design and build a safe, stable, and beautiful patio that works with your landscape.