


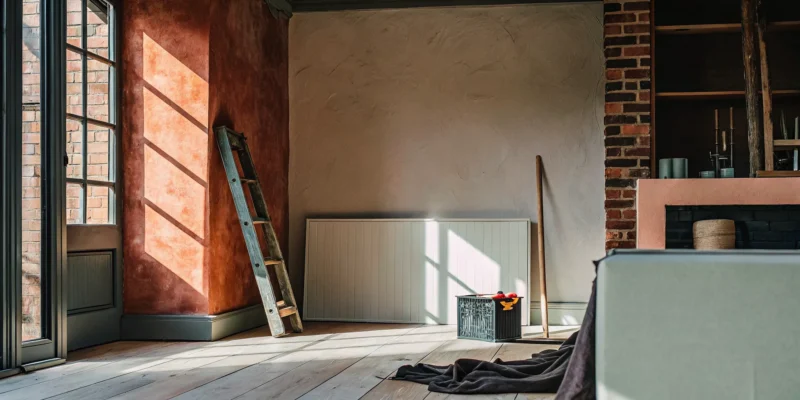
You’ve picked the perfect paint color and arranged your furniture, but the room still feels like it’s missing something. The answer might be a faux feature wall. This is your chance to go bold and define your space with a pop of color, a striking pattern, or rich texture. From modern geometric designs to classic board and batten, an accent wall serves as the perfect backdrop for your bed, sofa, or dining area. It anchors the room and draws the eye, creating a polished and intentional look that elevates your entire home’s style.
Key Takeaways
- Get a High-End Look for Less: A faux feature wall is a practical way to get the appearance of real stone, brick, or custom millwork; it uses affordable, lightweight materials to create a stunning focal point without the high cost.
- Preparation Is Key to a Professional Finish: Your project’s success depends on the details, so proper wall prep, accurate measurements, and finishing touches like caulk and paint are essential for achieving a seamless, built-in look.
- Balance Design with Practicality: Make sure your feature wall design complements the room’s scale and existing decor. While many projects are DIY-friendly, it is always best to call a professional for complex designs or any work involving electrical changes.
What Is a Faux Feature Wall?
Think of a faux feature wall as a clever design shortcut to get the high-end look of materials like stone, brick, or intricate wood paneling without the hefty price tag and complex installation. It’s a way to create a stunning focal point in a room using materials that mimic the real thing. For example, instead of hiring a mason to build a stone wall, you can use lightweight stone veneer panels. Or, you can create the illusion of classic wainscoting with strategically placed trim pieces and a fresh coat of paint. This approach makes a dramatic room transformation much more accessible.
While a full home remodeling project involves extensive planning and professional expertise, a faux feature wall lets you dip your toes into design and make a big impact with a smaller commitment of time and money. It can instantly define a space, creating a cozy backdrop for your bed, a sophisticated setting for your dining area, or a textured background for your entertainment center. The goal is to add texture, character, and a custom feel to your space, making it feel more personal and thoughtfully designed, often in just a weekend.
Faux vs. Traditional: What’s the Difference?
The biggest difference between a faux and a traditional feature wall comes down to materials and installation. A traditional feature wall uses authentic, heavy materials like solid wood planks, individual bricks, or genuine stone slabs. These projects require specialized tools, potential structural support, and a skilled professional to install. The result is an authentic wall built with classic masonry or carpentry techniques, which is often more costly and time-consuming.
Faux feature walls, on the other hand, use lightweight, manufactured materials designed to look like their traditional counterparts. This includes everything from MDF trim and PVC panels to high-quality veneers and wallpapers. Because these materials are lighter and engineered for simplicity, they are much easier to handle and install, making them perfect for a DIY project. You get a very similar visual effect without needing to be a construction expert.
Why Choose a Faux Feature Wall?
Opting for a faux feature wall is a fantastic choice for several reasons, especially if you’re looking for an affordable and manageable update. The most obvious benefit is the cost savings. Materials like faux brick or shiplap panels are significantly less expensive than real brick and wood. This allows you to achieve a luxurious look on a practical budget. Ease of installation is another major plus. You can completely change the feel of a room in a day or two with basic tools, which is a huge win for busy homeowners.
Beyond the practical perks, faux walls are incredibly versatile. Whether your style is modern, rustic, or coastal, there’s a faux option that will fit right in. You can get ideas for high-end looks by viewing galleries of porcelain and natural stone to see what kind of textures and patterns inspire you. A faux feature wall gives you the creative freedom to experiment with designs that might be too expensive or permanent with traditional materials.
Best Materials for a DIY Faux Feature Wall
Choosing the right material is the most important step in bringing your feature wall to life. The best option for you depends on your budget, your DIY comfort level, and the look you want to achieve. From classic paneling to rustic stone, there’s a material that fits your vision. Let’s walk through some of the most popular and user-friendly choices for a DIY project.
MDF Panels and Trim
If you love the timeless look of wainscoting or board and batten, MDF (Medium Density Fiberboard) is your best friend. It’s a fantastic material for beginners because it’s stable, affordable, and won’t warp with humidity changes like some natural woods can. MDF has a smooth surface that’s perfect for painting, giving you a flawless finish. You can buy large panels or individual trim pieces to create custom geometric or traditional patterns. This approach gives you the sophisticated feel of custom millwork, which is a cornerstone of high-end home remodeling, without the complex installation. It’s a straightforward way to add architectural character to any room.
Faux Stone and Brick Panels
For a touch of rustic charm or an industrial edge, faux stone and brick panels are a game-changer. These lightweight panels give you the gorgeous texture of real masonry without the cost, weight, and messy mortar of a traditional installation. They are designed for DIYers, often interlocking for a seamless fit. You can completely transform a fireplace surround, kitchen backsplash, or bedroom wall in a single weekend. While these panels are great for a DIY project, seeing professionally installed stonework can provide incredible inspiration. You can explore Gappsi’s porcelain and natural stone projects to get ideas for how to integrate beautiful textures into your home design.
Faux Wood Panels
Want to add warmth and organic texture to your space? Faux wood panels can create anything from a cozy, cabin-like atmosphere to a sleek, modern wood slat wall. These panels are much lighter and easier to cut and install than real wood planks, making them a practical choice for a feature wall. They come in a variety of finishes, so you can find the perfect match for your decor. Using faux wood is a simple way to get the look of a custom wood feature, which you often see in professionally designed pavilions and pergolas. It’s an effective method for making a room feel more inviting and grounded.
Peel-and-Stick Wallpaper
If you’re a renter or someone who loves to change up your decor frequently, peel-and-stick wallpaper is the ultimate low-commitment option. The application is simple: just peel off the backing and smooth it onto the wall. There’s no messy paste, and it’s designed to be removable without damaging your walls. The design possibilities are nearly endless, with wallpapers that mimic brick, stone, wood, and intricate geometric patterns. It’s the quickest way to create a dramatic accent wall with minimal effort. For more visual ideas on how different materials can transform a space, you can find plenty of inspiration on the Gappsi YouTube channel.
Design Inspiration for Your Faux Feature Wall
Once you decide to create a feature wall, the fun part begins: choosing a design. A faux feature wall can completely change the feel of a room, adding character, texture, and a focal point. The best part is that you can achieve a high-end look without the cost or complexity of traditional materials. Whether you prefer a subtle, classic style or a bold, modern statement, there’s a design that will fit your home perfectly. Let’s explore some popular ideas to get your creativity flowing.
Coastal and Natural
Bring the serene, calming feeling of the Long Island coast into your home with a natural-themed feature wall. This style is all about texture and organic elements. Faux panels provide a realistic appearance of natural materials, making them a versatile and practical choice for achieving this look. Think of a wall covered in faux weathered wood to create a beachy, rustic vibe or faux stone panels for a more grounded, earthy feel.
To complete the coastal aesthetic, pair your feature wall with a palette of soft blues, sandy beiges, and crisp whites. You can draw inspiration from the beautiful textures found in high-quality natural stone to select a faux panel that mimics the real thing. This approach creates a sophisticated backdrop that feels both refreshing and timeless.
Board and Batten and Wainscoting
For a touch of classic elegance, you can’t go wrong with board and batten or wainscoting. A faux-paneled accent wall uses trim pieces on your wall to look like traditional wood paneling, and it’s a cheaper and easier way to get the look of real wood panels. This style adds architectural depth and a sense of history to any room, from a formal dining room to a cozy bedroom. You can choose a traditional design, like lower-wall wainscoting, or go for a full-wall grid pattern.
Painting the trim and the wall the same color creates a subtle, textured effect, while painting the trim a contrasting color makes it a more prominent feature. While this is a great DIY project, achieving perfectly straight lines and clean joints is key. For complex designs, consulting with a home remodeling expert can ensure a flawless, professional finish.
Geometric and Modern
If your style leans more contemporary, a geometric feature wall can serve as a stunning piece of modern art. This design uses clean lines, repeating shapes, and sharp angles to create a dynamic and visually interesting focal point. Popular accent wall styles include geometric patterns, like diamonds, triangles, or intersecting lines, which you can create with thin wood trim or MDF strips.
Start by sketching your pattern on paper before transferring it to the wall. You can paint the entire wall a single color for a subtle, three-dimensional effect or use multiple colors to make the pattern pop. The precision required for these designs is similar to the detailed work found in custom masonry, where patterns create a huge impact. This style works especially well in living rooms, home offices, or anywhere you want to add a burst of energy.
Bold Colors and Accent Lighting
Sometimes, the simplest feature wall is the most effective. Painting one wall a bold, dramatic color is a quick and affordable way to transform a space. Current trends for accent walls often involve colorful walls, so don’t be afraid to choose a deep jewel tone, a vibrant primary color, or a moody dark shade. The key is to select a color that complements your existing furniture and decor while still making a statement.
To really make your accent wall shine, consider the lighting. Installing wall sconces or adjustable track lighting can highlight the color and create an inviting ambiance. Proper lighting draws the eye to your feature wall and can even enhance the texture of decorative panels. Thinking about how lighting interacts with structures, like in outdoor pavilions and pergolas, can give you great ideas for your indoor space.
How to Build a DIY Faux Feature Wall
Ready to transform your room? Building a faux feature wall is a fantastic weekend project that adds major personality without needing a full renovation. It might seem intimidating, but breaking it down into simple steps makes it manageable for any DIY enthusiast. With the right plan and a little patience, you can create a stunning focal point that looks professionally done. Let’s walk through the process together, step by step.
Step 1: Plan Your Design and Choose a Wall
First, decide which wall will become your masterpiece. A good rule of thumb is to pick the wall your eyes naturally go to when you enter the room, like the one behind your bed or sofa. This ensures your new feature wall becomes the true focal point. Once you’ve chosen your spot, sketch out a few design ideas. Consider the room’s overall style and how your new wall will complement it. Planning your design on paper helps you visualize the final look and work out any potential issues before you start. For more complex projects, getting expert design and construction advice can help refine your vision.
Step 2: Gather Your Tools and Materials
Having everything you need on hand before you begin makes the entire process smoother. For most paneling or trim projects, you will need a miter saw, nail gun, tape measure, level, pencil, caulk gun, and a stud finder. Depending on your design, your materials might include MDF boards, faux stone panels, or trim pieces. Make a detailed list and do one big shopping trip. This way, you won’t have to stop your progress to run to the store. A well-prepared workspace is the first step toward a professional-looking finish.
Step 3: Prepare and Mark Your Wall
Proper preparation is key to a successful installation. Start by clearing the wall and giving it a good cleaning. Next, use your stud finder to locate and mark the studs with a pencil; this is where you’ll nail your panels for a secure hold. Measure the height and width of your wall, and be sure to note the location of any outlets or light switches. Use your level and tape measure to draw precise guidelines for your design directly onto the wall. This roadmap will ensure your pieces are installed straight and evenly, which is crucial for a polished result.
Step 4: Cut and Install Panels or Trim
Now for the fun part: bringing your design to life. Following the “measure twice, cut once” rule is essential here. Use your miter saw to make precise cuts according to your design plan. Begin installing your main pieces first, whether it’s the outer frame or a central panel. Apply a bead of construction adhesive to the back of each piece and secure it to the wall with your nail gun, making sure to hit the studs you marked earlier. Taking your time with accurate measurements and cuts is the best way to avoid frustrating gaps and mistakes.
Step 5: Caulk, Sand, and Paint for a Flawless Finish
The final touches are what separate an average DIY project from a spectacular one. Once all your panels are installed, use caulk to fill every nail hole and seam. This step is critical for creating a seamless, built-in look. After the caulk dries, lightly sand any rough spots until everything is smooth to the touch. Finally, apply a coat of primer followed by your paint color of choice. Don’t rush this part. Neglecting these finishing touches can leave your hard work looking incomplete, so give it the attention it deserves for a truly flawless result.
Common DIY Mistakes to Avoid
A DIY project can be incredibly satisfying, but a few common missteps can turn your dream feature wall into a frustrating experience. Taking the time to avoid these errors will make the process smoother and ensure a professional-looking result you’ll be proud to show off. Let’s walk through some of the most frequent mistakes and how you can steer clear of them.
Skipping Wall Prep
It’s tempting to jump straight to the fun part, but skipping proper wall preparation can lead to a disaster. For your panels or trim to stick securely and look seamless, the wall underneath needs to be clean, smooth, and primed. Any dust, grease, or imperfections will prevent good adhesion and can show through your final finish. Before you begin, make sure to wear safety goggles and a dust mask, especially when sanding. Proper home remodeling always starts with a solid foundation.
Incorrect Scale and Proportions
This is where your design can either shine or fall flat. A common mistake is choosing a pattern or panel size that doesn’t fit the scale of the room. Oversized patterns can overwhelm a small space, while tiny details can get lost on a large wall. Before you make any cuts, map out your design on the wall with painter’s tape. This lets you visualize the proportions and adjust the spacing. Step back and look at it from different angles. Does it feel balanced? Taking this extra step helps you avoid disrupting the visual harmony of your space and ensures your design complements the room perfectly.
Using the Wrong Adhesives
Not all glues are created equal, and using the wrong one can compromise the entire project. An adhesive that isn’t strong enough or isn’t formulated for your specific materials could cause panels to peel away or sag over time. Always read the manufacturer’s instructions for both your wall material (like MDF or faux brick) and the adhesive itself. They will recommend the best type of construction adhesive for a secure, long-lasting bond. When in doubt, choose a product specifically designed for paneling or the type of masonry you are imitating to ensure your hard work holds up.
Ignoring Existing Decor and Lighting
A feature wall should feel like an intentional part of the room, not an afterthought. Before you commit, consider the room’s existing elements. Pick the wall your eyes are naturally drawn to when you walk in, and try to avoid walls with too many doors, windows, or awkward angles that will clutter the design. Think about how natural and artificial light will interact with your new wall. A textured surface, for example, will create different shadows and highlights throughout the day. Your feature wall should enhance your existing decor and create a cohesive look for the entire space, just like a well-designed pavilion does for a backyard.
Best Rooms for a Faux Feature Wall
A faux feature wall can dramatically change the feel of a room, adding texture, color, and a clear focal point. The beauty of this project is its versatility; you can install one almost anywhere. From creating a cozy retreat in your bedroom to defining a sophisticated outdoor lounge area, the right feature wall ties your entire space together. The best room for your project really depends on the atmosphere you want to create and the materials you’ve chosen to work with.
While this is a fantastic DIY project, seeing how a feature wall fits into a larger design can be a game-changer. If you’re planning a more extensive update, considering a full home remodeling project can help ensure every element, including your new accent wall, works in perfect harmony. Think about the spaces you use most and which ones could use a little extra personality. A feature wall is your chance to be bold and make a statement that reflects your personal style.
Living Rooms and Bedrooms
Your living room and bedroom are personal sanctuaries, making them perfect candidates for a feature wall. In a living room, an accent wall behind the sofa or around a fireplace can anchor the entire space and create an instant focal point. Imagine the warmth of faux wood panels or the classic elegance of a faux stone design. In the bedroom, a feature wall behind the headboard adds depth and can make the room feel more spacious and luxurious. It’s a simple way to inject high-end style and personality without committing to a complete overhaul. This is your opportunity to play with textures that create a cozy and inviting atmosphere.
Kitchens and Dining Rooms
Don’t overlook your kitchen and dining room when planning a feature wall. These spaces are the heart of the home, and adding a textured element can make them feel more welcoming and unique. You can use faux brick panels to create a rustic, industrial-style backsplash that’s much simpler to install and clean than traditional brick. In the dining room, a wall of geometric trim or sophisticated board and batten can define the space and add a touch of formal elegance. These materials give you the look of high-end finishes like natural stone or intricate woodwork with a fraction of the maintenance.
Outdoor Entertainment Spaces
Why limit beautiful design to your home’s interior? A faux feature wall can completely transform your outdoor entertainment areas. Use weather-resistant faux stone panels to add a rustic, natural look to an outdoor kitchen, a patio seating area, or the base of a pergola. It’s an excellent way to get the appearance of a custom stone wall without the complexity and cost of traditional masonry. This addition can make your backyard feel like a true extension of your living space, creating a polished and inviting environment for relaxing and entertaining guests. It’s the perfect finishing touch for structures like custom pavilions and pergolas.
When to Call a Professional
Taking on a DIY project is incredibly rewarding, but it’s also important to know your limits. While a simple faux feature wall is a great weekend project for many, some situations are better left to experienced professionals. The goal is a beautiful, lasting result, and sometimes the clearest path to achieving that is by calling for backup. Recognizing when you need help is a key part of any successful home improvement project.
The most important factor to consider is safety. If your design involves anything more than applying panels or trim to a flat, empty wall, it’s time to pause. Any project that requires electrical work, like installing built-in sconces or backlighting, should be handled by a licensed professional. The same goes for walls that contain plumbing or require structural changes. Messing with your home’s core systems is risky, so for these complex jobs, it’s best to rely on a full-service home remodeling team.
Think about the scope and complexity of your vision. Are you planning an intricate geometric design that requires precise, angled cuts? Are you working with heavy faux stone panels that need expert handling for a seamless finish? If your feature wall is part of a larger renovation, a professional can ensure the new design element feels cohesive with the rest of the space. An expert can integrate a stunning feature wall into a complete basement finish or make it the focal point of a new outdoor kitchen, ensuring the materials and style complement the overall landscape design.
Finally, be realistic about your time and skills. A professional has the right tools and years of experience to complete the job efficiently and with a flawless finish. If you’re short on time or feel the project is stretching your abilities, hiring a pro is a smart investment. It saves you from potential frustration and ensures the final product looks polished and high-end. For projects that require specialized knowledge, like detailed masonry work, an expert touch makes all the difference.
Related Articles
- Stone Accent Wall Installation: The Complete Guide
- Backyards Archives – Gappsi Group
- Latest News – Gappsi Group
Frequently Asked Questions
How much time should I set aside for a DIY feature wall? For most simple designs using trim or panels, you can expect the project to take a full weekend. Plan to spend the first day on preparation, measuring, and cutting your materials. The second day can be for installation, caulking, and painting. If you’re attempting a more complex geometric pattern or working with a very large wall, it’s wise to give yourself an extra day so you don’t have to rush the finishing touches.
Are faux materials durable and easy to clean? Yes, most modern faux materials are designed for real life. MDF panels, once painted, can be wiped down just like a regular wall. Faux stone and brick panels are often made from high-density polyurethane, which is resistant to moisture, pests, and fading. Cleaning usually just requires a gentle wipe with a damp cloth. Always check the manufacturer’s care instructions, but you’ll find they are generally very low-maintenance.
Can I install a faux feature wall in a high-moisture area like a bathroom? You can, but you must choose your materials carefully. Avoid using standard MDF, as it can swell with prolonged exposure to moisture. Instead, look for PVC panels, vinyl wallpapers, or faux stone panels specifically rated for use in damp environments like bathrooms or basements. Proper ventilation in the room is also key to ensuring your feature wall looks great for years to come.
What’s the most important step for making my project look professional instead of DIY? The finishing work makes all the difference. Taking the time to caulk every seam and nail hole is what creates that seamless, built-in appearance. After the caulk dries, a light sanding to smooth everything out, followed by a quality primer and two coats of paint, will give you a flawless result. Rushing these final steps is the quickest way to make your hard work look unfinished.
I love the idea, but I’m not sure I can do it myself. When should I definitely call a professional? You should call a professional if your project involves any electrical or plumbing work, like adding wall sconces or working around pipes. It’s also a good idea to hire an expert for very intricate designs that require advanced cutting skills or for installing heavy faux stone panels on a large or high wall. A professional ensures the job is done safely and with a perfect finish, which is a smart investment for more complex visions.