


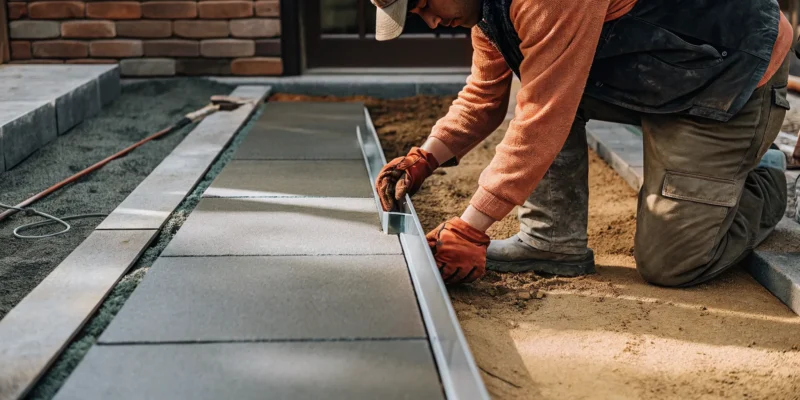
Living on Long Island means our outdoor spaces have to be tough. They need to stand up to salty air, summer humidity, and harsh freeze-thaw cycles. When you’re investing in a new patio or pool deck, you need a material that’s built to last through it all. That’s where limestone pavers truly shine. This dense, natural stone is uniquely suited to our climate, resisting weathering and providing a durable surface that won’t crack under pressure. Choosing the right material is about making a smart, long-term investment in your home. Let’s explore why a professional limestone paver installation Long Island is one of the most resilient and beautiful choices you can make for your property.
Key Takeaways
- Choose Limestone for Long Island Durability: This natural stone is dense enough to handle our coastal climate, from salty air to winter freezes, and it stays cooler for bare feet, making it perfect for patios and pool surrounds.
- A Quality Installation Is All About the Foundation: The long-term success of your pavers relies on expert site preparation, including a compacted base and proper drainage, which prevents common issues like sinking, shifting, and water damage.
- Budget for Installation and Future Upkeep: Plan for an initial cost between $18 and $35 per square foot, and remember to include long-term care, like resealing the stone every few years, to protect your investment and keep it looking beautiful.
Why Choose Limestone Pavers for Your Long Island Home?
When you’re planning a new patio, walkway, or pool surround, the material you choose is just as important as the design. Limestone pavers are a fantastic option for Long Island homeowners, offering a unique combination of strength, beauty, and practicality. This natural stone provides a classic look that complements a wide range of architectural styles, from coastal cottages to modern estates. Its inherent qualities make it well-suited to our local climate, ensuring your outdoor space remains beautiful and functional for years to come. Let’s look at why limestone might be the perfect fit for your next project.
Durability for the Long Island Climate
Limestone is a sedimentary rock, formed over millions of years under immense pressure. This natural process makes it an incredibly tough material that can easily handle the demands of a busy outdoor living area. It stands up well to heavy foot traffic, so you won’t have to worry about placing it in high-use spots like patios and walkways. More importantly for us on Long Island, certain types of high-density limestone are rated to withstand our freezing winter temperatures without cracking. When you select the right natural stone, you get a surface that is built to last through hot summers, snowy winters, and everything in between.
How Limestone Handles Salt Air, Humidity, and Freeze-Thaw Cycles
Living on Long Island means dealing with specific environmental challenges, including salty air, summer humidity, and harsh freeze-thaw cycles. Limestone is well-equipped to handle these conditions. Its dense structure helps it resist the corrosive effects of salt spray, a major benefit for homes near the coast. With proper installation that allows for drainage, it can manage the expansion and contraction that occurs during freezing and thawing. When installed and cared for correctly, a limestone patio can last for decades. Regular maintenance, including professional cleaning and sealing, will protect your investment and keep the stone looking its best.
Timeless Style and Design Flexibility
One of the biggest draws of limestone is its sophisticated and timeless appearance. It brings an understated elegance to any landscape, creating a luxurious feel that never goes out of style. Limestone pavers are available in a beautiful range of natural, earthy tones, including soft whites, creams, tans, and grays. The finishes can vary from smooth and honed to a more rustic, textured surface. This versatility allows you to create a look that perfectly matches your home’s aesthetic. Whether you’re designing a formal courtyard or a relaxed garden path, limestone provides a beautiful foundation for your masonry project.
Ideal Uses: Patios, Walkways, and Pool Decks
Limestone’s practical benefits make it a top choice for several outdoor applications. It’s an excellent material for patios and walkways, where its durability and classic beauty can be fully appreciated. It’s also one of the best options for pool decks. Unlike many other paving materials, limestone tends to stay cooler to the touch, so it’s more comfortable for bare feet on hot summer days. Its natural texture also provides good slip resistance when wet, which is a critical safety feature around swimming pools. From a quiet garden path to a bustling poolside patio, limestone offers a blend of safety, comfort, and style.
How to Select the Right Limestone Pavers
Picking the right limestone paver is about more than just choosing a color you like. It’s a decision that impacts the longevity, durability, and overall harmony of your outdoor space. To make a choice you’ll love for years, you need to consider a few key factors. From the stone’s thickness and origin to its final finish, each detail plays a role in creating the perfect patio, walkway, or pool deck. Thinking through these elements will help you find a paver that not only looks beautiful but also stands up to the demands of your lifestyle and the Long Island climate.
Choosing the Correct Thickness and Grade
The thickness of your limestone pavers is a critical detail that directly affects their performance and durability. For areas with heavy foot traffic like patios and walkways, a standard thickness is usually sufficient. However, for surfaces that need to support more weight, such as a driveway, thicker pavers are essential to prevent cracking and shifting. Thicker pavers often cost more, not just for the material itself but also because they require more intensive labor to install correctly. Our team can help you determine the appropriate grade and thickness for your specific project, ensuring your investment is both beautiful and built to last.
Understanding Stone Quality and Origin
Limestone is a natural stone, which means its quality can vary depending on where it was quarried. Stones from certain regions, like Indiana or Turkey, are often prized for their density and consistent color, but this premium quality can also come with a higher price tag. Unlike manufactured concrete pavers, every piece of limestone is unique, with its own subtle variations in texture and tone. This natural character is part of its appeal, but it also means the stone requires careful handling and expert preparation. When you select a natural stone, you’re choosing a one-of-a-kind material that requires professional craftsmanship to install properly.
Matching Colors and Finishes to Your Home
One of the best parts of designing with limestone is the wide array of colors and finishes available. You can find pavers in soft creams, elegant grays, and warm tans, with finishes ranging from smooth and honed to rustic and tumbled. These pavers add a classic, luxurious look to any space. Consider your home’s architectural style and exterior color palette when making your selection. You can even use limestone to create a seamless flow from your indoor living areas to your outdoor patio. A thoughtful landscape design will integrate your paver choice with the surrounding environment for a cohesive and polished look.
What Does Limestone Paver Installation Cost in Long Island?
Thinking about adding limestone pavers to your Long Island home is exciting, but I know the first question on your mind is probably about the cost. It’s smart to have a clear budget before you start dreaming up designs for your new patio or walkway. While every project is unique, we can break down the typical costs to give you a solid starting point for your planning. Understanding the numbers helps you make informed decisions and ensures there are no surprises down the road. Let’s get into what you can expect to invest in a beautiful, long-lasting limestone feature.
A Look at the Average Cost Per Square Foot
On Long Island, you can generally expect the cost of limestone paver installation to fall between $18 and $35 per square foot. This range is a helpful starting point because it typically covers the essentials: the limestone pavers themselves, preparing the ground, the labor for installation, and the final finishing touches. Think of it as an all-in price for a standard project. Of course, this is an average, and your specific project could land higher or lower on that scale. The type of natural stone you choose and the complexity of your design will play a big role in determining your final cost.
Factors That Influence the Final Price
That $18 to $35 per square foot range is a great baseline, but several factors can shift the final price. The size and complexity of your project are major drivers; a simple, square patio will cost less per square foot in labor than one with intricate curves and patterns. Your property’s current condition also matters. If your yard has a steep slope or requires extensive excavation, the site preparation will be more involved. One of the most critical factors is drainage. Proper drainage is essential to prevent water from pooling and causing issues like sinking or shifting pavers. Investing in a professional masonry team ensures this is handled correctly from the start.
How to Budget for Additional Costs
A successful project budget accounts for more than just the installation day. To keep your limestone pavers looking their best, you’ll need to plan for long-term maintenance. This includes resealing the stone every two to three years, which protects it from stains and weathering. This is a recurring cost, so it’s wise to factor it in from the beginning. You should also consider any necessary drainage solutions. If your property is prone to water issues, installing a proper drainage system is a vital investment to protect your pavers from water damage and structural problems. Gappsi offers expert restoration and sealing services to help maintain the beauty and integrity of your investment for years to come.
What to Expect During the Installation Process
Seeing your new limestone patio or walkway come to life is exciting, but it’s a detailed construction project that requires precision and expertise. Understanding the key stages of a professional installation helps you know what to expect and appreciate the craftsmanship that goes into creating a beautiful, long-lasting surface. A proper installation ensures your investment not only looks stunning on day one but also withstands the test of time and the Long Island climate. From the unseen foundation to the final protective seal, every step plays a vital role in the final outcome. Here’s a look at what our expert teams focus on during the installation process.
Preparing the Site and Compacting the Base
The success of your entire project rests on what’s underneath. One of the most common installation mistakes is poor base preparation. The base must support everything above it, so if it’s weak, even the strongest materials can fail. Our process begins with carefully excavating the area to the correct depth. We then build a foundation using layers of aggregate material. Each layer is thoroughly compacted to create a dense, stable base that won’t shift or settle over time. This meticulous approach to masonry and foundation work is what prevents pavers from sinking and creating uneven surfaces down the road.
Planning for Proper Drainage and Slope
Water is a paver installation’s biggest enemy if not managed correctly. Ignoring drainage can lead to water pooling beneath the pavers, which weakens the base and can cause sinking, sand washout, and algae growth. To prevent this, we engineer a slight, almost unnoticeable slope into the design. This grade directs rainwater and melting snow away from your home’s foundation and off the paver surface. Proper drainage is especially important for limestone, as standing water can lead to staining and deterioration. This careful planning protects the structural integrity of your patio and keeps it looking its best for years.
Laying the Pavers, Spacing Joints, and Setting Edges
Once the base is perfect, we begin laying the limestone pavers. This step is more than just placing stones side by side. We ensure there is a slight, consistent joint space between each paver. Placing them too tightly can cause chipping as the stones expand and contract with temperature changes. These joints are later filled with sand to lock the pavers in place. We also install durable edge restraints around the perimeter. These hidden borders are crucial because they provide lateral support and prevent the pavers from spreading or shifting outward over time, keeping your patio’s pattern intact.
Sealing and Applying Finishing Touches
The final steps are all about protection and polish. After the pavers are set, we sweep a special type of sand, called polymeric sand, into the joints. When activated with water, it hardens to lock the pavers together and prevent weed growth. Sealing is the last crucial step, as it protects the porous limestone from moisture, stains, and fading. We use a high-quality, breathable stone sealer that penetrates the surface without creating a slippery film. This protective layer makes cleaning easier and preserves the stone’s natural beauty. We recommend you reapply a sealer every few years to maintain this protection.
How to Maintain Your Limestone Pavers
Your beautiful new limestone pavers are an investment in your home’s comfort and value, and with the right care, they will look stunning for decades. Maintenance isn’t complicated, but it does require consistency. Think of it as simple housekeeping for your outdoor space. By staying on top of a few key tasks, you can prevent small issues from becoming big headaches and keep your patio, walkway, or pool deck looking as pristine as the day it was installed.
Proper care protects the stone from the specific challenges of the Long Island climate, from summer humidity to winter’s freeze-thaw cycles. It also ensures your outdoor living area is always ready for a family barbecue or a quiet morning with a cup of coffee. This guide walks you through the essential steps for cleaning, sealing, and protecting your limestone pavers.
Routine Cleaning and Spill Management Tips
Keeping your limestone pavers clean is the first step to long-term beauty. Regularly sweeping away leaves, dirt, and other debris prevents stains from setting in and discourages moss or weed growth between the stones. A quick sweep once a week is usually enough to keep things tidy. For a deeper clean, you can simply hose the area down with water.
If you notice tougher grime or spills, a little more effort might be needed. For most spots, a simple mixture of mild detergent and water is effective. Just be sure to rinse the area thoroughly afterward to remove any soap residue. Acting quickly on spills, especially from things like oil, wine, or acidic foods, is key to preventing permanent stains on the porous stone surface. A good guide to paver maintenance can offer additional tips for specific types of spills.
When and How to Reseal Your Pavers
Sealing your limestone pavers is one of the best things you can do to protect them. A quality sealer acts as a protective barrier, repelling water, resisting stains, and making routine cleaning much easier. While Gappsi applies an initial sealer upon installation, it will need to be reapplied over time to maintain its effectiveness. A good rule of thumb is to plan on resealing every three to four years.
How do you know when it’s time? A simple test is to sprinkle some water on the surface. If the water beads up, your sealer is still working. If it soaks into the stone, it’s time to reapply. The process involves thoroughly cleaning the pavers and applying a new coat of sealer, a service our team is happy to handle. Proper restoration and sealing not only protects your investment but also enhances the natural color and texture of the limestone.
Addressing Damage from Weather, Cracks, and Stains
Regularly inspecting your patio or walkway allows you to catch and address minor issues before they escalate. Look for any pavers that have shifted, developed cracks, or have stubborn stains. Weeds popping up in the joints are also a common issue that is best handled early. Promptly addressing these small problems is crucial for preventing larger, more expensive repairs down the road.
For minor shifts or a single cracked paver, a repair is often straightforward. Our masonry experts can easily replace a damaged stone or re-level a sunken area to restore the smooth, uniform surface of your installation. By staying vigilant, you can manage the effects of weather and heavy use, ensuring your limestone pavers remain a safe and beautiful feature of your home for years to come.
Avoiding Common and Costly Installation Mistakes
The best maintenance plan starts with a flawless installation. Many long-term paver problems, like sinking, shifting, and poor drainage, stem from mistakes made during the initial setup. One of the most critical steps is preparing a solid base. Without proper site excavation and a well-compacted foundation, the ground beneath will settle unevenly, causing the pavers above to become unstable.
This is why choosing an experienced contractor is so important. A professional installer understands that a strong, compacted base is essential for a lasting outdoor surface. At Gappsi, we take pride in our meticulous installation process, ensuring every layer is perfectly prepared before a single stone is laid. Investing in expert natural stone installation from the start is the most effective way to avoid future headaches and protect the value of your home improvement project.
How to Find a Limestone Paver Contractor in Long Island
Finding the right contractor is just as important as picking the perfect stone for your home. You want to partner with a team that not only has the technical skill for a flawless installation but also understands the specific needs of Long Island properties. Taking the time to vet your options will ensure your project runs smoothly and results in a beautiful, long-lasting outdoor space.
Verifying Licenses, Insurance, and Local Experience
Before you get too far in a conversation, always confirm that a contractor is licensed and insured. This is your first line of defense. A license shows they meet local and state requirements, while insurance protects you from liability if an accident happens on your property. Don’t be shy about asking for proof; any true professional will have this information ready for you. Local experience is also key. A contractor familiar with Long Island’s soil, weather, and building codes will be better equipped to create a limestone patio or walkway that lasts. They’ll understand the specific challenges of our climate, from humid summers to freeze-thaw cycles, ensuring your investment is built to endure. Experienced masonry professionals will have a portfolio showcasing their work right here in Nassau or Suffolk County.
Key Questions to Ask Before Signing a Contract
Once you’ve confirmed the basics, it’s time to dig a little deeper to find the perfect fit for your project. Think of this as a friendly interview where you’re in the driver’s seat. Having a few key questions prepared will help you compare contractors and feel confident in your final decision.
Here are a few essential questions to ask:
- Can you provide a portfolio of your recent limestone paver installations?
- Who will be the project manager, and will they be on-site?
- What is the estimated timeline from start to finish?
- How do you handle unexpected issues or weather delays?
- What kind of warranty do you offer on materials and labor?
Their answers will give you a clear picture of their experience, process, and commitment to customer satisfaction.
Why Partner with Gappsi for Your Natural Stone Installation
Choosing a contractor is about finding a partner you can trust to bring your vision to life. With Gappsi, you get a team that has been transforming Long Island homes since 1987. Our expertise isn’t just in laying pavers; it’s in designing and constructing complete outdoor living spaces. We handle every step of the process in-house, from the initial design consultation to the final sealing of your beautiful new limestone surface. This comprehensive approach ensures a seamless experience and a cohesive final look. We pride ourselves on our meticulous craftsmanship and our deep understanding of high-quality natural stone. When you work with us, you can feel confident that your project is in the hands of dedicated experts who are committed to exceeding your expectations.
Related Articles
- Best Pool Deck Stone by a Long Island Patio Contractor
- Limestone Patio & Pool Pavers Guide for Long Island
- Limestone Patio Pavers and Pool Copings in Long Island
- Natural Stone Pavers Long Island Outdoor Living
- Limestone pavers in Long Island Archives – Gappsi Group
Frequently Asked Questions
Is limestone slippery when it gets wet, especially around a pool? This is a great question, and a really important one for safety. Limestone has a natural texture that provides a good amount of grip, making it a solid choice for pool decks. To increase slip resistance, you can choose a finish that is more textured, like a tumbled or brushed finish, instead of one that is perfectly smooth. Proper sealing also helps without creating a slick surface, ensuring your pool area is both beautiful and safe for bare feet.
How does limestone compare to a popular material like porcelain? Both are excellent choices, but they offer different benefits. Limestone is a natural stone, so every single paver is unique with subtle variations in color and pattern, giving your patio an organic, one-of-a-kind character. Porcelain, on the other hand, is a manufactured material known for its perfect uniformity and non-porous surface. The decision often comes down to aesthetics: do you prefer the timeless, natural elegance of stone or the clean, consistent look of porcelain?
Will limestone pavers get too hot to walk on in the summer sun? One of the best features of limestone, especially for a pool deck or patio, is its ability to stay more comfortable in the heat compared to many other materials like concrete or dark-colored stones. Lighter shades of limestone, such as creams and tans, do a great job of reflecting sunlight instead of absorbing it. While any surface will get warm in direct sun, limestone is known for being much more pleasant for bare feet on a hot July afternoon.
Can I use limestone pavers for my driveway? Yes, you can, but it requires a specific approach. A driveway installation needs to handle the weight and stress of vehicles, so you can’t use the same pavers you would for a walkway. You would need to select thicker, high-density limestone pavers and install them over a specially reinforced base. It’s a more complex and costly process than a patio, but with the right materials and expert installation, a limestone driveway can be incredibly durable and beautiful.
How do I know when it’s really time to reseal my pavers? The general guideline is every three to four years, but a simple water test is your best indicator. Sprinkle a little water on the surface of your pavers. If the water beads up into droplets, your sealer is still doing its job. If the water darkens the stone and soaks in right away, it’s time to reseal. Staying on top of sealing is the best way to protect your limestone from stains and weather, keeping it looking great for years.