


.
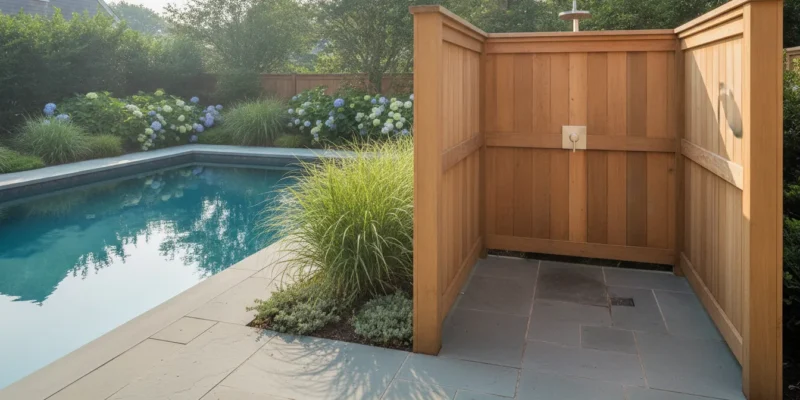
After a swim or a beach day, wet feet are only part of the mess that can move through a home. Sand, sunscreen, chlorine, and grass clippings can reach indoor floors and bathrooms when there is no convenient place to rinse outside. An outdoor shower can solve that problem while making the pool, patio, and landscape work together as one usable backyard.
Contact Gappsi through our contact page
An outdoor shower gives swimmers a dedicated place to rinse before and after using the pool. It can keep sand and residue outside while making it easier for guests to move between the pool and the rest of the property. The design should account for privacy, water temperature, durable finishes, drainage, winter protection, and utility access.
What Makes an Outdoor Shower Useful for a Long Island Backyard?
An outdoor shower is useful because it gives swimmers a convenient place to rinse before entering the pool and wash away chlorine, sand, sunscreen, and soil afterward. That keeps wet traffic out of the home, supports cleaner pool routines, and makes the pool, patio, and landscape easier to use together. The CDC explains why showering before swimming helps reduce contaminants introduced into a pool.
Convenience is the practical benefit homeowners notice first. Children and guests do not need to track water across a hallway to reach an indoor bathroom. A rinse station near the pool also gives people a place to wash sandy feet after a trip to the shore. If the shower is near a landscaped path, it can serve pool users without interrupting the main entertaining area.
Placement and construction determine whether the feature remains pleasant to use. A shower that empties against a foundation can create a maintenance problem. A shower with no privacy plan may be avoided even when it is close to the pool. A shower that uses slippery materials or poorly protected plumbing can become difficult to use as the seasons change.
For that reason, Gappsi approaches the shower as part of the outdoor living plan. The surrounding pool deck, patio, planting, masonry, and path should guide the location and finish. The goal is a clear route from the water to the rinse area, a controlled route for wastewater, and a design that fits the property.
Contact Gappsi through our contact page
How Should You Choose the Location and Privacy Design?
Choose an outdoor shower location that is close to the pool but screened from the house, neighboring properties, and the main entertaining space. Walk the route before selecting the enclosure. Check views from windows, side yards, gates, driveways, and seating areas, then plan a safe, well-drained approach with room for service access and towels.
- Poolside placement: keeps the rinse station convenient and limits wet traffic through the home.
- Side-yard placement: can provide natural screening when the property line and access path allow it.
- Near-house placement: may shorten hot and cold water runs, but it requires careful attention to the wall, foundation, and roof drainage.
- Beach-facing or garden placement: works for properties that need a broader rinse area for sand, outdoor gear, or muddy feet.
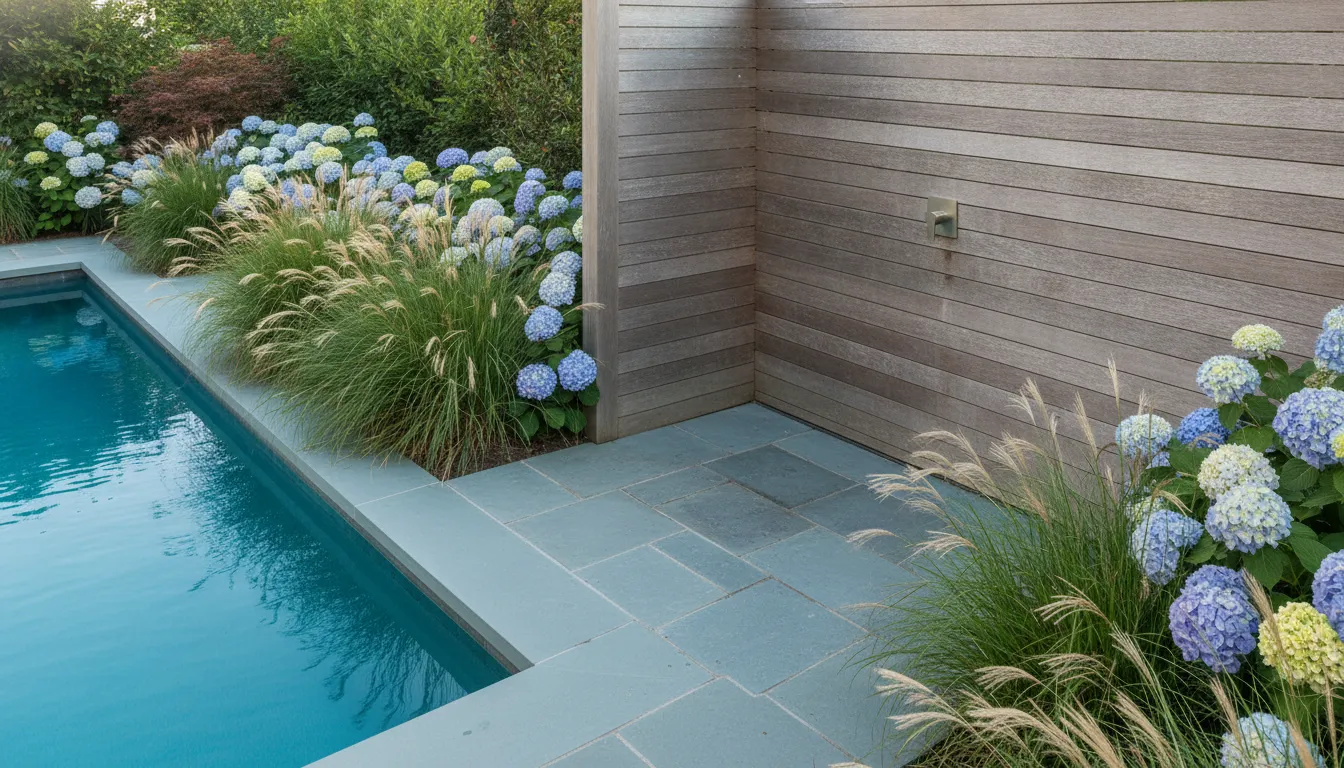
Privacy can come from a masonry wall, a framed screen, a fence panel, layered planting, or a combination of elements. A solid enclosure provides the most immediate screening, while plants soften the view and connect the shower to the landscape. The enclosure should still allow air movement and enough room to inspect fixtures, clean joints, and service the plumbing.
Think about the floor area as well as the shower head. A narrow standing zone may be adequate for one person, but families may need space for towels, a hand shower, hooks, and a small bench. A textured walking surface improves footing when wet. The shower door or opening should direct users toward the pool or path, not through a planting bed or onto a slippery transition.
An experienced landscape design and construction team can coordinate privacy planting, grading, paths, and the shower enclosure. That coordination helps prevent a common mistake: installing the fixture first and then discovering that the finished space has no comfortable approach or useful screening.
Which Plumbing and Drainage Details Need Attention?
Outdoor shower plumbing should be planned around the water source, supply-line route, pressure, shutoffs, temperature control, and drainage path. Existing utilities, pool equipment, grades, soil, and finished hardscape determine the work required. The design must keep discharge away from foundations, planting beds, paths, and neighboring properties while leaving access for service.
A cold-water line may be enough for a quick summer rinse. Hot and cold supply lines create a more comfortable experience for longer use, children, guests, and cooler mornings. A mixing valve should be accessible and protected from weather. The location of the home, pool equipment, utility routes, and proposed hardscape all affect the cost and complexity of the connection.
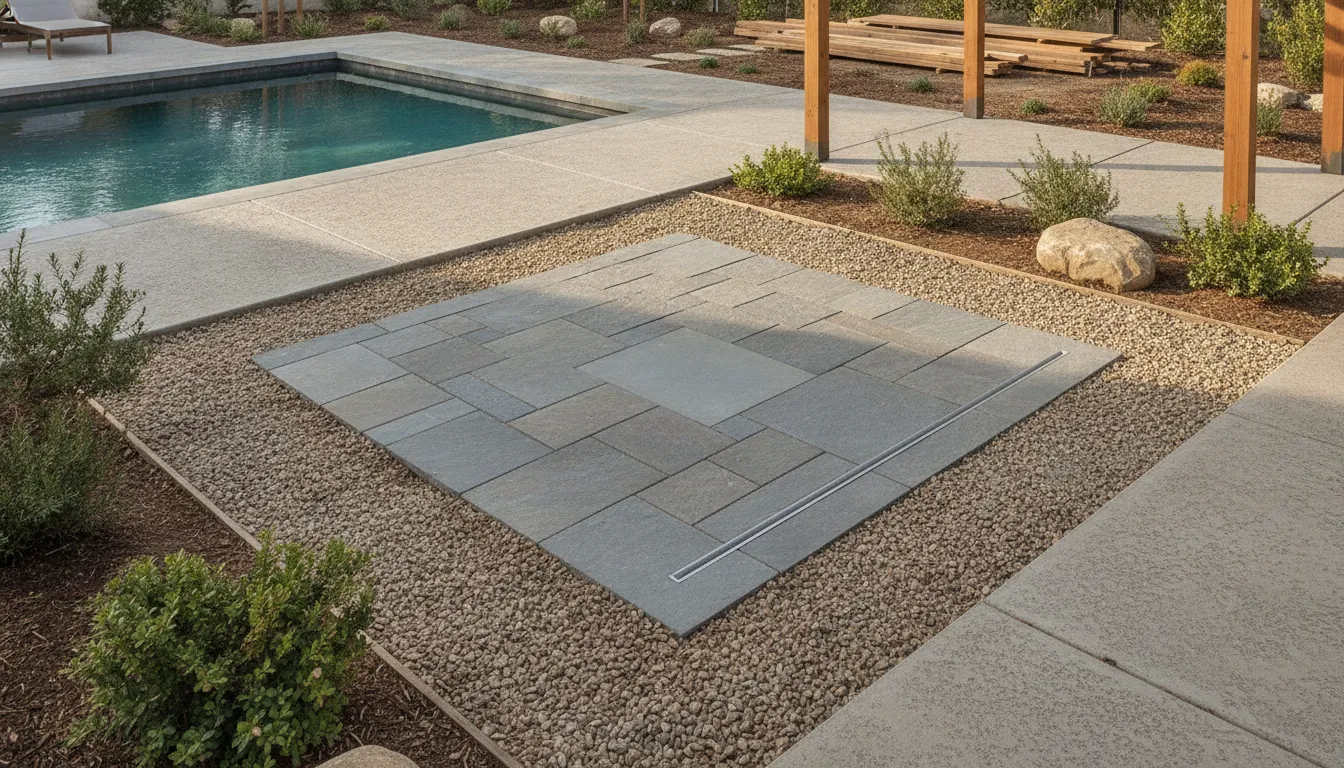
Drainage deserves the same attention as water supply. The shower should not discharge against a foundation, erode a planting bed, leave standing water on a path, or send concentrated flow toward a neighboring property. Depending on site conditions, the design may use a properly graded surface, a linear drain, a dry well, or another approved drainage approach. Local requirements and site-specific conditions should be confirmed before construction.
Surface runoff and shower discharge are not interchangeable. The EPA stormwater guidance explains why managed discharges matter. The installation plan should account for soil, slope, nearby structures, local regulations, and the amount of water the fixture will produce.
Protect the utility route during the rest of the backyard project. New pavers, pool coping, planting beds, lighting, and irrigation can make later repairs harder if the layout is not documented. A coordinated plan identifies shutoffs and service access before surfaces are installed.
At the shower itself, use a drain cover that can be inspected and cleared. Keep leaves, soil, and mulch away from the drain. If the area has a bench or privacy wall, slope the finished surfaces so water does not collect behind those elements. These small details make routine cleaning easier and help reveal leaks early.
What Materials Work Well for an Outdoor Shower?
Natural stone, exterior-rated porcelain tile, masonry, and carefully detailed screens can work well for an outdoor shower. Choose materials for wet traction, moisture exposure, cleaning, drainage, and visual connection to the pool deck or patio. The floor, walls, hardware, and transitions should be evaluated as one system before ordering materials.
| Material or element | Planning considerations |
|---|---|
| Natural stone | Can connect the shower to a stone patio or pool surround. Select a textured finish and plan for cleaning and sealing. |
| Porcelain tile | Offers many colors and patterns. Confirm that the selected product is suitable for wet exterior use and provides appropriate traction. |
| Masonry walls | Create a durable privacy element that can coordinate with other site walls. Include access for fixtures and drainage inspection. |
| Composite or treated screens | Can provide privacy with a lighter visual profile. Detail the base so it does not trap soil or remain in standing water. |
| Stainless or corrosion-resistant hardware | Helps fixtures withstand outdoor moisture and pool chemicals. Hardware still needs cleaning and seasonal inspection. |
Slip resistance matters more than a surface that looks smooth in a showroom. Water, soap, sunscreen, and leaves can all reduce traction. Edges should be finished cleanly, and transitions between the shower floor, deck, and path should not create a raised trip point.
Stone and porcelain can also tie the shower to a larger patio project. Gappsi’s porcelain and natural stone work can help homeowners evaluate materials in relation to the pool deck, paths, walls, and outdoor kitchen. The objective is a consistent material story, not a shower that looks unrelated to the rest of the property.
Maintenance should be part of the material decision. Ask how each surface should be cleaned, whether it needs sealing, how joints will be maintained, and what happens if a fixture must be replaced. Gappsi’s stone cleaning and sealing service is relevant when the shower uses materials that require periodic care. Homeowners comparing finishes can also review light ivory travertine pavers as a reference for color, texture, and poolside coordination.
How Much Does Outdoor Shower Installation Cost on Long Island?
Outdoor shower installation cost on Long Island depends on utility distance, water temperature, drainage, privacy construction, finish materials, and related pool or landscape work. A cold-water fixture may require less construction than a masonry enclosure with hot and cold plumbing, custom drainage, tile, lighting, and hardscape restoration. A site review is needed for a responsible estimate.
Important cost factors include:
- Distance to utilities: longer supply and drain routes may require more excavation and surface restoration.
- Water temperature: hot and cold connections add planning, components, and installation work.
- Drainage: grading, trenching, a drain body, or a dry well can change the site scope.
- Privacy construction: a masonry wall, fence screen, or planting plan each has different labor and material needs.
- Finish materials: stone, porcelain, concrete, and composite elements vary in cost and maintenance requirements.
- Related improvements: a path, patio, pool deck, bench, lighting, or landscape work may be installed at the same time.
Because these variables are site-specific, a responsible estimate should follow a review of the property rather than a generic online price. The review should identify the proposed location, utility access, drainage route, surface materials, privacy approach, and any work that must be coordinated with the pool or landscape.
A kit can appear less expensive because it may include only the visible fixture. It may not include excavation, a safe floor, a drain, screening, utility connections, winterization, or repairs to surrounding surfaces. A coordinated installation evaluates those parts together and makes the final scope easier to understand.
For a related hardscape plan, Gappsi can also review the surrounding Long Island masonry design. That is useful when the shower will be built into a wall, patio, pool surround, or larger outdoor entertaining area. Homeowners can use the Contact Gappsi through our contact page to organize a site-specific conversation about access, drainage, and finishes.
Contact Gappsi through our contact page
What Does the Installation Process Include?
Outdoor shower installation typically includes a property review, use and layout decisions, water and drainage planning, coordinated excavation, enclosure and finish construction, and final testing. The sequence varies by site, but planning the shower before paving, planting, or pool work is complete helps prevent demolition and rework. The finished plan should also identify shutoffs, service access, and transitions to nearby surfaces.
A typical process includes:
- Review the property: identify the pool, home, property lines, utilities, grades, privacy views, and access routes.
- Define the use: decide whether the shower is for a quick pool rinse, beach cleanup, extended outdoor use, or several purposes.
- Develop the layout: set the shower, enclosure, floor, hooks, bench, path, fixture controls, and service access.
- Plan water and drainage: determine cold or hot and cold supply, shutoffs, slope, drain type, and discharge location.
- Coordinate construction: complete excavation and utility work before installing finished masonry, tile, stone, planting, or paving.
- Test and finish: check temperature, pressure, drainage, transitions, privacy, and access before the area is put into regular use.
Timing is easier to manage when the shower is included in a broader pool or patio plan before surfaces are finalized. Retrofitting plumbing through completed hardscape can add demolition and restoration. Planning the shower at the same time as a custom swimming pool project can help align the rinse area with the deck, equipment, and circulation pattern.
How Do You Protect an Outdoor Shower Through the Seasons?
Protect an outdoor shower on Long Island by planning winter shutoffs and drainage, then checking the floor, drain, fixtures, seals, and privacy elements through the swimming season. Exposed lines should be handled according to the system design, and leaves, soil, mulch, and standing water should be kept away from the shower base. Ask the installer to explain the seasonal steps for the selected plumbing arrangement.
During the swimming season, rinse the floor and walls regularly to remove sunscreen, soap, leaves, and soil. Keep the drain clear and check the base of privacy screens for damp debris. At the beginning and end of the season, operate the controls and look for slow drips, loose connections, cracked seals, and changes in pressure.
- Keep leaves and mulch away from the drain and fixture base.
- Use the manufacturer’s recommended cleaner for tile, stone, and hardware.
- Inspect caulk and grout where water can collect.
- Confirm that the surrounding soil and planting have not shifted toward the shower.
- Store removable accessories before severe weather.
Seasonal inspection is also a chance to evaluate how the area is being used. If towels are always left on a wall, add hooks. If the route becomes muddy, improve the path. If users avoid the shower because the enclosure feels exposed, add screening. A practical design can be adjusted as the household’s routine becomes clear. If the shower is part of a broader surface-care plan, Gappsi’s paver sealing guidance offers another maintenance reference for hardscape around the rinse area.
Frequently Asked Questions
These answers cover common outdoor shower planning questions. Local requirements and site conditions can change the final design, so confirm project-specific details during a property review.
Do I need a permit for an outdoor shower?
Permit and approval requirements depend on the municipality, plumbing scope, drainage approach, and relationship to other work. Before construction, confirm the requirements for the property and proposed installation. A site review can identify questions that should be addressed before materials are ordered.
How do you drain an outdoor shower?
The shower needs a controlled drainage plan based on the surface, slope, soil, nearby structures, and local requirements. Options may include a graded surface, a linear drain, a dry well, or another approved approach. Water should not be directed against a foundation or allowed to erode a planting bed.
Do outdoor showers need hot water?
No. A cold-water shower can suit quick summer rinses. Hot and cold water can make the feature more comfortable for longer rinses, children, guests, and shoulder-season use. The choice depends on use, utility access, and project scope.
Can an outdoor shower be installed on a deck?
It can be possible, but the deck must be evaluated for structure, water management, surface durability, privacy, and plumbing access. The design should prevent uncontrolled water from collecting below the deck or damaging adjacent materials.
Where should an outdoor shower be placed near a pool?
Choose a location with a short, safe route from the pool, practical privacy, durable footing, service access, and controlled drainage. The best position is not always the closest point to the water because sightlines, utilities, grading, and the rest of the backyard layout also matter.
Plan Your Outdoor Shower with Gappsi
Gappsi helps Long Island homeowners plan outdoor living projects around the way the property will be used. An outdoor shower works best when the fixture, enclosure, floor, plumbing, drainage, and surrounding landscape are considered together. A site-specific discussion can clarify the right location, finish, utility approach, and construction sequence for your property. Gappsi’s design and construction experience includes masonry, pool areas, landscape construction, and hardscape materials, giving homeowners one coordinated conversation for the surrounding work.