


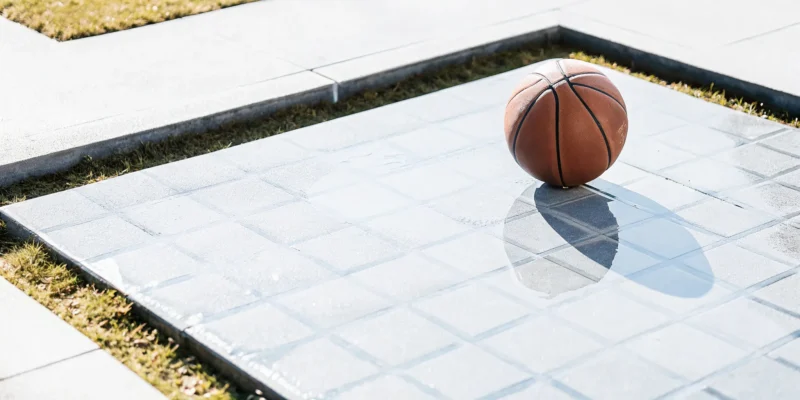
You’ve picked out the perfect court tiles and are ready to transform your backyard. Looking at your lawn, you might be tempted to skip the heavy prep work and lay the basketball court tiles over grass. I get it; it feels like a clever shortcut. However, this method will quickly turn your dream court into a lumpy, unstable surface that’s no fun to play on. The ground will shift, water will get trapped, and the ball bounce will be completely unpredictable. A little extra effort in building a proper sub-base is the key to a durable, high-performance court.
Key Takeaways
- Start with a Strong Base, Not Grass: Placing tiles directly on your lawn creates an unstable, unsafe court and leads to moisture damage. For a court that performs correctly and lasts for years, you must build on a solid foundation like concrete or compacted gravel.
- Proper Groundwork is Crucial for Success: The most important part of your court installation is preparing the ground underneath. This involves clearing the area of all grass and topsoil, compacting the earth, and grading the surface with a slight slope to allow water to drain away.
- Select the Right Tiles for Outdoor Play: Always choose outdoor-rated, interlocking tiles made from impact-resistant plastic. A perforated surface is essential for quick drainage and a safe playing area, while routine cleaning with a leaf blower or hose will keep the court in great condition.
Why Installing Court Tiles on Grass Doesn’t Work
Placing interlocking court tiles directly over your lawn might seem like a quick and easy way to build a backyard basketball court. I get the appeal, it feels like a simple weekend project. Unfortunately, this shortcut often leads to a frustrating playing experience and a damaged yard. For a court that performs well and lasts for years, what’s underneath the tiles is just as important as the tiles themselves. Starting with a proper foundation is the only way to guarantee a safe, fun, and durable court for your family.
An Unstable Playing Surface
Think about trying to play on a surface that’s constantly shifting. That’s exactly what happens when you lay court tiles on grass. Your lawn is soft and uneven, providing a poor base that can’t properly support the interlocking tile system. When it rains, the ground becomes even softer, causing tiles to sink and separate. This creates a wobbly, unstable surface that’s not just bad for the game, it’s a serious tripping hazard. A quality court needs a solid, unmoving foundation to ensure every game is safe and enjoyable.
Inconsistent Ball Bounce
A great game of basketball depends on a predictable ball bounce. When you place tiles over grass, the natural bumps and soft spots in the lawn create air pockets under the court. These gaps act like cushions, absorbing the ball’s energy and creating “dead spots” where it just won’t bounce right. Instead of a crisp, true dribble, you get an inconsistent and frustrating response. To get that satisfying bounce you expect from a real court, the tiles need to rest on a hard, flat surface that reflects energy, which is why professional sports games courts are built on a solid base.
Moisture, Mold, and Rot
Covering your lawn with solid court tiles blocks the sunlight and airflow that grass needs to survive. The grass underneath will quickly die, and the trapped moisture will turn the area into a muddy, smelly mess. This damp environment is the perfect breeding ground for mold and mildew, which can grow on the underside of your tiles and create an unhealthy playing space. Proper landscape design always accounts for drainage, and your game court should be no different. Without a way for water to escape, you’re essentially creating a shallow bog in your backyard.
What Makes a Good Sub-Base?
So, if you can’t just lay tiles on your lawn, what’s the right way to do it? The answer lies in building a proper sub-base. Think of the sub-base as the hidden hero of your sports games court. It’s the foundation that sits beneath the tiles, providing the stability and support needed for a safe, even playing surface. Without a good sub-base, you’ll face the same issues as you would with grass: sinking tiles, poor drainage, and an inconsistent ball bounce. A well-built sub-base is the difference between a court that lasts a couple of seasons and one that your family can enjoy for decades.
Creating a solid foundation is the most critical part of any sports games courts installation. It ensures that your investment is protected from shifting ground, water damage, and the effects of Long Island’s freeze and thaw cycles. The process involves three key stages: clearing and excavating the area, stabilizing the soil, and grading it for perfect drainage. Getting these steps right guarantees your court will perform beautifully and stand the test of time, giving you a reliable surface for every game.
Proper Excavation and Clearing
The first step is to create a clean slate. This means excavating the designated area, removing all the grass, topsoil, roots, and large rocks. Grass is simply not a firm enough surface for court tiles. It holds moisture, and as research points out, rain can make it soft and cause tiles to sink. By digging down to the firm, undisturbed subsoil, you create a solid starting point. The depth of excavation depends on your local soil conditions, but the goal is always the same: to get rid of any organic material that can decompose and shift over time, compromising the stability of your court.
Using Geosynthetic Fabric
Once the area is cleared and the soil is compacted, the next step is to lay down a special material called geosynthetic fabric. This might sound technical, but it’s essentially a heavy-duty fabric that acts as a barrier between the soil below and the gravel or concrete base you’ll add on top. This fabric is a game-changer for stability. It reinforces the ground and prevents the layers from mixing, which stops your base material from sinking into the soil over time. It’s a simple addition that dramatically improves the longevity and durability of your entire court structure.
Grading for Proper Drainage
Water is the biggest enemy of any outdoor construction project, and your sports games court is no exception. That’s why proper grading is so important. After excavating, the ground needs to be carefully sloped to ensure water runs off the court instead of pooling on top of it. A gentle slope of about 1%, which is barely noticeable to the eye, is all it takes to direct rainwater away from the playing surface. This simple step prevents puddles, protects the sub-base from water damage, and reduces the risk of ice patches forming in the winter. Proper landscape drainage is key to keeping your court safe and playable year-round.
Concrete: The Top Choice for a Lasting Court
When you’re investing in a home basketball court, you want it to last for years and play like a dream. While other options exist, a concrete base is the undisputed champion for creating a durable, high-performance playing surface. It provides the solid, stable foundation that interlocking court tiles need to perform their best. Think of it as the bedrock of your future family fun and friendly competition. A professionally installed concrete slab ensures your court won’t just look good on day one, but will withstand countless games, harsh weather, and the test of time. It’s the ultimate way to guarantee a consistent, reliable court for your home.
Concrete Thickness and Slope
For a home basketball court, the standard is a 4-inch thick concrete slab. This thickness provides the necessary strength and stability to support the court tiles and intense activity. To prevent cracking over time, the concrete should also be reinforced with rebar or wire mesh. Another critical detail is the slope. Your concrete base needs a very slight grade, typically around 1%, to allow water to run off. This prevents puddles from forming on the court, which keeps the surface safe and extends its life. Proper masonry work is key to getting these details right, ensuring your court has a solid and correctly prepared foundation from the start.
Why Concrete is a Superior Choice
Concrete is the superior choice because it delivers on three essential fronts: stability, performance, and longevity. The perfectly flat, unyielding surface prevents court tiles from shifting, separating, or creating uneven spots. This stability directly translates to better performance, giving you the most consistent and authentic ball bounce possible. A concrete base makes your home court feel much closer to a professional one. While the initial investment is higher than gravel, a concrete slab is a permanent solution that will last for decades, making it a core part of your home’s sports games courts and landscape. It’s the most reliable way to protect your investment in court tiles and ensure a top-tier playing experience.
Compacted Gravel: A Smart, Affordable Option
If a concrete slab isn’t in the cards for your backyard court project, don’t worry. Compacted gravel is an excellent and more affordable alternative for creating a solid foundation. While concrete is the premium choice for longevity, a properly installed gravel base provides the stability and level surface your basketball court tiles need to perform correctly. It’s a practical solution that can save you money without compromising the quality of your game.
Choosing gravel is a smart move when you want a reliable playing surface but need to work within a specific budget or have site limitations that make a concrete pour difficult. When done right, a compacted gravel base offers great drainage and a firm footing for your court tiles, ensuring a consistent ball bounce and a durable setup. This approach allows you to create fantastic sports games courts that your family can enjoy for years, proving you don’t always need concrete to build something great. It’s all about smart preparation and using the right techniques to build a base that lasts.
How to Layer and Compact Gravel
Creating a solid gravel base is a methodical process. First, you need to clear the designated area of all grass, roots, and topsoil. Once the ground is exposed, you’ll want to compact the soil and ensure it’s either perfectly level or has a very slight slope to help with water drainage. After the ground is prepped, you’ll add a layer of fine gravel or stone dust. This layer needs to be spread evenly and then compacted tightly with a machine to create a dense, stable foundation. For an even better result, you can place a special fabric over the compacted gravel before laying your tiles. This adds stability and improves drainage, keeping your court in great shape.
When to Choose Gravel Over Concrete
Opting for a gravel base over concrete often comes down to budget and practicality. If pouring a concrete slab isn’t feasible for your project, a well-built gravel base is the next best thing. It provides the firm, interlocking foundation required for basketball court tiles to function properly, preventing them from shifting or creating an uneven playing surface. This makes gravel an ideal choice for homeowners who want to achieve a professional-feeling court without the higher expense and longer installation time associated with concrete. Think of it as a strategic and cost-effective way to get the backyard court you’ve been dreaming of.
Are There Other Sub-Base Options?
While concrete and compacted gravel are the gold standards for a new court foundation, you might be wondering about other surfaces. The most important factor for any sub-base is that it must be a solid, stable, and flat surface to support your court tiles properly. If your property already has an area with hard-packed dirt or an asphalt surface, you may have a head start on your project.
Exploring these alternatives can sometimes save on initial installation costs, but it’s critical to understand their limitations. The quality of your foundation directly impacts the safety, performance, and lifespan of your home sports games courts. An unstable base can lead to shifting tiles, uneven playing surfaces, and poor ball bounce, which is why a professional assessment of your existing ground is always a good idea. Let’s look at two common alternatives to a fresh concrete or gravel base.
Hard-Packed Dirt
You might have a section of your yard where the ground is already extremely compacted, like a well-trodden courtyard. Some sources suggest that hard-packed dirt can be a viable alternative for a sub-base. However, this option comes with significant trade-offs. For this to work, the dirt must be perfectly level and uniformly compacted to a very high density. Even then, it remains more vulnerable to moisture, erosion, and shifting from freeze-thaw cycles compared to concrete or gravel. While it might seem like a cost-effective shortcut, it often lacks the long-term stability needed for a high-performance court, and you may find yourself needing to make repairs sooner rather than later.
Asphalt or Blacktop
If you have an existing asphalt driveway or another blacktop surface, you’re in a great position. A blacktop driveway is an excellent choice for a sub-base because it provides the solid, stable foundation that court tiles require. As long as the asphalt is in good condition, free of major cracks, and properly graded for drainage, you can often install tiles directly on top. This can save you considerable time and money on excavation and base preparation. Before moving forward, it’s wise to have the surface inspected. Any existing issues should be addressed to ensure your new court performs beautifully for years to come, a process that might involve professional restoration and sealing.
What Features Should You Look for in Basketball Court Tiles?
Once your sub-base is solid, the next step is choosing the right tiles. The quality of your court surface determines everything from ball bounce to player safety. Not all tiles are the same, so knowing what features to look for will help you build a court that performs well and lasts for years.
Easy Interlocking Design
Most modern court tiles feature an interlocking design, meaning they snap together easily like puzzle pieces. This makes the installation process straightforward and ensures a secure, uniform surface. This design is also a major advantage for maintenance. If a single tile ever gets damaged, you can simply pop it out and replace it without having to redo the entire court. It’s a simple feature that saves a lot of time and hassle down the road, keeping your court in top shape with minimal effort.
Surfaces Designed for Drainage
For any outdoor court in Long Island, proper drainage is non-negotiable. Look for tiles with a perforated or grid-like surface. These small openings allow water from rain or melting snow to drain straight through the tile and away from the playing area. This prevents puddles from forming, reduces the risk of slips, and helps the court dry quickly. Good drainage also protects the sub-base from moisture damage, ensuring the longevity of your entire sports games courts investment.
Durable, Impact-Resistant Materials
A basketball court takes a lot of abuse, so the tiles need to be tough. The best tiles are made from a high-impact polypropylene copolymer. This material is a durable, rigid plastic engineered to withstand constant activity, from repetitive ball bouncing to aggressive footwork. It’s also formulated with UV stabilizers to prevent the colors from fading under the sun and to resist cracking in cold weather. Choosing tiles made from this robust material ensures your court can handle intense play and harsh weather for years to come.
Tiles Rated for Outdoor Use
It’s crucial to select tiles specifically rated for outdoor installation. Unlike indoor tiles, which have a solid surface, outdoor tiles are designed to handle the elements. Their perforated design is essential for managing rain and preventing slips. Furthermore, these tiles are built to endure temperature swings without warping or becoming brittle. When you choose materials specifically made for the outdoors, like quality porcelain and natural stone for patios, you are investing in durability. The same principle applies to your game court tiles.
Avoid These Common Installation Mistakes
Building your own backyard basketball court is an exciting project, but a few common missteps can turn your dream court into a frustrating, uneven playing surface. Even with the best tiles, the success of your court depends entirely on what’s underneath it. Taking shortcuts during installation often leads to problems that are difficult and expensive to fix later. By understanding these potential pitfalls, you can ensure your court is built to last, providing a safe and enjoyable space for years of play. Let’s walk through the most frequent mistakes homeowners make and how you can steer clear of them.
Skipping Site Prep
It can be tempting to lay court tiles directly over your lawn to save time and effort, but this is a critical error. Grass simply doesn’t provide the firm, stable base required for a quality playing surface. The ground beneath the grass is often soft and uneven, which means the ball won’t bounce consistently. Over time, the grass trapped under the tiles will die and rot, creating a messy, smelly situation and causing the court to become even more unstable. Proper site preparation is the most important step in building a durable and functional court.
Building on Uneven Ground
Even if you clear the grass, building on unprepared, uneven ground is a recipe for a bad game. Soft soil, especially after it rains, can cause tiles to sink and shift, creating a lumpy surface and potential tripping hazards. Bumps in the underlying dirt can also create air pockets beneath the tiles. These pockets lead to “dead spots” where the basketball won’t bounce correctly, interrupting gameplay and causing frustration. A perfectly flat, compacted base is essential for the consistent performance you expect from high-quality sports games courts.
Forgetting Expansion Gaps
Outdoor court tiles are exposed to changing temperatures, which cause them to expand in the heat and contract in the cold. If you install the tiles flush against a wall, fence, or other fixed object, this natural movement has nowhere to go. The pressure can cause the tiles to buckle, warp, or pop out of place, ruining your court’s surface. To prevent this, always leave a small gap, typically about a half-inch to an inch, between the edge of the court and any surrounding structures. This simple step gives the material room to breathe and ensures your court remains flat and stable through every season.
Keep Your Court in Great Condition
A high-quality home basketball court is an investment in fun and family time. To make sure it lasts for years, a little routine maintenance goes a long way. Fortunately, the interlocking tile systems used for modern sports games courts are designed to be incredibly durable and easy to care for. By following a few simple steps, you can keep your court in top shape, ensuring a safe and consistent playing surface season after season.
Regular Cleaning
The perforated design of basketball court tiles is a game-changer for maintenance. Unlike solid surfaces that can puddle, these tiles allow water and small debris to pass right through, making cleanup a breeze. For everyday tidying, a leaf blower is your best friend for quickly clearing away leaves, twigs, and dust. For a deeper clean, you can simply rinse the entire surface with a garden hose. This simple routine prevents grime from building up and keeps your court looking vibrant and ready for action. It’s a low-effort way to protect your investment and maintain a pristine playing area.
Handling Snow and Ice
Living in Long Island means dealing with winter weather, but your basketball court can handle it. The same perforations that allow for great drainage also help manage melting snow and ice. When snow does accumulate, it’s best to use a plastic shovel to avoid scratching the tiles. If you use a snow blower, make sure it has plastic shoes or that you set the auger high enough so it doesn’t contact the court surface. We recommend avoiding salt and chemical de-icers, as they can be abrasive and potentially damage the tiles over time. A little care during the winter will ensure your court is ready for the first thaw.
Replacing Damaged Tiles
One of the biggest advantages of a modular tile court is the simplicity of repairs. While the tiles are extremely durable and designed to withstand intense play and weather, accidents can happen. If a tile ever does get damaged, you don’t have to worry about a costly, full-surface replacement. You can simply pop out the single damaged tile and snap a new one into place. This design makes long-term maintenance incredibly cost-effective and straightforward. We can even help you source matching tiles from the Gappsi Store to ensure a seamless repair.
Keeping Drainage Clear
Your court tiles are only one part of the drainage equation. The expertly prepared sub-base beneath them is what truly keeps water from becoming a problem. To ensure everything works as designed, it’s important to keep the area around your court clear. Regularly remove any buildup of leaves, mulch, or debris along the edges of the court. This prevents blockages that could stop water from flowing away from the court’s foundation. Proper landscape design around the court can also help direct water flow and prevent pooling, protecting the integrity of the sub-base for years to come.
Is a Professional Installation Worth It for a Home Basketball Court?
Let’s be honest, the idea of a weekend DIY project is tempting. You buy the tiles, clear a patch of grass, and snap them together. While it sounds simple, the reality of building a lasting and safe basketball court is much more involved. The real work, the part that determines if your court will last one season or twenty, happens before a single tile is laid. A professional installation is an investment in your home, your family’s safety, and the court’s performance for years to come.
Think of it like building a house. You wouldn’t build on a shaky foundation, and the same principle applies here. Professionals understand the complexities of site preparation, from analyzing soil conditions to ensuring proper grading for drainage, which is crucial for handling Long Island’s weather. They have the right equipment, like compactors and laser levels, to get the job done efficiently and correctly the first time. This saves you from the costly mistakes and future headaches that come with an unstable base. While the upfront cost is higher than a DIY attempt, the long-term value of a court that won’t warp, sink, or become a safety hazard is well worth it.
The Benefits of Professional Site Prep
The success of your home basketball court hinges entirely on its foundation. For the best performance and to make sure the court lasts, you must install the tiles on a solid, stable, and completely flat surface. The best options are a concrete base or properly compacted gravel. Anything less will compromise the court’s integrity and playability.
A professional team ensures this critical first step is done right. Proper site preparation isn’t just about leveling the ground; it’s about creating a solid sub-base that is necessary for safe play and consistent ball bounce. By handling the excavation, grading, and material compaction, a professional installer provides a foundation that prevents shifting, sinking, and water damage. Our masonry experts specialize in creating these durable bases, giving you a court you can enjoy for many years.
Gappsi’s Game Court Solutions
Many DIY attempts fail because of one common mistake: trying to build directly over the lawn. Simply covering grass with plastic grids or tiles blocks sunlight and airflow, which kills the grass and creates a muddy, uneven bog underneath. This not only ruins your court but also creates a mess in your yard. Avoiding these pitfalls is where professional expertise becomes invaluable.
At Gappsi, we provide complete sports games courts solutions that begin with meticulous site preparation. We follow a proven, step-by-step process to build a solid ground base, ensuring your court has the stability it needs for peak performance and safety. We handle everything from the initial design to the final tile installation, so you can avoid common mistakes and get a beautiful, functional court that adds value to your home.
Related Articles
- Basketball Courts Builder Long Island NY: A 2026 Guide
- Basketball Court Design & Installation in Long Island | Gappsi Inc
- Basketball Court Construction in Bayshore, NY | Gappsi Inc
- Basketball Game Courts Long Island – Custom Design by Gappsi Inc
- Volleyball Sport Game Courts – Gappsi Group
Frequently Asked Questions
Why is a concrete or gravel base so important? Can’t I just level the dirt? Think of the base as the hidden hero of your court. While perfectly leveled dirt might seem okay at first, it’s highly susceptible to moisture and weather. Rain can turn it soft, and freeze-thaw cycles can cause it to shift and heave. A dedicated concrete or compacted gravel base provides permanent stability, ensuring your court tiles don’t sink, separate, or create an uneven surface. This foundation is what guarantees a safe playing area and a consistent ball bounce for years.
What’s the real difference between a concrete and a compacted gravel base? Concrete is the top-tier choice for a court foundation, offering unmatched durability and a perfectly flat surface for the best possible ball performance. It’s a permanent structure that will last for decades. Compacted gravel is a fantastic and more budget-friendly alternative. When installed correctly, it provides the necessary stability and excellent drainage for your court tiles, making it a smart, practical option that doesn’t compromise the quality of your game.
Can I install court tiles over my existing asphalt driveway or patio? Yes, you often can, and it can be a great way to save on site preparation. An existing asphalt driveway or a solid paver patio can serve as an excellent sub-base because it’s already hard and stable. The key is that the surface must be in good condition, meaning it’s relatively level and free from major cracks or damage. It’s always a good idea to have the surface inspected first to ensure it can properly support your new court.
How much maintenance does a tile court actually need? You’ll be happy to hear they are surprisingly low-maintenance. The perforated design allows rain and dirt to pass through, so you won’t be dealing with puddles. For general upkeep, using a leaf blower to clear debris is usually all you need. If it gets dirty, you can simply rinse it with a garden hose. This easy care routine is what makes these sports games courts such a great addition to any home.
What happens if a single tile gets damaged? This is one of the best features of a modular court system. The tiles are incredibly tough, but if one happens to get damaged, the fix is simple and inexpensive. You don’t need to replace the whole court. You can just pop out the single damaged tile and snap a new one into its place in a matter of minutes.