


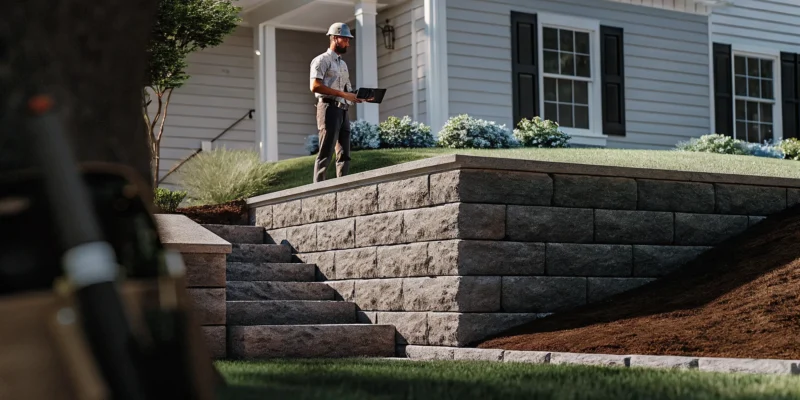
You’ve probably seen them around your neighborhood: retaining walls that are leaning, bulging, or cracking. These failures aren’t just eyesores; they are serious safety hazards that are expensive to fix. More often than not, these problems start because crucial steps were skipped during construction. A weak foundation, the wrong materials, or poor drainage can doom a wall from the start. Often, the first corner cut is ignoring the legal requirements. If you’re wondering, “do I need a permit for retaining walls in Long Island?” you’re already on the right track. This guide is designed to help you avoid common mistakes and ensure your project is a success from the ground up, protecting your property and your investment.
Key Takeaways
- Understand the 4-Foot Permit Rule: Walls under four feet high generally don’t need a permit on Long Island, but anything taller requires one, plus an engineer’s plan. Confirming with your local town is a non-negotiable first step to keep your project legal.
- Prioritize Drainage Above All Else: Most retaining walls fail from water pressure, not weak blocks. A proper system using crushed stone, a drain pipe, and filter fabric is essential to protect your investment and prevent bulging or collapse.
- Build a Strong Foundation with Proper Materials: A retaining wall’s strength starts from the ground up. Ensure a solid, compacted gravel base is installed and select materials specifically designed to handle the height and load of your wall, not just for their looks.
What Is a Retaining Wall and Why Do You Need One on Long Island?
If you’ve ever seen a terraced garden or a driveway cut into a hillside, you’ve seen a retaining wall. Simply put, a retaining wall is a structure designed to hold back soil and resist the pressure it creates. Think of it as a functional barrier that prevents earth from moving where you don’t want it to. For many Long Island homeowners, these walls are not just decorative features, they are essential solutions to common landscape challenges.
Retaining walls serve two main purposes: they create usable, flat land on sloped properties and they prevent soil erosion. Whether you want to install a beautiful patio, a safe play area for your kids, or simply protect your home’s foundation from shifting ground, a well-built retaining wall can be the answer. They are a perfect blend of engineering and artistry, turning a tricky landscape into a stable and stunning outdoor living space. A professional can help you with the entire design and construction process.
Common Uses for Retaining Walls
Retaining walls are incredibly versatile and can solve a variety of landscape problems. Their most common use is to create level surfaces on sloped yards. This newfound flat ground can become the perfect spot for a swimming pool, a garden, a patio, or even a driveway. By carving out these functional zones, you can get much more use out of your property.
Beyond creating flat space, retaining walls are also used to manage water runoff and prevent soil erosion, which can damage your home’s foundation or your neighbor’s property. They can also add visual interest and structure to your landscape design. You can use them to build raised flower beds, create a sunken seating area around a fire pit, or frame a grand staircase leading down a hill.
How They Work With Long Island’s Landscape
Long Island’s geography, especially the rolling hills of the North Shore’s “Gold Coast,” was shaped by ancient glaciers. This history left many properties with beautiful but challenging slopes. A retaining wall works with this unique terrain by turning a steep, unusable hill into a series of manageable, level tiers. This is a game-changer for homeowners who want to maximize their outdoor living area.
These structures are also critical for protecting your property. On a sloped lot, rainwater can rush downward, washing away valuable topsoil and putting pressure on your home’s foundation. A properly installed retaining wall helps control this water flow, directing it away from your house and preventing costly erosion. For waterfront properties, a retaining wall can be a crucial defense against shoreline erosion. By understanding the specific needs of your land, you can use a retaining wall to create a safer and more functional landscape design.
Do You Need a Permit for a Retaining Wall in Long Island?
Figuring out permits can feel like a headache, but it’s a crucial step to make sure your retaining wall is safe, legal, and built to last. On Long Island, the rules can vary depending on where you live, but there are some key guidelines that will help you get started on the right foot. Understanding these requirements from the beginning ensures your project goes smoothly and avoids any costly surprises.
What Is the 4-Foot Rule?
One of the most important guidelines for retaining wall permits on Long Island is the “4-foot rule.” It’s a simple benchmark: retaining walls under four feet in height generally do not require a building permit. However, once a wall reaches or exceeds four feet, a permit is almost always mandatory. For these taller structures, you’ll also need a special design prepared by a licensed New York engineer to ensure the wall can safely handle the pressure from the soil behind it. This rule is in place to protect both your property and your neighbors’, making sure any significant masonry project is properly planned and constructed.
How to Measure Wall Height for a Permit
So, how do you know if your wall hits that four-foot mark? The measurement isn’t taken from the ground level you see but from the very bottom of the wall’s foundation, or footing, to the top of the wall cap. This total height is what your local building department will consider. For example, if part of your wall’s foundation is buried a foot underground and the visible portion is three and a half feet tall, the total height is four and a half feet. This means you would need a permit. Getting this measurement right is the first step in determining your project’s requirements and avoiding any unexpected delays or issues down the road.
Nassau vs. Suffolk County: Know the Local Rules
While the 4-foot rule is a great starting point, it’s not the final word. Every town and incorporated village across Long Island, from the Town of Hempstead in Nassau County to East Hampton in Suffolk County, has its own set of building codes and permit processes. Some municipalities might have stricter height limits or different requirements altogether. Before you even think about breaking ground, your first call should be to your local building department. They can give you the specific details you need for your area and ensure your project complies with all local regulations. Checking first will save you a lot of time and potential headaches.
Setbacks and Property Line Requirements
Beyond the height of your wall, its location is just as important. Most towns have “setback” rules, which dictate how far a structure must be from your property lines. Building a retaining wall right on the edge of your property or significantly changing the ground level (a process called regrading) can cause major issues. It could violate town codes or, worse, create drainage problems by sending rainwater flowing into your neighbor’s yard, which can lead to disputes and even legal trouble. A professional landscape designer can help you create a plan that respects property lines and manages water runoff effectively.
What Are the Best Retaining Wall Materials for Long Island?
Choosing the right material for your retaining wall is about more than just looks. It affects your budget, the wall’s lifespan, and even your permit requirements. On Long Island, our coastal climate and soil conditions mean you need something that can stand up to the elements. Your choice will define the character of your landscape, whether you want a modern, clean line or a rustic, natural feel. Let’s walk through the most popular options so you can find the perfect fit for your property and your vision.
Concrete Blocks
Concrete blocks, often called segmental retaining wall (SRW) blocks, are the most common choice for a reason. They offer an excellent balance of strength, versatility, and value. These engineered blocks are designed to interlock, creating a durable wall that can handle the pressure of the soil behind it. They come in a huge variety of colors, textures, and sizes, allowing you to achieve anything from a classic quarried stone look to a sleek, modern finish. Because they are so popular, they are a cost-effective option, typically ranging from $40 to $160 per square foot. Our expert masonry team can help you select a style that complements your home perfectly.
Natural and Dry-Stack Stone
If you’re aiming for a timeless, high-end look, nothing beats natural stone. Each stone is unique, creating a wall with rich character and texture that blends beautifully into the landscape. While it’s a premium choice, costing between $90 and $275 per square foot, a professionally installed natural stone wall can last a lifetime. For a more rustic and traditional feel, dry-stack stone walls are built by carefully fitting stones together without mortar. This method is an art form and works best for walls under three feet tall. It’s a labor-intensive process, but the result is a charming wall that feels like it’s always been there. Gappsi offers a wide selection of beautiful natural stone to create a truly one-of-a-kind feature.
Poured Concrete
For a strong, modern statement, poured concrete is an excellent choice. It’s the go-to material when you need serious structural support, especially for walls over six feet tall or in tight spaces where other materials won’t work. Poured concrete walls offer a smooth, minimalist look that can be stamped, stained, or finished with a veneer for a custom appearance. While the upfront cost can range from $85 to $200 per square foot, it often becomes more cost-effective for larger, engineered projects. Its sheer strength makes it ideal for holding back heavy loads or creating crisp, clean lines in a contemporary landscape design.
Large Boulders
For a truly naturalistic look that feels integrated with the environment, large boulders are a fantastic option. Boulder walls are perfect for creating gentle, curving terraces and managing slopes in a way that looks organic and effortless. They are especially well-suited for shorter walls, typically under four feet, where they can define garden beds or manage a slight grade change. The cost is generally between $50 and $140 per square foot. Using boulders sourced from the region can create a seamless transition between your yard and the surrounding Long Island landscape, making it feel like the wall was carved by nature itself.
How Materials Affect Your Permit Needs
Your choice of material is directly linked to whether you’ll need a permit. In most Long Island towns, the magic number is four feet. Retaining walls under four feet in height usually don’t require a building permit. However, once your wall design reaches or exceeds four feet, you will always need a permit and a plan stamped by a licensed New York engineer. Certain materials lend themselves to different heights. For instance, you’re more likely to need a permit when using poured concrete, as it’s often chosen for taller, more structural walls. Conversely, a decorative dry-stack or boulder wall under four feet might not require one. Always factor this into your project planning from the start.
Don’t Forget Drainage: The Key to a Lasting Wall
A retaining wall is only as strong as its ability to manage water. While the material you choose for the face of the wall gets all the attention, what happens behind it is what truly determines its lifespan. Proper drainage isn’t just a feature; it’s the most critical element for ensuring your wall stands strong for decades, especially with Long Island’s wet and freezing weather. A well-designed drainage system prevents pressure buildup, protects your investment, and keeps your property safe.
Why Most Retaining Walls Fail (Hint: It’s Drainage)
If you’ve ever seen a retaining wall that’s bulging, leaning, or crumbling, the culprit is almost always poor drainage. When water from rain and runoff gets trapped in the soil behind a wall, it creates immense hydrostatic pressure. This pressure pushes relentlessly against the structure. During Long Island winters, the problem gets much worse. Trapped water freezes and expands, exerting even more force. This freeze-thaw cycle is a powerful destructive force that can cause even the most robust-looking walls to fail over time. Proper masonry construction isn’t just about what you see; it’s about building a system that can handle the elements.
The Role of Crushed Stone and Drain Pipes
A professional drainage plan uses a two-part system to channel water safely away. First, a layer of crushed stone is used as backfill directly behind the wall. Unlike dense soil, which holds water like a sponge, crushed stone creates a porous zone. Water can easily trickle down through the stones instead of building up against the wall. At the base of this stone layer, a perforated drain pipe is installed. This pipe collects all the water that filters down and carries it away from the wall’s foundation, releasing it downhill or into a designated drainage area. This simple combination is incredibly effective at relieving hydrostatic pressure.
Using Geotextile Fabric and Weep Holes
To ensure the drainage system works for the long haul, two other components are essential. A special geotextile fabric is placed between the native soil and the crushed stone backfill. This fabric acts as a filter, preventing dirt and silt from mixing with the stone and clogging the system. Without it, the drainage path would eventually get blocked, rendering it useless. This is a crucial step that should never be skipped. Additionally, small openings called “weep holes” are often integrated into the bottom of the wall face. These provide a secondary escape route for any water that might accumulate, offering an extra layer of protection. Proper restoration and sealing can also keep these weep holes clear over the years.
How Drainage Plans Affect Your Permit
When you apply for a permit for a retaining wall that is four feet or taller, your local building department will need to see a detailed construction plan. A major part of this plan is the drainage design. Municipalities want assurance that the wall is engineered to handle water loads safely and won’t fail, potentially causing damage to your property or your neighbor’s. For these taller walls, a licensed New York engineer must design the structure, including the drainage system. In complex situations, like walls over six feet or those built on poor soil, the town may even require a soil report to ensure the design is adequate for the specific site conditions.
Common Retaining Wall Mistakes to Avoid
Building a retaining wall might seem like a simple project, but a few common mistakes can turn your beautiful landscape feature into a costly problem. A well-built wall should last for decades, but one that’s poorly planned can fail in just a few years. The biggest issues usually stem from underestimating the powerful forces of nature, specifically water and gravity. Getting these details right is what separates a professional, long-lasting wall from a DIY disaster waiting to happen.
Before you start stacking a single block, it’s important to understand the most frequent points of failure. From ensuring water has a place to go, to choosing the right materials for the job, every step is critical. A weak foundation or a miscalculation of the weight your wall needs to hold back can lead to bulging, cracking, or a complete collapse. Let’s walk through the most common mistakes so you can avoid them on your Long Island property.
Forgetting About Drainage
Believe it or not, the number one reason retaining walls fail is poor drainage. When water from rain or irrigation gets trapped in the soil behind your wall, it creates immense hydrostatic pressure. This force is powerful enough to push even the heaviest blocks outward. Here on Long Island, the problem gets worse during our freeze-thaw cycles. Trapped water freezes, expands, and puts even more stress on the wall. A proper drainage system, including a gravel backfill and perforated pipe, isn’t just a nice-to-have feature; it’s the most critical element for ensuring your wall’s stability and longevity. Without it, you’re setting your wall up for a short and troubled life.
Choosing the Wrong Materials
The materials you choose are about more than just looks; they are fundamental to the wall’s structural integrity. Using decorative blocks intended for a small garden bed to build a four-foot-tall wall is a recipe for failure. The right materials must be able to handle the specific load and environmental conditions of your property. You need to consider the wall’s height, the weight of the soil it will hold back, and Long Island’s weather. Gappsi offers a wide selection of high-quality porcelain and natural stone pavers that are not only beautiful but also engineered for durability, ensuring your wall can withstand the elements for years to come.
Building on a Weak Foundation
A retaining wall is only as strong as the ground it sits on. One of the most common mistakes is failing to prepare a solid, level foundation. If you build on top of loose topsoil or an uneven surface, the wall will settle, shift, and eventually lean or fall. A proper foundation requires digging a trench, removing all organic material, and laying a base of compacted crushed stone. This creates a stable footing that distributes the wall’s weight evenly and prevents movement over time. Taking the time to create a strong base is a non-negotiable step for a wall that you want to stay straight and true.
Misjudging Height and Load
The pressure pushing against a retaining wall increases dramatically with its height. A four-foot wall must manage significantly more force than a two-foot wall, and the design needs to account for that. It’s also crucial to consider the “surcharge,” which is any additional weight on the soil behind the wall. This could be a sloped hill, a driveway, or even a patio. Underestimating these forces can lead to structural failure and serious safety hazards. This is why walls over a certain height often require a professional design from an engineer. Our team has extensive experience with complex masonry construction and can ensure your wall is built to handle the specific demands of your landscape.
What Happens If You Build Without a Permit?
Skipping the permit process might seem like a tempting way to save time and money, but it often leads to much bigger headaches down the road. Building a retaining wall without the proper approvals can create serious financial, legal, and safety issues. Think of the permit as more than just paperwork; it’s a system of checks and balances designed to ensure your project is safe, structurally sound, and won’t negatively impact your property or your neighbors. Taking this shortcut can jeopardize your investment and create problems that are far more expensive to fix than getting the permit in the first place.
Potential Fines and Legal Issues
Local towns on Long Island have building codes for a reason: to ensure public safety. If you build a retaining wall without a permit, you’re violating these local ordinances. A town inspector can issue a stop-work order, forcing all construction to a halt until you get the proper approvals. This is often followed by significant fines. In some cases, if the wall is deemed unsafe or doesn’t meet code, you could be ordered to tear it down entirely at your own expense. Property owners are legally responsible for maintaining structures on their land. A professional masonry contractor will handle the permit process to ensure your project is compliant from day one.
Trouble Selling Your Home
An unpermitted retaining wall can become a major obstacle when it’s time to sell your house. During the home inspection process, any unpermitted work is likely to be discovered. This creates a red flag for potential buyers and their lenders. No one wants to inherit a potential legal issue or a structurally unsound wall. You may be asked to get a retroactive permit, which can be a difficult and costly process. Often, sellers are forced to either tear the wall down or give the buyer a large credit to deal with it, delaying or even killing the sale. Properly addressing structural issues before you sell is key to a smooth transaction.
Liability for Damage to Neighboring Property
Your responsibility doesn’t end at your property line. A poorly designed or improperly built retaining wall can fail, especially under the pressure of soil and water. If your wall collapses and causes damage to a neighbor’s property, such as their yard, fence, or even their home’s foundation, you could be held liable for all repair costs. Changing the ground level along your property can also cause water runoff issues for your neighbors. If you built the wall without a permit, your homeowner’s insurance may refuse to cover the damages, leaving you to pay for everything out of pocket. This is a huge financial risk that can be easily avoided by doing things correctly from the start.
How to Apply for a Retaining Wall Permit on Long Island
Navigating the permit process for a retaining wall can feel like a big task, but it’s a critical step to ensure your project is safe, legal, and built to last. The good news is that it’s a completely manageable process, especially when you know what to expect. Each town and village on Long Island has its own set of rules, so getting familiar with your local requirements is the first step. Think of the permit as your project’s blueprint for success, confirming that every detail, from height to materials, is up to code.
Working with an experienced team can make this process much smoother. A seasoned contractor will be familiar with the local ordinances and can handle the paperwork and coordination for you. This leaves you free to focus on the exciting part: watching your beautiful new landscape take shape. Let’s walk through what you’ll need to get your application approved.
What Your Application Needs
The most important factor for your permit application is the height of your retaining wall. As a general rule, walls under four feet tall typically do not require a building permit on Long Island. However, once your wall design reaches or exceeds four feet in height, a permit is almost always necessary. For these taller walls, your application must include a special design prepared by a licensed New York engineer. This isn’t just a formality; it’s a crucial safety measure. Because every municipality has its own specific requirements, you should always check with your local building department before you begin any work. A professional masonry contractor can help you prepare and submit all the necessary documents.
When to Call a Licensed Engineer
If your retaining wall is planned to be four feet or taller, you will need to hire a licensed engineer. The engineer’s job is to create a structural design that proves the wall can safely hold back the soil behind it, a force known as hydrostatic pressure. This plan is a non-negotiable part of your building permit application. The cost for an engineer’s design can range from $1,500 to $4,500, but it’s a vital investment in the long-term stability and safety of your property. An engineered plan protects your home, your neighbor’s property, and ensures your wall stands strong for decades without bowing or collapsing.
How Long Does the Permit Process Take?
The timeline for getting a retaining wall permit approved varies quite a bit across Long Island. Since each town and village operates on its own schedule, there isn’t a single, standard waiting period. Some building departments might process an application in a few weeks, while others could take several months. The best way to get an accurate estimate is to contact your local building department directly. An experienced contractor who regularly works in your area will also have a good sense of the current timelines and can help you plan your project schedule accordingly. Patience is key, so it’s wise to get the permit process started well before you intend to break ground.
Understanding Fees and Inspections
Beyond the basic application fee, there can be other costs and steps involved in the permit process. For particularly tall walls (often those over six feet) or walls built on tricky terrain with poor soil, you may be required to get a soil report. This analysis helps the engineer create a stable design and can cost between $2,500 and $6,000. Once your permit is issued and construction begins, you’ll also need to schedule inspections. An inspector will visit your property at key stages to ensure the wall is being built exactly as specified in the approved plans. A full-service design and construction company can manage all these moving parts, from coordinating with engineers to scheduling inspections, making the entire experience seamless for you.
When Should You Hire a Professional?
While a DIY project can be rewarding, a retaining wall is a structural feature that needs to be built right. If your existing wall is showing signs of stress, it’s best to call in an expert before a small problem becomes a major failure. A professional can assess the situation and ensure any new construction or repairs are done correctly and safely, protecting your property for years to come.
Signs You Need a Pro
Keep an eye out for any visible cracks, especially stair-step patterns in the mortar joints of a block wall. These often indicate uneven settling or intense pressure from the soil behind them. Another serious warning sign is a wall that is leaning or bulging outward. This means the wall is losing its fight against gravity and the soil it’s meant to hold back. Finally, notice how water behaves around the wall. If you see water pooling at the base, it’s a clear signal that the drainage system isn’t working, which can quickly compromise the entire structure. Addressing these issues early with a professional restoration service can save you from a costly collapse down the road.
How to Choose a Long Island Masonry Contractor
Finding the right contractor is the most important step in ensuring your retaining wall is safe and built to last. Start by looking for a team with proven experience building retaining walls specifically here on Long Island. Ask to see a portfolio of their past work and don’t hesitate to ask for references; a reputable contractor will be proud to share their projects. Next, confirm they have the proper licenses and insurance for work in Nassau or Suffolk County. This is crucial for your protection. Finally, always get a clear, itemized estimate in writing. The proposal should detail all costs, including materials and labor, so there are no surprises. Choosing a qualified masonry contractor gives you peace of mind that your investment is sound and your property is in good hands.
Design a Retaining Wall That Works for You
A retaining wall should be much more than a simple barrier against soil. Think of it as a feature that can add incredible character and dimension to your property. Whether you want to create beautiful, tiered garden terraces on a sloped yard or you need to prevent soil erosion, a well-designed wall is both a practical solution and a stunning landscape element. It helps define outdoor spaces, adds visual texture, and can become a focal point of your yard’s overall design.
Before you fall in love with a particular stone or style, it’s essential to focus on what makes a wall last: proper drainage. The vast majority of retaining wall failures happen because of hydrostatic pressure, which is just a technical way of saying water builds up in the soil behind the wall. Without a way to escape, that trapped water exerts immense force, eventually causing the wall to bulge, crack, or even collapse. A successful design always starts with a solid plan to manage groundwater and surface runoff.
This is where professional masonry design proves its worth. An expert will help you choose materials that fit your aesthetic, from classic natural stone to modern concrete blocks, while ensuring they are appropriate for the wall’s height and load. More importantly, they will incorporate critical drainage systems, build a proper foundation, and account for the unique conditions of your property.
A thoughtful landscape design integrates the retaining wall so it feels like a natural and intentional part of your environment. By considering function and form together from the very beginning, you get a wall that not only looks fantastic but also stands strong against the elements for decades, saving you from future headaches and costly repairs.
Related Articles
- Three level retaining wall long island – Gappsi Group
- Learn About Quality Retaining Walls for Your Long Island Backyard – Gappsi Group
- Estimate for reinforced poured concrete footer for retaining walls long island – Gappsi Group
- Remove retaining walls|rebuild retaining wall|long island – Gappsi Group
- Top Concrete Block Retaining Wall Contractors Long Island
Frequently Asked Questions
My yard has a slope, but it’s not that steep. Do I still need a retaining wall? You might. Even a gentle slope can lead to gradual soil erosion over time, which can wash away your topsoil and put pressure on your home’s foundation. Beyond just solving problems, a retaining wall is a great way to create more functional space. It can turn a slightly sloped, awkward area into a perfectly level spot for a patio, a garden, or a safe play area for your kids.
What is the single most important factor for a long-lasting retaining wall? Without a doubt, it’s proper drainage. The number one reason retaining walls fail is because water gets trapped in the soil behind them. This creates immense pressure that can cause the wall to bulge, crack, or lean. A professionally installed drainage system, which includes a gravel backfill and a perforated pipe, is not an optional extra; it is the key to ensuring your wall stands strong for decades.
Is it a good idea to just build my wall slightly under four feet to avoid getting a permit? While it might seem like a clever shortcut, it’s generally not a good idea. First, the height is measured from the bottom of the foundation, not just the visible part, so it’s easy to miscalculate and end up in violation. More importantly, even a shorter wall needs a solid foundation and proper drainage to be stable. Trying to cut corners often leads to a wall that fails prematurely, which will cost you much more to fix in the long run.
How long should a professionally built retaining wall last? A well-built retaining wall is a long-term investment in your property and should last for many decades. Its lifespan depends entirely on the quality of the installation and materials. When a wall is built on a solid, compacted foundation, uses materials appropriate for its height, and includes a robust drainage system, it can easily stand strong for 50 years or more.
What’s the first step I should take if I think I need a retaining wall? Your first step should be to get a professional consultation. An experienced masonry contractor can visit your property to assess your specific needs, including the slope, soil conditions, and water runoff patterns. They can provide expert advice on the best design and materials for your home, explain the local permit requirements, and give you a clear idea of what the project will involve.