


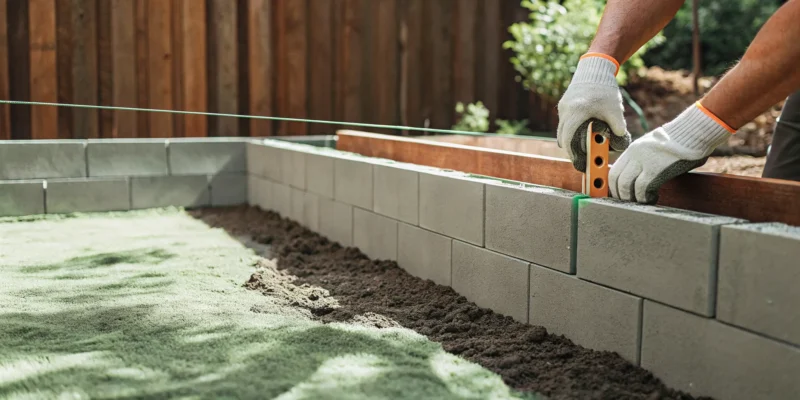
A retaining wall is in a constant battle with gravity and water. The soil it holds back is incredibly heavy, and when saturated with rain, the pressure it exerts is immense. A successful wall isn’t just built; it’s engineered. Its strength comes from a deep footing, a robust drainage system, and proper reinforcement that work together to counteract these powerful forces. Understanding the ‘why’ behind each step is just as important as the ‘how’. This guide will walk you through the principles of sound cement block retaining wall construction, ensuring you build a structure that stands strong against the elements and becomes a permanent, reliable feature of your landscape.
Key Takeaways
- Plan for Stability from the Start: A lasting wall begins with solid prep work. This includes checking local Long Island building codes for permits, understanding your property’s unique soil and drainage, and pouring a deep, level concrete footing that extends below the frost line.
- Control Water to Prevent Failure: Water pressure is the main reason retaining walls collapse. You must install a complete drainage system, including a layer of gravel, a perforated drain pipe to channel water away, and filter fabric to prevent clogs.
- Build with Reinforcement in Mind: Proper construction technique is crucial for strength. Always stagger the joints between blocks, build the wall with a slight backward lean into the hill, and add steel rebar or geogrid for any wall taller than three feet.
What Is a Cement Block Retaining Wall?
A cement block retaining wall is a hardworking structure designed to hold back soil on a slope. Think of it as a strong barrier that prevents erosion and carves out level, usable space where you once had a hill. If your Long Island property has uneven terrain, a retaining wall can be a game-changer, transforming a challenging slope into a functional patio, a tiered garden, or a flat lawn for the kids to play on. These walls are built using individual concrete blocks, which makes them a versatile option for all kinds of landscape designs.
While they are incredibly practical, retaining walls also offer a lot of design potential. They can add visual interest, create clean lines, and define different areas of your yard. Whether you’re looking to solve a drainage problem or simply want to add structure and beauty to your outdoor space, a well-built cement block wall is a durable and effective solution. The key is proper masonry construction, which ensures the wall is not only attractive but also strong enough to handle the immense pressure of the earth it holds back.
Why Build a Retaining Wall?
Retaining walls serve two main purposes: they are both functional workhorses and beautiful design elements. On the functional side, their primary job is to prevent soil erosion. By holding soil in place, they protect your landscape from washing away during heavy rains and help manage water runoff. This function also allows you to create more usable land. A steep, unusable hill can become the foundation for a gorgeous new patio, a safe play area, or a series of terraced garden beds perfect for planting flowers or vegetables. A retaining wall is a fundamental part of a thoughtful landscape design that can completely reshape your property’s potential.
Does Your Property Need a Retaining Wall?
Look around your yard. Do you have a noticeable slope where soil seems to be sliding downhill? Are you struggling to find enough flat ground for a garden or seating area? If so, a retaining wall might be the perfect solution. A properly constructed wall can last for 50 to 75 years, becoming a permanent and valuable feature of your home. However, a wall built without the right foundation and drainage can fail quickly, leading to frustrating and expensive repairs. For a skilled DIYer, a simple wall under four feet tall can be a manageable project. But as walls get taller, the risks increase. Any wall over four feet should have professional input, and walls over six feet absolutely require an engineer’s design to be safe.
How to Choose the Right Cement Blocks
Picking the right cement block is one of the most important decisions you’ll make for your retaining wall. This choice affects not just the final look of your project but its strength and longevity. With so many options available, it’s easy to feel a bit lost. But don’t worry, I’m here to walk you through exactly what you need to look for. Getting the materials right from the start saves you from headaches and costly repairs down the road.
Think of your blocks as the bones of your wall. You need them to be strong, durable, and suited for the job of holding back tons of soil. While the process is straightforward, every detail matters. From understanding the difference between common block types to selecting the right size for stability, each step is crucial. If you ever feel unsure about material selection or project scope, our expert masonry services are always available to guide you. Let’s break down how to choose the perfect blocks for a wall that is both beautiful and built to last.
Cinder Blocks vs. Retaining Wall Blocks
You’ve probably heard the terms “cinder block” and “concrete block” used interchangeably, but for a retaining wall, they are not the same. True cinder blocks are made with ash and are much lighter and weaker. They simply can’t handle the immense pressure from soil and water. For a retaining wall, you must use concrete masonry units, or CMUs. These are dense, heavy blocks engineered for strength.
A standard cinder block has a compressive strength of around 1,900 psi, while a proper CMU for retaining walls boasts a strength of 2,500 psi or more. This extra durability is essential for safety and performance. Always check the product specifications and choose CMUs designed for retaining walls.
Consider Block Size and Weight
The size and weight of your blocks are critical for your wall’s stability. A good rule of thumb is that your concrete footing should be at least twice as wide as your block. For example, if you’re using standard 8-inch-wide blocks, your footing needs to be at least 16 inches wide and 8 inches deep for a wall up to four feet high. This wide, solid base prevents the wall from shifting or tipping under pressure. Heavier blocks provide more resistance against the soil, creating a more secure structure. When selecting materials, always prioritize quality and strength, whether you’re using manufactured blocks or beautiful porcelain and natural stone.
Choose Your Cap Blocks and Finishes
Cap blocks are the final, finishing touch that gives your retaining wall a clean and professional appearance. These flat, solid blocks sit on the top row, covering the hollow cores and creating a polished surface. When installing them, make sure the top of the wall is clean and dry, then apply a strong concrete adhesive to secure them in place. This prevents them from shifting or getting knocked loose over time. Beyond standard caps, you can also find modular blocks in various shapes and textures to create unique patterns, adding a layer of custom design to your functional wall.
Gather Your Materials and Tools
Before you break ground, it’s smart to gather everything you’ll need for the job. Think of it like prepping ingredients for a recipe, it saves you from making frantic trips to the store mid-project. A well-organized workspace makes the entire process smoother and safer. While concrete blocks are a fantastic and durable choice for DIY projects, remember that you have other options. Materials like natural stone can offer a different aesthetic if you’re aiming for a specific look, and they integrate beautifully into a larger landscape design.
This guide focuses on a standard cement block wall, which provides incredible strength and a clean, uniform appearance. We’ve broken down the materials and tools into two simple checklists to help you stay organized. For larger or more complex projects, remember that having a professional team handle the heavy lifting is always an option. A masonry contractor can ensure your wall is built to last, especially on tricky slopes or with challenging soil conditions. They have the experience to assess your property and recommend the best structural approach. But if you’re feeling confident and ready to tackle it yourself, let’s get your shopping list sorted out so you can begin with confidence.
Materials Checklist
Getting your materials right is the first step to building a wall that stands the test of time. For a standard, durable retaining wall, you won’t need anything too exotic. Most of these items are available at your local hardware or building supply store. Make sure you calculate your quantities correctly before you buy.
You will need:
- Standard concrete masonry unit (CMU) blocks
- Cap blocks for a finished top edge
- Type S mortar, which is formulated for load-bearing, outdoor structures
- Concrete mix for the footing
- #4 rebar (1/2-inch thick) for vertical reinforcement
- A perforated drain pipe to manage water
- Clean, angular gravel for backfill and drainage
- Geotextile fabric to separate soil from the gravel
Tools Checklist
The right tools don’t just make the job easier; they make it safer and more precise. You may already own some of these, but others, like a plate compactor, can often be rented for a day or a weekend. Don’t be tempted to skip the safety gear, as cutting blocks and mixing concrete can create dust and debris.
Your tool list should include:
- Shovel and rake for excavation and grading
- Plate compactor to create a solid base
- Rubber mallet to gently set blocks in place
- Masonry saw for any necessary block cuts
- Wheelbarrow to move materials
- Masonry trowel and a mixing hoe
- Level and measuring tape
- Safety glasses and work gloves
Plan Your Retaining Wall Project
A successful retaining wall is all about the prep work. Before you even think about lifting a single block, taking the time to plan your project will save you from major headaches down the road. This planning phase is your roadmap, guiding everything from where you’ll dig to how many materials you’ll need. It’s also the most important step for ensuring your wall is strong, safe, and built to last. A poorly planned wall can fail under pressure, leading to costly repairs and a whole lot of frustration.
Think of this stage as your reality check. You’ll get a clear picture of the terrain, the scope of the work, and any potential challenges, like tricky soil or local regulations. This is where you honestly assess if the project is within your DIY comfort zone. If you uncover significant drainage issues or find out your wall requires complex engineering, it might be the right time to consult a professional. A trusted masonry contractor can handle the entire process, from design and permits to construction, ensuring the job is done right.
Assess Your Soil and Drainage
Before you start, take a good look at your project site. The type of soil and how water moves across your property are critical factors. If your soil has a lot of clay, it will expand and contract with moisture, putting immense pressure on the wall. Water is a retaining wall’s biggest enemy. Without proper drainage, water can get trapped behind the wall, creating powerful hydrostatic pressure that can cause it to bulge, crack, or even collapse. Also, check for large tree roots that could interfere with the foundation and compromise the wall’s stability over time. If your yard has a steep slope or you notice existing water problems, getting the drainage and grading right is essential.
Measure and Map Your Wall
Once you’ve assessed the site, it’s time to map out your wall’s exact location. This simple step helps you visualize the final project and makes the construction process much smoother. Grab some wooden stakes and a ball of string to create a clear outline of where the wall will be built. This visual guide ensures your lines are straight and your curves are exactly how you want them. It also gives you precise measurements for calculating how many blocks, how much gravel for backfill, and how much concrete for the footing you’ll need to purchase. Seeing the layout in your yard can also help you decide if the scale of the project is something you’re ready to tackle on your own.
Check Local Building Codes and Permits
This is a step you absolutely cannot skip. Before you start any construction, you must check the local building codes in your Long Island town. Many municipalities require a building permit for retaining walls over a certain height, often as low as three or four feet. Taller walls may even require plans stamped by a licensed engineer to ensure they are designed safely. Even if your wall is small, there could be setback rules that dictate how close it can be to property lines. A quick call or visit to your local building department’s website will give you the information you need. Ignoring these regulations can lead to fines or, even worse, an order to tear down all your hard work.
How to Build a Cement Block Retaining Wall
Building a cement block retaining wall is a significant undertaking, but it’s a project that can completely transform your landscape. With the right plan and a bit of muscle, you can create a structure that is both beautiful and functional. The process involves several key stages, from digging a proper foundation to carefully laying each course of blocks. Precision is your best friend here. Every step builds upon the last, so taking your time with the foundation and the first row will save you a lot of headaches later.
This guide breaks down the construction process into seven manageable steps. Following them carefully will help you build a wall that stands strong against the forces of nature and time. Remember, walls over four feet tall often require permits and professional engineering. If your project is large or you feel unsure at any point, our team of expert masons is always here to help design and build a wall that meets all safety and aesthetic standards for your Long Island home.
Step 1: Excavate the Trench
Your wall’s strength starts below the ground. The first step is to dig a trench for the foundation. A good rule of thumb is to make the trench twice as wide as your blocks. For a standard 8-inch block, that means digging a 16-inch-wide trench. The depth should be enough to completely bury the first course of blocks, plus an additional six to eight inches for your gravel base. Use stakes and a string line to mark out a straight path. Before you start digging, always call 811 to have any underground utility lines marked. This simple call prevents dangerous and costly accidents.
Step 2: Pour the Concrete Footing
The footing is the solid base your wall will sit on. It needs to be strong enough to prevent shifting and settling. For a block wall, a concrete footing is essential. It should be at least twice as wide as your blocks and extend below the frost line to prevent heaving during winter freezes. After you’ve prepared your concrete mix, pour it into the trench over your compacted gravel base. Smooth the surface with a trowel, making sure it’s perfectly level. This footing needs to cure completely before you can start laying blocks, so be patient and give it the time it needs to harden.
Step 3: Lay the First Course
This is the most important step in the entire process. The first course of blocks, or row, must be perfectly level, as it dictates the alignment for the rest of the wall. Start by setting the first block at the lowest point of your trench. Use a rubber mallet to tap it into place and a spirit level to check it from side to side and front to back. Make small adjustments until it’s perfect. Continue laying the first course, ensuring each block is level with the one next to it. Any imperfections here will be magnified as you build upward, so don’t rush it.
Step 4: Install Drainage
Water is the number one enemy of a retaining wall. Without proper drainage, hydrostatic pressure can build up behind the wall and cause it to bulge or even collapse. To prevent this, lay a 4-inch perforated drain pipe behind your first course of blocks. The pipe should sit on the gravel base and have the perforation holes facing down. Make sure the pipe has a slight downward slope toward an open area, often called a daylight exit, so water can flow away freely. This simple drainage system is a critical feature for any long-lasting retaining wall.
Step 5: Build the Wall with Staggered Joints
As you begin stacking the next courses, you’ll want to create a running bond pattern, similar to what you see on a brick wall. This means you should offset the vertical seams of each new row by half a block. This staggered pattern distributes the weight and pressure across the wall, making it much stronger and more stable. You will likely need to cut some blocks in half to start each new row correctly. You can do this with a masonry chisel and hammer or a circular saw fitted with a diamond blade.
Step 6: Add Reinforcement
For any wall that is more than a few feet tall, reinforcement is not optional, it’s a necessity. For walls approaching or exceeding three to four feet in height, you should insert vertical steel rebar into the block cores every few feet. Fill these cores with concrete to lock the rebar in place and unify the structure. For even greater stability, you can incorporate structural geogrid. This flexible mesh is laid between courses and extends back into the hillside, effectively anchoring the wall to the soil behind it. This is a key technique our professional masonry team uses for taller walls.
Step 7: Add Cap Blocks and Backfill
The final touches involve placing cap blocks and backfilling the wall. Cap blocks give your wall a clean, finished look and protect the hollow cores from rain and debris. Secure them to the top row using a strong construction adhesive. It’s a good idea to give the caps a slight backward slope to help shed water away from the face of the wall. Once the caps are on, you can backfill the space behind the wall. Add gravel directly behind the wall first, then fill the rest of the space with soil in 6-inch layers, compacting each layer as you go.
Why Is Drainage So Important?
Let’s talk about the single most critical factor for a long-lasting retaining wall: drainage. It might not be the most exciting part of the project, but getting it wrong is a guaranteed recipe for failure. Water is incredibly heavy and powerful. When soil behind your wall becomes saturated, the resulting hydrostatic pressure is immense. Without a clear path to escape, that water will push relentlessly against your wall, causing it to bow, crack, or even completely topple over. A wall without good drainage is a ticking time bomb.
Proper drainage isn’t just about preventing a catastrophic collapse. It also protects your investment from slower, more subtle damage. Trapped moisture can lead to efflorescence (those chalky white stains on the block face), encourage mold and mildew growth, and contribute to erosion at the base of the wall. By creating a system for water to flow away from the wall, you are ensuring its stability and appearance for years to come. This is a non-negotiable step that our professional masonry team prioritizes in every project, and it’s just as crucial for a DIY build. The following steps will show you how to create a comprehensive drainage system.
How to Install a Perforated Drain Pipe
Your primary defense against water pressure is a perforated drain pipe. This is a 4-inch plastic pipe with small holes or slits that allow water to enter. You’ll lay this pipe directly behind the first course of your wall, on top of the gravel base. It’s essential to ensure the pipe has a slight downward slope, about 1/8 inch per foot, leading toward an open area where the water can safely drain away. This is often called a “daylight exit.” This slope uses gravity to carry water away before it can build up and exert pressure on your wall. Make sure the holes in the pipe are facing down to collect water that pools at the base.
How to Use Gravel and Geotextile Fabric
The drain pipe doesn’t work alone; it needs to be surrounded by the right materials. You will backfill behind the wall and around the pipe with at least 12 inches of clean, angular gravel. Avoid using rounded pea gravel, as its smooth shape doesn’t lock together and can clog the system. The angular stones create stable air pockets that allow water to flow freely down to the perforated pipe. To prevent soil and silt from mixing with the gravel and clogging your drainage path, you must use a geotextile filter fabric. This special fabric acts as a barrier, letting water pass through while keeping the gravel clean. You’ll wrap this clean gravel with the filter fabric, creating a self-contained drainage column.
Where to Place Weep Holes
Weep holes are a secondary drainage measure that provides an extra escape route for water. These are small openings that pass directly through the face of the retaining wall, allowing trapped water to “weep” out. They are especially important for concrete block walls. A good rule of thumb is to install these small openings every 4 to 6 feet along the length of the wall, typically on the course just above ground level. You can create them by leaving the vertical mortar joint between two blocks empty or by inserting a small-diameter PVC pipe through the wall. These simple outlets are essential to let water escape and relieve pressure before it becomes a problem.
How to Ensure Your Wall Lasts
Building a retaining wall is a serious undertaking, and you want your hard work to result in a structure that stands strong for decades. A lasting wall isn’t about luck; it’s about using specific construction techniques that provide strength and stability against the constant pressure of the earth. From the angle of the wall to the materials you use inside it, every detail matters. These professional-grade steps are what separate a temporary retaining wall from a permanent landscape feature. While these techniques are achievable for a dedicated DIYer, they also highlight the structural knowledge that a professional masonry contractor brings to a project. Taking these extra measures will give you peace of mind and a wall that truly endures.
Incorporate a “Back-Batter” Lean
To give your wall the best chance at fighting gravity and soil pressure, you need to build it with a slight backward lean, known as a “back-batter.” This means each new row of blocks is set back slightly from the one below it. This subtle incline uses the wall’s own weight to resist the force of the soil pushing against it. You should also make sure to stagger the joints between blocks, overlapping each new row by half a block. Stacking blocks directly on top of each other creates weak vertical seams that can easily fail under pressure. This combination of a back-batter and staggered joints creates an incredibly strong, interlocked structure.
Proper Rebar Placement
Think of rebar as the skeleton for your retaining wall. Concrete blocks are strong under compression but can fail under tension, which is the pulling force exerted by soil pressure. Steel rebar provides the necessary tensile strength to hold everything together. For a truly robust wall, you should set vertical rebar rods into your concrete footing while it’s still wet, ensuring they are embedded at least six inches deep. As you build, place these steel rods into the hollow cores of your blocks, typically in every other core, to create a continuous line of reinforcement from the foundation to the top of the wall.
Use Geogrid for Taller Walls
If your retaining wall is going to be taller than three or four feet, you absolutely need to incorporate geogrid. Geogrid is a high-strength synthetic mesh that provides critical reinforcement. You lay it horizontally between courses of blocks, and it extends back into the soil behind the wall. This creates a stabilized soil mass that anchors the wall, effectively reducing the immense lateral pressure pushing against the blocks. By transferring the force from the wall into the reinforced soil, geogrid prevents leaning and potential collapse, making it an essential component for any large-scale retaining wall project.
Select and Apply Mortar Correctly
The mortar you use is the glue that binds your wall together, and your application technique matters. After mixing your mortar to the right consistency, spread a one-inch layer on top of the blocks. Before placing the next block, use the tip of your trowel to create a V-shaped furrow down the middle of the mortar bed. This simple step is crucial because it helps the mortar spread evenly when you set the next block, ensuring a solid bond with no air pockets. Using the right high-quality materials and applying them with care will create strong, weather-resistant joints that contribute to the overall integrity of your wall.
Common Retaining Wall Mistakes to Avoid
Building a retaining wall is a rewarding project, but it’s also one where small mistakes can lead to big problems. Even the most careful DIYer can fall into common traps that compromise the wall’s strength and longevity. A well-built wall should stand for decades, but one with hidden flaws might fail after just a few seasons. Understanding these potential pitfalls before you start is the best way to ensure your hard work pays off.
Avoiding these errors is not just about aesthetics; it’s about safety and protecting your investment. A failing wall can cause property damage and be a serious hazard. From the foundation to the final block, every step requires precision. If you ever feel like the technical details are becoming overwhelming, remember that professional masonry contractors have the experience to guarantee a flawless and lasting result. Let’s walk through the most frequent mistakes so you can steer clear of them.
Shallow Footings
The footing is the foundation of your retaining wall, and it’s the most critical element for stability. A common mistake is not digging the trench for the footing deep enough. In climates like Long Island’s, the ground freezes and thaws, causing it to expand and shift. Your footing must be placed below the frost line, which is the depth to which the ground freezes in winter. If your footing is too shallow, this seasonal movement, known as frost heave, can push your wall upward, causing it to tilt, crack, and eventually fail. Don’t cut corners on excavation; a deep, solid footing provides the anchor your wall needs to withstand the elements for years to come.
Improper Drainage
Water is the number one enemy of a retaining wall. When soil behind the wall becomes saturated with rain or groundwater, it gets heavy and exerts immense force, called hydrostatic pressure. Failing to plan for drainage is a recipe for disaster. Without an escape route, this water pressure will build until it pushes against the wall, causing it to bow, crack, or even collapse entirely. Proper drainage isn’t an optional add-on; it’s a core component of the wall’s design. A system of gravel backfill, geotextile fabric, and a perforated drain pipe is essential to redirect water away and relieve the pressure, ensuring your wall remains strong and upright. This is a key part of any professional landscape design.
Stacked Joints
When you lay your blocks, it might seem intuitive to place them in neat columns. However, stacking blocks so the vertical joints line up directly above one another creates long, straight seams of weakness through the wall. Think about a classic brick pattern; the joints are always staggered for a reason. This overlapping method, known as a running bond, distributes the weight and pressure across the entire structure. Stacked joints concentrate stress in vertical lines, making the wall much more likely to split apart or fail under pressure. Always stagger the joints between courses to lock the blocks together and create a single, strong, and unified wall.
Rushing the Cure
Patience is a virtue, especially when working with concrete or mortar. After you pour the concrete footing or apply mortar between blocks, it needs time to cure. Curing is a chemical process where the concrete hardens and gains its full strength; it’s not the same as simply drying. If you rush this step and start building on a footing that isn’t fully cured, it can settle unevenly and throw your entire wall out of alignment. The same goes for adding weight or backfill too soon. Always follow the manufacturer’s instructions for the concrete or mortar mix you’re using and give it the full recommended time to cure properly. This patience will pay off with a stronger, more durable wall.
Ignoring Permits
“I’ll just build it, who’s going to know?” is a risky mindset. Many homeowners are surprised to learn that retaining walls, especially those over a certain height (often three or four feet), require a building permit from their local municipality. Building without one can lead to stop-work orders, hefty fines, and even a mandate to tear the wall down. It can also create liability issues if the wall were to fail and cause damage. Before you buy a single block, check with your town or village’s building department to understand the local codes. A professional masonry company will handle all the necessary permits, ensuring your project is fully compliant and safe from the start.
When to Call a Professional Masonry Contractor
While tackling a DIY project can be incredibly rewarding, some jobs carry more risk than others. A retaining wall isn’t just a decorative garden border; it’s a structural feature responsible for holding back tons of earth. When a wall fails, it can lead to property damage, safety hazards, and expensive repairs. Recognizing when a project is beyond a weekend warrior’s scope is a critical step. For retaining walls, factors like height, soil conditions, and design complexity are clear signals that it’s time to call in a professional.
If Your Wall Is Taller Than Three Feet
As a general rule, any retaining wall planned to be over three feet tall is a job for a professional. Walls of this height are holding back immense soil and water pressure, requiring specific engineering to remain stable for years to come. In fact, most towns on Long Island require building permits for walls over three or four feet, and some may even ask for an engineer’s official approval. While hiring an expert adds to the upfront cost, it is far less expensive than rebuilding a failed wall. A professional masonry contractor will ensure the footing is correct and install necessary reinforcements like geogrid properly.
If You Have Challenging Site Conditions
The ground on your property is a major factor in your wall’s design. Not all soil is created equal. If your yard has heavy clay soil, for example, you face a greater challenge. Clay expands significantly when wet and shrinks as it dries, putting immense, fluctuating pressure on a retaining wall. A professional can conduct a proper site assessment to identify these issues. Similarly, building on a steep slope or managing complex drainage patterns requires an expert’s touch. They can design a wall with the right materials and drainage solutions to handle your property’s specific needs, preventing future blowouts or leaning.
If Your Vision Includes Intricate Designs
Perhaps you’re dreaming of something more than a simple, straight wall. If your plans include graceful curves, multiple tiers, or built-in features like stairways and seating, it’s best to bring in an expert. These custom elements require a high level of skill and precision. Cutting blocks for smooth curves, ensuring tiered walls are properly set back, and integrating other structures without compromising the wall’s integrity are all advanced techniques. A professional mason can translate your creative vision into a beautiful and structurally sound feature that enhances your outdoor living space, ensuring the finished product is both safe and stunning.
Related Articles
- Estimate for reinforced poured concrete footer for retaining walls long island
- Three level retaining wall long island
- Learn About Quality Retaining Walls for Your Long Island Backyard
Frequently Asked Questions
How high can I build a retaining wall myself before I need to call a professional? A good rule of thumb is to consider hiring a professional for any wall taller than three feet. Once you get above this height, the pressure from the soil increases dramatically, and the project becomes much more complex. Most towns on Long Island also require building permits and sometimes even an engineer’s approval for walls over three or four feet, so calling an expert ensures your project is safe, stable, and compliant with local codes.
What is the single most common mistake that causes a retaining wall to fail? Without a doubt, the biggest mistake is improper drainage. When water gets trapped in the soil behind a wall, it creates immense pressure that can cause the wall to bow, crack, or even collapse. A system that includes a perforated pipe, clean gravel, and filter fabric is not an optional upgrade; it is an essential part of building a wall that will last for decades.
Are concrete blocks my only option for building a retaining wall? While concrete blocks are an excellent choice for their strength and uniformity, they are certainly not your only option. Many people choose natural stone for a more organic, classic look that blends beautifully with the landscape. The construction principles are similar, but working with irregular stone requires a different level of skill. The best material for you depends on your budget, your home’s style, and the overall look you want to achieve.
How long can I expect a properly built cement block wall to last? A cement block retaining wall that is planned and built correctly can easily last for 50 to 75 years, or even longer. Its longevity comes directly from the quality of the construction. This means digging a deep footing, installing thorough drainage, using reinforcement like rebar, and not rushing the process. When you invest the time and effort to do it right, you are creating a permanent and valuable feature for your property.
Do I really need to pour a concrete footing for a block wall? Yes, for a heavy, permanent structure like a cement block retaining wall, a solid concrete footing is absolutely essential. Think of it as the anchor for your entire wall. It provides a stable, level base and prevents the wall from shifting, settling, or being pushed upward by ground frost in the winter. Skipping this step is one of the fastest ways to ensure a wall will fail, so it’s a part of the process you cannot afford to ignore.