


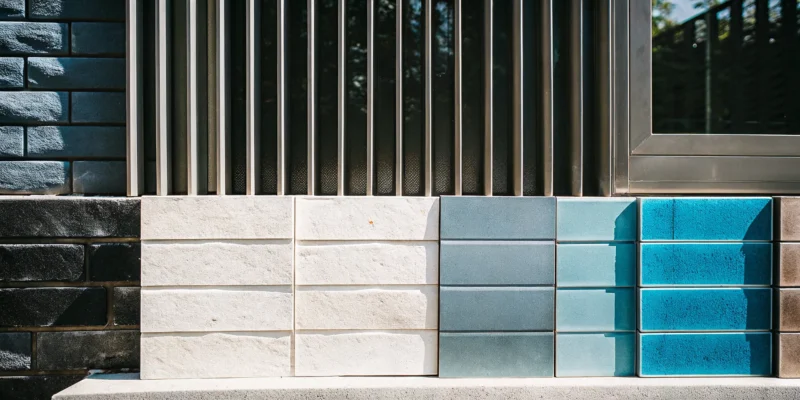
Painting your brick home is a huge commitment, and it’s natural to feel a little hesitant. On one hand, a fresh coat of paint offers a clean, modern look that can seriously improve curb appeal. On the other, it’s a permanent decision that can’t be easily undone. A successful paint job depends entirely on doing it correctly, from the initial cleaning to the final coat. This article breaks down the entire process, helping you determine if it’s the right move for your property. We’ll cover the essential steps for a beautiful and durable brick design wall paint exterior that protects your investment.
Key Takeaways
- Proper prep is non-negotiable: For a paint job that lasts, you must start with a clean slate. This means thoroughly washing the brick, repairing any cracks or damaged mortar, and applying a dedicated masonry primer to create a smooth, ready surface for the paint to bond to.
- Choose breathable paint to avoid damage: Brick needs to release moisture, so using the right paint is critical. Select a high-quality acrylic latex paint made for masonry; it allows the brick to breathe and prevents trapped moisture that causes peeling, bubbling, and long-term deterioration.
- Apply multiple thin coats for a better finish: While it seems faster, one thick coat of paint leads to drips and an uneven finish. Instead, apply at least two thin, even coats, allowing each one to dry completely. This technique ensures better adhesion, a smoother look, and a more durable result.
Why Paint Your Exterior Brick?
Deciding to paint your home’s brick exterior is a big step. While natural brick has a classic, timeless appeal, a fresh coat of paint can completely transform your property’s character. It’s a popular way to update an older home, create a more modern look, or simply get a fresh start. But the benefits go beyond just aesthetics. A proper paint job can also offer a layer of protection, helping to preserve your brick for years to come. Let’s walk through the main reasons homeowners choose to paint their brick and what you should consider before you start.
Increase Curb Appeal and Home Value
One of the most compelling reasons to paint your exterior brick is the immediate visual upgrade. Painting your brick house is a simple and effective way to make your home look new and more attractive. A dated, discolored, or mismatched brick exterior can be unified with a single, beautiful color, creating a clean and cohesive look. This change can dramatically improve your home’s curb appeal, making it stand out in the neighborhood. A fresh, modern exterior not only feels great to come home to but can also contribute to a higher property value when coordinated with other features like professional landscaping and well-maintained masonry.
Protect Brick from Weather Damage
While brick is known for its durability, it’s not completely immune to the elements. Brick is porous, meaning it can absorb water. Over time, exposure to rain, snow, and freeze-thaw cycles can cause moisture to get trapped inside, potentially leading to deterioration. A high-quality paint job acts as a sealant, creating a protective barrier that helps shield your brick from moisture and weather damage. This preventative layer can reduce the risk of spalling (when the brick surface flakes or peels off) and slow the growth of mildew and dirt buildup, making your exterior easier to clean and maintain.
What to Know Before You Commit
Painting brick can be a dramatic and satisfying upgrade, but it’s a permanent change and not always a beneficial one if done incorrectly. Once painted, brick is very difficult and expensive to strip back to its original state. It’s a commitment, so you want to be sure it’s the right choice for your home. It’s also crucial to use the right products. Always choose paints, primers, and coatings specifically formulated for masonry to ensure proper adhesion and breathability. According to the Brick Industry Association, you should also wait at least 28 days after new brickwork is completed before painting to allow the mortar to cure fully.
How to Prep Exterior Brick for Painting
A beautiful, lasting paint job on exterior brick is all about the prep work. It might not be the most exciting part of the project, but taking the time to properly prepare your brick surface is the single most important thing you can do to ensure your paint looks great for years to come. Skipping these steps can lead to peeling, bubbling, and cracking, forcing you to redo the work much sooner than you’d like. Think of it as creating the perfect canvas. A clean, smooth, and primed surface allows the paint to adhere correctly and withstand the elements. By following a few key steps, you can avoid common pitfalls and achieve a professional-quality finish that protects your brick and adds serious curb appeal.
Start with a Thorough Cleaning
First things first, you need to give your brick a deep clean. Paint simply won’t stick to dirt, dust, or mildew. Start by using a stiff-bristled brush to scrub away any loose debris, cobwebs, and grime. Once you’ve removed the surface-level dirt, it’s time to wash the brick. A dedicated masonry cleaner is your best bet, especially if you see any green or black spots, which could be fungus or algae. An anti-fungal cleaner will kill this growth and prevent it from pushing through your new paint job. A clean surface is non-negotiable for a lasting finish, a principle we apply to every project, including our professional restoration and sealing services. Allow the brick to dry completely before moving on, which can take at least 24 to 48 hours.
Repair Cracks and Damage First
Painting over damaged brick is like putting a bandage on a broken bone. It might look better for a little while, but it doesn’t fix the underlying issue. Carefully inspect your entire brick exterior for any cracks, holes, or crumbling mortar. Use a wire brush to clear out any loose rubble or old mortar from these damaged areas. This ensures that your filler will have a solid surface to bond with. For small cracks, you can use an acrylic caulk or an appropriate brick filler. For more significant issues, like large gaps or deteriorating mortar joints, it’s wise to call in an expert. A professional masonry contractor can ensure the structural integrity of your wall is sound before you cover it with paint.
Apply the Right Primer for a Lasting Finish
After your brick is clean, repaired, and completely dry, it’s time to prime. This step is absolutely essential for bare, unpainted brick. Because brick is so porous, it will soak up paint like a sponge, leading to an uneven, blotchy finish. A quality primer acts as a sealer and a bonding agent, creating a uniform surface that helps the topcoat of paint adhere properly. Look for a product specifically designed for masonry, like a loxon or acrylic masonry primer. This type of primer is formulated to condition the porous surface and block stains, ensuring your final paint color looks true and vibrant. Applying a good primer is the key to a durable, long-lasting finish that won’t need constant touch-ups.
Common Prep Mistakes to Avoid
Many paint failures on brick come down to a few common, avoidable mistakes during the prep phase. The biggest error is trapping moisture. Brick is a porous material that needs to breathe, meaning it allows water vapor to pass through it. If you seal it with the wrong type of paint or primer, or if you paint it when it’s still damp, moisture can get trapped inside. This leads to the paint blistering, bubbling, and peeling off in sheets. Another frequent mistake is inadequate cleaning. Painting over dirt or mildew guarantees a weak bond and a short lifespan for your paint job. Finally, skipping repairs on cracks and mortar will only cause bigger headaches later, as water can get into those gaps and cause more damage.
Choosing the Perfect Color and Design
Picking a paint color for your brick exterior is one of the most exciting parts of the process. It’s your chance to define your home’s character and make a statement. The right color can completely transform your property, making it feel fresh, modern, or classically elegant. While the number of choices can feel overwhelming, breaking it down helps. Think about the overall style you want to achieve, the existing features of your home, and the surrounding landscape. Do you want your home to blend seamlessly with nature, or do you want it to be a bold focal point on your street?
Whether you’re drawn to timeless neutrals or a bold, modern look, the perfect color is out there. It’s helpful to gather inspiration and even test a few samples on a small, inconspicuous area of your brick before making a final decision. Seeing the color in different lights throughout the day can make all the difference. Our design experts at Gappsi have helped countless Long Island homeowners find the ideal palette to complement their masonry and bring their vision to life. We understand how local light and architecture influence color, and we can help you find a shade that you’ll love for years to come.
Timeless Neutrals and Earth Tones
You can never go wrong with a classic. Earthy, neutral tones are a fantastic choice for brick because they work with the material’s natural texture instead of against it. Think of colors with a rich, organic feel, like warm taupes, creamy off-whites, and soft, muted grays. These shades have a “muddy” or natural undertone that feels both sophisticated and grounded. Choosing one of these timeless colors ensures your home will look stylish for years to come. These earthy exterior pairings create a sense of harmony with your home’s surroundings, making your property feel like a cohesive and peaceful retreat.
Modern Hues and Bold Palettes
If you want your home to have a more contemporary edge, consider modern hues like light and dark gray. A sleek charcoal or a crisp, light gray can give your brick exterior a sophisticated and updated look that stands out. These colors create a stunning backdrop for other elements, like a vibrant front door or lush green landscaping. Going bold doesn’t always mean using bright colors; a deep, moody shade like navy or even black can create a dramatic and elegant effect. You can find plenty of inspiration for painted brick walls to see how these striking colors look on real homes.
Using Accents and Two-Tone Designs
For a truly personalized look, think about using more than one color. A two-tone design can add depth and architectural interest to your home’s exterior. You could paint the main body of your brick one color and then use a contrasting or complementary shade on details like window trim, shutters, or even a specific section of the wall. This is a great way to express your style without committing to a single bold color everywhere. Adding a pop of vibrant color to your front door is another simple yet effective way to create a welcoming focal point and inject some personality into your home’s facade.
Matching Paint with Your Home’s Exterior
To create a truly cohesive and polished look, your paint color shouldn’t be chosen in isolation. Take a close look at your existing brick. Most bricks have subtle variations in color. Try to pick one of these underlying tones to highlight with your paint choice. This simple strategy ensures your new paint color will naturally complement the brick. Also, remember to consider the other fixed elements of your home, like the color of your roof, window frames, and any existing natural stone accents. Matching your paint to these features will tie your entire exterior design together beautifully.
How to Paint Your Brick Exterior Like a Pro
Once you’ve prepped your surface, it’s time for the main event. Painting brick isn’t just about slapping on a new color; it’s about using the right materials and techniques to get a beautiful, durable finish that lasts for years. With a little patience and the right approach, you can achieve a professional-quality result that completely transforms your home’s exterior. Let’s walk through the steps to get it done right.
Choosing the Best Paint and Finish for Brick
The paint aisle can be overwhelming, but for brick, the choice is critical. You need a paint that allows the brick to breathe. Always select a high-quality acrylic latex paint formulated specifically for masonry. These paints are designed to flex with temperature changes and allow moisture vapor to escape, which prevents blistering and peeling. Avoid standard exterior paints that can trap moisture and cause long-term damage to your brick. For the finish, satin or eggshell offers a slight sheen that is easier to clean than a flat finish, without highlighting imperfections the way a glossy finish would. Proper masonry work deserves a paint job that protects it.
The Right Tools for a Flawless Finish
Having the right tools on hand makes any project go more smoothly. For painting brick, you’ll want a paint roller with a thick nap, at least one inch, to get into all the crevices of the textured surface. A high-quality nylon or polyester brush is essential for cutting in around windows, doors, and trim. Don’t forget to lay down drop cloths to protect your landscaping and walkways, and use painter’s tape for crisp, clean lines. For larger projects, a paint sprayer can save a lot of time, but it requires careful masking to control overspray. Investing in good tools is a key part of any successful home remodeling project.
Techniques for an Even Application
Your technique is just as important as your tools. Before you start, make sure any cracks or holes are filled to create a smooth surface. Begin by “cutting in,” which means using your brush to paint the edges and corners where a roller can’t reach. Then, use your roller to fill in the large, flat areas. Work in small, manageable sections from top to bottom, overlapping each stroke to maintain a wet edge. This prevents noticeable lap marks and ensures a uniform finish. Applying paint evenly across the porous brick surface is key to a professional look that will stand the test of time.
Why Multiple Thin Coats Are Key
It might be tempting to apply one thick coat of paint to get the job done faster, but this approach often leads to drips, uneven coverage, and a longer drying time. Instead, plan on applying two or more thin coats. A thin coat adheres better to the brick and primer, creating a more durable bond. It also dries more quickly and evenly, allowing you to apply your next coat sooner. Always let each coat dry completely before starting the next one. This patience pays off with a much smoother, more resilient finish that won’t chip or peel prematurely.
Managing Moisture for a Lasting Paint Job
Brick is a porous material, meaning it absorbs and releases moisture. Painting it creates a new surface layer, and if that layer isn’t breathable, it can trap water inside. This trapped moisture is the number one enemy of a lasting paint job, leading to bubbling, flaking, and potential damage to the brick and mortar itself. This is why choosing a breathable, acrylic latex paint is so important. It allows moisture vapor to pass through, keeping your brick healthy and your paint job intact. Proper moisture management is fundamental to all quality masonry construction, and painting is no exception.
How to Maintain Your Painted Brick
Your work isn’t quite done after the final coat dries. To keep your painted brick looking fresh, a little maintenance goes a long way. Plan to gently wash the surface once a year with a soft-bristle brush and a mild detergent to remove dirt and prevent mildew growth. Periodically inspect the surface for any chips, cracks, or peeling areas. Touching up these small spots promptly will prevent moisture from getting behind the paint and causing bigger problems down the road. With consistent care, your painted brick will remain a beautiful feature of your home for years. If you notice significant wear, professional restoration and sealing services can help.
Related Articles
Frequently Asked Questions
Is painting my brick exterior a permanent decision? Yes, for all practical purposes, you should consider it a permanent change. While it is technically possible to remove paint from brick, the process is incredibly difficult, expensive, and can potentially damage the brick surface. It’s best to be completely sure about your color and design choices before you commit, because once the paint is on, you’re embracing a new look for the long haul.
How long can I expect a good paint job on brick to last? A high-quality paint job on a properly prepared brick surface can easily last 7 to 10 years, and sometimes even longer. The key factors are meticulous prep work, using the right breathable paint, and performing light annual maintenance. If you skip the cleaning and priming steps or use the wrong products, you might see peeling and chipping in just a year or two.
Can I just use a power washer to clean the brick before painting? You should be very careful with power washers. While they can be effective, using a setting that is too powerful can easily damage the face of the brick and the mortar joints, forcing water deep inside the pores. A safer approach is to use a garden hose, a stiff-bristle brush, and a good masonry cleaner. If you do use a power washer, keep it on a low-pressure setting and hold it at a distance from the wall.
What if my brick is already painted and peeling? What should I do? You cannot simply paint over failing paint. Before you do anything else, you must remove all the loose, bubbling, and peeling paint by scraping and sanding the surface until you reach a stable, solid layer. If the peeling is extensive, it could be a sign of a moisture problem that needs to be addressed first. Painting over it will only trap the issue and lead to the new coat failing quickly.
When should I consider hiring a professional instead of doing it myself? While painting a small brick wall can be a manageable DIY project, you should seriously consider hiring a professional for larger jobs. If your home is multiple stories high, has significant cracks or mortar damage, or if you suspect an underlying moisture issue, an expert is your best bet. A professional masonry contractor has the right equipment and experience to prepare the surface correctly and ensure a beautiful, long-lasting finish that protects your home.