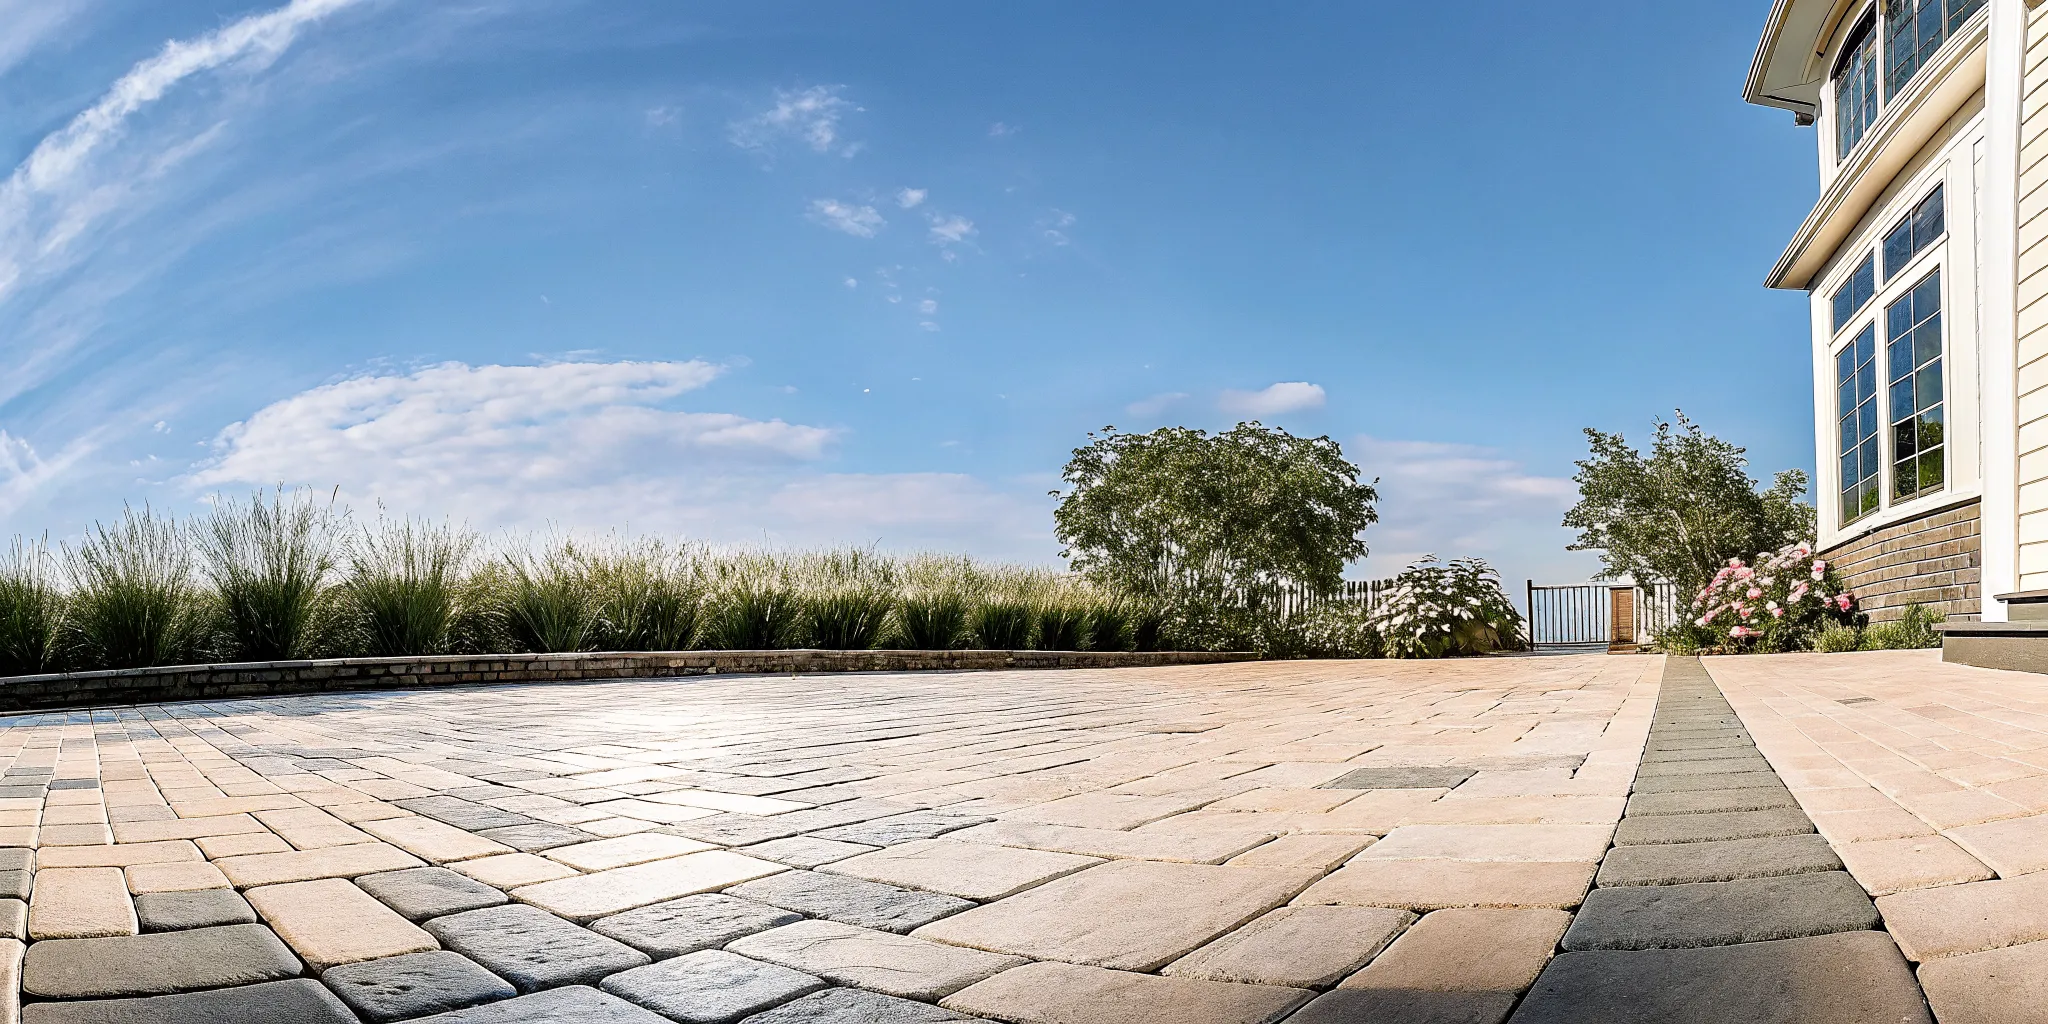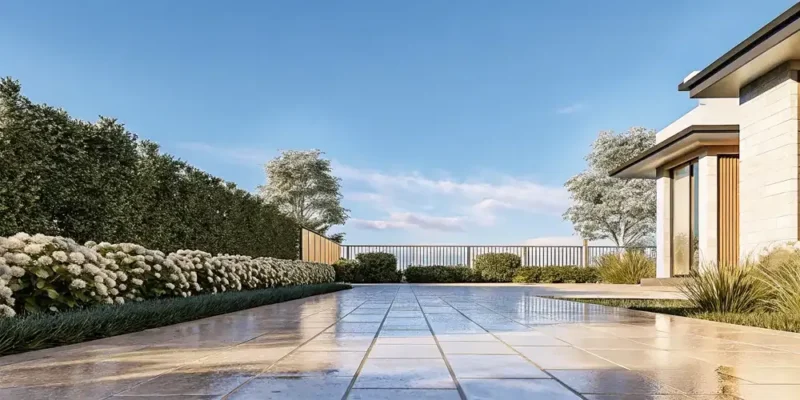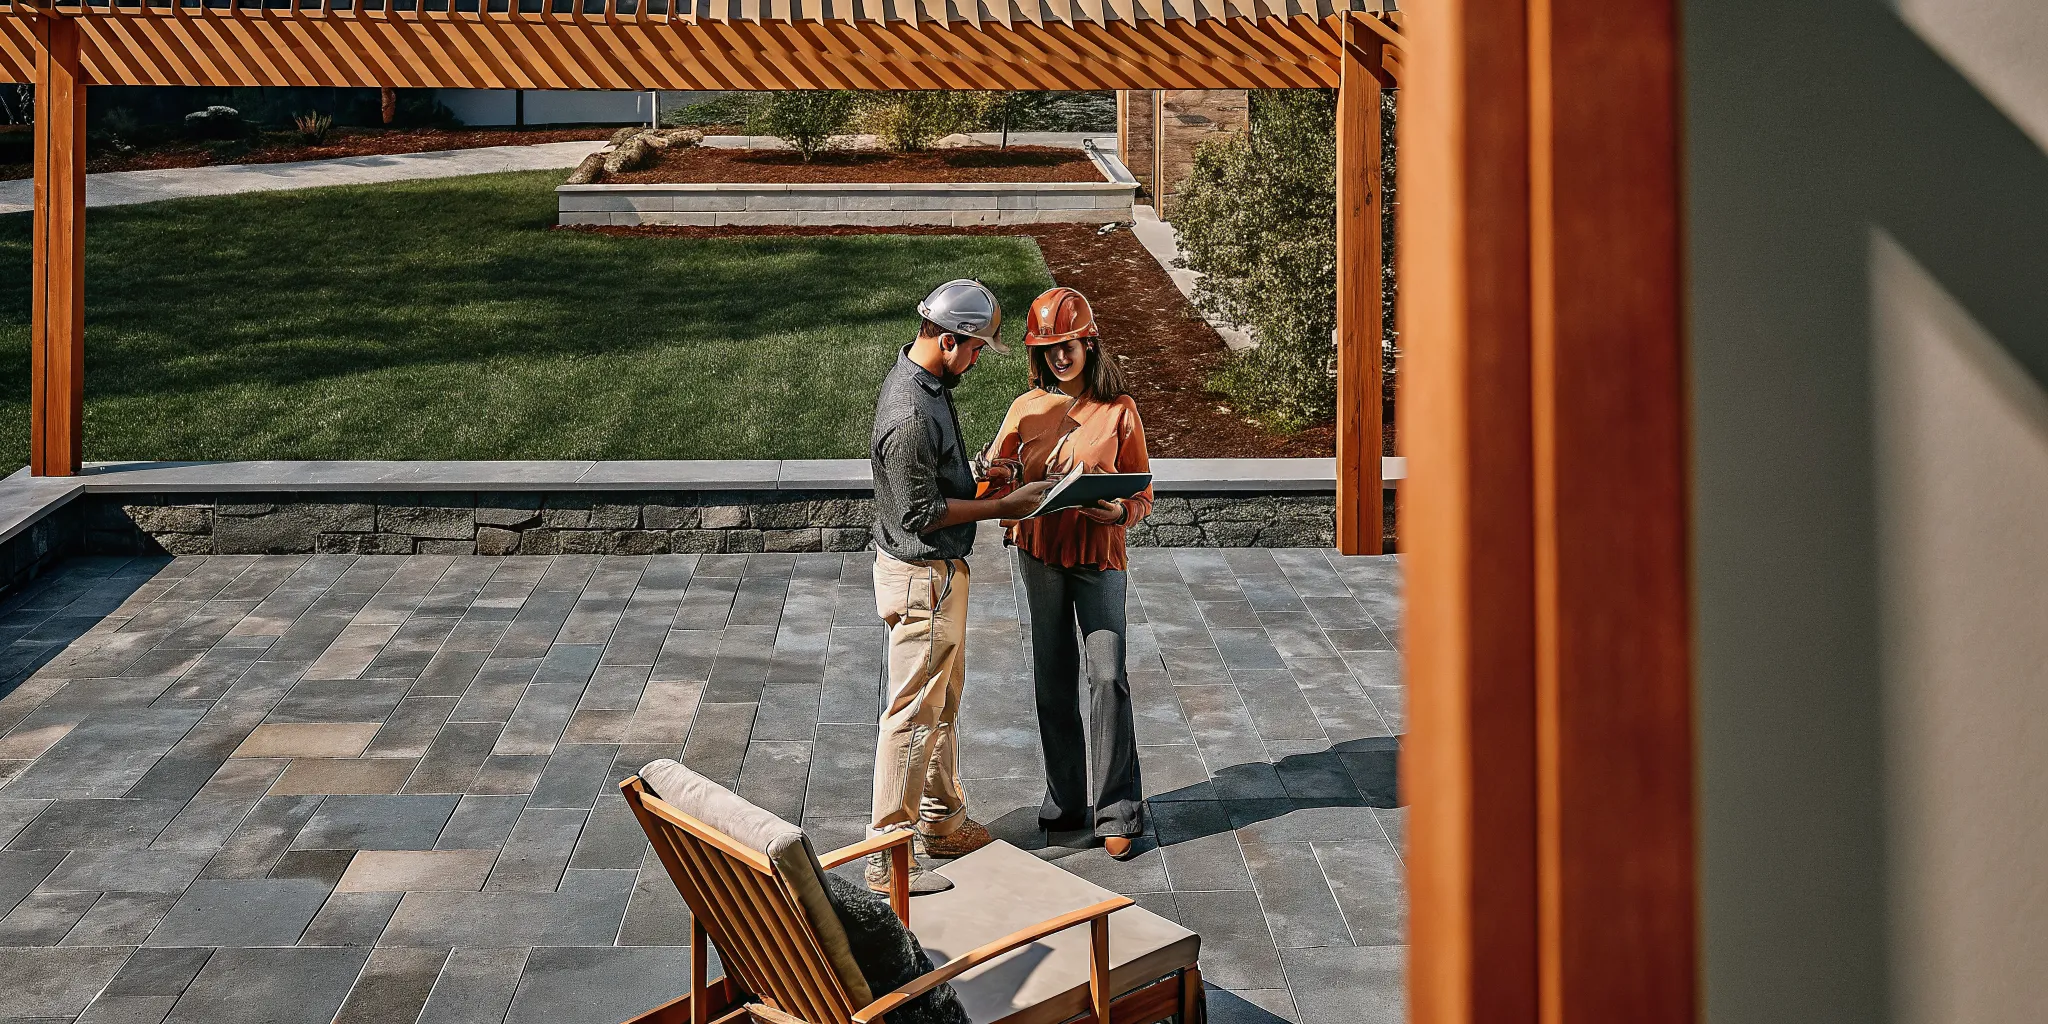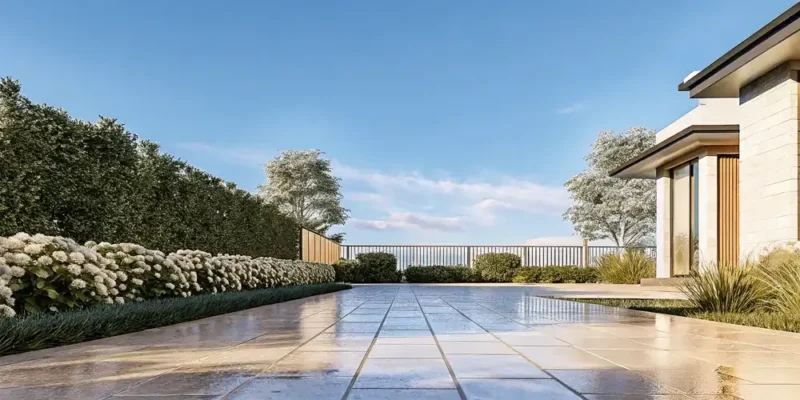
Applying a protective paver sealer to an outdoor patio with a roller.

The Homeowner’s Guide to Using Paver Sealer

Choosing a finish for your pavers is a design decision, just like picking a paint color for your living room. The final touch that ties your whole outdoor aesthetic together is the paver sealer. This single product can dramatically change the look and feel of your patio or walkway. Do you love the deep, rich tones your pavers have right after it rains? A wet-look sealer can make that look permanent. Or do you prefer the original, understated color of the stone? A natural-finish sealer offers invisible protection. This guide is all about style, helping you explore the different finishes, from matte to high-gloss, so you can find the perfect paver sealer to match your vision while protecting your surfaces.

Key Takeaways

  • Protect your investment with paver sealer: It’s the best way to guard against stains, prevent weed growth, and defend your pavers from weather damage, which keeps them looking new for years.
  • Choose a finish that matches your style: Select a sealer based on the final look you want, from a completely natural, invisible shield to a rich, wet-look gloss that makes colors pop.
  • Prioritize preparation for a flawless result: The success of your project depends on a perfectly clean and completely dry surface; rushing the prep work is the most common cause of a cloudy or peeling finish.

Why Seal Your Pavers?

You’ve invested in a beautiful paver patio, walkway, or driveway, and it looks fantastic. But how do you keep it that way? The secret is paver sealer. Think of it as the final, crucial step in protecting your outdoor space. Sealing your pavers isn’t just about looks; it’s a practical measure that defends against stains, weather, and weeds, extending the life of your investment. By creating a protective barrier, a good sealer ensures your pavers stay as strong and vibrant as the day they were installed. It’s a simple process that saves you from future headaches and costly repairs, making it one of the smartest things you can do for your property.

Protect and Enhance Paver Color

One of the first things you’ll notice about unsealed pavers is how the sun can dull their color over time. Just like a coat of paint fades, the rich tones of your pavers can wash out from constant UV exposure. Applying a sealer acts like sunscreen, locking in the original color and preventing that sun-bleached look. It not only protects the color but can also enhance it, giving the stones a richer, deeper appearance. This simple step ensures your beautiful natural stone pavers maintain their vibrancy, keeping your outdoor space looking fresh and new for years to come.

Prevent Stains from Spills and Grime

Life happens, and on a patio, that often means spills. From a tipped-over glass of red wine during a barbecue to an oil leak from a car on the driveway, stains are a real threat. Pavers are naturally porous, meaning they absorb liquids quickly, which can lead to permanent discoloration. Sealer creates an invisible shield on the surface, preventing spills from soaking in. This makes cleanup incredibly easy, as most messes can be wiped or rinsed away without a trace. Taking the time to seal your surfaces is the best way to prepare for our professional restoration and sealing services down the line.

Stop Weed Growth and Stabilize Joint Sand

Few things ruin the clean look of a paver patio faster than weeds sprouting up between the joints. Sealing your pavers is a fantastic way to combat this problem. When applied, the sealer soaks into the joint sand and hardens it, creating a durable bond. This solid barrier makes it much more difficult for weed seeds to take root and grow. It also prevents the sand from washing out during heavy rainstorms, which keeps your pavers from shifting. This stabilization is a key part of any quality masonry project and helps reduce your long-term maintenance chores.

Defend Against Weather Damage

Here on Long Island, our pavers face everything from hot summers to freezing winters. This constant cycle of weather can take a toll. When water seeps into unsealed pavers and freezes, it expands, causing cracks and surface flaking. A quality sealer is water-repellent, preventing moisture from getting in and protecting against this freeze-thaw damage. It also helps stop the growth of mold and mildew and reduces efflorescence, that chalky white residue that can appear on the surface. This protection is vital for maintaining the structural integrity of your driveways and patios through every season.

What Are the Main Types of Paver Sealers?

Walking into the sealer aisle can feel a bit overwhelming. You’ll see terms like “water-based,” “solvent-based,” “penetrating,” and “film-forming,” and it’s easy to wonder which one is right for your beautiful patio or driveway. Think of it like choosing a top coat for a manicure: some give a subtle, natural sheen, while others provide a high-gloss, dramatic finish. Each type of paver sealer offers a different combination of look, protection, and application process, so it’s all about finding what works for your project and your personal style.

Understanding the main categories is the first step to making a great choice. The biggest decision you’ll make is between a water-based and a solvent-based formula. This choice affects everything from the application process and the final appearance to the level of maintenance required down the road. After that, you’ll want to consider whether you prefer a sealer that soaks into the paver or one that forms a protective film on top. Don’t worry, it’s not as complicated as it sounds. We’ll break down exactly what these terms mean so you can find the perfect match for your outdoor space. Our team at Gappsi is always ready to help with professional restoration and sealing services if you prefer to leave it to the experts.

Water-Based vs. Solvent-Based

The most common way to categorize sealers is by their base: water or solvent. Water-based acrylic sealers are a popular choice for homeowners because they are easy to work with, have low odors, and are generally safer for nearby plants and pets. They provide a lovely, subtle sheen without harsh chemicals. On the other hand, solvent-based sealers are known for creating that rich, “wet look” that really makes paver colors pop. They offer excellent protection and are especially effective on brick, giving it a deep, vibrant finish that enhances its natural texture.

Penetrating vs. Film-Forming

Next, you’ll want to decide if you want a sealer that works from within or one that protects from the top. Penetrating sealers do exactly what their name suggests: they soak deep into the paver material. This creates an invisible shield that protects from the inside out and won’t peel or flake over time. It’s the perfect choice if you love the natural look of your stone pavers and want protection without changing their appearance. Film-forming sealers create a protective layer on the surface, which can give your pavers a satin or glossy finish while guarding against stains and wear.

Exploring Eco-Friendly Options

If minimizing your environmental impact is a priority, you’ll be happy to know there are great eco-friendly paver sealers available. These products are typically water-based, non-toxic, and formulated to be safe for your family, pets, and garden. They have little to no odor and contain zero volatile organic compounds (VOCs), which are harmful chemicals found in many traditional formulas. You can get excellent protection with a natural finish while making a choice that’s better for the environment. You can find high-quality, responsible options at the Gappsi Store to complete your project with peace of mind.

Which Paver Sealer Finish Is Right for You?

Choosing a paver sealer isn’t just about protection; it’s also about style. The finish you select can dramatically change the look of your patio, walkway, or driveway. Do you love the original, dry look of your stone, or do you prefer a rich, vibrant appearance that makes the colors pop? Your answer will guide you to the perfect sealer. Think of it as the final touch that defines your outdoor space’s personality. Let’s walk through the most popular finishes to help you find the one that matches your vision.

The Natural Look: For Subtle Protection

If you adore the authentic color and texture of your pavers, a natural look sealer is your best bet. This type of sealer penetrates deep into the stone, creating an invisible shield against moisture, stains, and UV rays without adding any shine or altering the appearance. It’s the ideal choice for maintaining a classic, understated aesthetic while still getting all the protective benefits. Your pavers will look just as they did before sealing, but they’ll be much better equipped to handle spills and harsh weather. Consider it a hardworking, behind-the-scenes hero for your beautiful natural stone.

The Wet Look: To Deepen Color

Want to make your paver colors look richer and more saturated? A wet look sealer is the way to go. This finish enhances your pavers by giving them the deep, vibrant appearance they have right after it rains. It’s a fantastic option for bringing out the complex tones and details in decorative pavers, making your patio or pool deck a true standout feature. The glossy finish not only deepens the color but also adds a layer of shine that catches the light beautifully. This is a popular choice for anyone looking to give their outdoor surfaces a fresh, polished, and permanently lustrous look.

Semi-Gloss and High-Gloss Finishes

For those who want a noticeable shine, semi-gloss and high-gloss sealers deliver a striking, reflective finish. These film-forming sealers create a strong protective topcoat that offers excellent durability and color enhancement. A semi-gloss finish provides a subtle luster, while a high-gloss option creates a much more dramatic, polished effect. These finishes are great for making a bold statement and are especially effective on smooth pavers. While solvent-based versions typically offer the highest shine, water-based options can provide a lovely sheen with fewer odors. You can find a variety of these premium sealers to achieve the exact level of gloss you desire.

What Are the Best Paver Sealer Brands?

Walking down the sealer aisle can feel overwhelming with so many brands promising the best results. Over our decades of experience, we’ve worked with countless products and have learned which ones truly deliver on their promises. The right brand for you depends on the look you want to achieve, the level of protection you need, and how you plan to apply it. We’ve found that focusing on trusted, high-quality brands saves a lot of headaches down the road. A premium sealer not only looks better but also lasts longer, giving you more value for your investment.

To help you make a confident choice, we’ve broken down some of our top recommendations and what makes them stand out. Whether you’re looking for a high-gloss finish or something more subtle, there’s a great option available. We’ll also cover the key features to look for so you can evaluate any brand like a pro.

Our Professional Sealer Recommendations

When clients ask for our top picks, a few names consistently come to mind. For a beautiful, deep wet look with a semi-gloss finish, Super Seal 25 is an excellent all-around choice. It’s a solvent-based sealer that does a fantastic job of enhancing color and stabilizing the sand in paver joints. If you want an even glossier, high-shine finish, its counterpart, Super Seal 30, offers similar protective qualities with a more dramatic look. For those who prefer a water-based product, we often recommend Masonry Saver Paver Sealer. It provides a lovely satin shine and a subtle wet look while still locking joint sand in place effectively.

Comparing Top Brands: Techniseal, SureCrete, and More

Beyond our go-to sealers, other brands offer fantastic, specialized products. Techniseal is a popular choice, particularly its NS Joint Stabilizer & Paver Sealer. This product is great for creating a clear, protective film that prevents joint sand from washing away while guarding against stains and erosion. Another reliable name is SureCrete, which offers a wide range of sealers known for their excellent protection against moisture, stains, and UV damage. Choosing between these top-tier brands often comes down to the specific needs of your patio or driveway. Our team often handles the entire restoration and sealing process for homeowners, which gives us firsthand experience with how these products perform in Long Island’s climate.

What to Look For: Durability, Protection, and Ease of Use

When you’re comparing sealers, keep three key factors in mind: durability, protection, and ease of use. Durability determines how long the sealer will last. Solvent-based acrylics typically last two to four years, while water-based versions last one to three years. Penetrating sealers can last even longer, sometimes up to ten years. For protection, look for a product that offers UV defense to prevent fading, stain resistance, and joint stabilization to stop weed growth. Finally, consider ease of use. Water-based sealers are generally easier to work with, have less odor, and clean up with just soap and water, making them a great choice for DIY projects.

How Much Does Paver Sealer Cost?

Figuring out the budget for your paver sealing project is a great first step. The cost of paver sealer is an investment in protecting your beautiful patio, walkway, or driveway from the elements and everyday wear. While prices can vary, understanding the key factors will help you plan effectively and choose a product that gives you the best long-term results. The total cost depends on the type of sealer you choose, the size of your space, and the texture of your pavers. Let’s break down what you can expect to spend.

Typical Price Ranges by Sealer Type

Generally, you can expect paver sealer to cost between $50 and $60 per gallon, with some premium or specialized formulas costing more. For most residential projects, you’ll likely buy a larger container. A 5-gallon pail often runs from $150 to $300 or more, depending on the quality and type. Water-based sealers are sometimes more affordable than solvent-based options, but the price is really driven by the quality of the ingredients and the performance features, like UV resistance or stain protection. You can find a curated selection of high-quality options at the Gappsi Store to fit different project needs and budgets.

Calculating Cost Per Square Foot

To figure out exactly how much sealer you’ll need, you have to consider the coverage rate. A good rule of thumb is that one gallon of sealer will cover about 125 square feet, but this can change quite a bit. The key is the porosity and texture of your pavers. A smooth, dense surface might get up to 300 square feet of coverage per gallon, while more porous or textured pavers could absorb more sealer, bringing your coverage down to around 200 square feet per gallon. Before you buy, measure the length and width of your area to get the total square footage. This will help you understand the unique qualities of your porcelain and natural stone surfaces.

Finding the Best Value for Your Project

The best value isn’t always the lowest price tag. A cheaper sealer might save you money upfront, but if it requires reapplication every year, it can cost you more time and money in the long run. Think about the needs of your space. A high-traffic driveway will benefit from a more durable, protective sealer than a quiet garden path. Buying a 5-gallon pail is almost always more cost-effective per gallon than buying individual gallons. Ultimately, the best value comes from choosing a sealer that provides the right finish and level of protection for your specific pavers, ensuring they stay beautiful for years. If you want a perfect application without the guesswork, our professional restoration and sealing services offer excellent long-term value.

How to Apply Paver Sealer: A Step-by-Step Guide

Applying paver sealer is a fantastic weekend project that can make a huge difference in the look and longevity of your patio, walkway, or driveway. With the right preparation and a bit of patience, you can achieve a professional-quality finish that protects your investment for years to come. Before you begin, it’s a good idea to gather all your tools. You’ll likely need a stiff-bristle broom, a pressure washer, a paver cleaner, a pump-style garden sprayer or a paint roller with an extension pole, and of course, your chosen sealer.

The process isn’t complicated, but each step builds on the last, so it’s important not to rush. The goal is to create a clean, dry surface so the sealer can bond properly with the pavers. From there, it’s all about applying thin, even coats and giving the product enough time to cure. Think of it as painting a room: the prep work takes the most time, but it’s what guarantees a beautiful result. While this is a very manageable DIY job, if you’re short on time or want to ensure a flawless application, our team offers expert restoration and sealing services to handle the entire process for you.

Step 1: Clean and Prep Your Pavers

You can’t get a lasting finish without a perfectly clean surface. This is the most critical step, so take your time with it. Start by sweeping away all loose dirt, leaves, and debris. Next, tackle any weeds or moss growing in the joints between the pavers. For stubborn stains like oil, grease, or rust, you’ll need a dedicated paver cleaner designed for those specific spots. Once you’ve treated any stains, it’s time to power wash the entire area. This removes ground-in dirt and any remaining cleaning solution. After washing, you must let the pavers dry completely. This can take at least 24 to 48 hours, depending on the weather. Sealing damp pavers will trap moisture, leading to a cloudy, white haze that is very difficult to remove.

Step 2: Check the Weather Forecast

Your sealer’s performance is highly dependent on the weather, so play meteorologist for a day. The ideal time to apply sealer is on a clear, dry day with low humidity and moderate temperatures, typically between 50 and 80 degrees Fahrenheit. Applying sealer in direct, intense sunlight or when it’s too hot can cause it to dry too quickly, preventing it from bonding correctly and leaving streaks. Conversely, if it’s too cold or humid, the sealer won’t cure properly and can develop that dreaded cloudy look. Plan your project for a day when you have a clear 24-hour window with no rain in the forecast. Always read the product label, as each manufacturer provides specific temperature and weather recommendations for the best results.

Step 3: Do a Small Patch Test

Before you commit to sealing your entire patio or driveway, always perform a patch test. This is a simple but essential step to ensure you’re happy with the final look. Choose a small, out-of-the-way area, like a corner behind a planter or near your home’s foundation, and apply the sealer exactly as you plan to for the main project. Let it dry completely according to the manufacturer’s instructions. This test allows you to see the true effect of the sealer on your specific pavers. You can check if you like the level of color enhancement and the sheen (whether it’s matte, satin, or gloss). It’s much better to discover you don’t like the finish on a two-square-foot patch than after you’ve sealed the whole space.

Step 4: Apply Thin, Even Coats

Now for the main event. The key to a smooth, uniform finish is applying the sealer in thin, even coats. A pump-style garden sprayer is often the best tool for the job, as it allows you to apply a consistent layer quickly. If you’re using a sprayer, work in manageable sections and use a sweeping motion. For smoother pavers, a short-nap roller can also work well. Your goal is to saturate the surface without letting the sealer puddle. If you see any pools forming, simply roll them out or back-brush them to spread the excess. Two thin coats are almost always better than one thick one. Let the first coat dry to the touch before applying the second, following the product’s specific instructions for recoating times.

Step 5: Let the Sealer Cure Completely

Patience is a virtue, especially when it comes to letting paver sealer cure. While the surface may feel dry to the touch within a few hours, it is not fully cured. Curing is the chemical process where the sealer hardens and bonds with the paver to create a durable, protective layer. This takes time. As a general rule, you should keep all foot traffic off the sealed area for at least four to six hours. Wait a full 48 to 72 hours before driving a car on a sealed driveway or placing heavy patio furniture back on your patio. Rushing this final step can lead to tire marks, scuffs, and a weakened finish, undoing all your hard work.

Common Paver Sealing Mistakes to Avoid

Sealing your pavers can feel like a big accomplishment, but a few simple missteps can undo all your hard work. Getting a durable, beautiful finish is all about the details. By learning what not to do, you can avoid the common issues that trip up many homeowners and ensure your patio or driveway looks fantastic for years. Let’s walk through the most frequent mistakes so you can get the job done right the first time.

Sealing Pavers While They’re Still Damp

Patience is truly a virtue when it comes to sealing pavers. One of the biggest mistakes is applying sealer before the pavers are completely dry after cleaning. Even a little bit of trapped moisture can cause big problems, leading to a cloudy, white haze under the sealer that’s difficult to fix. As experts note, this trapped moisture is a primary cause of whitening and sealer failure. To be safe, wait at least 24 to 48 hours after a deep cleaning or heavy rain before you even think about opening that can of sealer. Your pavers should be bone dry to the touch and below the surface.

Applying Too Much Sealer at Once

When sealing pavers, less is definitely more. It’s tempting to lay on a thick coat, thinking it will provide extra protection, but this often backfires. Applying too much sealer at once can create a host of issues, including whitening, peeling, and a splotchy, uneven finish. The goal is to apply thin, even coats that can properly absorb into the paver and cure correctly. Always follow the manufacturer’s guidelines on the product you purchase from the Gappsi Store. Using a roller or a sprayer can help you control the application and achieve that flawless, professional look without overdoing it.

Skipping Essential Prep Work

A great finish starts with a clean slate. Skipping the preparation stage is a recipe for a weak bond and a short-lived seal. Before you apply any sealer, the surface must be perfectly clean, free of dirt, grime, moss, and any chalky white residue, which is known as efflorescence. For the best results, you should wash the area thoroughly. Using a specialized paver preparator can help the sealer soak deeply into the concrete and adhere properly. Taking the time for meticulous prep work ensures your sealer performs its best and gives you the lasting protection you’re looking for. If the cleaning seems daunting, our restoration and sealing services can handle the prep for you.

Ignoring Temperature and Weather Warnings

Your local weather forecast is one of your most important tools for a paver sealing project. Applying sealer in the wrong conditions can ruin the finish. You should only apply sealer when air and surface temperatures are moderate, typically between 50°F and 95°F. If it’s too hot, the sealer can dry too quickly, leaving streaks and bubbles. If it’s too cold, it won’t cure properly. You should also avoid applying it on very windy days, which can blow debris onto the wet surface, or on rainy days, which will wash the sealer away. Always check the forecast for a clear, dry, and calm window of a few days to get the best results.

How Often Should You Reseal Your Pavers?

One of the most common questions we get is about how often pavers need to be resealed. As a general guideline, you should plan on resealing your paver patio, walkway, or driveway every two to three years. This simple maintenance step keeps them looking great and protects your investment from the elements. However, this isn’t a strict rule. The ideal frequency really depends on a few key factors, including Long Island’s weather, how much foot traffic the area gets, and the type of sealer you originally used. Some high-quality penetrating sealers can even last five years or more under the right conditions.

Think of paver sealer like sunscreen for your hardscape. It provides a protective barrier that wears down over time, exposing your pavers to UV rays that cause fading, moisture that can lead to cracks in the winter, and stains from spills. For homeowners who prefer a hands-off approach, Gappsi offers professional restoration and sealing services to ensure the job is done right, giving you long-lasting protection and peace of mind. Keeping up with a regular sealing schedule is the best way to preserve the color and integrity of your beautiful pavers for years to come.

Factors That Affect Your Sealer’s Lifespan

Several things can influence how long your paver sealer holds up. The type of sealer is a major factor. For example, a penetrating sealer soaks into the paver to form a protective shield from within and can last five years or more. A film-forming sealer, which creates a top coat, might need a fresh application every two to three years. The amount of traffic your pavers see also matters. A driveway or a popular patio space will show wear much faster than a decorative garden path. Finally, proper application is critical. Sealing pavers that are still damp or applying the sealer too thickly can cause it to fail early, leading to a cloudy or peeling finish.

Telltale Signs It’s Time to Reseal

So, how do you know when it’s time for a new coat? Your pavers will give you a few clear signals. The easiest way to check is with a simple water test. Sprinkle a little water onto the surface. If it beads up, your sealer is still doing its job. If the water soaks in and darkens the paver, the protective barrier has worn off. You might also notice that the colors look faded or that new stains from things like leaves or spills are becoming harder to clean. Any signs of whitening or flaking also mean it’s time to strip the old layer and reseal your porcelain and natural stone surfaces.

DIY vs. Hiring a Pro: What’s the Best Choice?

Deciding whether to seal your pavers yourself or call in a professional is a common crossroads for homeowners. The right choice really depends on your comfort level, the size of your project, and the results you’re aiming for. A DIY project can be rewarding, but a professional application offers peace of mind and a guaranteed finish. Let’s walk through the key considerations to help you decide which path is best for your patio, walkway, or driveway.

When to Tackle the Job Yourself

If you enjoy hands-on home projects and have a smaller area to cover, sealing your own pavers can be a great weekend task. You can apply sealer with a simple pump sprayer or a roller, but the key to success is all in the preparation. First, you must clean your pavers thoroughly to remove any dirt, grime, or stains. The most critical step, and the one where most DIY projects go wrong, is ensuring the pavers are completely dry before you apply the first coat. Sealing damp pavers can trap moisture, leading to a cloudy, white finish that’s difficult to fix.

The Benefits of a Professional Application

While doing it yourself can save some money upfront, hiring an expert often prevents costly mistakes down the road. Common issues like a milky finish, peeling, or an uneven sheen usually happen from applying too much sealer, not cleaning properly, or using the wrong product for your specific type of paver. A professional team has the experience and commercial-grade equipment to prepare the surface perfectly and apply the sealer correctly. Gappsi’s restoration and sealing services ensure a flawless, durable finish, saving you from the frustration of a DIY job gone wrong.

Comparing Costs and Long-Term Results

When you look at the budget, it’s important to think about long-term value. Many store-bought sealers need to be reapplied every two to three years. In contrast, professionals often use higher-quality penetrating sealers that can last five years or even longer, protecting your investment for years to come. Reapplying sealer too often can also cause a thick, unattractive buildup on the surface. By investing in a professional application, you not only get a better initial result but may also spend less time and money on maintenance over the life of your pavers.

Find Your Perfect Paver Sealer with Gappsi

Choosing the right paver sealer can feel like the final, crucial step in perfecting your outdoor space. Whether you’re a dedicated DIYer ready to tackle the project yourself or you’d prefer to leave it to the experts, we have the products and services to ensure your patio, walkway, or driveway looks its best for years to come. At Gappsi, we simplify the process by offering both high-quality materials and professional application, so you can find the exact solution that fits your needs and lifestyle. We’re here to help you protect your investment and keep your hardscapes looking beautiful.

Shop Our Selection of Premium Sealers

Finding the right sealer really comes down to the look you want to achieve and the level of protection your pavers need. Do you love the deep, rich color of your pavers when they’re wet? A wet-look sealer is perfect for that. Or maybe you prefer a subtle, matte finish that looks completely natural. We have options for that, too, along with semi-gloss and high-gloss finishes. At the Gappsi Store, you can browse our selection of premium sealers, each designed to protect your hardscapes from stains, water damage, and UV rays. A quality sealer also stabilizes the joint sand, which is key to preventing weed growth and insect infestations.

Schedule Your Professional Sealing Service

If you want a flawless finish without the guesswork, our team is ready to help. A professional application ensures every step is done right, from the initial cleaning to the final coat. We make sure your pavers are completely dry before application, which is critical for avoiding that hazy, cloudy look that can happen when moisture gets trapped. Our restoration and sealing services provide long-lasting protection and a perfect finish every time. Plus, we can advise you on the best maintenance schedule. Most pavers need resealing every two to three years to maintain their beauty and durability, especially with Long Island’s changing seasons. Let us handle the work so you can simply enjoy your beautiful outdoor space.

Frequently Asked Questions

Will sealing my pavers make them slippery? This is a great question, and a very common concern, especially for pool decks and walkways. The answer depends on the type of sealer you choose. Film-forming sealers, particularly high-gloss ones, can reduce the traction of the surface. However, many modern sealers include anti-slip additives to provide a safe, textured finish. If slipperiness is a concern, a penetrating sealer is an excellent choice because it soaks into the paver without forming a surface film, leaving the natural texture unchanged.

How soon can I seal newly installed pavers? It’s best to wait a bit before sealing a brand-new paver installation. Pavers can release a white, chalky substance called efflorescence as they cure, which is a natural process. Sealing too early can trap this haze underneath the protective layer. We generally recommend waiting at least 30 to 60 days after installation to give the pavers time to cure and release any initial efflorescence before you apply the first coat of sealer.

What’s the most common mistake people make when sealing their own pavers? By far, the most frequent mistake is applying sealer before the pavers are completely dry. Even a small amount of moisture trapped under the sealer can create a cloudy, milky-white haze that is very difficult to remove. After cleaning your pavers, you should wait at least 24 to 48 hours in dry, sunny weather to ensure they are bone dry all the way through before you begin sealing.

My pavers already have an old sealer on them. Can I just apply a new coat over it? It depends on the condition of the old sealer and the type you plan to use. If the existing sealer is a water-based product and is simply wearing thin without peeling or flaking, you can often apply a new coat after a thorough cleaning. However, if the old sealer is peeling, hazy, or if you are switching from a solvent-based to a water-based product (or vice versa), you will likely need to strip the old layer off first to ensure the new coat adheres properly.

How long do I have to wait to walk or drive on my newly sealed pavers? Patience is key after you’ve finished the job. While the sealer might feel dry to the touch in just a few hours, it needs more time to fully cure and harden. As a general rule, you should keep foot traffic off the area for at least four to six hours. For driveways, wait a full 48 to 72 hours before driving or parking a car on the surface to prevent tire marks and ensure a durable, long-lasting finish.

Share this page:
A person by their pool researches Long Island pool builders and designs on a tablet.

A Guide to Choosing Long Island Pool Builders

Your dream backyard is likely more than just a swimming pool. You probably envision a sprawling patio for entertaining, an outdoor kitchen for summer barbecues, or lush landscaping that creates a private retreat. The real challenge is finding a builder who sees your complete vision, not just the pool project. The best Long Island pool builders are partners who can design and build the entire space, ensuring every element works together in harmony. This integrated approach is key to creating a backyard that feels both luxurious and personal, saving you from the stress of managing multiple contractors and guaranteeing a cohesive, beautiful result.

Key Takeaways

  • Prioritize proven local expertise: Choose a builder with a strong Long Island reputation, verifiable licenses and insurance, and a portfolio of past projects that matches your style. This ensures they can handle local regulations and site conditions smoothly.
  • Find a single partner for your whole backyard: A company that designs and builds everything from the pool to the patio and landscaping creates a more cohesive and functional space, saving you the stress of coordinating multiple teams.
  • Understand the true value, not just the price: The lowest quote can lead to costly issues later, so focus on getting a detailed, itemized contract that outlines all materials, timelines, and warranties to protect your investment.

What to Look for in a Long Island Pool Builder

Choosing a company to build your backyard pool is a big decision. This isn’t just a construction project; it’s an investment in your home and your family’s lifestyle for years to come. The right builder will be your partner, guiding you through every step from design to the first cannonball. Finding that perfect match means looking beyond a simple price quote. You need a team with proven local expertise, the right credentials, and a portfolio that inspires confidence.

When you start your search, focus on finding a builder who understands the unique landscape of Long Island. A contractor with deep roots in the community will know how to handle local soil conditions, zoning regulations, and permitting processes, which saves you headaches down the road. Think of this as assembling your dream team. You want skilled professionals who can not only build a beautiful swimming pool but also deliver a smooth and transparent experience. Taking the time to vet your options carefully ensures your vision for a backyard oasis becomes a reality without any unwelcome surprises.

Check Their Local Experience and Reputation

A pool builder with decades of experience in Nassau and Suffolk counties brings more than just construction skills to the table. They bring an understanding of Long Island’s specific environment. A contractor with years of local projects under their belt has likely encountered a wide range of site conditions and challenges. This kind of experience is invaluable for a smooth installation.

A builder’s reputation is built on the experiences of their previous clients. Look for online reviews and testimonials, but also ask for a list of references you can speak with directly. Hearing from past clients gives you unfiltered insight into their communication style, professionalism, and the quality of their work. A reputable builder will be proud to connect you with happy customers.

Verify Licenses, Insurance, and Certifications

This step is all about protecting yourself and your investment. Any contractor you consider must be fully licensed and insured to work in your town. Ask for proof of their general liability insurance and workers’ compensation coverage. Without this, you could be held responsible for any accidents that happen on your property during construction. A professional company will provide these documents without hesitation.

Beyond the basics, look for industry certifications. Credentials from organizations like the Pool & Hot Tub Alliance (PHTA) show a commitment to ongoing education, safety standards, and professional ethics. You can often verify a business license through your local county’s consumer affairs office. These credentials are a clear indicator that you’re working with a true expert.

Review Their Portfolio of Past Projects

A picture is worth a thousand words, especially when it comes to pool design. Always ask to see examples of past projects to get a feel for a builder’s craftsmanship and design style. This is your chance to see their work up close and determine if it aligns with the aesthetic you have in mind. Pay attention to the details, from the tile work to the surrounding patio and landscaping.

A strong portfolio demonstrates versatility and experience. As you browse their photos and videos, check if they have experience with the specific features you want, like a waterfall, integrated spa, or custom lighting. Seeing their past work on the Gappsi YouTube channel can help you visualize what’s possible for your own backyard and confirm that their quality meets your standards.

Finding a Partner for Your Complete Backyard Vision

Your swimming pool is the centerpiece, but it’s rarely the only feature in your dream backyard. You might envision a sprawling patio for entertaining, an outdoor kitchen for summer barbecues, or lush landscaping that creates a private oasis. The challenge is finding a builder who doesn’t just see a pool project, but who sees your complete vision. Choosing a partner who can design and build the entire space ensures every element works together in harmony, from the pool coping to the garden beds. This integrated approach is key to creating a backyard that feels both luxurious and personal.

This holistic method saves you from the stress of becoming a general contractor yourself, juggling different companies for masonry, landscaping, and pool installation. A single, experienced team can manage the entire process, ensuring a seamless workflow and a cohesive final result. When your pool builder also specializes in creating complete outdoor living environments, you get a space that is not only beautiful but also perfectly functional for your family’s lifestyle. They can anticipate how one part of the project will affect another, preventing costly mistakes and delays. It’s about finding a true partner who can translate your ideas into a stunning, unified backyard retreat that you’ll enjoy for years to come.

Comprehensive Outdoor Living Design

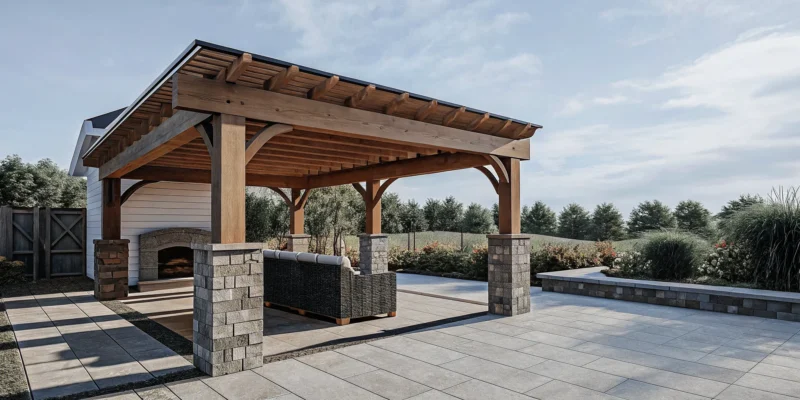
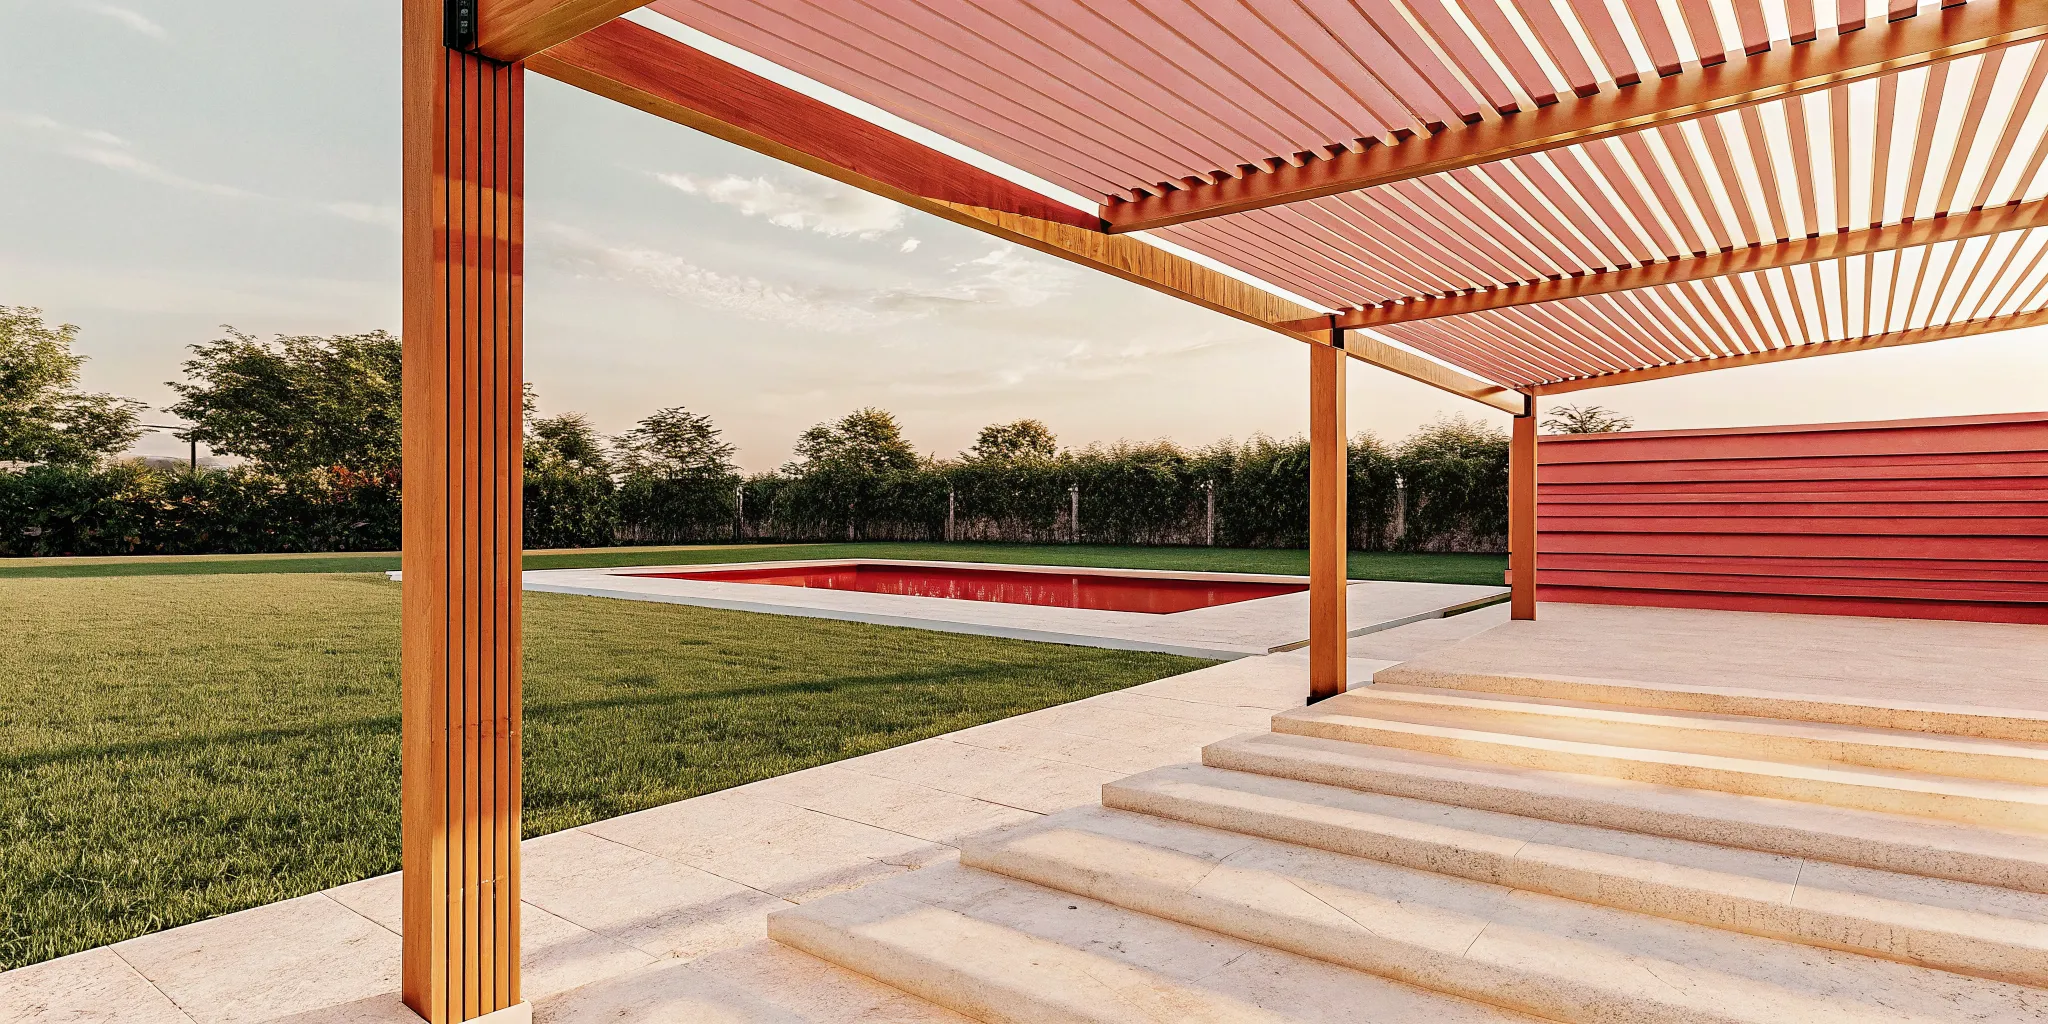
The best backyard transformations feel intentional and cohesive, where the pool, patio, and plantings look like they were always meant to be together. This is the benefit of a comprehensive design approach. When one company handles everything, you avoid mismatched materials or awkward transitions between spaces. A team that specializes in complete outdoor living can create a master plan for your property. They will consider traffic flow, sun exposure, and how you plan to use the space, integrating features like fire pits, retaining walls, and even beautiful pavilions or pergolas into a single, elegant plan. This unified process results in a more thoughtful and functional outdoor space.

A Showroom to See Materials Firsthand

Scrolling through photos online is a great way to gather inspiration, but it can’t replace seeing and touching materials in person. The color of a paver or the texture of a stone can look completely different on a screen than it does in the sunlight. A builder with a physical showroom gives you a significant advantage. Visiting a place like the Gappsi Store allows you to compare options side by side, from gleaming porcelain pavers to rustic natural stone. This hands-on experience helps you make confident decisions, ensuring the materials you choose for your pool deck and patio are exactly what you envisioned for your home.

Expertise Beyond Just the Pool

Building a high-quality swimming pool requires more than just excavation and plumbing. A truly great pool contractor possesses a deep understanding of the entire backyard ecosystem. Their expertise should extend to landscape architecture, masonry, and proper site preparation, including drainage and grading. This broad knowledge is crucial for preventing future problems and ensuring your investment lasts. A company with a diverse skill set can seamlessly integrate your pool with other complex features, like multi-level patios, outdoor kitchens, or even adjacent synthetic turf and Sports Games Courts. This level of experience ensures every component of your project is built to the highest standard.

What Services Do Pool Companies Offer?

When you start looking for a pool builder, you’ll quickly find that their services can vary quite a bit. Some companies focus solely on installing a standard pool, while others offer a full suite of services to transform your entire backyard. A premier pool company acts as a partner, guiding you through every stage from the initial sketch to long-term care. They understand that a pool is more than just a place to swim; it’s the centerpiece of your outdoor living space. Knowing what a full-service builder can provide helps you choose a partner who can bring your complete vision to life, ensuring every element works together beautifully.

Custom Pool Design and Installation

The best pool builders don’t offer one-size-fits-all solutions. Instead, they provide custom swimming pool design and installation services tailored to your property and lifestyle. This process starts with a conversation about how you envision using your space. Do you want a relaxing oasis, a family fun zone, or an elegant spot for entertaining? A skilled designer will then create a unique plan that considers your home’s architecture, the layout of your yard, and your personal style. They focus on high-quality construction and craftsmanship, ensuring your new pool is not only beautiful but also built to last for years of enjoyment.

Backyard and Landscape Integration

A swimming pool is just one part of a larger backyard ecosystem. Top-tier pool companies recognize this and offer services that create a cohesive and functional outdoor environment. This often includes professional landscape design to surround your pool with lush plantings and greenery. They may also specialize in masonry to build stunning patios, walkways, and retaining walls that complement the pool area. By integrating these elements, a builder can create a seamless flow between your home, your pool, and the rest of your yard, turning it into a true outdoor retreat.

Pool Renovations and Modernization

If you already have a pool that’s looking a bit dated, you don’t have to start from scratch. Many pool companies offer renovation and modernization services to breathe new life into your existing space. This could involve updating the look with new tile or a modern finish, replacing an old liner, or adding exciting water features. It’s also a great opportunity to upgrade your equipment with contemporary technology, like energy-efficient pumps or automated systems you can control from your phone. A quality renovation can completely revitalize your pool, making it more enjoyable and easier to maintain.

Ongoing Maintenance and Repairs

The relationship with your pool builder shouldn’t end once the construction is complete. Reliable companies offer ongoing maintenance and repair services to protect your investment and keep your pool in perfect condition. Regular maintenance is key to ensuring the water is clean, safe, and balanced, and that all equipment is running smoothly. These services can include everything from weekly cleanings and chemical checks to equipment repairs and replacements. Having a trusted professional handle the upkeep gives you peace of mind and more time to simply enjoy your pool.

How Much Does a Long Island Pool Cost?

Figuring out the budget for your dream pool is a huge step. Installing an inground pool on Long Island often costs more than the national average due to our unique local building conditions. The final price tag depends on several key choices, from the pool’s size and material to the features you add. At Gappsi, we walk you through every option to find a beautiful solution that fits your budget.

Factors That Affect Your Budget

The biggest factors influencing your pool’s cost are its size, shape, and material. Vinyl liner pools are generally the most budget-friendly option upfront, while gunite (a type of concrete) allows for complete customization but comes with a higher initial cost. Beyond the pool itself, think about features that will make it your own, like a built-in spa, a tanning ledge, or automated lighting. The materials for your pool deck are also a major consideration. A beautiful patio made from high-quality porcelain and natural stone will create a stunning finish but will affect the total project price.

Planning for Permits, Fencing, and Other Costs

Before any digging begins, you’ll need to secure permits, which can range from a few hundred to nearly two thousand dollars on Long Island. A professional builder will handle this process for you. Safety is also a top priority and a legal requirement, so you must include a pool fence in your budget. There are many styles to choose from, and your builder can help you select the right fences and netting to secure your yard beautifully. These initial steps, along with site preparation, are all essential parts of the total cost.

Understanding Long-Term Ownership Costs

Your financial commitment doesn’t end once the pool is filled. It’s smart to plan for long-term maintenance. The type of pool you choose will determine these ongoing costs. For example, a vinyl liner typically needs to be replaced every 10 years or so, which can cost several thousand dollars. Gunite swimming pools are incredibly durable but will need to be resurfaced every 10 to 15 years. You’ll also have annual costs for chemicals, electricity, and opening and closing the pool for the season. Factoring these expenses in from the start helps you enjoy your pool without any financial surprises.

How to Choose the Right Pool Contractor

Choosing the right pool contractor is one of the most important decisions you’ll make for your home. This isn’t just about hiring someone to dig a hole; it’s about finding a true partner who can bring your entire backyard vision to life. A great contractor will guide you through every step, from initial design to the first splash, ensuring the process is smooth and the final result is a beautiful, well-built oasis you’ll enjoy for years. Taking the time to find the right fit will save you from headaches and costly mistakes down the road.

Research and Vet Potential Builders

Before you start scheduling consultations, do a little homework. First, have a general idea of what you want. Think about the size, shape, and style of the pool that would best fit your yard and lifestyle. This preparation will help you have more productive conversations with potential builders. Look for a contractor with a long history of building custom swimming pools specifically on Long Island. An experienced local builder understands the unique soil conditions, weather patterns, and permitting processes in our area, which is invaluable for a smooth project. They’ve likely seen it all and can anticipate challenges before they become problems.

Key Questions to Ask During Your Consultation

When you meet with contractors, come prepared with a list of questions. Ask to see a portfolio of their completed projects. This allows you to assess the quality of their work and see if their design style matches your own. It’s also smart to ask if they service what they sell and stand behind their work with solid warranties. A reputable company will be there for you long after the installation is complete. Don’t forget to ask about the materials they use for pool surrounds, like beautiful and durable porcelain and natural stone pavers, and how they plan for important details like water runoff and drainage.

Compare Quotes and Contracts Carefully

Getting multiple quotes is standard practice, but it’s crucial to compare them carefully. The cheapest option is rarely the best. A surprisingly low bid could be a red flag for subpar materials, inexperienced labor, or hidden costs that will appear later. A professional quote should be detailed and itemized, clearly outlining every expense. Make sure you receive a comprehensive contract that specifies the full scope of work, a clear payment schedule, and detailed warranty information. This document protects you and ensures everyone is on the same page before any masonry work begins.

Mistakes to Avoid When Hiring a Pool Builder

Choosing the right pool builder is a major decision, and a few common missteps can turn your dream project into a stressful ordeal. By being aware of potential pitfalls from the start, you can ensure a smooth process and a beautiful result that you’ll enjoy for years. Making an informed choice means looking past the surface-level details and focusing on what truly matters for a long-term investment in your home.

Looking Beyond the Lowest Price

It’s always tempting to go with the lowest bid, but when it comes to building a pool, that can be a costly mistake. A price that seems too good to be true often is, potentially hiding subpar materials, inexperienced labor, or a contractor who cuts corners. Instead of letting price be your only guide, focus on overall value. A reputable builder’s quote will reflect high-quality materials and expert craftsmanship that prevent expensive repairs down the road. A well-built swimming pool is an investment, so prioritize a contractor’s experience and reputation over getting the cheapest deal.

Insisting on a Detailed Contract

Never move forward with a pool project without a comprehensive, written contract. This document is your most important tool for protecting your investment and ensuring everyone is on the same page. A thorough contract should clearly outline the complete scope of work, a detailed list of materials, a realistic project timeline with key milestones, and a clear payment schedule. Vague agreements can lead to misunderstandings about costs and deadlines. A professional builder will always provide a detailed contract that leaves no room for confusion, giving you peace of mind throughout the construction process.

Clarifying Warranties and Aftercare

Your relationship with a pool builder shouldn’t end the day the water is added. Before you sign anything, make sure you have a clear understanding of the warranties offered. Ask specific questions about the coverage for the pool structure itself as well as for essential equipment like pumps and filters. It’s also wise to inquire about their aftercare services. Knowing who to call for future maintenance or repairs can save you a lot of headaches. A builder who stands behind their work with strong warranties and offers ongoing restoration and sealing services is a partner you can trust for the long haul.

Popular Pool Designs on Long Island

When you picture a pool on Long Island, you might imagine a classic rectangular shape. While those are timeless, today’s backyard designs are so much more personal and sophisticated. A modern pool is the heart of your outdoor living space, blending beautiful design with smart functionality. Homeowners are moving toward pools that are not only stunning to look at but also easy to manage and efficient to run.

The latest trends focus on creating a complete backyard experience. Think of a pool that seamlessly integrates with your patio, landscaping, and even your home’s technology. It’s about designing a space that feels like a natural extension of your home, a place where you can relax, entertain, and make memories. From automated systems you can control with your phone to elegant water features that create a resort-like atmosphere, the options for customizing your pool are nearly endless. It’s all about building a private oasis that fits your lifestyle, whether you’re hosting summer parties or enjoying a quiet morning swim. Let’s look at some of the most popular design elements homeowners are asking for.

Smart Technology and Automation

Imagine adjusting your pool’s temperature or turning on the lights without ever leaving your patio chair. That’s the convenience of smart technology. Many new swimming pools now come with automation systems that let you manage everything from a smartphone app. This includes features like automated pool covers for safety and cleanliness, dynamic LED lighting to set the mood, and remote temperature controls. This technology doesn’t just add a layer of convenience; it also helps make your pool safer and more energy-efficient by giving you precise control over its operation. It’s a simple way to make pool ownership less about work and more about enjoyment.

Energy-Efficient and Eco-Friendly Options

A beautiful pool shouldn’t come with sky-high utility bills. That’s why energy-efficient and eco-friendly features are becoming standard in many Long Island pool designs. Variable-speed pumps are a great example, as they use significantly less energy than older, single-speed models by running at a lower speed for longer periods. Other popular choices include LED lighting, which is brighter and longer-lasting than traditional bulbs, and solar heating systems that use the sun’s energy to warm your water. These eco-conscious choices not only reduce your carbon footprint but also lead to real savings on your monthly energy costs, making them a smart investment for any home improvement project.

Custom Water Features and Finishes

To make your pool truly stand out, consider adding custom water features and high-end finishes. Elements like sheer descent waterfalls, deck jets, and bubblers can transform your pool into a dynamic water-scape, adding both visual interest and the soothing sound of moving water. An integrated spa is another popular feature, creating a perfect spot for relaxation. The materials you choose for the pool’s interior and surrounding patio also make a huge impact. Using beautiful and durable porcelain and natural stone pavers for the coping and decking gives the entire area a luxurious, cohesive look that reflects your personal style and enhances your home’s value.

Related Articles

Frequently Asked Questions

Why is it so important to hire a builder with specific Long Island experience? A builder who knows Long Island understands the unique challenges of our local environment, from the soil conditions in Suffolk County to the specific permitting rules in a Nassau County village. This local expertise means they can anticipate potential issues before they become expensive problems, ensuring a smoother and more efficient construction process. They have established relationships and a reputation to uphold right here in our community.

What are the real benefits of hiring one company for my entire backyard project? Using one company to design and build your entire outdoor space ensures a cohesive and harmonious result. When your pool builder also handles the masonry, landscaping, and other features, the final product looks intentional and professionally designed. This integrated approach saves you the headache of coordinating multiple contractors and timelines, preventing mismatched materials or awkward transitions between your pool, patio, and garden.

Besides the price of the pool itself, what other costs should I prepare for? It’s smart to budget for a few key items beyond the pool’s sticker price. You’ll need to account for municipal permits and mandatory safety fencing, which are required before construction can even begin. It’s also wise to think about long-term ownership costs, such as annual maintenance for chemicals and electricity, as well as future expenses like replacing a vinyl liner or resurfacing a gunite pool down the road.

My old pool looks dated. Can it be updated, or do I need to start over? You absolutely have options for revitalizing an existing pool. Many full-service pool companies offer renovation and modernization services that can completely transform your space without the cost of a full replacement. This can include anything from installing a new liner and modern tile to adding exciting water features or upgrading to energy-efficient equipment that you can control from your phone.

What should I look for in a contract to make sure I’m protected? A solid contract is your best protection. It should be detailed and specific, leaving no room for misunderstandings. Look for a complete scope of work that lists every step of the project, a clear breakdown of all materials being used, a realistic timeline with key milestones, and a straightforward payment schedule. It should also clearly state the warranty information for both the pool structure and the equipment.

Share this page:
Old tennis court restoration on Long Island, NY, with a worker repairing a cracked surface.

Old Tennis Court Restoration on Long Island: Costs & Options

That old tennis court in your backyard holds a lot of potential, even if your family’s passion for tennis has waned. Before you think about a complete demolition, consider the possibilities. What if that cracked, faded surface could become a vibrant, multi-purpose hub for family activity? Restoration today means more than just a new coat of paint. You can convert the space into a modern court for pickleball, basketball, or even a custom putting green. An old tennis court restoration on Long Island ny is the perfect opportunity to transform an underused area into a versatile Sports Games Courts that brings everyone together for new kinds of fun, right in your own backyard.

Key Takeaways

  • Inspect your court for key warning signs: Look for issues like cracks, faded lines, and standing water. Addressing these problems with a professional restoration is a smart investment that prevents more expensive structural damage later on.
  • Explore your restoration options: A worn court is an opportunity for an upgrade. You can choose a simple resurfacing, install a modern cushioned material, or convert the space into a multi-purpose Sports Games Courts for activities like pickleball and basketball.
  • Hire a specialist and maintain your investment: Choose a contractor with specific experience in Sports Games Courts who offers a strong warranty. Once the work is done, a simple routine of cleaning and minor repairs will keep your court playing perfectly for years.

Does Your Tennis Court Need Restoration?

A backyard tennis court is a fantastic feature for any Long Island home, offering a place for fun, fitness, and friendly competition. But like any outdoor structure, it faces the elements year-round. Over time, you might notice it’s not looking or playing its best. These changes are more than just cosmetic issues; they are signs that your court needs attention to ensure it remains safe, playable, and a valuable part of your property.

Recognizing the early signs of wear and tear can save you from more extensive and costly repairs down the line. From small cracks to persistent puddles, these symptoms indicate the court’s surface is breaking down. A professional restoration can address these problems, extending the life of your court and bringing back that fresh, professional feel. If you’re starting to see visible damage or a decline in playability, it’s likely time to consider your restoration options. Ignoring these issues can lead to bigger structural problems, turning a straightforward repair into a major project. Let’s look at the specific signs that tell you your tennis court is ready for a refresh.

Cracks and Uneven Surfaces

If you’re seeing cracks spiderwebbing across your court, you’re not alone. Cracking is one of the most common problems for tennis courts, especially with Long Island’s freeze-thaw cycles. While a few hairline cracks might not seem like a big deal, they are entry points for water. Once water gets beneath the surface, it can freeze and expand, making the cracks wider and causing the foundation to deteriorate. This creates an uneven playing surface and tripping hazards. You might also notice low spots, often called “birdbaths,” where water pools. These uneven areas affect ball bounce and can make the court unsafe. Promptly addressing these issues is key to a lasting restoration and seal.

Faded Lines and Peeling Paint

The vibrant colors and crisp white lines of a new tennis court don’t just look great; they are crucial for gameplay. When you notice the lines are faded and the paint is starting to peel or chip away, it’s a clear sign that the court’s protective acrylic coating is wearing thin. This coating acts as a shield for the asphalt or concrete base underneath. Once it’s compromised, the surface becomes more vulnerable to damage from UV rays and moisture. Peeling paint can also create a slick, uneven texture, affecting player footing and the ball’s grip on the court. Resurfacing not only restores the court’s appearance but also applies a fresh, durable layer of protection, making it safer and better to play on.

Poor Drainage and Puddles

Does your tennis court have puddles that stick around long after the rain has stopped? This is a major red flag. Standing water is a court’s worst enemy. Properly constructed courts are built with a slight, imperceptible slope to allow water to drain off efficiently. If water is pooling, it means you have low spots or the drainage system isn’t working correctly. This constant moisture accelerates the breakdown of the acrylic surface, encourages the growth of slippery mold and algae, and can seep into cracks, causing deeper structural damage. Addressing these drainage and masonry issues is fundamental to a successful restoration and the long-term health of your court.

What Are Your Tennis Court Restoration Options?

When your tennis court starts showing its age, you have several great options to bring it back to life. The right path depends on the court’s current condition, your budget, and how you want to use the space in the future. You might just need a simple refresh to make it look new again, or you could decide it’s time for a complete transformation. From repairing cracks and adding a new surface to converting the area into a modern multi-sport space, there’s a solution that fits your family’s needs. Let’s walk through the most common restoration approaches so you can find the perfect one for your home.

Resurface and Repair Cracks

If your court has a good foundation but is plagued by cracks and a worn-out surface, a full resurfacing is an excellent choice. This process involves professionally filling all the cracks and then applying a brand new acrylic surface layer. It’s a comprehensive fix that addresses both cosmetic and playability issues, making your court feel smooth and new again. For homeowners on Long Island, this type of restoration is a popular way to extend the life of their court without the cost of a complete rebuild. Gappsi’s restoration and sealing services can bring that fresh, professional look back to your court.

Power Wash, Paint, and Reline

Sometimes, a court is structurally sound but just looks tired and faded. In this case, a thorough cleaning and a fresh coat of paint can make a world of difference. The process starts with power washing to remove years of dirt, moss, and grime. Once the surface is clean and dry, we apply high-quality court paint in your chosen colors. The final step is to add crisp, accurate new lines for tennis, pickleball, or any other sport you have in mind. This option is a cost-effective way to dramatically improve your court’s appearance and create a vibrant, inviting playing environment.

Upgrade Your Surface Material

Restoration is also the perfect opportunity to upgrade your court’s material. While traditional acrylic hard courts are common, modern materials can offer a better playing experience. You could consider a cushioned surface for more comfortable play and reduced impact on your joints. Another popular choice is a high-quality synthetic turf, which provides a unique look and feel while requiring different maintenance. Upgrading the material can improve drainage, change the ball speed, and give your court a premium finish that stands out.

Convert to a Multi-Purpose Game Court

Has your family’s love for tennis faded? Your old court is a prime piece of real estate for a new activity. Converting it into a multi-purpose space is a fantastic way to get more use out of your backyard. We can transform the area into a court for basketball, pickleball, or volleyball. You could even install a putting green for the golf enthusiast in your family. Gappsi specializes in designing and building custom turf and sports games courts that can accommodate multiple activities, ensuring there’s always something fun to do right at home.

How Much Does Tennis Court Restoration Cost?

Understanding the cost of restoring your tennis court is the first step toward bringing it back to its former glory. While every project is unique, here’s a breakdown of what you can generally expect to invest in your Long Island court. The final price tag depends on the court’s condition and the specific services needed to make it playable and beautiful again.

Average Cost for a Full Restoration

If you’re budgeting for a complete overhaul, a full tennis court restoration on Long Island typically falls between $8,000 and $12,000. Think of this as a solid starting point. This price covers the essential steps to make your court look and play like new again. Of course, the final number depends on the specific repairs your court needs. A court with minor wear will cost less than one with significant surface damage. Getting a professional evaluation is the only way to know for sure, but this range gives you a realistic figure to begin your planning.

Factors That Influence the Price

Several key factors can shift the final cost of your project. The biggest variable is the current condition of your court’s surface. Are we talking about a few hairline cracks or major structural issues? The extent of peeling paint, mold growth, and any underlying drainage problems will also play a significant role. For example, fixing deep cracks or correcting a slope to prevent puddles requires more intensive labor and materials. Because of these variables, some extensive resurfacing projects can range from $12,000 to $20,000. The type of surface, whether it’s asphalt or concrete, also impacts the restoration method and cost.

How to Get an Accurate Quote

While online estimates are helpful for initial budgeting, a personalized quote is essential for an accurate price. A professional contractor will visit your property to perform a thorough assessment. They’ll inspect the surface for damage, check for low spots where water collects, and identify any other issues that need attention. This detailed evaluation allows them to create a precise plan and quote tailored to your court’s specific needs. At Gappsi, we provide comprehensive consultations for all our Sports Games Courts projects, ensuring you understand every aspect of the restoration and its cost before we begin.

Why Restore Instead of Rebuild?

When your tennis court starts showing its age, your first thought might be to tear it all out and start over. But in many cases, a full rebuild isn’t necessary and can be overkill. Restoration offers a smarter path forward, allowing you to bring your court back to life without the massive undertaking of a complete demolition. Choosing to restore is not just a repair; it’s a strategic decision that saves you time and money, benefits the environment, and protects the core structure of your court for years to come. By working with the existing foundation, you can achieve a like-new playing surface with far less disruption.

Save Time and Money

One of the most compelling reasons to restore your tennis court is the significant cost savings. A complete rebuild involves demolition, debris removal, and constructing a new base and surface, which can be a major investment. In contrast, restoring a court is much more budget-friendly. Resurfacing and repairing a tennis court in Long Island typically costs between $8,000 and $12,000, a fraction of what you would spend on a total replacement. This approach also saves a considerable amount of time. A restoration project can often be completed in days, not weeks, meaning less downtime and more time enjoying your newly refreshed court.

The Environmental Benefits

Opting for restoration is also a more sustainable choice. Demolishing an old court generates a large amount of waste that ends up in landfills. A rebuild also requires all new materials, from the aggregate base to the asphalt and acrylic surfacing, all of which have their own environmental footprint. By restoring your court, you are essentially recycling the existing structure. This process helps reduce construction waste and the demand for new raw materials. It’s a responsible way to upgrade your property while minimizing your impact on the environment.

Preserve Your Court’s Foundation

The foundation is the most critical and expensive part of your tennis court. As long as it’s structurally sound, it makes sense to protect it. Surface-level issues like cracks, peeling paint, and low spots are signs that your court needs attention, but they don’t always mean the base is failing. Regular maintenance and timely resurfacing can extend the life of your court’s foundation, preventing water from seeping in and causing more extensive damage. Our restoration and sealing services address these surface problems, protecting your investment and ensuring your court remains stable and playable for many more seasons.

How to Choose the Right Contractor

Finding the right partner for your restoration project is just as crucial as choosing the right surface material. The quality of the workmanship will determine how long your court lasts and how well it plays. To make sure you hire a team you can trust, focus on these key areas.

Look for Key Qualifications

Restoring a tennis court isn’t a job for a general paving company. Tennis courts require specific construction techniques to ensure proper slope for drainage, a perfectly even surface for playability, and durable materials that can withstand the game. You need a contractor who specializes in building and restoring sports games courts. These experts understand the precise requirements for everything from the sub-base to the final acrylic coating. They have the right equipment and knowledge to deliver a court that not only looks great but also performs to a high standard for years to come.

Prioritize Restoration Experience

When you’re vetting contractors, look for a team with a long history of successful projects right here on Long Island. An experienced company has seen it all, from major structural repairs to delicate surface refinishing. They understand how our local climate affects different materials and can recommend the best solutions for your specific court. Ask to see a portfolio of their completed work or even visit a past project. A contractor with a deep portfolio, like the projects you can see on our YouTube channel, demonstrates a consistent track record of quality and customer satisfaction. This experience is your best guarantee of a great result.

Understand Warranty Coverage

A reputable contractor will always stand behind their work with a solid warranty. This isn’t just a piece of paper; it’s a promise that protects your investment. A good warranty shows the company is confident in its materials and craftsmanship. Be sure to ask about the length of the warranty and exactly what it covers. While some offer a couple of years, a comprehensive warranty of three to five years provides even greater peace of mind. Before signing any contract, make sure you have the warranty details in writing. This ensures there are no surprises and that your beautifully restored court is protected.

What to Expect From the Restoration Process

Bringing an old tennis court back to life is a detailed process that goes far beyond a simple coat of paint. To get a durable, beautiful, and safe playing surface, a professional restoration follows a few key phases. It starts with a detailed evaluation of your court’s current condition, moves into meticulous surface preparation and repairs, and finishes with the application of a new surface and fresh lines. Understanding these steps will help you know what to expect when you partner with a contractor and ensure you get the results you’re looking for. Each stage is crucial for transforming your worn-out court into a pristine place to play.

Initial Assessment and Planning

The first step in any restoration project is a thorough assessment. A professional contractor will visit your property to inspect the court and understand the full scope of the work needed. During this evaluation, they’ll look at several key factors: the existing surface material (like asphalt or concrete), the condition of the old paint, and any underlying structural issues. They will identify problems such as cracks, low spots that cause puddles, drainage issues, or mold growth. This detailed inspection is essential for creating an effective restoration plan and providing you with an accurate quote for the project.

Surface Preparation and Repairs

Once a plan is in place, the physical work begins with surface preparation. This is arguably the most critical phase for ensuring the longevity of your restored court. The process typically starts with a high-powered pressure wash to remove dirt, debris, and any loose or peeling paint. After the court is clean, the focus shifts to repairs. Cracking is a very common issue, and experienced installers will use specialized techniques to fill and seal them properly. Any low spots or uneven areas are leveled out to ensure proper drainage and a smooth, safe playing surface. This careful prep work creates the perfect foundation for the new coating to adhere to.

New Surface and Line Application

With a clean and repaired base, it’s time for the transformation. A new acrylic coating is applied to the entire court. This specialized surface does more than just add color; it provides the texture needed for proper grip, protects the court from sun damage, and ensures consistent ball bounce. You can often choose from a variety of colors to customize the look. Once the new surface has cured, the final step is painting the lines. Precision is key here to ensure the court meets regulation standards. This is also the perfect time to add lines for other activities, like pickleball, creating a versatile multi-purpose Sports Games Courts for the whole family to enjoy.

How to Maintain Your Restored Court

After investing in restoring your tennis court, the last thing you want is to see it fall back into disrepair. Consistent maintenance is the key to protecting your beautiful new surface and ensuring it provides years of enjoyment. A little proactive care goes a long way in preventing costly future repairs and keeping your court in top playing condition. Think of it as a simple routine, just like maintaining your garden or pool. By staying on top of a few key tasks, you can preserve the integrity and appearance of your court, making sure it’s always ready for a match.

Regular Cleaning and Debris Removal

One of the easiest yet most effective ways to prolong the life of your court is through regular cleaning. Leaves, twigs, dirt, and other debris can hold moisture against the surface, which can lead to staining, mildew growth, and premature wear. I recommend using a leaf blower or a soft-bristled broom to sweep the court weekly. This simple step keeps the surface clean and safe for play. For a deeper clean, you can gently rinse the court with a hose. It’s also a good idea to consider seasonal care, like closing the court in the late fall to protect it from harsh winter weather.

Promptly Repair Cracks and Damage

Even with a newly restored surface, small cracks can sometimes appear due to ground movement or weather changes. It’s crucial to address these issues right away. A tiny crack might not seem like a big deal, but it’s an open invitation for water to seep underneath the surface. On Long Island, our freeze-thaw cycles can turn that water into a major problem, widening the crack and damaging the foundation. You can use a high-quality crack filler for minor repairs. By fixing small cracks early, you prevent them from becoming large, expensive problems that require professional intervention.

Schedule Professional Inspections

While your own maintenance efforts are vital, having a professional inspect your court every few years is a smart move. An expert can identify subtle issues you might miss, like early signs of surface wear or drainage problems. It’s important to work with a contractor who specializes in Sports Games Courts, not just a general paving company, as they have the specific knowledge for an athletic surface. A professional inspection provides peace of mind and can catch potential problems before they escalate, saving you time and money down the road. Think of it as a regular check-up for your court.

Related Articles

Frequently Asked Questions

How long does the tennis court restoration process usually take? The timeline for a restoration project is much shorter than a full rebuild. While the exact duration depends on the extent of repairs needed and, of course, the weather, most resurfacing projects can be completed within a week. This means you get back to playing on your beautiful, refreshed court with minimal downtime.

Can I just paint over the cracks on my court? While it might seem like a quick fix, simply painting over cracks doesn’t solve the underlying problem. Cracks are entry points for water, which can cause much bigger issues for your court’s foundation, especially with Long Island’s freeze-thaw cycles. A professional restoration involves properly cleaning, filling, and sealing these cracks to create a stable, uniform base before any new surface is applied.

Will restoration fix the puddles that form on my court after it rains? Absolutely. Addressing poor drainage is a fundamental part of a quality restoration. Those persistent puddles, or “birdbaths,” are caused by low spots in the court’s surface. During the preparation phase, a professional team will level these areas to restore the court’s original slope, ensuring water drains off efficiently and the surface remains safe and playable.

Can you add lines for other games, like pickleball, during the restoration? Yes, and it’s the perfect time to do it. Converting your court into a multi-use space is a popular and smart upgrade. Once the new surface is applied and cured, we can paint precise lines for pickleball, basketball, or any other activity you have in mind. This is a simple way to add a lot more fun and versatility to your backyard.

How long will a newly restored court surface last? A professionally restored acrylic surface should last for many years, typically between four to eight years. The lifespan depends on factors like how often the court is used, our local weather, and how well it’s maintained. Following a simple routine of regular cleaning and promptly addressing any minor issues will ensure you get the most out of your investment.

Share this page:
Hand with a roller applying stain to pavers before sealing them for long-lasting protection.

How to Stain and Seal Pavers the Right Way

If you’re looking for a weekend project that delivers a huge visual impact, look no further than your paver patio or driveway. Giving your hardscape a fresh look doesn’t have to be complicated or expensive. With the right preparation and materials, you can achieve a finish that looks like it was done by a professional. This guide is designed to empower you with the knowledge to do it yourself. We’ll cover everything from the essential prep work to the best application techniques, giving you a clear roadmap on how to stain and seal pavers for a finish you can be proud of.

Key Takeaways

  • Start with a perfectly clean surface: The success of your project depends on proper preparation. Before staining, you must thoroughly clean your pavers to remove all dirt and grime, then let them dry completely to ensure the stain absorbs evenly for a flawless finish. For an evaluation of older pavers, stains, or existing coatings, Long Island paver sealing specialists can recommend the right preparation and finish.
  • Apply products with the right technique: For a professional look, always test your stain color in an inconspicuous spot first. Apply both the stain and sealer in thin, even coats using a sprayer or roller, as this prevents the streaking and pooling that can happen with a single heavy layer.
  • Protect your work with sealing and upkeep: The final sealer coat is crucial; it locks in the color and protects your pavers from weather, spills, and UV damage. A simple routine of regular sweeping and resealing every three to five years will keep your hardscape looking beautiful.

Why Stain and Seal Your Pavers?

Your paver patio, walkway, or driveway is a major investment in your home’s beauty and function. Just like any other part of your home, it needs proper care to stay in top condition. Staining and sealing are two of the most effective ways to protect your pavers and keep them looking fantastic for years. Think of it as the finishing touch that locks in the beauty of your outdoor space and defends it against the elements. By taking this extra step, you ensure your beautiful hardscape remains a source of pride.

Get a Beautiful, Custom Look

Staining and sealing can make your outdoor areas look brand new. If your existing pavers have faded over time, a fresh coat of stain can revive their original color or give them a completely different look. With a wide range of shades available, you can customize the appearance of your patio to perfectly match your home’s exterior or your new outdoor furniture. This process enhances the natural texture of the stone and can add a rich, vibrant finish, transforming a tired-looking surface into a stunning feature of your landscape design. It’s an easy way to get a high-end, custom look without a complete replacement.

Protect Pavers from Weather and Spills

Sealing pavers helps protect your outdoor patio from stains, harsh weather, and pesky weeds. On Long Island, our pavers endure everything from hot summer sun to freezing winter snow, which can cause colors to fade and surfaces to wear down. A quality sealer creates a protective barrier that repels water, oil, and other spills, making cleanup much easier. It also helps prevent weeds from growing in the joints between pavers and protects against color fading from UV rays. Our professional restoration and sealing services are designed to shield your investment from the elements.

Make Your Patio or Driveway Last Longer

Beyond looking great, sealing your pavers is crucial for their longevity. Sealing helps them last longer and protects them from water damage and daily wear. Water is one of the biggest threats to paver installations. When it seeps into porous stone and freezes, it expands and can cause cracks. A sealer prevents this water penetration, which is especially important during Long Island’s freeze-thaw cycles. It also helps lock the jointing sand in place, maintaining the structural integrity of your entire masonry installation. Skipping this step can leave your pavers vulnerable to damage that can be costly to repair.

What You’ll Need to Stain and Seal Pavers

Getting a professional-looking finish on your pavers comes down to having the right supplies before you start. Gathering everything you need ahead of time makes the entire process smoother and helps you avoid any mid-project scrambles to the store. Think of it as setting up your workspace for success. From cleaning agents that prep the surface to the specific rollers that ensure an even coat, each item plays a crucial role. With the right tools and materials in hand, you’ll be well on your way to transforming your patio, walkway, or driveway.

Gather Your Cleaning Supplies

You can’t get a beautiful, lasting finish on a dirty surface. Before you even think about opening a can of stain or sealer, your pavers need to be completely clean. Start with a stiff-bristled broom to sweep away loose leaves and dirt. For a deeper clean, a power washer is your best friend, effectively removing ground-in grime and any of that white, powdery buildup called efflorescence. After a thorough wash, patience is key. You must let the pavers dry completely, which usually takes a full 24 to 48 hours. If this initial prep work feels overwhelming, our restoration and sealing services can handle the deep cleaning for you.

Choose the Right Paver Stain

Paver stain is a fantastic way to refresh faded colors or give your hardscape a completely new look. Unlike paint, which sits on the surface, a quality stain penetrates the concrete to create a rich, durable color. When you’re choosing a stain, remember that the final result will be influenced by the paver’s original color, its material, and how porous it is. Because of this, it’s always a smart idea to test the stain on a spare paver or in a hidden spot first to make sure you love the color. This simple step can save you from any surprises and ensure the final look matches your vision.

Find a High-Quality Paver Sealer

The sealer is your project’s finishing touch and long-term protector. It shields your freshly stained pavers from UV rays, water damage, and stains, all while making them easier to clean. Sealers come in various finishes, from a natural, matte look to a high-gloss, wet look that really makes the colors pop. For the best durability, look for a sealer that contains at least 25% acrylic solids. This ensures a strong, protective layer that will last for years. You can find professional-grade products at the Gappsi Store that will give your project the resilience it needs.

Get the Right Tools for the Job

Applying stain and sealer correctly requires the right applicators. Using the wrong tools can lead to a blotchy, uneven finish. For the best results, use a low-pressure garden sprayer to apply thin, even coats of both the stain and the sealer. This method helps prevent streaks and puddles. If you prefer using a roller, make sure it’s a high-quality, sponge-type roller designed for semi-smooth surfaces. You’ll also want to have painter’s tape and plastic sheeting on hand to protect your house and plants from overspray. And of course, don’t forget safety gear like gloves and glasses.

How to Prep Your Pavers for a Flawless Finish

Before you even think about opening a can of stain, let’s talk about prep work. I know, it’s not the most exciting part, but getting your pavers ready is the single most important thing you can do to guarantee a beautiful, long-lasting finish. A pristine surface allows the stain to absorb evenly and the sealer to bond correctly, giving you that professional look you’re after.

Think of it like painting a room in your house. You wouldn’t just paint over dirty, dusty walls, right? The same principle applies here. Taking the time to properly clean and prepare your patio, walkway, or driveway will make all the difference. If the prep work feels like too much to handle, our team offers expert restoration and sealing services to get your project started on the right foot. Ready to do it yourself? Let’s walk through the three essential steps to get your pavers perfectly prepped.

Step 1: Clear and Clean the Surface

First things first, you need a completely clear space to work. Move all your patio furniture, planters, grills, and anything else sitting on the pavers to another area. Once the surface is clear, grab a stiff-bristled broom and give the entire area a thorough sweep. You want to get rid of all the loose debris like leaves, dirt, and twigs. This initial sweep makes the deep cleaning process much more effective. A clean slate is non-negotiable for achieving an even stain, so don’t rush this step. It sets the stage for everything that comes next.

Step 2: Remove Tough Stains and Buildup

Now it’s time for a deep clean. For general grime, a pressure washer is your best friend. Work methodically in sections to lift away embedded dirt. Pay close attention to any stubborn spots, like oil drips or rust marks, which may require a specialized paver cleaner. You might also notice a white, chalky substance on the surface. This is called efflorescence, and it’s basically salt deposits rising out of the pavers. It’s crucial to remove this, as it can prevent the stain from adhering properly. Proper masonry care ensures these issues are handled correctly from the start.

Step 3: Let Pavers Dry Completely

Patience is key for this final prep step. After all that cleaning, your pavers will be saturated with water, and you absolutely cannot apply stain to a damp surface. Moisture will block the stain from penetrating the pores of the stone, resulting in a splotchy, uneven finish that won’t last. You need to let the pavers dry completely. This typically takes at least 24 to 48 hours, but it can vary depending on the humidity and sunlight. Before you start staining, make sure the pavers and the sand in the joints are bone dry to the touch.

How to Apply Paver Stain: A Step-by-Step Guide

Now for the fun part: applying the stain and watching your pavers transform. With all the prep work behind you, this stage is all about technique and patience. Applying stain isn’t difficult, but a few key steps will ensure you get that professional, even finish you’re looking for. Rushing the process can lead to blotchy results, so take your time and follow these guidelines carefully. From testing your color to picking the right day for the job, each step plays a crucial role in the final outcome. This is where you bring your vision to life, whether you’re aiming for a subtle color enhancement or a dramatic new look for your patio or walkway. The right application will not only look great but will also help the stain penetrate properly for long-lasting color. Remember, the goal is a uniform color that looks like it’s part of the stone, not just a layer of paint sitting on top. This process can completely rejuvenate an old patio, making it the centerpiece of your backyard again. If you’re ever unsure or just want a guaranteed perfect finish, the experts at Gappsi offer professional restoration and sealing services to handle the job for you. Let’s walk through how to apply paver stain correctly.

Test Your Stain Color First

Before you commit to staining your entire patio or driveway, it’s essential to test the color. Always apply a small amount of stain to an inconspicuous area first to see exactly how it will look. Pick a spot that’s usually hidden, like behind a large planter or against the foundation of your house. The color on the can might look slightly different once it’s on your specific pavers because of their unique porosity and texture. Let the test patch dry completely, as the color can change as it cures. This simple step saves you from any potential color surprises and ensures the final result is one you’ll love for years.

Apply Thin, Even Coats

For a smooth, uniform finish, the key is to apply the stain in thin, even coats. Pour your paver stain into a pump sprayer and apply it using a steady, circular motion to avoid streaks. It’s much better to apply two light coats than one heavy one, which can lead to pooling and an uneven appearance. Be careful not to apply more than three layers, as too much stain can have trouble adhering to the surface. Start at the farthest corner of your project and work your way backward so you don’t have to step on any freshly stained areas. This methodical approach ensures every paver in your masonry project gets consistent coverage.

Check the Weather Forecast

The weather plays a huge role in how well your paver stain applies and cures. The ideal time to stain is on a mild, overcast day with no wind. You’ll want to avoid applying stain in direct, hot sunlight (over 90°F), as it can cause the stain to dry too quickly and leave behind streaks. Rain is also a major issue, as it can wash away the stain before it has a chance to set. Before you start, check the forecast to make sure you have at least a 24-hour window of clear, dry weather. This gives the stain enough time to penetrate the pavers and cure properly, giving you a durable and beautiful finish.

How to Seal Pavers After Staining

Once your stain has fully dried, it’s time for the final step: sealing. This is what locks in that beautiful new color and gives your pavers a durable shield against the elements. Sealing protects your investment from moisture, UV rays, and everyday spills, ensuring your patio or driveway looks fantastic for years. While this is a manageable DIY project, applying sealer correctly is crucial for a professional-looking finish. If you prefer to leave it to the experts, Gappsi offers restoration and sealing services to guarantee a perfect result.

Pick the Right Application Method

Your two main tools for applying sealer are a low-pressure garden sprayer or a simple paint roller. A sprayer is excellent for covering large areas quickly and applying a consistent, even coat. A roller, especially one with a thicker nap, is great for working the sealer into the texture of the pavers and ensuring you get full coverage in the joints. Whichever you choose, the goal is to apply thin layers. This prevents the sealer from pooling, which can lead to a cloudy or uneven finish. Always read the instructions on your chosen sealer, as the manufacturer will have the best advice for their specific product.

Apply the Sealer for Full Protection

Start by applying one generous, even coat of sealer across the entire surface. As you work, pay close attention to the joints between the pavers. You want to make sure plenty of sealer soaks into the sand to help lock the pavers in place and prevent weed growth. If you notice any excess sealer puddling on the surface, simply use your roller or a brush to push it into the joints. For an extra layer of defense and a richer, glossier look, you can apply a second coat after the first one is dry to the touch. This second application deepens the color and provides maximum protection, similar to what you see on beautifully finished natural stone.

Let the Sealer Cure Completely

Patience is key during this final phase. The sealer needs time to cure, which means it’s chemically hardening and bonding to the paver surface. It might feel dry to the touch after a few hours, but it isn’t ready for use just yet. You should avoid walking on the sealed pavers for at least 24 to 48 hours. Wait even longer, typically three to four days, before driving a car on a sealed driveway or placing heavy patio furniture back on the surface. Always check the sealer’s instructions for specific curing times, as they can vary based on the formula and weather conditions. Giving it the proper time to cure ensures a tough, long-lasting finish.

How to Maintain Your Stained and Sealed Pavers

You’ve put in the work to stain and seal your pavers, and they look fantastic. Now, let’s talk about how to keep them that way. With a simple maintenance routine, you can protect your investment and enjoy your beautiful outdoor space for years to come. It’s all about consistent, gentle care and knowing what to look for.

Keep Your Pavers Looking New

The secret to keeping your pavers looking fresh is regular, light cleaning. Make it a habit to sweep your patio, walkway, or driveway once a week. This simple step prevents leaves, dirt, and other debris from building up and causing stains. For a deeper clean, plan to wash the surface once a year with a paver-specific cleaner or a pressure washer on a low setting. If you notice a spill, like from a barbecue or a car, try to treat it right away before it has a chance to set. For stubborn grime or a professional touch-up, our restoration and sealing services can make your pavers look brand new again.

Know When to Reseal

Think of paver sealer as a protective shield that wears down over time. To keep your pavers safe from weather damage, stains, and color fading, you’ll need to reapply a coat of sealer every three to five years. The exact timing depends on factors like how much direct sun the area gets and how much foot traffic it handles. An easy way to check is to sprinkle some water on the surface. If it beads up, your sealer is still doing its job. If the water soaks in and darkens the paver, it’s time to reseal. A fresh coat will revive the color and maintain the integrity of your beautiful natural stone pavers.

Avoid These Common Maintenance Mistakes

A little know-how can help you avoid some common maintenance mistakes. One of the biggest is improper surface preparation. Before you clean or reseal, make sure your pavers are completely clear of debris and totally dry. Applying sealer over a damp or dirty surface can trap moisture and grime, leading to a cloudy finish. Another mistake is ignoring small issues. A few weeds or a minor stain can become a much bigger problem if left untreated. Deal with these little things as soon as you spot them. Finally, avoid using harsh chemicals not designed for pavers, as they can damage the sealer and stain. If you encounter an issue you’re not sure how to fix, our masonry experts are always ready to help.

Related Articles

Frequently Asked Questions

How often should I stain and seal my pavers? For sealing, a good rule of thumb is to reapply a coat every three to five years. This keeps the protective barrier strong. Staining, however, is more about aesthetics. You only need to restain when you notice the color has faded significantly or if you simply want to update the look of your patio or walkway.

Can I just seal my pavers without staining them first? Absolutely. If you love the current color of your pavers, you can skip the stain and apply a clear sealer directly. Sealing is the essential step for protection. It will still enrich the natural color of the stone and give it that clean, finished look while protecting it from weather and spills.

What happens if I don’t seal my pavers? Leaving your pavers unsealed makes them vulnerable to the elements. They will be more likely to develop stains from things like oil or fallen leaves, and their color can fade from sun exposure. More importantly, unsealed pavers absorb water, which can lead to cracking when it freezes and expands during Long Island’s winters.

Should I seal brand new pavers right away? It’s actually better to wait a few months after your pavers are installed before sealing them for the first time. New pavers often release natural salts, a process that creates a white, chalky film called efflorescence. Waiting allows this process to finish so you can clean it off completely before locking it under a coat of sealer.

What’s the biggest mistake people make when doing this themselves? The most common mistake is rushing the preparation stage. You absolutely must start with a perfectly clean and completely dry surface. Applying stain or sealer over hidden dirt or damp pavers will trap grime and moisture, resulting in a cloudy, blotchy finish that won’t last. Patience during prep makes all the difference.

Share this page:
Restored old bocce court with a level surface and wooden borders on Long Island, NY.

Old Bocce Court Restoration on Long Island NY: A Guide

Your backyard is valuable space, and a neglected bocce court is a missed opportunity for fun and relaxation. Instead of letting it sit unused, you can transform it into a premier feature that adds both enjoyment and value to your home. A full restoration turns that forgotten patch of ground into a destination for family gatherings, friendly competitions, and quiet summer evenings. Investing in an old bocce court restoration on Long Island NY is about reclaiming your outdoor living area. In this article, we’ll cover the key considerations, from budgeting and material selection to the long-term benefits of bringing your court back to its former glory, creating a perfect spot for making memories.

Key Takeaways

  • Prioritize structural repairs for lasting results: Before considering aesthetics, address any underlying drainage or surface-leveling issues; this foundational work is crucial for creating a safe and durable court that performs well for years.
  • Choose materials based on maintenance and play style: Your surface choice, from traditional crushed stone to modern synthetic turf, directly impacts upkeep and how the game is played, so select the option that best fits your family’s lifestyle.
  • Partner with an experienced sports games courts contractor: A successful restoration requires specialized skills, so look for a licensed and insured professional with a proven portfolio of building and restoring courts, not just a general landscaper.

What Goes Into Restoring an Old Bocce Court?

Bringing an old bocce court back to its former glory is a rewarding project, but it involves more than just a quick sweep and a fresh layer of sand. A full restoration addresses the court from the ground up, ensuring it’s not only beautiful but also safe and ready for years of friendly competition. The process is a blend of careful repair, material science, and skilled craftsmanship. It starts with assessing the core issues, like an uneven surface or poor drainage, which can make the game frustrating and even cause injuries.

From there, a professional restoration tackles each component systematically. This includes leveling the playing surface, fixing any underlying drainage problems, replacing worn-out borders, and applying the final touches that make the court look pristine. Each step is crucial for creating a durable, high-performance playing area that your family and friends will love. Whether you’re reviving a cherished family court or updating one that came with your home, understanding the process helps you appreciate the work that goes into creating the perfect place to play. Gappsi’s expertise in building sports games courts ensures every detail is handled with precision.

Restoring and Leveling the Surface

The heart of any bocce court is its playing surface. Over time, weather, settling, and regular use can cause cracks, low spots, and an uneven plane. This not only affects how the balls roll but can also be a safety hazard. A proper restoration begins with addressing these imperfections. Surface cracks from temperature changes or heavy use can cause injury, so repairing them with the right mix of sand, binder, or fresh material is the first priority. The goal is to create a perfectly level and smooth surface that allows for a true and predictable roll, making every game fair and enjoyable.

Repairing the Drainage System

Have you ever noticed puddles on your court after it rains? That’s a sign of a drainage problem, one of the most common issues we see with older bocce courts. Without proper drainage, water sits on the surface, leading to material erosion, soft spots, and a shorter lifespan for your court. A thorough restoration involves inspecting the existing drainage system and making necessary repairs. This could mean clearing out old drains, installing new ones, or regrading the base layer to ensure water flows away from the playing area. A court that drains well is a court that lasts.

Replacing Borders and Edging

The borders of a bocce court do more than just frame the playing area; they are essential for keeping the surface material in place and maintaining the court’s structural integrity. Old wooden borders can rot and splinter, while concrete or stone edging can crack and shift over time. Replacing them is a key part of the restoration process. You can choose from a variety of durable and attractive materials, including beautiful porcelain and natural stone options that complement your landscape. Our expert masonry services can create a custom border that is both functional and stylish.

Applying Markings and Finishing Touches

Once the structural work is complete, it’s time for the finishing touches that truly bring the court to life. This final stage is all about the details that enhance both the look and function of the space. This includes applying a fresh coat of paint to the walls or backboards, carefully marking the foul lines and other in-play zones, and cleaning up any excess dirt or debris in and around the court. These final steps transform the area from a construction zone into a polished, game-ready court that looks brand new and invites everyone to play.

How Much Does Bocce Court Restoration Cost on Long Island?

Figuring out the budget for your bocce court restoration is a top priority. While there isn’t a single price tag for every project, understanding the variables can give you a clear picture of the potential investment. The final cost depends on the current condition of your court, the materials you choose, and the overall scope of the work. A simple resurfacing will cost less than a complete overhaul that involves fixing drainage and rebuilding borders. By breaking down the expenses, you can plan effectively and ensure there are no surprises along the way. This approach helps you match your vision with a realistic budget for bringing your court back to life.

What Affects the Final Price?

Several key factors will influence the total cost of your restoration project. The size of your court is the most obvious one; larger courts require more materials and labor. The choice of surface material is also critical, as different options come with different price points and maintenance needs. Your property’s accessibility can play a role too. If the court is in a hard-to-reach part of your yard, it might require more manual labor or specialized equipment. Finally, the extent of the existing damage will heavily impact the price. A court with deep cracks, poor drainage, or crumbling borders will need more intensive and costly repairs than one that just needs a refresh.

Breaking Down the Cost Per Square Foot

To get a ballpark idea, many bocce court projects on Long Island fall into the range of $30 to $40 per square foot. This is a helpful starting point for your budget, but remember it’s a general estimate. This cost typically covers site preparation, materials, and installation. For example, a project using high-quality synthetic turf might be at the higher end of that range, while a restoration with crushed oyster shell could be different. The final per-square-foot price will ultimately depend on the specific materials you select and the complexity of the restoration.

Planning for Additional Costs

When you’re budgeting, it’s smart to plan for more than just the court itself. Think about any extra features you might want to add. This could include new benches, surrounding landscaping, or even a small patio area for spectators. It’s important to ask your contractor for a detailed quote that breaks down every expense, including excavation, materials, labor, and any potential add-ons. This transparency helps you avoid unexpected costs. For instance, if your project requires building a retaining wall or custom seating, those masonry features will be a separate line item. A clear plan ensures your project stays on budget.

Choosing the Best Materials for Your Long Island Bocce Court

Selecting the right materials for your bocce court restoration is about more than just looks. Your choice directly affects how the court plays, how much maintenance it needs, and how well it holds up to Long Island weather. Whether you prefer a traditional feel or a modern, low-maintenance surface, understanding your options is the first step toward creating a court you’ll love for years to come. Let’s walk through the most popular choices for surfaces and borders.

Classic Choices: Clay and Crushed Stone

For a truly authentic playing experience, you can’t go wrong with classic materials like clay or crushed stone. These surfaces provide the traditional, slow roll that bocce enthusiasts love. A properly installed crushed stone base is also fantastic for drainage. It essentially acts as a built-in French drain, channeling water away from the playing surface without the need for visible drains. This is a huge plus for keeping your court in top shape through every season. While these materials require regular grooming to stay level, many find the classic gameplay is well worth the effort.

A Modern Option: Synthetic Turf

If you’re looking for a surface that offers consistent play with minimal upkeep, synthetic turf is an excellent modern alternative. A high-quality turf provides a smooth, predictable ball roll every time, and you won’t have to worry about raking or watering. We often build our premium bocce courts with a sturdy base and top it with durable synthetic turf that looks great and stands up to frequent use. It’s the perfect solution for families who want to spend more time playing and less time on maintenance.

Selecting Your Borders: Porcelain and Natural Stone

The borders of your bocce court do more than just frame the playing area; they are essential for holding the surface material in place and maintaining the court’s structural integrity. This is where you can add a beautiful, high-end touch to your backyard design. Durable and stylish options like porcelain and natural stone create a clean, permanent edge that adds a polished look to the entire space. Proper installation is key to ensuring the borders are level and secure, providing a solid foundation that prevents shifting and erosion over time.

How to Choose the Right Restoration Contractor on Long Island

Finding the right partner for your bocce court restoration is the most important decision you’ll make in this process. A great contractor brings not just skill but also a clear vision and a collaborative spirit to your project. They will guide you through material selection, design choices, and the construction process, ensuring the final result is a beautiful, functional court that your family can enjoy for years. On the other hand, the wrong choice can lead to frustrating delays, unexpected costs, and a court that doesn’t perform as it should.

Your goal is to find a team with proven experience, a transparent process, and the proper credentials. Taking the time to vet your options carefully will give you peace of mind and a finished project you can be proud of. Think of it as building a partnership. You want someone who listens to your ideas and has the expertise to bring them to life, creating a space that perfectly fits your Long Island home.

What to Look For in a Restoration Service

When you start looking for a contractor, focus on their specific experience with bocce courts and other outdoor living projects. Restoring a bocce court requires a unique skill set that goes beyond general landscaping. A true professional understands the nuances of proper surface installation, drainage, and border construction. Look for a company that has a strong portfolio of completed Sports Games Courts and can speak confidently about the technical details.

The choice of surface material is critical, and an experienced contractor can explain the pros and cons of different options, from traditional crushed stone to modern synthetic turf. They should also be experts in installing the frames and borders that keep the surface contained and maintain the court’s structural integrity. A company with deep roots in masonry and landscape construction will have the well-rounded expertise needed for a high-quality restoration.

Key Questions to Ask a Contractor

Before you sign any contracts, it’s important to have a detailed conversation with potential contractors. This is your chance to understand their process and make sure they’re the right fit for your project. Don’t hesitate to ask plenty of questions. Start by asking for a clear, detailed quote that breaks down the costs for excavation, materials, and labor. This transparency helps you avoid surprise expenses down the road.

You should also ask about their project timeline, the specific materials they recommend for your court, and why. Inquire about their team’s experience and ask to see examples of past restoration projects. A great contractor will be happy to walk you through their process for restoration and sealing, explaining how they handle each step from site preparation to the finishing touches.

Why You Should Check for Licenses and Insurance

Verifying that your contractor is fully licensed and insured is a crucial step that protects you and your home. A valid license is proof that the contractor has met local and state requirements, demonstrating their knowledge and professionalism. Insurance, including liability and workers’ compensation, protects you from being held responsible for any accidents or property damage that might occur during the restoration.

Properly restoring a bocce court involves technical work like grading the site, forming concrete borders, and installing vapor barriers. These tasks require professional oversight to ensure they are done correctly. Hiring a licensed and insured company like Gappsi, which has a long history of professional home remodeling, ensures your project is in capable hands and that your investment is secure from start to finish.

Common Restoration Challenges to Prepare For

Bringing an old bocce court back to life is an incredibly rewarding project, but it’s smart to go in with a clear picture of the process. Like any renovation, restoring a court can present a few hurdles. Knowing what to expect helps you plan effectively and ensures the project runs smoothly from start to finish. From uncovering hidden structural issues to working around Long Island’s unpredictable weather, being prepared is the key to a stress-free restoration and a beautiful, long-lasting court you can enjoy for years.

Dealing with Structural and Drainage Problems

One of the most frequent issues with older bocce courts is improper drainage. Over time, a court that doesn’t drain well can lead to a soft, uneven surface, water damage, and an unplayable mess after it rains. The first step in a quality restoration is often to address these foundational problems. This might involve installing a new drainage system and re-leveling the entire surface to ensure water flows away correctly. You may also find that the court surface has cracks from settling or temperature changes, which need to be repaired for safety and playability. Addressing these core structural elements is essential for a professional-level court.

How Weather Can Impact Your Timeline

On Long Island, we know the weather can change in an instant, and this can have a real impact on your restoration timeline. Rain, humidity, and extreme temperatures can cause delays, especially during crucial stages like excavation, pouring materials, or letting surfaces cure. For example, a project planned for early spring might face postponements due to late-season rain or cold snaps. It’s important to have a conversation with your contractor about a realistic timeline that accounts for potential weather delays. Building a little flexibility into your schedule will help manage expectations and prevent frustration if Mother Nature doesn’t cooperate.

Planning for Future Maintenance

Once your beautiful new bocce court is finished, the work isn’t completely over. To protect your investment and keep the court in top condition, you’ll need a plan for ongoing maintenance. Regular upkeep is what preserves the quality and performance of the playing surface for the long haul. This includes simple tasks like keeping the court clean, checking for any new cracks, and making sure the drainage system is clear of debris. With the right care, your restored bocce court can last for decades. Consider talking to your contractor about a maintenance plan or professional restoration and sealing services to keep it looking and playing its best.

Related Articles

Frequently Asked Questions

How long does a typical bocce court restoration take? The timeline for a restoration project really depends on the condition of your court and the scope of the work. A simple resurfacing might only take a few days, but if we need to address significant issues like poor drainage or rebuild the borders, the project could take a couple of weeks. We always provide a clear timeline upfront, keeping in mind that factors like weather can sometimes cause adjustments.

Do I need a full restoration, or can I just get my court resurfaced? This is a great question, and the answer lies in the court’s foundation. If the base is solid and the drainage is working well, a simple resurfacing might be all you need to get it back in playing shape. However, if you’re seeing persistent puddles, major cracks, or an uneven surface, these are signs of deeper issues. A full restoration addresses the court from the ground up, ensuring it will last for years to come.

What kind of upkeep is needed after the restoration is complete? The maintenance your court will need depends heavily on the surface material you choose. Traditional surfaces like crushed stone require regular raking to stay smooth and level. A modern synthetic turf surface, on the other hand, is much lower maintenance and mostly just needs to be kept clear of leaves and debris. We can walk you through the upkeep requirements for each option so you can choose what best fits your lifestyle.

Can I add things like lighting or a seating area during the restoration? Absolutely. The restoration process is the perfect time to integrate other features to create a complete entertainment area. Many homeowners choose to add built-in stone benches, surrounding landscape lighting for evening games, or even a small patio for spectators. Since we handle all aspects of outdoor construction, we can seamlessly incorporate these elements into the overall design.

What is the first step to getting my bocce court restored? The best way to start is with a professional consultation. This allows an expert to come out and assess the current condition of your court, listen to your ideas, and understand your budget. From there, they can provide a detailed plan and a clear quote for bringing your vision to life.

Share this page: