Outdoor kitchen countertop beside a Long Island patio

Outdoor Kitchen Countertops: Best Materials for Long Island

Choosing outdoor kitchen countertops for a Long Island home involves more than matching a color to the patio. The surface must stand up to sun, rain, humidity, seasonal temperature changes, food spills, hot cookware, and regular cleaning. It also has to work with the grill, sink, storage, masonry base, shade structure, and the materials already used around the property.

Call Gappsi Group at (631) 831-3177

The best material depends on the kitchen’s exposure, how you cook, the maintenance you will provide, and the design you want to create. Granite, quartzite, porcelain, concrete, stainless steel, and aluminum each offer a different balance of weather response, heat tolerance, stain resistance, fabrication needs, and visual character.

This guide compares those options without treating one surface as the right answer for every property. Use it to narrow the shortlist, then review the slab, support, cutouts, drainage, edge details, and surrounding landscape as one coordinated design.

What Should Outdoor Kitchen Countertops Handle on Long Island?

An outdoor kitchen countertop is a working surface, a weather-exposed finish, and a visible part of the yard. In Nassau and Suffolk County, an open island may receive strong sun, wind-driven rain, humidity, and winter freeze-thaw cycles. A covered kitchen has a different exposure profile, but it still needs materials and construction details intended for outdoor use.

Environmental research on stone durability identifies moisture, salt, heating and cooling, freeze-thaw cycles, and biological activity as factors that can affect service life. That does not mean every stone performs the same way or that a sealer solves every problem. It means the material and the installation should be selected together. Review the government-recorded stone durability study when comparing the conditions your site must handle.

Start with exposure and water management

Record whether the counter is fully exposed, protected by a roof, or partially shaded by a pergola. Note nearby trees, sprinklers, pool water, coastal air, and places where rain or wash water could collect. These details affect the surface, the base, the joints, and the way the finished counter should be cleaned and protected.

Drainage is part of countertop performance. Water should not be directed toward cabinet interiors, appliance openings, electrical components, or vulnerable joints. The supporting base must be stable and appropriate for the selected material. A durable slab can still develop problems if it is poorly supported, has an unsuitable overhang, or is installed without a plan for water movement.

Plan around cooking and food preparation

Measure the areas needed for cutting, plating, serving, and setting down groceries. A grill, sink, refrigerator, burner, or pizza oven creates different work zones, so the countertop should not be planned as one uninterrupted decorative surface. Leave a practical landing area beside hot appliances and confirm clearances before the slab is fabricated.

Even a material described as heat resistant benefits from sensible use. Trivets, heat-resistant landing areas, and a clear plan for hot cookware reduce avoidable damage. The Iowa State University Extension stone countertop care guidance is a useful reference for cleaning and heat-related precautions.

Call Gappsi Group at (631) 831-3177

How Do Granite and Quartzite Compare for Outdoor Kitchens?

Granite and quartzite are natural-stone choices with distinct colors, patterns, and fabrication considerations. Both can suit an outdoor kitchen, but a slab should be evaluated on its own characteristics rather than selected only by the name of the stone. Thickness, porosity, finish, support, seams, edge profile, and exposure all matter.

Granite: a practical natural-stone starting point

Granite is often shortlisted for outdoor kitchens because it can provide a strong, heat-tolerant surface with substantial visual variety. Dark, light, and patterned slabs can be coordinated with masonry, pavers, pool coping, or the home exterior. Its appearance also works across traditional, transitional, and contemporary designs.

Granite is not maintenance-free. The specific slab may need sealing, and sealing improves resistance to stains without making the surface immune to spills. Food oils, wine, acidic ingredients, and standing moisture should be addressed promptly. Use a cleaner recommended for the selected stone, and confirm the resealing schedule with the fabricator or installer. Iowa State University Extension cautions against acidic cleaners, ammonia, and window cleaners for granite care.

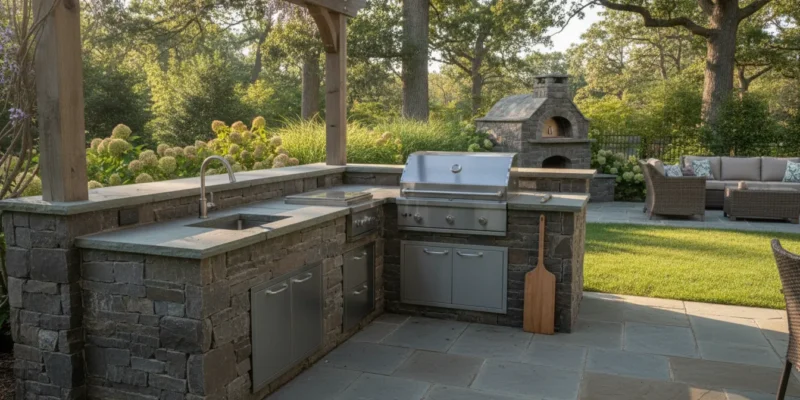
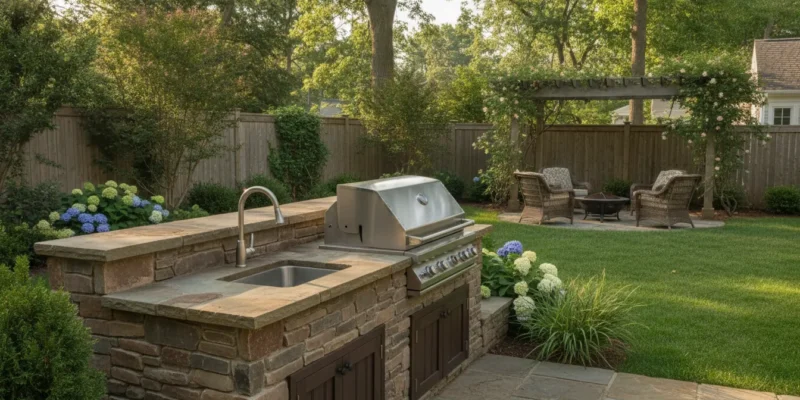
Granite outdoor kitchen countertop with a masonry island
Granite can connect an outdoor kitchen countertop to a masonry island and surrounding patio.

Quartzite: natural pattern with a different selection process

Quartzite can appeal to homeowners who want a natural stone with a lighter, more layered appearance. It is often considered for a sun-exposed counter because many quartzite slabs offer good resistance to scratching and weathering. The performance of a particular slab still needs to be confirmed, especially when the surface will receive heavy cooking use or direct weather.

Ask where the stone was quarried, how it was classified, whether it has been treated, and what care the fabricator recommends. A well-chosen slab can be a strong design feature, but the decision should include the stone’s porosity, the finish, cutouts, seams, overhangs, and support. Appearance alone is not enough to determine whether a slab belongs in a fully exposed kitchen.

Granite or quartzite: which should you shortlist?

Choose between them by comparing the actual slabs and the actual installation conditions. Granite may offer a broader range of familiar outdoor applications and colors. Quartzite may be attractive when the design calls for a more pronounced natural pattern or a marble-like direction. Both require the installer to resolve support, hot-pan use, cleaning, sealing, and water management before installation.

For a closer look at how granite can be used in an outdoor kitchen, read Gappsi’s granite outdoor kitchen countertop guide. The broader comparison here is still the right place to weigh granite against porcelain, concrete, stainless steel, and aluminum.

Why Is Porcelain a Popular Choice for Outdoor Kitchen Countertops?

Porcelain is often selected when homeowners want a consistent, contemporary surface with low porosity and a wide range of colors or stone-inspired patterns. Outdoor-rated porcelain can be considered for sun, stains, and routine cleaning, but the exact product and installation method must be confirmed before fabrication.

Porcelain can be a useful choice around food preparation because it does not absorb spills in the same way as a more porous surface. It can also coordinate with porcelain pavers used on a patio, pool deck, or walkway. Review the available porcelain and natural stone selections alongside the countertop slab so the colors, textures, and scale work together.

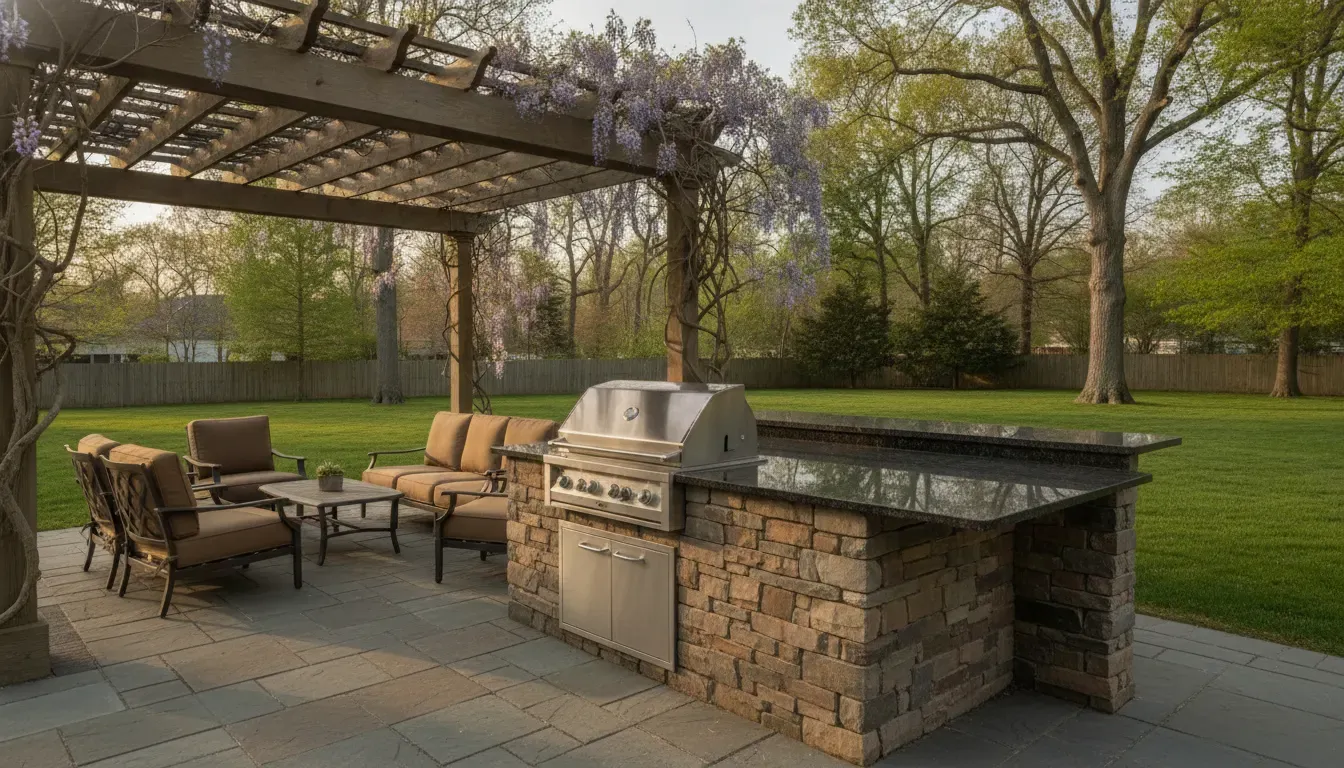
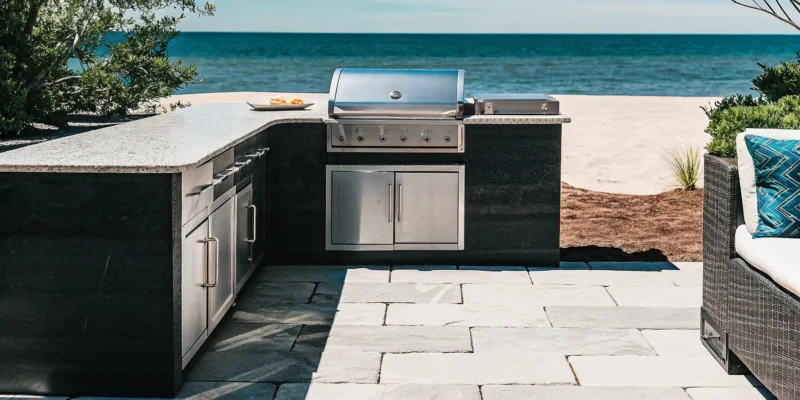
Porcelain outdoor kitchen countertop with grill and sink
A porcelain countertop can provide a clean work surface around a grill and sink.

Large porcelain slabs require careful handling. The design team should coordinate transport, access to the property, slab support, seams, corners, sink openings, grill cutouts, and exposed edges. Porcelain is rigid, so an opening or unsupported overhang cannot be treated as a minor detail. Confirm the manufacturer’s installation requirements and the fabricator’s plan for the exact slab.

View samples in both sun and shade. A surface that looks quiet indoors may show more contrast outdoors, while a bold pattern can compete with a busy paver layout. The best result comes from treating the countertop, cabinet fronts, masonry, appliances, and nearby paving as one material palette.

When Do Concrete, Stainless Steel, or Aluminum Make Sense?

Concrete, stainless steel, and aluminum can solve different design and performance needs. One may be right for a custom shape, another for a work-centered cooking area, and another where lower weight or rust resistance matters. Each choice still depends on the base, the exposure, the joints, and the way the kitchen will be used.

Material Useful strengths Important planning point
Concrete Custom-poured shapes, integrated forms, and a substantial architectural appearance. Sealing and moisture management should be part of the care plan. Confirm crack, stain, edge, and repair expectations.
Stainless steel Work-focused appearance, straightforward cleanup, and strong association with professional cooking areas. Coordinate the grade, finish, fasteners, drainage, edges, and nearby cabinetry for the actual exposure.
Aluminum Lower weight and natural resistance to rust can suit certain modular or moisture-prone applications. Review the support, joints, finish, movement, and connection details with the installer.

Concrete: useful when the shape is part of the design

Concrete can follow a curved bar, a broad serving ledge, a radiused corner, or a layout that does not fit a standard slab. Its ability to be formed around a design can make it appealing for a masonry-led outdoor room. The tradeoff is that concrete needs a clear maintenance and repair discussion before it is installed.

Because concrete can absorb moisture and develop stains or cracks, ask which sealer is intended, how often it should be renewed, what cleaners are allowed, and how the surface will be protected during winter. The finish, color variation, edges, sink openings, and support should be approved as part of the same sample and drawing process.

Stainless steel: suited to active cooking and frequent cleanup

Stainless steel can make sense when grilling, prep, and cleanup are the center of the outdoor kitchen. Its reflective surface creates a direct, commercial-style appearance, and it can be wiped clean after use. Select the appropriate outdoor-rated product and review the actual exposure, especially near a pool, salt air, or sources of standing water.

Stainless steel does not eliminate design coordination. Appliance openings, fasteners, corners, seams, drainage, and the transition to the base should be resolved before fabrication. Fingerprints, water marks, and surface scratches may also be more visible on some finishes, so compare samples and ask how the selected finish should be maintained.

Aluminum: an option when weight and moisture are important

Aluminum is worth considering when a lighter surface or component can simplify an installation. Its resistance to rust and moisture can be useful in damp settings, but the material still needs a sound support system and well-designed connections. Review how the finish will respond to sun, how edges will be fabricated, and how the countertop will meet cabinets, masonry, and appliances.

Do not choose aluminum only because it is light. The full assembly must be stable, level, properly supported, and compatible with the intended cooking equipment. A project-specific review is more reliable than a general claim about any countertop category.

Which Countertop Details Improve Cooking and Cleaning?

Material selection is only one part of a successful outdoor kitchen countertop. Daily comfort and long-term service also depend on the details that are easy to overlook in a showroom. Plan the work zones, edges, overhangs, cutouts, seams, drainage, and maintenance routine before the final slab is ordered.

How should stains, heat, and daily cleanup be handled?

Match the cleaning routine to the surface. Granite and other natural stones may need periodic sealing and a cleaner appropriate for the stone. Concrete may need more consistent protection because moisture and food oils can penetrate an unprotected surface. Porcelain and stainless steel may be simpler to wipe down, but they still need product-specific care. Remove spills promptly, especially around grills, marinades, wine, and cooking oils.

Give hot cookware a designated landing area. Use trivets or another heat barrier where the surface manufacturer recommends it. Plan where cutting boards, serving trays, paper towels, and small appliances will sit so food preparation does not happen at the edge of a walkway or directly beside a burner.

What fabrication details prevent water and layout problems?

Resolve appliance dimensions before the countertop is cut. A grill, sink, refrigerator, burner, or pizza oven opening can affect the slab’s support and the location of seams. Confirm the final specifications, access route, cabinet openings, and service clearances with the appliance supplier and installer.

Edge profiles and overhangs also need practical attention. A softened edge can be more comfortable beside a busy passage. A seating overhang needs adequate support and should not interfere with doors, walkways, or appliance ventilation. Drainage should move water away from the work surface, cabinet interiors, and masonry base rather than leaving moisture at a joint.

How Do You Match the Countertop to the Rest of the Yard?

A countertop should look connected to the property without making every surface identical. Start with the fixed elements that will remain in place, such as the home exterior, retaining walls, pool coping, patio, walkways, and shade structure. Then compare the countertop against those materials in the light where it will actually be used.

Build a consistent material palette

A bluestone setting may pair with a quieter gray surface, while warm travertine or sandstone can support beige, cream, or earth-toned tones. A patterned granite or quartzite can become the focal point when the surrounding paving is restrained. A more uniform porcelain slab may provide a visual break when the yard already contains several strong textures.

Use full-size samples when possible. Small samples can hide natural variation, seam placement, and the way a color changes from shade to direct sun. A material palette should include the countertop, masonry base, cabinet fronts, appliance finish, pavers, pool deck, and any wall or pergola finish that will be visible from the seating area.

Coordinate the kitchen structure and appliances

Cabinet doors, appliance fronts, hardware, and countertop edges should read as one group. Stainless steel can become a deliberate accent when it is repeated in hardware or lighting. Dark cabinet fronts can be balanced with a lighter surface, while a deeper stone can ground a pale structure. Keep the working layout in view so the design does not prioritize appearance over comfortable use.

Gappsi’s outdoor kitchen masonry design and construction service can be considered when the base, countertop, paving, and surrounding hardscape need to be coordinated as one project. A pergola or pavilion can also change the way the counter is experienced. Review pavilions, pergolas, and gazebos as part of the larger outdoor room rather than selecting the countertop in isolation.

A Practical Selection Checklist for Your Outdoor Kitchen

Use this checklist before choosing among outdoor kitchen countertops. It keeps the decision focused on the conditions the surface will actually face.

  1. Assess exposure: note sun, rain, humidity, nearby landscaping, coastal conditions, sprinklers, and the protection provided by a roof or pergola.
  2. Describe cooking habits: list the grilling, prep, serving, and storage tasks that will happen on the counter.
  3. Shortlist materials: compare granite, quartzite, porcelain, concrete, stainless steel, and aluminum against the site rather than a generic ranking.
  4. Review the supporting base: confirm that the structure, cabinets, masonry, and slab support are appropriate for the chosen material.
  5. Map appliances and utilities: mark the grill, refrigerator, sink, burners, gas, water, drainage, electrical access, and service panels before fabrication.
  6. Choose edges and overhangs: account for seating, traffic, corners, support, appliance doors, and the comfort of people moving around the island.
  7. Plan care: write down approved cleaners, sealing or treatment requirements, hot-pan precautions, and winter protection before installation.
  8. View samples outdoors: compare the slab beside the pavers, pool deck, siding, cabinet finish, appliances, and shade structure in sun and shade.
  9. Review the whole installation: have the countertop, base, appliances, utilities, drainage, and surrounding masonry checked together before the first cut.

Call Gappsi Group at (631) 831-3177

Frequently Asked Questions

What is the best countertop for an outside kitchen?

There is no single best surface for every Long Island outdoor kitchen. Granite, quartzite, porcelain, concrete, stainless steel, and aluminum each involve different tradeoffs in weather exposure, heat, stains, cleaning, fabrication, and design. Start with the property’s exposure and cooking habits, then compare actual products and installation details.

What can I use for outdoor countertops?

Common options include natural stone such as granite and quartzite, outdoor-rated porcelain, concrete, stainless steel, and aluminum. The best shortlist depends on the support structure, drainage, appliance cutouts, edge profile, maintenance routine, and the materials already used around the property.

What is the cheapest option for outdoor countertops?

The lowest overall project cost depends on the material, slab or fabrication requirements, cutouts, support, access, site work, and installation. A surface that appears simple may require additional reinforcement or maintenance. Compare the complete installed scope and the care you are prepared to provide instead of choosing on material name alone.

What type of countertop is best for an outdoor bar?

An outdoor bar countertop should be selected around the exposure, seating overhang, spill risk, edge comfort, and the way drinks will be served. Porcelain, natural stone, concrete, stainless steel, and aluminum can all be considered when the support and drainage are designed correctly. Bring the surface sample next to the cabinetry and surrounding patio before approving the final material.

Gappsi can help Long Island homeowners connect countertop selection with outdoor kitchen design, masonry, appliances, and surrounding outdoor living materials. To discuss the conditions and design goals for your Nassau or Suffolk County property, visit the Gappsi contact page.

Call Gappsi Group at (631) 831-3177

Share this page:
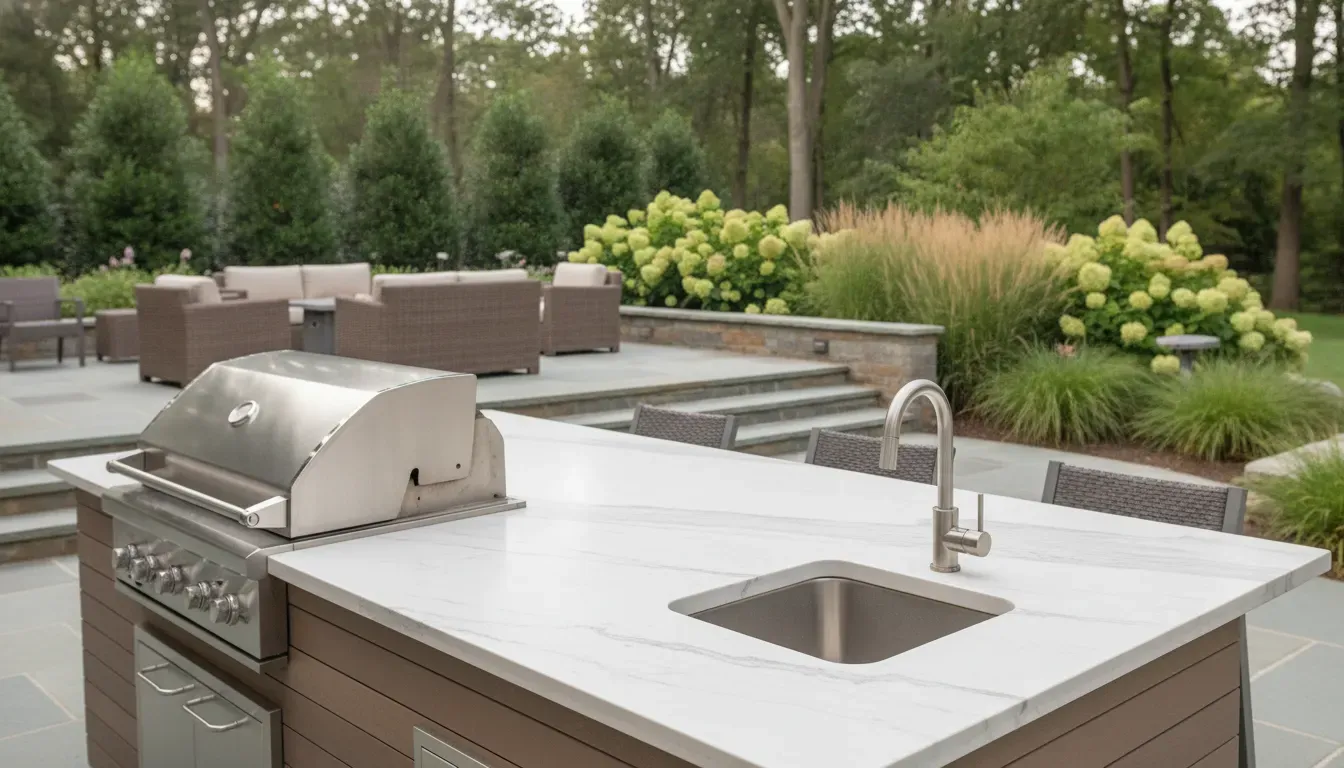
Stainless steel sink in a natural stone outdoor kitchen on Long Island

Outdoor Kitchen Sink Guide for Long Island

An outdoor sink is a small fixture with a large effect on how an outdoor kitchen works. It gives you a place to rinse produce, wash hands, fill containers, and manage cleanup without carrying everything indoors. On Long Island, the decision also involves seasonal freezing, water and drain routing, counter space, grading, and access for future service.

Call Gappsi Group at (631) 831-3177 to discuss your outdoor kitchen sink plan.

The right outdoor kitchen sink balances the way you cook with the available counter and cabinet space. Choose materials suited to the setting. Include a plumbing plan that can be shut off and drained before winter. Treat the sink as part of the kitchen design rather than an accessory added after the island is built.

Start by defining what the sink needs to handle on a typical day. That practical answer will guide the basin dimensions, landing space, and installation details that make the first design decisions easier.

How Do You Choose the Right Outdoor Kitchen Sink Size?

The right sink size depends less on a standard dimension than on how you expect to use the station. Start by separating food preparation from cleanup. If you mainly need to rinse produce, wash your hands, fill a glass, or clean a few utensils beside the grill, a compact basin may be practical. If you plan to wash platters, grilling tools, and larger cookware outside, you will need more basin width, depth, and clear counter space around it.

Think about the largest item you regularly expect to place in the basin. A shallow sink can work for quick rinsing, but a deeper basin gives you more room for soaking tools and containing splashes. Depth also affects comfort, especially when the sink will be used by several family members during a gathering. Ask whether the faucet, drain, and any accessories will reduce usable basin space rather than judging capacity from the outside dimensions alone.

Compact sinks for focused prep

A compact format can preserve valuable counter area in a smaller cooking island or a layout with a grill, refrigerator, and serving surface. Product listings provide examples such as 15 by 15 inch, 15 by 20 inch, and 15-inch sink formats. These are product examples, not universal sizing standards. A small sink may be appropriate when indoor cleanup remains part of the routine. Or when the outdoor station is intended primarily for handwashing, rinsing ingredients, and light prep.

Installation style can also influence the fit. Listings include both topmount and undermount configurations. A topmount or drop-in design may be useful when the countertop and cabinet plan favor a visible rim, while an undermount installation can create a continuous counter edge. Confirm the selected model’s required cutout, rim dimensions, faucet-hole layout, and cabinet clearance before ordering. The sink’s listed length and width are not necessarily the same as the opening that must be cut.

Workstation formats for cooking and cleanup

A workstation sink may make sense when you want prep functions integrated into one area. Examples in product listings include 21 by 20 inch and 29 by 20 inch formats, with some combining an ice chest and sink. That extra width can support a cutting board or other accessory, but it also consumes counter and cabinet space. Decide whether those features will be used often enough to justify the larger footprint.

Before finalizing the layout, measure the base cabinet width, interior clearance, countertop depth, backsplash or rear clearance, faucet reach, and drain location. Leave a usable landing area beside the sink so washed items do not sit in a traffic path. Also check door and drawer swings, grill clearance, and access for future maintenance. A coordinated plan for the island, plumbing route, drainage, and surrounding patio helps prevent a sink from fitting on paper but working poorly in daily use. For the broader layout sequence, review this guide to Long Island outdoor kitchen planning.

Which Materials Work Best for an Outdoor Kitchen Sink?

Material selection should account for more than appearance. An outdoor kitchen sink is exposed to rain, sun, temperature changes, food residue, and, on many Long Island properties, salty coastal air. The right choice depends on the sink’s location, the surrounding counter, how you plan to use it, and how easily the fixture can be covered or serviced.

Stainless steel is the most common starting point because it works with many outdoor kitchen designs and is available in both topmount and undermount formats. Product listings commonly use 304 and 316, also called T-316 or marine-grade, as examples of outdoor sink construction. One retailer describes 304 stainless as suitable for rust resistance in most climates, while 316 adds corrosion protection for salty coastal air because of its molybdenum content. That distinction can be relevant for homes near the North Shore, South Shore, or exposed waterfront areas. But it is not a universal rule that one grade is best for every installation. Review the manufacturer’s specifications and the actual exposure at your property.

Listings also show outdoor sinks made with 16-gauge T-316 stainless, including compact workstation and ice-chest configurations. These examples demonstrate how material and function can be combined, rather than establishing a required gauge for every project. A standard basin may suit handwashing, produce, and cleanup, while a workstation model can include a fitted cutting board or related accessories. Some sink stations also offer drying racks or integrated soap dispensers. Choose those features only if they support the way your household cooks and entertains.

Granite composite and stone-look options can help coordinate the sink with a granite, bluestone, porcelain, or other outdoor counter. Ruvati identifies stone, ceramic, and plastic alongside stainless steel as common outdoor sink material categories. Each option should be reviewed for food-safe use, cleaning requirements, installation method, and the manufacturer’s guidance for outdoor exposure. Do not select a material solely because it matches the counter. The sink cutout, edge detail, mounting system, drainage access, and serviceability all need to work together.

Planning choice Best fit Confirm before ordering
Compact basin Handwashing, rinsing, and light prep Landing space and cabinet clearance
Workstation sink Prep with an integrated cutting board Accessory footprint and cutout template
Topmount or drop-in A visible rim and straightforward counter fit Rim dimensions, faucet holes, and support
Undermount A continuous counter edge Counter construction, edge detail, and service access

Accessories can change the role of the fixture. A fitted cover may help keep leaves and debris out when the basin is not in use. A cutting board can create a compact prep station, while an insulated ice chest can combine cold storage with a sink in a larger entertaining area. Product listings include 15-by-20, 21-by-20, and 29-by-20 ice-chest or workstation examples, so confirm the required cabinet and counter space before choosing one. Pair the fixture with an outdoor-rated faucet, then plan access for shutoffs and winterization.

The sink base matters as much as the bowl. Review the guide to weatherproof outdoor cabinets when coordinating the cabinet material, counter support, and plumbing access. A coordinated design makes it easier to protect the sink, reach connections, and maintain a consistent appearance across the kitchen.

What Water Supply and Drainage Does an Outdoor Sink Need?

An outdoor kitchen sink is only as practical as the utility plan behind it. The fixture generally needs a dependable water supply and a drainage connection, but the best arrangement depends on the sink location. The distance to existing plumbing, the finished counter, and how the kitchen will be used. A site review should happen before cabinets, masonry, or countertops are finalized.

Cold-only or hot and cold water?

A cold-only supply may be suitable for rinsing produce, washing hands, filling containers, or handling quick cleanup near a grill. A hot and cold arrangement adds flexibility for washing greasy tools, cookware, and dishes. It also affects the faucet, supply lines, shutoff locations, and the route back to the home’s plumbing. Product options include compact sinks paired with a hot and cold outdoor faucet, but the product choice should follow the actual utility plan rather than determine it.

Make the water shutoff accessible from the cabinet or service area. A shutoff hidden behind permanent stonework is difficult to use when the sink needs maintenance or seasonal preparation. The plumbing layout should also leave room to inspect connections, disconnect lines if required, and protect the sink base from unnecessary exposure to leaks.

Plan the drain route before installation. An outdoor sink drain may connect to an approved existing drainage arrangement, or the project may require a different site-specific solution. The route should account for the trap, cleanout or service access where appropriate, pipe transitions, and the distance to the connection point. A trap holds water, so its location matters in an outdoor installation that may be exposed to freezing conditions. Do not assume that a convenient-looking discharge point is acceptable without professional review.

Drainage also involves the ground around the kitchen. The counter should direct splash toward a controlled surface rather than into cabinet seams. The patio or surrounding hardscape needs enough slope and runoff planning to keep rainwater from collecting beneath the sink base or flowing toward the house. Grading, nearby planting beds, pool areas, and existing drainage can change the practical route for both plumbing and surface water. These details are especially important when planning on Long Island, where seasonal weather and freeze exposure need to be considered together.

Connecting to existing plumbing may require additional fittings or modifications, depending on the home’s layout and the outdoor kitchen’s position. A plumber should confirm supply capacity, drain routing, trap treatment, access, and the project’s applicable requirements. Coordinate that review with the broader outdoor kitchen installation so masonry, cabinets, utilities, and finish materials are designed as one system.

Call Gappsi Group at (631) 831-3177 to discuss your outdoor kitchen plumbing and installation plan.

Where Should an Outdoor Kitchen Sink Go?

The best location is usually the point where food preparation, cooking, and cleanup overlap. Place the sink close enough to the grill for rinsing tools and handling ingredients. But not so close that the grill blocks access or exposes the faucet to unnecessary heat. A sink at the end of a counter run can work well when it leaves a clear prep surface between the basin and the cooking equipment.

Think through the full movement of a meal. Ideally, the refrigerator or ice chest should be within a few steps of the sink and prep counter. That arrangement lets you remove ingredients, rinse them, prepare them, and move them to the grill without crossing the main entertaining area. Review the relationship between the sink, grill, refrigerator, and storage as a single workflow rather than selecting each appliance separately. The guide to outdoor kitchen appliances can help organize those decisions.

Protect the work zone from traffic

Do not place the basin where guests naturally walk between the house, patio, pool, or seating area. A person washing dishes should not have to stand in the primary passage, and an open cabinet door should not narrow the route to the pool. Leave a clear landing surface on at least one side of the sink for plates, produce, and wet utensils. If the design includes a cutting board or drying rack, account for that accessory in the counter layout before finalizing the sink cutout.

For a poolside kitchen, keep the sink and its work surface convenient to the cooking area without turning the plumbing zone into a bottleneck around the pool deck. The same principle applies to patios and outdoor dining areas. The sink should support entertaining while remaining visually and physically integrated with the hardscape.

Account for sun, wind, and the house connection

Sun and wind affect comfort as much as distance does. A sink facing strong afternoon sun may become unpleasant to use, while prevailing wind can carry spray toward seating or blow leaves into an uncovered basin. Use the house, walls, pergolas, and planting as part of the layout conversation, but avoid creating a damp, inaccessible corner. A location with practical shade, reasonable visibility, and protection from direct exposure is often easier to maintain.

Placing the outdoor kitchen nearer to the house can simplify access and make it easier to coordinate water, drainage, and electrical routes. However, the shortest route is not automatically the right route. The design still needs sufficient counter depth, cabinet access, service clearance, and a drainage plan. Confirm how the sink will connect to the property plumbing and where discharge will go before the masonry is built. Site-specific plumbing, grading, and permit questions should be reviewed by the appropriate professionals.

Coordinate grading and drainage with the hardscape

An outdoor kitchen sink should be planned together with the patio grade, nearby planting beds, pool deck, and existing drainage. Surface water should not collect beneath the cabinets or flow toward the house. The counter, sink base, and surrounding paving need to work as one system, with access preserved for shutoff components and future service.

That coordination is especially important on Long Island properties where Nassau and Suffolk sites can have different grades, existing hardscape conditions, and connections to work around. Gappsi Group combines outdoor kitchen planning with masonry design and construction, so the sink position can be reviewed alongside patios, pool areas, grading, drainage, and the overall material plan.

How Do You Winterize an Outdoor Kitchen Sink on Long Island?

Seasonal freezing makes winterization part of the installation plan for an outdoor kitchen sink in Nassau or Suffolk County. The goal is to remove standing water from the supply and drain components before cold weather arrives. General outdoor-sink guidance recommends draining water and disconnecting plumbing when the fixture will be exposed to winter conditions. The exact procedure depends on the faucet, shutoff arrangement, drain design, and whether any components occupy an unheated cabinet or other exposed space.

Use the following sequence as a planning checklist. It is general freeze-protection guidance, not a statement of Long Island plumbing code. A licensed plumber should confirm the details of your specific installation.

  1. Shut off the water supply. Close the dedicated shutoff serving the sink, if one is installed. If the sink shares a branch line, identify the correct valve before shutting it down. Do not assume that closing the faucet handle isolates the pipe. The supply must be turned off upstream of the outdoor fixture.
  2. Open the faucet and any accessible valves or spigots. With the supply closed, open the faucet to release pressure and let water move out of the line. If the installation includes a separate drain valve, low-point drain, or hose connection, open it according to the plumbing design. Follow the fixture manufacturer’s instructions rather than forcing a valve.
  3. Remove hoses and detachable accessories. Disconnect garden hoses, spray attachments, quick-connect fittings, and other removable water connections. Store them in a dry location. Leaving a hose attached can retain water at the connection and make it harder for the line to drain completely.
  4. Drain residual water from the supply and faucet. Let the faucet remain open while the line drains. Some installations may need an appropriate blowout procedure or disconnection of plumbing, but that work should be performed with the correct equipment and professional guidance. Never introduce compressed air into a system without confirming that the components can safely handle it.
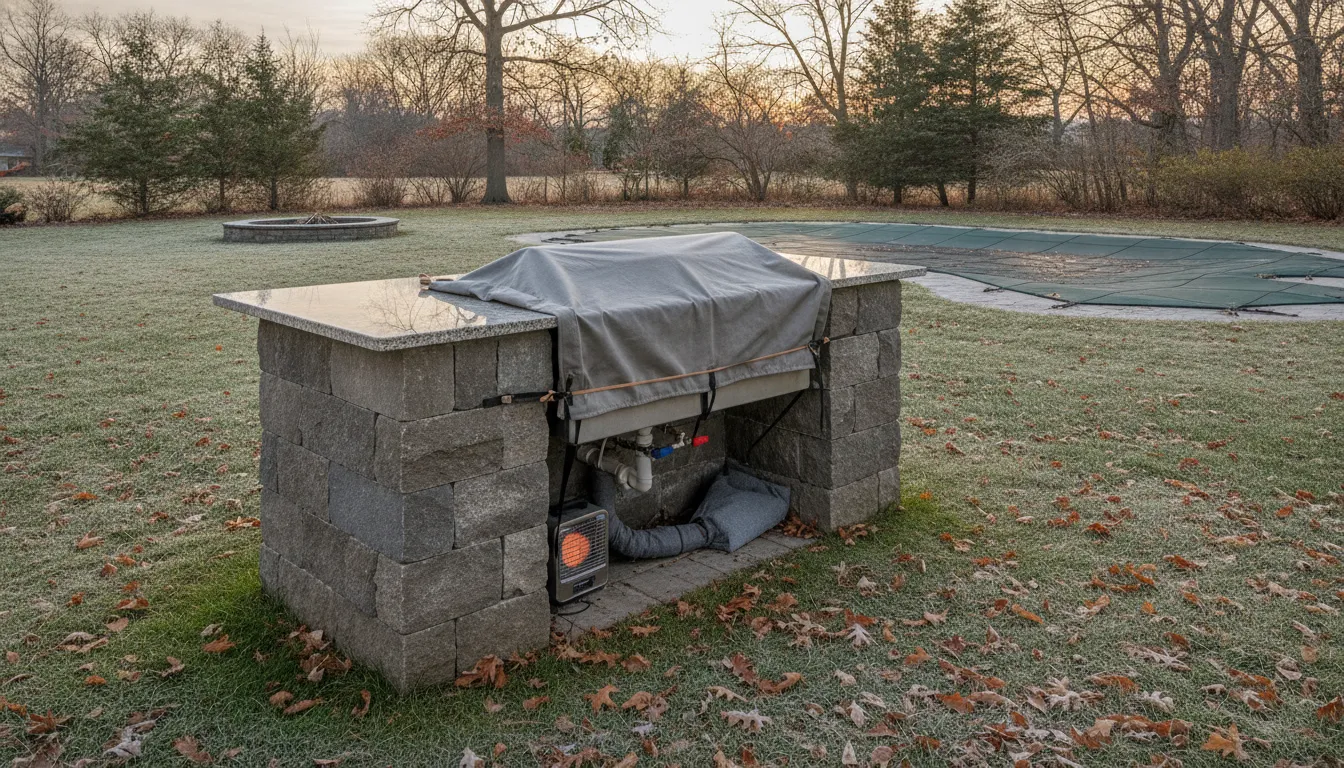
  5. Review the trap, drain, and unheated spaces. Inspect the P-trap or other trap arrangement for retained water, and ask the plumber how it should be emptied or protected. Pay particular attention to pipes, filters, valves, and traps inside an unheated cabinet, beneath the counter, or along an exposed route. General winter guidance identifies these locations as needing specific freeze protection. Do not use antifreeze or another treatment unless the product and plumbing professional specifically support it. Homeowner preparing an outdoor kitchen sink for winter protection
  6. Preserve access and plan the spring restart. Keep cabinet panels, cleanouts, shutoffs, and service openings accessible. Do not fill the cabinet with stored items that prevent inspection. In spring, check for cracked fittings, loose connections, or visible damage before reopening the water supply. Open the valve gradually, inspect every connection for leaks, and run the faucet briefly before returning the sink to normal use.

Building this checklist into the original design is easier than trying to reach hidden plumbing after the countertop and cabinets are complete. On Long Island, winterization should be discussed alongside cabinet access, drainage. And the location of the water shutoff so the sink can be serviced without disrupting the rest of the outdoor kitchen.

What Should Long Island Homeowners Confirm Before Installation?

A well-planned outdoor kitchen sink should be coordinated with the entire cooking island, patio, and landscape rather than added as an isolated fixture. Before installation begins, review the following checklist with your designer, contractor, and plumber.

  • Design visualization: Ask to see how the sink, faucet, grill, refrigerator, counter landing areas, and seating will work together. A 3D visualization can help you evaluate sightlines, circulation, proportions, and the relationship between the kitchen and the rest of the yard before construction starts.
  • Material samples: Compare the sink finish with the selected counter and hardscape materials. Bring home or review samples of granite, marble, travertine, bluestone, porcelain, or stone veneer in the actual outdoor setting. Check how the colors and textures relate to the patio, pool area, and house exterior.
  • Exact dimensions: Confirm the sink’s overall dimensions, basin depth, rim or flange, cabinet opening, and required cutout. Do not rely on a product name or nominal size. The installer should work from the manufacturer’s template, including faucet-hole placement and clearances for doors, drawers, plumbing, and accessories.
  • Water and drain route: Decide whether the sink needs cold water only or hot and cold service. Confirm where the supply will enter, where shutoff access will remain, and how the drain will connect to the approved destination. Existing plumbing may require fittings or modifications, so have a qualified professional review the site-specific setup rather than assuming a route will work.
  • Permit questions: Ask which portions of the outdoor kitchen, plumbing, electrical work, gas service, or related masonry require review in your municipality. Permit coordination should be addressed before materials are ordered. Local requirements can vary, and the project team should confirm the applicable rules for your property.
  • Grading and drainage: Make sure the sink area is coordinated with finished grades, patio slopes, splash zones, and stormwater flow. Gappsi’s landscape services include grading and drainage planning, which can help integrate the kitchen into the wider outdoor space instead of directing water toward the house, cabinets, or walkways.
  • Freeze plan: Discuss how the supply, faucet, drain, trap, and exposed connections will be protected or drained before freezing weather. Include a practical shutoff and access plan in the design, especially if plumbing will sit in an unheated cabinet or isolated island.
  • Cabinet access: Verify that doors or removable panels provide enough room to install, inspect, shut off, disconnect, and service the plumbing. Leave usable access after the counter and appliances are in place.
  • Construction coordination: Confirm the sequence for base construction, utilities, cabinets, countertops, sink installation, appliance placement, grading, and final surface work. Gappsi serves Nassau and Suffolk Counties and offers 3D visualization, drawings, permit coordination, material selection, and complete project coordination for outdoor living projects.

For a project that connects the kitchen to the wider property, review Long Island landscape and drainage planning alongside the sink layout. That broader review can identify access, runoff, and grade decisions before they become costly changes during construction.

(631) 831-3177

Frequently Asked Questions

What is the best sink for an outdoor kitchen?

The best choice depends on how you will use the station, the counter space available, and the plumbing you can reach. Choose a basin that supports your regular prep and cleanup tasks, then confirm that its material, faucet, mounting style, and cabinet cutout suit outdoor exposure. Stainless steel, stone, ceramic, and plastic are common categories, but the product specifications matter more than the label alone.

Should I put a sink in my outdoor kitchen?

A sink can be worthwhile if you regularly wash hands, produce, utensils, or grilling equipment outdoors. It reduces trips into the house and gives messy tasks a dedicated place. If the kitchen is used only occasionally or extending water and drainage would create an impractical route, compare that construction work with your expected use before deciding.

What kind of sink is best for outside?

Look for a sink specifically designed for outdoor conditions, with materials and finishes suited to rain, sunlight, temperature changes, and your level of exposure. Marine-grade stainless steel is one product category marketed for corrosion resistance, while stone or ceramic may coordinate more closely with a masonry counter. A cover can also help protect the basin between uses.

Does an outdoor kitchen sink need hot water?

Not always. Cold water may be sufficient for rinsing produce, washing hands, or cleaning tools, while hot and cold water can make food preparation and cleanup more convenient. Decide based on your routine, then have the supply route, shutoff access, faucet compatibility, and site-specific plumbing reviewed before installation.

How do I protect an outdoor sink from Long Island winters?

Plan to shut off the outdoor water supply, disconnect hoses, open valves, and drain residual water before freezing weather. The trap and any plumbing in an unheated cabinet or exposed area also need review. Winterization details depend on the installation, so confirm the procedure with the plumbing professional and keep shutoff access usable.

Ready to Plan Your Outdoor Kitchen Sink?

A sink works best when its size, water supply, drainage, and winterization plan are considered alongside the rest of the outdoor kitchen. Gappsi Group can help you discuss the design, coordinate the plumbing details, and plan the installation for your Long Island property.

Call Gappsi Group at (631) 831-3177 to discuss your outdoor kitchen sink design and installation plan.

Share this page:
Weatherproof outdoor kitchen cabinets with stainless steel grill and stone veneer on a Long Island bluestone patio

Outdoor Kitchen Cabinets Built for Long Island Weather

Salt air from the Atlantic Ocean can corrode low-grade metal fixtures within a single humid summer. For Nassau and Suffolk County homeowners, choosing the wrong backyard setup leads to warped frames and rust.

Call (631) 831-3177 to plan durable outdoor kitchen cabinets with our design team.

Outdoor kitchen cabinets on Long Island must use durable, weatherproof materials to withstand salty ocean breezes, high summer humidity, and harsh winter freeze-thaw cycles. Marine-grade polymer is a durable, non-porous option that never rots, splits, or swells, while 304 and 316 stainless steel offer strong, rust-resistant cabinet setups.

For built-in masonry structures, sealed concrete bases and stone veneer cladding match local patios well and provide stable protection against heavy snow and ocean moisture. You should avoid standard wood composites and low-grade plastics because they quickly fade, warp, or decay under the hot summer sun and damp coastal air. Selecting these weather-resistant materials ensures your backyard kitchen remains functional and beautiful for many years.

How do you find the right setup that stays beautiful and functional against salty ocean air and freezing snow? Start by understanding why Long Island weather demands weatherproof outdoor kitchen cabinets, then compare the materials that stand up to this climate before you plan your backyard build.

Why Long Island Weather Demands Weatherproof Outdoor Kitchen Cabinets

Building a cooking space in your backyard is a great way to enjoy the warm months on Long Island. But Nassau and Suffolk Counties have a harsh coastal climate that puts huge stress on your home. To make your space last, you must choose durable materials over style alone. Finding outdoor kitchen cabinets that can survive the salty wind, wet air, and freezing winters is critical.

The toll of salt air and high humidity

If you live near the water, you know how tough coastal air can be. The outdoor kitchen services we offer help you choose products that can stand up to these conditions. High moisture is common across Long Island, and this wet air is full of ocean salt. This harsh salt-air environment is a major cause of rust and corrosion on standard metals.

Standard metals will quickly rust, flake, and fall apart without proper care. Cheap wood or thin plastic will also warp and peel when the humidity stays high for weeks. For example, standard wood composite panels require special resins and wax to stay stable. But research from the Oklahoma State University Extension shows they still swell and rot in wet outdoor settings.

Freeze-thaw cycles and winter weather

Summer is not the only season that can damage your backyard setup because Long Island winters are cold, wet, and windy. The ground and your backyard structures go through many freeze-thaw cycles every year. When water gets into small cracks in your cabinets, it turns to ice and expands. This constant expansion can split cheap wood, crack stone, and pull cabinet joints apart.

Your doors and drawers can also become hard to open. Standard hardware like hinges and slides will quickly rust or bind when exposed to these cold, wet months. To keep your kitchen working well, you must invest in corrosion-resistant hardware made from high-grade steel or tough polymer. These parts are made to move smoothly even after years of winter snow and ice.

Weather resistance over style choices

When you design your space, it is easy to focus on style. You might want a look that matches your indoor kitchen. But you must prioritize weather resistance over aesthetic preference to prevent your kitchen from failing too soon. Standard indoor cabinets will rot, mold, and break down within a year if left in the open wind and rain.

Choosing strong, durable products is the only way to protect your investment. When you use materials like marine-grade polymer, thick stone, or top-grade stainless steel, your kitchen stays strong for decades. It will keep its shape, keep your tools dry, and look great season after season. Starting with the right weather-proof cabinet choices will save you time, money, and stress in the future.

What Is the Best Outdoor Kitchen Cabinets Material for Coastal Air?

Choosing materials for outdoor kitchen cabinets on Long Island is a task of style and science. Salt air and high moisture can soon destroy standard indoor parts. To build a space that lasts, you must find how cabinet options stand up to coastal weather. Our local shore environment demands materials that resist salt rust and winter freeze cycles.

Material durability comparison

This overview shows how the four main families of cabinet materials perform in our local climate. Each material has distinct strengths and weaknesses when exposed to salt water and winter freezes.

Material Salt-Air Resistance Freeze-Thaw Maintenance Best For
Marine-grade polymer Excellent Excellent Very low Coastal homes
Stainless steel (304/316) Good to excellent Excellent Low to medium Sleek modern looks
Sealed concrete Excellent Excellent Low Stone design matching
Wood and PVC Poor to moderate Moderate High Sheltered spots

Not sure which family of outdoor kitchen cabinets fits your yard best? Call (631) 831-3177 for a free material recommendation.

Marine-grade polymer performance

Many homeowners choose marine-grade polymer for their coastal kitchens. This plastic is fully non-porous, so it will not crack, swell, or rot in damp air. It is made to resist bad weather and needs very little care to keep its clean look.

If you want a stress-free setup, you can learn more about weatherproof outdoor kitchen cabinets that use this plastic. Because the color goes all the way through the material, scratches do not show easily. You can clean these cabinets with a simple spray from a garden hose.

Stainless steel and sealed concrete strength

Metal cabinets offer a sleek look and withstand high heat. But stainless steel can rust in salty coast air if you do not care for it or if you use the wrong grade. To stop rust, you must use 304 or 316 stainless steel.

These exact grades give the best shield against salt-water rust on the shore. Adding a powder coat is another wise choice. A powder coat baked onto the metal seals the surface and blocks salt air.

If you prefer a stone look, sealed concrete is a strong choice. When sealed the right way, concrete stands up to wet air and is highly heat-resistant. It gives your cooking space a bold look that does not wear down from cold winter freezes.

You can also cover the concrete base with a stone veneer. This natural stone veneer ties the kitchen style into your yard paving and masonry.

Wood and PVC challenges

Natural wood and PVC plastics present key trials in coastal areas. Teak wood resists rot because of its natural oils, but it still needs constant oiling to keep its color and stop splits. On the other hand, PVC is cheap and resists water, but it can warp when exposed to intense summer sun.

Over time, high heat makes cheap PVC sag and lose its form. This warping can prevent the doors from closing tightly, which lets damp sea breeze reach your stored items.

Standard indoor wood composites are even worse for outdoor use. Research from Oklahoma State University shows that wood composite panels like particleboard need special glue and wax to keep their shape.

Even with these binders, these panels absorb moisture and swell up, which leads to quick cabinet ruin when placed near the ocean. Using indoor grade panels outside is a mistake that leads to costly repairs.

Marine-Grade Polymer vs Stainless Steel: Which Lasts Longer?

Indoor cabinets often use wood composite substrates. Standard wood boards need wax and resin to stay stable, as shown in Oklahoma State University research. But outdoor spaces face much harsher conditions. For a coastal backyard, you need materials that are completely waterproof and rustproof. Marine-grade polymer and stainless steel are the two top choices for outdoor kitchen cabinets. Both resist water, but they handle salt air and heat in very different ways.

The strength of marine-grade polymer

Marine-grade polymer is a dense plastic that cannot absorb water. Because it is non-porous, it will not crack, swell, or rot when exposed to snow and rain. This material has UV blockers to stop fading from the sun. Salt air on Long Island will not corrode polymer cabinets. You can clean them with a quick hose-down. They do not need painting, staining, or sealing. For homeowners who want a clean look with minimal work, this material is hard to beat.

The limits of stainless steel in coastal air

Stainless steel offers a sleek, modern look. It is very strong and stands up to hot grills and heavy use. But coastal air is tough on metal. Salt can cause rust on steel cabinets if you do not clean them often. To prevent rust, you must choose the right grade of metal. High-end brands like Danver build their doors and boxes from 304-grade stainless steel, and they offer 316-grade stainless steel for coastal homes. These high-grade metals resist rust, but they still need to be wiped down to remove salt buildup.

Warranty and maintenance differences

Warranties often show how long a material will last. For example, Danver offers a lifetime warranty on their outdoor cabinets, and a five-year limited warranty on their powder-coat finishes. Marine-grade polymer cabinets also come with long warranties because they do not decay. When it comes to care, polymer is the clear winner. You only need mild soap and water to keep polymer clean. Stainless steel is more demanding. It must be wiped down with special cleaners to prevent tea staining and rust spots near the ocean.

How to choose the right look

Both options can look great in your yard. Stainless steel gives a bright, commercial kitchen feel. Polymer can be made in many colors and door styles to match your home. If you want to see these choices in person, you can visit the Gappsi showroom in Smithtown, New York. Our team can help you compare both options to find the best fit for your yard.

Do Stone and Masonry Cabinets Hold Up to Freeze-Thaw Cycles?

Long Island winters bring harsh cold and deep frost. If you build your outdoor kitchen cabinets with the wrong materials, they will not last. Stone and masonry are the oldest building methods for a reason. When built with care, these materials can easily survive many seasons of freezing and thawing.

The freeze-thaw threat on Long Island

Freeze-thaw cycles happen when water gets into a material and freezes, expanding to put huge pressure on the structure. As shown in research on wood composite panels, indoor wood needs wax and resin to stay strong. But these wood products still fail fast in wet, freezing air. If water enters tiny cracks, ice will push the pieces apart.

Proper masonry resists this damage because stone does not soak up water easily. Solid stone and brick structures form a shield against wet weather. Gappsi brings authentic Italian masonry craftsmanship to every build to ensure your outdoor kitchen stays dry and tight. Since we started in 1987 in Smithtown, we have designed kitchens that stand up to the local weather.

Weatherproof core construction

The secret to a durable masonry kitchen is a strong core. We construct the frame of the cabinets using concrete block or poured concrete. As noted on the Gappsi outdoor kitchen page, sealed concrete is highly durable and heat-resistant for outdoor kitchen cabinet structures. This solid core does not warp, rot, or burn when you cook.

To keep water out, we apply a waterproof seal over the concrete base. We also use the right type of mortar to fill any gaps where water might pool. Without this seal, freezing water would crack the mortar and loosen the structure over time. We seal the joints with strong sealants that do not shrink or pull away.

Stone veneer and natural finishes

Once the core is built, we apply the outer finish. Stone veneer can be used to clad outdoor kitchen cabinets to match your existing landscape design. You can choose natural stone veneer, brick, or concrete pavers. These outer layers protect the core and give your yard a classic look.

Working with masonry allows you to create a unified outdoor space. Our team blends the kitchen walls with your patio pavers and pool decks. We combine our masonry and paving craftsmanship to build a space that lasts for decades. You can see these stone options at our local showroom to find the perfect fit.

How Should Outdoor Kitchen Cabinets Be Ventilated and Laid Out?

Planning the setup of outdoor kitchen cabinets requires more than just choosing materials. To make a space that is safe and works well, you must focus on air flow and layout. Proper setup stops heat buildup and protects your cooking area.

Ventilation for gas safety

Safety is the first step in any outdoor setup. Gas grills and cooktops produce heavy fumes and heat that can build up inside enclosed spaces. If you use gas appliances, you must make sure that all cabinet designs include enough ventilation to comply with local safety codes. Vents on the sides or back of your outdoor kitchen cabinets let these gases escape. Without proper vents, gas can collect under your grill and create a fire hazard.

You must also plan clearances around your grill. Heat from cooking can damage your countertops or cabinets if they sit too close. Leave enough space between the grill and other units to keep the surfaces cool. Using fireproof materials like concrete or stone veneer can also help prevent heat damage.

Functional workspace layouts

A good layout makes outdoor cooking much easier. The classic work triangle connects your grill, prep area, and sink. Placing these parts in a smooth sequence keeps your cooking workflow easy. You should have enough counter space next to your grill to plate food and prep meals.

  1. Confirm appliance clearances first so heat and flame stay away from cabinetry and countertops.
  2. Route plumbing and electrical before framing, leaving service access panels for future repairs.
  3. Balance the work triangle so the grill, sink, and prep area form a short, efficient path.
  4. Seal every joint between cabinets, walls, and appliances to keep wind, pests, and water out.

Plumbing and electrical lines need a clear plan before you set up any cabinets. Your sink cabinet must have easy access for pipe repairs. Water can collect under the sink because of small leaks or humidity. To protect your storage, you should use a rubber under-sink mat with a lip to catch any spills. This simple step prevents water damage and keeps your stored items dry through the humid coastal months.

Gaps and hardware details

Outdoor setups often have gaps between the cabinets and the nearby structures. Wind, dirt, and pests can get into these spaces if you leave them open. You should use filler and closure panels to close spaces between cabinets and walls or other appliances. These panels give your kitchen a finished look and block dirt from piling up in hard-to-reach areas.

Lastly, you must choose the right hardware for your doors and drawers. Coastal air can quickly damage standard metal parts. You should avoid basic steel hinges that rust and bind after a few months. Instead, choose stainless steel or polymer-coated hardware for all drawers and hinges to keep them working smoothly. This hardware is tough against salt air and damp weather. If you want to see these tough materials in person, you can visit our showroom to explore your options.

How Much Do Weatherproof Outdoor Kitchen Cabinets Cost on Long Island?

Building a kitchen outside on Long Island is a big project. You might want to know the cost of outdoor kitchen cabinets first. This cost is not fixed. It changes based on the size of your yard and the materials you pick. But choosing the right material is more important than how it looks. When planning your layout, choosing durable outdoor kitchen cabinets is the best way to prevent early cabinet failure.

Factors driving the upfront investment

The total price of your project depends on your specific choices. A small setup with few doors costs less than a large, curved island. Materials also play a major role in the initial price.

For instance, standard indoor wood cabinets are cheap but will rot fast outside. They use low-cost wood composite sheets that fail in wet air. These cheap panels often rely on urea-formaldehyde glue, which cannot handle moisture. You can read about how wood composite sheets are made for indoor use. To build a kitchen that lasts, you must invest in outdoor materials. Materials like marine-grade polymer or 304 stainless steel have a higher upfront cost, but they are built to last.

Why durable materials save money over time

Long Island has a harsh coastal climate. The salt air accelerates corrosion, which quickly ruins cheap metal hinges and drawers. In winter, the freeze-thaw cycles crack weak plastics and split standard wood.

If you choose cheap cabinets, you will have to replace them in just a few years. That means you pay for parts and labor twice. Investing in strong, weatherproof materials costs more on day one, but it saves you from constant repairs. These specialized materials do not rust, warp, or crack under the sun and snow. By choosing tough products, you protect your wallet for decades to come.

The Gappsi design-build advantage

When you plan an outdoor kitchen, you often have to deal with many contractors. One person designs the space, another pours the concrete, and a third sets up the plumbing. This can lead to costly mistakes and delays.

Gappsi offers a seamless design-build process that handles everything from start to finish. Since 1987, Gappsi has been designing and building custom outdoor living spaces on Long Island. We start with a 3D design so you can see your kitchen before we build it. Then, our own team carries out the work. This keeps your costs clear and prevents errors. You do not have to pay multiple fees to different workers. To get started on your custom yard layout, you can contact Gappsi for a project quote.

Still deciding between marine-grade polymer, stainless steel, and masonry for your coastal yard? Call (631) 831-3177 for a free materials consultation.

Frequently Asked Questions

Which outdoor kitchen cabinets are best for salt air?

Marine-grade polymer and grade 304 or 316 stainless steel are the best choices for coastal areas. Marine-grade polymer is non-porous and does not rust, crack, swell, or rot. Stainless steel resists rust but needs regular cleaning. The Gappsi outdoor kitchen guide explains that salt air speeds up metal rust, which makes these materials necessary.

Can I use wood for outdoor kitchen cabinets on Long Island?

You can use teak wood, but it needs a lot of care. Teak resists rot because of its natural oils, but it will turn gray unless you oil it regularly. Other wood products, like particleboard, will fail fast. According to an Oklahoma State University study, standard wood-composite panels need special wax and resins to hold their shape and are meant for indoor cabinets.

Do stone and masonry cabinets hold up to freeze-thaw cycles?

Yes, masonry and stone cabinets are highly durable against freezing weather. Gappsi uses stone veneer to clad outdoor cabinet bases, which matches your home landscape. Concrete cabinets must be sealed properly to protect them from water and temperature swings. Choosing these tough materials helps prevent cracks during the cold Long Island winters.

Does outdoor kitchen cabinetry need ventilation?

Yes, proper ventilation is vital for safety. This is especially true for cabinets that hold gas appliances. Vents stop gas and heat from building up inside the cabinet spaces. You must use vents that meet local safety codes. Investing in stainless steel or polymer-coated hinges keeps your doors working in the humid air.

Ready to build your weatherproof outdoor kitchen?

Winter freeze and coastal salt air will quickly warp and rust cheap outdoor kitchen cabinets. Delaying your custom kitchen project means you miss out on cooking outside with your family this season. If you start planning now, Gappsi can design and build your new weatherproof space before the next big holiday.

Our Smithtown team has designed and built custom outdoor spaces on Long Island since 1987. We use durable materials like marine-grade polymer and stainless steel to make sure your setup lasts. We invite you to visit our local showroom to see these rugged materials in person. Do not let another warm month go by with an empty or bare backyard patio.

Ready to get started? Call (631) 831-3177 to schedule a free outdoor kitchen consultation.

Share this page:
Firemagic BBQ grills and appliances on display in the Gappsi showroom on Long Island.

Find a Firemagic BBQ Grills Showroom on Long Island

Researching a major purchase online is helpful, but nothing replaces seeing it in person. When you’re investing in a premium product like a Fire Magic grill, you need to feel the quality for yourself. You want to lift the heavy, balanced hood and see the flawless stainless steel finish up close. This is why visiting a local showroom is so important. As one of the leading Firemagic BBQ grills and appliences showroom desplay stores on Long Island New York, Gappsi provides a hands-on experience. Our team can walk you through the different series, explain the features, and help you visualize how a Fire Magic grill will look and feel in your own backyard.

Key Takeaways

  • Choose a Grill That Lasts: Fire Magic stands out for its American-made stainless steel construction and an exceptional lifetime warranty, making it a durable centerpiece for your outdoor kitchen that you can rely on for years.
  • Find Your Perfect Match: Whether you want a seamless built-in grill for a custom kitchen or a flexible freestanding model, Fire Magic offers different series so you can select the features and performance that fit your cooking style.
  • Design Beyond the Grill: Get the most out of your investment by working with an authorized dealer like Gappsi, who can help you plan a complete outdoor kitchen by integrating your grill with custom masonry, stone countertops, and a pergola.

Why Choose a Fire Magic Grill?

When you’re designing a beautiful outdoor kitchen, the grill is the centerpiece. It’s where family and friends will gather for years to come. Investing in a Fire Magic grill means choosing a brand known for exceptional performance, incredible durability, and a commitment to quality that’s hard to find anywhere else. These grills are more than just cooking appliances; they are the heart of your outdoor living space, built to deliver professional results and stand the test of time. Let’s look at what makes Fire Magic a top choice for homeowners.

Built to Last with Stainless Steel Construction

One of the first things you’ll notice about a Fire Magic grill is its solid, premium feel. Made right here in the USA, these grills are crafted from heavy-duty stainless steel with meticulous attention to detail. This isn’t just for looks; this robust construction ensures your grill can handle the demanding Long Island climate, from humid summer evenings to chilly winter afternoons. A Fire Magic grill is an investment in longevity, designed to resist rust and corrosion while maintaining its polished appearance. When you build a custom outdoor kitchen, you want every element to be durable, and this grill is built to match that standard.

Master Any Recipe with High-Performance Cooking

If you love to cook, a Fire Magic grill will feel like a dream come true. These grills are engineered for high-performance cooking, capable of reaching high temperatures for a perfect sear and maintaining consistent heat for slow-roasting. The powerful burners and thoughtful design give you precise control, so you can confidently tackle any recipe. Whether you’re grilling steaks for a weekend barbecue or preparing a delicate fish dinner, the results are consistently delicious. This level of performance turns your patio into a true gourmet kitchen, expanding your culinary horizons and making every meal an event. You can find the perfect model for your cooking style at the Gappsi Store.

Understanding the Lifetime Warranty

A company’s warranty tells you a lot about the confidence they have in their products. Fire Magic offers one of the best warranties in the industry, which gives you incredible peace of mind. When you invest in a premium grill, you want to know it’s protected for the long haul. Fire Magic stands behind its craftsmanship with extensive coverage, ensuring that your grill remains a reliable part of your home for many years. This commitment to customer satisfaction and product longevity is a key reason why so many homeowners choose Fire Magic. It’s not just about buying a grill; it’s about partnering with a brand that values your investment as much as you do.

A Breakdown of Extended Warranty Coverage

Fire Magic’s warranty isn’t just a vague promise; it’s a detailed guarantee of quality. Because they build their grills to last, they can offer specific, long-term coverage on essential components. Here’s a quick look at what their warranty includes:

  • Lifetime Warranty: Cast stainless steel burners, stainless steel cooking grids, and stainless steel housing.
  • Fifteen-Year Warranty: Brass valves, inner liners, manifold assemblies, and porcelain-coated cast iron grids.
  • Ten-Year Warranty: Electric grill stainless steel cooking grids and housings.

This tiered coverage is a testament to the quality of each part. For complete details, you can always review the full Fire Magic warranty information. This level of transparency ensures you know exactly what to expect from your grill.

Find Your Perfect Fire Magic Grill on Long Island

Choosing the right grill is the first step toward creating your dream backyard oasis. Fire Magic offers a range of options designed to fit your lifestyle, cooking preferences, and outdoor space. Whether you envision a fully integrated outdoor kitchen or a powerful, portable grilling station, there’s a Fire Magic solution for you. At Gappsi, we can help you explore these incredible grills and find the one that will become the heart of your home’s outdoor entertaining for years to come. Let’s walk through the options to find your perfect match.

Explore Built-In Grills, Freestanding Grills, and Appliances

Your first decision is choosing between a built-in or freestanding grill. Built-in grills are the cornerstone of a custom outdoor kitchen, offering a seamless, high-end look. They integrate perfectly with masonry and stone countertops for a truly personalized setup. Freestanding grills provide more flexibility, allowing you to move your cooking station around your patio or deck as needed. Beyond the grill itself, Fire Magic offers a complete suite of matching appliances. You can complete your kitchen with powerful side burners, outdoor-rated refrigerators, and sleek stainless steel storage doors and drawers. Visiting the Gappsi showroom is a great way to see these options in person and get a feel for the quality.

A Guide to the Echelon Diamond, Aurora, and Other Series

Fire Magic organizes its grills into distinct series, each offering a unique combination of features and performance. The Echelon Diamond series represents the pinnacle of luxury and innovation, with advanced features like hot surface ignition, interior halogen lighting, and a spring-assisted hood for effortless operation. Just below it, the Aurora series delivers professional-grade power and premium features, making it a popular choice for serious grillers. Fire Magic grills are widely known for their exceptional quality, beautiful design, and long-lasting durability. No matter which series you choose, you’re investing in a high-performance machine that will help you master any recipe while enhancing your outdoor kitchen design.

What Sets Fire Magic Apart as a Premium Brand?

So, what makes Fire Magic a top-tier brand? It starts with their commitment to American manufacturing. Every grill is crafted with meticulous attention to detail in California using heavy-gauge, 304 stainless steel for unmatched durability and corrosion resistance. This isn’t just a grill; it’s a long-term investment in your home and lifestyle. Fire Magic also stands behind its products with one of the best warranties in the industry, giving you peace of mind for decades of use. When you choose Fire Magic, you are selecting a brand that is consistently recognized as one of the best on the market. This dedication to quality is why we at Gappsi are proud to be an authorized dealer for their products.

Where to Buy Fire Magic Grills on Long Island

When you’re ready to invest in a premium grill like a Fire Magic, seeing it in person is the best way to appreciate its quality and features. Reading reviews and looking at photos online is helpful, but nothing compares to a hands-on experience. For homeowners on Long Island, finding a trusted local dealer is the first step. This ensures you not only get the right product but also the support you need to build your dream outdoor kitchen. Gappsi is your local destination for exploring the full Fire Magic collection and bringing your vision to life.

Visit Gappsi’s Showroom and Store

The best way to find the perfect Fire Magic grill is to see it for yourself. At the Gappsi Store, you can explore a wide selection of Fire Magic models up close. This allows you to feel the heavy-duty stainless steel construction, open the smoothly balanced lids, and get a real sense of each grill’s size and presence. Our team is always on hand to walk you through the different series, explain the unique features of each grill, and answer any questions you have. Seeing the grills in a showroom setting helps you move from imagining your outdoor kitchen to actually planning it.

Why Shop at an Authorized Dealer like Gappsi?

Purchasing from an authorized dealer like Gappsi gives you complete peace of mind. It guarantees that you are buying a genuine Fire Magic product, which is essential for activating the lifetime warranty. Our team receives direct training and has deep product knowledge, so we can provide expert advice tailored to your specific cooking style and outdoor space. Unlike online-only retailers or unauthorized sellers, we offer dedicated customer support for the life of your grill. We are an established part of the Long Island community, known for our commitment to quality in all our home remodeling projects.

What to Expect During Your Showroom Visit

When you visit our showroom, you’ll find more than just a display of grills. You’ll discover a source of inspiration for your entire backyard. We showcase Fire Magic grills within the context of complete outdoor kitchens, helping you visualize how one would look integrated into a custom island. You can see and touch the materials that will surround your grill, from beautiful porcelain and natural stone countertops to custom masonry. Our designers are here to help you think through the entire project, ensuring your new grill is the perfect centerpiece for a functional and stunning outdoor living area.

Design Your Outdoor Kitchen Around a Fire Magic Grill

When you start planning your outdoor kitchen, think of your grill as the main event. A Fire Magic grill is more than just an appliance; it’s the heart of your outdoor cooking space, setting the standard for quality and performance. These grills are famous for their incredible power and durable construction, making them a smart investment for anyone who loves to cook outdoors. Choosing a Fire Magic grill first helps anchor the entire design process. It dictates the scale of your project and influences the layout, creating a natural workflow between your cooking, prep, and cooling zones. It’s the centerpiece that brings both function and elegance to your backyard, ensuring your investment is built around a product designed to last a lifetime.

Building your design around the grill simplifies subsequent decisions. Once you’ve selected your ideal Fire Magic model, choosing complementary appliances and materials becomes much easier. The grill’s premium stainless steel finish provides a clear aesthetic direction for your cabinetry, refrigerator, and storage doors. This approach ensures a cohesive look and feel throughout the space. Our team at Gappsi can help you with the entire home remodeling process, ensuring every element works together in harmony. We believe a well-designed outdoor kitchen should be a natural extension of your home, and starting with a strong centerpiece is the key to achieving that seamless integration.

Integrate Masonry for a Seamless Outdoor Kitchen

To give your outdoor kitchen a permanent, high-end feel, integrating it with custom masonry is the way to go. A Fire Magic grill is designed to be built into a stone or brick enclosure, creating a streamlined look that’s both stunning and practical. This approach makes the grill feel like an original part of your landscape rather than a standalone unit. As experts at Oasis Outdoor Living note, “Fire Magic grills are known for being the best. They offer great quality, last a long time, and look very nice,” which is exactly what you want in a built-in feature. Our masonry team can design and build a structure that perfectly houses your grill and adds valuable counter space for prep and serving.

Frame Your Space with a Pavilion or Pergola

An outdoor kitchen is more enjoyable when it’s comfortable. Adding a structure like a pavilion or pergola frames the space, turning it into a true outdoor room. These structures provide welcome shade on sunny days and offer protection from light rain, extending the time you can spend cooking and entertaining. A pavilion or pergola also adds a vertical architectural element that makes your entire backyard feel more luxurious. It defines the kitchen area, separating it from the rest of your yard and creating an inviting destination for family and friends. You can even incorporate lighting and fans to make the space comfortable day or night.

Select Porcelain and Natural Stone for a Polished Finish

The materials you choose for your countertops and patio flooring complete the look of your outdoor kitchen. For a durable and sophisticated finish, we recommend using porcelain and natural stone. These materials are built to withstand the elements while providing a beautiful surface for food prep and serving. Porcelain offers a sleek, modern look with minimal maintenance, while natural stone like granite or travertine provides timeless, organic beauty. As Barbeques Galore points out, you can customize your setup with everything from “access doors, sinks, tower holders, refrigerators, and more,” and the right stone or porcelain will tie all these high-quality components together for a truly polished result.

Are There Promotions or Financing for Fire Magic Grills?

Investing in a premium grill is a significant decision, but it doesn’t have to be a financial strain. Several options can make owning a Fire Magic grill more accessible, allowing you to start enjoying your dream outdoor kitchen sooner. From seasonal sales to flexible payment plans, there are practical ways to fit this high-end appliance into your budget. As an authorized dealer, we can help you find the best purchasing strategy for your project.

Find Seasonal Promotions and Discounts

A great way to get the best value on your Fire Magic grill is to keep an eye out for seasonal promotions. Manufacturers and authorized dealers often introduce special offers around holidays or during specific times of the year, like the start of grilling season. These promotions can include direct discounts, bundled deals with other appliances, or added accessories at no extra cost. Visiting the Gappsi store is a great way to see our current inventory and learn about any ongoing specials. We always recommend asking our team what promotions are available when you’re ready to buy.

Explore Financing Options to Make Your Dream Kitchen a Reality

You don’t have to pay for your entire outdoor kitchen upfront. Financing is a fantastic tool that breaks down the total cost into manageable monthly payments, making your project much more affordable. This approach allows you to build the complete outdoor living space you envision now, rather than waiting to save up for every component. Many homeowners use financing for larger home improvement projects, and setting up your perfect grilling station is no different. To learn about the financing partnerships we offer, ask our team for guidance. We can walk you through the available options and help you find a plan that works for your budget.

How to Get Started with Your Fire Magic Grill

Ready to bring the power and precision of a Fire Magic grill to your backyard? Getting started is simpler than you might think, and our team is here to help every step of the way. Whether you’re replacing an old grill or designing a brand new outdoor living area from scratch, we can guide you from the initial idea to the final installation. The first step is connecting with our experts, who can help you turn your vision into a concrete plan that fits your home and lifestyle perfectly. We believe the process should be just as enjoyable as the final result.

Get Expert Guidance at the Gappsi Store

The best way to appreciate the quality of a Fire Magic grill is to see it for yourself. We invite you to visit the Gappsi Store in Huntington Station, NY, to explore our collection in person. At our showroom, you can get a feel for the solid stainless steel construction, test the smooth operation of the hoods and drawers, and compare the different series side by side. Our knowledgeable team is always on hand to answer your questions, explain the unique features of each model, and help you select the perfect grill and accessories for your cooking style. We’ll make sure you leave feeling confident in your choice.

Plan Your Complete Outdoor Kitchen with Our Team

Your Fire Magic grill can be the star of a fully integrated outdoor kitchen. Our design team specializes in creating cohesive spaces that blend function and style, and we’re here to help you plan the entire project. As an authorized Fire Magic dealer, we know exactly how to incorporate these premium appliances into a custom design. We can build a beautiful and durable structure with our expert masonry services, add shade with a custom pavilion, and complete the look with elegant natural stone countertops. By working with Gappsi, you get a single, dedicated team to manage every detail of your outdoor kitchen construction.

Related Articles

Frequently Asked Questions

What makes Fire Magic grills a premium investment compared to other brands? Think of it as investing in performance and longevity. Fire Magic grills are made in the USA from heavy-gauge stainless steel, which means they are built to resist rust and stand up to Long Island weather for years. Beyond their durability, they are engineered to cook like professional appliances, giving you precise heat control for a perfect sear or a slow roast. You are paying for quality craftsmanship that delivers consistent results and lasts a lifetime.

I see Fire Magic has a lifetime warranty. What does that actually cover? The lifetime warranty is one of the best parts, and it covers the most critical components of the grill. This includes the cast stainless steel burners, the cooking grids, and the stainless steel housing. Other parts, like the valves and manifold, are covered for an impressive fifteen years. This extensive coverage shows how much confidence the company has in its product, giving you peace of mind that your grill is protected for the long haul.

Should I choose a built-in or a freestanding Fire Magic grill? This really depends on your vision for your outdoor space. A built-in grill is the perfect choice if you are planning a custom outdoor kitchen, as it creates a seamless, high-end look integrated with your countertops. If you prefer flexibility or aren’t ready for a full build-out, a freestanding model gives you the same incredible cooking power on a movable cart. You can always start with a freestanding grill and decide to build it in later.

Why is it better to buy my grill from an authorized dealer like Gappsi? Shopping at an authorized dealer guarantees you are getting a genuine Fire Magic product, which is necessary to activate that amazing warranty. More importantly, you get expert guidance from a team that truly knows the products. We can help you compare models and plan your entire project. Plus, you get the benefit of local customer support from a company that has been part of the Long Island community for decades.

Do I need to build a full outdoor kitchen to own a Fire Magic grill? Not at all. While Fire Magic grills are a fantastic centerpiece for a complete outdoor kitchen, they are also available as high-performance freestanding models. You can absolutely enjoy the power and quality of a Fire Magic grill on its own. Many of our clients start with a freestanding grill and then decide to build a custom kitchen around it years later.

Share this page:
Built in outdoor kitchen with stone counters and stainless steel grill

Built In Outdoor Kitchen Planning Guide

Long Island homeowners often waste patio space by using a small, portable grill that lacks prep room. A built in outdoor kitchen provides dedicated counters, storage, and cooking equipment in a permanent layout designed around the way you entertain.

Request an outdoor kitchen design consultation with Gappsi

A built in outdoor kitchen is a fixed cooking space that includes a grill and a sink to handle all your meal prep needs outside. Planning this space requires choosing a layout that keeps your cooking and social zones set apart for safety and comfort for you and your guests. You must also check local rules for setbacks and permits, as these structures often require a site plan and survey to meet all building codes. Based on Prosper, Texas guidelines, a real outdoor kitchen must have a sink, while a station without one is simply a grilling area. Thinking about gas lines and power outlets early in the design process helps you avoid costly changes and ensures the setup adds value to your home.

Designing the perfect cooking area starts with a clear plan for your backyard goals and hosting needs. You need to decide if you want a small spot for family meals or a large zone for big events. The first step in your planning journey is to

Built In Outdoor Kitchen: Start with how you will use the space

Your plan for a built in outdoor kitchen should start with how you live. Think about your cooking habits and how often you host guests. Long Island homeowners often need a space that handles both small family meals and large group parties. If you host many people, you will need a bigger grill and more counter space. The right built-in outdoor kitchen design balances these needs with the size of your yard.

Map out the traffic flow

The best layout makes it easy to move between the house and the yard. Place your kitchen near the main back door to help with carrying food and supplies. You should also think about where people will sit. A good plan keeps guests close to the cook but out of the main work area. You can add countertop overhangs for bar stools to create a social dining spot. This helps keep the space tidy and safe while you use the grill.

Plan for comfort and safety

Safety is a top priority for any permanent structure. Local laws often say that a grilling station must sit at least 3 feet from your property line. You also need to follow fire safety rules from the maker of your grill. On Long Island, many people add a patio cover or a pavilion to stay out of the sun. If you put a grill under a roof, you must have good airflow to stop smoke from building up. Proper vents and clear paths make the space much better for everyone.

Think about seasonal needs

A built in outdoor kitchen on Long Island must stand up to the weather. Our cold winters and hot summers can be hard on stone and metal. You should choose stainless steel appliances that do not rust. It is also smart to think about how you will close the kitchen for the winter. Planning for utility lines early in the design phase saves time and money later. This includes gas pipes, water for a sink, and wires for outdoor lights.

How should you choose the location and layout?

Finding the best spot for your built in outdoor kitchen is the key first step. You need a place that feels easy to reach and stays close to your house. A good plan makes cooking outside as simple as it is in your main kitchen. It should also account for the sun, wind, and how water flows through your yard. You want to make sure the site is level so the base is strong and stays in place for years.

Pick a smart spot

A common mistake is putting the kitchen too far from the home. You want a short path between your indoor food area and your new outdoor space. This makes it easy to carry plates and tools back and forth. If you have to walk too far, you may find that you use the space less often. You should also make sure there is enough room for people to walk past the chef without getting in the way.

Watch the wind and sun

The way the wind blows through your yard can change how you use your built in outdoor kitchen. You do not want smoke from the grill to blow right into the faces of your guests. It is also wise to check where the sun hits during the late day. A hot sun can make it hard to cook or eat. You might need to add a roof or a tall wall to block the wind or sun. This keeps the space cool and keeps the air clear while you grill.

Check local rules

Before you start, you must talk to your local town office. Most towns treat a built in outdoor kitchen as a fixed structure. This means you will need to show a site plan and get a permit. Local building codes also have rules for how far your kitchen must be from your fence. For example, some towns want a minimum setback of three feet from any property line. Using these safety and zoning codes helps you avoid fines later. It also ensures your project meets the fire safety rules for your area.

Plan your design

Your layout should focus on an easy flow. This links the grill, the fridge, and the sink into a tight shape. A well-built built in outdoor kitchen has enough flat space for prep work and serving. You can also view a built-in outdoor kitchen design to see how a pro layout fits into a real yard. Think about how you will move from the grill to the dining table. A good design keeps the chef part of the party while they work.

  1. Check your property lines to make sure your kitchen is in a legal spot.
  2. Find the way the wind blows so smoke does not blow into your home or dining area.
  3. Mark where gas, water, and power lines will run from your home to the new site.
  4. Make sure the ground is flat and has a way for water to drain away from the base.
  5. Set the plan to include its own zones for hot cooking, cold storage, and prep work.

Choose materials made for Long Island weather

Long Island has a tough climate for any outdoor project. Salt air from the coast and heavy winter snow can damage weak materials. A high-end **built in outdoor kitchen** needs parts that can stand up to these shifts. Picking the right stone and metal ensures your project lasts for decades.

Solid framing and masonry bases

The base of your kitchen is its most vital part. Many builders use concrete block or steel studs to form the frame. Concrete block is very strong and handles the weight of heavy stone counters well. It also resists the wet soil found in Nassau and Suffolk counties. Using masonry allows for a custom look with natural stone veneer. This style matches the local landscape and adds a high-end look to your home. When you plan your layout, make sure to follow local building codes for setbacks. A solid base keeps your kitchen level as the ground freezes and thaws each year.

Durable prep and dining surfaces

Prep areas face the most stress from sun and rain. Granite and marble are top picks for an outdoor kitchen installation on Long Island. These stones are dense and do not fade under the summer sun. They also stay cooler than darker man-made materials. Porcelain is another smart choice for modern designs. It is non-porous, so it does not absorb water or stains. This prevents the stone from cracking when it gets very cold. You can see many of these stone types at a local retail showroom before you decide. Picking the right surface makes cleaning up after a large party much easier.

Material Category Climate Benefit Ideal Application Life Span
Natural Stone UV and Heat Resistant Countertops and Veneer 30+ Years
316 Stainless Steel Salt Air Protection Cabinets and Grills 25+ Years
Concrete Block Freeze-Thaw Stable Island Structure 50+ Years
Marine-Grade PVC Waterproof Cabinet Boxes 20+ Years
High-Density Stone Stain Resistant Flooring and Pavers 30+ Years

Hardware for coastal air

The air on Long Island is often damp and salty. This mix can cause low-grade metals to rust and pit in just a few months. When you build a custom built-in outdoor kitchen, always ask for 316-grade stainless steel. This metal contains molybdenum. It helps fight off rust from the sea air. You also need to think about how water moves away from your kitchen. Proper drainage prevents puddles from forming near the base of your storage units. In the winter, you must clear the lines and cover the units to keep out ice. Using high-end hardware means you spend less time on repairs and more time cooking outside.

Which appliances and utilities belong in the plan?

The grill is the main focus of a built in outdoor kitchen. You should pick a size that fits how many people you plan to feed. Gas grills are fast and easy to start, which makes them a top pick for many. If you want a smoky taste, a wood-fired grill or a smoker might be better. Some high-end builds include a pizza oven. These ovens reach high heat and cook pizzas in just a few minutes. You should also think about cold storage. A small fridge keeps raw meat and cold drinks near the grill. This saves you from walking back to the house many times. Adding custom outdoor kitchen features like an ice maker can also make hosting much easier. Having ice on hand is great for keeping seafood fresh or making cold drinks.

Grilling and cooling tools

A built in outdoor kitchen needs more than just a place to cook. Side burners are helpful for boiling water or cooking sauces while the main meal is on the grill. You can also add a warming drawer to keep food at the right heat until it is time to eat. For those who love to bake, a pizza oven adds a fun touch to any yard. These tools let you cook a full meal without using your indoor stove. It is best to choose tools made of high-grade steel. This helps them stand up to rain and snow on Long Island. Picking the right mix of tools makes your yard more useful for all types of meals.

Sinks and cleaning zones

Adding a sink turns a simple grill area into a full kitchen. It lets you wash your hands, rinse food, and clean tools on the spot. Local building codes often use the sink to tell the two types of spaces apart. In some towns, a spot without a sink is called a “grilling station” instead of a kitchen. You should talk to local fire and health officials to learn the rules in your area. Storage is another key part of this zone. You will need drawers for tongs, brushes, and cleaning rags. Having a trash bin built into the space keeps the area tidy and keeps pests away.

Power, gas, and safety lines

You must plan for power, gas, and water lines before the first stone is set. Every tool needs a power source or a gas feed. Outlets are a must for fridges, blenders, and phone chargers. You will also need bright lights over the grill and soft lights for the dining spot. If you build your kitchen near a wall or under a roof, safety is the top goal. You must follow all rules for clearance to burnable materials to prevent fires. A vent hood is often needed to clear out smoke and heat. It is also wise to put in shutoff valves for gas and water. This lets you stop the flow fast if you find a leak. Most plans for a built in outdoor kitchen should include these key utility points:

  • Natural gas or propane lines for the grill and side burners.
  • Water lines and a drain for the sink and ice maker.
  • Set power lines for fridges and large tools.
  • Low voltage wires for accent and task lighting.
  • Main shutoff valves for gas and water in a handy spot.

These steps help you build a space that is both fun and safe for your family. Planning for these items early helps your project stay on track and meets all local rules.

Plan for comfort, safety, and year-round durability

Building a built in outdoor kitchen needs a deep focus on safety and long-term care. You want a space that feels cozy in the sun but stays strong during a Long Island winter. A great plan starts with following the rules set by your local town or county. Many areas have strict setback laws that keep fixed structures a set distance from your property lines. Before you dig, check with your local building office to see what permits you need for gas, water, and power lines.

Fire safety and stable surfaces

Fire safety is the most vital part of any kitchen plan. You must leave plenty of space between your grill and any walls made of wood or vinyl. Heat from the grill can melt or burn these surfaces if they are too close. Always check the guide that came with your tools to find the right gap. If you want to place your grill under a pavilion or roof, you must think about smoke. High heat and grease can build up fast under a ceiling. Adding a vent hood keeps the air clean and prevents fires. This setup also keeps your guests from breathing in heavy smoke while you cook.

You should also think about the ground you walk on. Outdoor cooking areas often get wet or greasy from spills. Choosing stones with a rough grip helps stop slips and falls. Many homeowners choose custom masonry that looks good and provides a safe surface. You can explore different stone types at a local outdoor kitchen showroom to see which one fits your style. A flat floor makes it easy to move hot pans or heavy trays from your home to your prep station.

Integrated lights and utility access

Good lights make your built in outdoor kitchen safer and more fun to use after the sun goes down. You need two types of lights for the best results. Task lights should shine directly on the grill and prep counters so you can see your food clearly. Soft lights should go near the dining seats to set a nice mood. All of your plugs must be safe for outdoor use. Experts suggest using GFCI outlets to prevent power shocks in wet weather. It is also smart to hide these outlets under the counter lip to keep them dry and out of sight.

Utility access is another key part of a good design. You will need to reach your gas valves and water shut-off points easily. Most builders add small doors in the kitchen base for this reason. These panels allow you to turn off the water or gas without tearing apart your stone walls. Expert outdoor kitchen setup ensures that all these lines are buried deep enough to stay safe from yard work or shifting soil. Planning for these needs now will save you from making big changes later.

Winter care for Long Island

Our cold winters in Nassau and Suffolk counties mean you must plan for frost. Before the first freeze, you need to drain all the water from your outdoor pipes and sink. If water stays in the lines, it will turn to ice and crack the pipes. You should also turn off the power to any outdoor fridges and clean them out. Using heavy-duty covers for your grill and other tools stops snow and ice from hurting the metal parts. These covers keep your built in outdoor kitchen looking new even after a big storm.

Steady cleaning is the final step for a long life. Even high-grade stainless steel can rust if it is near the salt air of the coast. You should use a soft cloth and a special metal cleaner to wipe down your tools once a month. This removes dust, salt, and grease that can eat away at the finish. Caring for your stone counters is just as easy. A quick rinse with a hose and mild soap keeps the stone bright and clean. With the right care, your built-in space will be ready for many years of summer fun and family meals.

What does the design-build process include?

Choosing a design-build model for your built in outdoor kitchen project makes the path from start to finish easy. This method joins the planning and build phases under one team. It helps you avoid the stress of dealing with many different trade workers. On Long Island, Gappsi handles every step in-house to ensure high quality and a smooth result.

Consultation and 3D design

The journey starts with an on-site review of your land in Nassau or Suffolk County. Our experts look at your yard’s layout and how you plan to use the space. We then create a built-in outdoor kitchen design using 3D tools. This step lets you see exactly how the final kitchen will look before we start any work. You can check the flow between your house and the dining area to make sure it fits your life.

Selection and utility prep

Once you approve the plan, you can visit our retail showroom to pick out your stone. Seeing natural stone and appliance options in person helps you make the best choices for your home. During this stage, we also plan for all gas, water, and power needs. We ensure that every custom built-in outdoor kitchen meets local safety rules. This includes following local building codes that require specific gaps from property lines and structures.

Building and finishing

Our skilled masonry team builds the core of your kitchen island with weather-proof stone or concrete block. We handle all utility hookups and install high-grade stainless steel appliances that resist rust. The process ends with a final walk-through and a punch list to ensure every detail is perfect. By using one provider for the whole project, you get a tough space that adds real value to your home. If you are ready to start, contact us today for a full property review.

Finalize the plan before construction begins

Planning your project is the first big step. Before you dig or pour stone, you must know what you want. A built in outdoor kitchen is a long-term part of your home. If you change your mind later, it can be hard and costly to fix. You should take time now to think about how you will use the space. Decide which parts are most needed for your home. A good plan will help you avoid mistakes that can slow down the work.

Pick your layout and features

You need to decide if you want a full kitchen or just a place to grill. A true outdoor kitchen has a sink and a place to cook. A grilling station does not have a sink. You may also want to look at a built-in outdoor kitchen design with a pizza oven or a small fridge. Think about the “work triangle” between your grill, prep area, and sink. This layout makes cooking fast and easy. You can also add countertop overhangs to give your guests a place to sit. This turns your cooking area into a social spot for your friends and family.

When picking tools, choose stainless steel for your grill and fridge. This metal holds up well against rust and the salt in the air on Long Island. You should also think about storage. Drawers and cabinets will keep your tools dry and clean. Make sure to use parts that can stand up to the sun and rain. Real stone is a great pick for the counters because it is strong and looks good. These choices will ensure that your kitchen lasts for many years.

Map out utility lines and rules

Utility lines are the bones of your build. You must plan for gas, water, and power before you start. All gas lines need a pro to put them in so your home stays safe. For power, you must use GFCI outlets to avoid shocks in the rain. You will also need task lights over the grill and soft lights for the dining area. This makes it safe to cook and eat once the sun goes down. Good lighting also helps set a nice mood for your outdoor space.

You should also check local rules for things like setbacks. Many towns have laws that say how close a grill can be to a fence or a wall. Most towns need you to submit a site plan and a permit. This proves that your kitchen is safe and in the right spot. You must also plan for drainage to keep water from pooling at the base. A slight slope in the patio will help keep the area dry and safe. Following these rules now will save you from fines or more work later.

Set your budget and timeline

A big project needs a clear budget. List your “must-have” items first. If the cost is too high, you can build your kitchen in steps over a few years. You might start with the grill and the island. Then, you can add a sink or a fridge the next year. This helps you manage your money while still getting the space you want. It also lets you use the kitchen while you save for the next part of the build.

It is also wise to save about ten to twenty percent of your budget for extra costs. This fund will help if you find a problem under the ground or need to change a part. For example, you might find old pipes that need to be moved. You should also think about when you want to start. In New York, it is best to build in the spring or summer. This ensures that the ground is not frozen and the weather is good for the crew. By planning for these things now, you can avoid stress once the work starts.

Talk to Giuseppe about planning your Long Island outdoor kitchen

Frequently Asked Questions

How much does a built in outdoor kitchen cost to build?

Building a custom cooking space varies in price based on size and gear. A basic setup often starts at about five thousand dollars. More big designs with top-tier stone work can cost over twenty thousand dollars. For an exact price, you should visit a local showroom to pick your supplies. This helps you find the total cost for your own project and plan.

Do I need a permit for a built in outdoor kitchen on Long Island?

Yes, most towns on Long Island need a permit for these units. You must often send a site plan and building drawings to your local town office. Based on zoning rules, you may also need to keep the kitchen at least three feet from your land line. Expert builders can help you file these papers to make sure your work follows all safety laws.

Which materials are best for a built in outdoor kitchen on Long Island?

Stainless steel is the top choice for cooking gear because it stops rust in salty air. For the base, many owners use concrete block or steel frames for long life. Countertops made of real stone or tile work well in our climate. These items stand up to heat and cold through the year. Picking the right stone makes sure your kitchen stays in good shape for many years.

Is a built in outdoor kitchen worth the price?

Yes, a built in outdoor kitchen adds value to your home and helps your yard. These fixed units last much longer than cheap grills. They offer a custom look and high strength that fits the style of your house. As said by Gappsi, they provide a clean look and let you pick your own layout. This makes your backyard a great place for friends and family to meet and eat.

Ready to request an outdoor kitchen consultation?

Delaying your build can lead to higher costs for stone and long wait times for parts at your Long Island home. If you book your plan now, you avoid the rush and save your spot on our schedule. Starting today makes sure your new custom built-in outdoor kitchen is ready for the first warm spring days.

Ready to request an outdoor kitchen consultation? Visit our website to request an outdoor kitchen consultation today. Our expert team will work with you to pick the best stone and layout to fit your own back yard. You can also view our recent projects to see how we help Long Island families build the best spot for parties and meals.

Share this page: