Gunite Pool Renovation | Dune Road West Hampton, N.Y.

View Gappsi’s YouTube Channel for Videos of Gunite Pool Renovation on Dune Road West Hampton, N.Y.

Gunite pool renovation can involve repairing or replacing the pool’s surface, tile, coping, skimmer, and patio. At Gappsi, we’re passionate about transforming ordinary backyards into extraordinary retreats. As your trusted partner in pool construction and swimming pool service, we offer a comprehensive range of services tailored to your needs. From expertly designing and building your dream pool to providing regular cleaning, maintenance, and state-of-the-art equipment installation, we’re dedicated to delivering unparalleled quality and customer satisfaction. Let us take care of the details so you can relax and enjoy paradise.

Even with proper care and maintenance, your swimming pool is still at risk of damage due to wear and tear. In time, it may deteriorate due to chemicals, exposure to the elements, and extended periods of use. If you have noticed leaks, cracks, rough spots, discoloration, and other areas of damage on the walls or bottom of your pool, you should consider investing in swimming pool resurfacing.

Gunite Pool Remodeling for Homeowners

We provide gunite pool remodeling for homeowners on Long Island, NY.  Our team recommends that pool owners commit to pool resurfacing every eight to ten years or when they notice signs that their pool is damaged and needs restoration. Call us today to schedule a consultation for pool resurfacing if you see any of these warning signs:

  • Does your pool surface feel rough or pitted?
  • Is your pool tile fading or dull?
  • Are you bored with the plain, white marble dust you loved five years ago?
  • Does your gunite pool look old and worn out?
  • Discoloration or staining
  • Peeling, bubbling, crumbling, chipping, or flaking plaster, paint, or cement
  • A coarse texture along the pool’s walls or floor
  • Cracks or chips in the surface of the pool
  • Pebble or tile loss
  • Damage to the paint or fiberglass

gunite-pool-renovation-dune-road-west-hampton-ny2From full swimming pool reconstruction, concrete pool resurfacing & plastering to pool tile repair, pool coping replacement, and in-ground pool repair, Gappsi has the experience to handle all your swimming pool remodeling needs.  Check out our Swimming Pool page and gallery.

Our gunite pool renovation and remodeling services will transform your inground swimming pool from dull to stunning. We also offer energy-efficient equipment upgrades, such as adding a spa and waterfall, raising the pool depth, improving drainage, and repairing cracks. Other services include energy-saving makeovers, alternative ways to sanitize your pool, acid baths, and pool inspections.

Types of Swimming Pool Renovations

Gunite/Concrete Pool Renovations

  1. Re-plastering
  2. Tile Replacement
  3. Coping Replacement
  4. Deck Replacement
  5. Equipment and Plumbing Upgrade
  6. Installing New Water Features and Lighting

Fiberglass Pool Renovations

  1. Tile Replacement
  2. Coping Replacement
  3. Deck Replacement
  4. Equipment and Plumbing Upgrade
  5. Installing New Water Features and Lighting

Vinyl Liner Pool Renovations

  1. Liner Replacement
  2. Pool Bottom Repair
  3. Coping Replacement
  4. Deck Replacement
  5. Equipment and Plumbing Upgrade
  6. Installing New Water Features and Lighting

Spa Renovations

  1. Re-plastering
  2. Tile Replacement
  3. Coping Replacement
  4. Deck Replacement
  5. Equipment and Plumbing Upgrade
  6. Installing New Water Features and Lighting

gunite-pool-renovation-dune-road-west-hampton-nyUpgrade Your Pool and Add a Spa

To upgrade your pool and add a spa, you can consider options such as integrating a spa area directly into the existing pool design, creating a spillover feature from the spa to the pool, adding custom tile accents, installing water features like fountains or waterfalls, upgrading the pool lighting, and incorporating advanced filtration systems for optimal water quality. All while ensuring proper plumbing connects the spa and pool water flow seamlessly.

Key points to consider when adding a spa to your pool:

Placement: Decide whether you want the spa wholly integrated into the pool structure (like a raised seating area), attached to one side of the pool, or built as a separate unit nearby but connected to plumbing.

Design aesthetics: Choose a spa design that complements the style of your existing pool. Consider tile patterns, coping options, and overall visual flow.

Features: Based on your desired relaxation experience, choose spa features such as jets, blowers, spillways, and seating configurations.

Water circulation: Ensure proper plumbing is installed for independent water heating in the spa while maintaining a consistent flow between the pool and spa.

Automatic Pool Covers for Your Gunite Inground Pool

An automatic pool cover is a retractable vinyl cover that does not shrink and is most often fade-resistant. It has a track mounted on or under the pool decking, and an electric motor opens and closes it.

The automatic pool cover can also mean significant energy savings! It will help keep your pool warmer and allow you to keep it open longer. By keeping the cover closed when it is not being used, you save money by not having to run the pool heater as much.

Another great thing about an automatic pool cover is the safety aspect. These covers are the ultimate safety measure if appropriately used. There is a switch that operates the cover, which can be locked with a key, which adds another safety measure. This will eliminate just anyone from being able to open it. Lots of insurance companies consider an automatic pool cover safer than a fence.

gunite-pool-renovation-dune-road-west-hampton-ny1Gunite Pool Renovation on Dune Road West Hampton, N.Y.

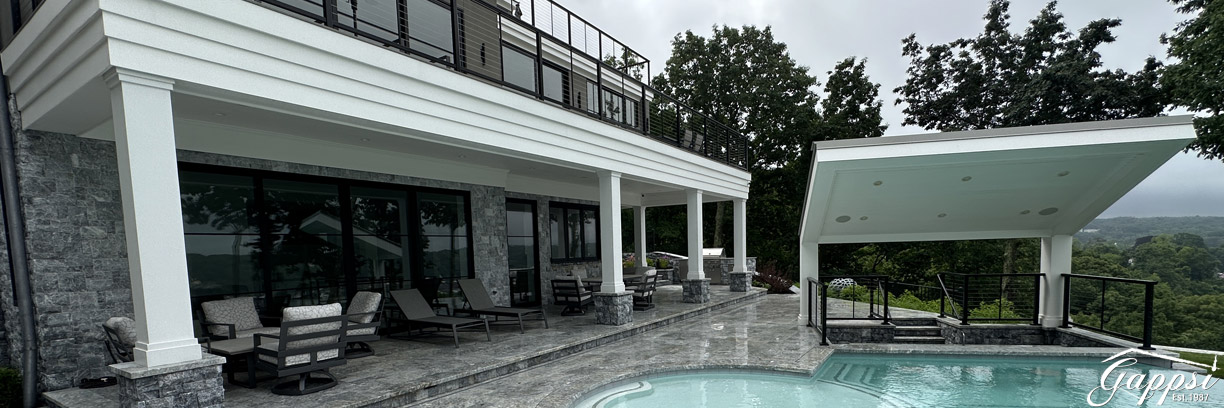
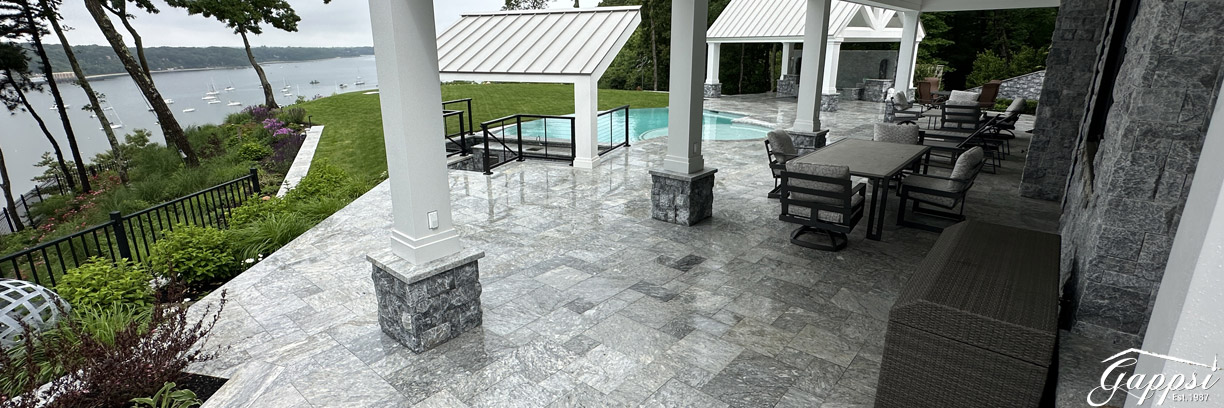
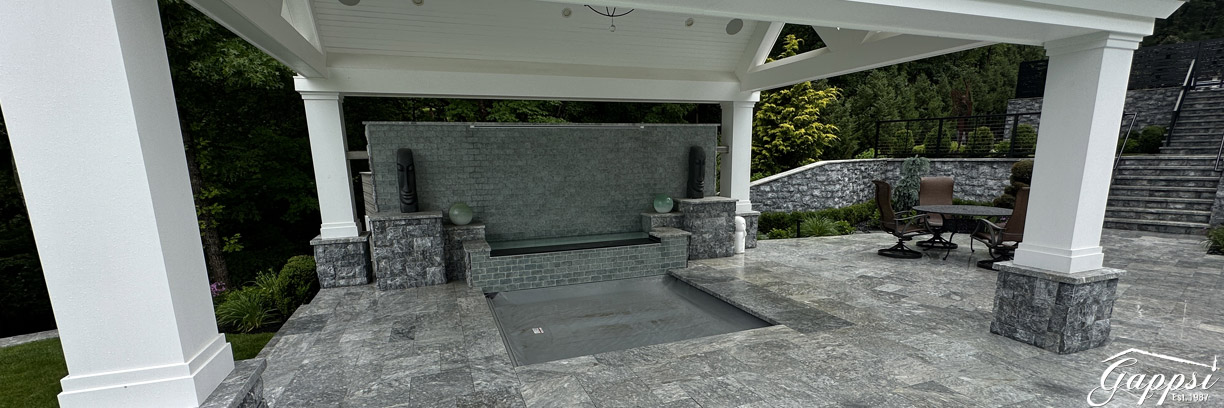
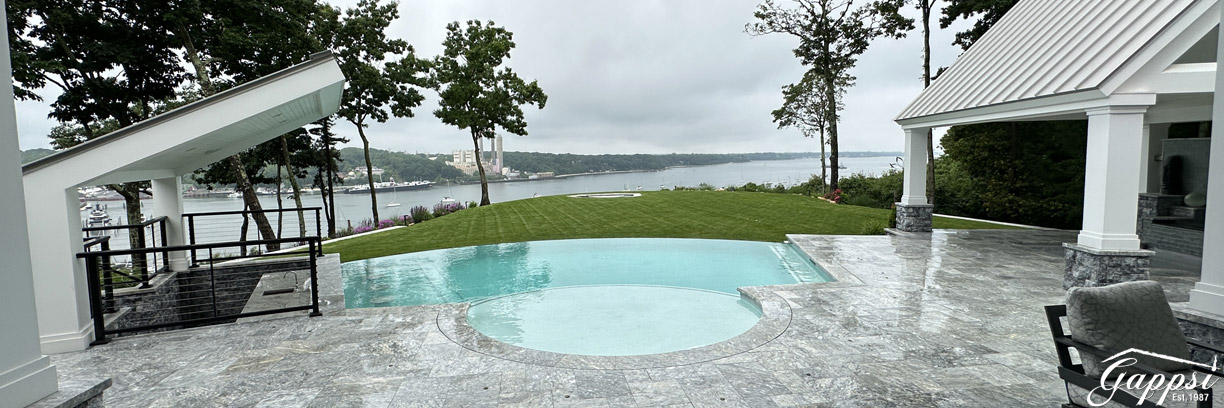
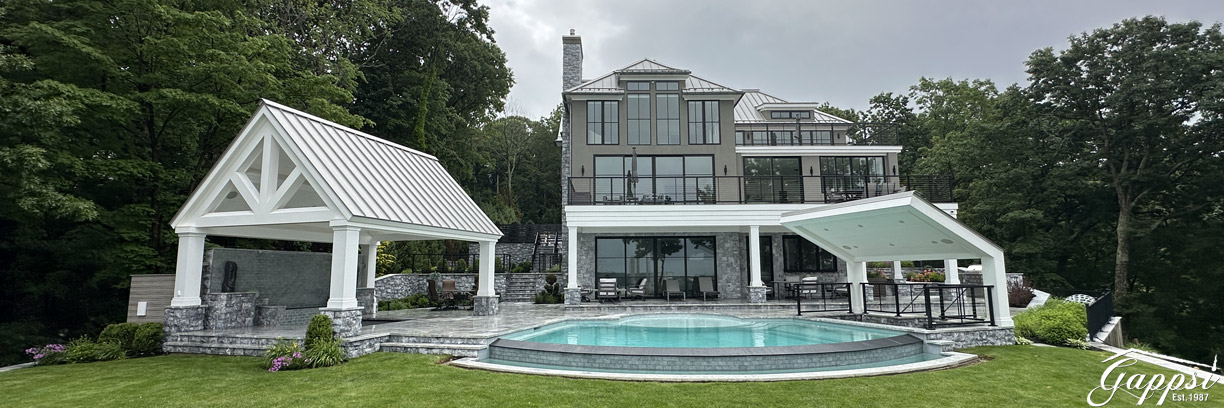
Gappsi recently renovated a gunite pool on Dune Road in West Hampton, N.Y., and we installed an all-new spa. We shot all the gunite and installed bluestone coping and tiles on the spa. We reinstalled new tiles on the pool and finished the pool and spa with super blue diamond bright. This spa spills inside the pool, with tile markers on the steps. This is the latest gunite pool renovation by Gappsi on Dune Road in Westhampton, NY.

Share this page:

Pickleball Sports Game Courts with Out of Bounce Netting System | Queens, N.Y

View Gappsi’s YouTube Channel for Videos of Pickleball Sports Game Courts with Out of Bounce Netting Systems | Queens, N.Y

When building a pickleball sports game court with out of bounce netting system, selecting the right surface material is essential for playing at the highest level. The surface affects the court’s playability, safety, and maintenance.

Surface Material and Construction

The choice of surface material greatly affects the court’s playability and maintenance. Asphalt and concrete are the most common materials used for pickleball courts, each with advantages and disadvantages. Asphalt is more affordable and offers a softer surface, while concrete provides a more durable and low-maintenance option. Regardless of the material chosen, it’s essential to ensure a smooth finish to prevent injuries and enhance the playing experience.

Asphalt is a popular choice for pickleball courts due to its durability and cost-effectiveness. It provides a hard, smooth surface that is ideal for fast-paced games.

Asphalt courts can withstand heavy use and weather conditions, making them a long-lasting option.

pickleball-sports-game-courts-with-out-of-bounce-netting-system-queens-n.yAsphalt Pickleball Sports Game Court Pros:

  • Durability: Asphalt is highly durable and can last many years with proper maintenance.
  • Cost-effective: Compared to other surface materials, asphalt is relatively inexpensive.
  • Low Maintenance: Asphalt courts require minimal maintenance, usually limited to occasional cleaning and resurfacing.

Asphalt Pickleball Sports Game Court Cons:

  • Hard Surface: The hardness of asphalt can be tough on players’ joints, especially during extended play.
  • Heat Absorption: Asphalt absorbs heat, making the surface hot and potentially uncomfortable during sunny days.

Concrete is another durable and long-lasting surface material for pickleball courts. It provides a hard, smooth playing surface similar to asphalt but with a few distinct differences.

Concrete Pickleball Sports Game Court Pros:

  • Longevity: Concrete courts can last for decades if properly maintained.
  • Smooth Surface: Concrete provides an even and consistent playing surface.
  • Stability: Concrete is less likely to develop cracks or deformities than asphalt.

Concrete Pickleball Sports Game Court Cons:

  • Cost: Concrete is more expensive to install than asphalt.
  • Hard-on Joints: Like asphalt, the hard surface of concrete can be tough on players’ joints.
  • Maintenance: While concrete is durable, any cracks that do develop can be more challenging to repair.

pickleball-sports-game-courts-with-out-of-bounce-netting-system-queens-n.y-1Pickleball Sports Game Courts with Out of Bounce Netting System Queens, N.Y.

In our recent project in Queens, N.Y., we installed two pickable courts over the existing asphalt tennis court area with two other tennis courts left existing.

We used part of the existing tennis courts and installed Mateflex tiles over the asphalt to build two pickleball sports game courts. The Mateflex tile features a narrow gauge rib system for quick drainage, high traction, and good ball bite (less skid), which is ideal for tennis court resurfacing. This is comparable to using a narrow gauge racquet string. Even after many years of wear and tear, these ribs will maintain the same width and, therefore, the same playing speed.

Each Mateflex tile has 32 individual interlocks and surrounding modules for superior court integrity. The interlocking tile is firm for a stable playing platform and reinforced for exceptional strength and longevity, which is necessary for any tennis or pickleball court design.

Why Choose Mateflex Sport Game Court Tiles

  • Experience – Matéflex has provided high-quality solutions since 1974 as the oldest American modular tile manufacturer.
  • Quality – We won’t settle for anything less than the highest standards for materials and manufacturing. We supervise our molding process, so we always control quality.
  • Performance – Our products are engineered to enhance comfort and performance and will show in your players’ games.
  • Safety – Matéflex products were developed with injury prevention in mind.
  • Durability – Protect your investment by choosing long-lasting flooring products.
  • Ease – Every Matéflex product was designed to be portable, low-maintenance, and cost-effective.
  • Service – We provide outstanding support from design to installation and throughout the life of your court.
  • Comfort – We provide outstanding support from design to installation and throughout the life of your court.

Pickleball Court Lines and Marking

The client chose maroon red for the outer court perimeter and royal blue for the pickleball insert.  In addition, we installed out-of-bounce netting with aluminum poles to separate the two courts to help contain the balls within each court.  

Sports netting, also known as ball stop netting, keeps balls in play and out of spectator areas to protect players, spectators, and property. Netting provides players an extra layer of safety, allowing them to play confidently. It also keeps balls from flying into areas where spectators could be injured. Netting prevents balls from traveling into areas that could cause damage and aids in maintaining consistent play.  Sports game court netting also keeps the balls within the boundaries, ensuring fair competition.

pickleball-sports-game-courts-with-out-of-bounce-netting-system-queens-n.y-2Out-of-bounds netting can be custom-built to fit any size space and is made from durable materials that can withstand heavy impacts and harsh weather conditions.

Pickleball sports game court netting by Dominator was installed, which can also be extended higher for playing a volleyball game.  

Synthetic Turf for Sports Game Court Fringe

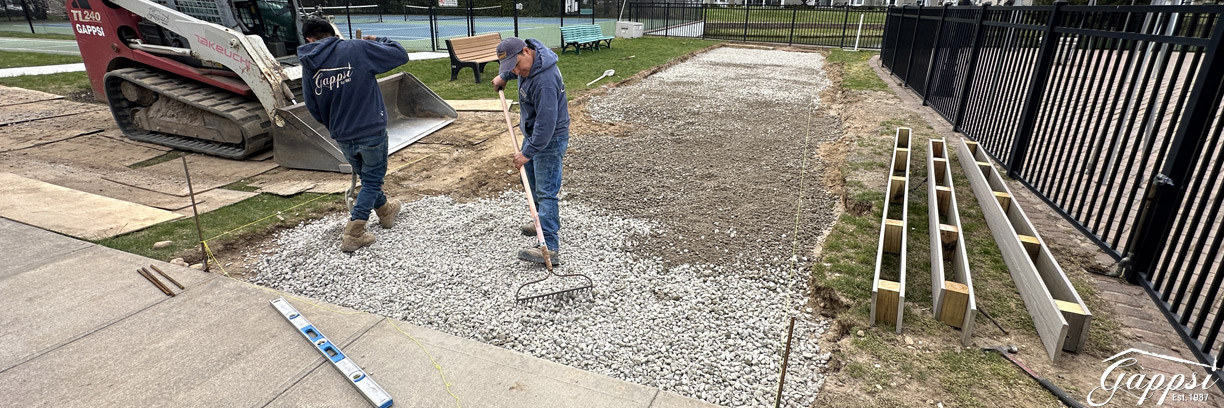
Our team installed synthetic turf fringe all around the court. It is also a visual border as a transition from the Mateflex polypropylene tile to the lower asphalt base.

The second tennis court will eventually be remodeled into a new tennis court, or we might put pickable courts sideways. The clients will use this for now and decide whether to keep the old tennis court or add more pickable courts and possibly a putting green. This is the latest sports game court installation done by Gappsi in Queens, NY. 

SCHEDULE A MEETING TODAY WITH GAPPSI

Share this page:

Rooftop Turf Installation: What You Must Know

You want a beautiful green lawn for your family to enjoy, but your property simply doesn’t have the yard space. This is where your unused roof comes into play, offering a perfect canvas for the green retreat you’ve been wanting. With modern materials and expert techniques, a rooftop turf installation can give you a low-maintenance, durable, and stunningly green surface. It’s the ideal solution for adding functional living area to your home. This guide explains everything you need to know, from choosing the right materials to understanding the critical installation steps for a flawless finish.

https://youtu.be/qBUtIfGSnxo

View Gappsi’s YouTube Channel for Videos of Rooftop Putting Green Installation, Long Beach, NY

Green grass can be seen from the highest building with our rooftop putting green installation! Gappsi Turf Solutions offers an innovative design that enables rooftop gardens where grass is challenging to grow. With a year-round, well-cared-for look, Gappsi Synthetic Turf Solutions for rooftops resembles natural grass in its best condition.

Turn your unused rooftop into a beautiful space where residents, employees, or students can relax or practice their golf game. Perfect for urban rooftops where outdoor space is an issue, Gappsi Synthetic Turf Solutions will beautify any rooftop to turn it into valuable, usable space.

Critical Safety Considerations for Rooftop Turf

Transforming a rooftop into a green oasis is an exciting project, but it comes with a unique set of safety rules. Unlike a backyard installation, a rooftop project involves your home’s primary defense against the elements. The main priorities are protecting the structural integrity of your roof, preventing leaks, and ensuring the turf system can withstand wind and weather. It’s also crucial to consider fire safety and potential heat damage. Overlooking these factors can lead to costly repairs and safety hazards. At Gappsi, we treat every synthetic turf installation with meticulous attention to these details, ensuring your rooftop retreat is both beautiful and secure for years to come. Understanding these considerations is the first step toward a successful project.

Warning: Never Penetrate the Roof Membrane

This is the golden rule of rooftop turf installation. Your roof’s membrane is a waterproof barrier that protects your home from water damage. You should never drill, nail, or puncture this membrane in any way. Even a single small hole can compromise the entire system, leading to leaks that are difficult to trace and expensive to repair. Water can seep into the roof structure, causing rot, mold, and significant structural damage over time. Professional installers use specialized techniques that secure the turf system without ever breaking this critical seal. It’s a non-negotiable aspect of a safe and durable rooftop installation.

How to Avoid Leaks and Expensive Damage

To avoid damaging the roof membrane, the entire turf system must be installed using non-penetrative methods. This means relying on gravity, specialized adhesives, and perimeter blocking instead of nails or screws. According to experts at Synthetic Grass Warehouse, you must not drill or nail into the roof. The proper method involves creating a secure perimeter frame and using the weight of the infill to hold the turf in place. This approach ensures the roof remains completely waterproof while providing a stable base for your new green space. It protects your investment and gives you peace of mind.

Understanding Wind Resistance and Ballast

Rooftops, especially on Long Island, are exposed to significant wind uplift. A strong gust of wind can catch the edge of an improperly secured turf installation and peel it back, creating a dangerous situation and ruining your investment. To counteract this, the turf system needs sufficient weight, known as ballast, to hold it down. This is typically achieved with a combination of sand infill and a securely anchored perimeter. The entire system is designed to be heavy enough to resist wind forces without relying on fasteners that would penetrate the roof membrane, ensuring everything stays exactly where it should.

The Role of Infill in Weighing Down Turf

Infill is a granular material, usually a specialized sand, that is brushed into the fibers of the synthetic turf after it’s laid down. While it helps the turf blades stand up straight and provides a cushioned feel, its most critical role on a rooftop is to weigh down the fake grass. This added weight is essential for preventing strong winds from lifting the turf. The amount and type of infill must be carefully calculated based on the turf product and local weather conditions to ensure the system has enough ballast to remain stable.

Securing the Perimeter Against Wind Lift

While infill provides overall weight, the edges of the turf are the most vulnerable to wind. To prevent lift, the perimeter must be securely fastened. One effective method is to use a perimeter “nailer board” that is glued to the roof surface, not nailed. The turf is then attached to this board. Another strategy is to use heavy planters or outdoor furniture strategically placed along the edges to hold them down. This creates a secure boundary that protects the installation from wind while avoiding any penetration of the roof membrane.

Fire Safety Ratings for Rooftop Materials

Fire safety is a critical, and often overlooked, aspect of rooftop design. Since rooftops can be exposed to embers from nearby fires or even fireworks, any materials you add must meet strict fire safety standards. High-quality synthetic turf products designed for rooftop applications will have a specific fire rating. This rating indicates how the material behaves when exposed to fire, and choosing a product with a high rating is essential for the safety of your home and everyone in it. It’s a specification that should never be compromised for cost or aesthetics.

Why a Class A Fire-Rating is Essential

For rooftop applications, a Class A fire rating is the highest level of protection you can get. Materials with this rating are effective against severe fire exposure and do not easily spread flames. Many premium turf products, like some offered by SYNLawn, are manufactured to achieve a Class A Fire-Rating, making them a safe choice for homes, apartment buildings, and commercial properties. When planning your project, always confirm that the turf you select meets this important safety standard to ensure compliance with building codes and provide maximum protection.

Common Heat and Melting Risks

Modern synthetic turf is incredibly durable, but it is still a plastic-based product that can be susceptible to melting under extreme heat. This isn’t usually an issue with direct sunlight alone, but problems can arise from concentrated heat sources. The most common culprits are reflections from energy-efficient windows and hot objects placed directly on the turf’s surface. Being aware of these potential hazards allows you to plan your space accordingly and protect your turf from damage, ensuring it stays looking great for years.

Sunlight Reflection from Windows

Low-E (low-emissivity) windows are great for insulating your home, but they can act like a magnifying glass, reflecting and concentrating sunlight onto a small area. This intense reflection can generate enough heat to melt synthetic turf fibers. Before installation, it’s important to check for reflective windows or other shiny surfaces like glass railings that could pose a risk. If a potential issue is identified, you may need to apply a film to the window or choose a turf product with a higher melting point.

Damage from Hot Objects like Grills

A rooftop is a perfect place for a summer barbecue, but you need to be careful where you place hot items. Fire pits, grills, and even the bases of some intense patio heaters can get hot enough to melt the turf fibers. It’s recommended to never put hot items directly on the grass. Instead, create a designated patio area using porcelain pavers or other heat-resistant materials for your grill and fire pit. This not only protects your turf but also creates a more functional and visually appealing outdoor living space.

The Proper Rooftop Installation System

A successful rooftop turf installation is more than just laying down green carpet. It’s a complete system designed to manage water, withstand the elements, and protect your roof. A proper installation begins with a dedicated drainage layer, which allows water to flow freely to the roof’s existing drains. The perimeter is then secured using non-penetrating methods, and the system is weighted down with the correct amount of infill. Finally, the entire design should account for future roof access and maintenance. At Gappsi, our process ensures every layer works together to create a durable, functional, and safe rooftop environment that you can enjoy without worry.

The Importance of a Dedicated Drainage Layer

Proper drainage is arguably the most important functional component of a rooftop turf system. Without it, water can become trapped between the turf backing and the roof surface, leading to mold, mildew, and unpleasant odors. Trapped water also adds significant weight and can accelerate the breakdown of the turf materials. A dedicated drainage layer creates a space for air and water to move freely. This not only ensures rainwater gets to the roof drains efficiently but also helps keep the surface clean and dry, extending the life of your investment.

How a Drainage Grid Prevents Mold and Heat Buildup

The solution to rooftop drainage is a specialized drainage grid or mat installed directly underneath the turf. This grid creates an air gap that serves two key functions. First, it provides a clear channel for water to flow away, preventing pooling and stagnation. Second, this air gap allows for constant air circulation, which helps dissipate heat from the roof surface and prevents the buildup of moisture that can lead to mold and bacteria. This drainage grid is very important for the longevity and hygiene of your rooftop turf.

Securing the Perimeter Without Damaging the Roof

As we’ve covered, the perimeter is the most vulnerable part of a rooftop turf installation, especially when it comes to wind. Securing it properly without drilling into the roof is a challenge that requires a professional approach. The goal is to create a solid, immovable edge that anchors the entire system. This is typically done by building a frame around the turf area that is adhered, not screwed, to the roof surface. This method provides the necessary strength to resist wind lift while keeping the waterproof membrane completely intact.

Using a “Nailer Board” System

A common professional technique involves using a “nailer board,” which is a bit of a misnomer since no nails are used to attach it to the roof. This composite board is installed around the perimeter of the turf area and is secured directly to the roof surface using a powerful, waterproof adhesive designed for this purpose. The synthetic turf is then stretched and fastened to this board, creating a taut, secure edge. This system effectively transfers the wind load to the structure without a single puncture.

The Critical Role of Infill for Weight

While we’ve discussed infill as a key component for ballast, its importance can’t be overstated in a rooftop system. The weight of the infill is the primary force holding the main field of the turf in place. Without it, the turf would be little more than a lightweight blanket, easily shifted or lifted by wind. The selection of turf and the amount of infill are directly related. A turf with a shorter pile height and denser construction can hold more infill, making it a better and safer choice for rooftop applications.

How Sand Infill Acts as Ballast

The sand infill works by filling the space between the turf fibers, all the way down to the backing. This not only adds a significant amount of weight distributed evenly across the entire surface but also helps to lock the turf system together. When a turf product is chosen that is not too thick, it allows for an adequate amount of infill to be added. According to installation experts, using less infill means the wind can easily remove the turf, so getting this ratio right is critical for safety and stability.

Designing for Future Roof Access and Maintenance

Your roof will eventually need inspection, maintenance, or repair. A properly designed turf system should allow for this without requiring a complete tear-out. If the turf is permanently glued down across its entire surface, accessing the roof membrane underneath becomes a destructive and costly process. A modular or non-adhered system is far more practical for long-term homeownership. It allows sections of the turf to be rolled back for access and then easily put back in place, saving you significant time and money down the road.

Why Glued-Down Turf is Not Recommended

While it might seem like an easy solution, gluing the entire turf surface directly to the roof is a bad idea. This method can trap air and moisture, creating bubbles and promoting the growth of mold and bacteria underneath. Furthermore, it makes future roof repairs a nightmare. Removing glued-down turf almost always damages both the turf and the roof surface it was attached to. A system that “floats” on a drainage grid and is secured only at the perimeter is the superior professional method.

Selecting the Right Materials for Your Rooftop

Choosing the right materials is just as important as the installation technique. Not all synthetic turf is created equal, and products designed for rooftops have specific characteristics that make them suitable for the job. You need to consider the total weight of the system, the durability of the turf fibers, and its ability to resist heat. Selecting a high-quality turf product designed for this unique application will ensure your rooftop space is not only safe and beautiful but also comfortable and long-lasting. The experts at Gappsi can help you select the perfect materials for your project, from the turf itself to complementary porcelain pavers.

Understanding Material Weight and Structural Integrity

Before you add anything to your roof, you must confirm it can handle the extra load. A complete synthetic turf system, including the drainage layer, turf, and infill, adds a significant amount of weight. It’s essential to consult with a structural engineer to verify your building’s roof can support this additional “dead load.” This is a critical safety step to prevent structural damage to your home. A professional installer will always require this verification before beginning work, ensuring the project is feasible and safe from the ground up.

Estimating Total Weight: Up to 5 Pounds Per Square Foot

So, how much weight are we talking about? A typical rooftop turf system can add a substantial load. The combination of the turf itself and the sand infill used as ballast can easily add up to 5 pounds per square foot. For a 500-square-foot rooftop, that’s an extra 2,500 pounds. This is why a structural assessment is not just a suggestion but a mandatory part of the planning process. It ensures your rooftop paradise doesn’t become a structural liability.

Choosing Durable and Resilient Turf Fibers

A rooftop is an exposed, high-traffic environment. The turf you choose needs to be tough enough to handle constant sun exposure, temperature swings, and foot traffic without breaking down. The type of fiber used to make the turf blades plays a huge role in its durability and resilience. While many turf products look similar at first glance, their underlying composition determines how well they will perform over time. Investing in a product with superior fibers will result in a space that looks great for many years.

The Benefits of Nylon Fibers for Rooftops

For demanding applications like rooftops, turf made with nylon fibers is often considered a top-tier choice. Nylon is an incredibly strong and resilient material with excellent “memory,” meaning the blades will spring back to an upright position after being stepped on. High-end products are often made with strong nylon fibers that can withstand intense sun and weather without degrading. This makes them an ideal, albeit more premium, choice for a long-lasting and low-maintenance rooftop installation.

Incorporating Heat-Resistant Technology

One of the historical drawbacks of synthetic turf has been its tendency to get hot in direct sunlight. However, technology has come a long way, and many modern turf products now include innovative features to keep the surface cooler and more comfortable, even on hot summer days. This is especially important for a rooftop, which receives more direct sun than a typical backyard. These technologies work by reflecting infrared light, which is responsible for heat, rather than absorbing it.

How Technologies Like HeatBlock Keep Turf Cooler

Leading manufacturers have developed proprietary technologies to combat heat. For example, some SYNLawn products incorporate HeatBlock Technology, which is designed to keep the turf surface significantly cooler than traditional synthetic grass. These products also include advanced UV protection to prevent fading and degradation from the sun. When you choose a turf with these features, you’re investing in a more comfortable and durable surface that is better suited for the harsh conditions of a rooftop environment.

View Our Synthetic Turf & Sports Game Court Gallery For More Ideas

Gappsi’s artificial grass for rooftops has been installed in playgrounds, urban residential building rooftops, recreational areas, and more. The lightweight synthetic grass is the perfect maintenance-free solution for rooftop areas.

Are you craving a unique outdoor sanctuary, perhaps a place to relax and practice golf while enjoying a fantastic view away from the hustle and bustle? Converting your rooftop to a putting green with artificial turf could be your perfect solution.

It can be a serene retreat and a visually stunning addition to your complex if done right!

1. Plan For Safety – First and foremost, ensure your rooftop can bear the additional weight of your golf haven. Seek professional help to assess the structural integrity. Once confirmed, design the putting green cautiously to ensure proper safety measures. This could include installing barriers or railings for accident prevention.

2. Utilize Space Wisely—Rooftop spaces can vary significantly in size. Strategic use of available space is crucial regardless of your rooftop’s dimensions. If space is tight, try a minimalist approach, focusing on one or two golf holes and a small seating area. If the location allows, consider a larger green or incorporate a few obstacles for added challenge.

3. Consider Drainage—Good drainage is essential to keeping your rooftop green in top shape. Ensure the base below the artificial turf is designed for efficient drainage. Using turf that allows rapid permeability will prevent waterlogging and increase the lifespan of your green.

4. Choose High-Quality Artificial Turf – Quality matters, especially regarding the artificial turf you install. Opt for top-quality artificial greens replicating the feel of real grass golf greens. They’ll provide the ball roll accuracy and durability that a golf enthusiast appreciates.  The quality of the artificial turf you choose heavily influences the green’s playability and durability. Opt for top-quality, low-maintenance artificial grass. It might cost more initially, but it will save time, effort, and long-term satisfaction.

roof-top-putting-green-installation-long-beach-ny5

Lightweight, Maintenance Free Synthetic Turf for Rooftops

More and more commercial and residential organizations are installing rooftop greens to add an aesthetically pleasing and recreational element to their properties. Additional rooftop areas may include plain synthetic turf to cover weathered or visibly undesirable surfaces, improving views that overlook the rooftop area.

The benefits of having a rooftop putting green installed by Gappsi, Inc.
  • Natural appearance & feel
  • All weather use
  • Custom-fit to any size or shape rooftop
  • Cleaner, more professional-looking appearance
  • Adds value to the building/property.
  • Adds recreational attraction to building/property
  • Turns unused square footage into a functional attraction
  • Extremely low maintenance

roof-top-putting-green-installation-long-beach-ny3Rooftop Putting Green Installation, Long Beach, N.Y.

Gappsi recently designed and installed a rooftop putting green in Long Beach, Long Island. The first step is spreading the bluestone gravel, which is applied on top of the Merafi paper. Next, we will install the synthetic turf fringe. Synthetic turf fringe is a section of artificial grass that connects a putting green to the fairway and is also known as the “apron” or “collar.”

Why Do You Need Synthetic Turf Fringe

  • Purpose: It connects the green to the fairway, prevents the ball from rolling off, and provides stability and protection to the putting green.
  • Height – Usually 1–2 inches tall, but is customizable.
  • Width—This can vary depending on the space, but it can be as narrow as 6 inches or several feet wide.
  • Installation – It should be cut perfectly to blend seamlessly with the putting green.
  • Benefits – Durable, weather-resistant, and can create a realistic play experience.

The rooftop putting green installation in Long Beach, N.Y., was completed on the second floor over a parking garage. We added flower beds to accent the putting green curves.  Creating an impressive landscape around your synthetic putting green is an excellent way to enhance your outdoor space’s aesthetic appeal. Surrounding your putting green with various plantings is a classic landscaping idea.  Choose low-growing perennial flowers, ornamental grasses, or ground covers to create a beautiful and natural-looking boundary that visually separates your green from the rest of your space.

roof-top-putting-green-installation-long-beach-ny2The putting green has a very beautiful undulation. Although it is difficult to see from the images posted, bumps and gullies have been added to create a golf course feel.

We installed the putting green grass and the Gappsi Dreamy 35 (1.5 Pile Height) for the fringe. This project was done for Engel Burman, an apartment complex on Long Beach’s water. We installed five cups and flags and outlined the flower beds with aluminum metal edging. This is the latest sports game court installation completed in Long Beach, NY.

Design the Perfect Rooftop Putting Green

Your perfect rooftop retreat is just a rooftop putting green installation away. These design tips provide a roadmap for creating an inviting, engaging, and relaxing space. Look no further than Gappsi for top-notch synthetic turf solutions. Please find out how we can help you bring your rooftop putting green to life. Call us at 631-543-1177 or message us online for a free consultation today! roof-top-putting-green-installation-long-beach-ny1

Practical and Logistical Considerations for Rooftop Putting Greens

Once you’ve handled the major safety and structural elements, it’s time to focus on the smaller details that ensure your rooftop putting green is functional and enjoyable for years to come. Thinking through the logistics of door clearance, pet needs, accessibility, and even static electricity can make the difference between a good project and a great one. These are the kinds of practical details that a professional team anticipates. At Gappsi, we’ve managed countless synthetic turf installations, so we know exactly which questions to ask to make sure your finished space works perfectly for your lifestyle.

Ensuring Proper Door Clearance

Imagine your beautiful new rooftop green is installed, but now the door leading out to it scrapes against the turf every time you open it. It’s a small but frustrating detail that can be easily avoided with proper planning. Before installation, it’s crucial to measure the clearance for any doors that will open over the turf area. As a general rule, you should ensure you have at least a one-inch gap for doors to swing freely over the new surface. A professional installer will account for the total height of the drainage system and the turf itself to guarantee a seamless transition from your indoor to your outdoor space.

Pet-Friendly Accommodations and Drainage

If you have furry friends, you’ll want to make sure your rooftop oasis is welcoming for them, too. However, it’s important to have a plan for pet waste. Allowing pets to urinate directly on the turf can lead to odors and bacteria buildup over time. A smart solution is to use a special system, sometimes called a “porch potty,” which incorporates a removable container beneath the turf and drainage layer. This setup contains waste, making it easy to clean while keeping your putting green fresh and hygienic for everyone, both two-legged and four-legged.

Accessibility for Commercial Properties

If you’re planning a rooftop installation for a commercial building, apartment complex, or any public-facing property, there are additional rules to consider. These projects must often follow ADA (Americans with Disabilities Act) guidelines to ensure the space is accessible to everyone. This can impact everything from ramp inclines to surface evenness and pathway widths. Working with a company that has experience in both residential and commercial projects is key, as they will be familiar with the specific requirements needed to create a compliant and inclusive space for all visitors and residents.

How to Handle Static Electricity

Here’s a detail you might not think of: static electricity. In dry or windy conditions, walking across synthetic turf can sometimes generate a surprising amount of static. Luckily, there are a few simple ways to manage it. One effective method is to place a piece of copper under the grass to help absorb the static charge. For a quicker fix, you can simply give the grass a light watering. Some have even found that a diluted fabric softener solution can help reduce static buildup, keeping your rooftop experience shock-free.

Frequently Asked Questions

Is it really safe to put all that weight on my roof? That’s the most important question to ask, and the answer is: it depends on your roof’s structure. Before any turf goes down, a structural engineer must verify that your roof can handle the additional load. A complete system with a drainage layer, turf, and sand infill can add up to 5 pounds per square foot. Skipping this professional assessment is not an option, as it ensures the project is safe and prevents any potential damage to your home.

What happens when it rains? Won’t my roof turn into a swamp? Not with a professional installation. A critical part of the system is a dedicated drainage grid that sits underneath the turf. This grid creates a gap that allows rainwater to flow freely to your roof’s existing drains, preventing water from getting trapped. This not only avoids pooling but also allows for air circulation, which helps prevent mold, mildew, and unpleasant odors from developing.

My building has low-E windows. I heard they can melt artificial grass. Is that true? Yes, this is a real concern. Energy-efficient windows can reflect and concentrate sunlight, creating hot spots intense enough to melt turf fibers. Before installation, it’s important to identify any reflective surfaces that could pose a risk. If a potential problem exists, solutions like applying a protective film to the window or choosing a turf with a higher melting point can prevent damage and protect your investment.

Can I just glue the turf down to make sure it doesn’t fly away? Gluing the entire turf surface directly to your roof is not a good idea and is not the professional standard. This method traps moisture, which can lead to mold, and makes future roof repairs a destructive and expensive nightmare. A proper installation uses a non-penetrating system where the turf “floats” on a drainage layer and is secured by a perimeter frame and the weight of the sand infill.

What makes rooftop turf different from the kind I’d put in my backyard? While they might look similar, the best turf for rooftops has specific features. It needs to be part of a complete system that includes a drainage layer. The turf itself should have a Class A fire rating for safety and be made from durable fibers, like nylon, that can withstand intense sun and foot traffic. It should also be designed to hold a significant amount of sand infill, which acts as the necessary weight to keep it in place.

Key Takeaways

  • Protect Your Roof at All Costs: The most important rule for a rooftop turf project is to never puncture the waterproof membrane of your roof. Professional installation uses non-penetrating methods, like perimeter adhesives and the weight of infill, to secure the system and prevent leaks.
  • A Rooftop Installation is a Complete System: A successful project involves more than just the turf. It requires a drainage grid to manage water, a secure perimeter to resist wind, and the correct amount of sand infill to act as ballast, all working together for a safe and durable result.
  • Material Selection is Crucial for Safety and Comfort: You must choose materials specifically designed for rooftops. This includes turf with a Class A fire rating, heat-resistant technologies to keep the surface cool, and getting approval from a structural engineer for the system’s total weight.

Related Articles

Share this page:

SaunaLife Barrel Sauna Model EEG6 installed in Great River NY

View Gappsi’s YouTube Channel for Videos of SaunaLife Barrel Sauna Model EEG6 installed in Great River, N.Y.

The SaunaLife Barrel Sauna delivers a complete backyard luxury spa experience in one simplified package. With the Saunalife Ergo, you’re not just purchasing a sauna but investing in a full package that combines the best design and functionality. Gappsi saunas feature industry-leading material thickness for walls, benches, and backrests, ensuring durability and comfort. The intelligent ergonomic layout, including curved Thermo-Aspen benches and a premium arched backrest, accommodates all body sizes, guaranteeing every user experiences the ultimate in comfort.

SaunaLife Barrel Sauna Model EE6G was designed and engineered by sauna enthusiasts to be spacious, comfortable, durable, attractive, and affordable. It represents the best sauna barrel value with the highest level of quality.

Clever engineering and design resulted in a supremely comfortable sauna for up to four bathers. SaunaLife carefully crafts the contoured bench and arched backrest for superior ergonomics. Together with an elevated seating position with a lower footrest, this is the most comfortable barrel sauna available on the market.

saunalife-barrel-sauna-model-eeg6-installed-in-great-river-ny-1The SaunaLife Barrel Sauna Model EE6G’s impressive 7’3″ interior diameter lets you stand comfortably without crouching. Its large diameter allows ergonomically contoured and formfitting seating. The arched backrest provides proper lumbar support and a natural seating position. Silky-smooth seating made from beautiful Thermo-Aspen. This knot-free wood is perfect for sauna seating and feels comfortable against your skin in high heat.

Visit Gappsi’s Showroom Today to View Our Sauna Products on Display!

Glass Tempered Door

All SaunaLife barrel saunas come standard with an inviting full-length tempered bronze glass door, allowing you to unwind while admiring the outdoors.

Enhanced Lighting

All Ergo models come with WiFi-connected LED lighting to set the perfect ambiance in your sauna before entering. The sleek lighting offers a dotless, warm, even glow throughout your sauna and features:

  • App and wireless remote control capabilities
  • IP67-rated waterproof and heat-resistant fixtures
  • Low voltage for safety
  • Expandable system with multiple fixture options

saunalife-barrel-sauna-model-eeg6-installed-in-great-river-ny-2Lighting Upgrade Packages

E-Sconce Package – This package features a pair of dimmable, wet-rated external sconces to illuminate the sauna entrance and an additional interior LED light bar to illuminate the benches from either side.

E Mood Light Bar—Install a ceiling-mounted color-changing LED light bar to create a vibrant chromotherapy experience. The light bar has customizable hues and lighting scenes to set the perfect mood.

Whether you’re looking for personal rejuvenation, quality time with a partner, or relaxing moments with friends, this two- or three-person sauna is your hassle-free ticket to a private backyard retreat. The Saunalife Ergo represents not just ease of installation but a commitment to uncompromising quality and all-encompassing convenience.

Frequently Asked Questions SaunaLife Saunas

  1. How long does it take for the sauna to heat up? Most saunas typically take 30 to 45 minutes to heat up to the desired temperature, depending on the outside temperature and the heater’s power.
  2. How long does it take to build? Typically, two people can assemble the SaunaLife barrels in a day.
  3. Do I need an electrician? Yes – All heaters need a professional electrician to install them.

saunalife-barrel-sauna-model-eeg6-installed-in-great-river-ny-3Harvia Vega Heater

We installed a Harvia Vega Heater in the SuanaLife EEG6 model. Immerse yourself in the luxurious comfort of a perfect sauna experience with the Harvia Vega Compact Sauna Heater. This modern and user-friendly heater, crafted by the world’s leading sauna manufacturer, delivers powerful heat to saunas up to 175 cubic feet.

Imagine entering your tranquil oasis, enveloped in the gentle, therapeutic warmth. The ergonomic design and easy-to-use controls ensure effortless operation, while the sleek stainless steel shell adds a touch of modern elegance to your sauna space. The low-mounted design bathes the room in comforting heat, reaching even the lower benches for a truly blissful experience.

Don’t wait to create your at-home sanctuary of relaxation. Visit Gappsi today to bring the rejuvenating power of sauna bathing into your life. Breathe easy, unwind deeply, and experience the pure bliss of the Harvia Vega Compact Sauna Heater.

saunalife-barrel-sauna-model-eeg6-installed-in-great-river-ny-4Create a personal backyard sauna sanctuary with SaunaLife outdoor sauna barrels. These innovative spaces provide a relaxing experience steps away from your home.

SaunaLife barrel saunas are ergonomically engineered for superior comfort. They have contoured seating, arched arches, and wood-slanted backrests. These spaces are available in various sizes and configurations to suit your bathing needs.

This is the latest outdoor barrel sauna sold and assembled by Gappsi in Great River, N.Y. It is the Model EEG6, a stunning sauna. The top is covered with Shingles. We built the sauna on a concrete slab. The front of the sauna is all glass see-through. It has a bench facing the glass door with extra benches or steps. It has a control thermostat and lights. The sauna is perfect if you have a view that you want to see while you are in it.

View Our Swimming Pool Gallery

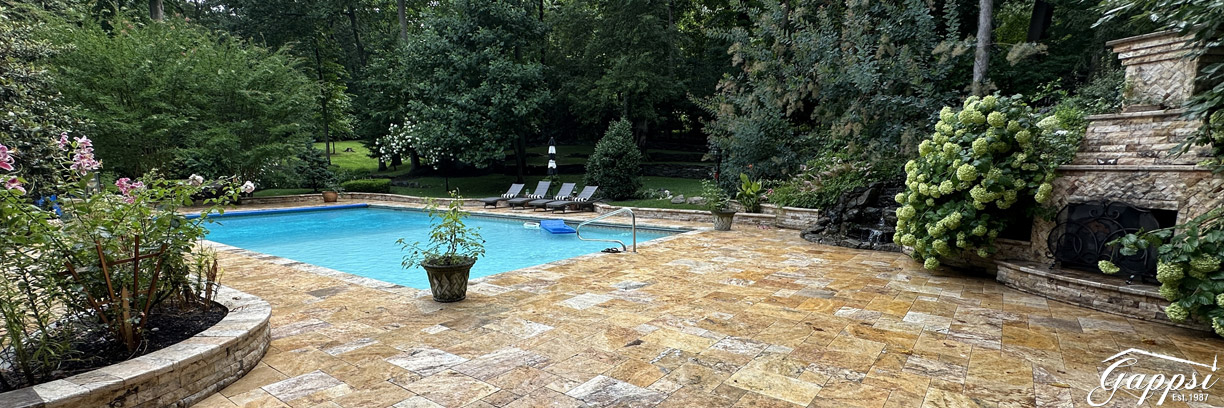
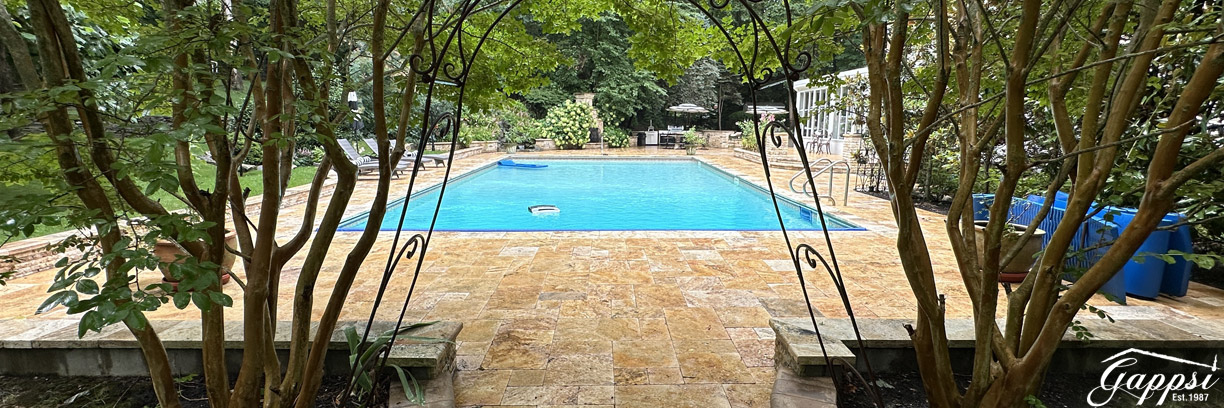
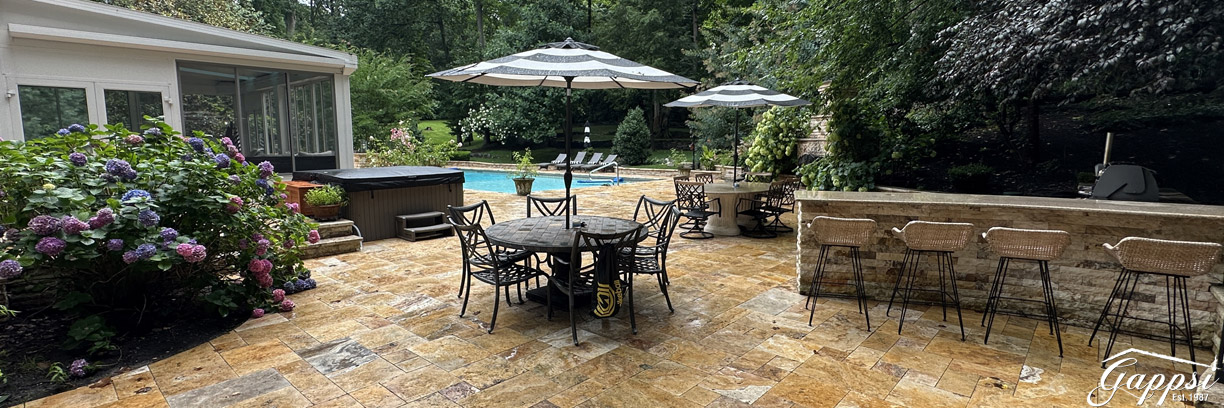
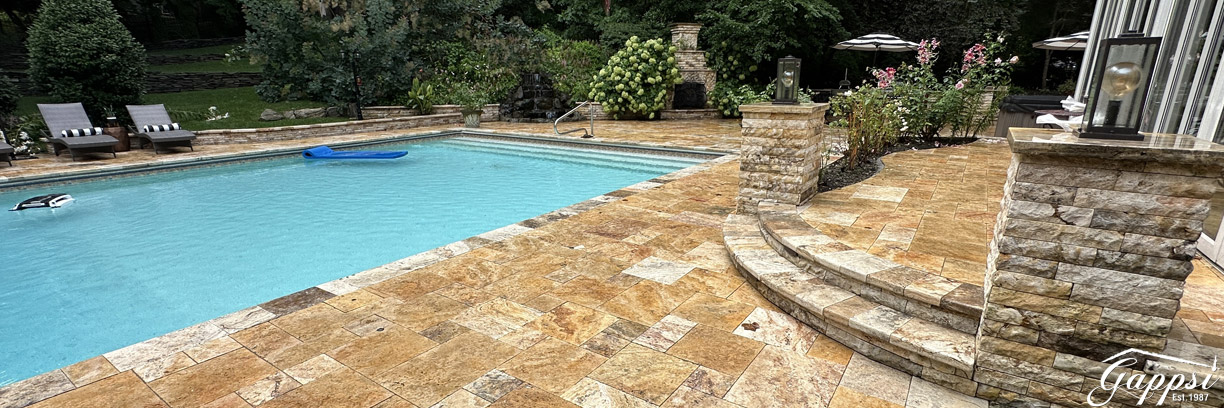
Gappsi also installed this pool and travertine patio about 15 years ago. This is one of our repeat customers. The pool was built with an auto cover that lasted 15 years and was recently replaced. The travertine was also installed 15 years ago, and it looks like it was completed just yesterday!

SCHEDULE A MEETING TODAY WITH GAPPSI

saunalife-barrel-sauna-model-eeg6-installed-in-great-river-ny-5

Share this page:

Italian Porcelain Tiles and Synthetic Turf Patio Combinations Smithtown NY

View Gappsi’s YouTube Channel for Videos of Italian Porcelain Tiles and Synthetic Turf Patio Combinations, Smithtown, N.Y.

The Beauty of Choosing Italian Porcelain Tiles for Outdoor

If you are looking for beautiful outdoor tiles, then it’s a fact that few materials rival porcelain. With so many porcelain tile options available, how do you decide? Why would you choose one tile over another? What are the key things to look out for? And why are Italian outdoor tiles considered the best?

Our blog explores all this and more as we look at tiles that offer superior quality, sophisticated design, and brilliant versatility.  Why choose porcelain, and in particular Italian porcelain outdoor tiles? They are the perfect choice for the discerning homeowner, designer, or architect and are a great way to add value to your property.

Why is Italian Porcelain Better?

Italian factories produce the best porcelain. This means the clay has time to cure and harden slowly, resulting in a more reliable, long-lasting product. Other porcelain worldwide is fired at a lower temperature for a shorter time, making it less structurally sound.

italian-porcelain-tiles-and-synthetic-turf-patio-combination-smithtown-ny3What is unique about Italian tiles?

Italian tiles are highly liquid-resistant, and their durability against permanent stains makes them perfect for residences with pets or children; given proper maintenance and care, they will continue to look fresh for years.

Are Italian Porcelain Tiles Slippery?

Italian Tiles: Italian tiles also prioritize safety standards, often providing excellent slip-resistant options. The emphasis on aesthetics and functionality ensures that Italian tiles are visually appealing and practical for use in areas where slip resistance is crucial.

Italian porcelain tiles are a good choice for outdoor patios because they are durable, low maintenance, and can withstand a variety of weather conditions:

  • Durability: Porcelain tiles resist scratches, chips, and cracks and withstand heavy weights.
  • Weather resistance: Porcelain tiles are frost-proof, fade-resistant, and can withstand rain, snow, and water splashes.
  • Low maintenance: Porcelain tiles are easy to clean and require minimal upkeep.
  • Aesthetic variety: Porcelain tiles come in a wide range of colors and styles and can replicate the look of natural stone.
  • Eco-friendly: Porcelain tiles are made from natural materials and have a long lifespan.
  • State-of-the-art factories: Some say Italian porcelain factories are state-of-the-art and use green processes.

italian-porcelain-tiles-and-synthetic-turf-patio-combination-smithtown-ny2Italian Porcelain Tiles and Synthetic Turf Patio Combination | Smithtown, NY

Our recent project is located in Smithtown, N.Y.  We installed 24 x 24 Italian porcelain tile pavers with synthetic turf strips in between.  Are you thinking of giving your outdoor space a makeover with artificial grass? Well, you’re in luck because it’s become a game-changer for homeowners. Synthetic grass and pavers, when skillfully combined, can elevate your backyard to new heights of elegance and functionality.

One of the main benefits of artificial grass is its versatility. Today’s turf can be used in many more places than past varieties. High-quality turf comes in various colors, pile heights, face weights, and densities for multiple uses, from greens and sports fields to backyard lawns, dog runs, and driveways.

Transform your outdoor space and seamlessly blend the beauty of artificial grass with the versatility of pavers. We used two different types of synthetic turf for this backyard project in Smithtown, N.Y.  View our Synthetic Turf page for more ideas.

  • Shorter turf for the strips between the pavers, sometimes called Turf Ribbons, is very flush with the top of the pavers. Placing synthetic turf between concrete, pavers, travertine, or flagstone can magnify the beauty of the project design. However, placing synthetic turf ribbons in between these types of hardscapes can be challenging if the installation is not planned out before the installation.
  • A taller grass for the perimeter was chosen. Choosing a taller synthetic grass for around pavers can create a softer, more visually appealing “lush” look, providing a comfortable surface to walk on while adding a touch of greenery to a primarily hard surface area. This is especially important when you want a more inviting feel for lounging or relaxing outdoors.

italian-porcelain-tiles-and-synthetic-turf-patio-combination-smithtown-ny1Key reasons to choose a taller synthetic grass around pavers:

  1. Enhanced aesthetics: A taller pile height can more closely mimic natural grass, adding a lush, vibrant appearance to your patio or outdoor space.
  2. Softer feel underfoot: The taller blades provide a more comfortable walking surface than a shorter pile, especially when sitting or lounging on the ground.
  3. Visual contrast: The difference in height between the grass and pavers can create a visually exciting design element.

Considerations for using a taller synthetic grass with pavers:

  1. Maintenance: Taller grass may require frequent brushing to prevent matting and maintain its appearance.
  2. Foot traffic: High-traffic areas might benefit from a shorter pile height to prevent excessive wear and tear.
  3. Leveling: Ensure the grass is installed consistently with the pavers to avoid tripping hazards.

Synthetic Turf Wrapped Raised Patio

Gappsi wrapped the turf around the sides of the raised patio. The dark green synthetic turf between the patios is also used for bocce courts.

The grass used for the trim is the long turf imported from Italy and the Italian porcelain. This is the latest porcelain and synthetic turf project built in Smithtown, NY.

SCHEDULE A MEETING TODAY WITH GAPPSI

italian-porcelain-tiles-and-synthetic-turf-patio-combination-smithtown-ny

Share this page: