Durable powder coated aluminum fence with modern vertical panels and integrated lighting.

5 Key Benefits of Powder Coated Aluminum Fences

You’ve probably heard the term “powder coated” when shopping for outdoor products, but what does it actually mean? Unlike traditional paint, powder coating is a dry finishing process where a powder is electrostatically applied and then cured under heat. This creates a thick, hard finish that’s bonded directly to the metal. When applied to a material as strong and rust-proof as aluminum, the result is exceptional. Powder coated aluminum fences are specifically engineered to resist chipping, fading, and scratching, making them ideal for the Long Island climate. This article explains the process and why this technology creates a superior, long-lasting fence.

Key Takeaways

  • Powder Coating is Tougher Than Paint: This special finishing process bakes a protective layer onto the aluminum, making it highly resistant to chipping, fading, and weather, so you can forget about constant upkeep.
  • Aluminum Offers the Best of All Worlds: It gives you the elegant look of iron without the rust, the low maintenance of vinyl without the risk of cracking, and more durability than wood, making it a smart long-term investment.
  • Personalize Your Fence with Minimal Effort: Choose from timeless colors to perfectly match your home’s style, and keep your fence looking new with simple soap-and-water cleaning and routine inspections for minor damage.

What is Powder Coating for Aluminum Fences?

When you’re looking for a fence that combines style with strength, you’ll likely come across the term “powder coated.” So, what exactly is it? Think of powder coating as a high-tech, super-durable finish for metal. Unlike traditional liquid paint that’s sprayed on and left to air dry, powder coating is a dry finishing process. A special, pigment-rich powder is applied to the aluminum, and then the fence is baked in an oven. This curing process melts the powder, causing it to flow and form a thick, even, and incredibly resilient layer that bonds directly to the metal’s surface.

This method creates a finish that is much tougher and more consistent than conventional paint. It’s the go-to choice for products that need to withstand the elements, from outdoor furniture to automotive parts, because it provides superior protection. For homeowners in Long Island, this means your fencing will be exceptionally well-protected against our humid summers, salty air, and chilly winters. The result is a beautiful, uniform finish that resists chipping, fading, and scratching for years to come. It keeps your property looking sharp and well-maintained with very little effort on your part, giving you more time to simply enjoy your yard.

The Step-by-Step Powder Coating Process

The flawless finish of a powder coated fence comes from a meticulous, multi-step process. First, the aluminum is thoroughly cleaned to remove any dirt, oil, or grime. This pretreatment step is critical because it ensures the powder will adhere perfectly. Next, the surface is prepared, often by sandblasting, to create a slightly rough texture for the powder to grip. Then comes the application: a special spray gun gives the powder an electrostatic charge, which makes it stick to the grounded aluminum fence panels like a magnet. This technique ensures complete and even coverage. Finally, the coated fence enters a curing oven, where the heat melts the powder into a smooth, hardened shell that is permanently bonded to the metal.

Powder Coating vs. Traditional Paint

While both powder coating and paint add color and a layer of protection, they are worlds apart in performance. Traditional liquid paint is less expensive upfront and can be a DIY project, but it’s prone to chipping, peeling, and fading over time, especially outdoors. It simply doesn’t hold up as well against moisture, UV rays, and daily wear and tear. Powder coating, on the other hand, is significantly more durable. The thermal bonding process creates a finish that is thicker and more resistant to impact, chemicals, and weather. It’s a far more lasting solution that maintains its color and integrity for much longer, saving you from frequent repainting and touch-ups down the road.

Why Aluminum is the Perfect Match

Aluminum is already a fantastic material for outdoor structures because it’s lightweight and naturally resistant to rust. When you combine it with the protective power of powder coating, you get a fencing solution that is truly built to last. The powder coating acts as an impenetrable barrier, shielding the aluminum from moisture, salt air, and sun exposure, which further prevents any chance of corrosion. This powerful duo ensures your fence not only looks stunning but also stands strong against the elements without demanding constant upkeep. It’s the ideal combination for creating beautiful and resilient outdoor living spaces that you can enjoy for many years.

Why Choose a Powder Coated Aluminum Fence?

When you’re deciding on a fence for your property, you want something that looks great, lasts for years, and doesn’t add another chore to your weekend to-do list. That’s exactly why powder coated aluminum fences are such a popular choice for Long Island homeowners. This type of fence combines the lightweight strength of aluminum with a finish that’s incredibly tough and beautiful. It’s more than just a boundary for your yard; it’s a lasting upgrade that offers peace of mind. Let’s look at the specific benefits that make this fencing a standout option.

Enjoy Unmatched Durability and Weather Resistance

Long Island weather can be tough on outdoor materials, from humid summers to salty winter air. A powder coated aluminum fence is built to handle it all. The powder coating process creates a thick, durable layer that’s baked onto the aluminum, forming a protective shield. This finish is much stronger than a simple coat of paint. It resists chipping, scratching, and fading, keeping your fence looking sharp season after season. Most importantly, it protects the aluminum from moisture, which means you never have to worry about rust or corrosion. It’s a reliable choice for a beautiful, long-lasting fencing solution.

Spend Less Time on Maintenance

One of the best parts of choosing a powder coated aluminum fence is how little work it requires from you. Unlike wood fences that need staining or painted fences that eventually peel, a powder coated finish is designed for longevity. You can forget about the hassle of regular touch-ups or the expense of repainting every few years. This saves you a significant amount of time and money over the life of the fence. A simple cleaning with soap and water is usually all it takes to keep it looking brand new. You can spend your weekends enjoying your yard, not working on it.

A Safer, More Eco-Friendly Choice

Choosing a powder coated fence is also a decision you can feel good about. The process is much kinder to the environment compared to traditional liquid paints. Powder coating doesn’t release harmful volatile organic compounds (VOCs) into the atmosphere, which helps maintain better air quality for your family and community. The application process is also very efficient, creating minimal waste. Any excess powder can often be collected and reused, making it a more sustainable option. By selecting a powder coated aluminum fence, you’re investing in a product that is both safe for your home and better for the planet.

A Smart Long-Term Investment

While the initial cost of a powder coated aluminum fence might be slightly higher than some other options, it’s a smart investment in your property’s future. Think about the money you’ll save over the years on repairs, repainting, and eventual replacement. Because of its incredible durability and resistance to the elements, this fence maintains its value and appearance for a very long time. It’s a one-time purchase that pays for itself through low maintenance and a long lifespan. When you consider the total cost of ownership, our aluminum fencing options often prove to be the most economical choice.

Powder Coated Aluminum vs. Other Fences

When you’re choosing a fence, the material and its finish are just as important as the style. You want something that not only looks great but can also handle everything Long Island weather throws at it, from humid summers to salty winter air. Powder coated aluminum stands out from the crowd, offering a unique combination of strength, beauty, and longevity that other options just can’t match. Let’s break down how it compares to traditional paint and other popular fencing materials like wood, vinyl, and iron, so you can see why it’s such a smart choice for your home.

A Closer Look: Powder Coat vs. Paint

You might think of paint as the go-to finish for metal, but powder coating is in a league of its own. Instead of liquid paint, this process uses a dry powder that is electrostatically applied to the aluminum. The fence panel is then cured under heat, which melts the powder into a smooth, incredibly durable layer. This finish is much thicker and stronger than a coat of paint. While painting might seem like a cheaper, easier option upfront, it’s prone to chipping, peeling, and fading over time. Powder coating, on the other hand, creates a resilient, long-lasting bond that keeps your fence looking brand new for years with minimal effort.

How Aluminum Stacks Up Against Steel, Iron, Vinyl, and Wood

Every fencing material has its place, but powder coated aluminum often comes out on top. It gives you the classic, elegant look of wrought iron without the heavy weight, high cost, and constant battle against rust. Unlike wood fences, which require regular staining and sealing to prevent rot and warping, aluminum is virtually maintenance-free. And while vinyl is also a low-maintenance option, it can become brittle and crack over time, especially in colder weather. Powder coated aluminum provides the perfect balance: it’s strong, lightweight, rust-proof, and stylish, making it a versatile choice for any property. Gappsi offers a variety of fencing options to suit your home’s specific needs.

Resisting Scratches and Impacts

Life happens, especially in a busy yard. Between kids playing, pets running around, and routine lawn care, your fence is bound to take a few hits. This is where the toughness of a powder coated finish really shines. The thermal bonding process creates a hard, thick shell that is much more resistant to scratches, chips, and scuffs than traditional paint. You won’t have to worry about a stray soccer ball or a leaning bicycle causing unsightly damage. This resilience means your fence will maintain its flawless finish and curb appeal for years, even in high-traffic areas around your patio or pool.

Standing Strong Against Rust and Humidity

Here on Long Island, we know all about humidity and salty air, which can be tough on outdoor materials. The biggest advantage of aluminum is that it doesn’t rust. When you add a powder coated finish, you get an extra layer of protection against the elements. The coating seals the metal, preventing moisture and oxygen from causing any corrosion or oxidation. This plastic-like barrier ensures your fence won’t succumb to the effects of rain, snow, or coastal air. You can install it and relax, knowing it’s built to withstand the local climate without needing constant upkeep or future restoration services.

Customize and Care for Your Fence

One of the best parts of choosing a powder-coated aluminum fence is how it combines strength with style. Beyond its durability, this type of fencing offers a fantastic canvas for personalization, allowing you to match it perfectly to your home’s aesthetic. And the good news doesn’t stop there. Keeping your fence looking brand new is surprisingly simple. With just a little attention, you can ensure your fence remains a beautiful and secure boundary for your property for years to come. Let’s walk through how you can customize your fence and keep it in top condition with some straightforward care tips.

Keep Your Fence Looking New with Simple Cleaning

You don’t need special equipment or harsh chemicals to maintain the fresh look of your powder-coated fence. In most cases, a simple cleaning with mild soap and water is all it takes to wash away dirt and grime. Think of it as a quick spring-cleaning task for your yard. A gentle wash once or twice a year helps preserve the finish and protects your investment. This easy routine ensures your fence continues to complement your home and landscaping beautifully. For tougher spots or long-term maintenance questions, our team at Gappsi is always ready to help with professional restoration and sealing services.

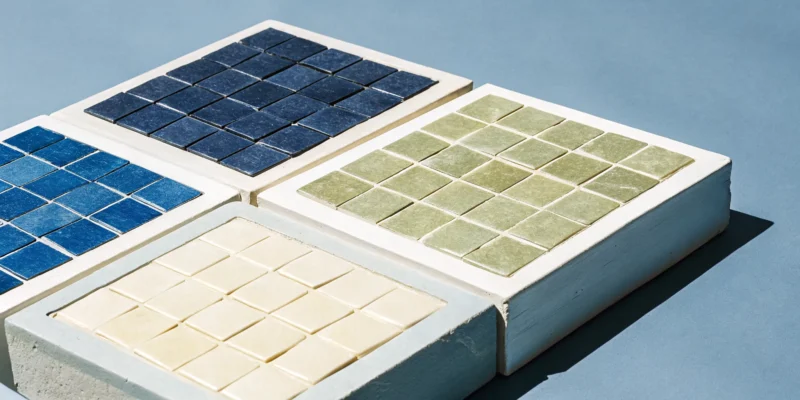
Find the Perfect Color and Finish for Your Home

Your fence is one of the first things people see, so its color and style should reflect your personal taste and your home’s character. Powder-coated aluminum fences come in several classic colors that make a statement. Black offers a timeless, wrought-iron elegance that works with almost any architectural style. A crisp white fence can brighten your property and perfectly match your home’s trim. For a more historic or distinguished look, bronze provides a warm, rich finish that’s ideal for grand entrances. Choosing the right color enhances your curb appeal and makes your entire property feel more cohesive. We can help you explore all the fencing options to find the perfect match.

How to Inspect Your Fence for Lasting Beauty

A little prevention goes a long way in keeping your fence in pristine condition. Make it a habit to walk along your fence line every few months, especially after a storm or during seasonal yard work. Look closely for any small scratches or chips in the powder coating that might have occurred from stray rocks or gardening tools. Catching these minor imperfections early is key. Addressing them quickly prevents any potential for moisture to get underneath the coating, ensuring the finish remains intact and continues to protect the aluminum beneath. This simple, proactive check is the easiest way to maintain the integrity and beauty of your fence for the long haul.

Quick Fixes for Minor Coating Damage

If you spot a small chip on your fence, your first instinct might be to grab a can of paint. However, regular paint doesn’t adhere well to a powder-coated surface and is likely to peel or fade over time, creating a bigger issue. Instead of a quick paint job, it’s better to use a touch-up kit specifically designed for powder coatings. For anything more than a minor nick, it’s wise to consult with professionals. An expert can properly repair the area to ensure a seamless, durable finish that matches the original coating. This approach maintains both the look and the protective qualities of your fence, keeping it strong and beautiful.

Related Articles

Frequently Asked Questions

How is powder coating different from just painting a fence? Think of it as the difference between a sticker and a tattoo. Regular paint sits on top of the metal and can chip or peel away over time. Powder coating involves applying a dry powder that is then baked onto the aluminum. This process melts the powder, causing it to fuse directly with the metal to create a thick, durable, and uniform finish that is much more resistant to scratches, fading, and the elements.

How much maintenance does a powder-coated aluminum fence really need? Honestly, very little. This is one of their biggest advantages. You won’t have to deal with the annual scraping, sanding, or repainting that comes with other types of fences. For the most part, a simple wash with soap and water once or twice a year is all you need to remove any dirt or pollen and keep the fence looking its best.

Will the fence rust or corrode, especially with Long Island’s salty air? This is a perfect question for our coastal climate, and the answer is no. Aluminum itself is a rust-proof material, which already gives it a huge advantage. The powder coating adds another layer of defense, acting as a complete seal that shields the metal from moisture and salt. This powerful combination makes it an ideal, long-lasting choice for any property on Long Island.

What happens if the coating gets scratched or damaged? The finish is incredibly tough, but accidents can happen. If you get a minor scratch from a lawnmower or a stray rock, it’s best to address it with a touch-up kit made specifically for powder-coated surfaces. Using regular paint won’t work well and can make the spot more noticeable. For any significant damage, it’s always a good idea to consult a professional to ensure the repair is seamless and properly sealed.

Why should I choose aluminum over a traditional wood or iron fence? Powder-coated aluminum gives you the best of both worlds. It offers the classic, elegant appearance of wrought iron without the heavy weight and constant risk of rust. Compared to wood, it’s a huge time-saver because it doesn’t require any staining or sealing to protect it from rot or insects. It’s the perfect balance of strength, style, and low-maintenance durability.

Share this page:
A modern Gunite swimming pool, a durable option versus vinyl for the changing Long Island, NY weather.

Gunite vs. Vinyl: Best Pool for Long Island Weather?

Long Island weather is not for the faint of heart, and the same goes for our swimming pools. Any outdoor structure here has to be tough enough to handle the dramatic swing of our seasons, from scorching summer sun to the ground-shifting pressure of a deep winter freeze. When you’re investing in a pool, you need to know its core structure can withstand these challenges year after year. This is where the fundamental differences between Gunite and vinyl become so important. So, when considering a Gunite or vinyl swimming pool what’s the best for Long Island ny weather? This article focuses specifically on durability, comparing how each material resists our climate to help you choose a pool that’s truly built to last.

Key Takeaways

  • Choose gunite for ultimate design flexibility: Its custom, on-site construction allows for any shape or feature, making it a permanent and integrated part of your landscape. Vinyl pools offer beautiful, classic designs with a faster installation time.
  • Balance upfront cost with long-term expenses: Vinyl pools are more affordable initially but require a significant liner replacement every 7 to 15 years. Gunite has a higher starting price but eliminates this recurring cost, making it a more predictable long-term investment.
  • Prioritize durability for our climate: Gunite’s solid concrete shell is built to last for decades and easily handles Long Island’s freeze-thaw cycles. The primary concern with a vinyl pool is protecting its liner, which is more vulnerable to damage from weather and daily use.

Gunite vs. Vinyl Pools: What’s the Difference?

When you start planning your backyard oasis, one of the first big questions you’ll face is what type of pool to build. Gunite and vinyl liner pools are two of the most popular choices for Long Island homeowners, but they are fundamentally different. Understanding how they are built, the design freedom they offer, and how long it takes to install them will help you decide which one is the perfect fit for your family and your home. Each type has its own unique set of benefits, so let’s look at what sets them apart.

How They’re Built

The construction method is the main difference between gunite and vinyl pools. A gunite pool is built to last, created by spraying a mix of concrete and sand over a steel-reinforced frame (rebar). This process forms a single, solid concrete shell that is incredibly strong and durable. After the shell cures, it’s finished with a smooth layer of plaster, tile, or other aggregate finishes. This monolithic structure is what gives gunite pools their reputation for strength.

Vinyl liner pools are built differently. The process starts with excavating the shape of the pool and assembling a frame of wall panels. A custom-made sheet of vinyl is then fitted into the structure, acting as a waterproof membrane that holds the water. The liner attaches to a track along the top edge of the pool. This construction makes the initial installation faster than a gunite pool. Gappsi’s team are experts in building both types of swimming pools, ensuring quality craftsmanship no matter which you choose.

Your Design and Customization Options

If you can dream it, you can probably build it with gunite. This is where gunite pools truly shine. Because they are built on-site, they offer nearly limitless design flexibility. You can create a completely custom shape that flows with your landscape, and add unique features like beach-style entries, built-in benches, tanning ledges, or stunning infinity edges. The interior finish can also be customized with a variety of colors and textures, from classic plaster to beautiful pebble or glass bead aggregates.

Vinyl liner pools offer more limited design choices. While you can select from many standard shapes and sizes, creating a truly freeform design is more difficult. Customization often comes from choosing the liner itself, which is available in a wide range of colors and patterns to mimic the look of tile or stone. While you can still create a beautiful pool, you won’t have the same level of structural customization that you get with a gunite build. You can further enhance any pool design with gorgeous porcelain and natural stone pavers for the surrounding patio.

The Installation Process and Timeline

Patience is key when installing a gunite pool. The construction process is more involved and takes longer, typically anywhere from six to eight weeks, depending on the complexity of the design and weather conditions. After the hole is excavated and the rebar cage is built, the gunite is sprayed on. Then comes the most important part: the curing process. The concrete shell needs several weeks to cure and gain its full strength before the final interior finish can be applied.

In contrast, a vinyl liner pool can be installed much more quickly. Since the components are manufactured off-site, the on-site work is mostly assembly. Once the excavation is complete and the wall panels are in place, the liner can be installed and the pool can be filled with water in a matter of days. For homeowners who want to be swimming as soon as possible, the faster installation timeline of a vinyl pool is a significant advantage.

How Do Gunite and Vinyl Pools Handle Long Island’s Climate?

Living on Long Island means we enjoy beautiful summers perfect for swimming, but it also means dealing with freezing winters and coastal storms. These weather patterns can be tough on any outdoor structure, so your pool needs to be built to last. The material you choose plays a huge role in how well it holds up season after season. Gunite and vinyl pools react very differently to our local environmental stresses. From the ground freezing and thawing to the occasional nor’easter, understanding how each pool type performs is key to making a smart investment.

Handling the Freeze-Thaw Cycle

One of the biggest tests for any pool on Long Island is our winter freeze-thaw cycle. As the ground freezes and expands, it puts immense pressure on a pool’s structure. Gunite swimming pools are built with a strong, reinforced concrete mix that can withstand this cycle, making them much less likely to crack. Their solid shell moves with the ground as one piece. Vinyl liner pools, however, can be more vulnerable. Shifting ground can stretch the liner or damage the walls. If water gets behind the liner and freezes, it can cause significant problems, making the material more susceptible to wear from our harsh winters.

Durability Through Changing Temperatures

Beyond just the winter, Long Island’s temperatures can swing dramatically. We go from hot, humid summer days to frigid nights, and your pool needs to handle it all. This is where the long-term durability of gunite really shines. Concrete pools can last for decades with proper care, making them a resilient choice for our fluctuating climate. The structure itself is incredibly stable. A vinyl liner’s lifespan is more directly impacted by these temperature swings. Extreme heat can make the vinyl pliable, while cold can make it brittle, affecting its fit and integrity over time and leading to eventual replacement.

Facing Storms and High Groundwater

As an island, we’re no strangers to heavy rain and strong winds. These storms can lead to high groundwater levels, which pose a threat to in-ground pools. Gunite pools are more resilient against storms and high groundwater because of their sheer weight and solid construction. They resist the hydrostatic pressure that pushes up from underneath. Vinyl liner pools are more vulnerable to this pressure. Rising groundwater can push the liner inward, causing it to “float” and wrinkle. This often requires professional repairs. Proper site preparation and landscape drainage can help, but the risk is higher than with a solid gunite shell.

What’s the Real Cost of a Gunite vs. Vinyl Pool?

When you’re planning your budget for a new pool, it’s easy to focus only on the initial price tag. But the true cost of ownership goes far beyond the installation day. You also need to think about long-term maintenance, potential repairs, and replacement expenses down the road. Both gunite and vinyl pools have very different cost structures over their lifetimes, so understanding these differences is key to making a smart investment for your Long Island home. Let’s break down what you can expect to spend, both now and in the future.

Upfront Installation Costs

The initial investment is one of the biggest distinctions between gunite and vinyl pools. Generally, a vinyl liner pool has a lower entry price, which makes it an attractive option for homeowners working with a specific budget. The construction process is simpler, which helps keep those initial costs down.

On the other hand, a gunite pool requires a larger upfront investment. Custom-built swimming pools made from gunite can start around $50,000 and go up from there depending on size, complexity, and custom features. While the initial sticker price is higher, you are paying for a permanent, highly durable structure that is built to last for decades.

Long-Term Maintenance Expenses

Over the years, the costs associated with gunite and vinyl pools start to look quite different. With a gunite pool, you’ll need to budget for things like acid washing every three to five years to keep the surface clean and bright. You may also use slightly more chemicals because of the porous nature of the plaster finish.

The biggest long-term expense for a vinyl pool is replacing the liner. Vinyl liners are very tough, but they typically need to be replaced every 7 to 10 years. This is a significant recurring cost that you won’t have with a gunite pool. Factoring in this future expense is essential when comparing the overall financial commitment of each pool type.

Comparing Repair and Replacement Costs

When it comes to durability, gunite has a clear advantage. A gunite pool can last more than 50 years with proper care, so you won’t be thinking about a full replacement. Repairs usually involve patching small cracks in the plaster, which is a specialized but manageable task. Because gunite is so strong, these repairs are often infrequent.

With a vinyl pool, you’ll need to replace the liner every 8 to 15 years, which is a major extra cost over the life of the pool. While you can patch small tears in the liner, a full replacement is an inevitable expense. This is the most significant difference in long-term costs and a crucial factor when deciding which pool is the right financial fit for your family.

Which Pool Lasts Longer?

When you’re planning a major addition to your home like a swimming pool, you want to know it’s built to last. A pool is a significant investment, and its lifespan is a critical factor in your decision. The durability of a pool comes down to its core structure and how well that structure can handle years of use, chemical treatments, and Long Island’s distinct seasons. This is where the differences between gunite and vinyl pools become very clear.

Gunite pools are constructed as a single, solid piece, creating a durable vessel that can stand the test of time. Vinyl liner pools, on the other hand, consist of a separate frame and a liner. While the frame provides support, the liner is the part that holds the water, and it has a much shorter lifespan than the pool structure itself. Understanding how each type ages and what kind of upkeep is required will give you a realistic picture of your long-term commitment. Let’s look at what you can expect from each option over the years.

The Lifespan of a Gunite Pool

If your top priority is longevity, a gunite pool is the clear winner. With proper care, the concrete shell of a gunite pool can easily last for 50 years or more, making it a true generational investment for your family. These swimming pools are built on-site with a steel rebar framework that is then sprayed with a concrete and sand mixture. This process creates a monolithic, incredibly strong structure that becomes a permanent part of your landscape. While the interior plaster finish will need to be redone every 10 to 15 years to keep it looking fresh, the core structure remains sound for decades.

How Often Vinyl Liners Need Replacing

A vinyl liner pool’s lifespan is really determined by its liner. The liner itself typically needs to be replaced every 7 to 10 years. Factors like sun exposure, water chemistry, and accidental tears from pets or sharp objects can shorten its life even further. While the underlying wall panels can last much longer, the liner is the most critical and vulnerable component. This means you should factor in the recurring cost and hassle of a full replacement every decade or so. It’s an important long-term expense to consider when comparing the initial price tag of a vinyl pool to that of a gunite installation.

Resistance to Chemicals and Weather

Gunite pools are exceptionally resilient. Their solid concrete and steel construction makes them incredibly durable against ground shifts and the pressures of our local freeze-thaw cycles. They can handle heavy use and are less prone to scratching or staining from debris after a storm. While the plaster surface is porous and requires diligent water chemistry management, the structure itself is tough. A vinyl liner is more delicate. It can be punctured by storm debris, stained by improper chemical use, or become brittle over time from sun and cold, making it more susceptible to damage during seasonal changes.

What Maintenance Does Each Pool Need in Our Climate?

A beautiful pool is a fantastic addition to your home, but it’s important to understand the upkeep involved. The maintenance needs for Gunite and vinyl pools are quite different, especially with our changing seasons here on Long Island. From balancing water chemistry to getting your pool ready for summer, the tasks you’ll perform depend heavily on the material you choose. Let’s break down the typical maintenance routine for each so you can decide which one fits best with your lifestyle.

Managing Your Pool’s Water Chemistry

All swimming pools require balanced water, but Gunite and vinyl surfaces react to chemicals differently. A Gunite pool’s plaster finish is porous, so you’ll need to be more diligent about managing the water chemistry. If the pH, alkalinity, or calcium levels are off, the water can become acidic and slowly etch the surface, making it rough. On the other hand, vinyl liners are non-porous, but they aren’t immune to chemical damage. Consistently high chlorine or low pH can make the liner brittle and cause the color to fade over time. Both types require regular testing, but Gunite demands a bit more attention to protect its finish.

Preventing Liner Tears and Damage

The primary maintenance concern for a vinyl pool is the liner itself. It’s a durable material, but it can be punctured or torn by sharp objects like fallen branches, pet claws, or broken pool toys. While small holes can often be patched, a significant tear could require a full liner replacement, which is a considerable expense you can expect to face every 10 to 20 years. In contrast, the rugged plaster or aggregate finish of a Gunite pool eliminates this worry entirely. This durability is a major reason why many Long Island families choose custom Gappsi swimming pools for their backyards, offering peace of mind during active summer fun.

Opening and Closing Your Pool for the Season

Seasonal maintenance is a non-negotiable part of pool ownership on Long Island. When opening a Gunite pool for the summer, you’ll likely need to give the walls a thorough brushing to remove any algae that may have settled into the porous surface. Every few years, an acid wash can help remove stubborn stains and brighten the finish. For vinyl pools, the process is often simpler, but it includes a careful inspection of the liner for any damage that might have occurred over the winter. Proper closing procedures are critical for both types to prevent damage from freezing temperatures. For tougher jobs, professional restoration and sealing services can keep your pool surround looking pristine year after year.

How Do the Design and Style Options Compare?

Beyond durability and cost, the look and feel of your pool are what you’ll enjoy every single day. This is where gunite and vinyl pools really show their differences, turning a simple choice into a creative one. While both can create a beautiful backyard centerpiece, one offers nearly limitless freedom, while the other provides a more streamlined approach with proven, popular designs. Your decision will come down to how much you want to personalize your space and how the pool will integrate with your patio, garden, and overall outdoor living area.

If you have a specific vision for a one-of-a-kind oasis, or if your property has unique challenges like a sloped yard or an unusual shape, the material you choose will play a huge role in bringing that vision to life. Think about your ideal backyard. Is it a classic rectangle perfect for swimming laps, or a freeform lagoon with built-in waterfalls and seating? Do you want a finish that sparkles in the sun or a simple, smooth surface? Answering these questions will help you see whether the boundless customization of gunite or the straightforward elegance of vinyl is the right fit for your Long Island home.

Comparing Shapes and Sizes

When it comes to creating a truly custom shape, gunite is in a class of its own. Because gunite is sprayed onto a rebar framework on-site, it means that gunite pools can be any shape you like. This flexibility is perfect for homeowners who want a pool that flows with their landscape, fits into a unique space, or matches a specific architectural style. You can design gentle curves, sharp angles, or a completely organic shape that looks like a natural pond.

Vinyl liner pools, on the other hand, are built using pre-manufactured panels. This means you’ll be choosing from a catalog of established shapes and sizes, like rectangles, ovals, or L-shapes. While there are many beautiful options available, you won’t have the same level of freedom to create a completely original design from scratch.

Finishes and Custom Features

The customization continues with the pool’s interior surface. Gunite offers a wide variety of interior finishes, including different colors and pebble-like finishes with glass or quartz that can shimmer in the sun. This allows you to choose a texture and color that perfectly complements your patio and landscaping. You can also seamlessly integrate features like tanning ledges, built-in benches, and custom steps. These elements are formed as part of the pool shell, creating a cohesive, high-end look that works with your overall masonry design.

Vinyl liners also provide options, offering smooth finishes and a variety of colors and patterns. You can choose a liner that mimics the look of tile or a simple, brilliant blue. While you can’t achieve the same textured feel as a pebble finish, modern vinyl liners are attractive and feel soft to the touch.

Matching Your Long Island Landscape

The unique properties across Long Island often call for creative solutions. Gunite pools are ideal for creating unique designs that fit the specific landscape of your yard, especially in areas with challenging terrain like slopes or irregular lot lines. A gunite pool can be built to hug the contours of your property, making it feel like it was always meant to be there. This adaptability allows you to create a harmonious flow between your home, your pool, and your garden.

A vinyl pool is an excellent choice for more traditional, level backyards where a standard shape fits easily. If your property is relatively flat and you have a clear, open area, a vinyl pool can be installed efficiently and look fantastic. The key is to assess your space and decide whether a custom build or a classic design will better suit your landscape.

How Does Each Pool Affect Your Home’s Value?

A swimming pool is more than just a place to cool off; it’s a major home improvement project. So, it’s smart to think about how this investment will affect your property’s value down the road. The type of pool you choose plays a significant role in its long-term financial impact. Both gunite and vinyl pools can make your home more desirable, but they contribute to its value in different ways, from buyer appeal to the total cost of ownership over time. Understanding these differences will help you see the complete picture of your investment.

Impact on Property Value and Appeal

When potential buyers tour your home, the pool is a major focal point. A gunite pool often makes a stronger first impression. Because of its incredible strength and longevity, gunite is widely seen as the “gold standard” in the pool industry. It’s viewed as a permanent, luxurious addition to the property, not just an accessory. This perception can significantly increase your home’s appeal.

A vinyl liner pool is still a fantastic feature that promises years of family fun. However, because the liner is a replaceable component, some buyers might not view it with the same sense of permanence as a gunite structure. A well-maintained vinyl pool in a beautifully landscaped yard is always a plus, but a gunite swimming pool often carries more weight in a buyer’s mind as a high-end, structural asset.

Calculating Your Return on Investment

Thinking about return on investment (ROI) helps you weigh the cost against the value a pool adds. A gunite pool can increase your home’s value by 5% to 7%, with some reports showing an ROI of around 56%. This means you could potentially recoup a significant portion of the installation cost when you sell your home. The durable, custom nature of gunite contributes directly to this higher valuation.

Vinyl pools have a lower upfront cost, which is a major draw. While they still add value and appeal, the ROI calculation is different. Because buyers know the liner will eventually need replacement, the value-add might be slightly less than that of a gunite pool. The key to maximizing ROI for any pool is creating a complete outdoor oasis. Integrating features like a stunning natural stone patio and thoughtful landscaping turns your pool from a simple feature into a lifestyle upgrade.

The Total Cost of Ownership Over Time

The initial price tag is only one part of the financial story. The total cost of ownership includes maintenance, repairs, and replacements over the pool’s lifetime. This is where the differences between gunite and vinyl become very clear. Vinyl liners typically need to be replaced every 7 to 10 years, which is a recurring expense you’ll need to plan for. While a vinyl pool is often cheaper at first, the cost of liner replacements can add up over time.

In contrast, a gunite pool has a structural lifespan of 50 years or more with proper care. It may need to be resurfaced every 10 to 15 years, but you won’t face the complete replacement of a major component. This long-term durability makes the total cost of ownership more predictable. For a potential buyer, a gunite pool represents a stable, long-lasting feature, while an aging vinyl pool might signal a future expense.

Which Pool Is Right for Your Long Island Home?

Choosing between a gunite and a vinyl liner pool comes down to your personal priorities. There’s no single right answer, but understanding how each option aligns with your budget, lifestyle, and long-term plans will help you make a confident decision. Think about what you want from your backyard oasis, not just for this summer, but for all the years to come. By weighing the key differences, you can find the perfect fit for your family and create the backyard you’ve always imagined.

Your Budget and Timeline

Your budget is one of the most practical starting points. Gunite pools represent a larger upfront investment, often starting at $50,000 or more, due to the custom construction process. However, this cost covers a highly durable, permanent structure. On the other hand, vinyl liner pools are more budget-friendly at the start, making them an accessible option for many homeowners. The main financial consideration with vinyl is the eventual liner replacement, which you can expect to do every 8 to 15 years. This is a significant future expense to keep in mind. Your timeline also matters. A custom gunite swimming pool takes longer to build, while a vinyl pool installation is typically faster.

How You Plan to Use Your Pool

Think about how your family will enjoy the pool day to day. If you’re dreaming of a one-of-a-kind resort-style backyard with unique features like built-in benches, waterfalls, or an attached spa, a gunite pool is your best bet. Its flexibility allows for complete creative control, making it ideal for homeowners who want a true luxury experience. If your goal is a beautiful, comfortable pool for swimming, playing, and relaxing, a vinyl liner pool is an excellent choice. Vinyl liners offer a smooth, non-abrasive finish that’s gentle on feet and swimsuits. Plus, with a wide variety of colors and patterns available, you can still achieve a stunning look that complements your home’s masonry and landscape.

Making the Final Decision

So, how do you choose? Opt for gunite if you want a high-end, custom-designed pool and are prepared for a higher initial cost and a longer installation period. It’s an investment in a permanent, uniquely shaped structure that can significantly add to your property’s value. Choose a vinyl liner pool if your priority is a lower upfront cost and a quicker installation. Vinyl pools are fantastic for family fun and offer beautiful aesthetics, but be prepared for the long-term maintenance of protecting the liner from damage and budgeting for its eventual replacement. Ultimately, the best pool is the one that fits your vision and financial plan for your Long Island home.

Related Articles

Frequently Asked Questions

Is a gunite pool really worth the higher initial cost? Think of it as a long-term investment in your property. While the upfront cost for a gunite pool is higher, you are paying for a permanent, steel-reinforced structure that can last for more than 50 years. This durability and the perception of luxury often translate to a higher home value. A vinyl pool costs less to install, but you will need to factor in the significant expense of replacing the liner every decade or so, which can make the total cost of ownership higher over time.

I have an active family with kids and pets. Which pool is more durable for daily use? For a busy backyard, gunite is the tougher choice. The plaster or aggregate finish is incredibly resilient and can stand up to dog claws, dropped pool toys, and general wear and tear without the constant worry of a puncture. While vinyl liners are strong, they are more susceptible to tears or holes from sharp objects, which means you’ll need to be more mindful during active play.

What is the single biggest long-term expense I should plan for with each pool type? The most significant recurring cost is very different for each pool. With a vinyl liner pool, your biggest future expense will be replacing the entire liner, which is typically needed every 7 to 10 years. For a gunite pool, the major long-term maintenance task is resurfacing the interior finish every 10 to 15 years. This refreshes the pool’s appearance, but it’s important to remember the underlying concrete shell remains intact for decades.

My backyard has a unique shape. Does that mean I have to choose gunite? If you want a pool that perfectly follows the curves of your landscape or fits into an unusual space, then gunite is your best option. Its on-site construction method allows for complete design freedom, so you can create any shape you can imagine. Vinyl pools are limited to pre-manufactured shapes, so while there are many beautiful classic designs to choose from, you won’t get that same custom-fit solution for a challenging property.

How much more work is a gunite pool to maintain week to week? The main difference in weekly maintenance comes down to water chemistry. Because a gunite pool’s plaster surface is porous, you need to be a bit more diligent about keeping the pH and alkalinity levels balanced to protect the finish from etching. A vinyl liner is non-porous, which can be slightly more forgiving. However, both pool types require regular testing, chemical balancing, and cleaning to stay sparkling and safe for swimming.

Share this page:
An outdoor kitchen contractor in Long Island, NY, reviewing design plans on a modern patio.

How to Find the Best Outdoor Kitchen Contractor in Long Island

Moving beyond a simple grill on the patio and creating a true outdoor kitchen is about designing a space that works perfectly for you. It’s a chance to build a custom layout with ample counter space, integrate high-end appliances, and choose beautiful finishes that complement your home’s style. This level of personalization is what transforms a backyard into a genuine extension of your indoor living area. Achieving this requires a team that can handle every phase of the project with precision and creativity. A professional Outdoor Kitchen Designer Installer Contractor Long Island NY combines your unique vision with expert craftsmanship to build a space that is both highly functional and deeply personal, making your outdoor entertaining dreams a reality.

Key Takeaways

  • Focus on finding the right builder: Your project’s success depends on hiring an experienced, licensed, and insured contractor. A true professional will manage everything from the initial design and permits to the final installation, making the process smooth and stress-free.
  • Choose materials that last: For a Long Island outdoor kitchen, durability is non-negotiable. Opt for weather-resistant materials like natural stone and stainless steel to ensure your investment can handle coastal weather and look great for years.
  • Plan your project before you build: A detailed design and a clear budget are your best tools for a successful outcome. Knowing what you want and what you can spend helps you make smart decisions and prevents costly changes down the road.

What to Expect from an Outdoor Kitchen Contractor

Hiring a contractor for your outdoor kitchen is a big step, and knowing what to expect can make the process feel much more manageable. A great contractor is more than just a builder; they are your partner in creating a space that fits your lifestyle and home perfectly. From the initial sketches to the final cleanup, they guide you through every phase. This involves detailed planning sessions, professional construction using durable materials, and the flawless integration of all your appliances. They handle the technical details so you can focus on planning your first backyard barbecue. A true professional ensures the final product is not only beautiful but also functional and built to last for years of enjoyment.

Custom Design and Planning

The first thing a great contractor will do is sit down with you to create a custom design. This isn’t just about picking a grill; it’s about mapping out the entire space. They’ll help you think through the layout, making sure there’s a natural flow between your cooking, prep, and dining areas. Expect them to create a detailed blueprint that considers everything from the placement of your refrigerator to the amount of counter space you need. This collaborative design process ensures the final kitchen is tailored specifically to how you and your family want to use it. A thoughtful plan is the foundation of a successful project.

Professional Installation and Construction

Once the design is finalized, the focus shifts to building. Professional installation is where a contractor’s expertise really shines. This process is far more complex than just setting up some appliances on your patio. It involves building a sturdy, level foundation and using construction techniques that ensure your kitchen can withstand the elements. A skilled team handles everything from masonry and stonework to running utility lines for gas, water, and electricity. Their experience in home construction guarantees that every component is installed safely and correctly, giving you a durable and reliable outdoor cooking space.

Sourcing High-Quality Materials

The materials used in your outdoor kitchen are critical for its longevity, especially in Long Island’s coastal climate. A reputable contractor will guide you toward options that are both beautiful and incredibly durable. They have access to high-quality materials and know which ones perform best outdoors. Expect them to recommend weatherproof choices like stainless steel for cabinetry and tough surfaces like granite or natural stone pavers for countertops and patios. Choosing the right materials from the start saves you from costly repairs and maintenance down the road, ensuring your investment looks great for years to come.

Seamless Appliance Integration

An outdoor kitchen is only as good as its appliances, and a skilled contractor ensures they all work together perfectly. They will design cabinetry and countertops to fit your specific grill, sink, and refrigerator for a clean, built-in look. Beyond just making things fit, they manage the technical side of appliance integration. This includes ensuring proper ventilation for grills, connecting plumbing for sinks and ice makers, and running safe electrical wiring for outlets and lighting. This attention to detail is what transforms a collection of appliances into a fully functional and cohesive outdoor kitchen where everything is exactly where you need it.

Choosing the Best Materials for Your Outdoor Kitchen

Selecting the right materials is one of the most important steps in creating an outdoor kitchen that lasts. Here on Long Island, our beautiful coastal environment also means we deal with salt air, humidity, and changing seasons. Your material choices need to stand up to these elements while matching the style of your home. A well-designed outdoor kitchen uses a combination of durable, weather-resistant, and beautiful materials to create a space that’s both functional and inviting for years to come. It’s about finding the perfect balance between strength and style, ensuring your investment looks great and performs well no matter the weather.

Durable Countertops for a Coastal Climate

Your countertops are the workhorse of your outdoor kitchen, so they need to be tough. For a coastal climate like ours, you want materials that resist moisture, salt, and sun without staining or fading. We highly recommend materials like porcelain and natural stone for this reason. Granite is another excellent choice, known for its incredible durability and timeless look. These options are not only resilient against the elements but are also easy to clean, which means you can spend more time enjoying your space and less time on upkeep. They provide a beautiful, high-end finish that truly completes your outdoor cooking area.

Weatherproof Cabinetry and Storage

Outdoor kitchen cabinetry needs to do more than just look good; it has to protect your tools and supplies from the weather. Metal frames, particularly those made from stainless steel, are a top choice for their strength and resistance to rust and corrosion. To ensure your investment lasts, look for marine-grade materials, which are specifically designed to withstand harsh, wet environments. This type of construction ensures your cabinets won’t warp or rot after a few seasons. Gappsi’s custom masonry work can also create durable, built-in storage solutions that blend seamlessly with your patio and home.

Essential Appliances and Grilling Gear

When it comes to appliances, you can’t simply move your indoor equipment outside. Outdoor appliances are built differently, using materials like stainless steel that can handle temperature swings and moisture without failing. This includes everything from your grill and side burners to your refrigerator, sink, and ice maker. Investing in products specifically rated for outdoor use is crucial for both safety and longevity. The great thing about a custom outdoor kitchen is that the cabinetry and layout can be designed to accommodate any cooking appliance you want, giving you a truly personalized and functional setup.

Must-Have Features for Long Island Homes

A great outdoor kitchen is more than just a place to cook; it’s a destination for entertaining. To make your space truly functional, consider incorporating features like a built-in grill, which creates a sleek, integrated look. Ample counter space is another must-have for prepping food and serving guests. Don’t forget about creating a comfortable atmosphere. Adding a seating area under one of our custom pavilions or pergolas provides shade and defines the space, making it the perfect spot for family and friends to gather while you cook.

Popular Design Ideas

If you’re looking for design inspiration, modular outdoor kitchens are becoming very popular. They offer a sleek, modern aesthetic and can be customized to fit your specific needs and backyard layout. Another growing trend is the use of sustainable and natural materials that blend with the surrounding landscape. This approach creates a cohesive, eco-friendly design that feels both stylish and grounded. For more visual ideas and to see how these concepts come to life, you can find plenty of inspiration from our past projects. A thoughtful design ensures your outdoor kitchen is a beautiful extension of your home.

How to Hire the Right Outdoor Kitchen Contractor

Choosing the right contractor is the single most important decision you’ll make for your outdoor kitchen project. This is the team that will turn your vision into a functional, beautiful space where you’ll make memories for years to come. A great contractor doesn’t just build; they guide you through the entire process, from initial design to final installation, ensuring every detail is perfect. They understand the unique challenges of building on Long Island and have the expertise to create a durable and stunning addition to your home. Finding a partner with a proven track record in high-end masonry and outdoor living is key to a smooth and successful project. The right team makes all the difference, transforming a complex construction job into an exciting creative process.

Verify Their Experience and Specialization

When you start talking to contractors, ask specifically about their experience with outdoor kitchens. This is a specialized field that requires more than general construction knowledge. A good rule of thumb is to look for a builder who has completed at least 25 outdoor kitchens and has been specializing in them for several years. This level of experience means they understand the nuances of outdoor construction, from selecting weather-resistant materials to properly running utility lines for water, gas, and electricity. They’ll know how to design a layout that is both beautiful and practical, ensuring your new kitchen can withstand Long Island’s coastal climate while functioning perfectly for your family’s needs.

Check for Proper Licensing and Insurance

This step is straightforward but absolutely critical. Before you sign any contracts, ask for proof of licensing and insurance. A reputable contractor will have this information readily available and will be happy to share it with you. Proper licensing ensures that the contractor meets local and state regulations, while comprehensive insurance protects you and your property from any liability in case of an accident during construction. Think of it as your safety net. Working with a fully licensed and insured company gives you peace of mind, knowing that your project is in professional hands and that you are financially protected from start to finish.

Review Their Portfolio and Design Style

A contractor’s portfolio is their resume, and it’s your best window into their quality of work and design aesthetic. As you look through photos of their past projects, remember that you’re seeing their absolute best work. Pay close attention to the details. Do the lines look clean? Is the stonework precise? How well are the appliances integrated into the cabinetry? Most importantly, does their style align with your vision? Whether you’re dreaming of a sleek, modern setup or a rustic, stone-clad kitchen, you want to see examples that resonate with you. Looking at the porcelain and natural stone they’ve used can also give you a great sense of their craftsmanship.

Assess Communication and Project Management

You’re about to enter a partnership with your contractor, so clear and consistent communication is essential. During your initial conversations, pay attention to how they listen to your ideas and answer your questions. A great contractor will have a structured process and will be able to explain it clearly. Ask who your main point of contact will be and how they will provide updates on the project’s progress. You want a team that is organized, responsive, and transparent. Feeling comfortable and confident in your contractor’s communication style will make the entire home remodeling process much more enjoyable and stress-free.

Red Flags to Watch For

Trust your instincts during the hiring process. If something feels off, it probably is. Be wary of any contractor who can’t provide a portfolio of their outdoor kitchen work or seems hesitant to share references. Vague estimates that don’t mention costs for utilities or permits are another major red flag. A professional will discuss these details upfront. Similarly, be open about your budget from the very first conversation. A trustworthy contractor will respect your budget and help you make smart decisions to stay within it. Avoiding contractors who overpromise or pressure you into a quick decision will help you find a reliable partner for your project.

Understanding the Design and Installation Process

Bringing an outdoor kitchen to life is an exciting project, and knowing what to expect can make the entire experience smooth and enjoyable. A professional contractor will guide you through a structured process, turning your initial ideas into a fully functional and beautiful space. From the first conversation to the final sign-off, each step is designed to ensure your vision is realized perfectly. Think of it as a collaborative journey where your input is combined with expert design and construction skills. This process ensures every detail is considered, from the layout and materials to local regulations and the final installation, resulting in an outdoor kitchen you’ll love for years.

The Initial Consultation and Site Visit

The first step is a conversation. This is where you share your vision, your must-haves, and how you imagine using the space. A project manager will visit your home to see the area, take precise measurements, and discuss the possibilities. This on-site visit is crucial because it allows the team to assess factors like sun exposure, existing utility lines, and the overall flow of your backyard. It’s the perfect time to ask questions and explore different design ideas. This initial meeting lays the groundwork for the entire project, ensuring that the proposed design is both beautiful and practical for your specific property.

Developing the Design and Selecting Materials

After the consultation, the design phase begins. Your contractor will create a detailed plan or even a 3D rendering so you can visualize the final product. This is where you’ll finalize the layout, including the placement of appliances, countertops, and seating areas. You’ll also select the materials. For a Long Island home, choosing durable, weather-resistant options is key. Your contractor can guide you through high-quality choices for everything from the base structure to the countertops. Selecting the right porcelain and natural stone not only defines the kitchen’s style but also ensures it withstands coastal weather, giving you a lasting investment.

Navigating Permits and Local Regulations

Building an outdoor kitchen often involves connecting utilities like water, gas, and electricity, which means you’ll likely need permits. This part of the process can feel complicated, but an experienced contractor will handle it for you. They understand the local building codes and regulations in towns across Long Island, from Suffolk to Nassau County. Your contractor will prepare and submit all the necessary paperwork, coordinate inspections, and ensure your project is fully compliant. This service is a major benefit of working with a professional, as it saves you time and prevents potential headaches down the road.

The Construction and Installation Timeline

Once the design is approved and permits are secured, construction begins. Many modern contractors, including Gappsi, build components of your kitchen off-site in a controlled environment. This approach minimizes disruption to your home and yard and can speed up the overall timeline. When the components are ready, the on-site installation is often completed quickly and efficiently. Your project manager will keep you updated throughout the process, providing a clear timeline so you know what to expect. This streamlined method is also used for other structured projects, like installing custom pavilions and pergolas.

Final Walk-Through and Project Completion

The final step is the most rewarding. Once the installation is complete, your contractor will do a final walk-through with you. This is your opportunity to inspect every detail of your new outdoor kitchen. You can test the appliances, check the finishes, and make sure everything is exactly as you envisioned. It’s the time to ask any final questions about using and caring for your new space. A reputable contractor won’t consider the job finished until you are completely satisfied. After the walk-through, all that’s left to do is fire up the grill and start making memories.

How to Budget for Your Outdoor Kitchen

Creating a budget for your outdoor kitchen is one of the most important first steps you can take. It’s easy to get swept up in the excitement of picking out grills and finishes, but a solid financial plan is what truly sets your project up for success. Think of your budget not as a restriction, but as a roadmap that guides every decision, ensuring the final result is exactly what you dreamed of without any stressful surprises. An outdoor kitchen is a significant investment that adds incredible value and enjoyment to your home. Taking the time to plan your spending helps you and your contractor work together as a team, turning your vision into a beautiful, functional space where you’ll make memories for years to come. A clear budget empowers you to make informed choices, prioritize what matters most, and move forward with confidence.

Key Factors That Influence Cost

The total investment for an outdoor kitchen can range from around $15,000 for a simple setup to well over $100,000 for a high-end, custom design. Several key elements will shape your final cost. The overall size and complexity of the layout are the biggest drivers, along with the materials you select. For Long Island’s coastal climate, choosing durable, weather-resistant options is a must. Investing in high-quality porcelain and natural stone for countertops and patios will pay off in the long run by minimizing maintenance and repairs. The number and grade of appliances, from the grill and refrigerator to sinks and side burners, also significantly impact the price. Finally, don’t forget to account for the professional installation of utility lines for gas, water, and electricity, which is essential for both safety and function.

Smart Budgeting Strategies

The best way to keep your project on track financially is to be open and honest about your budget with your contractor from the very first conversation. A clear number allows your designer to create a plan that aligns with your goals and financial comfort zone. I always recommend making a list of priorities: what are your absolute must-haves, and what features are nice-to-haves that could potentially be added later? This gives you flexibility if you need to make adjustments. Working with a professional masonry designer during this phase is invaluable. They can help you allocate funds effectively and suggest creative solutions to get the look you want while respecting your budget, preventing expensive changes once construction is underway.

Understanding Financing and Payment Schedules

Before you sign any contracts, it’s crucial to understand the financial terms. Make sure you know the difference between an estimate, which is a ballpark figure, and a fixed quote, which is a firm price for the work detailed in your agreement. Ask your contractor how they handle “change orders,” which are modifications to the original plan that can increase the final cost. A transparent contractor will have a clear process for this. Your contract should also outline a payment schedule tied to specific project milestones, like the completion of the foundation or the installation of appliances. This approach is a hallmark of professional home remodeling and ensures you only pay for work as it’s completed, giving you peace of mind throughout the process.

How Seasonal Timing Can Affect Your Project

Believe it or not, the time of year you begin your outdoor kitchen project can influence both the timeline and cost. Spring and summer are the busiest seasons for outdoor construction on Long Island, meaning contractors are in high demand and schedules are tight. If you plan your project during the off-season, like late fall or early winter, you may find more scheduling flexibility. An experienced local contractor knows how to manage a project through Long Island’s unpredictable weather patterns, ensuring progress continues safely. Planning ahead for complementary structures, such as pavilions and pergolas, at the same time can also create a more efficient and cohesive construction process, regardless of the season you start.

Maintaining Your New Outdoor Kitchen

Your outdoor kitchen is the heart of your backyard, a place for making memories and sharing meals. To keep it looking and functioning beautifully for years, a little routine maintenance is key. Think of it as protecting your investment. When your kitchen is built with expert masonry and high-quality materials, the foundation for longevity is already there. Still, regular care ensures it’s always ready for your next gathering.

Proper upkeep prevents small issues from becoming costly problems and keeps your appliances in top working order. By creating a simple maintenance plan, you can avoid common pitfalls and ensure your outdoor kitchen remains a source of pride and enjoyment. From quick cleanups after a barbecue to seasonal preparations for our Long Island winters, these simple habits will make all the difference.

A Simple Maintenance Checklist

Keeping your outdoor kitchen in great shape doesn’t have to be a major chore. A few simple habits can make a world of difference. After each use, wipe down countertops and appliance surfaces to prevent stains and buildup. Clean your grill grates while they’re still warm to easily remove any food residue. It’s also a good practice to regularly check your gas connections for leaks and ensure your propane tank has enough fuel for your next cookout. Finally, empty trash receptacles promptly to keep pests away and use fitted covers for your grill and appliances to protect them from the elements.

Seasonal Care and Winterizing Tips

Living on Long Island means preparing your outdoor kitchen for changing seasons. As colder weather approaches, proper winterization is essential to prevent damage. Start by shutting off the water supply to your sink and ice maker, and drain the lines completely to avoid frozen, burst pipes. Disconnect the gas line to your grill and other appliances for safety. Give everything a deep clean to remove grease and food particles that can attract pests over the winter. Once clean and dry, cover all your appliances, cabinets, and furniture with heavy-duty, waterproof covers to shield them from snow, ice, and moisture. This small effort in the fall ensures a quick and easy startup next spring.

Strategies for Long-Term Protection

The best way to protect your outdoor kitchen long-term starts with the initial build. Choosing durable, weather-resistant materials is the most critical step. High-quality porcelain and natural stone for countertops and patios can withstand coastal weather without fading or cracking. Beyond material selection, periodic sealing is a fantastic strategy. Applying a quality sealant to stone surfaces every few years protects them from stains and water damage. If you notice any grout cracking or surfaces looking worn, consider professional restoration and sealing services to bring them back to life. Regular inspections will help you catch any minor wear and tear before it becomes a larger issue.

Solving Common Issues

Even the best-built outdoor kitchens can face occasional issues. One of the most important safety considerations is proper ventilation, especially if your kitchen is located under one of Gappsi’s beautiful pavilions and pergolas. Ensure your grill has adequate clearance and that smoke and fumes can escape easily. Grease buildup is another common problem, so be sure to clean your grill’s drip pan regularly to reduce the risk of flare-ups. Many potential problems, from poor drainage to cracked countertops, can often be traced back to an inexperienced contractor. Working with a specialist from the start is the best way to ensure your kitchen is designed and built to avoid these issues altogether.

Related Articles

Frequently Asked Questions

How long does it typically take to build an outdoor kitchen? The timeline can vary quite a bit depending on the complexity of your design and the permit process in your town. A straightforward project might take a few weeks from the start of construction, while a more elaborate kitchen with extensive masonry and utility work could take a couple of months. A good contractor will give you a clear and realistic timeline during the design phase, factoring in everything from material delivery to inspections.

What is the single most important factor when choosing materials for a coastal climate like Long Island? Durability against the elements is, without a doubt, the most critical factor. Here on Long Island, materials have to stand up to salt air, humidity, and freezing temperatures. You want to choose options like stainless steel for cabinetry and dense natural stone or porcelain for countertops because they resist corrosion, moisture, and temperature swings. Investing in weatherproof materials from the start is the best way to ensure your kitchen looks beautiful for years, not just a season or two.

Can I save money by using indoor appliances outside? This is a common question, but the simple answer is no. Indoor appliances are not built to withstand the elements. Moisture, humidity, and temperature changes can cause them to rust, short-circuit, and fail quickly, which is both a waste of money and a safety hazard. Outdoor-rated appliances are constructed with materials like stainless steel that are specifically designed to handle outdoor conditions, ensuring they operate safely and last for a long time.

How much does an outdoor kitchen really cost? The cost depends entirely on your vision, from the size and materials to the appliances you choose. A simple, compact kitchen might start around $15,000, but a large, custom-built space with high-end appliances, extensive stonework, and features like a sink or refrigerator can easily exceed $100,000. The best approach is to be upfront about your budget with your contractor. This allows them to design a kitchen that includes your must-have features while staying within a price range you’re comfortable with.

What happens if I want to change something after construction has started? It’s definitely possible to make changes, but it’s important to understand how they affect the project. Any modification to the original plan is handled through a “change order,” which is a formal document that details the new work and any associated costs or timeline adjustments. A professional contractor will have a clear process for this and will discuss the implications with you before proceeding. This transparency ensures there are no surprises and that you remain in control of the budget and schedule.

Share this page:

Fully Screened Vinyl Country Lane Gazebo Installation in Huntington, NY

Outdoor living spaces are becoming more popular on Long Island as homeowners seek ways to enjoy their backyards comfortably while staying protected from the elements. A screened gazebo is a great solution. Gappsi recently completed a 12′ x 14′ fully screened vinyl Country Lane Gazebo for a homeowner in Huntington.  This gazebo combines classic craftsmanship with modern materials, creating an elegant and practical space that keeps insects out and has become the highlight of the backyard.

A Custom Country Lane Gazebo Built for Comfort

The new gazebo is 12 feet by 14 feet, giving plenty of room for seating, relaxing, and entertaining. The homeowners wanted a spot to place outdoor furniture and enjoy time outside without worrying about mosquitoes or other insects common in Long Island’s warmer months.
To solve this, the gazebo has full screening that allows fresh air in while keeping insects out, making it comfortable to use from spring through fall.  Inside, a sitting area with outdoor furniture invites homeowners to relax, read, enjoy coffee, or host guests in a peaceful, bug-free setting.

Durable Vinyl Exterior for Long-Term Protection

A key feature of this gazebo is its vinyl-wrapped exterior. The whole structure is covered in high-quality vinyl, which has several advantages over traditional wood.  Vinyl-wrapped gazebos are durable and need little maintenance. Unlike wood, vinyl does not need regular staining, painting, or sealing. It also resists moisture, rot, and insect damage, making it a great choice for Long Island’s changing weather.
The clean white vinyl finish gives the gazebo a timeless look that fits many home styles in Huntington and nearby areas.  Thanks to its weather-resistant vinyl, homeowners can enjoy long-term use with minimal maintenance.

Natural Wood Ceiling with Rich Mahogany Finish

While the gazebo’s exterior features modern vinyl protection, its interior highlights the warmth and character of natural wood. The structure’s ceiling was intentionally left exposed, creating a classic gazebo aesthetic.  The wood ceiling has a mahogany finish, adding depth and richness to the inside. The darker color looks great next to the bright vinyl exterior, making the space even more attractive. charm, blending wood craftsmanship with modern durability, an approach many homeowners value.  The mahogany finish enhances the ceiling’s appearance and protects the wood, preserving its natural texture and grain.

Classic Roof Design with Decorative Cupola

Another eye-catching element of this gazebo installation is the cupola at the roof peak. Cupolas are a traditional architectural feature often found on gazebos, barns, and other classic structures.  Cupolas look attractive and can also help with ventilation, keeping the inside comfortable.
The cupola adds an extra layer of elegance to the overall design, making the structure a true focal point in the backyard. From a distance, the roofline and cupola lend the gazebo a refined, polished appearance that enhances the entire outdoor space.

A Mosquito-Free Outdoor Retreat

Screened gazebos are great for keeping out mosquitoes, which can make it hard to use outdoor spaces in the evening.  The screened design lets the homeowners relax insect-free, while enjoying fresh air and natural light.
This makes the gazebo ideal for:
  • Outdoor dining
  • Relaxing with family
  • Reading or working outside
  • Hosting friends and guests
  • Enjoying warm summer evenings
This gazebo creates a comfortable outdoor room that combines nature with protection.

Enhancing Outdoor Living in Huntington, NY

Backyard structures, such as gazebos, can significantly enhance a property’s value and usability. In communities like Huntington, where outdoor living is highly valued, a professionally installed gazebo becomes both a lifestyle upgrade and an attractive design feature.
This Country Lane gazebo by Gappsi shows how good design and craftsmanship can change a backyard. It provides a useful place to gather and adds beauty to the property.  More homeowners now see their backyards as extensions of their homes. By adding things like screened gazebos, patios, and outdoor kitchens, they can create great spaces for entertaining, relaxing, and enjoying nature.

Professional Gazebo Installation by Gappsi

Every gazebo installation requires careful planning, proper site preparation, and expert construction to last a long time. The Gappsi team specializes in designing and installing custom outdoor structures for each homeowner’s needs. From the first design to the final installation, the team pays close attention to every detail. The result is a gazebo that looks great and stands up to changing weather.
This 12′ x 14′ fully screened vinyl Country Lane gazebo in Huntington, NY, is another example of the quality outdoor projects Gappsi has completed across Long Island.

Creating the Perfect Backyard screened gazebo can transform a backyard by adding comfort, protection, and style for outdoor enjoyment.

The new Country Lane screened gazebo in Huntington, NY, offers just that: a peaceful, stylish, and practical space where the homeowners can enjoy the outdoors while staying safe from mosquitoes.  With its vinyl-wrapped exterior, mahogany wood ceiling, and classic roof cupola, this gazebo blends traditional craftsmanship with modern durability. It is a beautiful addition to the property and will provide relaxation and outdoor enjoyment for years to come.

Contact Gappsi Today

📍 Serving all of Long Island, NY — Nassau & Suffolk Counties
🌐 www.gappsi.com
📞 Call now for a free consultation and estimate!

SCHEDULE A MEETING TODAY WITH GAPPSI

Share this page:
Pavers with a wet look sealer showing the glossy, color-enhancing finish.

Best Paver Sealer Wet Look: Our Top 4 Picks

If you’ve ever wished you could bottle that rich, vibrant look your patio has right after a rainstorm, you’re not alone. That deep, saturated color that makes every stone pop is exactly what a high-quality sealer can achieve, giving your outdoor space a polished appearance all year long. A paver sealer wet look finish does more than just look good; it creates a permanent sheen that enhances your stonework day in and day out. But it’s not just about aesthetics. This protective coating is one of the smartest things you can do for your investment, guarding it against stains, sun fading, and pesky weeds.

Key Takeaways

  • It’s about protection, not just looks: A wet look sealer provides a beautiful glossy finish, but its main job is to create a durable barrier against UV rays, stains, and moisture, which helps your pavers last longer.
  • Proper preparation is non-negotiable: The secret to a flawless, even finish is starting with a completely clean and dry surface. Sealing over dirt or damp pavers is the number one cause of a cloudy or blotchy result.
  • Hiring a pro protects your investment: While you can apply sealer yourself, a professional service handles the intensive prep work and uses high-quality products correctly, preventing common mistakes and ensuring a durable finish.

What Is a Wet Look Paver Sealer?

If you love how your stone pavers look right after it rains, a wet look sealer is for you. It’s a special coating designed to give your patio, walkway, or driveway that rich, glossy sheen all the time. These sealers are typically high-solids acrylic formulas that darken the pavers just enough to make their natural colors pop, creating a vibrant, polished appearance. Think of it as a permanent enhancement that brings out the best in your stonework.

Beyond the beautiful finish, these sealers are a key part of paver maintenance. They create a protective barrier on the surface of the stone, which is essential for preserving its beauty and integrity over the long term. Whether you have brand new pavers or are looking to bring older ones back to life, applying a quality sealer is one of the best ways to protect your investment. Gappsi offers professional restoration and sealing services to ensure your outdoor spaces always look their best.

How It Creates That Signature Shine

That signature wet look comes from a liquid polymer that, when applied, forms a clear, durable film over the paver surface. This film acts like a lens, deepening the colors and creating a high-gloss finish that reflects light. It essentially locks in the saturated look that water creates, but without the moisture. Products like Techniseal’s high-gloss sealer for concrete pavers are specifically formulated to achieve this effect, giving your hardscape a clean, vibrant appearance that makes the entire space feel more refined and put-together.

Why It’s More Than Just a Good Look

While the aesthetic improvement is a major draw, the protective benefits are just as important. A wet look sealer guards your pavers against all sorts of potential damage. It helps prevent stains from oil, grease, and fallen leaves, making cleanup much easier. It also provides crucial UV protection to stop the sun from fading the beautiful colors of your porcelain and natural stone pavers. Plus, it hardens the sand in the paver joints, which helps prevent weed growth and keeps the pavers from shifting over time, ensuring your patio remains stable and beautiful for years.

A Look at the Best Wet Look Paver Sealers

When you’re ready to give your patio or driveway that polished, just-rained-on look, you’ll find plenty of sealers on the market. The key is finding one that delivers a beautiful finish and offers serious protection against the elements. We’ve worked with countless products over the years, and a few consistently stand out for their performance and durability. Here are four of the best wet look paver sealers that we recommend to homeowners looking for that perfect combination of style and strength.

Gappsi’s Professional-Grade Sealers

We’ve spent decades perfecting outdoor spaces, so we know exactly what Long Island pavers need to withstand our specific climate. That’s why we developed our own line of professional-grade sealers. These products are formulated to provide a rich, wet look that deeply enhances the color of your natural stone or concrete pavers. More importantly, they create a durable shield against UV damage, which prevents fading, and protect against common stains from spills or leaves. When you want a product you know is tough enough for our local weather and designed to keep your investment looking its best, our sealers are a reliable choice.

Eagle Sealer Products

If you’re aiming for a high-impact, super-glossy appearance, Eagle’s Clear Wet Look Sealer is a popular option for homeowners. As a solvent-based acrylic, it creates a noticeable sheen that makes paver colors pop. This sealer does a great job of protecting surfaces from moisture, UV fading, and everyday stains. It’s a solid all-around performer that typically keeps its vibrant look for about two to three years before a reapplication is needed. It’s a fantastic choice for a patio or pool deck where you want that striking, reflective finish.

Techniseal Solutions

Techniseal is another trusted name in the industry, and their WL4 high-gloss sealer is a fantastic product for concrete pavers and slabs. It’s specifically designed to create what they call a “permanent wet look,” preserving that fresh, clean appearance long after it’s applied. We like it because it not only makes pavers look great but also offers excellent protection against stains from oil or grease. This makes it a practical choice for driveways and outdoor kitchen areas where spills are more likely to happen. It helps keep your surfaces beautiful and simplifies cleanup.

Seal N Lock Options

For a more advanced formula, Seal ‘n Lock’s Ultra Wet Look® paver sealer is an impressive choice. This product uses what they call Nano Technology, which allows the water-based urethane-modified acrylic to penetrate deeper into the paver’s surface. This deep penetration creates an incredibly strong and long-lasting protective barrier from within. The result is a beautiful wet look that doesn’t just sit on the surface but truly enhances the stone. It’s a top-tier option for anyone looking for maximum durability and a rich, lasting finish for their outdoor living spaces.

What Are the Pros and Cons of Wet Look Sealers?

Choosing a sealer for your pavers is a big decision that impacts both the look and longevity of your outdoor space. Wet look sealers are a popular choice for a reason, but they aren’t a one-size-fits-all solution. Understanding the benefits and potential drawbacks will help you decide if that glossy, vibrant finish is the right move for your patio, walkway, or driveway. It’s all about weighing what you gain in appearance and protection against the specific needs of your property and lifestyle.

The Advantages You’ll Love

The most obvious benefit is the stunning visual transformation. A wet look sealer deepens and enriches the color of your pavers, making them pop with a vibrant, glossy sheen. It brings out the beautiful, natural tones in the stone that might otherwise look faded. Beyond aesthetics, these sealers offer serious protection. They form a durable barrier against UV rays that cause fading, and they repel stains from spills or leaves. This protective layer also helps lock the sand in the joints between pavers, which maintains the integrity of the surface and keeps weeds from sprouting. Proper restoration and sealing can truly extend the life of your investment.

Things to Keep in Mind

While the benefits are compelling, there are a few things to consider. The biggest factor is moisture. Applying a sealer to pavers that are even slightly damp can trap water underneath, leading to a cloudy or milky appearance that ruins the finish. This is why waiting for a dry stretch of weather and ensuring the surface is completely arid is critical. Another point is that some high-gloss sealers can make the surface a bit slippery when wet, which is an important safety consideration around swimming pools or on sloped walkways. Over-applying the product can also make this issue worse. These potential problems highlight why professional application is often the best route to ensure a flawless and safe result.

How Do You Choose the Right Sealer for Your Pavers?

Picking the right sealer can feel like a big decision, but it’s pretty straightforward when you know what to look for. The goal is to find a product that not only gives you the beautiful wet look you want but also provides serious protection for your investment. It’s about finding the perfect balance between aesthetics and durability, ensuring your patio, walkway, or driveway looks fantastic for years. Let’s walk through the key factors to consider so you can choose with confidence.

What to Look for in a Sealer

Think of a high-quality sealer as a shield for your pavers. Its main job is to protect them from the elements. You’ll want a sealer that offers excellent UV protection to prevent the sun from fading your pavers’ beautiful colors. It should also be water-resistant to guard against mold, mildew, and stains from spills. Another key feature is joint stabilization. A good sealer will harden the sand between your pavers, which helps stop weeds from sprouting and keeps ants from setting up camp. The best products offer a comprehensive defense that keeps your outdoor spaces looking clean and vibrant. Gappsi’s restoration and sealing services focus on using sealers that provide this complete protection.

Matching the Sealer to Your Pavers

Not all pavers are created equal, and neither are sealers. The right choice depends entirely on the material you’re working with. Porous surfaces like natural stone and concrete pavers absorb sealer differently than dense materials like porcelain. Using a sealer that isn’t compatible with your paver type can result in a blotchy finish, a white haze, or inadequate protection. Before you buy, confirm the sealer is formulated for your specific pavers. For instance, some wet look sealers are designed to deeply penetrate and enrich the color of natural stone, while others are made to form a protective film over the top. Always read the product specifications to ensure a perfect match.

Choosing a Sealer for Long Island Weather

Here on Long Island, our pavers face a unique set of challenges. From hot, humid summers to harsh, freezing winters, the weather can take a toll. A sealer for our climate needs to be tough. Look for a product that can handle the freeze-thaw cycles of winter, which can cause pavers to crack and shift. A breathable, water-based sealer is often a great choice because it allows moisture trapped beneath the surface to escape without clouding the finish. It also needs to stand up to salt if your patio or driveway is near areas treated with de-icing products. Choosing a sealer built for our specific weather is a critical step in any masonry project to ensure long-lasting results.

What’s the Best Way to Apply a Wet Look Sealer?

Applying a wet look sealer isn’t complicated, but it does require attention to detail. The secret to a flawless, lasting finish lies in proper preparation and application. Getting these steps right ensures your pavers look stunning and stay protected. We’ll walk through the entire process, from getting your pavers ready to avoiding common slip-ups that can derail your project.

How to Prep Your Pavers

Think of this as the most important step. Applying sealer to a dirty or damp surface is a recipe for disappointment. Before you even think about opening the sealer, your pavers must be completely clean and dry. This means scrubbing away all dirt, grime, oil stains, and any of that chalky white residue called efflorescence. A pressure washer can be a great tool here, but make sure you let the pavers dry thoroughly afterward, which can take at least 24 to 48 hours. A pristine surface allows the sealer to bond correctly, giving you that beautiful, even sheen. If the prep work feels overwhelming, our restoration and sealing services can handle it for you.

The Right Tools and How to Use Them

Once your pavers are prepped, it’s time to apply the sealer. The right tools make all the difference. For a smooth, consistent coat, use a garden sprayer that can handle solvents, a low-pressure sprayer, or a natural bristle brush. One tool you should absolutely avoid is a roller. Rollers tend to create bubbles and can leave an uneven, streaky finish on the textured surface of pavers. Also, check the weather forecast. The ideal time to apply sealer is on a mild, dry day with the temperature somewhere between 40 and 75 degrees Fahrenheit. This helps the sealer cure properly without drying too fast or too slow.

Common Application Mistakes to Avoid

A few common mistakes can turn your project into a headache, so let’s make sure you avoid them. The biggest error is applying sealer to pavers that are still damp. Even if they look dry on the surface, moisture can be trapped underneath, leading to a cloudy, milky finish that’s difficult to fix. Another major misstep is skipping the cleaning process. Sealing over dirt or stains just locks them in permanently and prevents the product from adhering properly. Be patient and give your pavers plenty of time to dry after cleaning. Taking your time ensures your beautifully sealed patio looks professional and lasts for years.

How Long Does a Wet Look Sealer Last?

One of the most common questions we get is about the longevity of a wet look sealer. It’s a great question, because you want to know your investment of time and money is going to pay off. Generally, a high-quality wet look sealer can last up to five years under the best conditions. However, “best conditions” can be a bit of a unicorn, especially here on Long Island where our patios and walkways face everything from blazing summer sun to winter ice. Think of your sealer as a hardworking shield for your beautiful pavers. Its main job is to protect against moisture, UV rays, stains, and everyday wear and tear, which is crucial for preserving the beauty of your outdoor living space.

The actual lifespan really depends on a few key variables. The amount of foot traffic your patio gets, its exposure to direct sunlight, and how well the surface was prepared before application all play a huge role. A walkway that sees constant use will naturally show wear faster than a quiet, shaded seating area. For these high-traffic spots or surfaces that get a lot of direct sun, you might find that you need to reapply a maintenance coat every couple of years to keep that rich, glossy finish looking its best. Creating a regular maintenance schedule is the best way to protect your pavers for the long haul, and our professional restoration and sealing services can help you figure out a plan that makes sense for your specific space.

What Makes Your Sealer Last Longer

Several key factors determine how long your wet look sealer will maintain its shine and protective qualities. First is the quality of the sealer itself. Products with a higher percentage of solids tend to form a thicker, more durable film, offering better protection and a longer-lasting gloss. Another major factor is the environment. A patio that’s shaded for most of the day will hold its seal longer than one that bakes in the sun. The type of porcelain and natural stone you have can also play a role, as some materials are more porous than others. Proper application on a thoroughly cleaned and completely dry surface is also critical for maximum adhesion and durability.

Signs It’s Time to Reapply

Knowing when to reapply sealer is all about observation. Your pavers will give you some clear signals. The most obvious sign is that the wet look has started to fade and the surface looks dull or dry. You might also notice that water no longer beads up on the surface when it rains; instead, it soaks in. This is a key indicator that the protective barrier is wearing down. In some cases, you might see peeling or flaking, which often points to an issue with the initial application, like moisture being trapped underneath. If your pavers are looking tired or are getting harder to clean, it’s probably time for a fresh coat.

How Do You Maintain Sealed Pavers?

Applying a wet look sealer is a fantastic way to enhance and protect your patio, walkway, or driveway. But the work doesn’t stop once the sealer is dry. To keep that beautiful, glossy finish looking its best for years to come, a little routine maintenance is essential. Proper care not only preserves the aesthetic appeal of your pavers but also extends the life of the sealant, protecting your investment against the elements. Think of it as simple upkeep that pays off big time. By following a few straightforward tips for cleaning and long-term protection, you can ensure your outdoor space remains a stunning feature of your home.

Simple Cleaning Tips

Keeping your sealed pavers clean is easier than you might think. The best approach is gentle and consistent. Start by regularly sweeping away leaves, dirt, and other debris to prevent stains and mildew from setting in. For a quick refresh, a simple rinse with a garden hose often does the trick. If you encounter spills, like from a barbecue or a dropped drink, try to clean them up right away with a mild soap and water. Avoid using harsh, acidic cleaners or a high-pressure washer, as these can strip away the sealer and damage the paver surface. For stubborn stains that won’t budge, it’s best to call in experts who offer professional cleaning and restoration.

How to Protect Your Pavers for the Long Haul

Long-term protection is all about preserving the integrity of the sealant. After the initial application, it’s crucial to let the sealer fully cure for at least 24 hours before walking on it or placing furniture. This prevents peeling and ensures a durable bond. Every season, take a walk around your patio or driveway to inspect for any signs of wear, paying close attention to high-traffic areas. Most sealers will need to be reapplied every three to five years to maintain that vibrant wet look and protective barrier. When it’s time to reapply, ensuring the surface is perfectly clean is the most important step for a lasting finish. A professional resealing will guarantee your pavers are properly prepped and sealed.

How Much Does Professional Paver Sealing Cost?

When you start looking into professional paver sealing, you’ll find that prices generally fall between $0.75 and $2.00 per square foot here on Long Island. This range can shift based on a few key things: the current condition of your pavers, the type of material they’re made from, and the total size of your patio, walkway, or driveway. For example, older pavers that need extensive cleaning or have a lot of weeds will likely be on the higher end of that scale. It’s important to remember that this price isn’t just for a can of sealer. It covers a complete service designed to protect and beautify your investment for years to come.

A professional quote typically includes a thorough power washing to remove dirt and grime, re-sanding the joints between the pavers, and the precise application of a high-quality sealer. Think of it as a full spa treatment for your outdoor surfaces. The goal is to restore their original beauty and shield them from the elements. At Gappsi, our restoration and sealing services are tailored to handle the specific challenges of our local climate, ensuring your pavers look great and last longer. Getting a professional estimate is the best way to understand the exact cost for your project and what that investment covers, giving you a clear picture of how to best protect your outdoor space.

DIY vs. Professional Application

Going the DIY route might seem like a good way to save money, and for small, simple projects, it can be. However, sealing pavers correctly involves more than just rolling on a coat of sealer. A professional job, which usually costs between $1.50 and $2.00 per square foot, includes critical prep work that makes all the difference. This means a deep, powerful cleaning to lift stubborn stains and organic growth, followed by adding new sand to the joints. This step is essential for stabilizing the pavers and preventing weeds. When you hire a professional, you’re paying for their expertise, commercial-grade equipment, and premium products that deliver a flawless, even finish that lasts.

Why Professional Sealing Pays Off

Investing in professional sealing is really about protecting your larger investment: your beautiful paver patio or driveway. A pro knows exactly how to handle different materials, from porous natural stone to durable porcelain pavers, using the right cleaning methods and sealers for each. This expertise prevents costly mistakes, like trapping moisture or creating a cloudy finish, which can be difficult and expensive to fix. Professionals also use high-quality sealants that offer superior protection against UV rays, stains, and water damage. In the long run, this expert application extends the life of your pavers, keeps them looking fantastic, and saves you money on future repairs and intensive maintenance. It’s a smart move for maintaining your home’s value and curb appeal.

Related Articles

Frequently Asked Questions

Will a wet look sealer make my patio slippery, especially around a pool? This is a great question, and the answer is that it can. High-gloss sealers create a smooth, non-porous film that can reduce traction, particularly when it gets wet. If you’re sealing an area around a swimming pool or a sloped walkway, safety is key. You can ask your professional installer about adding a non-slip additive to the sealer. This creates a slightly textured finish that provides more grip without significantly dulling the shine.

How often will I really need to reseal my pavers here on Long Island? While a high-quality sealer can last up to five years, the real timeline depends on your specific property. A patio that gets intense, direct sun all day or a walkway with heavy foot traffic will likely need a maintenance coat every two to three years to keep it looking its best. The key is to watch for the signs. When you notice the glossy finish has faded or that rainwater is soaking in instead of beading up, it’s time to think about resealing.

What happens if I apply the sealer and it looks cloudy or hazy? A cloudy or milky white haze is almost always caused by one thing: trapped moisture. This happens when a sealer is applied to pavers that weren’t completely dry. Unfortunately, it’s not an easy fix and usually requires stripping the sealer off with a special solvent and starting the process over. This is one of the biggest reasons we recommend professional application, as we can ensure the surface is perfectly prepped and arid before any product is applied.

Can I apply a new coat of wet look sealer over an old one? It depends on the condition of the existing sealer. If the old coat is simply faded but still intact, you can often clean the surface thoroughly and apply a new coat right on top. However, if the old sealer is peeling, flaking, or has turned cloudy, it must be completely stripped off first. Applying a new layer over a failing one will only cause the new coat to peel off as well, so a clean slate is essential for a lasting finish.

Is a solvent-based or water-based sealer better for my pavers? Both types have their advantages, and the best choice often depends on the paver material and the finish you want. Solvent-based acrylic sealers tend to penetrate deeply and create a very rich, high-gloss finish that really makes colors pop. Water-based sealers are more environmentally friendly, have a much lower odor during application, and offer excellent breathability. This breathability is a great feature for our climate, as it allows any moisture vapor from under the pavers to escape without clouding the finish.

Share this page: