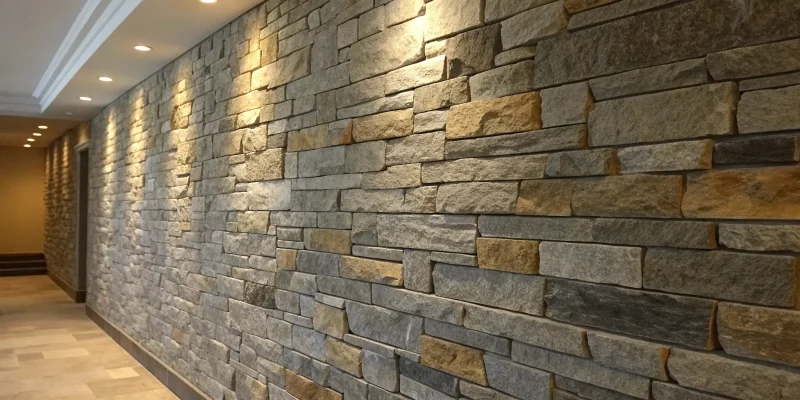
Few home improvement projects offer the same dramatic impact as a stone accent wall. It introduces a natural, organic element that brings warmth and texture to any interior space. While the final result looks complex and high-end, the process itself is more straightforward than you might think. This guide demystifies the entire stone accent wall installation, breaking it down into clear, manageable steps. We’ll cover the essential prep work that guarantees a lasting bond, the right way to apply adhesive, and the techniques for cutting and placing stone for a balanced, beautiful pattern. Consider this your complete roadmap to creating a stunning feature wall with confidence.
Key Takeaways
- Proper Prep is Non-Negotiable: The success of your accent wall depends on the prep work. A clean surface, a moisture barrier, and a cement board backing are the essential first steps for a durable, long-lasting finish.
- A Methodical Approach Creates a Natural Look: Plan your stone layout on the floor before you begin to avoid unnatural patterns. Work from the bottom up and take your time to ensure each stone is secure and your lines are clean.
- Know When to Call in a Professional: While a simple wall can be a great DIY project, hiring an expert for large or complex installations is a smart investment that guarantees a flawless result and helps you avoid costly mistakes.
What You’ll Need for Your Stone Accent Wall
Before you can bring that beautiful stone accent wall to life, you’ll need to gather the right supplies. Think of it as your project’s shopping list. Having everything on hand before you start makes the entire process much smoother and more enjoyable. From the star of the show—the stone itself—to the tools that will help you get that perfect finish, getting organized is the first step toward a stunning result. We’ll walk through the four main categories of materials and tools you’ll need to get the job done right.
Choosing Your Stone Veneer
The first, and most exciting, step is selecting your stone. When you’re browsing options, you’ll find that natural stone veneer comes in various thicknesses, usually between 0.4 and 1.75 inches. This isn’t just a minor detail; the thickness affects the final look and the installation method. A thicker stone might offer a more rustic, dimensional feel, while a thinner one can create a sleek, modern look. Take your time exploring Gappsi’s wide selection of porcelain and natural stone to find a style that truly fits your home’s personality and your design vision.
The Right Adhesives and Mortars
To make sure your beautiful stone veneer stays put for years to come, you need the right foundation. A common mistake is applying the stone directly to drywall. For the best adhesion and long-term durability, it’s always recommended to install a cement board over your existing wall first. This creates a solid, stable surface for the mortar to grip onto. Using the correct polymer-modified mortar is also crucial, as it’s specially formulated to handle the weight of the stone and create a powerful bond. These expert masonry techniques are what ensure a lasting, professional-quality finish.
Tools for Cutting and Shaping
Unless you’re incredibly lucky, you’ll need to cut some stones to fit perfectly around outlets, corners, and the edges of the wall. For clean, precise cuts, a wet saw and an angle grinder are your best friends. A wet saw uses water to keep the blade cool and reduce dust, making it ideal for straight cuts through the stone. An angle grinder is perfect for smaller, more intricate adjustments or shaping curves. Having both tools on hand will give you the flexibility to handle any cutting challenge and ensure every piece of stone fits just right.
Essential Safety Gear
This part is non-negotiable. Your safety should always come first. Before you even open a bag of mortar, make sure you have a good pair of gloves to protect your hands from irritation. When it’s time to cut the stone, safety goggles and a dust mask are absolute must-haves. Cutting stone creates fine dust and small chips that you definitely don’t want in your eyes or lungs. It only takes a few seconds to put on your safety gear, and it’s a simple step that protects you throughout the entire project.
How to Prep Your Wall for Stone Veneer
Before you even think about mixing mortar, let’s talk about prep work. I know it’s the least glamorous part of any project, but getting your wall ready is the single most important step to ensure your stone veneer looks amazing and lasts for decades. A properly prepared surface prevents issues like moisture damage, cracking, or stones falling off down the line. Think of it as building a solid foundation—without it, even the most beautiful stonework can fail.
The goal is to create a stable, moisture-resistant surface that can securely hold the weight of the stone and mortar. This involves a few key stages that you can’t afford to skip. First, you’ll need to completely clear and protect your work area. Then, you’ll address the wall itself by applying a moisture barrier and installing the right kind of backing material, like a cement board. Finally, you’ll want to do a quick check to make sure your wall’s structure is up to the task. While stone veneer is relatively lightweight, you still want peace of mind. Taking the time to do this right sets you up for a smooth installation and a flawless finish. If you’re feeling unsure about any of these steps, our masonry experts are always here to help.
Clear and Protect Your Workspace
First things first: clear the room. Move any furniture, rugs, and decor out of the space entirely. For items that are too big to move, cover them completely with heavy-duty plastic sheeting and tape it down. This project will create a lot of dust, and you’ll be surprised where it can end up. Cover your floors with drop cloths to protect them from scratches and mortar spills. If you have hardwood or tile floors, it’s a good idea to lay down a layer of thin cardboard or rosin paper under the drop cloths for extra protection against dropped tools or stones. Taking 30 minutes to protect your workspace will save you hours of cleanup later.
Prep the Surface and Add a Moisture Barrier
If you’re installing stone veneer over a surface like drywall or wood panels, adding a moisture barrier is a must. The mortar used to apply the stone contains a lot of water, which can seep into porous surfaces and cause rot, mold, or structural damage over time. In fact, most building codes require a moisture barrier for this type of installation. You’ll typically use a water-resistant building paper or asphalt-saturated felt, overlapping the seams and securing it to the wall with staples. This simple layer acts as a shield, protecting the integrity of your wall and ensuring your stone accent wall stands the test of time.
Install the Right Backing Material
While you can technically install stone veneer over drywall, it’s not the best approach. For a truly durable and professional-looking finish, you should apply the stone to a cement board. Drywall can degrade when exposed to the moisture in the mortar, weakening the bond over time. Cement board, on the other hand, is designed to handle wet conditions without swelling, crumbling, or losing its strength. It provides a much more stable and rigid surface for the mortar to adhere to, creating a stronger, more permanent bond for your stone. Think of it as the ideal canvas for your stonework.
Check for Structural Support
One of the great things about stone veneer is that it’s lightweight enough for most interior walls. Generally, a standard wood-framed wall built with 2×4 or 2×6 studs is perfectly capable of supporting the added weight without any extra reinforcement. Before you start, use a stud finder to locate the studs in your wall—you’ll need to screw your cement board directly into them. If you have an older home, or if you’re unsure about your wall’s construction, it’s always a good idea to consult a professional. A quick inspection can give you the confidence that your wall is ready for its beautiful new finish. Our home remodeling team can easily assess your structure.
Your Step-by-Step Installation Guide
Ready to bring your stone accent wall to life? Once your wall is prepped, the installation process can begin. Think of it like putting together a beautiful, textured puzzle. Taking your time with each step is the key to getting that professional, high-end look you’re after. We’ll walk through the process together, from laying the first stone to applying the final protective coat. With a little patience and the right technique, you’ll have a stunning feature wall that completely transforms your space.
Start from the Bottom and Work Up
The golden rule of installing stone veneer is to start at the bottom and work your way up. This method uses gravity to your advantage. Each new row of stones gets support from the row beneath it, which prevents any slipping or sliding while the adhesive sets. Starting at the base ensures your entire wall is stable and secure from the ground up. It’s a simple but crucial first step that creates a solid foundation for the rest of your project and helps you keep your lines straight and even as you build.
Apply the Adhesive Correctly
Getting the adhesive right is essential for a long-lasting wall. You’ll want to spread a thin layer of mortar or mastic adhesive, about 1/8 to 1/4 inch thick, onto a small section of the wall at a time. Then, use the notched side of your trowel to comb through the adhesive, creating grooves. These grooves create suction and help the stone grip the wall securely. It’s one of the most important parts of any masonry project. Let the adhesive get a little tacky before you start pressing the stones into place—this will give you the best hold.
Cut and Place Each Stone
This is where your artistic vision comes into play. Before you apply any adhesive, lay your stone veneer pieces out on the floor to plan your pattern. This allows you to mix and match different shapes, sizes, and colors to create a balanced, natural look. You’ll inevitably need to cut some stones to fit around outlets or at the end of a row. For clean, precise cuts, a wet tile saw is your best friend. Measure twice, mark your stone with chalk, and cut once. Placing each custom-fit piece of natural stone is incredibly satisfying as you watch your design take shape.
Finish with Clean Joints
Once all the stones are set and the adhesive has cured, it’s time to finish the joints. Depending on the style of stone you’ve chosen, you may need to apply grout in the gaps between them. This step fills in any empty spaces and gives the wall a complete, polished appearance. Some styles, like dry-stack stone, are designed to fit tightly together without visible grout lines. Always check the recommendations for your specific stone veneer. If you are grouting, use a grout bag to apply it neatly into the joints, then smooth it out for a clean finish.
Seal the Stone for Protection
The final step is to protect your beautiful new wall. Applying a quality stone sealant is a must, as it creates a protective barrier against moisture, dust, and stains. This makes cleaning much easier and helps preserve the natural color and texture of the stone for years to come. It’s a simple step that ensures your investment continues to look as good as the day you installed it. If you want to ensure it’s done perfectly, professional restoration and sealing services can provide a flawless and durable finish.
Common Installation Mistakes to Avoid
Even with the best materials, a few common slip-ups can turn your dream accent wall into a frustrating project. Knowing what to watch out for ahead of time is the best way to ensure a smooth process and a beautiful, lasting result. From the initial prep work to the final stone placement, paying attention to the details makes all the difference. Let’s walk through the most frequent mistakes so you can sidestep them completely and feel confident in the final outcome. Think of this as your friendly guide to getting it right the first time, so you can spend less time troubleshooting and more time admiring your work.
Skipping Wall Prep
This is easily the most critical mistake you can make. Applying stone veneer to a surface that isn’t ready is like building a house on a shaky foundation—it just won’t last. The wall you’re working on must be completely clean, dry, and structurally sound before you even think about mixing your mortar. Any lingering dust, grease, or moisture will prevent the adhesive from bonding properly, which can lead to loose or falling stones down the road. Taking the time to thoroughly clean the surface and make any necessary repairs isn’t just a suggestion; it’s a non-negotiable first step for a professional-looking finish that stands the test of time.
Using the Wrong Amount of Adhesive
Getting the consistency of your mortar or adhesive just right is a bit of an art form. If you mix it too stiff, you’ll struggle to apply it, and it won’t create a strong bond with the stone. On the other hand, if it’s too thin and watery, your stones will slide down the wall before they have a chance to set. The ideal mortar should be loose enough to flow easily from the tip of the bag without being runny. A great pro tip is to mix small batches as you go. This helps you maintain the perfect consistency and prevents the adhesive from drying out too quickly.
Incorrect Stone Placement and Timing
It’s tempting to jump right in, but a little planning goes a long way. Avoid the dreaded “zipper effect,” where the vertical joints line up and create an unnatural, distracting pattern. To prevent this, lay out your stones on the floor first to create a pattern that looks balanced and organic. Start your installation from the bottom corners and work your way up and in. Rushing the process can also lead to slippage, so give each row enough time to set before adding the weight of the next one. Patience is your best friend here, and a well-planned layout is key to a natural look.
Ignoring Gaps and Alignment
Small gaps and misaligned stones might not seem like a big deal up close, but they can be glaringly obvious once you step back and look at the finished wall. These little imperfections can disrupt the entire visual flow of your accent wall, making it look less polished. As you work, frequently take a few steps back to check your progress from a distance. Ensure your horizontal lines are level and that the spacing between stones is consistent. Proper masonry work is all about precision, and taking care of these small details is what separates an average job from a professional installation.
What’s the Cost of a Stone Accent Wall?
Figuring out the budget for your stone accent wall is a huge step in bringing your vision to life. While the final price tag can vary, understanding the key components will help you plan effectively and avoid surprises. Generally, you can expect a stone accent wall to cost between $650 and $3,250, with an average around $1,300. The main factors influencing this range are the size of your wall and the type of stone you choose. Let’s break down what goes into that number so you can feel confident about your investment.
Breaking Down Material Costs
The star of the show is, of course, the stone itself. Your choice of stone veneer will be the biggest driver of your material costs. Natural stone, with its unique textures and colors, often comes at a higher price point than manufactured stone veneer, which offers a consistent look and a lighter weight. At Gappsi, we have a wide selection of beautiful porcelain and natural stone options to fit different styles and budgets. Thinking about the square footage you need to cover will give you a clearer picture of your material expenses before you even begin.
Factoring in Labor and Professional Fees
Unless you’re a seasoned DIY pro, professional installation is the way to go for a flawless finish. It’s important to know that labor often makes up more than a third of the total project cost. This fee covers the expertise, precision, and efficiency of an experienced team. A professional installer ensures every stone is perfectly placed, the wall is structurally sound, and the final result is stunning and durable. When you hire a team for their masonry expertise, you’re paying for peace of mind and a wall that will look incredible for years to come.
Planning for Unexpected Costs
A smart budget always leaves a little room for the unexpected. Beyond the stone and labor, there are other potential costs to consider. These can include essential supplies like underlayment, backing materials, high-quality adhesives, and grout. You might also have delivery fees for your materials and the cost of any specialized tools needed for the job. Planning for these items from the start helps prevent budget overruns and keeps your project running smoothly. A good contractor will outline these potential costs for you upfront.
Ways to Save on Your Project
You can absolutely create a gorgeous stone wall without overspending. One of the best ways to manage your budget is to ask for an itemized quote. Avoid lump-sum estimates that don’t detail where your money is going. An itemized list breaks down the costs for labor, materials, and any other fees, giving you full transparency. You can also discuss different material options with your designer. Sometimes, a slightly different style of stone veneer can offer a similar look for a lower price, helping you achieve your dream design while staying on budget.
DIY vs. Hiring a Pro: What’s Right for You?
Deciding whether to tackle your stone accent wall yourself or bring in a professional comes down to your budget, timeline, and comfort level with home projects. While a DIY project can be incredibly rewarding, sometimes the peace of mind and flawless finish of a professional job is the better investment. There’s no single right answer, but thinking through a few key points will help you figure out the best path for your home and your sanity. Let’s break down which route might be the right one for you.
When to DIY Your Accent Wall
If you’re a hands-on person who enjoys a good weekend project, building a stone accent wall can be a great fit. With stone veneer, the process is more straightforward than you might think. Many homeowners find it’s a beginner-friendly project that can completely transform a room without a massive budget. This path is ideal for smaller, more straightforward walls where the stakes feel a little lower. If you have the patience to dedicate to proper wall prep, carefully placing each stone, and finishing the details, you can achieve a beautiful result you’ll be proud of for years. It’s a chance to put your personal touch on your space and learn a new skill along the way.
When to Call in the Professionals
While DIY is tempting, there are times when calling an expert is the smartest move. If your project is large, involves complex cuts around outlets or windows, or requires structural considerations, a professional is essential. Common DIY installation mistakes like visible gaps, improper sealing, or a poorly planned layout can ruin the final look and be difficult to fix. Our expert masonry team has the experience to handle these challenges seamlessly, ensuring a perfect and quick installation. If you’re short on time, want a guaranteed high-end finish, or just prefer to leave it to someone with a trained eye for design and detail, hiring a pro is the way to go.
The Benefits of a Professional Guarantee
Hiring a professional offers more than just a great-looking wall; it provides complete peace of mind. While labor costs are a significant part of the investment, that price includes expertise that helps you avoid expensive errors down the road. A professional team handles everything, from ensuring the wall is structurally sound to managing any necessary local permits. At Gappsi, our home remodeling experts guarantee the quality of their work, so you can be confident that your new accent wall is not only beautiful but also built to last. It’s an investment in quality, efficiency, and the assurance that the job will be done right the first time.
How to Care for Your New Stone Accent Wall
Your new stone accent wall is a showstopper, and keeping it that way is easier than you might think. With just a little routine care, you can ensure your investment stays as beautiful as the day it was installed. Proper maintenance protects the stone from dust, stains, and moisture, preserving its natural character and texture for years to come. Whether your wall is a cozy indoor feature or a striking exterior statement, these simple steps will help you maintain its integrity and appearance without a lot of fuss.
Simple Cleaning and Upkeep
For day-to-day care, a light touch is all you need. General maintenance involves dusting or using a vacuum with a brush attachment to get rid of any loose debris. For a slightly deeper clean, you can wash the surface with a mild soap and water solution. If you notice more stubborn spots, use a soft-bristle brush and clean water to gently scrub the area. For exterior walls, hosing the veneer down once or twice a year can help the stone keep its beautiful, natural appearance. This simple routine is usually enough to handle everyday dust and grime.
Resealing to Protect Your Investment
Sealing your stone wall is a key step in protecting it from the elements. A quality sealer acts as a barrier, helping to prevent moisture and stains from penetrating the stone. While not something you need to do often, periodically applying a clear sealer will go a long way in preserving your wall’s color and condition. This is especially important for walls in high-traffic areas, kitchens, or outdoor spaces exposed to weather. If you’d rather leave it to the experts, Gappsi offers professional restoration and sealing services to ensure the job is done right.
Tips for Long-Term Care
Beyond regular cleaning, a few extra tips can keep your wall looking its best. If you want to enrich the stone’s natural tones, consider using an enhancer. This product will bring out the deep color of the stone, giving it a richer, darker look while adding another layer of protection. It’s also a good idea to periodically inspect the wall for any loose stones or cracked mortar, addressing small issues before they become bigger problems. Consistent, gentle care is the best way to maintain the beauty of your natural stone for a lifetime.
Related Articles
- Natural Stone Wall Veneers – Nicolock Driveway Pavers – Gappsi Group
- Natural Stones Add More Curb Appeal & Elegance – Gappsi Group
- FAQ about Swimming pools, Landscape, masonry, carpentry, natural stone. – Gappsi Group
- Gappsi Giuseppe Abbrancati Masonry Design Gallery – Gappsi Group
- Reviews on Anchor pavers and walls? – Gappsi Group
Frequently Asked Questions
Can I install stone veneer directly over my existing drywall? While it might seem like a tempting shortcut, it’s not a good idea. The mortar used to set the stone contains a lot of moisture, which can weaken drywall over time and compromise the bond. For a truly durable and professional result, you should always install a cement board over the drywall first. This creates a stable, moisture-resistant surface that gives the mortar the best possible grip and ensures your wall will last for decades.
What’s the most common mistake that ruins a stone accent wall? Hands down, the biggest mistake is rushing or skipping the wall preparation. If the surface isn’t perfectly clean, dry, and properly backed with a material like cement board, the adhesive won’t bond correctly. This can lead to loose or even falling stones down the line. Taking the time to create a solid foundation is the single most important step for a beautiful and long-lasting finish.
Do I really need to seal an indoor stone wall? Yes, it’s a step you won’t want to skip. Even indoors, a stone wall is exposed to dust, airborne particles, and potential splashes or scuffs, especially in a high-traffic area. A quality sealer creates an invisible barrier that protects the stone from absorbing stains and makes it much easier to clean. It’s a simple final step that preserves the natural color and integrity of the stone for years to come.
How do I get the stone layout to look natural and not like a repeating pattern? The key is to plan your layout before you apply any adhesive. Lay a good number of stones out on the floor to see how the different shapes, sizes, and colors work together. Intentionally mix them up to create a balanced look. As you install, make sure to stagger your vertical joints so they don’t line up, which avoids that unnatural “zipper” look. Taking a few steps back frequently to check your work helps you see the bigger picture.
Is this a project I can realistically finish in a single weekend? For a very small and straightforward wall, a dedicated DIYer might be able to complete it in a weekend. However, for most projects, it’s better to plan for more time. The preparation, cutting stones to fit, letting the mortar set between rows, and grouting all take time and patience. Rushing the process is where mistakes happen, so it’s often a multi-day or two-weekend project to do it right.

 Understanding the Original Surface: Cambridge Toffee Onyx Pavers
 Step 2: Creating Color Samples for Client Approval
 Step 4:
  This project showcases what’s possible when homeowners want to update their outdoor living area without tearing out and replacing existing pavers. Through expert staining and sealing, Gappsi delivered a like-new surface at a fraction of the cost of rebuilding.
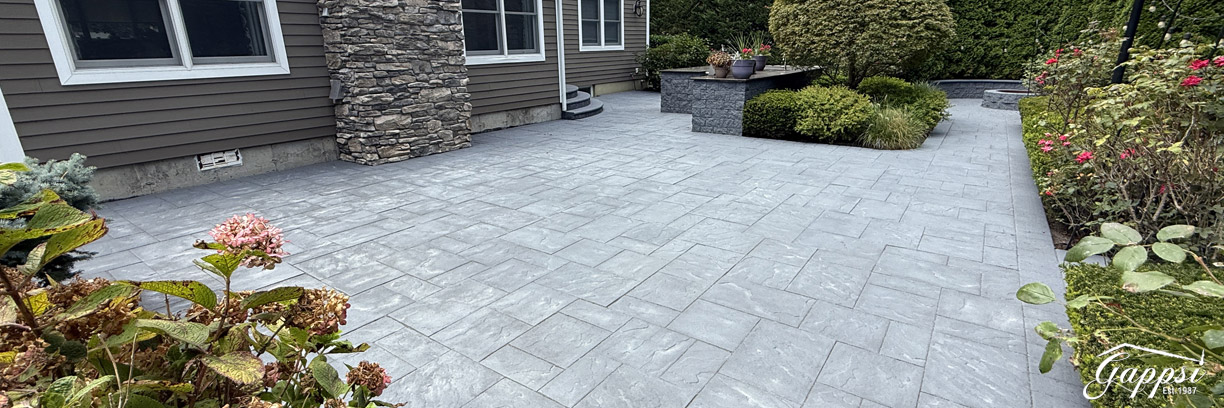 Transform Your Pavers Without Replacing Them
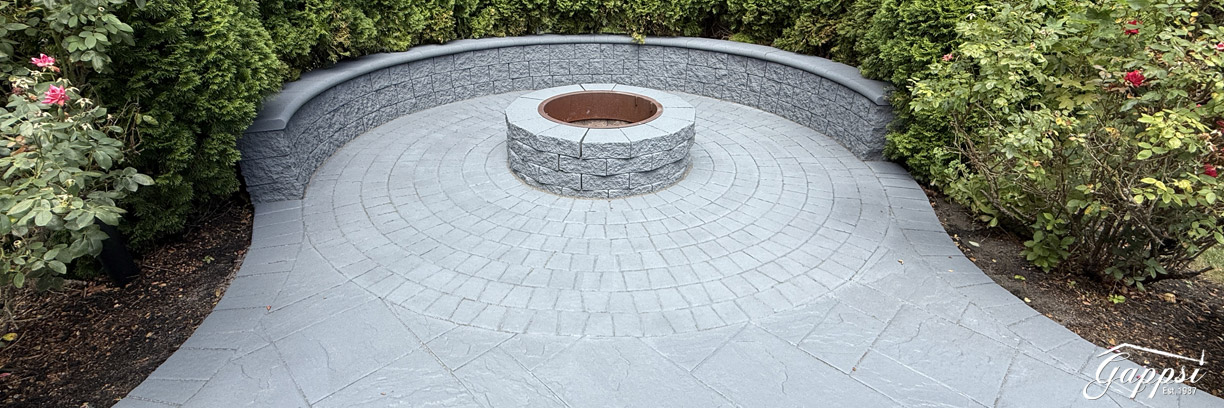
 A Freeform Design That Feels Natural
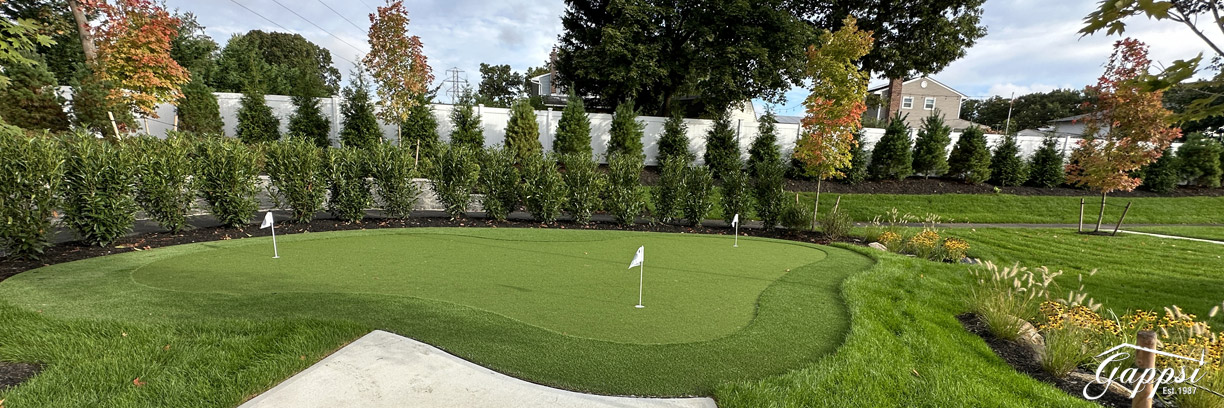
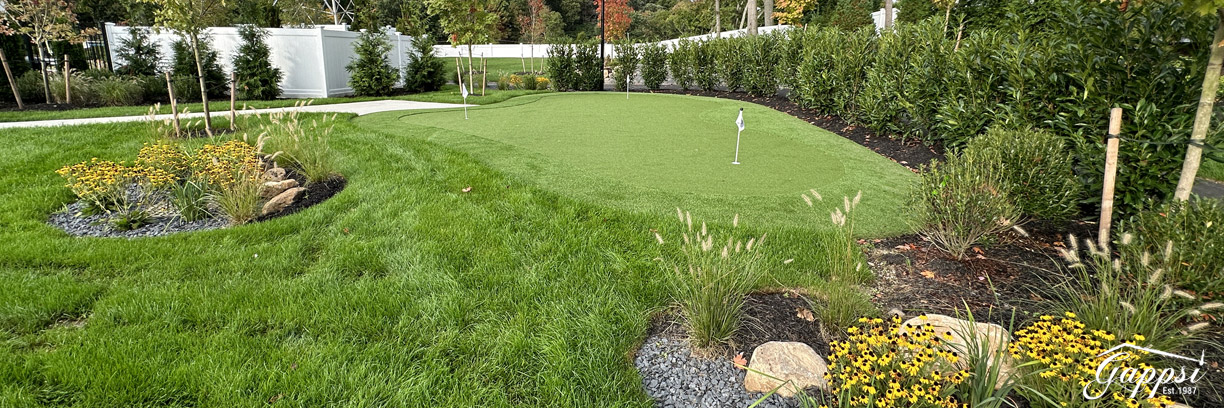 Why Choose Synthetic Turf for Your Putting Green or Sports Game Court
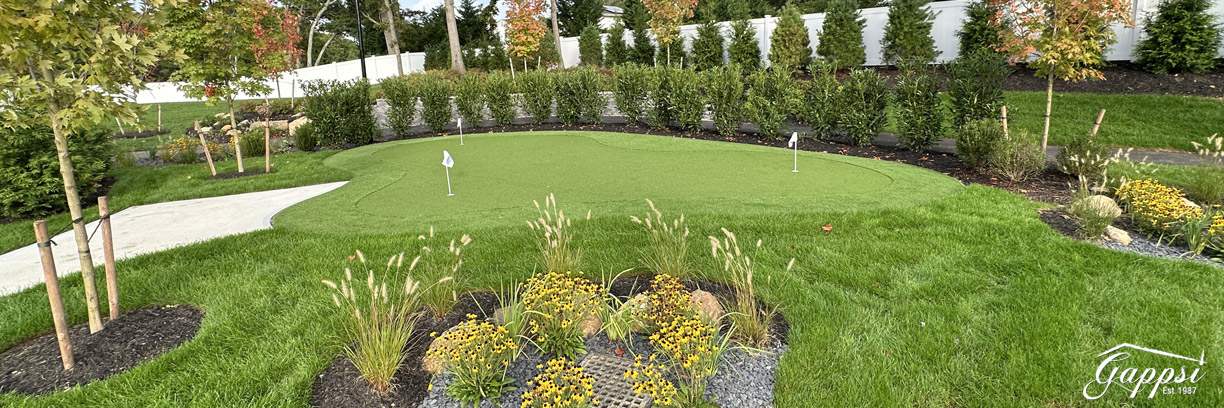 Choose Gappsi for Your Long Island Putting Green Installation
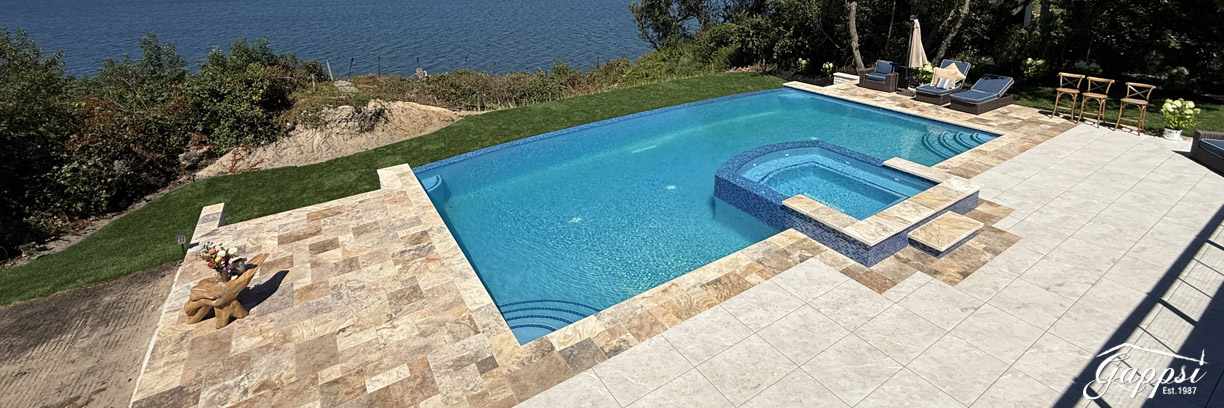
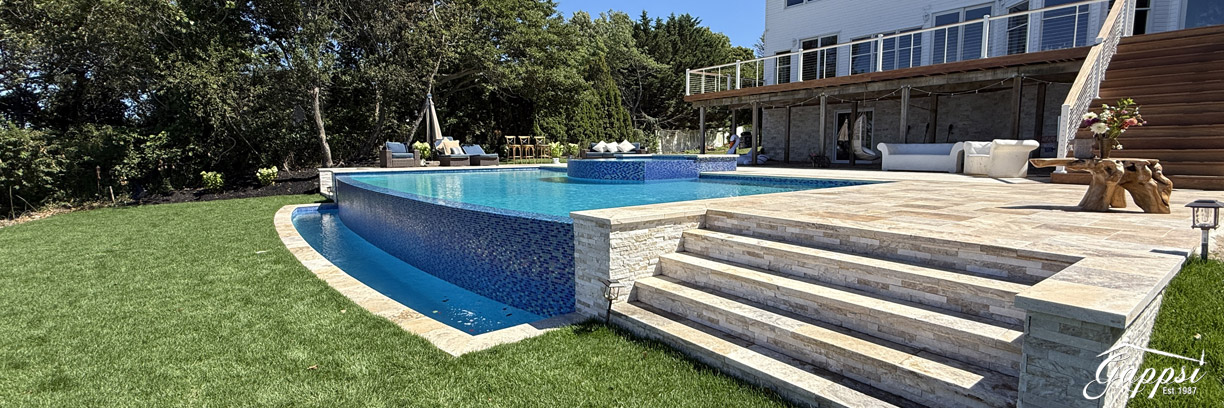 The pool’s location along the property’s edge allows the water to flow into the Sound visually. Creating a mesmerizing illusion of endless space. This architectural approach transforms a typical backyard into a resort-style destination. It emphasizes tranquility and the natural connection between land, water, and sky.
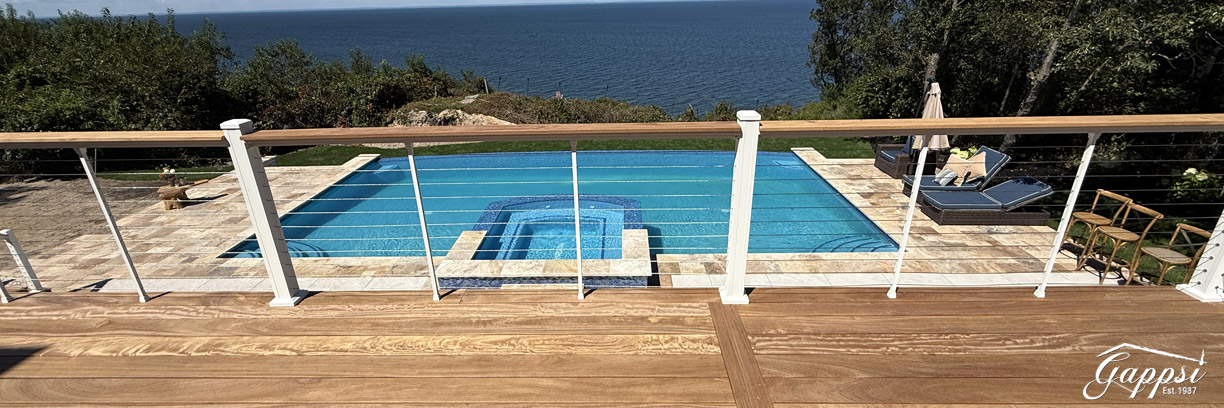 The Pool and Spa: A Fusion of Beauty and Innovation
 Fiorito Travertine & Italian Porcelain: A Sophisticated Surface
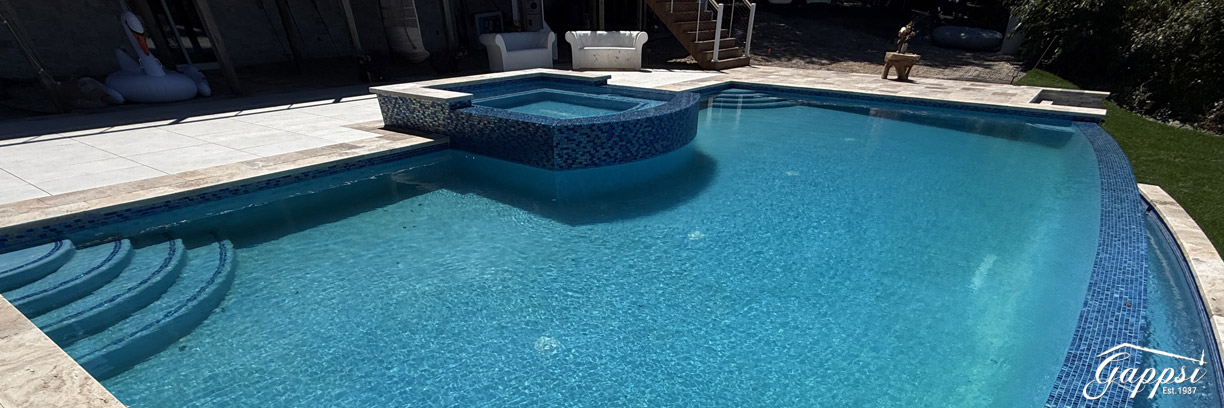 Engineering Precision: The Gappsi Standard
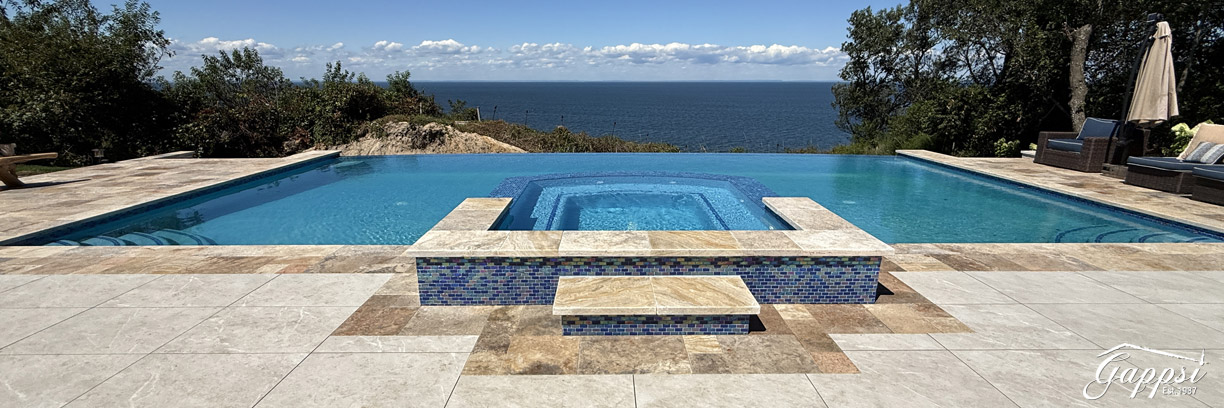 Experience the Art of Outdoor Living