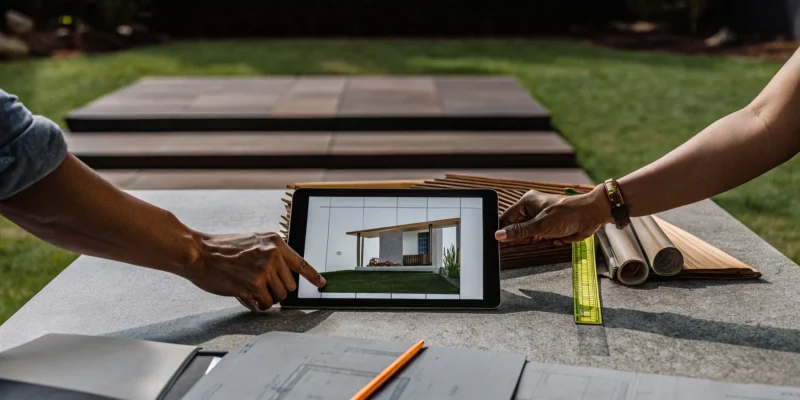
You have a vision for your backyard: a beautiful, shaded space for family dinners, a comfortable retreat by the pool, or an elegant focal point for your garden. A pavilion can be all of those things, but turning that vision into a reality requires a solid plan, and that plan starts with a budget. Understanding the costs involved is the first step toward building the outdoor living area you’ve been dreaming of. This article will serve as your roadmap, guiding you through the main types of pavilions, the custom features available, and the other expenses like electrical work and foundations. By the end, you’ll have a clear understanding of the entire process, making it much easier to get a quote for backyard pavilion and start your project.
Key Takeaways
- Look Beyond the Sticker Price: Your total cost includes more than just the structure. Remember to factor in expenses like site preparation, permits, electrical work for lighting, and a solid foundation to avoid budget surprises.
- Match Your Pavilion to Your Home and Habits: The right pavilion is a blend of form and function. Consider how materials like wood or metal, and roof styles like hip or open gable, will complement your home’s architecture and support how you plan to use your new outdoor room.
- Vet Your Builder Thoroughly: The success of your project depends on your contractor. Choose a licensed and insured professional who provides detailed, itemized quotes, offers a strong warranty, and has a portfolio of high-quality work you can review.
What Affects the Cost of a Backyard Pavilion?
Thinking about adding a pavilion to your backyard is exciting, but it’s natural to wonder about the cost. The final price tag isn’t just one number; it’s a combination of several key factors. From the size of the structure to the materials you choose, every decision plays a role in your total investment. Understanding these elements will help you set a realistic budget and plan a project that perfectly fits your space and your wallet. Let’s walk through the main components that will shape the cost of your new outdoor retreat.
How Size and Layout Impact Your Budget
First, the size of your pavilion is one of the biggest factors in its cost. A larger structure requires more materials and labor, which naturally increases the price. But it’s not just about square footage. The complexity of the layout also matters. A simple rectangular design will be more budget-friendly than a custom L-shaped or multi-level structure. It’s also smart to think about the installation footprint. You’ll need extra space around the pavilion for the construction crew and their equipment, a detail that’s easy to overlook during the planning phase. Exploring different pavilion and pergola designs can give you a better sense of how size and shape influence the final look.
Choosing Your Pavilion Materials
The materials you select will define your pavilion’s style, durability, and maintenance needs, all of which affect the cost. Classic wood offers a warm, traditional look, while vinyl and metal provide a more modern, low-maintenance alternative. Here on Long Island, it’s especially important to choose materials that can handle our coastal climate. You’ll want something that resists humidity, salt air, and seasonal weather changes. For example, certain woods have a high resistance to rot, while powder-coated aluminum stands up well to moisture. We often integrate beautiful and resilient materials like porcelain and natural stone for flooring and support columns, ensuring your pavilion is built to last.
The Role of Design and Custom Features
A basic pavilion provides shade and style, but custom features are what truly make the space your own. These additions will influence your budget, so it’s good to decide what’s most important to you. Popular upgrades include integrated lighting for evening gatherings, ceiling fans for hot summer days, and electrical outlets for charging devices or plugging in speakers. You could even add a full outdoor kitchen or a cozy fireplace. The overall design style also plays a part. The roofing style you choose, whether it’s a classic hip roof or a more open gable design, can dramatically change the look and cost. These custom touches are where a skilled design and build team can really bring your vision to life.
Preparing Your Site and Foundation
Before your pavilion can go up, the ground beneath it needs to be ready. Site preparation is a critical step that should never be overlooked. This process can involve clearing and leveling the land, removing trees or other obstructions, and grading the area for proper drainage. The foundation itself is another major cost component. A simple concrete slab is a common choice, but you might opt for a more decorative foundation using pavers or natural stone. Proper planning and design from the start prevents costly mistakes down the road. A full-service team can handle all the necessary masonry and site work, ensuring your pavilion has a solid and stable base.
What Are the Main Types of Backyard Pavilions?
Choosing a pavilion is an exciting step in creating your dream outdoor space. But with so many options, it’s easy to feel a little overwhelmed. The right pavilion not only provides shade and shelter but also defines the style of your backyard. Think of your pavilion as the anchor for your outdoor living area, whether it’s a quiet spot for morning coffee or a central hub for family gatherings next to the pool. It’s a structure that invites you to spend more time outside, extending your living space and adding significant value to your property.
The style you select can transform your yard from a simple lawn into a destination. From the materials you choose to the shape of the roof, every detail contributes to the final look and feel. Understanding the main types of pavilions and pergolas will help you narrow down what works best for your home, your lifestyle, and your budget. Are you drawn to the warmth of natural wood that complements a traditional garden, or the clean lines of modern metal for a sleek poolside lounge? Do you need a fully custom structure to fit a unique corner of your yard? Let’s walk through the most popular styles to help you find the perfect match for your Long Island home.
Classic Wood Pavilions
There’s a reason wood pavilions are a timeless favorite. They bring a natural warmth and classic charm that blends beautifully with almost any landscape design. Materials like cedar and pine are not only beautiful but also durable, creating a sturdy structure that feels both elegant and inviting. A wood pavilion is incredibly versatile; you can leave the wood in its natural state, stain it to highlight the grain, or paint it to perfectly match your home’s exterior trim. Imagine a cozy wood pavilion with a stone fireplace for cool evenings or a simple, rustic structure overlooking your garden. This flexibility allows a wood pavilion to serve as a beautiful and functional extension of your home’s masonry and stonework.
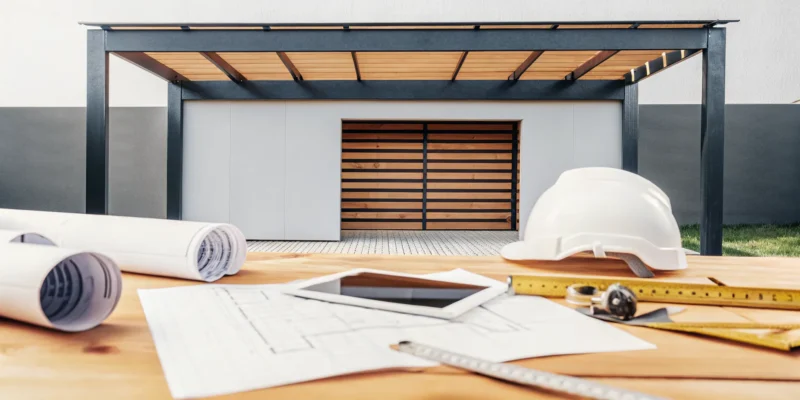
Sleek Metal and Steel Designs
If your taste leans more contemporary, a metal or steel pavilion might be the perfect fit. These structures are known for their sleek, sophisticated look, using strong materials like powder-coated aluminum or steel to create a minimalist profile. With their clean lines and simple forms, metal pavilions add a touch of modern elegance to any backyard without obstructing views. They are a fantastic choice for framing a chic outdoor lounge area or a poolside retreat. One of the biggest advantages of metal is its durability and low maintenance. Unlike wood, it won’t warp or rot, and it stands up exceptionally well to the coastal weather we get on Long Island. These pavilions look stunning when paired with other modern elements, like a geometric swimming pool or minimalist patio furniture.
Hip Roof vs. Open Gable Styles
The style of the roof has a major impact on your pavilion’s overall appearance and function. The two most common styles are the hip roof and the open gable. A hip roof features four sides that slope gently downwards from a central point or ridge. This design offers excellent protection from sun and rain from all angles and has a classic, elegant look that complements traditional home architecture. It creates a cozy, enclosed feeling underneath. An open gable roof, on the other hand, has two sloping sides that form a triangle, leaving the ends open. This style creates a more vaulted, airy ceiling, making the space feel larger and more open. It’s a great choice if you want to preserve a sense of openness in your yard while still having overhead cover.
Custom-Built vs. Prefabricated Kits
When it comes to construction, you can generally choose between a prefabricated kit or a fully custom-built pavilion. Kits come with pre-cut materials and a set design, which can simplify the installation process. They are a good option if you have a standard-sized space and find a design that you love as is. However, they offer limited flexibility if your yard has unique dimensions or if you want specific features. A custom-built pavilion gives you complete creative control. Working with a designer and builder, you can create a structure that is perfectly tailored to your space, needs, and aesthetic vision. This is the best route if you want to integrate the pavilion seamlessly with an existing patio, add custom electrical for lighting and fans, or match architectural details of your home. A custom build ensures your pavilion is truly one-of-a-kind.
How to Get an Accurate Pavilion Quote
Getting a clear and accurate quote for your backyard pavilion starts with a little preparation. When you know what you want and what to ask, you can confidently compare your options and find the right builder for your project. Here’s how to get started.
Gather Your Project Details
Before you pick up the phone, take some time to brainstorm your vision. Having a clear idea of your project helps a contractor give you a much more accurate price. Think about the basics first: What size do you envision, and where will it go in your yard? Consider its main purpose. Will it be a cozy spot for family dinners, a shady lounge by the swimming pool, or the hub for an outdoor kitchen? Your answer will shape the design. It’s also helpful to gather inspiration photos that capture the style you’re hoping for, whether it’s rustic wood or modern metal. This initial planning sets a solid foundation for your conversation with a builder.
What to Share with Your Contractor
Once you have your vision, it’s time to share it. The more details you can provide, the better. Start with the size, location, and style you decided on. Then, talk about materials. Are you leaning toward a classic wood pavilion or a low-maintenance vinyl or metal structure? Let your contractor know about any custom features you want, like built-in lighting, ceiling fans, or electrical outlets for charging devices. It’s also a good idea to have a general budget in mind. Sharing this helps your builder recommend designs and materials that fit your financial comfort zone, ensuring the final proposal is both beautiful and practical for your home.
Key Questions to Ask for Your Quote
A quote is more than just a number; it’s the start of a conversation. To make sure you’re hiring a reliable professional, come prepared with a few key questions. Ask for a detailed, itemized estimate so you can see exactly what you’re paying for. Inquire about their license and insurance, which are non-negotiables for any project on your property. It’s also smart to ask about their experience with similar projects and to see a portfolio or watch videos of their work. Finally, clarify who is responsible for securing building permits. A trustworthy contractor will be happy to answer these questions and guide you through the process.
What Other Costs Should You Expect?
When you receive a quote for your backyard pavilion, it’s important to understand what it includes. The price of the structure itself is just one piece of the puzzle. To create a realistic budget and avoid any surprises down the road, you need to account for several other potential expenses. From navigating local rules to planning for long-term care, thinking about these costs upfront ensures your project goes smoothly from start to finish. Here are the key areas to factor into your total investment.
Permits and Local Regulations
Before any construction begins, you’ll need to consider local building codes. Depending on your pavilion’s size and your specific location in Long Island, a permit may be required. Each town and village has its own set of rules, so it’s a good idea to check with your local building department early on. This step can feel a bit overwhelming, but working with an experienced builder makes it much easier. A team that regularly builds pavilions and pergolas will be familiar with local requirements and can often handle the permit application process for you, ensuring everything is compliant from day one.
Electrical and Site Work
A pavilion is more than just a roof; it’s a functional outdoor room. If you envision having lights for evening gatherings, a ceiling fan for warm days, or outlets for music and charging devices, you’ll need to budget for electrical work. Beyond that, your site itself must be ready for construction. This might involve clearing the area, leveling uneven ground, or even doing some foundational landscaping to prepare the space. Proper site preparation is essential for a stable and secure structure, so be sure to discuss these needs with your contractor to get a clear idea of the associated costs.
Installation and Labor
The cost of labor and installation is a significant part of your pavilion project. This isn’t just about assembling the structure; it also includes building a solid foundation to support it. Whether you opt for a simple concrete slab or an elegant patio made from porcelain and natural stone, the foundation is critical to your pavilion’s longevity. The complexity of your design, the materials you choose, and the accessibility of your property will all influence the final installation cost. A detailed quote should clearly break down these labor expenses, so you know exactly what you’re paying for.
Future Maintenance and Care
Your beautiful new pavilion is an investment in your home, and like any investment, it requires some upkeep to stay in top shape. Depending on the materials you choose, you should plan for future maintenance. For example, a wood pavilion may need to be re-stained or sealed every few years to protect it from the elements. All pavilions will benefit from routine cleaning to keep them looking their best. Factoring in a small budget for long-term care will protect your structure for years to come. For paver or stone bases, professional cleaning and sealing services can also extend their life and beauty.
How to Compare Pavilion Quotes
Once you have a few quotes in hand, the real work begins. It’s tempting to just scan for the lowest price, but a smart comparison goes much deeper than that. The goal is to understand the true value behind each number, ensuring you’re comparing apples to apples. A lower price might seem attractive initially, but it could signal cheaper materials, less experienced labor, or surprise costs down the road. A thorough, professional quote tells a story about the contractor’s process, their attention to detail, and the quality of the final product you can expect for your Long Island home.
To make the best decision for your home and budget, you need to look at three key areas. First, you have to know how to read the quote itself and what a detailed estimate should include. A vague, one-line price is a red flag. Second, it’s important to recognize common budgeting mistakes so you can avoid them from the start, ensuring your project stays on track financially. Finally, you’ll want to examine the less obvious, but equally important, details like project timelines and warranties. Breaking down each quote this way helps you see beyond the bottom line and choose a builder who will deliver a beautiful, lasting pavilion without any hidden surprises.
How to Read a Quote
A good quote is more than just a final number; it’s a transparent breakdown of your entire project. Don’t accept a single lump-sum figure. Instead, look for an itemized list that details the costs for materials, labor, foundation work, and any custom features you requested. The price of a pavilion can vary widely based on its size, the materials used, and the complexity of the design. A detailed quote allows you to see exactly where your money is going and ensures there are no misunderstandings. This level of detail also shows that the contractor has thoroughly considered your project and isn’t just giving you a rough guess. At Gappsi, we provide comprehensive quotes for our custom pavilions and pergolas so you can feel confident in your investment.
Common Budgeting Mistakes to Avoid
One of the most common mistakes homeowners make is rushing through the planning phase and only budgeting for the structure itself. A beautiful pavilion often requires more than just assembly. Think about the entire scope of the project. Will you need a new patio or foundation? Our masonry experts can create the perfect base for your structure. Do you want lighting, ceiling fans, or outdoor outlets? That means you’ll need to budget for electrical work. Also, consider the space required for the construction crew and their equipment. Neglecting these associated costs or the long-term maintenance needs can lead to unexpected expenses that strain your budget later on. A great contractor will help you think through these details from the beginning.
What to Look for in Timelines and Warranties
The details beyond the price are often what separate a great contractor from a good one. Your quote should include a clear and realistic project timeline with estimated start and end dates. This shows the builder respects your time and has a solid plan for execution. Equally important is the warranty. A reputable builder will stand behind their work with a strong warranty covering both materials and labor. Be cautious of quotes that seem significantly lower than others. An unusually low price can sometimes be a red flag for lower quality work, subpar materials, or a non-existent warranty, leaving you unprotected if issues arise. A company that offers comprehensive home remodeling services understands the importance of quality and client satisfaction, which is always reflected in their timelines and warranties.
How to Choose the Right Pavilion Builder
Selecting the right builder for your pavilion is just as important as choosing the perfect design. The right partner will guide you through the process, deliver exceptional quality, and ensure your new outdoor structure stands the test of time. A great contractor turns your vision into a reality, while a poor one can lead to headaches and disappointment. To make sure you have a smooth and successful project, focus on finding a builder with a strong reputation, a commitment to quality, and a portfolio that inspires you.
Explore Gappsi’s Custom Pavilions and Pergolas
Your backyard is unique, so your pavilion should be too. Instead of settling for a one-size-fits-all kit, look for a builder who specializes in custom designs. At Gappsi, we create bespoke pavilions and pergolas tailored to your home’s style and your family’s needs. Whether you envision a rustic timber frame structure for cozy evenings or a modern pergola for poolside lounging, a custom approach ensures every detail is perfect. We work with you to design an outdoor structure that not only provides shade and comfort but also becomes a stunning focal point in your landscape, seamlessly integrating with your existing patio and garden.
Qualities of a Great Contractor
A great contractor brings more than just tools to the job; they bring a commitment to excellence. When you’re vetting potential builders, look for three key qualities: superior materials, skilled craftsmanship, and outstanding customer service. A reputable company will be transparent about the materials they use, from the wood for the frame to the porcelain and natural stone for the foundation. Their team should consist of experienced artisans who take pride in their work. Just as importantly, they should prioritize clear communication, listen to your ideas, and keep you informed every step of the way.
Why Experience and References Matter
Experience is not just a number; it’s a track record of success, problem-solving, and satisfied clients. A builder with decades of experience has likely encountered every possible challenge and knows how to handle them efficiently. Before hiring anyone, ask for proof of their license and insurance to protect yourself. Don’t just rely on online reviews. Ask for a portfolio of their completed projects and a list of references you can contact. Seeing their work firsthand on their YouTube channel or speaking with past customers will give you genuine insight into their craftsmanship and professionalism, helping you make your decision with confidence.
What to Know Before You Sign the Contract
You’ve compared quotes, chosen a builder, and finalized your design. The last step before breaking ground is signing the contract. This document is more than just a formality; it’s the official blueprint for your project, outlining every detail from payment terms to the final walkthrough. Taking the time to review it carefully ensures that you and your contractor are completely aligned on the expectations for your new pavilion. A thorough contract protects both parties and sets the stage for a smooth, successful build. Before you add your signature, let’s walk through the key details you’ll want to confirm.
Understanding Payment Schedules and Timelines
Your contract should clearly detail the payment schedule and the project timeline. Typically, payments are tied to specific project milestones, like the completion of the foundation, framing, or roofing. This structure ensures you are paying for work as it’s finished. The contract should also provide a realistic timeline, including a start date and an estimated completion date. At Gappsi, we provide a comprehensive proposal that breaks down these elements so you know exactly what to expect. A clear plan prevents misunderstandings and helps you manage your budget effectively from start to finish.
How Seasons Can Affect Pricing
While the cost of materials and labor is a major factor, the time of year you build can also play a role. Spring and summer are peak construction seasons on Long Island, which can mean longer wait times for scheduling. Building during the off-season, like in the late fall or winter, might offer more flexibility. Your contract should lock in pricing, protecting you from seasonal fluctuations once signed. Regardless of the season, it’s vital to use materials suited for the regional climate. We often recommend durable options like porcelain and natural stone that can handle Long Island’s weather year-round, ensuring your investment lasts.
Planning for Post-Installation Support
A great builder’s commitment doesn’t end when the construction is complete. Your contract should include information about warranties for both materials and workmanship. It’s also a good idea to discuss what post-installation support looks like. Will the company provide guidance on how to care for your new pavilion? Knowing who to call if you have questions or need future work provides valuable peace of mind. We believe in building lasting relationships with our clients, offering services like restoration and sealing to keep your outdoor spaces beautiful for years to come.
Related Articles
- Gazebo | Pavilion | Pergola Archives – Gappsi Group
- Outdoor Kitchen Pavilion Archives – Gappsi Group
- 5 Ideas for a Pool Pavilion with Outdoor Kitchen
- Outdoor Pavilion & Pool Resurfacing Services | Gappsi Inc
- Outdoor Pavilion And Pool Resurfacing Archives – Gappsi Group
Frequently Asked Questions
How long does it actually take to build a pavilion? The timeline for a pavilion project varies quite a bit because the physical construction is only one part of the process. You also have to account for the design phase, securing any necessary permits, and preparing the site. A straightforward, prefabricated pavilion on a ready site might be complete in a few weeks. However, a large, custom-built pavilion that includes a new stone foundation and electrical work could take a couple of months from the initial design meeting to the final walkthrough. A professional builder will always provide a detailed project timeline in your contract.
Do I really need a permit for a pavilion on Long Island? It really depends on the size of your pavilion and the specific regulations in your town or village. Many smaller structures might not require a permit, but larger ones almost always do. It’s a step you definitely don’t want to skip, as it ensures your pavilion is safe and compliant with local codes. The best approach is to work with an experienced local builder who understands the requirements in your area. They can confirm what’s needed and often handle the entire permit application process for you.
What’s the biggest mistake people make when budgeting for a pavilion? The most common mistake is budgeting only for the pavilion structure itself and forgetting about the other essential costs. A successful project includes a solid foundation, which could be a concrete slab or a beautiful paver patio. You may also need to level the ground or run electrical lines for lighting and ceiling fans. Thinking about the project holistically from the start, including site work and custom features, helps you create a realistic budget with no surprises.
Is a wood or metal pavilion better for Long Island weather? Both materials can be excellent choices, so it comes down to your personal style and how much maintenance you prefer. Wood offers a timeless, natural look but will require periodic staining or sealing to protect it from our coastal humidity and weather. On the other hand, powder-coated aluminum or steel pavilions provide a sleek, modern aesthetic and are extremely durable and low-maintenance. The right choice is the one that best fits your home’s look and your lifestyle.
Can I add a pavilion to my existing patio? Yes, absolutely. Adding a pavilion is a fantastic way to get more use out of an existing patio by providing shade and a defined space for relaxing or dining. A custom builder can design a structure that fits your patio’s dimensions perfectly. They will also assess your current patio to ensure it can properly support the weight of the new pavilion, making any necessary reinforcements to create a safe and seamless addition to your backyard.