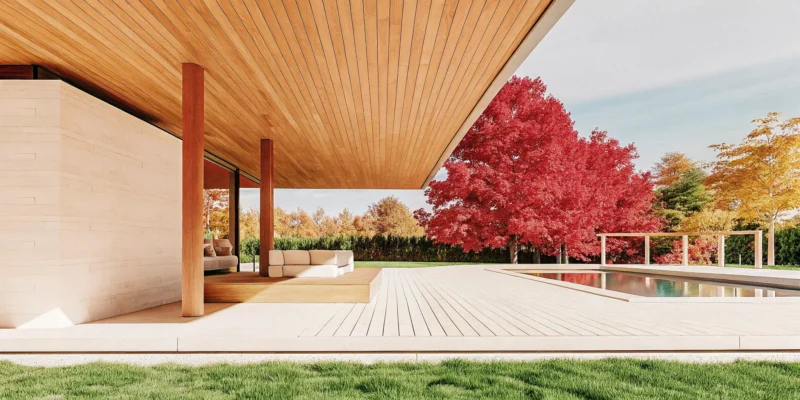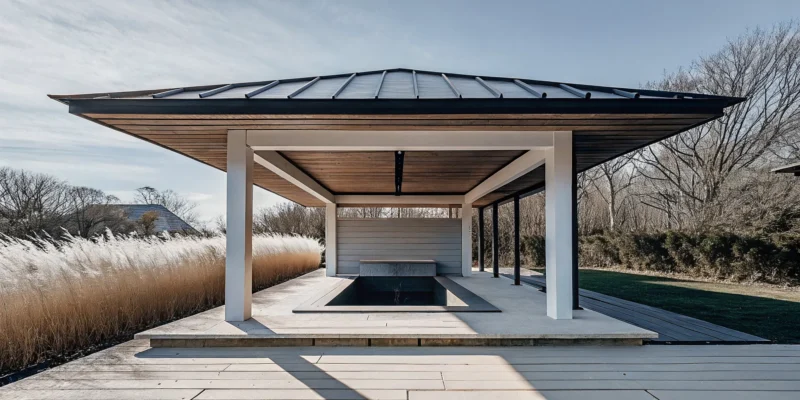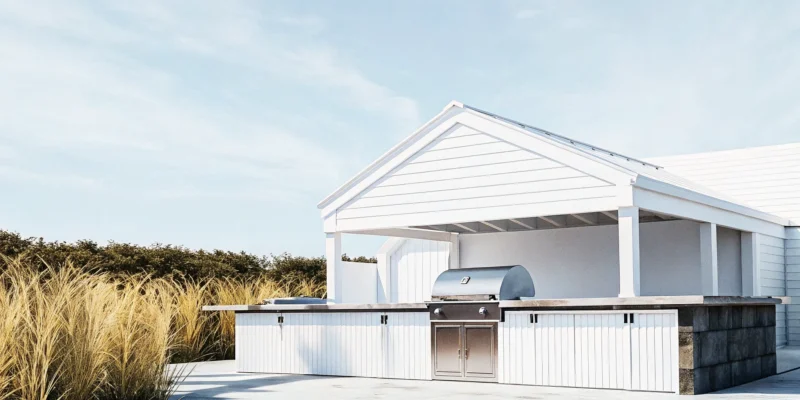
A modern outdoor kitchen pavilion on Long Island with a built-in stainless steel grill.

The Ultimate Outdoor Kitchen Pavilion Long Island Guide

Think about your last backyard barbecue. You probably spent a lot of time running between the grill outside and the kitchen inside, trying to keep food warm and guests happy. An outdoor kitchen pavilion solves this problem by bringing everything you need into one cohesive, beautiful space. It provides shelter from the sun and rain, a dedicated area for cooking and prep, and a comfortable spot for everyone to gather. This isn’t just about convenience; it’s about creating a seamless outdoor living experience. Let’s explore the features and design ideas that make an outdoor kitchen pavilion on Long Island the ultimate upgrade for your home.

Key Takeaways

  • Invest in Your Lifestyle and Home Value: An outdoor kitchen pavilion does more than just look good; it extends your outdoor season for year-round enjoyment and adds significant, sought-after value to your property.
  • Plan for Function and Durability: Create a space that lasts by carefully choosing a layout that fits your needs, selecting weather-resistant materials for the Long Island climate, and planning for utilities like lighting and heating from the start.
  • Budget Smartly and Maintain Simply: Understand that costs depend on size, materials, and appliances, and remember to account for site prep and permits. Investing in quality construction upfront makes seasonal maintenance easier and protects your pavilion for years.

Is an Outdoor Kitchen Pavilion a Worthwhile Investment?

Adding an outdoor kitchen pavilion is a big decision, and it’s natural to wonder if it’s the right move for your home. Beyond the initial cost, it’s an investment in your lifestyle, your property’s value, and the way you enjoy your home. A well-designed pavilion isn’t just an add-on; it transforms your backyard into a functional and beautiful extension of your living space. It creates a central point for gathering, cooking, and relaxing, making every day feel a little more like a vacation. Let’s look at the key reasons why a pavilion is one of the most rewarding home improvements you can make.

Extend Your Outdoor Living Season

One of the biggest benefits of a pavilion is its ability to make your backyard usable for more than just a few months a year. Unlike a simple patio umbrella, a pavilion is a permanent structure with a solid roof designed to handle Long Island’s unpredictable weather. It provides reliable shade from the summer sun and shelter from rain, allowing you to keep your plans without worrying about the forecast. With a sturdy, engineered structure, you can comfortably host a barbecue on a drizzly spring day or enjoy a quiet morning coffee outdoors in the fall. This makes your outdoor kitchen a true year-round asset, not just a seasonal novelty.

Increase Your Home’s Value and Curb Appeal

An outdoor kitchen is one of the most impactful upgrades you can make to a Long Island home, and adding a pavilion takes it to the next level. This feature is highly sought after by homebuyers, who see it as a premium addition that offers a sophisticated lifestyle. A beautifully constructed pavilion significantly enhances your home’s curb appeal and can provide a strong return on investment. When you invest in home remodeling, you want projects that add both personal enjoyment and long-term financial value. An outdoor kitchen pavilion checks both boxes, making your property stand out in the market while giving you a stunning space to enjoy for years.

Create the Ultimate Entertainment Space

A pavilion turns your outdoor kitchen into the social hub of your home. The best designs are integrated into the overall landscape, creating a seamless flow from your house to your yard. You can design your pavilion to include distinct zones for different activities, like a cooking area with a grill and pizza oven, a bar with casual seating, and a separate lounge or dining space. This thoughtful layout makes it the perfect spot for hosting everything from intimate family dinners to large gatherings with friends. With the right pavilions and pergolas, your backyard becomes the go-to destination for making memories.

What Are the Must-Have Features for a Pavilion?

Once you decide to build an outdoor kitchen pavilion, the fun part begins: choosing the features that will make it your family’s favorite spot. A truly great pavilion is more than just a structure; it’s a seamless blend of durability, function, and comfort. Thinking through these key elements from the start ensures your new space will meet your needs for years to come. From the materials that will stand up to Long Island weather to the appliances that will make you feel like a professional chef, every choice helps create your perfect outdoor retreat.

Choose Durable Materials for Long Island’s Climate

Living on Long Island means dealing with a unique climate, from humid, salty summer air to cold, snowy winters. The materials you choose for your pavilion need to be tough enough to handle it all without warping, rotting, or corroding. That’s why we often recommend materials like stainless steel for appliances and fixtures, along with beautiful and resilient porcelain and natural stone for countertops and flooring. These options not only look stunning but also provide the long-lasting durability you need, ensuring your investment remains beautiful and functional season after season.

Select Your Appliances, Countertops, and Storage

Your outdoor kitchen can be just as capable as your indoor one. Think beyond a simple grill and consider what would make your outdoor cooking experience truly special. Many modern designs include built-in refrigerators for cold drinks, pizza ovens for fun family nights, and even sinks for easy cleanup. When you build a custom pavilion, you can integrate high-end appliances and create plenty of counter space for food prep and serving. Don’t forget to include smart storage solutions, like cabinets and drawers, to keep your cooking tools organized and protected from the elements.

Plan for Lighting, Heating, and Utilities

To get the most out of your pavilion, you’ll want to use it in the evening and during cooler weather. Thoughtful lighting, like built-in LEDs or elegant string lights, creates a warm and inviting atmosphere for nighttime gatherings. For chilly nights, you can incorporate overhead heaters or a nearby fire pit to keep everyone comfortable. It’s also critical to plan for utilities early in the design process. Running gas, water, and electrical lines requires careful coordination, which is why our home remodeling expertise is so valuable. Proper planning ensures everything is conveniently and safely installed.

How Can You Customize Your Outdoor Kitchen Pavilion?

Creating a pavilion that feels like a true extension of your home is all about personalization. This is your chance to design a space that perfectly fits your lifestyle, whether you envision quiet family dinners or lively backyard parties. From the foundational structure to the finishing touches, every choice you make contributes to the final look and feel. Customization ensures your new outdoor kitchen pavilion is not just beautiful but also incredibly functional for your specific needs. Let’s walk through the key areas where you can put your personal stamp on the design.

Define Your Pavilion’s Layout, Size, and Roof Style

First, think about how you’ll use the space. The layout and size of your pavilion should be directly influenced by its purpose. A larger footprint can accommodate distinct zones for cooking, dining, and lounging, while a more compact design might focus on an efficient kitchen and seating area. The right roof design is also critical for year-round comfort. On Long Island, where we get our fair share of snow and need plenty of summer shade, styles like gable or hip roofs are excellent choices. These designs effectively manage snowfall and provide ample coverage, making your outdoor pavilion a comfortable retreat in any season.

Explore Materials Like Wood, Vinyl, and Stone

When you’re selecting materials for your pavilion, durability is a top priority. Long Island’s coastal air and winter weather demand materials that can stand up to the elements without warping, rotting, or corroding. Wood offers a timeless, rustic appeal, while modern vinyl provides a low-maintenance alternative that holds up well over time. For a truly luxurious and enduring structure, incorporating natural stone or porcelain adds unmatched elegance and strength. Combining materials, such as stone bases for wooden posts, can create a beautiful look while also protecting the structure from ground moisture and wear.

Find a Design Style That Complements Your Home

Your pavilion shouldn’t look like it was dropped into your backyard from somewhere else. The best designs feel like a natural extension of your house. Take cues from your home’s existing architecture, materials, and color scheme. For instance, matching the pavilion’s roof style and shingles to your house creates a seamless and intentional connection. Our approach to home remodeling and design is rooted in this same principle of cohesion. By echoing the lines, textures, and overall character of your home, your new pavilion will enhance your property’s aesthetic and feel like it was always meant to be there.

Consider Add-Ons to Enhance Functionality

This is where you can really tailor the space to your lifestyle. Think beyond just a grill and a counter. A full outdoor kitchen can include a sink, refrigerator, pizza oven, and plenty of storage. Built-in seating is a great space-saver, while a fireplace or fire pit adds warmth and a cozy focal point for cooler evenings. Don’t forget practical elements like lighting, ceiling fans, and electrical outlets for music or a TV. You can even integrate custom fencing or netting to create a bug-free zone, ensuring you can enjoy your outdoor oasis in complete comfort.

How Much Does an Outdoor Kitchen Pavilion Cost on Long Island?

Figuring out the budget for your dream outdoor kitchen pavilion is one of the most important steps in the planning process. The total cost can vary quite a bit, because every project is unique. The final price tag depends on the size of your pavilion, the materials you choose, the appliances you install, and the complexity of the build.

Think of it less as a single purchase and more as a custom project tailored to your home and lifestyle. To give you a clear picture of what to expect, let’s break down the key elements that will shape your budget. By understanding these factors, you can plan effectively and make informed decisions that align with your vision and financial goals.

Understand the Factors That Influence Price

The price of an outdoor kitchen pavilion is a sum of its parts, and some parts have a bigger impact on the budget than others. The most significant factors are size, materials, and appliances. A larger pavilion that can accommodate more guests will naturally cost more than a smaller, more intimate structure. The materials you select for the pavilion frame, roofing, and kitchen finishes also play a huge role. For example, custom masonry work and high-end natural stone countertops will be more of an investment than simpler options.

Beyond the structure itself, the appliances you choose are a major cost driver. A basic grill and sink setup will be more budget-friendly than a full suite with a pizza oven, refrigerator, and warming drawers. Finally, consider the logistics. Depending on how far the outdoor kitchen is from your house, running electrical and gas service to it could increase costs.

Plan Ahead for Potential Hidden Costs

Planning an outdoor kitchen involves more than choosing a grill. To create a realistic budget, you need to account for costs that might not be obvious at first glance. Site preparation is a big one. Your yard may need to be graded, or you might need a new patio or foundation poured before construction can even begin. These foundational steps are critical for a lasting structure but are often overlooked in initial estimates.

Another consideration is permits. Most municipalities on Long Island require building permits for new structures, which come with their own fees and processes. You also need to think about the cost of running utility lines for water, gas, and electricity. This can involve trenching and professional installation, adding to the overall project expense. Finally, remember to budget for finishing touches like landscaping to seamlessly blend your new pavilion into your existing yard.

How to Budget for a Long-Term Investment

While the initial cost is a key consideration, it’s helpful to view your project as a long-term investment. An outdoor kitchen is one of the most impactful upgrades you can make to a Long Island home. It not only adds significant resale value but also transforms how you experience your property. A pavilion is the single addition that extends the return on everything else already built into your yard, from the pool to the patio.

When you budget, think about the value it brings to your daily life. A beautiful and functional outdoor kitchen pavilion becomes the heart of your home for months out of the year, creating a perfect setting for family dinners and entertaining friends. By investing in quality materials and a thoughtful design, you are creating a space that will deliver enjoyment and value for many years to come.

How to Keep Your Outdoor Kitchen Pavilion in Great Condition

Your outdoor kitchen pavilion is the heart of your backyard, a place for making memories and enjoying beautiful Long Island weather. To keep it looking and functioning its best for years to come, a little regular maintenance goes a long way. Think of it not as a chore, but as a way to protect your investment and ensure your space is always ready for an impromptu family barbecue or a quiet evening outdoors. Sticking to a simple routine will prevent small issues from becoming big problems, saving you time and money down the road.

Your Guide to Seasonal Maintenance and Winterizing

As the seasons change on Long Island, so do your pavilion’s needs. Before winter arrives, it’s essential to prepare your outdoor kitchen for the cold. Start by giving everything a thorough cleaning, especially the grill grates and burners. Shut off the water lines to your sink and ice maker to prevent pipes from freezing and bursting. It’s also a good idea to cover your appliances, countertops, and furniture to protect them from snow and ice. When spring returns, you can reverse the process: uncover everything, reconnect your utilities, and inspect for any wear from the winter months. This seasonal checklist ensures your pavilion is always protected and ready for enjoyment.

Tips for Cleaning Appliances, Surfaces, and Structures

A consistent cleaning schedule is the key to keeping your outdoor kitchen looking brand new. For appliances like grills and pizza ovens, make a habit of wiping down stainless steel exteriors and cleaning cooking surfaces after use. For your pavilion’s structure and surfaces, a gentle wash every few months can remove pollen, dirt, and other buildups. The right cleaning method depends on your materials. For instance, porcelain and natural stone pavers have different needs than a wooden deck. Taking the time to deep clean your cooking appliances and restock drawers with utensils will make your next gathering feel effortless and organized.

Know When to Call a Professional for Repairs

While regular cleaning and minor upkeep are manageable, some issues require an expert touch. If you notice problems like cracks in your stone countertops, loose pavers in your patio, or issues with gas and electrical lines, it’s best to call for help. Structural problems with the pavilion itself, such as significant wood rot or instability, also demand professional attention to ensure safety. Trying to fix these complex issues yourself can often lead to bigger, more expensive problems. A professional can diagnose the root cause and provide a lasting solution, giving you peace of mind. Gappsi’s restoration and sealing services can address wear and tear to keep your patio and stonework in top shape.

Choose the Right Long Island Pavilion Builder

The easiest way to ensure a low-maintenance outdoor kitchen is to build it right from the start. A builder with deep experience constructing pavilions and pergolas on Long Island will understand how to work with our specific climate. They will recommend durable materials that can withstand humid summers, freezing winters, and coastal air without constant upkeep. Investing in quality craftsmanship and weather-resistant materials from the beginning means you’ll spend less time on maintenance and more time enjoying your beautiful outdoor space. Choosing the right partner ensures your pavilion is not only stunning but also built to last for decades.

Related Articles

Frequently Asked Questions

How long does the entire process take, from design to completion? The timeline for building an outdoor kitchen pavilion can vary quite a bit. The design phase, where we map out your vision, can take a few weeks. After that, securing permits and ordering materials adds to the schedule. The construction itself depends on the project’s complexity, but a good builder will give you a clear and realistic timeline from the start so you know exactly what to expect.

What’s the real difference between a pavilion and a pergola? That’s a great question. The main difference is the roof. A pavilion has a solid, continuous roof that provides complete protection from sun and rain, making it a true outdoor room. A pergola has a slatted or open-beam roof structure, which offers partial shade and is often used to support climbing plants. Your choice depends on how much protection from the elements you want for your space.

Can a pavilion be added to my existing patio or pool area? Yes, in many cases, a pavilion can be beautifully integrated with your existing outdoor spaces. The most important step is to have a professional assess your current patio or deck to ensure its foundation is strong enough to support the weight of a new pavilion structure. This ensures the new addition is both safe and built to last.

Do I really need a permit for an outdoor pavilion on Long Island? Generally, yes. Most towns and villages on Long Island require building permits for permanent structures like pavilions. While it might seem like an extra step, the permit process is there to protect you. It ensures your pavilion is built safely and meets all local building codes. A reputable builder will handle the entire permitting process for you.

How do I get started with designing my own pavilion? The best way to start is by thinking about how you want to use the space. Do you envision large parties or quiet family dinners? Look for inspiration online and in magazines to get a feel for the styles you like. Once you have a few ideas, the next step is to talk with a design professional who can help you refine your vision and create a functional plan that fits your home and your lifestyle.
Share this page:
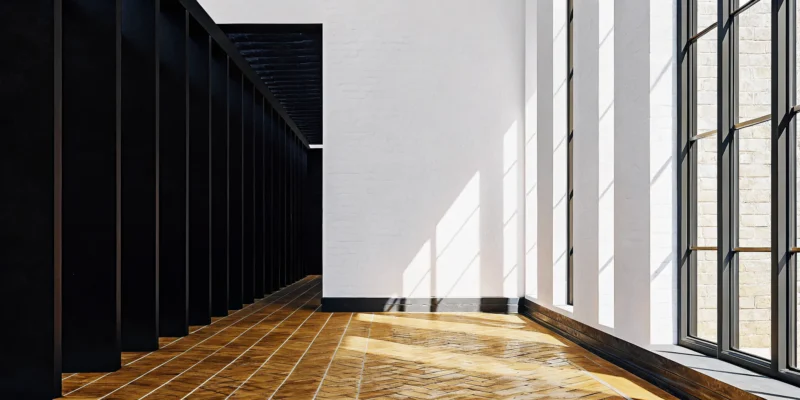
Red brick floor laid in a classic herringbone pattern in a modern home.

Red Brick Herringbone Floor: Pros, Cons & Cost

Some design trends fade as quickly as they appear, but others have a staying power that makes them true classics. The red brick herringbone floor falls firmly into the second category. With its rich, earthy tones and dynamic zig-zag pattern, it brings a sense of movement and history to any room, from a cozy farmhouse kitchen to a chic, industrial-style living area. It’s a choice that feels both grounded and full of character. If you’re considering this beautiful and durable option, you’re in the right place. We’ll cover what defines the pattern, the best materials to use, and how to care for your investment, ensuring it remains a beloved feature in your home for decades.

Key Takeaways

  • It’s a Stylish Choice That Lasts: A red brick herringbone floor provides both timeless character and serious durability. The classic pattern adds warmth and texture, making it a practical and beautiful foundation for busy areas of your home like kitchens and entryways.
  • Professional Installation Is Worth It: The intricate herringbone pattern requires precision to look right, making it a difficult installation. Hiring an experienced masonry professional is the best way to avoid a skewed layout and ensure a flawless, long-lasting result.
  • Sealing Is Key for Easy Maintenance: Because brick is naturally porous, applying a quality sealant is a critical step. This protects your floor from stains and moisture, which simplifies daily cleaning and preserves the brick’s beauty for years.

What Is a Red Brick Herringbone Floor?

A red brick herringbone floor is a classic design choice that brings warmth, texture, and a touch of history into any home. It involves laying rectangular red bricks or brick-like pavers in a distinctive zig-zag pattern. This flooring style has been around for centuries, yet it feels just as fresh and relevant in modern homes as it does in rustic farmhouses. Whether you’re aiming for a cozy kitchen, a durable mudroom, or a statement entryway, this flooring makes a lasting impression.

The beauty of a red brick herringbone floor lies in its ability to be both a neutral backdrop and a standout feature. Its rich, earthy tones complement a wide range of color palettes and design styles, from industrial to traditional. Before you decide if this look is right for your space, let’s explore what defines the pattern, the materials you can use, and where it works best in a home.

Understanding the Herringbone Pattern

The herringbone pattern gets its name from its resemblance to the bone structure of a herring fish. It’s created by arranging rectangular bricks in a staggered, zig-zag layout. Each brick is laid at a 90-degree angle to the one next to it, forming a broken V-shape that repeats across the floor. This arrangement creates a sense of movement and visual interest that can make a room feel more spacious and dynamic.

Don’t confuse it with the chevron pattern, where the ends of the pieces are cut at an angle to meet in a perfect point. The herringbone pattern uses simple rectangular bricks, which gives it a more intricate and textured look. This timeless design requires precision, making expert masonry work essential for a flawless finish that adds character and sophistication to your home.

Real Brick vs. Brick-Look Alternatives

When planning your floor, you have two main material choices: real brick or a brick-look alternative. Real thin brick pavers offer unmatched authenticity. Often made from reclaimed clay, each brick has its own unique character, with subtle variations in color and texture that tell a story. This option provides a genuinely rustic and warm feel underfoot. However, real brick is porous, heavier, and typically requires sealing to protect it from stains and moisture.

For a more practical approach, you can opt for porcelain or natural stone tiles designed to look like brick. These alternatives are incredibly durable, water-resistant, and easier to clean, making them a great choice for busy households. While they may not have the exact texture of real brick, modern manufacturing techniques have made them look remarkably similar. The choice between real brick and a look-alike often comes down to balancing your desire for authenticity with your lifestyle needs.

Best Rooms for a Red Brick Herringbone Floor

The durability and classic style of a red brick herringbone floor make it a versatile choice for many areas of your home. It’s especially popular in high-traffic zones where you need a floor that can handle daily wear and tear. Think of entryways, mudrooms, and hallways, where the pattern can hide dirt while making a great first impression. Kitchens are another perfect spot, as the brick adds a cozy, European-inspired feel that pairs beautifully with both modern and traditional cabinetry.

Beyond floors, you can use the herringbone pattern to create stunning accent walls, fireplace surrounds, or even a backsplash. It’s also an excellent option for laundry rooms, sunrooms, and covered patios. As part of a larger home remodeling project, a brick herringbone floor can connect different spaces and add a cohesive, custom-designed element throughout your property.

Weighing the Pros and Cons of Red Brick Herringbone

A red brick herringbone floor makes a stunning statement, but it’s important to look at the full picture before you commit. Like any design choice, it comes with a unique set of benefits and challenges. Understanding these factors will help you decide if this beautiful, classic flooring is the right fit for your home, your lifestyle, and your budget. Let’s walk through the key pros and cons to consider.

The Pros: Durability, Character, and Timeless Appeal

The biggest draw of a red brick herringbone floor is its undeniable character. It brings a sense of history and warmth into a room that’s hard to replicate. Made from real clay, these bricks have a rustic, authentic look with classic red tones arranged in a dynamic zig-zag pattern. This flooring is also incredibly durable and can handle high-traffic areas with ease, making it a practical choice for entryways, kitchens, and mudrooms.

Best of all, the herringbone pattern is a timeless design element. It turns the simple brick into something more sophisticated, ensuring your floor won’t look dated in a few years. You get the charm of old, reclaimed bricks, which adds a unique story to your home’s design. This classic appeal pairs well with many different styles, from modern farmhouse to industrial chic, making it a versatile foundation for your decor.

The Cons: Weight, Cost, and Installation Challenges

On the other hand, there are a few practical challenges to keep in mind. First, real brick is heavy. Your home’s subfloor must be strong enough to support the additional weight, which might require reinforcement and should always be assessed by a professional. Brick is also a porous material, meaning it can absorb spills and stain if not properly sealed. Without a good sealant, it can also give off a bit of clay dust.

The installation itself is another major consideration. Herringbone is one of the most difficult patterns to lay correctly. It requires precision, careful planning, and a lot of cuts, which makes the installation more labor-intensive and costly than a standard layout. This is not a simple DIY project; you’ll want to rely on an experienced masonry designer to ensure the lines are perfect and the pattern remains consistent across the entire floor.

Brick Herringbone vs. Other Flooring Types

So, how does brick herringbone stack up against other options? Compared to a standard running bond brick pattern, the herringbone layout instantly adds more visual interest. It breaks up the monotony and creates a high-end look using a relatively humble material. It feels more intentional and decorative, turning your floor into a true focal point.

When compared to wood herringbone, brick offers a more rustic and industrial feel. It’s also a more durable option for areas prone to moisture, like a mudroom or covered patio. Of course, you can also find brick-look alternatives made from porcelain or other materials. While these can be easier to clean and install, they don’t offer the same authentic texture and natural color variation as real clay brick. Ultimately, the choice comes down to balancing authentic character with your project’s practical needs, something a home remodeling expert can help you sort out.

What’s the Cost of a Red Brick Herringbone Floor?

Understanding the cost of a red brick herringbone floor involves looking beyond the price tag on the tile. The total investment depends on the materials you choose, the size of your space, and whether you hire a professional or tackle the installation yourself. While it can be more of an upfront investment than some other flooring types, its durability and classic style make it a worthwhile addition that adds lasting value to your home.

Think of the final price in three parts: the cost of the brick itself, the price of additional materials like grout and sealer, and the cost of labor. Each of these elements can vary, but breaking them down will give you a much clearer picture of your total budget. We can help you explore material options and provide a detailed estimate that covers every aspect of the project, ensuring there are no surprises along the way.

Breaking Down the Cost Per Square Foot

When you start shopping for materials, you’ll often see an advertised price of around $9.99 per square foot for popular red brick herringbone mosaics. This is a great starting point for budgeting, but remember that this number typically only covers the cost of the tile itself. The final material cost can change depending on whether you choose genuine thin brick pavers or a porcelain lookalike, with natural materials often costing a bit more.

Exploring different porcelain and natural stone options can help you find the perfect balance between your budget and your design vision. While the per-square-foot price is a key piece of the puzzle, it’s just one part of the overall financial picture.

Factors That Affect the Final Price

Several other factors influence the final cost of your herringbone floor. First, it’s wise to get 10% more tile than you think you need. This extra material provides a buffer for any cuts, mistakes, or accidental breaks that can happen during installation. You’ll also need to budget for supplies like thin-set mortar, grout, and a high-quality sealer to protect the brick from stains and moisture.

The condition of your subfloor matters, too. If it needs leveling or repairs before the tile can be laid, that will add to the project’s cost and timeline. The complexity of a herringbone pattern often requires more skilled labor, which is why working with an experienced masonry designer can ensure the job is done right.

Comparing Professional vs. DIY Costs

Deciding between a DIY installation and hiring a professional is a major cost consideration. Some modern brick mosaics come with a mesh backing that simplifies installation, making a DIY approach more manageable for a handy homeowner. Going the DIY route saves you money on labor, but you’ll still need to account for your time and the cost of renting or buying specialized tools like a wet saw.

Hiring a professional, on the other hand, provides peace of mind. An expert installer can handle any subfloor issues and execute the intricate herringbone pattern flawlessly. While professional labor adds to the upfront cost, it protects your investment by ensuring a beautiful, long-lasting floor. For a project of this scale, professional home remodeling services guarantee a polished result.

How Difficult Is a Red Brick Herringbone Installation?

A red brick herringbone floor is a showstopper, but its beauty comes from a complex installation. Unlike a simple grid, the interlocking zigzag pattern demands precision and patience. Even a small mistake at the start can throw off the entire layout, creating a wavy effect that’s hard to ignore. So, is this a weekend DIY project or a job best left to the pros?

The answer depends on your skill level, your tools, and your tolerance for imperfection. While some find the rustic nature of brick forgiving, others argue that the herringbone pattern itself is one of the most difficult to execute correctly. Before you start pulling up your old floors, it’s important to understand exactly what the process entails. From establishing perfect lines to making countless angled cuts, installing a herringbone floor is a significant undertaking. Let’s look at what makes this installation so challenging and help you decide the best path forward for your home.

A Look at the Installation Process

The herringbone installation process is methodical and requires careful planning from the very first step. It begins with finding the exact center of the room and snapping a chalk line to serve as your guide. From there, you lay out the V-shaped pattern, ensuring each brick is perfectly placed against the next. This isn’t as simple as just laying tiles side by side; there are specific rules to starting this layout to keep the pattern straight.

You’ll need to apply thin-set mortar, place each brick, and use spacers to maintain consistent grout lines. The real challenge comes with the cuts you’ll need to make along the walls, which will all be at an angle. This requires a good quality wet saw and a steady hand. For many homeowners, the complexity and precision involved make hiring an expert in masonry a worthwhile investment.

Why Precision Is Key for the Herringbone Pattern

With a herringbone pattern, precision is everything. Because the bricks interlock at a 45-degree angle, every piece affects the position of the next. If your starting line is even slightly off, or if a few bricks are misaligned, the error will multiply as you move across the floor. This can result in grout lines that “wander” and a pattern that looks skewed rather than sharp and uniform. A perfectly straight layout is what gives herringbone its sophisticated and timeless appeal.

While it’s true that a perfect installation is possible, it takes a very skillful hand to achieve it. An experienced installer knows how to constantly check their lines and make micro-adjustments to keep the pattern true from one end of the room to the other. This level of expertise ensures your floor becomes a stunning feature, not a distracting eyesore.

Planning for Extra Material

When you’re budgeting for your project, remember to account for extra material. For a herringbone pattern, it’s wise to order at least 10% to 15% more flooring than your room’s square footage requires. This isn’t just a buffer for accidental breaks; it’s a necessity due to the nature of the pattern. The angled cuts you’ll make where the floor meets the walls create more waste than the straight cuts used in a standard grid layout.

Having extra bricks on hand prevents the stress of running out of material mid-project, especially if you’re using reclaimed brick where finding a perfect match later can be difficult. This overage ensures you have enough to complete the job and keep a few extra bricks for any future repairs. When sourcing materials, exploring a supplier with a wide variety of porcelain and natural stone can help you find the perfect brick look.

Deciding Between a Professional and DIY

So, should you do it yourself? Some DIYers feel that because brick is naturally rustic, the end result is meant to be imperfect, making it a great project for first-time tilers. If you’re aiming for a very casual, farmhouse look and aren’t bothered by a few imperfections, a DIY installation could be a rewarding challenge. You’ll save on labor costs and gain a huge sense of accomplishment.

However, if you want a crisp, clean, and perfectly aligned herringbone pattern, hiring a professional is the safest bet. A flooring installation is a major part of any home remodeling project, and mistakes can be costly and difficult to fix. An experienced team has the right tools, techniques, and foresight to handle the complexities of the pattern, ensuring a beautiful, durable floor that adds lasting value to your home.

How to Care for Your Red Brick Herringbone Floor

One of the best things about a red brick herringbone floor is its incredible durability. This isn’t a delicate surface you have to tiptoe around. It’s meant to be lived on and can handle the daily hustle of a busy home, including kids and pets. With the right care routine, your brick floor will not only last for decades but will also develop a beautiful patina over time. Keeping it in top shape is straightforward and doesn’t require a lot of complicated steps.

The key is to start with a properly sealed surface and then follow a simple maintenance schedule. This involves routine cleaning to prevent grit from scratching the finish, knowing how to tackle spills quickly, and understanding when it’s time to reapply a protective coat. Let’s walk through the simple steps to protect your investment and keep your gorgeous herringbone floor looking its best for years to come.

Sealing Your Floor for Moisture Protection

Think of sealant as your floor’s first line of defense. Brick is naturally porous, which means it can absorb liquids and dirt, leading to stains and discoloration. A high-quality sealer penetrates the brick and grout, creating a protective barrier that repels moisture and grime, making cleanup much easier. For older homes that may not have a modern damp-proof membrane, it’s wise to use a breathable sealer. This allows any naturally occurring moisture from below to escape instead of getting trapped, which could cause issues down the road. A professional sealing ensures complete and even coverage, giving you peace of mind from day one.

Simple Tips for Daily Cleaning

Maintaining your brick floor is surprisingly simple and doesn’t require much more than your usual cleaning routine. The main goal is to keep abrasive dirt and sand off the surface. Regular sweeping with a soft-bristle broom or vacuuming with a hard floor attachment will do the trick perfectly. For a deeper clean, you can mop the floor weekly. Just use a gentle, pH-neutral cleaner mixed with warm water. Harsh chemicals or acidic cleaners like vinegar can strip the sealant and damage the brick over time, so it’s best to stick with products designed for natural stone or brick surfaces. This simple habit prevents buildup and keeps your floor looking fresh.

How to Handle Spills and Stains

The golden rule with a porous surface like brick is to act fast. When a spill happens, whether it’s wine, juice, or a pet accident, clean it up immediately. Use a clean cloth or paper towel to blot the liquid, working from the outside of the spill inward to prevent it from spreading. Avoid rubbing, as this can push the liquid deeper into the brick and grout lines. For most everyday spills, a quick blot is all you need, especially on a well-sealed floor. If you do encounter a tougher, set-in stain, a specialized brick cleaning product or a paste made from baking soda and water can often lift it out.

When to Reseal Your Brick Floor

No sealant lasts forever. Over time, foot traffic will gradually wear down the protective layer. How often you need to reseal depends on how much use the area gets, but a good rule of thumb is every three to five years. A simple way to check is to sprinkle a few drops of water on the floor. If the water beads up, your sealer is still doing its job. If it soaks into the brick and darkens it, it’s time for a new coat. When the time comes, resealing your floors is a project that restores that essential layer of protection, ensuring your brick continues to resist stains and moisture for years to come.

Is a Red Brick Herringbone Floor Right for You?

Deciding on a new floor is a big commitment, and a red brick herringbone floor is a particularly bold and beautiful choice. It’s more than just a surface to walk on; it’s a statement piece that brings incredible character and texture into your home. But before you start picturing that perfect rustic entryway or cozy kitchen, it’s important to consider if this unique flooring truly fits your lifestyle, budget, and home. Let’s walk through the key considerations, from styling and installation to safety, to help you make a confident decision. With the right approach, you can create a stunning feature that you’ll love for years to come.

Styling Your Red Brick Herringbone Floor

One of the best things about a red brick herringbone floor is its versatility. The classic zig-zag pattern, where bricks are laid at an angle, instantly adds a sense of history and movement to a room. While it’s a natural fit for rustic, farmhouse, or industrial designs, it can also create a surprising and warm contrast in more modern spaces. You can choose from different layouts, like single or double herringbone, to change the scale and feel of the pattern. This timeless look adds so much charm and warmth, making it a durable and stylish choice for high-traffic areas like mudrooms, kitchens, and entryways. The rich color and texture of the brick serve as a beautiful foundation for almost any decor.

Common Design Mistakes to Avoid

While the final look is stunning, getting there requires precision. The herringbone pattern is known for being one of the most difficult to lay correctly. A common mistake is underestimating the complexity of the installation. There are specific rules for starting the pattern and keeping the lines straight, and even a small error can throw off the entire floor. A bad herringbone layout is immediately noticeable and can undermine the sophisticated look you’re aiming for. This is one of those projects where professional expertise makes all the difference. An experienced installer will ensure the pattern is centered, the lines are crisp, and the final result is flawless.

A Note on Safety and Slip Resistance

When considering brick flooring, it’s wise to think about the practical details, including safety. Because brick is naturally porous, it can be prone to absorbing moisture and stains if not properly treated. An unsealed or uneven floor can also present a tripping hazard and create nooks where dirt can hide. The solution is to have your floor professionally installed and sealed. A quality sealant protects the brick from spills and wear while also creating a more uniform, slip-resistant surface. With proper restoration and sealing services, your brick floor will not only be safer but also much easier to clean and maintain over the years.

Bring Your Vision to Life with Gappsi

A red brick herringbone floor is a project that requires both vision and skill. It’s a choice that promises timeless appeal, adding a touch of charm and warmth that is durable enough to withstand years of wear. While the installation demands expertise, the result is a truly special feature in your home. At Gappsi, our team has the masonry and design experience to bring your vision to life perfectly. We handle every detail, from preparing the subfloor to laying each brick with precision and applying the final seal. If you’re ready to add this beautiful and enduring element to your home, we’re here to help you get it right.

Related Articles

Frequently Asked Questions

Is a brick floor hard or uncomfortable to stand on for long periods? Brick is a hard surface, similar to natural stone or porcelain tile, so it doesn’t have the softness of carpet or cork. In areas where you stand a lot, like in the kitchen, many people place a stylish area rug or a cushioned mat for extra comfort. That said, the unique texture can feel pleasant underfoot, and it’s a surface that holds warmth well, especially in a sunny room.

Can I install radiant heating underneath a brick herringbone floor? Yes, you absolutely can. Brick is an excellent material for radiant floor heating because it conducts and retains heat very well. An underfloor heating system can make your brick floor feel wonderfully warm and cozy, which is a fantastic feature in kitchens, bathrooms, or entryways during colder months. Just be sure the installation is handled by a professional who is experienced with both radiant heat systems and brick flooring.

How do I keep the grout lines from getting dirty? This is a great question and a common concern with any tiled floor. The most important step is to have the floor properly sealed right after it’s installed. A good quality sealer will protect both the brick and the grout, creating a barrier that stops dirt and spills from soaking in. For routine cleaning, simply avoiding harsh chemicals and using a pH-neutral cleaner will keep your grout looking fresh without damaging the sealant.

Is this a good flooring choice for a home with kids and pets? It’s one of the best. A red brick floor is incredibly tough and can easily handle the daily chaos of family life, from dropped toys and running pets to heavy foot traffic. Its natural color variations and textured pattern are also great at hiding minor scuffs, crumbs, and pet hair between cleanings. When properly sealed, the floor is also resistant to spills and stains, making cleanup much less stressful.

What’s the main difference between using real brick pavers and porcelain tiles that look like brick? The choice really comes down to a balance of authenticity and practicality. Real thin brick pavers offer an unmatched rustic character, with genuine texture and subtle color variations that give your floor a truly historic feel. Porcelain alternatives, on the other hand, are manufactured to be extremely dense and non-porous. This makes them incredibly resistant to stains and water, and they often require less long-term maintenance.

Share this page:
A metal stiffener reinforces a vinyl fence post for support and durability.

What Are Vinyl Fence Post Stiffeners & Do You Need Them?

When you look at a perfectly installed vinyl fence, you see clean lines and a flawless white finish. What you don’t see is the most critical component for its long-term stability. Inside the key posts, there should be a hidden source of strength. Think of it as the skeleton that supports the entire structure. Without this internal framework, a fence can’t stand up to strong winds or the constant stress of a gate opening and closing. This unseen hero is the vinyl fence post stiffener, a metal support that provides the rigidity vinyl can’t offer on its own, ensuring your fence looks just as good in ten years as it does today.

Key Takeaways

  • Reinforce key posts for stability: A metal stiffener acts as a skeleton inside your hollow vinyl posts, preventing them from bending or sagging. Always use them in high-stress points like gates, corners, and end posts to ensure your fence stays straight and strong.
  • Choose compatible, rust-proof materials: Select a galvanized steel stiffener that is made to fit your specific post profile perfectly. A snug fit provides maximum strength, and the galvanized coating prevents rust from weakening the support and staining your vinyl.
  • Secure your posts for local conditions: A stiffener only works if the post is installed correctly. This means digging deep enough (at least one-third of the post’s height) and setting it in a concrete footing with proper drainage to handle Long Island’s soil and weather.

What Is a Vinyl Fence Post Stiffener?

Think of a vinyl fence post stiffener as the backbone for your fence. It’s a metal support, usually made of steel or aluminum, that slides inside a hollow vinyl post. Its job is to provide the rigidity and strength that vinyl alone can’t offer. Without this internal support, posts can wobble, bend under pressure, or sag over time, especially at key points like gates or corners. A stiffener ensures your beautiful vinyl fence stands tall and straight for years, resisting wind and daily wear.

Why Your Vinyl Posts Need Support

Vinyl is a fantastic material for fences and netting because it’s low-maintenance and resists rot and weather. However, it’s also more flexible than traditional materials like wood or metal. This flexibility means it needs some help to maintain its structure and strength over the long haul. Post stiffeners provide that crucial internal support, preventing the posts from bowing or leaning. This is especially important for posts that bear extra weight, like those holding a gate. Proper installation depth is also key; a post that isn’t buried deep enough can shift, compromising the entire fence line, no matter how well it’s reinforced.

Steel vs. Aluminum: What’s the Difference?

When choosing a stiffener, you’ll typically decide between steel and aluminum. Both add significant strength, but they have their differences. Steel is incredibly strong and often less expensive, but it must be galvanized (coated in zinc) to prevent rust. Aluminum is lighter and naturally resistant to corrosion, which is a great advantage in Long Island’s coastal climate. While steel offers maximum rigidity, many find that aluminum inserts are excellent for reinforcing gate posts and fences in high-wind areas. The right choice depends on your specific needs, budget, and the environmental conditions your fence will face. Ultimately, either option helps create a stronger, more durable fence.

Key Features of a Quality Stiffener

A quality stiffener is more than just a piece of metal; it’s part of a complete system. One of the most important features is a proper fit. The stiffener should slide snugly into the post, preventing any rattling or movement. It’s crucial to use components from the same manufacturer, as mixing and matching brands can lead to gaps and weak connections. Additionally, if you choose steel, ensure it is galvanized to protect against rust. A quality stiffener is only effective when installed correctly, which includes setting the post in a solid masonry foundation to the proper depth.

Why Post Stiffeners Are Essential for Your Vinyl Fence

Think of post stiffeners as the skeleton for your vinyl fence. While the vinyl provides the clean, polished look, the stiffeners inside provide the strength and structure to keep it standing straight and strong for years. Skipping them, especially in key areas, is like building a house without a proper frame. It might look fine at first, but it won’t have the integrity to withstand daily use and Long Island’s weather. Investing in stiffeners is one of the smartest ways to protect your new fence and ensure it remains a beautiful, functional part of your property. They are a small component that makes a huge difference in performance and longevity.

Supporting High-Stress Gate Posts

Your gate is the one part of your fence that’s designed to move. All that opening and closing, combined with the gate’s own weight, puts a constant strain on the posts it’s attached to. Without reinforcement, these gate posts will eventually sag, causing the gate to drag on the ground, stick, or refuse to latch properly. Post stiffeners provide the internal rigidity needed to handle this load. They create a solid, unbending core within the hollow vinyl post, ensuring your gate continues to swing smoothly and align perfectly every time you use it. This is a critical spot where extra strength is not just a good idea, it’s a necessity.

Securing Corner and End Posts

Corner and end posts are the anchors of your entire fence line. They bear the tension from two directions and hold everything taut and in place. Because these posts are under more stress than the posts in the middle of a run, they are far more likely to lean, wobble, or twist over time if left unsupported. A post stiffener acts as a rigid backbone, preventing this from happening. By sliding a metal support inside these crucial posts, you ensure they remain perfectly upright and secure. This maintains the structural integrity of the whole fence, preventing a domino effect of sagging panels and an uneven appearance down the line.

Protecting Your Fence from Wind and Weather

Here on Long Island, we get our fair share of strong winds and seasonal temperature swings. A hollow vinyl fence can act like a sail in a heavy gust, and without internal support, the posts can bend or even break under the pressure. Stiffeners give your fence the strength to stand firm against the wind. Furthermore, vinyl naturally expands in the summer heat and contracts in the cold. This movement can cause posts to warp or buckle if they don’t have a rigid core to maintain their shape. Proper fence installation with stiffeners helps your fence accommodate these changes without compromising its structure or look.

How to Choose the Right Post Stiffener

Selecting the right post stiffener is just as important as choosing your fence style. The wrong choice can undermine the entire structure, leading to leaning posts and a shorter lifespan for your beautiful new fence. Think of it as the backbone of your fence post; it needs to be strong, compatible, and suited for its environment. When you’re ready to make a selection, there are three key things to consider: the fit with your posts, the material of the stiffener itself, and the type of soil in your yard. Getting these details right from the start will save you from headaches and costly repairs later on.

Matching the Stiffener to Your Posts

It’s a common misconception that all vinyl fence parts are interchangeable. In reality, components from different manufacturers often have slight variations in size and shape. Using a stiffener that doesn’t match your post profile can create a loose fit, which prevents it from providing the rigid support your fence needs. A wobbly stiffener inside a post is almost as ineffective as having no stiffener at all.

To ensure a perfect fit, it’s best to source your stiffeners from the same manufacturer as your vinyl posts. If that isn’t possible, you’ll need to measure the interior dimensions of your posts carefully to find a compatible product. At Gappsi, we help homeowners select the right components for a strong, cohesive fencing system that stands the test of time.

Galvanized vs. Non-Galvanized: Which Lasts Longer?

When choosing between stiffener materials, galvanized steel is the clear winner for durability. Galvanization is a process that coats steel with a layer of zinc, creating a powerful barrier against rust and corrosion. While a non-galvanized stiffener might save you a little money upfront, it’s a risky choice. Moisture can and does find its way inside vinyl posts, and once a plain steel stiffener starts to rust, it loses its strength and can even stain your white vinyl from the inside out.

Given Long Island’s humid climate and salt-filled air, corrosion is a constant threat. Investing in galvanized stiffeners is essential for protecting your fence and ensuring it remains strong for years. It’s a simple step that provides long-term peace of mind.

Does Your Soil Type Matter?

Yes, your soil type absolutely matters when it comes to fence stability. The stiffener’s primary job is to anchor the post firmly in the ground, and your soil’s composition determines how challenging that job will be. Long Island is known for its sandy, loose soil, which provides far less natural resistance than dense clay. In sandy conditions, fence posts are more susceptible to shifting, especially when facing strong winds or the weight of a gate.

Because of this, a robust post stiffener is non-negotiable. It provides the rigidity needed to keep the post straight, while a concrete footing creates a solid base. Our expertise in masonry and site preparation ensures that every post is set correctly for your specific soil conditions, creating a foundation that will keep your fence secure.

How to Install a Vinyl Fence Post Stiffener

Installing a vinyl fence post stiffener is a straightforward project, but it requires precision and patience. Taking the time to do it right ensures your fence remains strong and stable for years. While we always recommend professional fences and netting installation for a flawless finish, here’s a guide if you’re tackling this yourself.

Tools and Materials for the Job

Before you begin, gather all your tools and materials. Having everything on hand makes the process much smoother. You’ll need a post hole digger, a level, a power drill, measuring tape, concrete mix, and gravel for drainage. Of course, you’ll also need your vinyl posts and the correct stiffeners. It’s wise to invest in quality tools for the job, as they make a real difference in the final outcome. Make sure the stiffeners you choose are designed for your specific post size and type. Double-checking your materials list before you start can save you a trip to the store later.

Step-by-Step Installation

The key to a successful installation is to work methodically and avoid rushing. Most mistakes happen when you skip critical steps. First, slide the stiffener into the vinyl post, ensuring it fits snugly. Next, secure the stiffener to the post using screws, typically near the top and bottom. Once the stiffener is secure, you can place the post into the prepared hole. Use your level to make sure the post is perfectly plumb before pouring concrete. Following the manufacturer’s guidelines for your specific fence system is the best way to ensure a secure and lasting installation.

How Deep to Set Your Posts

Proper post depth is non-negotiable for a stable fence, especially with Long Island’s variable weather. A good rule of thumb is to bury at least one-third of the post underground. For an eight-foot post, that means digging a hole about three feet deep. This depth provides the necessary leverage to resist wind and ground movement. Failing to set posts deep enough can lead to an unstable installation that leans or shifts over time. Adding a few inches of gravel at the bottom of the hole for drainage before adding concrete is also a great practice.

Accounting for Expansion and Contraction

Vinyl is a durable material, but it does expand and contract with temperature changes. This is a crucial factor to consider during installation. To prevent your fence from buckling or warping, you need to leave space for this movement. A common guideline is to leave a quarter-inch gap between the fence rails and the posts. This small gap allows the material to shift naturally as the seasons change without putting stress on the structure. It’s a simple step that protects the integrity and appearance of your fence for the long haul.

Common Mistakes to Avoid

A vinyl fence is a fantastic, low-maintenance choice for your property, but its durability truly depends on a flawless installation. Many of the biggest problems we see come from skipping important steps or trying to cut corners during the setup process. Getting it right the first time saves you from future headaches, repairs, and the frustration of a fence that doesn’t look or perform its best. By avoiding a few common pitfalls, you can ensure your fence remains a beautiful and sturdy boundary for years to come.

Skipping Stiffeners on Key Posts

One of the most significant mistakes is failing to use post stiffeners where they matter most: on gate posts, corner posts, and end posts. These areas handle the most stress on your entire fence line. Gates, in particular, bear constant weight and motion, which can cause an unsupported post to sag, lean, or twist over time. The truth is, vinyl fencing is one of the most durable and beautiful options available, but only when installed correctly. Professional fencing services always include stiffeners in these critical locations to provide the necessary structural backbone for long-term stability.

Using the Wrong Size or Material

Not all vinyl fence parts are created equal, and they certainly aren’t interchangeable. Mixing components from different brands or using a stiffener that is the wrong size for your post can create a weak and unstable fence. These mismatches can lead to gaps, poor connections, and a structure that won’t stand up to strong winds or daily wear and tear. It’s essential to use high-quality, compatible materials for every part of your installation. At the Gappsi Store, we source components that are designed to work together perfectly, ensuring a secure fit and lasting durability for your project.

Overlooking Proper Drainage

Properly setting your fence posts in concrete is about more than just stability; it’s also about managing water. A common mistake is failing to slope the concrete footing away from the post. Without a slight slope, water can pool around the base of the vinyl. In Long Island’s climate, this trapped moisture can freeze and expand during the winter, leading to frost heave that can shift or even lift your posts out of the ground. Our expertise in masonry ensures that every post is set with proper drainage in mind, protecting your investment from the ground up.

Rushing the Installation

Patience is a virtue, especially when it comes to fence installation. Most mistakes happen when the process is rushed. Taking the time to double-check measurements, ensure posts are perfectly plumb, and allow the concrete to cure completely before hanging the fence panels is absolutely critical. Skipping these steps might save a few hours, but it often leads to a crooked fence or structural weaknesses that require costly fixes down the road. A professional home improvement team understands that a meticulous process is the key to a successful outcome, saving you time, money, and frustration in the long run.

Is a Vinyl Fence Right for Your Long Island Home?

If you’re thinking about a new fence for your Long Island property, you’ve probably considered vinyl. And for good reason. Vinyl fencing offers a clean, modern look that is incredibly durable and low maintenance, which is a huge advantage for any homeowner. It won’t rot or splinter, and you’ll never have to spend a weekend staining or painting it. This makes it a fantastic, long-lasting option that can handle the salty air and seasonal weather we experience here.

However, the success of a vinyl fence depends entirely on its installation. Long Island’s climate brings hot, humid summers and cold, icy winters, causing vinyl to expand and contract with temperature changes. This is perfectly normal for the material, but it must be accounted for during installation to prevent warping or buckling down the road. A professional installer understands how to give the fence panels enough room to move without compromising the structure. This is just one reason why expert fencing installation is so important.

The stability of your fence relies on getting the foundation right. This means setting the posts to the proper depth and using the correct concrete mixture to secure them, especially in our local soil conditions. Many common installation mistakes, like not digging deep enough or setting posts incorrectly, can compromise the entire fence’s strength and longevity. While vinyl is a forgiving material in many ways, a poor installation can lead to leaning posts and sagging sections, especially after a strong storm. Ultimately, a vinyl fence is an excellent choice for a Long Island home, but only when it’s installed correctly by a team that knows how to build for our specific environment.

Related Articles

Frequently Asked Questions

Do I need a stiffener in every single vinyl fence post? Not necessarily. While adding one to every post would create an incredibly strong fence, it’s most critical to use them in high-stress locations. You absolutely need stiffeners for all gate posts, corner posts, and end posts. These are the anchor points that bear the most weight and tension, so they require that extra internal support to prevent leaning and sagging over the entire life of your fence.

What’s the worst that can happen if I skip the stiffener on my gate post? Skipping a stiffener on a gate post is setting yourself up for future frustration. The constant weight and movement of the gate will cause the unsupported vinyl post to sag over time. This leads to a gate that drags on the ground, won’t latch correctly, or becomes difficult to open and close. Essentially, the one moving part of your fence will stop working properly, which often requires a difficult and costly repair.

Is a galvanized steel stiffener really necessary on Long Island? Yes, it’s a very smart choice for our local climate. The galvanization process coats the steel in zinc, which protects it from rust and corrosion. Given Long Island’s humidity and salty air, an unprotected steel stiffener will eventually rust inside the post. This not only weakens the support but can also cause ugly rust-colored stains to bleed through and ruin the look of your white vinyl fence.

Can I mix and match posts and stiffeners from different brands to save money? I would strongly advise against it. Vinyl fence components are not universally sized, and even small differences between brands can result in a poor fit. A stiffener that is loose inside the post will rattle and won’t provide the rigid support it’s supposed to. For a strong, stable fence, it’s always best to use a complete system where all the parts are designed to work together perfectly.

Besides the stiffener, what’s the most important part of setting a strong fence post? The foundation is everything. You must dig the post hole to the proper depth, which is typically at least one-third of the post’s total height. Setting the post in a solid concrete footing is also non-negotiable, especially in Long Island’s often sandy soil. This combination of depth and a solid concrete base is what truly anchors your fence against wind and prevents it from shifting over time.

Share this page:
Modern poolside pavilion with wood accents, built by a custom builder in Long Island.

Choosing a Poolside Pavilion Builder in Long Island

Your home is a reflection of your personal style, and your outdoor space should be no different. A custom pavilion offers a blank canvas to create the backyard retreat you’ve always wanted. This is your opportunity to design a structure that perfectly suits your lifestyle, whether that means a fully equipped outdoor kitchen for entertaining, a cozy fireplace for cool evenings, or a sleek, modern space for quiet relaxation. The possibilities are endless. The key is working with a poolside pavilion builder Long Island residents rely on for custom projects, one who can translate your unique vision into a beautifully crafted, functional, and durable outdoor living area.

Key Takeaways

  • Think beyond just shade: A well-designed pavilion is a lifestyle investment that extends your home’s living space, provides year-round usability, and increases your property value.
  • Design for your specific lifestyle: Customization is what makes a pavilion truly yours, so plan for features like outdoor kitchens, integrated lighting, and smart technology during the initial design phase to create a functional space that fits your exact needs.
  • Prioritize the right partnership: The success of your project depends on your builder, so select a local, experienced team that offers a custom design process and can show a portfolio of high-quality craftsmanship to ensure your investment is built to last.

Why Invest in a Poolside Pavilion?

A poolside pavilion is so much more than just a roof. It’s a statement piece that transforms your backyard from a simple swimming area into a complete outdoor living destination. Think of it as the anchor for your entire outdoor space, a place where memories are made, from lazy summer afternoons to cozy fall evenings. Investing in a pavilion extends the function and enjoyment of your pool area, creating a versatile hub for relaxation and entertainment that you and your family will use for years. It’s a decision that adds value not just to your property, but to your lifestyle.

Enjoy Shade, Shelter, and Style

Long Island summers are beautiful, but the midday sun can be intense. A pavilion offers a welcome retreat, providing cool shade right where you need it most, by the pool. It means you can spend the entire day outside without worrying about sunburns or overheating. But it’s not just for sunny days. A sturdy pavilion also gives you shelter from unexpected summer showers, so a little rain doesn’t have to send everyone running inside. It allows you to plan gatherings with confidence, knowing you have a covered space. Gappsi’s custom pavilions and pergolas are designed to blend style with function, creating an elegant and comfortable outdoor room.

Create a Year-Round Outdoor Oasis

Why limit your outdoor enjoyment to just a few months? A well-built pavilion turns your backyard into a space you can use throughout the year. Unlike a simple umbrella or canopy, a pavilion is a permanent structure engineered to handle Long Island’s diverse weather, from summer sun to winter snow. Imagine sipping hot cocoa under your pavilion on a crisp autumn day or hosting a cozy winter get-together around a fire feature. By adding elements like an outdoor fireplace or heaters, you can create a true year-round oasis. Our expert masonry team can integrate these features seamlessly into your pavilion design for ultimate comfort.

Increase Your Property’s Value

A beautiful, functional outdoor living space is a huge selling point for any home, and a poolside pavilion is a standout feature that can significantly increase your property’s value. It’s an investment that pays you back, both in enjoyment and in equity. For potential buyers, a pavilion signals a high-quality, well-maintained home with premium amenities. It helps them envision themselves relaxing and entertaining in the backyard, making your property more desirable. Adding a pavilion is a smart home remodeling project that enhances your home’s appeal and provides a solid return when it’s time to sell. It’s a feature that truly sets a home apart in the competitive Long Island market.

How Can You Customize Your Poolside Pavilion?

A poolside pavilion is so much more than just a roof on four posts. Think of it as a blank canvas for your dream outdoor retreat. This is your chance to create a space that perfectly matches your home’s style and how you love to spend your time, whether that’s hosting big family barbecues or enjoying quiet mornings by the water. The beauty of a custom-built pavilion is that you get to call the shots on every detail, ensuring the final result is a perfect fit for your lifestyle and a seamless addition to your property.

From the fundamental structure to the high-tech amenities inside, you can tailor your pavilion to be a true extension of your home. It’s an opportunity to design a functional and beautiful space that serves your specific needs. Maybe you need a shady spot for the kids to play, a sophisticated area for entertaining guests, or a private sanctuary for relaxation. Whatever your goal, customization is key. We’ll explore how to choose the right materials, decide on a layout, and add features that will make your pavilion the most popular spot in your backyard. Let’s walk through the main ways you can personalize your pavilion and make it uniquely yours.

Choose Your Roofing Style and Materials

The roof and support structure are the first things people notice, so it’s important to choose materials that reflect your personal style while standing up to Long Island weather. Most pavilions and pergolas are built from beautiful traditional wood, low-maintenance vinyl, or impressive timber frames. A classic wood pavilion offers a warm, natural aesthetic that blends seamlessly with your landscape. Vinyl is a practical choice that resists moisture and requires very little upkeep, giving you more time to relax. For a truly grand statement, a heavy timber frame provides a rustic yet elegant look with unmatched strength and character. Consider your home’s architecture and your desired maintenance level when making your choice.

Decide Between Open-Air and Enclosed Designs

How do you envision using your pavilion? Your answer will help you decide between a breezy, open-air structure or a more protected, enclosed design. An open-air pavilion keeps you connected to the outdoors, letting you enjoy the sunshine and summer breezes while still having a shady spot to retreat to. If you want to extend your outdoor season, consider an enclosed or partially enclosed design. Adding screens can keep bugs away on summer nights, while incorporating windows and doors can create a true three-season or even four-season room. This transforms your pavilion into a functional extension of your living space, perfect for entertaining regardless of the weather.

Add Built-In Features like Kitchens and Lighting

This is where you can truly personalize your pavilion and turn it into the ultimate entertainment hub. Integrating built-in features makes the space more functional and luxurious, eliminating the need to run back and forth to the house. Imagine a full outdoor kitchen with a grill, sink, and refrigerator, or a stunning stone bar where guests can gather. A custom masonry fireplace or fire pit can become a cozy focal point for cool evenings. Thoughtful lighting is also key, from overhead fans with lights to subtle accent lighting that sets the perfect mood after sunset. These additions make your pavilion the go-to spot for any occasion.

Integrate Smart Technology

Bring your poolside pavilion into the modern age with smart technology that adds convenience and a touch of magic. With integrated systems, you can control your entire outdoor environment from your phone. Picture yourself adjusting the ambiance with smart lighting that changes color and brightness, or playing your favorite summer playlist through a built-in, all-weather sound system. You can even install automated screens or shades that lower with the touch of a button to block the afternoon sun. When planning for tech, it’s crucial to use durable, weather-resistant materials to protect all the wiring and components, ensuring your smart features work flawlessly for years. You can see examples of our high-tech projects on the Gappsi YouTube channel.

Select Flooring and Finishes

The right flooring is essential for creating a safe, comfortable, and beautiful foundation for your pavilion. Since the area will be near water, a non-slip surface is a top priority. Popular options for poolside patios include beautiful and durable materials like natural stone or modern porcelain pavers. These materials not only provide excellent traction but also stay cooler underfoot than many other surfaces. At Gappsi, we specialize in a wide range of porcelain and natural stone options to complement any design. Beyond the floor, you can also customize finishes like the wood stain, paint color, and hardware to ensure every last detail aligns perfectly with your vision.

What Are the Latest Pavilion Design Trends in Long Island?

A poolside pavilion is no longer just a simple structure for shade. It has become a true statement piece, an extension of your home’s living space that reflects your personal style. Here on Long Island, we’re seeing some exciting trends that transform backyards into luxurious outdoor destinations. Homeowners are moving beyond basic designs and embracing pavilions that are as functional as they are beautiful. From the materials used to the features integrated within, today’s pavilions are all about creating a custom, sophisticated experience that feels like a natural part of your property.

These structures are engineered to handle rain, wind, and sun, providing a reliable and comfortable outdoor room you can enjoy for much of the year. The latest designs focus on blending aesthetics with practicality, ensuring your pavilion is not just a beautiful focal point but also a highly usable space for relaxing, dining, and entertaining. Whether you envision a rustic retreat or a sleek, modern oasis, the current trends offer plenty of inspiration. We’ll explore how natural materials are being used to connect with the landscape, how kitchens and entertainment features are turning pavilions into social hubs, and why open-air designs are becoming so popular. Let’s look at the top design trends shaping outdoor living spaces across the island.

Using Natural Materials to Complement Your Landscape

One of the biggest trends is designing pavilions that blend seamlessly with their natural surroundings. The goal is to make your new structure feel as if it has always been part of your landscape. This is achieved by carefully selecting materials that complement your home’s architecture and your garden’s aesthetic. Warm woods like cedar or rich timber frames create a classic, organic feel, while stone bases or accent walls can ground the structure beautifully. By using high-quality porcelain and natural stone, you can create a cohesive look that flows from your patio to your pavilion. This thoughtful approach ensures your pavilion enhances the natural beauty of your yard instead of competing with it.

Integrating Outdoor Kitchens and Entertainment Areas

Modern pavilions are the heart of backyard entertainment, serving as a functional extension of your indoor living space. Homeowners are incorporating full-service outdoor kitchens complete with built-in grills, sinks, refrigerators, and even pizza ovens. This transforms the pavilion into the perfect spot for hosting everything from casual family barbecues to elegant dinner parties. Beyond cooking, these structures are becoming all-in-one entertainment hubs. Imagine a cozy stone fireplace for cool evenings, a mounted flat-screen TV for watching the big game, and an integrated sound system for setting the mood. Our expert masonry services can help you build the custom stone bar or fireplace that completes your vision.

Designing Modern, Open-Air Structures

While traditional designs remain popular, many Long Island homeowners are drawn to modern, open-air pavilions. This style emphasizes clean lines, minimalist frames, and an airy, uncluttered feel. Materials like sleek aluminum, durable vinyl, and simple wood frames contribute to a contemporary aesthetic that feels both elegant and relaxed. These open-concept structures provide essential shade and shelter without obstructing beautiful views of your pool and landscaping. The focus is on creating a breezy, resort-like atmosphere that encourages relaxation and connection with the outdoors. These versatile pavilions and pergolas can be customized to fit any modern design preference, giving you a chic and functional outdoor retreat.

How to Complement Your Outdoor Space with a Pavilion

A pavilion is more than just a structure; it’s the centerpiece that can unify your entire backyard design. When thoughtfully planned, it connects different elements of your outdoor space, creating a cohesive and inviting environment. By integrating your pavilion with other features like your pool, patio, and garden, you can transform a simple yard into a seamless outdoor living area. The key is to think about how each element works together to support your lifestyle and aesthetic goals.

Pair Your Pavilion with a Pool

A pavilion and a pool are a perfect match. Placing a pavilion poolside gives you a comfortable, shaded retreat right where you need it most. It’s the ideal spot to relax on a lounge chair, read a book, or watch the kids splash around without being in the direct sun. A pavilion provides reliable shelter from summer heat and unexpected rain, extending the time you can comfortably spend outdoors. You can furnish it to be an open-air living room or a dining area for poolside meals. This addition transforms your swimming pool from just a place to swim into a complete resort-like destination in your own backyard, enhancing both its function and its beauty.

Combine It with Custom Masonry and Landscaping

To make your pavilion feel like a natural part of your property, integrate it with custom masonry and thoughtful landscaping. Matching the stone on your pavilion’s support columns to a nearby retaining wall or outdoor kitchen creates a beautiful, unified look. A winding stone path can connect your home’s patio to the pavilion, guiding guests through the garden. Professional landscaping softens the structure’s lines and helps it blend into the surroundings. Consider planting lush garden beds around the base or training climbing vines up the posts for a touch of romance and greenery. This combination of hardscaping and softscaping ensures your pavilion looks like it has always been there.

Incorporate Porcelain and Natural Stone

The flooring you choose for your pavilion and the surrounding patio is crucial for creating a cohesive design. Using the same material for both areas makes the entire space feel larger and more connected. Materials like porcelain and natural stone are excellent choices for poolside environments. Porcelain pavers offer a sleek, modern look and are incredibly durable and low-maintenance. Natural stone, such as travertine or bluestone, provides a timeless, elegant feel with unique textures and colors. Selecting a material that complements your home’s exterior and your pavilion’s design will tie everything together, resulting in a polished and harmonious outdoor living space that flows beautifully from one area to the next.

What Does a Poolside Pavilion Cost in Long Island?

Figuring out the budget for a poolside pavilion is one of the first steps in bringing your vision to life. While there isn’t a single price tag, understanding what goes into the final cost can help you plan effectively. The price of a pavilion in Long Island depends on your specific choices regarding size, materials, and custom features. Think of it less as a fixed cost and more as a custom investment tailored to your backyard and lifestyle. By breaking down the expenses, you can make informed decisions that align with your financial plans and create a beautiful, functional outdoor space that you’ll love for years. Let’s explore the key elements that shape the budget for your project.

Key Factors That Influence Price

The final cost of your poolside pavilion is shaped by three main factors: size, materials, and custom features. A larger structure will naturally require more materials and labor, which increases the price. Similarly, a complex or unique design will be more involved to construct than a standard rectangular shape. The materials you choose also play a significant role. Options range from classic wood to low-maintenance vinyl and modern aluminum, each with different price points. At Gappsi, we help you select from a wide range of high-quality pavilions and pergolas to find the perfect fit for your aesthetic and budget. Finally, adding features like built-in kitchens, fireplaces, lighting, or audio systems will add to the overall investment, but they also add immense value and enjoyment.

Common Cost Misconceptions

One of the biggest misconceptions is that you can save money by adding features later. While it might seem logical, integrating elements like electrical wiring or plumbing during the initial construction is almost always more cost-effective. Retrofitting these features later can be complicated and expensive. Another common oversight is forgetting about long-term maintenance. Some materials may have a lower upfront cost but require more upkeep over time. Investing in durable, high-quality materials from the start can reduce future expenses and effort. Our restoration and sealing services are a testament to our belief in building things that last, but we prefer to help you choose materials that minimize that need in the first place.

How to Maximize Your Budget

Getting the most value from your investment starts with smart planning. Before you begin, think carefully about how you want to use your pavilion. Will it be a quiet spot for relaxing, or a hub for entertaining large groups? Answering this helps you prioritize which features are essential. Investing in quality materials and craftsmanship upfront is another way to ensure your budget is well spent. Durable materials not only look better but also withstand the test of time, saving you from costly repairs down the road. Working with an experienced design and build team allows you to explore options, like beautiful and resilient porcelain and natural stone for flooring, that align your vision with your budget for a result that is both stunning and sensible.

How to Choose the Right Pavilion Builder in Long Island

Selecting the right builder for your poolside pavilion is one of the most important decisions you’ll make. You’re not just hiring a contractor; you’re choosing a partner to help bring your vision for the perfect outdoor retreat to life. A great builder combines design expertise, quality craftsmanship, and a deep understanding of the local Long Island environment. They should listen to your ideas, respect your budget, and manage the project with professionalism from start to finish. This partnership is the foundation of a successful project, ensuring the final structure not only meets but exceeds your expectations.

Finding a company that can handle every aspect of the project, from initial design to final construction, simplifies the process and ensures a cohesive result. An integrated team can seamlessly coordinate everything from masonry foundations to electrical wiring for lighting and entertainment systems. This avoids the headaches of juggling multiple contractors and timelines. Look for a team that feels like a true partner, one who is as invested in creating your dream backyard as you are. With the right builder, the journey can be just as rewarding as the beautiful pavilion you’ll enjoy for years to come.

Look for Local Experience and Expertise

When building in Long Island, local experience is non-negotiable. A builder with a long history in Nassau and Suffolk counties will understand the specific building codes, permitting processes, and environmental factors that can impact your project. They know how to design structures that withstand coastal weather and complement the area’s distinct architectural styles. A company with deep local roots has a reputation to uphold and a portfolio of nearby projects you can often see for yourself. Ask potential builders about their experience in your specific town to gauge their familiarity with the community. A team that has been serving Long Island for decades brings invaluable design and construction expertise to your project.

Verify Their Custom Design Process

Your pavilion should be a reflection of your personal style and how you want to live outdoors, not a generic, one-size-fits-all structure. A top-tier builder will offer a collaborative and custom design process. They should take the time to understand your needs, from how you plan to use the space to your aesthetic preferences. The process should feel like a partnership, where your vision is the foundation of the design. A builder who offers detailed 3D renderings can help you visualize the final product and make confident decisions before construction even begins. Look for a company that showcases a wide variety of pavilions and pergolas, as this demonstrates their ability to create truly custom structures for their clients.

Ask About Materials and Craftsmanship

A pavilion is a long-term investment, and its durability depends entirely on the quality of the materials and the skill of the builders. Don’t hesitate to ask detailed questions about the types of wood, vinyl, or metal they use and why they recommend certain options. A knowledgeable builder will explain the pros and cons of each material, considering factors like maintenance, longevity, and appearance. High-quality craftsmanship is just as important. Examine their past work for clean lines, sturdy joints, and meticulous attention to detail. The right materials, from the support beams to the porcelain and natural stone flooring, ensure your pavilion will not only look stunning but also stand the test of time.

Inquire About Licensing, Timelines, and Warranties

Before signing any contract, it’s essential to do your due diligence. Confirm that the builder is fully licensed and insured to work in Long Island. This protects you from liability and ensures they are accountable for their work. A professional builder will also provide a clear, realistic project timeline and keep you informed of progress along the way. Finally, ask about their warranties. A reputable company will stand behind its craftsmanship and the materials it uses, giving you peace of mind that your investment is protected. This level of transparency and professionalism is a hallmark of an experienced home remodeling and construction company that you can trust with your home.

Ready to Build Your Dream Poolside Pavilion?

Taking the step to build a poolside pavilion is an exciting decision that completely transforms how you enjoy your home. The difference between a good pavilion and a great one often comes down to the builder. You need a partner who understands Long Island’s unique environment and can bring your specific vision to life. Look for a team that offers deep expertise in both design and construction, ensuring your new structure is not only beautiful but also built to last through every season. A quality builder will help you create a versatile space for year-round enjoyment, providing cool shade from the summer sun and reliable shelter from the elements.

A truly special pavilion reflects your personal style. Whether you envision a classic timber frame or a modern vinyl structure with a full outdoor kitchen, the right builder provides extensive customization options. They should also guide you through selecting high-quality materials, like durable porcelain and natural stone, that stand up to the weather and complement your home’s aesthetic. The best projects are a collaboration between your ideas and a builder’s craftsmanship, resulting in a space that feels uniquely yours.

At Gappsi, we have spent over three decades helping Long Island homeowners create stunning outdoor living spaces. Our process is collaborative from start to finish, combining your vision with our expertise in custom pavilions and pergolas. We handle everything from the initial design to the final touches, creating a seamless experience for you. If you are ready to explore the possibilities for your backyard, we invite you to view our work and see what we can build together.

Related Articles

Frequently Asked Questions

What is the difference between a pavilion and a pergola? The simplest way to tell them apart is by looking at the roof. A pavilion has a solid, continuous roof that provides complete protection from sun and rain, making it a true outdoor room. A pergola, in contrast, has a slatted or latticed roof that offers partial shade and is often designed to support climbing plants. Your choice depends on whether you want full shelter or just a bit of filtered sunlight.

Can a pavilion really be used during Long Island’s colder months? Absolutely. While an open-air pavilion is wonderful, you can design it for year-round comfort. By adding features like a custom masonry fireplace, built-in heaters, or even enclosing the structure with screens or windows, you can create a cozy and inviting retreat. This turns your pavilion into a space you can enjoy for holiday gatherings or quiet winter evenings, not just in the summer.

How much maintenance does a new pavilion require? The level of maintenance depends almost entirely on the materials you select. A classic wood pavilion, for example, will need periodic sealing or staining to keep it looking its best and protect it from the weather. If you prefer a lower-maintenance option, materials like vinyl or aluminum are great choices that typically only require occasional cleaning to stay in top condition.

How long does a pavilion project usually take from design to completion? The timeline can vary quite a bit because every project is custom. The process includes the initial design phase, securing any necessary permits, and the actual construction. A simple, standard pavilion will be quicker to build than a large, complex one with a full outdoor kitchen and custom masonry. A professional builder will give you a clear and realistic timeline once the design is finalized.

Do I need a permit to build a pavilion on my property? In most towns across Long Island, a permanent structure like a pavilion does require a building permit. This process ensures that the construction is safe, up to code, and properly documented. Working with an experienced local builder is a huge benefit here, as they will be familiar with your town’s specific requirements and can manage the entire permitting process for you.

Share this page:
A modern custom gazebo built for a backyard on Long Island.

Your Guide to a Custom Gazebo on Long Island

Your home reflects your personal style, and your backyard should be no different. When you decide to add an outdoor structure, you’re faced with a choice: a generic, off-the-shelf kit or a structure designed just for you. A prefabricated gazebo limits you to standard sizes and materials, often resulting in a feature that feels disconnected from your home. The real magic lies in personalization. A custom gazebo on Long Island gives you complete creative control to build a space that fits your lifestyle perfectly. You can choose the ideal shape, select materials that match your home, and add features like integrated lighting, screens, or a ceiling fan. This guide is for homeowners who want to create a truly unique outdoor retreat.

Key Takeaways

  • Choose Custom for a Lasting Structure: A custom-built gazebo lets you pick the right materials, like wood, vinyl, or aluminum, and a design that perfectly matches your home and stands up to Long Island’s weather, unlike a one-size-fits-all kit.
  • Hire a Pro to Handle the Headaches: A full-service builder is your best partner, managing everything from the design and materials to the tricky local permit process, which saves you time and ensures the project is done right.
  • View Your Gazebo as a Valuable Addition: Think of a custom gazebo as an investment in your lifestyle and property value, as it creates a functional outdoor room for relaxing and entertaining that makes your home more enjoyable and appealing.

Custom or Prefab Gazebo: Which Should You Choose?

When you decide to add a gazebo to your backyard, one of the first choices you’ll face is whether to go with a custom build or a prefabricated kit. While a prefab kit from a big-box store might seem like a straightforward solution, it often comes with trade-offs. A custom-designed gazebo, on the other hand, is built to your exact specifications, ensuring it perfectly complements your home and lifestyle. Let’s walk through the key differences to help you decide which path is right for your Long Island home.

The Perks of a Custom Design

A custom design gives you complete creative control. Instead of being limited to a few standard models, you can create an outdoor structure that is uniquely yours. We can help you design and build custom pavilions, pergolas, and gazebos that fit your yard, your vision, and your budget perfectly. This means choosing the ideal size, shape, and materials to match your home’s architecture and your existing landscape. A custom approach ensures your new gazebo doesn’t just sit in your yard, it becomes a seamless and functional part of your outdoor living space.

The Downsides of Prefab Kits

Prefabricated gazebo kits can seem appealing because of their lower initial price, but they have significant limitations. You’re stuck with the designs, materials, and sizes offered, which may not suit your space or style. These one-size-fits-all solutions can look out of place and often lack the durability of a professionally built structure. With a kit, you miss the opportunity to create a cohesive look that ties into your patio’s porcelain and natural stone or other landscape features. A custom build avoids these issues, giving you a high-quality, personalized structure built to last.

Choosing the Best Materials for a Long Island Gazebo

Selecting the right material for your gazebo is one of the most important decisions you’ll make. It determines not only the look and feel of your new outdoor space but also how much maintenance it will require over the years. On Long Island, our four-season climate, complete with humid summers, freezing winters, and salty coastal air, makes durability a top priority. You need a material that can stand up to the elements while matching your home’s aesthetic.

The three most popular choices are classic wood, low-maintenance vinyl, and modern aluminum or composite. Each has its own unique benefits, from the timeless charm of natural cedar to the hassle-free resilience of vinyl. Gappsi designs and builds custom pavilions, pergolas, and gazebos using a variety of high-quality materials, so you can find the perfect fit for your backyard vision and lifestyle. Let’s walk through the pros and cons of each option to help you decide.

Classic Wood Gazebos

There’s something undeniably beautiful about a classic wood gazebo. It offers a warm, natural look that blends seamlessly into any landscape. For a durable and stunning option, Western Red Cedar is an excellent choice because it contains natural oils that help it resist rot and decay. A wood structure feels traditional and authentic, creating a cozy retreat in your backyard.

While wood is gorgeous, it does require some upkeep to maintain its beauty, especially in our climate. To protect it from moisture and sun damage, you’ll need to periodically stain or seal it. For homeowners who love the rich character of natural materials and don’t mind a little seasonal maintenance, a wood gazebo is a fantastic investment that adds timeless value to your property.

Low-Maintenance Vinyl Gazebos

If your goal is to spend more time relaxing in your gazebo and less time maintaining it, vinyl is the perfect material for you. Vinyl gazebos are designed to handle Long Island’s weather with ease, from summer sun to winter snow. They won’t rot, splinter, or fade, and they are completely impervious to pests like termites. This makes them an incredibly practical choice for busy families.

Best of all, vinyl is exceptionally easy to clean. A simple wash with soap and water is all it takes to keep your gazebo looking brand new year after year. With a clean, polished appearance, a vinyl gazebo offers a crisp look that complements many modern home styles while giving you a beautiful outdoor feature without the work.

Durable Aluminum and Composite

For a sleek, contemporary structure with maximum durability, look no further than aluminum and composite materials. These options offer a modern aesthetic and are engineered for superior longevity. Gappsi can even design structures with special louvered aluminum roofs that you can adjust for sun or shade. These materials are perfect for creating a sophisticated, resort-like feel right in your own backyard.

Aluminum and composite are completely resistant to rust, corrosion, and insect damage, making them an ideal choice for coastal homes exposed to salty air. They require virtually no maintenance and will retain their structural integrity and appearance for decades. When paired with a beautiful stone patio, an aluminum or composite gazebo creates a truly stunning and durable outdoor living space.

How Long Island Weather Impacts Your Choice

Your gazebo’s material will be its first line of defense against Long Island’s demanding weather. The constant exposure to sun, rain, snow, and salt can take a toll on any outdoor structure, so choosing wisely is key to protecting your investment. For example, the high humidity in the summer can be tough on untreated wood, making a proper seal essential.

This is where a material’s inherent properties really matter. Vinyl is unfazed by moisture, making it a worry-free option for rainy seasons. Aluminum is an excellent choice for homes near the South Shore, as it won’t corrode from the salty air. Understanding how each material reacts to our local climate helps you select a gazebo that not only looks great on day one but continues to perform beautifully for years to come. Proper restoration and sealing are also part of a long-term care plan for many outdoor surfaces.

Personalize Your Gazebo: Top Custom Features

A custom gazebo is more than just a structure; it’s a personal retreat designed just for you. This is where you can move beyond a standard kit and create a space that perfectly fits your lifestyle and your backyard’s aesthetic. The real beauty of a custom build lies in the details, from the foundational shape and size to the functional features that make it comfortable and inviting year-round.

Thinking through your customization options is the most exciting part of the process. Do you envision a cozy reading nook, a lively hub for family dinners, or a serene poolside escape? By tailoring the design, you ensure your new gazebo isn’t just an addition to your yard, but the heart of your outdoor living space. Let’s explore some of the top features you can choose to make your gazebo uniquely yours.

Finding the Right Size, Shape, and Roof

The first step in personalizing your gazebo is choosing the right footprint. The ideal size depends on both your available space and how you plan to use it. A smaller, intimate gazebo might be perfect for a quiet corner of your garden, while a larger structure can comfortably host dinner parties. Common shapes like octagons, squares, and rectangles each offer a different feel and flow. An octagonal shape provides a classic, panoramic view, while a rectangular design can feel more like a defined outdoor room.

The roof is another key element that defines your gazebo’s character. You can select materials that complement your home’s existing architecture, from traditional wood shingles to durable metal or modern composite roofing. A well-chosen roof not only protects you from the elements but also completes the structure’s visual appeal.

Adding Screens, Lighting, and Power

To get the most out of your gazebo, consider features that add comfort and convenience. On Long Island, screens are a popular addition, allowing you to enjoy warm evenings without worrying about mosquitos and other insects. This simple feature can transform your gazebo into a usable three-season room.

Properly planned lighting and power can take your gazebo from a daytime spot to a 24/7 destination. We can help you design and build a structure with integrated, hidden wiring for ceiling fans, overhead lights, speakers, and outlets. Imagine having a place to charge your phone, play music, or plug in a small refrigerator for cold drinks. These thoughtful additions make the space more functional for relaxing, dining, and entertaining.

Integrating Your Gazebo with Pools, Patios, and Landscapes

A truly stunning gazebo doesn’t stand alone; it connects seamlessly with the rest of your outdoor environment. Think of it as a key feature within your overall landscape design. Placing your gazebo next to a swimming pool creates a perfect shaded lounge for drying off or watching the kids play. Connecting it to your patio with a matching stone walkway creates a natural flow between your home and garden.

Your gazebo can serve as a beautiful focal point, drawing the eye and anchoring your backyard design. By integrating it with other elements like an outdoor kitchen, a nearby fire pit, or surrounding garden beds, you create a cohesive and inviting outdoor living area. It becomes the central hub for everything from morning coffee to evening gatherings with friends and family.

How to Choose the Best Gazebo Builder on Long Island

Finding the right partner to build your gazebo is just as important as choosing the right materials and design. You want a team that understands the local landscape, has a proven track record, and can make the process feel effortless. On Long Island, your best bet is a builder with deep roots in the community and a portfolio that speaks for itself.

What to Look For in a Top-Tier Builder

The best builder is one who can bring your specific vision to life. Start by looking for a company with an extensive portfolio of completed projects in Nassau and Suffolk counties. This gives you a clear idea of their craftsmanship and design versatility. A top-tier builder should be able to create fully custom outdoor structures tailored to your yard, while also offering beautiful standard models if you prefer a more straightforward option. Don’t forget to check online reviews and ask for references. Hearing directly from past clients about their experience provides invaluable insight and helps you choose a builder with confidence.

Why a Full-Service Approach Matters

Opting for a builder with a full-service approach can make your project significantly smoother and less stressful. Instead of you juggling separate designers, suppliers, and construction crews, a full-service company manages everything for you. This means one dedicated team handles the entire project, from the initial design concepts and material selection to securing permits and the final installation. This integrated process ensures clear communication and a cohesive result, preventing costly errors and delays. You get a single point of contact and the peace of mind that comes from knowing every detail is being expertly managed from start to finish.

How Much Does a Custom Gazebo Cost on Long Island?

Let’s talk about one of the biggest questions on every homeowner’s mind: the budget. The cost of a custom gazebo isn’t a one-size-fits-all number because every project is unique. The final price depends entirely on your vision, from the size and materials to the special features you choose to include. While a simple wood pergola might cost between $4,000 and $7,000, a custom gazebo is typically a more complex structure and falls on the higher end of that spectrum. It’s not uncommon for a fully customized gazebo to cost $15,000 or more, especially when it includes high-end materials and intricate details.

Think of it as investing in a permanent, beautiful addition to your home that’s built to last. This isn’t just an outdoor accessory; it’s a functional living space designed to your exact specifications. By understanding the key cost drivers from the start, you can create a realistic budget and make informed decisions as you plan your perfect outdoor retreat. A good builder will walk you through every line item, ensuring there are no surprises and that the final result is exactly what you imagined for your Long Island backyard.

Key Factors That Affect the Price

The primary factors influencing your gazebo’s cost are its size, materials, and custom features. A larger, more elaborate structure will naturally require more materials and labor. Your choice of materials also plays a huge role. For example, premium woods like cedar or durable, low-maintenance vinyl will cost more upfront than standard pressure-treated pine. The foundation is another consideration, whether it’s a simple concrete slab or an elegant patio made from high-quality porcelain and natural stone pavers. Finally, add-ons like built-in seating, electrical wiring for lighting and fans, or integrated screens will increase the total investment. These features are what truly personalize the space and make it your own.

Budgeting and Financing Your Project

Seeing the potential price tag can feel overwhelming, but a custom gazebo is a significant home improvement project that adds lasting value. Don’t let the initial number discourage you. Many homeowners find that financing is a practical way to make their dream project a reality without depleting their savings. Some financing options allow you to break down the total cost into predictable, manageable monthly payments. This approach makes it easier to move forward with your project now instead of waiting. When you consult with a full-service builder, be sure to ask about the payment and financing solutions they recommend to help you budget effectively for your new outdoor structure.

Do You Need a Permit for a Gazebo on Long Island?

Let’s talk about one of the less glamorous, but very important, parts of building a gazebo: the paperwork. The short answer is yes, you will likely need a permit for a permanent, custom gazebo on Long Island. While the specific rules can differ from town to town across Nassau and Suffolk County, most municipalities require one for structures of a certain size and permanence. Factors like the gazebo’s square footage, its height, and whether it has electricity or is attached to a foundation all play a role in the permitting process.

Trying to figure this out on your own can feel like a full-time job. It often involves digging through your town’s building codes, filling out applications, and providing detailed plans. This is where the value of an experienced local builder really shines. A team that regularly works in your area will already know the specific requirements for your project. They understand that getting a permit isn’t just about checking a box; it’s about ensuring your new gazebo is safe, structurally sound, and a compliant addition to your property. This protects your investment and gives you confidence that the job is done right from the very beginning. Choosing a builder who is an expert in custom pavilions, pergolas, and gazebos means they will have this process down to a science.

How a Full-Service Builder Handles the Paperwork

A full-service builder manages your entire project, and that includes handling all the permit-related headaches for you. Instead of you spending hours at the town building department, your builder takes care of the entire process. They will prepare and submit all the necessary applications, architectural drawings, and site plans required by your local municipality. They act as the main point of contact with town officials, answering any questions and providing additional information as needed.

This comprehensive approach means you can focus on the exciting parts of the project, like choosing materials and design features, while your builder handles the bureaucracy. This is a standard part of a professional home remodeling or outdoor construction project. From initial submission to scheduling final inspections, a full-service team ensures every step is completed correctly, giving you total peace of mind.

Key Questions to Ask a Gazebo Builder

Choosing a builder is the most important decision you’ll make for your gazebo project. Think of it as a job interview where you’re the hiring manager. The right partner will not only build a beautiful structure but also make the entire process smooth and stress-free. Before you commit, sit down with potential builders and come prepared with a list of questions. Their answers will tell you everything you need to know about their expertise, process, and reliability.

Start with the basics to gauge their experience. Ask to see a portfolio of their completed pavilions and gazebos, paying close attention to the quality of the craftsmanship. Inquire if they offer standard models or specialize in fully custom designs. A great builder can work with you to create a structure that perfectly fits your vision and your property. Be sure to ask what materials they recommend for Long Island’s weather and why. You should also get a clear understanding of their design process, including whether they provide 3D renderings so you can visualize the final product. Finally, ask about their team, the project timeline, and how they handle the essential, and often complicated, permit process. A confident builder will have clear, direct answers that give you peace of mind.

Your Pre-Hiring Checklist

Before you sign any contracts, run through this final checklist to ensure you’re partnering with a true professional. First, verify that the builder is fully licensed and insured to work in your area. This is non-negotiable. Next, carefully review the contract to confirm it includes a detailed scope of work, a list of materials, a project timeline, and a clear payment schedule. A trustworthy builder will also manage the entire permit process for you, leveraging their experience with local regulations in towns across Nassau and Suffolk County. Finally, discuss the warranty they offer on both materials and labor. A solid warranty shows that a company stands behind its work.

Red Flags to Watch For

Knowing what to avoid is just as important as knowing what to look for. Be cautious of any builder who gives you a vague estimate or uses high-pressure sales tactics to rush your decision. A professional provides a detailed, itemized quote and respects your need to consider your options. Another major red flag is a lack of a portfolio or verifiable references. If they can’t show you their past work, they may not have the experience you need. It’s also wise to be wary of companies without a physical office or showroom. A local presence, like the Gappsi Store, provides accountability. Lastly, if a builder dismisses the need for permits or is difficult to communicate with from the start, it’s best to walk away.

Is a Custom Gazebo a Good Investment?

Absolutely. For many Long Island homeowners, a custom gazebo is a smart investment that pays off in more ways than one. It’s not just about adding a beautiful structure to your yard; it’s about creating a new area for your family to live, relax, and entertain. Think of it as an outdoor living room, a shaded retreat on a hot summer day, or the perfect spot for hosting dinner parties. This added functional space can make your entire property feel more expansive and useful.

From a financial perspective, a well-designed gazebo can offer a solid return on investment by increasing your home’s curb appeal and overall value. While the initial cost is a key consideration, the long-term benefits often outweigh it. The real magic happens with customization. Unlike a one-size-fits-all kit, a custom build allows you to design a space that perfectly fits your lifestyle. You can work with a builder to create unique pavilions and pergolas that include features like built-in lighting, ceiling fans, or even outlets for a sound system. By tailoring the gazebo to your specific needs, you create a truly personal oasis that enhances both your property’s value and your daily enjoyment of it.

Related Articles

Frequently Asked Questions

How long does it take to build a custom gazebo? The timeline for a custom gazebo project can vary quite a bit, as it depends on the design’s complexity, the materials you choose, and the local permit process. Generally, you can expect the entire process, from the initial design consultation to the final installation, to take anywhere from a few weeks to a couple of months. A full-service builder will give you a clear and realistic timeline upfront and will manage every step to keep the project moving forward efficiently.

What’s the real difference between a gazebo, a pergola, and a pavilion? It’s easy to get these terms mixed up, but they each serve a different purpose. A gazebo is typically a freestanding, often octagonal structure with a solid roof and partially enclosed sides, creating a cozy, room-like feel. A pavilion also has a solid roof but is usually larger, rectangular, and completely open on the sides, making it ideal for covering an outdoor dining area or kitchen. A pergola is the most open of the three, featuring a slatted or open-beam roof designed to provide partial shade for a walkway or patio.

How much maintenance will my new gazebo actually need? The amount of maintenance really comes down to the material you select. If you choose a vinyl, aluminum, or composite gazebo, you’re looking at very little upkeep, usually just a simple cleaning with soap and water to keep it looking fresh. A classic wood gazebo requires a bit more care. To protect it from Long Island’s weather and keep it looking its best, you will need to stain or seal it every few years.

Can I really use a gazebo for more than just the summer months? Absolutely. While a gazebo is a perfect escape from the summer sun, adding custom features can extend its use well into the spring and fall. Installing screens is a fantastic way to create a bug-free zone for relaxing on warm evenings. With proper lighting and a ceiling fan, your gazebo can become a comfortable three-season retreat for reading, dining, or just enjoying your backyard without being fully exposed to the elements.

How does the custom design process actually work? The custom design process is a collaborative effort to bring your vision to life. It starts with a consultation where we discuss how you want to use the space, your style preferences, and your budget. From there, we create initial designs, often including 3D renderings so you can see exactly what the finished structure will look like in your yard. We’ll help you select the perfect materials, colors, and features before finalizing the plans and moving on to construction.

Share this page: