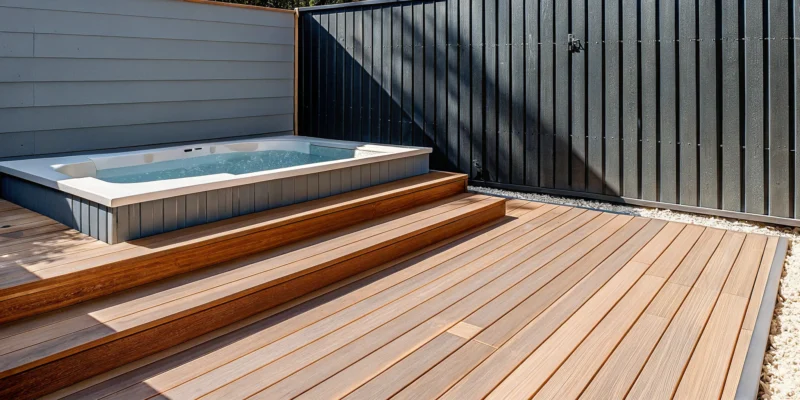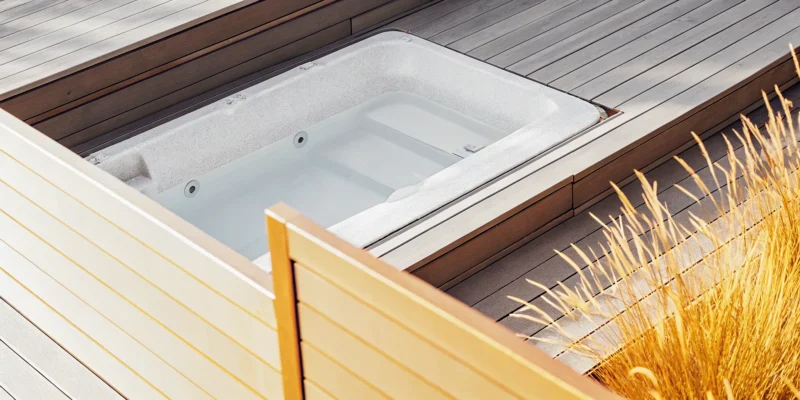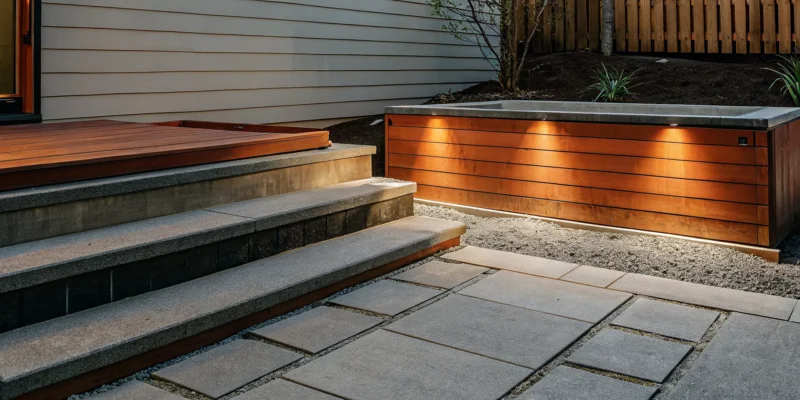
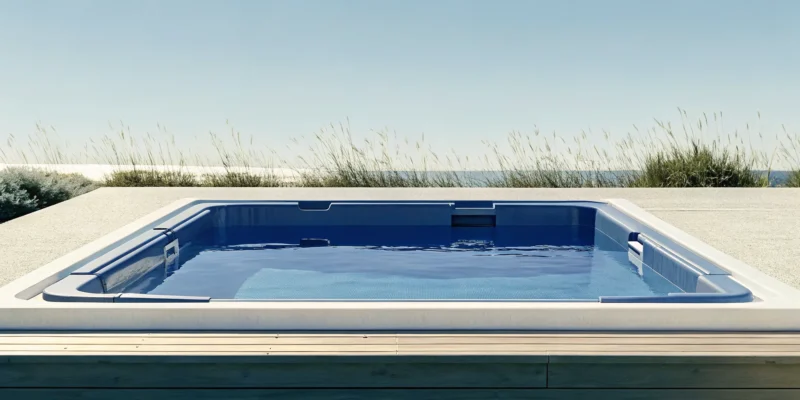
A swim spa on a solid concrete pad foundation, surrounded by decorative pavers.

How to Choose the Right Swim Spa Pad for Your Home

Your swim spa shouldn’t look like an afterthought dropped into your backyard. It should feel like a seamless, integrated part of your outdoor living space. This is where the swim spa pad becomes more than just a functional necessity; it becomes a design opportunity. While a simple concrete slab gets the job done, you can also use beautiful materials like natural stone or elegant porcelain pavers to create a foundation that enhances your entire patio and landscape. This guide explores how to choose a swim spa pad that not only provides the critical support your spa needs but also elevates the look and feel of your property for a truly luxurious finish.

Key Takeaways

  • Your Foundation is Non-Negotiable: A swim spa needs a perfectly level, stable pad to support its massive weight. Using unprepared ground can lead to costly damage to the spa’s structure, so proper site preparation is the most critical part of the installation.
  • Choose the Right Pad Material: Your pad can be made from concrete, gravel, or decorative pavers, each with different costs and benefits. Concrete is a durable workhorse, while pavers and stone offer a beautiful, integrated look, so weigh the pros and cons to find the best fit for your budget.
  • Plan for Access, Permits, and Drainage: A successful project requires planning for the details. This includes building a pad larger than the spa, checking local Long Island permit requirements, planning for water runoff, and leaving enough clearance for future maintenance.

What Is a Swim Spa Pad?

Think of a swim spa pad as the essential foundation for your new backyard oasis. It’s a perfectly level, stable surface specifically engineered to support your swim spa. You can’t just place a spa on your lawn or an old patio. It needs a dedicated base to ensure it functions correctly and lasts for years. Without a proper pad, your spa could shift, crack, or even damage its internal components, leading to costly repairs.

Creating this foundation is a key part of any swim spa installation. Whether it’s a reinforced concrete slab, a bed of compacted gravel, or a system of interlocking pavers, the goal is the same: to provide unwavering support. The right pad distributes the spa’s immense weight evenly, preventing it from settling or becoming unlevel over time. It’s the unsung hero that protects your investment from the ground up.

Why a Solid Foundation Is Crucial

A solid foundation is non-negotiable because your swim spa needs to support a massive amount of weight on a completely level surface. Even a slight tilt can put stress on the spa’s shell and cause problems with water circulation and drainage. According to experts at Master Spas, the best practice is to use a reinforced concrete pad that is at least four inches thick. Proper site preparation is the first step to a successful installation, as it helps you spot and solve potential issues before they become major headaches. This is where professional expertise in services like masonry becomes invaluable, ensuring the base is built to last.

How Much Weight Does Your Swim Spa Pad Need to Hold?

To understand why the foundation is so important, let’s talk numbers. A typical swim spa can weigh upwards of 3,000 pounds once it’s filled with water and people. All of that weight is concentrated in a relatively small area. Most swim spas are about eight feet wide, with lengths ranging from 11 to 21 feet. Your pad must be strong enough to hold the equivalent of a small car without shifting, cracking, or sinking. This is why a simple patch of grass or a standard patio won’t work. The pad needs to be specifically designed and constructed to handle this significant load safely for decades.

Exploring Types of Swim Spa Pads

Choosing the right foundation for your swim spa is just as important as choosing the spa itself. This base, or pad, needs to support thousands of pounds of water and equipment while staying perfectly level for years. The best option for your Long Island home depends on your budget, your backyard’s conditions, and the look you want to achieve. Let’s walk through the most common types of swim spa pads so you can make a confident choice for your new backyard oasis.

Concrete Pads

A reinforced concrete pad is the gold standard for swim spa foundations. It’s incredibly strong, stable, and durable, making it a worry-free, long-term solution. For a swim spa, the pad should be at least four inches thick and reinforced with steel rebar to prevent cracking under the immense weight. While it’s one of the most reliable options, it’s also a permanent one. A professionally poured concrete pad ensures a perfectly level surface that will support your investment for decades. Our expert masonry team can prepare the site and pour a foundation that meets the exact specifications for your swim spa, giving you total peace of mind.

Gravel Pads

A compacted gravel base is a popular and cost-effective alternative to concrete. This type of pad is typically built by creating a level frame, often with timber, and filling it with layers of crushed stone that are then compacted to create a solid, stable surface. The key to a successful gravel pad is ensuring it’s perfectly level and provides excellent drainage, which is a natural benefit of using stone. While it can be a DIY project, professional installation guarantees the proper depth and compaction needed to support a heavy swim spa. This option offers a more natural look and can be a great choice for many backyards.

EZ Pads (Modular Plastic Pads)

Modular pads, like the popular EZ Pad, are another option for your swim spa foundation. These pads consist of interlocking, heavy-duty plastic pieces that you can snap together to create a base of the right size. They are lightweight, easy to transport, and can often be installed in less than an hour on an already level patch of ground. This makes them a fast and convenient choice, especially if you need a less permanent solution. However, it’s critical that the ground underneath is perfectly prepared, level, and compacted, as the plastic pad will conform to any imperfections below it, which could cause issues for your spa over time.

Pavers and Natural Stone

For a truly integrated and high-end look, a base made from pavers or natural stone is an excellent choice. This option allows your swim spa foundation to become a beautiful part of your patio or landscape design. When professionally installed over a properly compacted base, pavers create a strong and stable surface that can easily support the weight of a swim spa. You can choose from a wide variety of porcelain and natural stone options to match your home’s aesthetic, turning a simple foundation into a stunning design feature. This approach seamlessly blends your spa into its surroundings for a cohesive and luxurious feel.

Comparing Pad Types: Cost, Durability, and Installation

Choosing the right foundation for your swim spa involves balancing your budget, long-term expectations, and installation timeline. Each pad type comes with its own set of trade-offs, so understanding them upfront will help you make a confident decision for your Long Island home. Let’s break down what you can expect from each option when it comes to cost, durability, and the work involved to get it ready for your spa.

A Look at the Costs

When budgeting for your swim spa pad, it’s important to look at the total project cost, not just the price of materials. For example, modular plastic pads might seem affordable at first glance, with some brands costing around $400. However, homeowners have reported spending over $700 once they factor in site preparation and other necessities.

On the other hand, a professionally installed concrete or paver pad has a more inclusive upfront cost. While the initial quote may be higher, it typically covers the excavation, materials, and labor needed for a permanent, reliable foundation. A custom masonry base ensures you have a solid, level surface built to last, preventing costly issues down the road.

Durability and Longevity of Each Pad Type

Your swim spa is a heavy, long-term investment, and its foundation needs to be just as durable. A reinforced concrete slab is a classic choice known for its strength and ability to withstand thousands of pounds for decades. Similarly, high-quality pavers offer exceptional durability with the added benefit of aesthetic appeal. You can create a beautiful, integrated patio space using porcelain and natural stone that complements your landscape design.

Modular pads can be durable, but their longevity is entirely dependent on the ground beneath them. If the base isn’t perfectly compacted and level, the pads can shift or warp over time, potentially damaging your spa. No matter which option you choose, using quality materials and ensuring proper site work is the key to a foundation that lasts as long as your swim spa.

Installation Complexity and Timelines

The installation process varies significantly between pad types. A concrete pad is the most time-intensive option, as it requires excavation, framing, pouring, and several days (or even weeks) for the concrete to cure fully before you can place the spa on it. Modular pads are often marketed as a quick DIY solution, but achieving a perfectly level and compacted base can be a surprisingly complex and frustrating task for many homeowners.

A professionally installed paver or stone base offers a great balance. The installation is handled by experts who prepare the site, create a stable sub-base, and lay the pavers precisely. While it requires professional help, the pad is often ready to use much faster than concrete. A proper swim spa installation from start to finish removes the guesswork and ensures your foundation is flawless from day one.

How to Choose the Best Base for Your Swim Spa

Selecting the right foundation for your swim spa is one of the most important decisions you’ll make. The best base isn’t just about what looks good; it’s about creating a safe, stable, and long-lasting home for your investment. A solid foundation prevents shifting, cracking, and costly damage to both the spa and your property. To make the right choice, you need to look at your yard’s specific conditions, account for our local climate, and make sure you get the dimensions just right. Let’s walk through the key factors to help you build a perfect foundation from the ground up.

Assess Your Drainage and Ground Conditions

Before any materials are brought in, take a close look at your chosen spot. Proper site preparation is essential for a stable swim spa pad. Where will water go when it rains or splashes out of the spa? A good foundation plan includes effective drainage to guide water away from the base, preventing erosion and pooling that can compromise its integrity. The ground itself must be firm and level. Soft soil or uncompacted dirt will settle under the immense weight of a filled swim spa, leading to a tilted, unstable pad. A professional landscape design assessment can identify potential grading or soil issues early on, ensuring your project starts on solid ground.

Consider Long Island’s Climate and Freeze-Thaw Cycles

Here on Long Island, we know our weather can be tough. The constant cycle of freezing and thawing during the winter months can wreak havoc on improperly installed surfaces. When water seeps into tiny cracks, freezes, and expands, it can cause concrete to crumble and pavers to shift. To avoid this, your foundation must be built to withstand these temperature swings. For example, a concrete pad should be at least four inches thick and properly reinforced to handle the pressure. Using durable materials installed with expert masonry techniques ensures your swim spa base remains stable and secure year after year, no matter what the winter brings.

Determine the Right Pad Size

Your swim spa pad needs to be larger than the spa itself. A common mistake is creating a base that exactly matches the spa’s footprint, leaving no room for error or access. As a general rule, the pad should extend at least six inches to a foot beyond the spa’s dimensions on all sides. This provides a stable, level surface for the spa to rest on and gives you a clean, solid area to walk on when getting in and out. Before finalizing the size, consider your spa’s specific requirements, including the location of access panels for maintenance, and any accessories like steps or cover lifters that will need space on the pad.

Common Swim Spa Pad Mistakes to Avoid

Installing a swim spa is an exciting upgrade for your home, but a few common missteps with the foundation can cause major headaches down the road. The good news is that these mistakes are entirely preventable with a little planning and professional guidance. A solid pad is the key to protecting your investment and ensuring you can enjoy your spa for years to come. By understanding what not to do, you can make sure your project starts on the right foot.

From preparing the ground correctly to thinking about future maintenance, every detail matters. Let’s walk through the most frequent errors homeowners make so you can sidestep them completely. Taking the time to get your swim spa pad right from the beginning will save you a lot of hassle and expense in the long run.

Skipping Proper Site Preparation

One of the most critical errors is failing to properly prepare the site before installing the pad. It’s tempting to rush this step, but placing a pad on uncompacted or poorly graded soil is a recipe for trouble. Over time, the ground can shift and settle, causing your pad to become unstable, crack, or tilt. This not only looks bad but can also put uneven stress on your swim spa’s shell, potentially leading to damage.

Proper site preparation involves clearing the area of all vegetation, roots, and large rocks. The ground must then be excavated to the correct depth and graded for drainage before adding and compacting a base layer of gravel. This creates a stable foundation that won’t sink or move. A professional masonry contractor understands how to create a solid base that will support the immense weight of a swim spa for decades.

Ignoring Drainage and Water Runoff

Water is a swim spa’s best friend, but it can be your foundation’s worst enemy if not managed correctly. Overlooking drainage is a frequent mistake that can lead to serious issues. When rainwater or spa overflow has nowhere to go, it can pool around and under the pad. This can cause soil erosion, wash away the base material, and compromise the entire foundation. In Long Island’s climate, trapped water can also freeze and expand in the winter, causing the pad to heave and crack.

A well-designed site plan always includes a strategy for water runoff. This usually means grading the surrounding land to direct water away from the spa area. In some cases, installing a French drain or other drainage solutions might be necessary. Proper landscape design ensures your swim spa pad stays dry, stable, and secure through every season.

Placing Your Spa on Uneven or Soft Ground

Never place a swim spa directly on grass, soil, or any other soft surface. It also should never be placed on an uneven base. A swim spa filled with water and people can weigh tens of thousands of pounds, and it needs a perfectly level, solid surface to distribute that weight evenly. Trying to level a spa with shims or blocks is not a safe or sustainable solution. An unlevel spa puts enormous strain on the frame and acrylic shell, which can lead to cracks and leaks that may void your warranty.

Before your swim spa is delivered, the pad must be checked with a level to ensure it’s completely flat. Whether you choose concrete, pavers, or a gravel base, the final surface must be uniform and structurally sound. This non-negotiable step protects the spa itself and ensures safe, enjoyable use for your family.

Forgetting to Leave Enough Clearance

A swim spa pad that is the exact size of the spa itself is a pad that is too small. It’s a common oversight to forget about the space needed around the spa for access, maintenance, and safety. You need enough room to comfortably walk around the unit, operate the cover and cover lifter, and allow service technicians to access the equipment panels. Without adequate clearance, simple repairs can become a major, costly project.

As a general rule, you should leave at least three feet of clear, usable space on all sides of the swim spa. This ensures you have easy access for cleaning and service. When planning your backyard layout, think about the entire area, not just the spa’s footprint. Factoring in this extra space during the design phase will make your life much easier and help you get the most out of your new backyard feature.

Do You Need a Permit for a Swim Spa Pad on Long Island?

Figuring out permits can feel like a chore, but it’s a critical step for your swim spa project. On Long Island, the rules can differ quite a bit between towns, so you’ll need to check your local requirements. Getting this right from the start saves you from potential headaches and ensures your project goes smoothly. It’s not just about following rules; it’s about making sure your beautiful new swim spa is installed safely and correctly.

Review Local Building Codes in Nassau and Suffolk County

In Suffolk County, for instance, swim spas are often considered public bathing facilities and require an operating permit to ensure they meet health and safety standards. You can learn more about the specific Pool and Bathing Permits on the county’s website. In Nassau County, the regulations are just as important, and your local village or town building department will have the final say. It’s always best to call them directly to confirm what’s needed for your installation, as local zoning rules can also affect placement and safety features.

Meet Weight-Bearing and Safety Requirements

Permits aren’t just about paperwork; they’re about ensuring your swim spa is safe for years to come. A filled swim spa is incredibly heavy, and the pad underneath must be engineered to support that weight without shifting or cracking. Local building codes dictate the specific construction methods and materials needed for a stable foundation. This ensures your investment is protected and your family is safe. If your dream backyard includes a beautiful structure to house your spa, like one of Gappsi’s custom pavilions or pergolas, those additions will also require their own permits. Working with an experienced team ensures every part of your project, from the foundation up, is compliant and built to last.

Can You Upgrade Your Pad with Pavers or Stone?

If you’re wondering whether you can place your swim spa on something more attractive than a plain concrete slab, the answer is a definite yes. Upgrading your swim spa pad with pavers or natural stone is an excellent way to transform a purely functional base into a beautiful design element. This approach integrates your swim spa into your backyard, making it feel like a cohesive part of your outdoor living space rather than just an add-on.

The key to a successful paver or stone pad is what lies beneath. A solid foundation is non-negotiable. To prevent the surface from shifting or settling under the immense weight of a filled swim spa, the pavers must be installed over a properly compacted base of gravel and sand. This expert preparation ensures your spa remains stable and level for years to come. When done correctly, a decorative stone base provides a durable, reliable, and visually stunning foundation. Our masonry experts specialize in creating these custom pads, ensuring they are as strong as they are beautiful.

Explore Porcelain and Natural Stone Options

When you decide to upgrade your swim spa pad, you open up a world of design possibilities with materials like porcelain and natural stone. These options offer far more character and style than simple concrete. Gappsi provides a wide selection of porcelain and natural stone pavers that are perfect for this application. Porcelain is incredibly durable, resistant to stains and frost, and comes in countless styles that can mimic wood, stone, or modern concrete. Natural stone, like travertine or bluestone, offers timeless elegance and a unique look, as no two stones are exactly alike. These materials allow you to perfectly match your swim spa base to your existing patio, walkways, or pool deck, creating a seamless and high-end finish.

The Aesthetic and Functional Benefits of Upgrading

Choosing pavers or stone for your swim spa pad offers significant advantages beyond just looking good. Aesthetically, it creates a polished, resort-like feel in your own backyard. Functionally, these materials are built to last. High-quality pavers are designed to handle heavy loads, providing more than enough support for a swim spa. Unlike a large concrete slab that can crack over time, a paver pad is easier to repair; if a paver is damaged, you can simply replace it. This type of installation also promotes better drainage, as water can seep through the joints and into the gravel base below, preventing pooling around your spa. This thoughtful approach is a core part of our landscape design philosophy, where beauty and function work together.

How to Maintain Your Swim Spa Pad

Once your swim spa is installed, a little routine maintenance on the pad will protect your investment for years to come. The goal is to keep the foundation stable, secure, and looking great. The specific steps will vary slightly depending on whether you have a concrete, gravel, or paver base, but the core principles are the same. Regular checks can help you spot small issues before they turn into costly repairs, ensuring your backyard oasis remains a source of relaxation, not stress.

Keep Your Pad Level

A level pad is non-negotiable for the health of your swim spa. An uneven surface puts uneven pressure on the spa’s shell, which can lead to cracks and damage over time. After the initial installation, it’s a good idea to periodically check that everything is still perfectly flat, especially after Long Island’s winter freeze-thaw cycles. You can use a long carpenter’s level to check the surface of the pad itself. If you notice any sinking or shifting, it’s important to address it right away. For concrete, this might mean a professional repair, while for pavers or gravel, it could involve adding and re-compacting material. Addressing these issues promptly is key to ensuring your spa’s longevity and performance.

Maintain Drainage and Prevent Cracks

Proper drainage is essential for the stability of your swim spa pad. Water should always flow away from the base, never pool around or underneath it. Keep the surrounding area clear of leaves and debris that could block drainage paths. For concrete pads, regularly inspect for small cracks. Sealing them early on prevents water from seeping in, freezing, and making the cracks larger. For paver and stone pads, this means keeping the joints filled with sand to prevent shifting. Gappsi’s restoration and sealing services can help protect your pad from the elements and keep it in top condition.

Care for the Surrounding Area

Maintaining the area around your swim spa is just as important as maintaining the pad itself. It’s recommended to keep at least three feet of clear, accessible space on all sides of the spa. This clearance is crucial for a few reasons: it provides safe entry and exit, gives you a place to set the cover, and ensures a technician can easily access the spa’s internal components for service. Keep this zone free of clutter, trim back any encroaching plants, and ensure the ground is stable and not prone to turning into mud. This simple step makes using and servicing your swim spa much easier and safer.

Get Professional Swim Spa Pad Installation on Long Island

Once you’ve chosen your swim spa, the next step is getting it into your backyard. This part can be more complex than most people realize. A swim spa is a massive, heavy vessel, and getting it from the delivery truck to its final spot requires careful planning. You’ll need to measure every pathway and gate, and sometimes, a crane is necessary if access is tight. Handling these logistics is one of the biggest reasons to work with a professional team. An experienced installer manages the entire process, ensuring your spa arrives safely without any damage to your property or the unit itself.

The foundation itself is the most critical piece of the puzzle. Your swim spa needs an incredibly solid, perfectly level surface that can support thousands of pounds of water and people for years to come. A small error in leveling or an improperly prepared base can lead to structural stress on the spa, potentially voiding your warranty and causing serious damage over time. Our Gappsi team specializes in building durable foundations, from reinforced concrete pads to custom paver bases. We have the masonry expertise to construct a pad that meets the exact specifications for your swim spa, giving you total peace of mind.

Choosing a professional installer like Gappsi means you get a comprehensive solution. We don’t just pour a concrete slab; we handle the complete site preparation, including excavation, grading, and ensuring proper drainage to protect your investment. We see the project through from start to finish, integrating the pad seamlessly into your backyard design. By trusting experts with your swimming pools and spa installations, you’re not just buying a product, you’re investing in a safe, beautiful, and long-lasting addition to your home. It’s the best way to make sure your new backyard oasis starts on a solid footing.

Related Articles

Frequently Asked Questions

Can I just put my swim spa on my existing patio? While it might seem convenient, most existing patios are not built to handle the immense, concentrated weight of a filled swim spa. A standard patio often lacks the reinforced foundation and perfectly level surface required to support thousands of pounds safely. Placing a spa on an inadequate base can cause the patio to crack and the spa to shift, potentially damaging its shell and voiding the warranty. It’s always best to have a dedicated pad built specifically for your spa.

How much bigger than the swim spa should the pad be? A good rule of thumb is to make the pad at least one foot larger than the spa on all sides. This extra space is more important than you might think. It provides a stable, clean area for you to walk on when getting in and out, gives you room for steps and cover lifters, and most importantly, ensures service technicians have enough clearance to access the spa’s maintenance panels. Planning for this extra room from the start will save you a lot of hassle later.

Which type of pad is the most durable for Long Island’s weather? For our local climate with its tough freeze-thaw cycles, the most durable options are a reinforced concrete pad or a professionally installed paver pad. A concrete pad, when poured to the right thickness and reinforced with steel, offers incredible strength. Likewise, a paver pad built on a properly compacted base is designed to be flexible and strong, allowing it to withstand ground movement without cracking. Both options, when installed correctly, will provide a stable foundation for decades.

Can I save money by building the pad myself? While a DIY project can be tempting, the foundation is the one area where you don’t want to cut corners. The pad must be perfectly level and built on a properly compacted base to support the spa’s weight evenly. Any imperfections can lead to serious, costly damage to the spa itself. Investing in a professional installation ensures the job is done right from the start, protecting your much larger investment in the swim spa.

How long after the pad is installed can my swim spa be delivered? The timeline depends entirely on the type of pad you choose. If you opt for a concrete pad, you will need to wait for it to cure completely, which can take anywhere from several days to a few weeks depending on the weather. However, if you choose a gravel or paver pad, your swim spa can often be delivered and installed as soon as the pad construction is finished, allowing you to enjoy your new oasis much sooner.
Share this page:
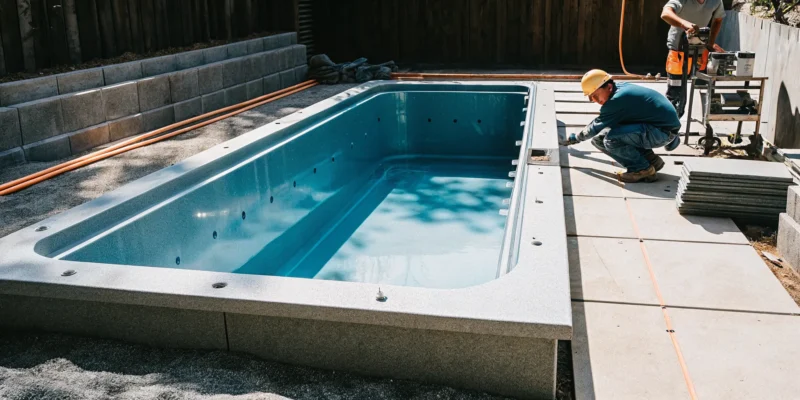
Swim spa installation with workers preparing a concrete foundation.

Swim Spa Installation: A Complete Beginner’s Guide

You’ve chosen the perfect swim spa, but now you’re wondering about the next steps. The process of getting it from the showroom to your backyard can bring up a lot of questions. Will it fit through the gate? Do I need a crane? What kind of permits are required in my town? These are all valid and important concerns. A successful swim spa installation is all about having the right answers and a solid plan before work begins. This guide provides those answers, breaking down the entire process into clear, manageable steps so you know exactly what to expect and can look forward to enjoying your new backyard oasis with complete peace of mind.

Key Takeaways

  • Plan for a Solid Foundation and Clear Delivery Path: A successful installation starts with a perfectly level, reinforced base, like a six-inch concrete slab. You also need to measure the delivery route from the street to your yard, planning for a crane, which is used in most installations.
  • Prioritize Safety with Professional Electrical Work: A swim spa requires a dedicated 240-volt GFCI circuit to run safely, so this is not a DIY job. Always hire a licensed electrician to handle the wiring to protect your family and your investment.
  • Design for Long-Term Maintenance Access: When planning your spa’s placement and surrounding landscape, leave at least three feet of clear space on all sides. This simple step ensures technicians can easily access equipment for service, saving you future headaches.

Preparing for Your Swim Spa Installation

Bringing a swim spa into your backyard is an exciting step toward creating your personal wellness retreat. Before the delivery truck arrives, a bit of thoughtful preparation will ensure the entire installation process is seamless and stress-free. Think of it as setting the stage for years of enjoyment. Getting the groundwork right, both literally and figuratively, is the most important part of the project.

The key is to think through a few logistics ahead of time. You’ll want to pinpoint the perfect spot, make sure you have enough room, prepare a solid foundation, and understand local requirements. It might sound like a lot, but breaking it down makes it manageable. Working with an experienced team that understands the ins and outs of swim spa installation on Long Island means you have a partner to guide you through every decision. Let’s walk through what you need to consider to get your property ready for its new addition.

Choose the Right Location

Selecting the right spot for your swim spa is the first, and arguably most important, decision you’ll make. Think about how you plan to use it. Do you want it close to the back door for easy access during colder months? Or would you prefer it tucked away in a more private corner of your yard? Consider the view from the spa and also how it looks from your house. A well-placed swim spa should feel like a natural extension of your home and fit beautifully into your overall landscape design. Also, remember to factor in proximity to electrical and water sources to simplify the hookup process.

Confirm Space and Clearance

Once you have a general location in mind, it’s time to get out the measuring tape. A swim spa is a significant size, and it needs some breathing room. As a rule of thumb, you should plan for at least three feet of clearance on all sides. This isn’t just for aesthetics; it’s essential for service and maintenance. The side that houses the equipment panel needs to be easily accessible for any future work. Think beyond the spa’s footprint and consider the space needed for steps, a cover lifter, and any decking or patio space you want to add around it for lounging.

Plan for Weight, Drainage, and Water

A swim spa filled with water is incredibly heavy, so a solid foundation is non-negotiable. You can’t simply place it on the grass or an existing patio. Most installations require a reinforced concrete pad that is at least six inches thick. This foundation must be perfectly level to ensure the spa’s shell is properly supported and its internal plumbing functions correctly. Our masonry team can create the perfect base for your spa. You also need to consider water drainage. The site should be graded so that rainwater and any water that splashes out flows away from the spa and your home’s foundation.

Check Long Island Permits and Codes

Before any work begins, it’s vital to check the local building codes and permit requirements in your specific Long Island town or village. Many municipalities have rules regarding the placement of a swim spa, including how far it must be from property lines, septic systems, and wetlands. There are also often safety regulations that need to be met, such as specific types of locking safety covers or even fencing around the spa area. Navigating these local ordinances can be tricky, but it’s a standard part of our process at Gappsi. We handle the permits to ensure your installation is fully compliant, giving you complete peace of mind.

What Are Your Swim Spa Installation Options?

One of the most exciting parts of planning for your swim spa is deciding how it will fit into your backyard. The installation style you choose will define the entire look and feel of your outdoor space, so it’s worth taking the time to explore your options. Whether you envision a seamless, built-in look or a more straightforward setup, there’s a perfect fit for your home. Each method has its own aesthetic and construction requirements, but with the right design and installation team, any of them can create a stunning focal point for your property.

At Gappsi, our team has the design and construction expertise to handle every type of installation. We can help you weigh the pros and cons of each option and create a plan that works for your space, budget, and vision. From initial excavation and masonry to the final landscaping touches, we manage the entire process for a stress-free experience.

In-Ground Installation

An in-ground installation offers the most integrated and luxurious look, making your swim spa appear like a custom part of your landscape. With this option, the spa is set completely flush with the ground, creating a sleek, streamlined aesthetic similar to a traditional swimming pool. This approach is perfect if you want your spa to blend seamlessly with a patio or lawn.

To achieve this, we first excavate the area and build a concrete vault to house the unit. This process requires careful planning to ensure proper drainage and easy access to the spa’s equipment for any future maintenance. A well-designed in-ground installation from a team of experts ensures your swim spa is not only beautiful but also functional for years to come.

Semi-Recessed Installation

A semi-recessed installation gives you the best of both worlds: a custom, built-in feel with easier access. By partially sinking the swim spa into the ground or a deck, you create a multi-level look that adds dimension and visual interest to your backyard. This is a fantastic option for properties with slopes or for homeowners who want to break up a flat landscape.

This style makes getting in and out of the spa a breeze, as the wall height is lower. Like an in-ground setup, a semi-recessed installation requires thoughtful planning to keep the equipment accessible, often through cleverly hidden trapdoors or removable panels in the surrounding deck or patio. It’s a versatile choice that pairs beautifully with creative landscaping and hardscaping designs.

In-Deck Installation

If you have a deck or are planning to build one, an in-deck installation is an excellent way to create a cohesive outdoor living area. With this method, the swim spa is set level with the surface of the deck, making it feel like an intentional and original feature. The result is a clean, unified space where your spa and deck flow together perfectly.

For this installation, the deck is built around the swim spa, or the spa is lowered into a pre-cut opening. The most important consideration here is ensuring the deck structure can support the weight of a full swim spa. We also design the deck to allow for maintenance access, often by leaving a side open or incorporating removable deck sections. This approach is ideal for creating a central hub for relaxation and entertainment.

Freestanding Installation

A freestanding installation is the simplest and quickest way to get your swim spa up and running. The spa is placed directly on a solid, level surface, like a reinforced concrete pad. While this setup can sometimes have a “boxy” appearance since the full height of the spa is visible, it offers incredible flexibility. You can start enjoying your swim spa in just a few days.

Many homeowners choose a freestanding installation initially and then enhance the area over time. You can build a deck around it, add custom steps, or use landscaping to soften the edges and integrate it more fully into your yard. This approach allows you to complete your project in phases, making it a practical and popular choice for many Long Island homes.

Building the Right Foundation for Your Swim Spa

A swim spa is a fantastic addition to your home, but its performance and lifespan depend entirely on what’s underneath it. The foundation is the most critical part of the installation process. Because a swim spa is incredibly heavy, especially when filled with water and people, it requires an unshakeable base to prevent structural damage and ensure it functions correctly for years to come. This isn’t a step where you can cut corners. A filled swim spa can weigh tens of thousands of pounds, and that massive load needs a solid, stable, and perfectly level surface to rest on.

Whether you choose a concrete slab or a reinforced deck, the key is professional execution. An improperly prepared foundation can lead to serious issues down the road, from cracks in the spa shell to malfunctioning equipment. At Gappsi, our expertise in masonry and outdoor construction ensures your swim spa sits on a perfectly prepared, level, and durable surface. We handle the entire process, from site evaluation to final pour, so you can focus on the exciting part: enjoying your new backyard oasis.

Pouring a Concrete Slab

A reinforced concrete slab is the most common and recommended foundation for a swim spa. To properly support the immense weight, this slab needs to be at least six inches thick and poured on stable, compacted ground. It’s not just about pouring concrete; it’s about creating an engineered pad that won’t shift, crack, or settle over time. This process involves site preparation, building a proper frame, and often includes rebar reinforcement for added strength.

A perfectly level surface is non-negotiable. Even a slight slope can put stress on the swim spa’s frame and interfere with its internal plumbing and drainage systems. Our team has decades of experience pouring concrete foundations for swimming pools and spas, ensuring your installation starts on solid ground.

Reinforcing Your Deck

Placing a swim spa on a deck can create a beautiful, integrated look, but it requires careful planning. Your existing deck was likely not built to handle the thousands of pounds a filled swim spa weighs. To make this work, the deck must be professionally evaluated and reinforced. This often involves adding more support posts, beams, and joists directly underneath the spa’s location to transfer the load safely to the ground.

You will also need to consider local building codes, including setback rules that dictate the minimum distance a structure must be from your property line. We can help you understand these requirements and design a deck reinforcement plan that is both safe and compliant. Integrating a spa into a deck is a project that requires a deep understanding of structural engineering, a core part of our home remodeling services.

Why a Level Surface is Essential

We can’t stress this enough: your swim spa must be installed on a perfectly level surface. If the foundation is uneven, it can cause the spa’s acrylic shell to twist and warp under the water’s weight, which can lead to cracks and leaks that are expensive to repair. An unlevel base also affects how the equipment functions, from the pumps and jets to the filtration system.

You should never try to level a swim spa by placing shims or other objects underneath it. This creates pressure points that can damage the frame and void your warranty. The only correct way to do it is to ensure the site itself is level before the spa arrives. A professional will pour a level concrete top cap or grade the area properly to create a solid, flat base from the start.

Ensure Easy Equipment Access

When planning your foundation, think about future you. You’ll need to access the spa’s internal components for routine maintenance and any potential service calls. We recommend leaving at least three feet of clear space around all sides of the swim spa. This clearance gives technicians room to work and provides space for you to store the cover and move around the spa safely.

Boxing your swim spa in without planning for access is a common mistake that can turn a simple repair into a major headache. By incorporating access panels and sufficient clearance into the initial design, you make long-term ownership much easier. This foresight is a key part of our design process for all our saunas and swim spas, ensuring your backyard retreat is as functional as it is beautiful.

What Electrical Work Does a Swim Spa Require?

Getting the electrical setup right for your swim spa isn’t just a technical detail; it’s the key to ensuring your new oasis runs safely and efficiently for years to come. Because swim spas combine high-powered equipment with water, there’s no room for error. Working with a professional is non-negotiable. Let’s walk through what you need to know about the electrical requirements so you can feel confident about this critical step in your installation process.

Understand Voltage and Amperage Needs

First things first, your swim spa needs a lot of power. Most models require a 240-volt, 50-amp or 60-amp electrical service. This is a heavy-duty connection, much more powerful than a standard household outlet. It’s essential because it powers the powerful jets, heaters, and filtration systems that make your swim spa so enjoyable. Before installation, you’ll need to confirm the exact specifications for your chosen model. Our team at Gappsi can help you understand the requirements for the specific hot tubs and swim spas we offer, ensuring your home’s electrical system is prepared for the new addition. This dedicated power source guarantees your spa performs at its best without overloading your home’s circuits.

Install a GFCI Breaker and Dedicated Circuit

Safety is the top priority when mixing electricity and water. That’s why every swim spa installation must include a Ground Fault Circuit Interrupter, or GFCI. This smart device is designed to instantly shut off the power if it detects any imbalance in the electrical current, which could indicate a potential shock hazard. Your licensed electrician will install a GFCI breaker on a dedicated circuit, meaning the spa has its own circuit that isn’t shared with any other appliances. We recommend placing the GFCI breaker box within sight of the spa for easy access in an emergency. This setup is a crucial part of our home remodeling and installation safety standards.

Why to Hire a Licensed Electrician

While it might be tempting to handle some parts of your home improvement projects yourself, electrical work for a swim spa is a job exclusively for a professional. A licensed electrician is essential for your safety and to ensure the installation complies with all local Long Island building codes. They have the expertise to correctly wire the high-voltage connection, install the GFCI, and ensure everything is properly grounded. Hiring a professional protects your investment, prevents damage to the spa’s sensitive components, and, most importantly, keeps your family safe. At Gappsi, we coordinate with trusted, licensed electricians to manage this part of the installation seamlessly, giving you complete peace of mind.

Get the Timing Right for Your Electrical Setup

Coordinating the electrical work is a key part of a smooth installation day. While you might think it’s best to get the wiring done ahead of time, it’s actually better to wait until after your swim spa has been delivered and placed in its final position. This allows the electrician to see exactly where the spa’s electrical panel is located and run the conduit and wiring to the precise spot. This simple step prevents costly mistakes and ensures a clean, efficient connection. Planning the project timeline is something we handle for you, as you can see in our project videos. We manage the delivery and coordinate with the electrician to make sure every step happens in the right order.

Planning for Swim Spa Delivery and Placement

Measure and Clear the Delivery Path

Your swim spa will arrive as one large, solid unit, so planning its journey from the delivery truck to your backyard is a critical first step. Before delivery day, grab a tape measure and walk the entire route. Measure the width of gates, side yards, and any tight corners. Don’t forget to look up; check for low-hanging tree branches, utility lines, or roof eaves that could get in the way. A clear and wide path is essential for a smooth delivery. If you’re unsure about a particular spot, it’s always best to take photos and measurements to share with your installation team. Proper planning and design at this stage prevents major headaches later.

Know When You’ll Need a Crane

It might sound dramatic, but using a crane for swim spa delivery is actually very common. In fact, a crane is used for the vast majority of installations. This usually happens when the delivery truck can’t get close enough to the final placement site or if the path is too narrow or complex for a dolly. Instead of seeing this as a complication, think of it as the safest and most efficient way to get your spa into position. When you’re budgeting for your project, it’s wise to assume a crane will be needed. This way, you have a realistic view of the total cost and can avoid any last-minute financial surprises on delivery day.

Avoid Common Delivery Misconceptions

Let’s clear up a few common myths about swim spa delivery. First, your spa will not arrive in a box of parts for you to assemble like a piece of furniture. It comes as a single, fully constructed unit. This is why measuring the delivery path is so important. Second, while the process requires careful coordination, it doesn’t have to be complicated or stressful. A professional team, like the experts at Gappsi, has this process down to a science. They handle the logistics, from coordinating the crane to carefully placing the swim spa, making the installation feel seamless. Your main job is to prepare the space and get excited for your first swim.

Leave Access on All Four Sides

Once your swim spa is in place, you might be tempted to build a deck right up to the edge or plant dense shrubs all around it. Before you do, think about future maintenance. To keep your spa running perfectly, technicians may need to access the internal components, which are located behind panels on all four sides. As a rule of thumb, plan to leave at least three feet of clear space around the entire perimeter. This ensures that any future repairs or service checks can be done easily and without having to dismantle parts of your beautiful new backyard oasis. This foresight is a key part of a successful landscape design.

Maintaining Your New Swim Spa

Your swim spa is installed, and now the fun begins. To keep it running perfectly for years, a little maintenance goes a long way. Think of it as protecting your beautiful new investment. Consistent care ensures your spa remains a clean, safe, and inviting retreat. It’s simpler than you might think, and breaking it down into a few key areas makes it completely manageable. From water chemistry to the surrounding landscape, a proactive approach will save you time and effort down the road. This lets you focus on what matters most: enjoying your personal oasis.

Manage Water Quality and Chemicals

Clear, safe water is the top priority for any swim spa owner. This means regularly testing your water and adjusting the pH and sanitizer levels. While it might sound technical, it quickly becomes a simple routine. Keeping the water balanced prevents bacteria from growing and protects the spa’s components from corrosion or scaling. We can guide you through the right products and schedules for your specific swim spa. Proper water care is the foundation of a healthy and enjoyable experience, ensuring your spa is always ready for you to take a dip.

Clean and Maintain Your Filters

Your swim spa’s filters are the unsung heroes of clean water. They work tirelessly to trap debris, oils, and other particles. To keep them working effectively, you’ll need to clean them regularly. A clogged filter can’t do its job, which leads to cloudy water and puts extra strain on the spa’s pump. We recommend rinsing your filters every few weeks and giving them a deep clean every few months, depending on your usage. Following a simple cleaning schedule is one of the easiest ways to maintain your spa’s performance and extend the life of its equipment.

Care for the Surface and Cover

Beyond the water, the spa itself needs some attention. Regularly wipe down the acrylic shell to keep it free of residue and looking its best. Your spa cover is just as important. It keeps debris out, retains heat to save energy, and acts as a critical safety barrier. Inspect it periodically for any tears or damage that could compromise its integrity. If you notice significant wear, our team can help with restoration and sealing solutions. A simple cleaning with the right products will keep your cover in great shape, maintaining the spa’s appearance and efficiency.

Implement Key Safety Features

A swim spa brings a lot of joy, and ensuring it remains a safe environment is crucial, especially for families with children. Always secure your spa with a locked safety cover when it’s not in use. For an added layer of protection, consider installing a perimeter fence around the spa area. Gappsi offers a variety of stylish and durable fencing options that can complement your backyard design. It’s also wise to establish clear rules, like no unsupervised use, to make sure everyone can enjoy the spa safely.

Plan Your Surrounding Landscape

The area around your swim spa is just as important as the spa itself. Thoughtful landscaping not only enhances the beauty of your backyard but also improves functionality and safety. Use non-slip materials for any surrounding patios or pathways to prevent accidents. We often recommend beautiful and durable porcelain or natural stone pavers for this purpose. It’s also important to ensure there is adequate drainage to prevent water from pooling. A well-designed landscape creates a seamless transition from your home to your new oasis, making the entire space more inviting.

Related Articles

Frequently Asked Questions

Can I just place a swim spa on my existing concrete or paver patio? This is a great question, and the short answer is usually no. While your patio might seem solid, most are not engineered to support the immense weight of a filled swim spa, which can be tens of thousands of pounds. Placing a spa on an inadequate base can cause the patio to crack and the spa itself to warp. The best and safest solution is a dedicated, reinforced concrete pad that is at least six inches thick and perfectly level. Our masonry team can create this foundation to ensure your investment is protected from day one.

Is a crane always necessary for delivery, and how does that work? A crane is used for the majority of swim spa installations, so it’s wise to plan for it. It might sound like a big production, but it’s actually the safest and most efficient way to place the spa, especially if your yard has tight corners, slopes, or is far from the street. Instead of a complication, think of it as a standard part of the process. We handle all the coordination, so on delivery day, you can just watch as your spa is carefully lifted and set perfectly into place.

Why is leaving three feet of space around the spa so important? That three-foot clearance is your best friend for long-term, stress-free ownership. The spa’s equipment, like pumps and heaters, is housed behind access panels on all sides. Leaving clear space ensures that if you ever need service, a technician can easily get to the components without having to dismantle your deck or dig up your landscaping. It makes routine maintenance simple and turns a potentially major repair into a minor one, saving you time and money down the road.

What does a realistic maintenance routine look like for a new owner? Keeping your swim spa in great shape is simpler than you might think and quickly becomes second nature. On a weekly basis, you’ll want to test the water and add sanitizers or balancers as needed. This usually takes just a few minutes. Then, about once a month, you should take out the filters and give them a good rinse with a hose. That’s the core of it. Following this simple schedule will keep your water sparkling and your equipment running smoothly.

Do I need to install a fence around my swim spa on Long Island? Safety regulations can vary between towns and villages in Nassau and Suffolk County, but many do require a safety barrier for any structure that holds a certain amount of water. This could mean a perimeter fence with a self-latching gate or a certified locking safety cover. The best approach is to check your local building codes, but you don’t have to figure this out alone. As part of our installation process, we confirm all local requirements to ensure your project is fully compliant and your family is safe.

Share this page:
Budget-friendly swim spa installation with an above-ground unit and simple wood deck.

15 Swim Spa Installation Ideas on a Budget

A beautifully integrated swim spa can transform your backyard into a luxurious private resort, but achieving that polished, custom look doesn’t have to drain your savings. The secret isn’t about spending more; it’s about designing smarter. The placement of your spa, the materials you choose for the surround, and the landscaping that frames it all play a huge role in the final aesthetic. This guide is your source for creative and effective swim spa installation ideas on a budget. We’ll explore how simple choices, like tucking your spa into a corner or using a mix of gravel and pavers, can deliver a high-end feel. You can create a stunning, cohesive outdoor space that looks professionally designed, all while keeping your budget firmly in check.

Key Takeaways

  • Look beyond the sticker price: A realistic swim spa budget accounts for the unit and the installation. Factor in costs for a solid foundation, electrical work, delivery, and your chosen design (above-ground, semi-recessed, or in-ground) to avoid surprises.
  • Get creative with placement and timing: You can save money by using an existing patio for your foundation or tucking the spa into a corner to reduce finishing needs. You can also find better deals by shopping for your spa during the off-season, like fall or winter.
  • Create a luxe look for less: A beautiful surround doesn’t require a huge investment. Use budget-friendly materials like pressure-treated wood, gravel, and native plants, or tackle DIY projects like privacy screens to get a polished, custom look without overspending.

What Does a Swim Spa Installation Really Cost?

Figuring out the budget for a swim spa is about more than just the sticker price of the unit itself. The installation is a major part of the total investment, and the costs can change quite a bit depending on how you want it to look and function in your yard. The main factors are the type of installation you choose, the condition of your site, and the materials you use to finish the space. A simple setup on an existing patio will cost much less than a fully recessed spa that looks like a built-in pool, which requires excavation and more extensive construction.

At Gappsi, we help homeowners find the right balance between their dream backyard and their budget. Whether you’re looking for a simple, above-ground model or a fully integrated design, understanding the installation costs is the first step. We can help you explore options for hot tubs and swim spas that fit your lifestyle and complement your home’s aesthetic. From preparing the site to adding the final landscaping touches, every decision impacts the final cost. Let’s break down the typical costs for the three main types of installation so you can plan your project with confidence and avoid any surprises along the way.

Above-Ground Installation

This is the most straightforward and budget-friendly way to install a swim spa. For an above-ground setup, the spa simply sits on a solid, level surface. The installation cost for a simple project on a flat, accessible yard is often on the lower end of the spectrum, typically ranging from a couple of thousand dollars. The main expense here is preparing the foundation. You’ll need a reinforced concrete pad or a specially designed deck to support the spa’s weight. Our expert masonry team can create the perfect foundation to ensure your spa is safe and secure for years to come.

Semi-Recessed Installation

A semi-recessed installation offers a beautiful compromise between an above-ground and in-ground spa. By sinking the spa partially into the ground, you get a more custom, built-in look that’s easier to access. The installation costs for this style vary based on your site conditions, the vault design, and the materials you choose for the surround. You’ll need to account for excavation and building a retaining wall or vault. Finishing the area with materials like porcelain or natural stone pavers will create a polished look but will also influence the final price.

Fully In-Ground Installation

For the most seamless and luxurious look, a fully in-ground installation makes your swim spa appear like a traditional swimming pool. This is the most complex and expensive option, as it requires significant excavation, extensive plumbing and electrical work, and a concrete vault to house the spa. The final cost depends heavily on your specific design choices and the surrounding landscape construction. While the spa unit itself might have a clear price, the installation can be a major project that transforms your entire backyard into a cohesive outdoor living space.

Factor in Ongoing Running Costs

Your budget shouldn’t stop at installation. It’s also smart to plan for the long-term running costs of your swim spa. On average, you can expect to spend between $1,000 and $3,000 per year to operate your spa. These costs cover electricity to run the heater and jets, water care chemicals to keep it clean, and occasional filter replacements. A high-quality, well-insulated cover is one of the best investments you can make to keep these heating costs down. Thinking about these recurring expenses from the start will help you enjoy your new swim spa without any financial surprises down the road.

Check These Site Requirements Before You Buy

Before you get too far into dreaming about your new swim spa, it’s important to handle the practical side of things. Proper site preparation is the key to a smooth installation and a spa that lasts for years. Taking the time to assess your property for these key requirements will save you from unexpected costs and headaches down the road. Think of it as creating the perfect home for your new favorite backyard feature.

Find a Solid, Level Foundation

Your swim spa needs to sit on a perfectly solid and level surface. When filled with water and people, a swim spa can weigh close to 20,000 pounds, so a structurally sound foundation is not negotiable. A reinforced concrete pad is the most common and reliable option. Placing your spa on an uneven or weak surface can cause structural damage to the spa shell over time and may even void your warranty. We can help you prepare the perfect base with professional masonry services to ensure your investment is secure from day one.

Consider Sunlight, Shade, and Privacy

Think about where the sun hits your yard throughout the day. Placing your swim spa in a spot with full, direct sun might make it too hot for a comfortable afternoon soak in the summer. On the other hand, a completely shaded spot might feel too cool. You also want to consider privacy from neighbors. The ideal location offers a balance of sun, shade, and seclusion. A well-placed pergola or pavilion can provide shade and privacy, creating a comfortable and intimate atmosphere for you to enjoy your spa in any weather.

Plan for Power, Plumbing, and Access

A swim spa requires a dedicated electrical circuit, which must be installed by a certified electrician to ensure safety and meet local codes. You’ll also need easy access to a water source for filling it and a plan for drainage. Don’t forget about the delivery itself. You need a clear, wide path from the street to the final location, free of obstructions like fences, air conditioning units, or low-hanging tree branches. Planning for these logistical needs is a core part of our home remodeling and installation process, so everything is handled correctly from the start.

Review Local Permits and Regulations in Long Island, NY

Before any work begins, you must check the local regulations in your specific Long Island town or village. Permitting requirements can vary significantly across Nassau and Suffolk counties. You may need an electrical permit, a general construction permit, or both. Some areas also have specific rules about how far the spa must be from your property line or home. Failing to secure the right permits can lead to fines and problems later on. Working with an experienced local installer who understands these regional differences ensures your project is fully compliant and hassle-free.

Budget-Friendly Swim Spa Placement Ideas

You don’t need a massive yard or an unlimited budget to create a beautiful swim spa retreat. In fact, some of the most stunning and functional designs come from clever placement. Thinking strategically about where your swim spa will go can save you a significant amount on site preparation, materials, and labor. It’s all about working with what you have and making smart choices that align with your vision and your wallet.

From tucking it into an unused corner to building a simple deck around it, your placement decision is the first step toward creating a space you’ll love. Let’s look at a few practical and cost-effective ideas for your Long Island home.

Tuck It Into a Corner or Against the House

Placing your swim spa in a corner of your yard or right up against your house is a fantastic way to save space and money. This approach minimizes the need for extensive landscaping on all four sides and can create a cozy, sheltered nook. Using existing structures like your home or a sturdy fence as a backdrop provides instant privacy and a windbreak. You can install it above ground for simplicity or partially recess it for a more integrated feel. This flexibility allows you to choose a location that best fits your landscape and budget, turning an overlooked area into your favorite spot to unwind.

Use an Existing Patio or Concrete Slab

If you already have a structurally sound patio or concrete slab, you’re in luck. Using an existing foundation is one of the biggest money-savers for a swim spa installation. It eliminates the cost and time associated with pouring a new concrete pad, which can be a major expense. A simple above-ground installation on a flat, accessible surface is the most straightforward option. Before moving forward, have our team at Gappsi inspect the slab to ensure it’s level and can support the weight of a filled swim spa. If it’s ready to go, you can focus your budget on other features, like landscaping or a beautiful porcelain paver surround.

Get a Polished Look with Partial Recessing

For a high-end look without the full cost of an in-ground installation, consider a semi-recessed design. By digging down just a foot or two, you can lower the profile of your swim spa, making it easier to get in and out of while creating a sleek, custom appearance. This method requires less excavation than a fully in-ground project, which saves on labor costs. You can then build a simple deck or stone patio up to the edge of the spa. This gives you the best of both worlds: a streamlined look that integrates beautifully with your yard and a more manageable price tag. Our swimming pool installation experts can help design the perfect semi-recessed setup for your space.

Shop Off-Season to Find Better Deals

While this isn’t a placement tip, it’s a budgeting strategy that’s too good to ignore. Timing your purchase can lead to significant savings. Swim spa retailers often offer discounts during the fall and winter months after the peak summer season has ended. This “off-season” is the perfect time to find a great deal on the model you want. By planning ahead and buying when demand is lower, you can free up more of your budget for the installation and surrounding landscape. You can then schedule your installation for the spring and have your new swim spa ready to enjoy as soon as the weather warms up.

Affordable Decking and Surround Ideas

The area around your swim spa, often called the surround, is just as important as the spa itself. It’s what integrates the spa into your backyard, provides a safe entry and exit, and sets the overall mood. A beautiful surround can make an affordable, above-ground swim spa look like a custom-built oasis. You don’t need a massive budget to create a stunning and functional space. From classic wood to modern pavers, there are plenty of cost-effective materials that deliver a high-end look. Thinking about the material that best fits your lifestyle and budget is the first step toward creating a swim spa area you’ll love for years to come.

Choose Pressure-Treated Wood Decking

Wood is a timeless and popular choice for a reason. It’s affordable, versatile, and creates a warm, natural look. Building a custom wood deck that wraps around your swim spa can give an above-ground model the polished appearance of a fully recessed installation for a fraction of the cost. Pressure-treated pine is one of the most budget-friendly options available. While it requires regular maintenance like staining and sealing to prevent rot and weathering, the initial savings are significant. Proper care ensures your deck remains beautiful for years, and professional restoration and sealing services can help keep it in top condition.

Explore Budget-Friendly Composite Decking

If you love the look of wood but want to skip the annual maintenance, composite decking is an excellent alternative. Made from a blend of wood fibers and recycled plastics, this material is designed to withstand the elements without warping, splintering, or fading. While the upfront cost is higher than pressure-treated wood, you’ll save money and time on upkeep in the long run. Composite decking comes in a wide variety of colors and finishes, making it easy to match your home’s exterior and create a cohesive outdoor living space. It’s a durable, stylish option for a low-maintenance swim spa surround that looks great for years.

Use Gravel and Stone for a Low-Cost Surround

For a simple, modern, and incredibly budget-friendly surround, consider using gravel or crushed stone. A clean bed of pea gravel creates a minimalist look that’s easy to install and provides excellent drainage around your swim spa. You can frame the area with landscape edging to keep the stones contained and add large, flat pavers as stepping stones for a comfortable path. This approach is perfect for creating a zen-like atmosphere. You can even use different colored stones to create patterns or borders. Gappsi offers a variety of natural stone options that are perfect for creating a simple yet elegant spa foundation.

Get a High-End Look with Porcelain or Stone Pavers

If you want to achieve a luxurious, permanent feel, pavers are a fantastic investment. Materials like natural stone or porcelain create a sophisticated and durable surface that elevates your entire backyard. While more expensive than gravel or wood, pavers offer unmatched longevity and require very little maintenance. They provide a solid, level base and a seamless transition from your spa to the rest of your patio or landscape. With a wide selection of porcelain and natural stone pavers, you can design a surround that perfectly complements your home’s style, giving you a resort-quality finish that will last a lifetime.

How Can Landscaping Transform Your Spa Area on a Budget?

The right landscaping is what turns a simple swim spa installation into a personal backyard retreat. It’s the final layer that adds personality, softness, and a sense of escape. But creating that oasis doesn’t have to drain your wallet. With a bit of planning and some smart choices, you can achieve a high-end look that complements your home and lifestyle without overspending. The key is to focus on elements that deliver a big visual impact for a small investment.

Thoughtful landscaping can frame your spa, create privacy, and tie the entire space together. Instead of just having a spa sitting on a slab, you can integrate it into a cohesive design that feels intentional and beautiful. From lush greenery and textured stone to simple pathways, there are plenty of budget-friendly ways to make your spa area feel like a destination. Let’s explore a few ideas that will help you get a polished, professional look for less.

Plant Native, Low-Maintenance Greenery

Plants are one of the easiest ways to soften the hard edges of a swim spa and make it feel like a natural part of your yard. To keep your budget and to-do list in check, focus on native and low-maintenance greenery. Choosing plants that thrive in Long Island’s climate means less watering, less fuss, and less money spent replacing them. Ornamental grasses, ferns, and hardy succulents are excellent choices because they add texture and color without demanding constant attention. A professional landscape designer can help you select the perfect plants that will flourish around your spa, giving you a lush look that lasts.

Create a Rock Garden with Decorative Stone

If you want a sophisticated look with almost zero upkeep, a rock garden is a fantastic option. Using a mix of decorative stones, gravel, and a few hardy plants, you can create a visually interesting landscape that won’t require mowing or watering. This approach is perfect for adding texture and a modern feel to your spa area. You can use larger stones to frame the spa or create a clean, defined border with smaller pebbles. Integrating different sizes and colors of natural stone helps build a space that feels layered and thoughtfully designed, giving you a major style upgrade for a minimal investment.

Install Stylish, Low-Maintenance Synthetic Turf

A lush green lawn around your spa looks beautiful, but the upkeep can be a hassle. Constant mowing, watering, and fertilizing add up over time. A great budget-friendly alternative is synthetic turf. It gives you that perfect, vibrant green look year-round without any of the maintenance. This is a smart long-term investment that saves you time and money. Plus, you won’t have to worry about grass clippings or mud getting into your spa. Gappsi offers high-quality synthetic turf and sports games courts that provide a clean, durable, and beautiful surface for any backyard design.

Add Mulch, DIY Garden Beds, and Simple Paths

Sometimes the simplest additions make the biggest difference. Applying a fresh layer of mulch to your garden beds is an inexpensive way to make your entire spa area look neat and polished. It also helps suppress weeds and retain moisture for your plants. You can also define the space by creating simple pathways using affordable materials like gravel or individual stepping stones. These paths not only add charm but also guide foot traffic, protecting your lawn. Combining mulch with well-placed garden beds and a simple path can completely transform your spa’s surroundings, creating a cohesive and inviting aesthetic on a tight budget.

Privacy and Ambiance Solutions That Won’t Break the Bank

Creating a private, relaxing oasis around your swim spa is just as important as the spa itself. After all, you want a space where you can truly unwind. The good news is that you don’t need to spend a fortune to achieve a sense of seclusion and style. With a few smart choices, you can build an inviting atmosphere that feels like a high-end retreat. From simple structures to natural screens and creative lighting, here are some budget-friendly ways to enhance your swim spa’s privacy and ambiance.

Install a Pergola or Lattice Panels

A pergola is a fantastic way to define your spa area and add a touch of architectural elegance without completely closing it in. It creates the sense of an outdoor room and provides a perfect structure for hanging string lights, climbing vines, or flowing curtains for extra privacy. If a full pergola is outside your budget, consider installing simple lattice panels. You can place them strategically to block views from neighbors or the street. They are affordable, easy to install, and can be painted or stained to match your home’s exterior. Gappsi offers beautiful pavilions and pergolas that can be customized to fit your space and budget.

Consider Different Fencing Options

Fencing is a classic and effective way to create a private sanctuary around your swim spa. You have plenty of affordable options, from traditional wood fences to low-maintenance vinyl. A decorative fence not only blocks sightlines but also adds to the overall aesthetic of your backyard. One crucial tip: make sure any permanent structure leaves enough room to access the spa’s equipment panels. You don’t want to be stuck with costly demolition just to perform routine maintenance. A well-planned fence installation ensures both privacy and practicality, giving you a peaceful retreat designed for total comfort.

Plant Fast-Growing Hedges for Natural Privacy

For a softer, more organic approach, use plants to create a living privacy screen. Fast-growing evergreen hedges like Arborvitae or Privet can form a dense wall of green in just a few seasons, offering year-round seclusion. Planting hedges is often more affordable than building a fence, and it adds natural beauty and texture to your backyard. You can also use large potted plants or tall ornamental grasses to create flexible privacy around your spa. A thoughtful landscape design not only enhances privacy but also turns your spa area into a lush, tranquil garden escape.

Set the Mood with Affordable Lighting

Lighting has a massive impact on ambiance, and you can create a magical atmosphere without a big investment. Simple string lights draped over a pergola or nearby trees cast a warm, inviting glow perfect for evening relaxation. Solar-powered path lights are another great option for illuminating walkways around the spa safely and affordably. For a DIY touch, you can hang mason jar candles or use flameless LED candles placed around the spa surround. The right lighting transforms your swim spa from a simple water feature into a captivating focal point of your backyard after the sun goes down.

What DIY Projects Offer the Biggest Savings?

While certain parts of a swim spa installation, like electrical work, should always be left to the professionals, there are plenty of projects you can tackle yourself to save money. Getting your hands dirty with a few DIYs is the perfect way to add a personal touch to your backyard oasis without stretching your budget. These projects focus on the surround, landscaping, and ambiance, which are the elements that truly make the space your own. By handling these finishing touches, you can allocate more of your budget to the spa itself and the essential site prep, ensuring a high-quality foundation for your new favorite spot.

It’s about being smart with your resources. You get the satisfaction of building something with your own hands while still relying on expert craftsmanship for the critical components. This hybrid approach gives you the best of both worlds: a professionally installed, reliable spa and a beautifully personalized setting that reflects your style, all while keeping your finances in check. Focusing your DIY efforts on aesthetics lets you create a custom look that feels luxurious and complete, proving that a dream backyard doesn’t have to come with an impossible price tag.

Build Your Own Deck Surround

A deck is a fantastic way to seamlessly integrate your swim spa into your backyard, and building it yourself can cut labor costs dramatically. With some basic carpentry skills, you can create a beautiful and functional surround. Consider creative designs like a multi-level deck to add dimension or build in bench seating for extra lounging space. Pressure-treated wood is a durable and cost-effective material to start with. You can also combine your DIY deck with professionally installed elements for a truly custom look. For example, adding a small masonry retaining wall or stone accents can create a stunning mixed-material design that feels incredibly high-end.

Create DIY Privacy Screens and Planters

Privacy is essential for creating a tranquil and relaxing swim spa environment. Instead of investing in a full fence right away, you can create stylish and effective privacy screens yourself. Simple lattice panels from a home improvement store can support climbing vines, creating a living wall of green. You can also build large planter boxes to fill with tall grasses or shrubs, which act as a natural and beautiful barrier. These DIY solutions not only save you money but also add a soft, organic feel to your space. If you later decide you want a more permanent structure, Gappsi offers a variety of beautiful fences and netting options.

Design Simple Container Gardens

You don’t need a massive landscaping budget to surround your swim spa with lush greenery. Container gardening is an easy and affordable way to add color and life to your spa area. You can start with just a few pots and add more over time. Choose a variety of container sizes and styles to create visual interest. Good plant choices for poolside containers include palms, ornamental grasses, succulents, and colorful annuals like coleus. The best part about container gardens is their flexibility; you can move them around to change the look of your space whenever you want. For a more permanent design, our landscape design team can help you integrate your containers into a cohesive plan.

Add Finishing Touches on a Budget

The small details are what transform a simple spa installation into a personalized retreat. Luckily, these finishing touches are often the most affordable and fun to do yourself. Set the mood with outdoor string lights draped over a pergola or between trees. You can create your own charming candle holders using mason jars or recycled glass bottles for a warm, inviting glow. A small, painted side table can hold drinks and towels, while a simple DIY towel rack keeps things organized. These little projects add character and charm without a significant cost. For more inspiration, check out the Gappsi YouTube channel to see how we finish our custom projects.

Common Budgeting Mistakes to Avoid

Bringing a swim spa home is an exciting project, but it’s easy for your budget to get off track if you don’t account for the full scope of work. The price of the spa itself is just the starting point. Thinking through the entire installation process helps you create a realistic budget and avoid stressful surprises. Let’s walk through a few common financial missteps and how you can sidestep them.

Don’t Underestimate Site Prep Costs

One of the biggest budgeting oversights is underestimating the cost of preparing your site. The installation alone can range from a couple of thousand dollars to over twenty thousand, completely separate from the spa unit. A simple setup on a flat, accessible yard is on the lower end. However, if your plan involves recessing the spa, requires a crane to lift it into place, or needs an electrical panel upgrade, the costs will be higher. A solid, level foundation is non-negotiable, and creating one often requires professional masonry work. This base is critical for the stability and longevity of your spa, so it’s an area where you want to invest in quality craftsmanship.

Avoid Skipping Professional Installation

Trying to save money by skipping a professional installation can lead to much bigger expenses down the road. A swim spa is a heavy, complex piece of equipment that requires expert handling. It’s crucial to use a certified electrician to install a dedicated, correctly rated circuit for both safety and energy efficiency. A professional team ensures your spa is level, secure, and compliant with all local codes. When you work with experts, you’re not just paying for labor; you’re investing in peace of mind and the long-term health of your swim spa.

Remember to Plan for Electrical and Drainage

Forgetting to plan for water and power is another frequent mistake. Your swim spa needs a dedicated electrical circuit, and its location must be planned with that in mind. Just as important is drainage. Installing the spa in a low spot where rainwater collects can damage its components and your yard. A proper drainage plan is essential for protecting your investment. This is where integrated landscape design becomes so valuable, as it ensures water flows away from your spa and home foundation.

Measure Twice Before Choosing a Location

Before you fall in love with a specific spot, get out your measuring tape. You need to measure your gates, side yards, and any other access points to make sure the spa can actually get to its final destination. If the path is too narrow, you may need to rent a crane, which adds a significant cost. Planning your access route ahead of time saves a lot of money and stress on delivery day. You can see how our professional crews handle these logistics by watching our project videos to get a better sense of the process.

How to Keep Your Ongoing Swim Spa Costs Low

Your swim spa installation is just the beginning of your journey. Once it’s in place, you’ll want to keep the running costs as low as possible without sacrificing enjoyment. The good news is that a few smart choices and simple habits can make a huge difference in your monthly utility bills. By focusing on heat retention and routine care, you can ensure your swim spa remains an affordable luxury for years to come. These strategies are especially effective in Long Island, where chilly fall and winter temperatures can put your spa’s heater to the test.

Invest in a High-Quality Insulated Cover

Think of your swim spa cover as the roof of your house; it’s your first line of defense against the elements. A well-fitting, insulated cover is essential for stopping heat from escaping, particularly during cold weather. If your cover is worn, waterlogged, or doesn’t create a tight seal, your heater will have to work overtime just to maintain the water temperature, driving up your energy costs. Investing in a durable, high-quality cover from the start is one of the most effective ways to manage your expenses. It’s a purchase that quickly pays for itself in energy savings and helps protect your swim spa investment.

Use Proper Insulation to Cut Energy Use

The quality of your swim spa’s built-in insulation plays a massive role in its energy efficiency. Models with full-foam insulation in the walls can reduce energy consumption significantly, sometimes by up to 40%. This insulation fills the entire cabinet, preventing heat from seeping out and cold air from getting in. When you’re shopping for a swim spa, ask about the type and density of its insulation. A well-insulated model might have a slightly higher upfront cost, but the long-term savings on your electricity bill make it a worthwhile feature. It’s a key factor in keeping your spa ready for a warm, relaxing dip without breaking the bank.

Heat Your Spa During Off-Peak Hours

Many utility companies offer time-of-use rates, charging less for electricity during off-peak hours, which are typically late at night. You can take advantage of this by heating your swim spa when energy is cheapest. Most modern spas come with programmable controls that allow you to set a heating schedule automatically. Simply program your spa to heat during these off-peak windows, and it will be warm and ready when you want to use it. Check with your local Long Island utility provider to see if they offer these rates. It’s a simple adjustment that can lead to noticeable savings on your monthly bills.

Adopt Simple Habits to Extend Your Spa’s Life

Consistent maintenance is key to keeping your swim spa running efficiently and avoiding costly repairs. While it might be tempting to stretch the time between water changes, it’s a counterproductive habit. Old water requires more chemicals to stay balanced, which adds to your expenses. Instead, stick to a regular schedule for draining and refilling your spa. You should also clean your filters regularly to ensure proper water flow, which allows your heater and pumps to operate smoothly. These simple acts of upkeep not only save you money on chemicals but also extend the life of your spa’s components, protecting your overall home and property value.

Related Articles

Frequently Asked Questions

What is the biggest “hidden cost” I should plan for with a swim spa? The most significant cost outside of the spa unit itself is the site preparation and installation. This includes creating a solid, level foundation like a reinforced concrete pad, which is essential to support the spa’s immense weight. It also covers the necessary electrical work to install a dedicated circuit, which must be done by a certified electrician. If you choose a semi-recessed or in-ground style, you will also need to budget for excavation, which can be a major expense.

Can I really put a swim spa on my existing patio to save money? Using an existing patio can be a fantastic way to save on foundation costs, but only if the patio is up to the task. A filled swim spa can weigh nearly 20,000 pounds, so the slab must be perfectly level and structurally engineered to handle that load without cracking. Before you proceed, it is critical to have a professional inspect the patio to confirm its strength and stability. This step ensures your investment is safe and prevents damage to both your spa and your property.

How much should I actually budget for running my swim spa each year? You can generally expect to spend between $1,000 and $3,000 annually on running costs. This figure covers electricity for the heater and jets, water care chemicals, and occasional filter replacements. The single best thing you can do to keep these costs on the lower end of that spectrum is to invest in a high-quality, well-fitting insulated cover. It dramatically reduces heat loss, meaning your heater works less and your energy bills stay down.

Do I really need a permit for a swim spa on Long Island? Yes, it is very likely you will need a permit. Most towns and villages across Nassau and Suffolk counties have specific regulations for swim spas. These permits typically cover the electrical installation and may also dictate how far the spa must be from your property lines or home. Working with an experienced local installer is the best way to make sure all the necessary permits are secured and your project is fully compliant with local codes from the start.

What’s the smartest way to get a high-end look without a high-end budget? The key is to invest your money in the essentials and get creative with the finishes. Prioritize a quality spa unit and professional installation for the foundation and electrical work. You can then save significantly by handling some of the aesthetic elements yourself, like building a simple wood deck surround or creating a modern landscape with gravel and pavers. Planting fast-growing hedges for privacy is another great way to get a lush, custom feel for less than the cost of a fence.

Share this page:
Small swim spa installation idea with modern decking in a tiny backyard.

Small Swim Spa Installation Ideas for Tiny Backyards

If you live on Long Island, you know that a spacious backyard can be a rare luxury. Many homeowners dream of having a pool but quickly dismiss the idea, thinking their yard is simply too small to accommodate one. I have some great news for you. A compact swim spa delivers the best of both worlds: a place for a great low-impact workout and a spot for total relaxation, all in a footprint that fits surprisingly tight spaces. It’s a versatile, year-round solution that brings fitness and fun right to your doorstep. This guide is here to show you how it’s possible, exploring creative small swim spa installation ideas that can turn even a narrow side yard into a private, beautiful oasis.

Key Takeaways

  • Enjoy year-round wellness in one unit: A small swim spa fits perfectly in compact yards and combines a low-impact swimming workout with relaxing hydrotherapy jets, giving you a versatile space for fitness and fun throughout the year.
  • Prioritize the technical details: A smooth installation requires planning ahead, which means preparing a reinforced concrete foundation, hiring a licensed electrician for the 240V hookup, and mapping out a clear path for delivery and maintenance access.
  • Create a complete retreat and follow the rules: Transform your spa into an oasis by designing the surrounding patio, adding privacy fencing, and incorporating lighting, but first check local permit and safety regulations to ensure a compliant installation.

Why a Small Swim Spa Is Perfect for Your Yard

If you think your Long Island backyard is too small for a pool, I have some great news for you. A compact swim spa offers the best of a swimming pool and a hot tub, all in a footprint that can fit into surprisingly tight spaces. It’s a versatile, year-round solution that brings exercise, relaxation, and family fun right to your doorstep, without requiring a massive yard. Let’s look at why a small swim spa might be the perfect addition to your home.

Get Exercise, Relaxation, and Therapy in One

A swim spa is a complete wellness center packed into a single unit. On one end, powerful jets create a continuous current you can swim against, providing an amazing low-impact workout without needing the length of a traditional lap pool. After your swim, you can move to the other end, where comfortable seating and hydrotherapy jets work to soothe sore muscles and melt away stress. It’s the perfect combination of fitness and relaxation. These versatile hot tubs and swim spas deliver a full-body experience, offering everything from a challenging workout to a therapeutic soak after a long day.

Enjoy the Benefits of a Pool, Without the Footprint

One of the biggest advantages of a small swim spa is its size. Models as short as 10 to 13 feet can easily fit into narrow side yards, small patios, or other compact areas where traditional swimming pools would be impossible. This means you don’t have to sacrifice your entire yard to enjoy the water. Plus, swim spas offer incredible installation flexibility. You can place them above ground for a simple setup, build a deck around them for an integrated look, or even install them partially or fully in-ground for a sleek, custom appearance that blends seamlessly with your landscape design.

Use It All Year, Even in Long Island

Unlike a traditional pool that you have to close up for the winter, a swim spa is designed for year-round enjoyment. Thanks to excellent insulation, efficient heaters, and high-quality covers, you can keep your swim spa running through fall, winter, and spring. Imagine soaking in the warm, bubbling water on a crisp autumn evening or watching the snow fall from the comfort of your spa. To make it even more comfortable, you can install one under a custom-built structure. Adding one of Gappsi’s pavilions and pergolas provides shelter from the elements, giving you a private, all-season retreat right in your own backyard.

Explore Your Swim Spa Installation Options

One of the most exciting parts of planning for your new swim spa is deciding how it will fit into your backyard. The installation style you choose will define the entire look and feel of your space, so it’s worth taking the time to explore your options. The three main approaches are above-ground, semi-recessed, and fully recessed. Each one offers a different aesthetic, level of accessibility, and budget consideration.

Think about what you want your finished yard to look like. Are you aiming for a quick and simple setup, or do you dream of a seamless, built-in oasis that looks like it has always been there? Your choice will depend on your personal style, your property’s layout, and your overall project budget. We can help you visualize how each option would work in your space, ensuring your new hot tub or swim spa becomes a beautiful and functional extension of your home. No matter the size of your Long Island yard, the right installation can transform it into a private retreat.

Above-Ground: Freestanding or Integrated with a Deck

The above-ground installation is the most popular and cost-effective way to add a swim spa to your home. Because it doesn’t require major excavation, the setup is fast, often taking less than a day once the foundation is ready. You can simply place the spa on a reinforced concrete slab and you’re good to go. This freestanding approach is perfect if you want to start enjoying your spa as soon as possible.

For a more custom feel, you can integrate the spa with a new or existing deck. Building a deck around the swim spa creates a cohesive look and makes getting in and out a breeze. It also gives you a dedicated space for lounge chairs, towels, and drinks. Using beautiful porcelain or natural stone pavers for the surrounding patio can create a truly stunning and durable outdoor living area.

Semi-Recessed: A Sleek Profile with Easy Access

If you love the integrated look but want something a little different, a semi-recessed installation is a fantastic middle ground. This style involves setting the swim spa partially into the ground, which lowers its profile and gives it a sleek, built-in appearance. It’s a great way to make a small yard feel more open while still providing easy access, since you won’t have to climb as high to get in.

A semi-recessed spa is also an excellent solution for yards with a slight slope, as it can be built into the hillside to create a beautiful, terraced effect. By surrounding it with thoughtful landscape design, you can make the spa feel like a natural part of your garden. This option combines the convenience of an above-ground model with the custom aesthetic of a fully recessed one.

Fully Recessed: Create a Seamless, Built-In Look

For the ultimate in elegance, a fully recessed installation is the way to go. This method involves placing the swim spa completely in the ground, so it sits flush with your patio or lawn. The final result is incredibly seamless, resembling a small, luxurious in-ground pool that blends perfectly with your landscape. This option is ideal for creating a sophisticated and minimalist backyard design.

A fully recessed spa requires more significant site work, including excavation and careful planning for drainage and access panels. The process is similar to installing our custom swimming pools, ensuring a stable and long-lasting foundation. While it’s the most involved option, a fully recessed swim spa offers an unmatched level of integration and turns your backyard into a truly high-end retreat.

Plan Your Space: Foundation and Site Prep

Before you can soak in your new swim spa, you need to prepare the ground it will sit on. Proper site preparation is the single most important step for a successful and long-lasting installation. A swim spa is a significant investment, and a solid foundation protects that investment by ensuring it remains stable, level, and accessible for years to come. This isn’t the place to cut corners. Planning the location, foundation, and access ahead of time will prevent major headaches down the road and help the entire installation process go smoothly. From pouring the right base to planning for future maintenance, every detail matters.

Think of it like building a house; you wouldn’t build on shaky ground, and the same principle applies here. A well-prepared site accounts for the immense weight of the spa, ensures water drains away properly, and provides easy access for service. Our team approaches every installation with a comprehensive plan, considering everything from the delivery path to the final electrical hookup. By focusing on a flawless foundation, we make sure your swim spa is a source of enjoyment, not a series of problems. This initial planning phase is where our expertise in home remodeling and construction truly shines, as we integrate your new spa perfectly into your backyard vision.

The Importance of a Concrete Foundation

Your swim spa needs a solid, level surface to rest on, and a standard deck or patio usually isn’t strong enough. A filled swim spa is incredibly heavy, which is why a reinforced concrete pad is the gold standard for a secure foundation. Most manufacturers require a concrete pad that is at least four to six inches thick to support the spa’s weight and prevent shifting or cracking over time. Attempting to place it on an unprepared surface or an old patio can lead to serious structural issues for both the spa and your property. Our expert masonry team can design and pour a concrete foundation that is perfectly sized and leveled for your specific swim spa model, giving you total peace of mind.

Why Proper Weight Support Is Crucial

It’s hard to picture just how heavy a swim spa is until you see the numbers. When filled with water and people, a small swim spa can weigh between 12,000 and 20,000 pounds. That’s more than three or four cars combined. This immense weight is why a professionally installed, reinforced concrete pad is non-negotiable. Without it, the ground could settle unevenly, putting stress on the spa’s shell and potentially causing cracks or leaks. Ensuring your foundation is built to handle the load is a critical part of the swimming pool and spa installation process and guarantees your spa remains safe and functional for years of enjoyment.

Plan for Clearance and Maintenance Access

When choosing the perfect spot for your swim spa, think about future access. You’ll need to leave enough room around the spa for any potential maintenance or repairs. We recommend leaving about three feet of clear space on the side where the main equipment panel is located. This allows a technician to easily access the pumps, heaters, and electrical components without any trouble. Boxing in your spa without planning for this clearance can turn a simple repair into a major, costly project. Factoring this space into your initial landscape design ensures that your spa is not only beautiful but also easy to service, saving you time and money if it ever needs a tune-up.

Make It Fit: Ideas for Tight or Awkward Spaces

Even in a small backyard, you have several creative options for installing a swim spa. You can place it above ground, which is the simplest method, or integrate it with a custom deck for a built-in feel. For a more seamless look, consider a semi-recessed or fully recessed installation. Partially sinking the spa into the ground can make it feel more like a natural part of the landscape and visually expand a smaller yard. You can frame the space with a beautiful stone patio and a custom pavilion or pergola to create a true backyard oasis that feels both luxurious and intimate, no matter the size of your space.

Manage Grading and Drainage

Proper drainage is essential, especially for semi-recessed or fully recessed swim spas. You need a plan for where rainwater and splashed water will go so it doesn’t pool around the spa’s base or equipment. Poor drainage can lead to water damage, erosion, and create a hazardous, slippery environment. Our team carefully grades the site to direct water away from the spa area. We can also install effective drainage solutions as part of our masonry and site work, protecting your spa and the surrounding patio from water-related issues. This thoughtful planning prevents future problems and keeps your backyard sanctuary safe and beautiful.

Design a Swim Spa That Feels Like a Getaway

Your swim spa is more than just a place to exercise or relax; it’s the centerpiece of your personal backyard retreat. The real magic happens when you design the surrounding space to feel like a true getaway. With thoughtful planning, you can transform even a compact area into a luxurious oasis that complements your home and lifestyle. It’s about creating a complete experience, from the moment you step outside.

Integrating your swim spa into a larger outdoor living area with features like a kitchen, fire pit, or special lighting makes the space more functional and inviting. Think about how you want to use the area. Do you envision quiet morning workouts, fun family afternoons, or relaxing evenings with friends? By adding structures for shade, a beautiful patio, cozy gathering spots, and the right landscaping, you can create a destination you’ll never want to leave.

Add Shade with Pavilions and Pergolas

A swim spa is a year-round investment, and adding a structure overhead helps you get the most out of it. A pavilion or pergola provides welcome shade on hot summer days and offers protection from light rain, extending your spa season. More than just a practical addition, these structures define your spa area, making it feel like a dedicated outdoor room. We can help you design custom pavilions and pergolas that match your home’s architecture and create a stunning focal point in your backyard. Imagine a beautiful wood pergola with climbing vines or a classic pavilion with space for lounge chairs, turning your spa into a resort-style escape.

Design a Beautiful Patio Surround

The surface around your swim spa is just as important as the spa itself. A well-designed patio provides a safe, non-slip area for getting in and out, and it seamlessly integrates the spa into your landscape. Forget about plain concrete slabs. You can create a high-end look with materials like elegant porcelain and natural stone pavers that stay cool underfoot and offer incredible durability. Our expert masonry designers can help you choose the perfect materials and layout to create a beautiful, functional surround. This solid foundation not only looks great but also gives you a clean, stable space for patio furniture and planters.

Incorporate Fire Pits, Gardens, and Dining Spaces

Even a small backyard can become a multi-functional entertainment hub. You can combine your swim spa with a cozy dining area, a warm fire pit, or vertical gardens to make the most of every square foot. A fire pit adds ambiance and warmth, making evening soaks feel extra luxurious, especially during cooler Long Island nights. Adding a small dining set nearby creates the perfect spot for a post-swim meal or drinks with friends. Our landscape design team can help you arrange these elements to create a natural flow and a cohesive, inviting atmosphere for entertaining.

Use Landscaping and Lighting to Set the Mood

The right plants and lighting are the finishing touches that bring your swim spa oasis to life. Strategic landscaping with lush greenery, flowering shrubs, and ornamental grasses can soften the edges of the spa and add natural beauty and texture. Consider planting aromatic flowers like lavender or jasmine nearby to create a sensory experience. At night, lighting sets the mood. A layered lighting scheme, including path lights for safety, uplighting on trees for drama, and integrated LED lights in the spa itself, can create a truly magical ambiance. This thoughtful approach to landscaping and lighting will make your spa area feel enchanting after the sun goes down.

Create Privacy with Fencing and Screens

Privacy is a key ingredient for a relaxing spa experience. You want to feel completely at ease, without worrying about prying eyes from neighbors. There are many stylish ways to create a secluded atmosphere. A well-designed privacy fence not only blocks the view but can also serve as a beautiful backdrop. You can also use decorative screens, trellises with climbing plants, or a row of tall, slender evergreens to form a living wall. Our team can install a variety of fences and netting solutions that provide the seclusion you need while enhancing your backyard’s overall design. These barriers also help block wind, making your time in the spa even more comfortable.

What to Plan for Before Installation Day

With your swim spa chosen and the location picked, it’s time to focus on the details that ensure a smooth installation day. A little planning now prevents major headaches later, so you can start enjoying your new backyard oasis as soon as possible. Working with a professional team like Gappsi means we handle the heavy lifting, but thinking through these key logistics will make the entire process seamless. Here’s what you need to sort out with your project manager before your swim spa arrives.

Plan Your Electrical Hookup

Your new swim spa is a powerful machine, and it needs the right electrical supply to run safely and efficiently. Unlike a simple appliance you can plug into any wall socket, a swim spa requires a dedicated 240V electrical hookup. This is a job for a licensed electrician, who will ensure everything is up to code. You’ll need to plan where the wiring will run from your home’s electrical panel to the spa. We’ll work with you and the electrician to place the connection point discreetly and conveniently, making sure it’s properly installed for safe, all-weather use. Proper electrical planning is a critical step for any swimming pool or spa installation.

Map Out the Delivery Path

Getting your swim spa from the truck to its final resting place is a major part of the installation. Take a walk from the curb to your backyard and imagine a large, heavy object making the same trip. We’ll need a clear path, free of obstacles like narrow gates, low-hanging tree branches, or air conditioning units. In some cases, especially for tight Long Island properties, a crane may be needed to lift the spa over the house and into the backyard. Our team will perform a thorough site inspection to map out the safest and most efficient delivery path, but it’s always helpful for you to be aware of the plan.

Plan for Proper Drainage

Water is going to splash out of your swim spa, and you’ll eventually need to drain it for maintenance. It’s essential to plan for where all that water will go. Your spa’s foundation should be prepared to direct water away from the spa’s equipment and your home’s foundation. For semi-recessed or fully recessed installations, a drainage system is even more critical to prevent water from pooling around the spa after it rains. Our expertise in creating beautiful and functional patios with porcelain and natural stone pavers includes designing effective drainage solutions that protect your investment and your property.

Consider Noise and Your Neighbors

Being a good neighbor is part of enjoying your home, and your new swim spa is no exception. While modern swim spas are designed to be quiet, the pumps and heaters do produce a low hum. Think about how that sound might travel, especially if your neighbors are close by. We can help you choose a quieter pump model or use special pads to reduce vibrations. Strategic placement of the spa can also make a big difference. You might also consider adding privacy features like fencing and screens or landscaping, which can help buffer sound while creating a more intimate setting for you to relax.

Know the Rules: Permits, Zoning, and Safety

Getting a swim spa is exciting, but before you can start relaxing, there’s some important homework to do. Installing a swim spa involves more than just picking a spot in your yard. You’ll need to consider local rules for permits, zoning, and safety. It might sound like a bit of a hassle, but these regulations are in place to protect you, your family, and your investment. They ensure your spa is installed correctly and safely, preventing future problems and helping maintain your property value.

Navigating these requirements can feel overwhelming, especially since every town on Long Island has its own set of rules. From electrical hookups and concrete pads to property line setbacks and safety barriers, there are several details to get right. Thinking about these things early on will save you from potential fines, delays, or even having to move your spa after it’s installed. The good news is you don’t have to figure it all out on your own. This section will walk you through what you need to know. Working with a team that knows the local landscape can make this part of the process completely stress-free, turning a potentially complicated task into a simple checklist.

Understand Local Long Island Permit Rules

Before any work begins, you need to look into your local building permits. Each town and village in Nassau and Suffolk County has its own specific requirements for swim spa installations. You will likely need permits for the electrical work and the concrete foundation your spa sits on. Some municipalities may even have specific zoning laws that dictate how close your spa can be to your house or property line. Taking the time to understand these rules upfront is essential for a smooth project. It ensures your installation is fully compliant and avoids any unwelcome surprises from your local building department down the road.

Follow Safety Rules for Fencing and Covers

Safety is the most important part of any home improvement project, and swim spas are no exception. If you have children or pets, this is especially critical. Most local codes require specific safety measures, like installing a secure, locking cover to prevent anyone from using the spa unsupervised. You may also be required to install fencing and netting around the spa area to create a secure barrier. It’s also a great idea to make sure the spa is visible from your house. Following these safety rules gives you peace of mind, knowing your backyard getaway is a safe space for everyone to enjoy.

Hire a Pro Who Knows Local Regulations

The simplest way to handle all these rules is to work with a professional who has done it all before. An experienced installer will be familiar with the specific codes and permit processes for towns across Long Island. A team like Gappsi can manage the entire process, from filing the initial paperwork to ensuring the final installation passes inspection. By hiring experts who specialize in hot tubs and swim spas, you can relax and focus on the fun parts of the project, confident that all the technical details and local regulations are being handled correctly.

Avoid These Common Installation Mistakes

A swim spa is an incredible addition to your home, but the installation process has a few moving parts. Getting it right from the start ensures you can relax and enjoy your new oasis without any headaches down the road. A little bit of planning goes a long way. By working with an experienced team and knowing what to look out for, you can sidestep these common installation mistakes and ensure your project goes off without a hitch.

Forgetting to Measure Twice

The old saying “measure twice, cut once” is especially true for a swim spa installation. Before you fall in love with a specific model, you need to know your exact backyard dimensions. Small swim spas are typically 7 to 8 feet wide and 10 to 15 feet long, but that’s not the only measurement to consider. You must plan for at least two to three feet of clear space around the entire spa for maintenance access. Any walkways should be at least 30 to 36 inches wide to ensure safe and easy movement around the area.

Ignoring How It Will Get into Your Yard

A swim spa doesn’t just magically appear in your backyard. You need a clear and practical plan for how it will get from the delivery truck to its final spot. Depending on your property’s layout, this can be a complex logistical challenge. In tight spaces or yards with limited access, a crane is often necessary to lift the spa over your house or other obstacles. This is a crucial detail to sort out well in advance, not on delivery day. Planning the delivery path is a key step that prevents costly delays and property damage.

Neglecting the Foundation and Drainage

A filled swim spa is incredibly heavy, and your existing deck probably isn’t built to handle that kind of weight. A proper foundation is non-negotiable. In most cases, you will need a new, reinforced concrete pad to provide adequate support. For recessed or semi-recessed installations, you also have to think about water. You need a solid plan for how water will drain away from the spa after it rains or from splashing. Proper masonry and drainage work prevents water from pooling around the structure, which could cause serious damage over time.

Overlooking Electrical and Safety Needs

Swim spas have specific power requirements, usually a 240V electrical hookup, which is different from a standard household outlet. You’ll need a licensed electrician to run the proper wiring, so it’s important to plan where the electrical lines will go. Safety is another top priority. Local regulations often require specific safety measures, such as locking covers and secure fencing. Thinking about these elements early on helps you integrate them seamlessly into your design while keeping your family and guests safe.

Keep Your Swim Spa in Top Shape

Your swim spa is a fantastic investment in your health and happiness, so keeping it in great condition is key to enjoying it for years to come. A little routine maintenance goes a long way in ensuring your water is always sparkling clean and ready for a swim or a relaxing soak. Think of it not as a list of chores, but as a simple rhythm that protects your backyard oasis. By following a few easy steps, you can prevent common issues and make sure your spa runs efficiently, saving you time and money. This consistent care ensures your swim spa remains the beautiful, inviting centerpiece of your yard.

Balance Your Water Chemistry

Keeping your swim spa’s water balanced is one of the most important things you can do. Plan to test the water two to three times a week to check the sanitizer, pH, and alkalinity levels. This quick check helps you maintain a healthy environment that’s safe and comfortable for swimming while preventing issues like algae growth before they start. Staying on top of your water chemistry means you can spend less time troubleshooting problems and more time enjoying your spa. If you ever need advice or supplies, Gappsi can help you find exactly what you need for your specific hot tub or swim spa.

Clean and Replace Filters Regularly

Your spa’s filters work hard to keep the water clear, so they need regular attention. Make it a habit to rinse your filters about once a month to remove loose debris. For a deeper clean, you should remove and wash them every two to four weeks. This simple task ensures your spa’s circulation system runs smoothly and efficiently. It’s also a good idea to completely drain and refill your spa with fresh water three to four times a year. This resets your water chemistry and gets rid of any built-up contaminants, giving you a perfectly fresh start.

Care for Your Spa and Cover

A good cover is your swim spa’s best friend. Always keep your spa covered when you’re not using it. This simple step does so much: it helps maintain the water temperature (which saves on energy costs), keeps out leaves and other debris, and protects the spa’s shell from sun damage. Taking care of your cover by cleaning it periodically will also extend its life. For even more protection from the elements, consider adding one of Gappsi’s custom pavilions or pergolas to create a beautiful, shaded spot for your spa.

Get the Most Out of Your Spa’s Features

To keep your swim spa running at its best, it’s helpful to create a simple maintenance schedule. For example, you can set a reminder to rinse your filters on the first of every month. This makes the task easy to remember and ensures it gets done consistently. Understanding how all the features of your spa work, from the jets to the heating cycles, also helps you use it more efficiently. Taking a little time to learn the ins and outs of your specific model will help you enjoy every feature to the fullest and keep it operating perfectly.

Is a Small Swim Spa Right for Your Long Island Home?

So, you’re wondering if a small swim spa is the right fit for your Long Island home. Let’s figure it out. The biggest advantage is how little space they require. If you have a compact backyard, a narrow side yard, or even just a 20-by-20-foot patio, a swim spa can bring that resort-like feel home. Models as small as 10 to 13 feet long offer the benefits of a pool without needing a huge footprint.

One of the best parts is their year-round usability. Unlike a traditional pool you have to close for the season, a swim spa can be enjoyed through crisp autumn evenings and even snowy winter days. They are incredibly versatile, offering a space for exercise, relaxation, and family fun all in one. Plus, you have options for installation: you can place it above ground, build it into a deck, or have it fully recessed for a seamless, integrated look.

Before you get too far, there are a few practical things to keep in mind. You’ll need a dedicated 240V electrical hookup and a solid, level foundation to support the weight. It’s also smart to leave about two to three feet of clearance around the unit for easy maintenance access. While the initial investment is significant, a swim spa can completely transform your backyard into a private wellness retreat you can use any day of the year.

Related Articles

Frequently Asked Questions

How much space do I actually need for a small swim spa? You might be surprised by how little space you need. While you should always measure your specific area, many compact swim spas are about 10 to 13 feet long and 8 feet wide. The key is to also plan for about three feet of clearance on at least one side for maintenance access. This means even a narrow side yard or a small patio can often accommodate a swim spa, giving you a pool experience without needing a huge yard.

Is a swim spa just a big hot tub, or can I really swim in it? It’s the best of both worlds. A swim spa has a dedicated swim lane with powerful jets that create a continuous current you can swim against, which provides a great low-impact workout. Then, in a separate section, you have jetted hydrotherapy seats just like a hot tub for relaxation and muscle recovery. It’s a complete fitness and wellness system in one unit.

What kind of foundation does a swim spa need? Can I just put it on my patio? A swim spa is incredibly heavy when filled with water, often weighing over 15,000 pounds, so your existing patio or deck likely isn’t strong enough. It requires a solid, level foundation, and the best option is a reinforced concrete pad that is at least four to six inches thick. Placing it on an unprepared surface is a common mistake that can cause serious damage to the spa and your property, so getting the foundation right is the most important step.

Can I really use a swim spa all year in Long Island, even in the snow? Absolutely. Unlike a traditional pool, swim spas are designed for year-round use. They are built with excellent insulation and come with high-quality, thick covers that trap heat efficiently. This means you can keep the water warm and inviting even through the fall and winter. Soaking in the hot, bubbling water while snow falls around you is a pretty amazing experience.

What’s the first step I should take if I’m considering a swim spa? Do I need to worry about permits? The best first step is to have a professional site consultation. This helps you figure out the perfect model and placement for your specific yard. And yes, you will likely need permits for the installation, particularly for the electrical work and the concrete foundation. Every town on Long Island has different rules, so working with an experienced installer who knows the local regulations will make the entire process smooth and stress-free.

Share this page:
Modern sunken swim spa deck with clean lines and natural wood accents.

Your Guide to the Best Swim Spa Deck Ideas

Without a thoughtful plan, a swim spa can look like a large box dropped in the middle of your yard. The key to making it look like a luxurious, fully integrated feature is the deck design. The right deck elevates your spa from a simple piece of equipment to the centerpiece of a sophisticated outdoor living area. Whether you prefer the sleek, modern look of a sunken spa or the functionality of a multi-level entertainment space, the design possibilities are endless. We’ve gathered our favorite swim spa deck ideas to inspire you, focusing on how different layouts, materials, and finishing touches can create a cohesive and beautiful extension of your home.

Key Takeaways

  • Plan Your Deck as an Outdoor Room: Create a truly functional space by designing a layout with distinct zones for lounging and easy access. A great design considers traffic flow and materials to feel like a natural extension of your home.
  • Get the Technical Details Right: Your spa’s safety and longevity depend on the essentials. Ensure your project includes a reinforced, level foundation to support the weight, proper electrical work, and at least three feet of clearance for maintenance access.
  • Layer in Comfort and Privacy: Complete your backyard retreat by adding elements that enhance the experience. Use landscaping, fences, or a pergola to create a secluded feel, and install lighting to improve ambiance and safety for evening use.

What Makes a Swim Spa Deck Great?

A great swim spa deck does more than just hold your spa; it creates a destination in your backyard. It’s about designing a space that feels like a natural extension of your home and personal style. The best designs seamlessly integrate the spa into your overall landscape design, making it look like it was always meant to be there. This means thinking about how the deck flows with your garden, patio, and the architecture of your house to create one cohesive and beautiful outdoor living area.

Functionality is just as important as appearance. Consider the path from your back door to the spa. You’ll want it to be short and convenient, especially on cooler evenings. Privacy is another key factor. A well-placed deck can shield you from the view of neighbors, creating a private retreat for you and your family to relax. Thoughtful placement ensures you can enjoy your swim spa comfortably any time of day.

The materials you choose will define the look and durability of your deck. Composite decking is a fantastic, low-maintenance option that resists moisture, while natural woods like cedar offer timeless beauty. You can also incorporate porcelain and natural stone pavers to create stunning multi-level designs with separate zones for lounging, dining, or sunbathing. A sunken design, where the deck is built around a partially recessed spa, can provide a sleek, modern look and make getting in and out easier.

Finally, the details complete the experience. Proper lighting is essential for safety after dark and sets a relaxing mood. And here’s a pro tip that’s often overlooked: always plan for maintenance access. Your swim spa will need service at some point, so designing a removable panel or hatch will save you a major headache down the road. Combining these elements of design, function, and foresight is what truly makes a swim spa deck great.

How to Choose the Best Deck Materials

Selecting the right material for your swim spa deck is one of the most important decisions you’ll make. The material you choose sets the tone for your entire backyard oasis, influencing everything from the look and feel to the amount of maintenance required. You want something that not only looks beautiful but can also handle poolside splashes and Long Island’s distinct seasons. Let’s walk through some of the best options so you can find the perfect fit for your lifestyle and aesthetic.

Composite Decking

If you love the look of wood but not the upkeep, composite decking is a fantastic choice. Made from a blend of wood fibers and recycled plastic, it gives you that classic deck appearance without the risk of rot, warping, or splintering. This material is especially great for wet areas around a swim spa because it resists moisture damage and provides excellent durability. You can spend more time enjoying your spa and less time on maintenance. Plus, it comes in a variety of colors and finishes, making it easy to match your home’s style.

Natural Wood (Cedar and Redwood)

There’s nothing quite like the timeless, natural beauty of a real wood deck. Woods like cedar and redwood are popular for a reason: they offer a warm, classic look and are naturally resistant to rot and insects. A wooden deck creates an inviting, organic feel that blends seamlessly with your landscape. Keep in mind that natural wood does require some love to keep it looking its best. You’ll need to plan for regular sealing and staining to protect it from the elements and maintain its rich color, but for many homeowners, the stunning result is well worth the effort.

Stone and Porcelain Pavers

For a truly luxurious and permanent feel, consider building your deck with stone or porcelain pavers. This option creates a sophisticated hardscape that feels like a natural extension of your home. Porcelain and natural stone pavers are incredibly durable, slip-resistant, and can withstand harsh weather without fading or cracking. They offer endless design possibilities, allowing you to create a custom look that complements your pool and landscaping perfectly. A paver deck provides a solid, elegant foundation for your swim spa that will last for decades with minimal maintenance.

Consider Long Island’s Climate

Living on Long Island means we get to experience a unique coastal climate, from humid summers to freezing winters. This is a critical factor when choosing your deck materials. Salt in the air can be tough on certain woods, and the freeze-thaw cycle can challenge less durable surfaces. It’s important to select a material that is proven to perform well in our specific environment. As local experts, we help homeowners choose materials that are not only beautiful but are also engineered to handle Long Island’s weather, ensuring your investment remains safe and stunning for years to come.

How to Design Your Deck Layout

Once you have your materials picked out, it’s time for the fun part: designing the layout. The right design does more than just hold your swim spa; it creates an experience. Think about how you want to use the space. Will it be a quiet retreat for morning workouts, a hub for family fun, or a sophisticated spot for entertaining guests? A thoughtful layout defines different zones for various activities, ensuring smooth traffic flow and making the most of your backyard. This planning stage is crucial for creating a space that is both beautiful and highly functional for your specific needs.

Your deck should feel like a natural extension of your home and landscape. Consider the views you want to highlight and the areas where you might want more privacy. A well-designed layout can transform a simple backyard into a functional and beautiful outdoor living area. With a bit of planning, you can create a swim spa deck that not only looks incredible but also perfectly suits your lifestyle. The key is to balance aesthetics with practicality, creating a space you’ll love for years. Our team can help you visualize the possibilities with a professional landscape design that brings all these elements together seamlessly.

Multi-Level Decks

A multi-level deck is a fantastic way to add dimension and visual interest to your backyard. By creating different platform heights, you can naturally separate your space into distinct zones. Imagine a lower level for your swim spa, providing easy entry, with an upper level dedicated to a dining table or a comfortable lounge area. This approach is especially effective for sloped or uneven yards, as it works with the natural contours of your land instead of against them.

These separate levels create a more dynamic and organized outdoor living space. You can connect the tiers with wide, inviting steps, and use different materials or lighting to define each area. This design isn’t just practical; it makes your backyard feel larger and more luxurious.

Sunken Deck Designs

For a sleek, integrated look, consider a sunken deck design. This style places the swim spa partially or fully in the ground, with the decking built flush around it. The result is a seamless, high-end appearance that makes your swim spa look like it was always meant to be there. This design is perfect for creating a private, intimate atmosphere, almost like your own personal grotto.

A sunken design is also a great solution for yards that aren’t perfectly level, as it can help create a flat, usable area. It minimizes the visual height of the swim spa, allowing it to blend beautifully with your landscaping. This approach gives you a clean, modern aesthetic while making it easy to get in and out of the water.

Wraparound Decks

A wraparound deck provides 360-degree access to your swim spa and creates a generous amount of usable surface area. This design can surround your spa on two, three, or all four sides, offering plenty of room for lounge chairs, planters, and side tables. It’s an excellent choice if you plan on entertaining, as it gives guests space to relax by the water without having to get in.

If you have an existing deck, you don’t necessarily have to start from scratch. We can often modify your current structure to accommodate a new swim spa, cutting out a section and reinforcing the frame to support the weight. This type of home remodeling project seamlessly integrates your new spa into your existing outdoor living space.

Built-In Seating and Lounge Areas

To maximize space and create a polished, custom look, incorporate built-in features directly into your deck design. Benches that flow from the deck’s edge, for example, provide ample seating without the clutter of extra furniture. This is a smart way to ensure there’s always a spot for family and friends to gather and socialize.

You can also add other built-in elements like planters, storage boxes for towels and spa accessories, or even a bar top along one side of the spa for drinks and snacks. These thoughtful details make the space more functional and feel completely integrated. For ultimate comfort, consider adding a pavilion or pergola overhead to provide shade and define your new lounge area.

What Does Installation Involve?

Bringing a swim spa into your backyard is an exciting project, but it’s more than just picking a spot and filling it with water. A successful installation requires careful planning and execution to ensure safety, longevity, and easy maintenance for years to come. From building a solid base to handling the electrical work, each step is crucial. Working with a professional team ensures that all the technical details are managed correctly, so you can focus on the fun part: enjoying your new backyard oasis. A proper setup for your swim spa is the first step toward creating a seamless and beautiful outdoor living space.

Start with a Strong, Level Foundation

A swim spa is incredibly heavy, especially when filled with water and people. Because of this, it needs a perfectly solid and level surface that can support the immense weight without shifting or cracking over time. The standard recommendation is a reinforced concrete pad that is at least four inches thick. This isn’t a step where you want to cut corners. An unstable foundation can damage the spa’s shell and components. Our expert masonry team can prepare the perfect base, giving you peace of mind that your investment is secure.

Plan for Clearance and Access

When designing your deck and layout, think beyond the footprint of the swim spa itself. You need to leave at least three feet of clear, accessible space on all sides. This clearance is essential for several reasons. It provides a safe path for getting in and out of the spa, gives you room to handle the cover, and, most importantly, allows service technicians to access the internal components for any maintenance or repairs. Factoring this space into your initial landscape design will prevent major headaches down the road.

Electrical Requirements

Swim spas require a significant amount of power to run the jets, heaters, and filtration systems. Most models need a dedicated 240V/50-amp electrical connection, which is not a DIY project. For your safety and to ensure your spa operates correctly, this work must be completed by a licensed electrician. They will run the proper wiring from your home’s electrical panel to the spa’s location and install a GFCI (Ground Fault Circuit Interrupter) for protection. We coordinate with trusted electricians to make sure all electrical work is done safely and meets all local codes.

Permits and Local Building Codes

Before any work begins, it’s important to understand your local regulations. Many towns on Long Island require permits for swim spa installations. These rules often cover aspects like placement, safety barriers, and electrical connections. For example, you may be required to have specific fencing or a locking cover to meet safety standards. Navigating the building codes in different parts of Suffolk and Nassau County can be complex, but it’s a critical part of any home improvement project. An experienced installer will handle the permitting process for you, ensuring your project is fully compliant from day one.

Common Planning Mistakes to Avoid

A swim spa is a fantastic investment, but a few planning missteps can create major headaches. Thinking through the entire process, from delivery to your first dip, will save you time, money, and stress. Let’s walk through some common mistakes I’ve seen homeowners make so you can sidestep them completely.

Underestimating the Weight Load

It’s easy to think of a swim spa deck as just another deck, but it’s supporting a massive amount of weight. When filled with water and people, a swim spa can weigh up to 24,000 pounds. That’s more than three elephants. This incredible weight requires a foundation that is far more robust than a typical patio or deck structure. Without proper support, your deck could sag, crack, or even collapse, leading to costly damage and serious safety risks. This is why working with professionals who understand the structural engineering needed for heavy water features is not just a good idea, it’s essential.

Forgetting Maintenance Access

A sleek, built-in swim spa looks amazing, but if you can’t access the internal components, you’ll have a big problem when it’s time for service. A common rule of thumb is to leave at least three feet of clear space around all sides of the spa. This gives a technician room to work on the plumbing and electrical systems. This space is also useful for you, providing a clear path for getting in and out and a place to store the cover when the spa is in use. If you’re planning a sunken design, be sure to incorporate removable access panels into your deck plan.

Not Planning for Delivery

Your swim spa will arrive as one large, bulky unit. A frequent oversight is failing to plan for its journey from the delivery truck to its final spot in your yard. Before you even place an order, you should measure the entire delivery path. Check the width of gates, pathways, and any tight corners. Also, look up for any overhead obstacles like low-hanging tree branches or utility lines. A professional installation team will perform a site visit to confirm the logistics, but doing your own initial check can help you identify potential challenges early on. You can see examples of how these large projects come together on the Gappsi YouTube channel.

Overlooking Safety and Non-Slip Surfaces

Water and smooth surfaces are a recipe for slips and falls. When choosing materials for the area immediately surrounding your swim spa, safety should be your top priority. Opt for materials with a textured, non-slip finish. Many beautiful porcelain and natural stone pavers are designed specifically for wet areas like pool surrounds, offering both safety and style. Also, consider how you’ll use the spa at night. Integrating multi-colored LED lighting into the deck, steps, and surrounding landscape not only creates a beautiful ambiance but also improves visibility and safety after dark. Just be sure any electrical work is handled by a licensed professional.

Landscaping Ideas for Your Swim Spa Oasis

Your swim spa deck is the foundation, but the landscaping is what truly transforms the space into a personal paradise. The right plants, lighting, and privacy features work together to create a cohesive and inviting atmosphere that feels like a natural extension of your home. Think of it as the finishing touch that pulls your entire backyard vision together. A thoughtful landscape design not only adds beauty and value but also enhances the experience of using your swim spa, making every dip feel like a getaway.

By carefully selecting greenery and structural elements, you can craft an environment that is both stunning and functional. The goal is to create a space that feels secluded, peaceful, and completely your own. From lush plantings that add color and fragrance to strategic lighting that sets the mood for an evening soak, every detail contributes to your backyard oasis. Let’s look at a few key landscaping ideas that will make your swim spa area the highlight of your home.

Add Plants, Flowers, and Greenery

Surrounding your swim spa with plants and flowers is one of the easiest ways to soften the hardscape of a deck and integrate it into your yard. Greenery adds color, texture, and a sense of life, making the area feel lush and relaxing. For a low-maintenance approach, choose hardy perennials and evergreen shrubs that thrive in Long Island’s climate. Consider adding fragrant plants like lavender or gardenias in pots near the spa to create a soothing aroma while you unwind. A mix of tall grasses for movement, flowering shrubs for color, and potted plants for flexibility allows you to create a layered, dynamic garden design.

Create Privacy with Hedges, Trellises, and Fencing

To make your swim spa feel like a true retreat, privacy is essential. You want to be able to relax without feeling like you’re on display. Tall, dense hedges like Arborvitae or Holly create a beautiful living wall that offers year-round seclusion and helps block wind. Another great option is installing a trellis with climbing vines, such as clematis or wisteria, for a softer, more romantic look. For a more immediate and structural solution, a stylish privacy fence or screen can define the space while complementing your home’s architecture. These elements ensure your spa area is a peaceful and intimate sanctuary.

Use Lighting for Ambiance and Safety

The right lighting plan serves two important purposes: it creates a magical ambiance for evening soaks and ensures the area is safe to use after dark. Soft, warm landscape lighting can completely change the mood of your backyard. Consider installing uplights to highlight beautiful trees, path lights to guide the way, and string lights over a seating area for a festive glow. For safety, it’s critical to illuminate steps, deck edges, and the path to and from your house. Modern LED systems offer incredible flexibility, allowing you to adjust color and brightness to suit any occasion, turning your swim spa into a stunning nighttime feature.

Add-Ons for the Ultimate Swim Spa Experience

Your swim spa is the star of the show, but the right supporting features can turn your backyard into a personal resort. These add-ons bring comfort, convenience, and a major wow-factor, making your space the go-to spot for relaxation and entertainment. From creating shady lounge areas to building cozy spots for cool evenings, the right additions complete your swim spa oasis and extend its use throughout the year. By thoughtfully integrating these elements, you create a cohesive and luxurious outdoor living area that you and your family will enjoy for years to come.

Install Shade with Pergolas and Pavilions

A swim spa is all about relaxation, but the Long Island sun can be intense. Adding a shade structure is a game-changer for comfort and usability. A beautifully crafted pergola or pavilion not only provides a welcome escape from direct sunlight but also defines the space, creating a resort-like feel. These structures are perfect for setting up a seating area or an outdoor dining spot right next to your spa. Gappsi’s custom pavilions and pergolas can be designed to match your home’s architecture and your personal style, seamlessly blending function with sophisticated design to enhance your entire backyard aesthetic.

Include an Outdoor Kitchen or Bar

Why limit your swim spa to just swimming and relaxing? Turn it into the ultimate social hub by adding an outdoor kitchen or bar area. Imagine preparing drinks and snacks for your guests without ever having to leave the party. A custom bar top with built-in seating encourages conversation and creates a fun, casual atmosphere right by the water. This is a fantastic way to entertain friends and family. With expert masonry, you can build a durable and stylish outdoor kitchen that includes everything from a grill and refrigerator to a sink and counter space, making outdoor gatherings effortless and enjoyable.

Add Built-In Storage Solutions

A cluttered deck can really take away from the relaxing vibe you’re trying to create. That’s where smart storage comes in. Instead of having towels, spa covers, and cleaning supplies out in the open, consider incorporating built-in storage into your deck design. Benches with hinged tops, hidden cabinets, or custom-built cubbies can keep everything organized and out of sight. This not only keeps your space tidy but also maximizes functionality. Thoughtful home remodeling expertise can help you integrate these solutions seamlessly into your deck’s structure, ensuring they are both practical and visually appealing.

Ensure Year-Round Comfort with Heaters and Fire Pits

Don’t let cooler weather cut your swim spa season short. You can extend your enjoyment throughout the year by adding a source of warmth to your deck area. A custom-built fire pit or an outdoor fireplace creates a cozy and inviting atmosphere, perfect for gathering around after an evening swim. The warmth and flickering light make the space comfortable even on chilly nights. These features serve as a natural focal point for your outdoor living space, and our masonry designers can help you create a fire feature that perfectly complements your swim spa and overall backyard design.

Create Your Dream Swim Spa Deck on Long Island

Creating the perfect deck for your swim spa is about blending beauty with function. When you’re planning your Long Island backyard oasis, a few key decisions will make all the difference. Start by thinking about location. Placing your

Next, consider your materials. While composite decking is a popular choice for its resistance to water damage, don’t forget about the timeless look of natural wood. For a truly elegant and durable surface, porcelain and natural stone pavers create a stunning foundation that stands up to the elements. The right design can also transform your space. A multi-level deck creates distinct zones for lounging and dining, while a sunken design can make your swim spa feel seamlessly integrated into your yard.

Finally, don’t overlook the finishing touches. The right landscaping adds color and serenity, with tall hedges or trellises offering an extra layer of privacy. It’s also critical to ensure the foundation is strong enough to support the spa’s weight, which can be substantial when filled, and that delivery access is planned for. Thinking through these elements from the start helps ensure your new swim spa deck is a dream come true.

Related Articles

Frequently Asked Questions

What’s the most important factor when choosing a deck material for Long Island? For our coastal climate, durability is everything. You need a material that can handle humid summers, salty air, and winter’s freeze-thaw cycles without failing. Composite decking is a great low-maintenance option that resists moisture and won’t splinter. For ultimate longevity and a high-end look, porcelain or stone pavers are practically weatherproof. While natural wood is beautiful, be prepared for the regular sealing it will need to withstand our specific weather conditions.

How do I make sure my deck is strong enough for a swim spa? A swim spa deck is not a typical deck; it’s a specialized structure. A filled swim spa is incredibly heavy, so it requires a foundation built to handle that specific load, which is usually a reinforced concrete pad. The deck itself must also be engineered with extra support. This is not a DIY-friendly project. The safest approach is to work with an experienced builder who understands the structural requirements to prevent sagging or collapse and ensure your family’s safety.

Can I build a deck around my swim spa if my yard isn’t level? Absolutely. An uneven yard is actually a great opportunity to get creative with your design. A multi-level deck is a perfect solution, as it allows you to build different platforms that follow the natural slope of your land. This can create separate, functional zones for the spa, dining, and lounging. Another option is a sunken design, where we excavate a portion of the yard to create a level spot for the spa, making it look beautifully integrated with the landscape.

What’s the biggest mistake people make when planning their swim spa deck? The most common and costly mistake is forgetting to plan for maintenance access. Your swim spa has pumps, heaters, and electrical components that will eventually need service. If you build the deck flush against all sides without including a removable panel or hatch, a technician won’t be able to reach anything. Always plan for at least three feet of clearance on the side with the equipment panel to save yourself a major headache in the future.

Do I need a permit to install a swim spa on Long Island? Yes, in most cases you will need a permit. The specific requirements vary between towns across Suffolk and Nassau County, but they generally cover safety regulations for things like electrical wiring and fencing or locking covers. Navigating these local codes can be complicated, so it’s a huge benefit to work with a professional installer who is familiar with the process and can handle all the paperwork for you, ensuring your project is compliant from the start.

Share this page: