


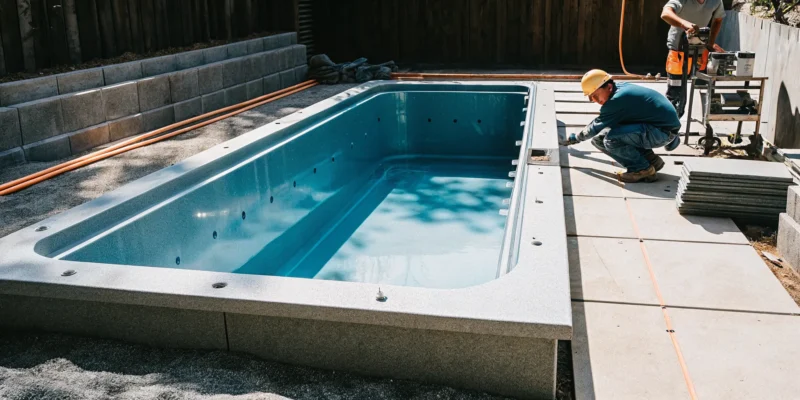
You’ve chosen the perfect swim spa, but now you’re wondering about the next steps. The process of getting it from the showroom to your backyard can bring up a lot of questions. Will it fit through the gate? Do I need a crane? What kind of permits are required in my town? These are all valid and important concerns. A successful swim spa installation is all about having the right answers and a solid plan before work begins. This guide provides those answers, breaking down the entire process into clear, manageable steps so you know exactly what to expect and can look forward to enjoying your new backyard oasis with complete peace of mind.
Key Takeaways
- Plan for a Solid Foundation and Clear Delivery Path: A successful installation starts with a perfectly level, reinforced base, like a six-inch concrete slab. You also need to measure the delivery route from the street to your yard, planning for a crane, which is used in most installations.
- Prioritize Safety with Professional Electrical Work: A swim spa requires a dedicated 240-volt GFCI circuit to run safely, so this is not a DIY job. Always hire a licensed electrician to handle the wiring to protect your family and your investment.
- Design for Long-Term Maintenance Access: When planning your spa’s placement and surrounding landscape, leave at least three feet of clear space on all sides. This simple step ensures technicians can easily access equipment for service, saving you future headaches.
Preparing for Your Swim Spa Installation
Bringing a swim spa into your backyard is an exciting step toward creating your personal wellness retreat. Before the delivery truck arrives, a bit of thoughtful preparation will ensure the entire installation process is seamless and stress-free. Think of it as setting the stage for years of enjoyment. Getting the groundwork right, both literally and figuratively, is the most important part of the project.
The key is to think through a few logistics ahead of time. You’ll want to pinpoint the perfect spot, make sure you have enough room, prepare a solid foundation, and understand local requirements. It might sound like a lot, but breaking it down makes it manageable. Working with an experienced team that understands the ins and outs of swim spa installation on Long Island means you have a partner to guide you through every decision. Let’s walk through what you need to consider to get your property ready for its new addition.
Choose the Right Location
Selecting the right spot for your swim spa is the first, and arguably most important, decision you’ll make. Think about how you plan to use it. Do you want it close to the back door for easy access during colder months? Or would you prefer it tucked away in a more private corner of your yard? Consider the view from the spa and also how it looks from your house. A well-placed swim spa should feel like a natural extension of your home and fit beautifully into your overall landscape design. Also, remember to factor in proximity to electrical and water sources to simplify the hookup process.
Confirm Space and Clearance
Once you have a general location in mind, it’s time to get out the measuring tape. A swim spa is a significant size, and it needs some breathing room. As a rule of thumb, you should plan for at least three feet of clearance on all sides. This isn’t just for aesthetics; it’s essential for service and maintenance. The side that houses the equipment panel needs to be easily accessible for any future work. Think beyond the spa’s footprint and consider the space needed for steps, a cover lifter, and any decking or patio space you want to add around it for lounging.
Plan for Weight, Drainage, and Water
A swim spa filled with water is incredibly heavy, so a solid foundation is non-negotiable. You can’t simply place it on the grass or an existing patio. Most installations require a reinforced concrete pad that is at least six inches thick. This foundation must be perfectly level to ensure the spa’s shell is properly supported and its internal plumbing functions correctly. Our masonry team can create the perfect base for your spa. You also need to consider water drainage. The site should be graded so that rainwater and any water that splashes out flows away from the spa and your home’s foundation.
Check Long Island Permits and Codes
Before any work begins, it’s vital to check the local building codes and permit requirements in your specific Long Island town or village. Many municipalities have rules regarding the placement of a swim spa, including how far it must be from property lines, septic systems, and wetlands. There are also often safety regulations that need to be met, such as specific types of locking safety covers or even fencing around the spa area. Navigating these local ordinances can be tricky, but it’s a standard part of our process at Gappsi. We handle the permits to ensure your installation is fully compliant, giving you complete peace of mind.
What Are Your Swim Spa Installation Options?
One of the most exciting parts of planning for your swim spa is deciding how it will fit into your backyard. The installation style you choose will define the entire look and feel of your outdoor space, so it’s worth taking the time to explore your options. Whether you envision a seamless, built-in look or a more straightforward setup, there’s a perfect fit for your home. Each method has its own aesthetic and construction requirements, but with the right design and installation team, any of them can create a stunning focal point for your property.
At Gappsi, our team has the design and construction expertise to handle every type of installation. We can help you weigh the pros and cons of each option and create a plan that works for your space, budget, and vision. From initial excavation and masonry to the final landscaping touches, we manage the entire process for a stress-free experience.
In-Ground Installation
An in-ground installation offers the most integrated and luxurious look, making your swim spa appear like a custom part of your landscape. With this option, the spa is set completely flush with the ground, creating a sleek, streamlined aesthetic similar to a traditional swimming pool. This approach is perfect if you want your spa to blend seamlessly with a patio or lawn.
To achieve this, we first excavate the area and build a concrete vault to house the unit. This process requires careful planning to ensure proper drainage and easy access to the spa’s equipment for any future maintenance. A well-designed in-ground installation from a team of experts ensures your swim spa is not only beautiful but also functional for years to come.
Semi-Recessed Installation
A semi-recessed installation gives you the best of both worlds: a custom, built-in feel with easier access. By partially sinking the swim spa into the ground or a deck, you create a multi-level look that adds dimension and visual interest to your backyard. This is a fantastic option for properties with slopes or for homeowners who want to break up a flat landscape.
This style makes getting in and out of the spa a breeze, as the wall height is lower. Like an in-ground setup, a semi-recessed installation requires thoughtful planning to keep the equipment accessible, often through cleverly hidden trapdoors or removable panels in the surrounding deck or patio. It’s a versatile choice that pairs beautifully with creative landscaping and hardscaping designs.
In-Deck Installation
If you have a deck or are planning to build one, an in-deck installation is an excellent way to create a cohesive outdoor living area. With this method, the swim spa is set level with the surface of the deck, making it feel like an intentional and original feature. The result is a clean, unified space where your spa and deck flow together perfectly.
For this installation, the deck is built around the swim spa, or the spa is lowered into a pre-cut opening. The most important consideration here is ensuring the deck structure can support the weight of a full swim spa. We also design the deck to allow for maintenance access, often by leaving a side open or incorporating removable deck sections. This approach is ideal for creating a central hub for relaxation and entertainment.
Freestanding Installation
A freestanding installation is the simplest and quickest way to get your swim spa up and running. The spa is placed directly on a solid, level surface, like a reinforced concrete pad. While this setup can sometimes have a “boxy” appearance since the full height of the spa is visible, it offers incredible flexibility. You can start enjoying your swim spa in just a few days.
Many homeowners choose a freestanding installation initially and then enhance the area over time. You can build a deck around it, add custom steps, or use landscaping to soften the edges and integrate it more fully into your yard. This approach allows you to complete your project in phases, making it a practical and popular choice for many Long Island homes.
Building the Right Foundation for Your Swim Spa
A swim spa is a fantastic addition to your home, but its performance and lifespan depend entirely on what’s underneath it. The foundation is the most critical part of the installation process. Because a swim spa is incredibly heavy, especially when filled with water and people, it requires an unshakeable base to prevent structural damage and ensure it functions correctly for years to come. This isn’t a step where you can cut corners. A filled swim spa can weigh tens of thousands of pounds, and that massive load needs a solid, stable, and perfectly level surface to rest on.
Whether you choose a concrete slab or a reinforced deck, the key is professional execution. An improperly prepared foundation can lead to serious issues down the road, from cracks in the spa shell to malfunctioning equipment. At Gappsi, our expertise in masonry and outdoor construction ensures your swim spa sits on a perfectly prepared, level, and durable surface. We handle the entire process, from site evaluation to final pour, so you can focus on the exciting part: enjoying your new backyard oasis.
Pouring a Concrete Slab
A reinforced concrete slab is the most common and recommended foundation for a swim spa. To properly support the immense weight, this slab needs to be at least six inches thick and poured on stable, compacted ground. It’s not just about pouring concrete; it’s about creating an engineered pad that won’t shift, crack, or settle over time. This process involves site preparation, building a proper frame, and often includes rebar reinforcement for added strength.
A perfectly level surface is non-negotiable. Even a slight slope can put stress on the swim spa’s frame and interfere with its internal plumbing and drainage systems. Our team has decades of experience pouring concrete foundations for swimming pools and spas, ensuring your installation starts on solid ground.
Reinforcing Your Deck
Placing a swim spa on a deck can create a beautiful, integrated look, but it requires careful planning. Your existing deck was likely not built to handle the thousands of pounds a filled swim spa weighs. To make this work, the deck must be professionally evaluated and reinforced. This often involves adding more support posts, beams, and joists directly underneath the spa’s location to transfer the load safely to the ground.
You will also need to consider local building codes, including setback rules that dictate the minimum distance a structure must be from your property line. We can help you understand these requirements and design a deck reinforcement plan that is both safe and compliant. Integrating a spa into a deck is a project that requires a deep understanding of structural engineering, a core part of our home remodeling services.
Why a Level Surface is Essential
We can’t stress this enough: your swim spa must be installed on a perfectly level surface. If the foundation is uneven, it can cause the spa’s acrylic shell to twist and warp under the water’s weight, which can lead to cracks and leaks that are expensive to repair. An unlevel base also affects how the equipment functions, from the pumps and jets to the filtration system.
You should never try to level a swim spa by placing shims or other objects underneath it. This creates pressure points that can damage the frame and void your warranty. The only correct way to do it is to ensure the site itself is level before the spa arrives. A professional will pour a level concrete top cap or grade the area properly to create a solid, flat base from the start.
Ensure Easy Equipment Access
When planning your foundation, think about future you. You’ll need to access the spa’s internal components for routine maintenance and any potential service calls. We recommend leaving at least three feet of clear space around all sides of the swim spa. This clearance gives technicians room to work and provides space for you to store the cover and move around the spa safely.
Boxing your swim spa in without planning for access is a common mistake that can turn a simple repair into a major headache. By incorporating access panels and sufficient clearance into the initial design, you make long-term ownership much easier. This foresight is a key part of our design process for all our saunas and swim spas, ensuring your backyard retreat is as functional as it is beautiful.
What Electrical Work Does a Swim Spa Require?
Getting the electrical setup right for your swim spa isn’t just a technical detail; it’s the key to ensuring your new oasis runs safely and efficiently for years to come. Because swim spas combine high-powered equipment with water, there’s no room for error. Working with a professional is non-negotiable. Let’s walk through what you need to know about the electrical requirements so you can feel confident about this critical step in your installation process.
Understand Voltage and Amperage Needs
First things first, your swim spa needs a lot of power. Most models require a 240-volt, 50-amp or 60-amp electrical service. This is a heavy-duty connection, much more powerful than a standard household outlet. It’s essential because it powers the powerful jets, heaters, and filtration systems that make your swim spa so enjoyable. Before installation, you’ll need to confirm the exact specifications for your chosen model. Our team at Gappsi can help you understand the requirements for the specific hot tubs and swim spas we offer, ensuring your home’s electrical system is prepared for the new addition. This dedicated power source guarantees your spa performs at its best without overloading your home’s circuits.
Install a GFCI Breaker and Dedicated Circuit
Safety is the top priority when mixing electricity and water. That’s why every swim spa installation must include a Ground Fault Circuit Interrupter, or GFCI. This smart device is designed to instantly shut off the power if it detects any imbalance in the electrical current, which could indicate a potential shock hazard. Your licensed electrician will install a GFCI breaker on a dedicated circuit, meaning the spa has its own circuit that isn’t shared with any other appliances. We recommend placing the GFCI breaker box within sight of the spa for easy access in an emergency. This setup is a crucial part of our home remodeling and installation safety standards.
Why to Hire a Licensed Electrician
While it might be tempting to handle some parts of your home improvement projects yourself, electrical work for a swim spa is a job exclusively for a professional. A licensed electrician is essential for your safety and to ensure the installation complies with all local Long Island building codes. They have the expertise to correctly wire the high-voltage connection, install the GFCI, and ensure everything is properly grounded. Hiring a professional protects your investment, prevents damage to the spa’s sensitive components, and, most importantly, keeps your family safe. At Gappsi, we coordinate with trusted, licensed electricians to manage this part of the installation seamlessly, giving you complete peace of mind.
Get the Timing Right for Your Electrical Setup
Coordinating the electrical work is a key part of a smooth installation day. While you might think it’s best to get the wiring done ahead of time, it’s actually better to wait until after your swim spa has been delivered and placed in its final position. This allows the electrician to see exactly where the spa’s electrical panel is located and run the conduit and wiring to the precise spot. This simple step prevents costly mistakes and ensures a clean, efficient connection. Planning the project timeline is something we handle for you, as you can see in our project videos. We manage the delivery and coordinate with the electrician to make sure every step happens in the right order.
Planning for Swim Spa Delivery and Placement
Measure and Clear the Delivery Path
Your swim spa will arrive as one large, solid unit, so planning its journey from the delivery truck to your backyard is a critical first step. Before delivery day, grab a tape measure and walk the entire route. Measure the width of gates, side yards, and any tight corners. Don’t forget to look up; check for low-hanging tree branches, utility lines, or roof eaves that could get in the way. A clear and wide path is essential for a smooth delivery. If you’re unsure about a particular spot, it’s always best to take photos and measurements to share with your installation team. Proper planning and design at this stage prevents major headaches later.
Know When You’ll Need a Crane
It might sound dramatic, but using a crane for swim spa delivery is actually very common. In fact, a crane is used for the vast majority of installations. This usually happens when the delivery truck can’t get close enough to the final placement site or if the path is too narrow or complex for a dolly. Instead of seeing this as a complication, think of it as the safest and most efficient way to get your spa into position. When you’re budgeting for your project, it’s wise to assume a crane will be needed. This way, you have a realistic view of the total cost and can avoid any last-minute financial surprises on delivery day.
Avoid Common Delivery Misconceptions
Let’s clear up a few common myths about swim spa delivery. First, your spa will not arrive in a box of parts for you to assemble like a piece of furniture. It comes as a single, fully constructed unit. This is why measuring the delivery path is so important. Second, while the process requires careful coordination, it doesn’t have to be complicated or stressful. A professional team, like the experts at Gappsi, has this process down to a science. They handle the logistics, from coordinating the crane to carefully placing the swim spa, making the installation feel seamless. Your main job is to prepare the space and get excited for your first swim.
Leave Access on All Four Sides
Once your swim spa is in place, you might be tempted to build a deck right up to the edge or plant dense shrubs all around it. Before you do, think about future maintenance. To keep your spa running perfectly, technicians may need to access the internal components, which are located behind panels on all four sides. As a rule of thumb, plan to leave at least three feet of clear space around the entire perimeter. This ensures that any future repairs or service checks can be done easily and without having to dismantle parts of your beautiful new backyard oasis. This foresight is a key part of a successful landscape design.
Maintaining Your New Swim Spa
Your swim spa is installed, and now the fun begins. To keep it running perfectly for years, a little maintenance goes a long way. Think of it as protecting your beautiful new investment. Consistent care ensures your spa remains a clean, safe, and inviting retreat. It’s simpler than you might think, and breaking it down into a few key areas makes it completely manageable. From water chemistry to the surrounding landscape, a proactive approach will save you time and effort down the road. This lets you focus on what matters most: enjoying your personal oasis.
Manage Water Quality and Chemicals
Clear, safe water is the top priority for any swim spa owner. This means regularly testing your water and adjusting the pH and sanitizer levels. While it might sound technical, it quickly becomes a simple routine. Keeping the water balanced prevents bacteria from growing and protects the spa’s components from corrosion or scaling. We can guide you through the right products and schedules for your specific swim spa. Proper water care is the foundation of a healthy and enjoyable experience, ensuring your spa is always ready for you to take a dip.
Clean and Maintain Your Filters
Your swim spa’s filters are the unsung heroes of clean water. They work tirelessly to trap debris, oils, and other particles. To keep them working effectively, you’ll need to clean them regularly. A clogged filter can’t do its job, which leads to cloudy water and puts extra strain on the spa’s pump. We recommend rinsing your filters every few weeks and giving them a deep clean every few months, depending on your usage. Following a simple cleaning schedule is one of the easiest ways to maintain your spa’s performance and extend the life of its equipment.
Care for the Surface and Cover
Beyond the water, the spa itself needs some attention. Regularly wipe down the acrylic shell to keep it free of residue and looking its best. Your spa cover is just as important. It keeps debris out, retains heat to save energy, and acts as a critical safety barrier. Inspect it periodically for any tears or damage that could compromise its integrity. If you notice significant wear, our team can help with restoration and sealing solutions. A simple cleaning with the right products will keep your cover in great shape, maintaining the spa’s appearance and efficiency.
Implement Key Safety Features
A swim spa brings a lot of joy, and ensuring it remains a safe environment is crucial, especially for families with children. Always secure your spa with a locked safety cover when it’s not in use. For an added layer of protection, consider installing a perimeter fence around the spa area. Gappsi offers a variety of stylish and durable fencing options that can complement your backyard design. It’s also wise to establish clear rules, like no unsupervised use, to make sure everyone can enjoy the spa safely.
Plan Your Surrounding Landscape
The area around your swim spa is just as important as the spa itself. Thoughtful landscaping not only enhances the beauty of your backyard but also improves functionality and safety. Use non-slip materials for any surrounding patios or pathways to prevent accidents. We often recommend beautiful and durable porcelain or natural stone pavers for this purpose. It’s also important to ensure there is adequate drainage to prevent water from pooling. A well-designed landscape creates a seamless transition from your home to your new oasis, making the entire space more inviting.
Related Articles
- Different Advantages of Owning Your Long Island Own Swim Spa
- Inground Pool Installation Long Island: A 2026 Guide
- Long Island Swimming Pool Design & Construction NY | Gappsi
- Swim Spas Saunas Nassau & Suffolk County Long Island
- Swimming Pool Builders Contractor Long Island NY – Gappsi Group
Frequently Asked Questions
Can I just place a swim spa on my existing concrete or paver patio? This is a great question, and the short answer is usually no. While your patio might seem solid, most are not engineered to support the immense weight of a filled swim spa, which can be tens of thousands of pounds. Placing a spa on an inadequate base can cause the patio to crack and the spa itself to warp. The best and safest solution is a dedicated, reinforced concrete pad that is at least six inches thick and perfectly level. Our masonry team can create this foundation to ensure your investment is protected from day one.
Is a crane always necessary for delivery, and how does that work? A crane is used for the majority of swim spa installations, so it’s wise to plan for it. It might sound like a big production, but it’s actually the safest and most efficient way to place the spa, especially if your yard has tight corners, slopes, or is far from the street. Instead of a complication, think of it as a standard part of the process. We handle all the coordination, so on delivery day, you can just watch as your spa is carefully lifted and set perfectly into place.
Why is leaving three feet of space around the spa so important? That three-foot clearance is your best friend for long-term, stress-free ownership. The spa’s equipment, like pumps and heaters, is housed behind access panels on all sides. Leaving clear space ensures that if you ever need service, a technician can easily get to the components without having to dismantle your deck or dig up your landscaping. It makes routine maintenance simple and turns a potentially major repair into a minor one, saving you time and money down the road.
What does a realistic maintenance routine look like for a new owner? Keeping your swim spa in great shape is simpler than you might think and quickly becomes second nature. On a weekly basis, you’ll want to test the water and add sanitizers or balancers as needed. This usually takes just a few minutes. Then, about once a month, you should take out the filters and give them a good rinse with a hose. That’s the core of it. Following this simple schedule will keep your water sparkling and your equipment running smoothly.
Do I need to install a fence around my swim spa on Long Island? Safety regulations can vary between towns and villages in Nassau and Suffolk County, but many do require a safety barrier for any structure that holds a certain amount of water. This could mean a perimeter fence with a self-latching gate or a certified locking safety cover. The best approach is to check your local building codes, but you don’t have to figure this out alone. As part of our installation process, we confirm all local requirements to ensure your project is fully compliant and your family is safe.