When you think about your dream backyard, what do you see? Maybe it’s a spacious patio for summer barbecues, an elegant deck surrounding your pool, or a cozy fire pit area for cool evenings. The foundation for all these beautiful outdoor living spaces is the ground you stand on. Cambridge Pavers provide a durable and stylish base for any backyard vision, offering endless design possibilities with their wide range of colors and textures. But turning that dream into a functional, long-lasting reality requires more than just great materials. It takes skill and experience. This guide will show you how to plan your project and select a trusted Cambridge pavers installer on Long Island ny who can bring your perfect outdoor oasis to life.
Key Takeaways
- Get strength and style in one package: Cambridge Pavers are popular on Long Island for a reason; their ArmorTec technology ensures they won’t fade or crack from our weather, while a huge selection of styles lets you create a completely custom look.
- Prioritize the installer, not just the brand: The success of your paver project depends almost entirely on proper installation. A solid, well-prepped base is essential to prevent sinking and shifting, so vetting your contractor is the most important step you will take.
- Use pavers to unify your entire yard: Don’t just stop at the patio. Pavers are the perfect material to create a cohesive flow between your driveway, walkways, pool deck, and outdoor kitchen, tying your whole property together.
What Are Cambridge Pavers and Why Are They a Long Island Favorite?
If you’ve started dreaming up a new patio or driveway for your Long Island home, you’ve likely come across the name Cambridge Pavers. They are a top choice in our area, and for good reason. Unlike poured concrete that can crack under pressure, Cambridge Pavingstones are individually manufactured from a special high-density concrete. This process makes them incredibly strong and resistant to water absorption, which is key to preventing the freeze-thaw damage that can ruin an outdoor space over time. For homeowners in Suffolk and Nassau counties, this means investing in a beautiful, durable surface that will look great for years to come.
The real magic of Cambridge Pavers is how they combine this durability with stunning design. They provide the foundation for countless outdoor living projects, from elegant pool decks to welcoming walkways and robust driveways. When you choose Cambridge, you’re not just getting a functional surface; you’re getting a key design element that defines your home’s curb appeal and backyard atmosphere. Gappsi’s expertise in masonry design allows us to transform these high-quality materials into a space that perfectly reflects your style and needs, ensuring the final result is both beautiful and built to last.
How ArmorTec Technology Stands Up to Long Island Weather
One of the biggest advantages of Cambridge Pavers is their exclusive ArmorTec technology. Think of it as a built-in shield for your investment. Every paver has a super-strong outer layer made from a mix of fine sand and granite aggregates. This process creates a smooth, dense surface that’s tough enough to handle anything Long Island throws at it. From scorching summer sun to freezing winter temperatures, ArmorTec ensures your pavers won’t fade or wear down. It also provides excellent protection against damage from snowplows and de-icing salts, a major concern for any Long Island homeowner. This innovative technology is why your patio or driveway will keep its rich color and texture season after season.
Find Your Perfect Color, Style, and Design
Your outdoor space should be a reflection of you, and Cambridge Pavers makes that possible with a huge selection of colors, styles, and patterns. Whether you love the classic look of European cobblestone or the rustic charm of natural stone, there’s a collection for you. For example, the Renaissance collection offers timeless, old-world elegance, while the Ledgestone series provides a more rugged, natural appearance. This variety gives you the freedom to create a truly custom look. You can mix and match colors, create intricate borders, or design a stunning centerpiece for your patio. With so many options, it’s easy to design a space that feels completely unique to your home.
How Do Cambridge Pavers Compare to Other Options?
On Long Island, the two most popular paver brands you’ll hear about are Cambridge and Nicolock. Both are excellent local companies known for producing high-quality, durable products. In terms of strength, they are very similar, both meeting industry standards of over 8,000 PSI, which means they are built to last for decades. The main differences often come down to specific color blends and textures. One brand might have the exact shade of gray or the specific surface finish that you fall in love with. The most important factor, however, isn’t choosing one brand over the other. It’s ensuring they are installed correctly. Proper masonry installation is what guarantees your pavers will withstand our climate and look beautiful for a lifetime.
Where to Use Cambridge Pavers in Your Yard
One of the best things about Cambridge Pavers is their incredible versatility. They aren’t just for one type of project; you can use them to define, connect, and beautify almost any part of your property. From creating a grand entrance to designing a private backyard retreat, these pavers provide a durable and stylish foundation. Their wide range of colors and patterns means you can create a cohesive look that flows from your front yard to your back, tying all your outdoor living spaces together. Let’s explore some of the most popular ways to incorporate them into your Long Island home.
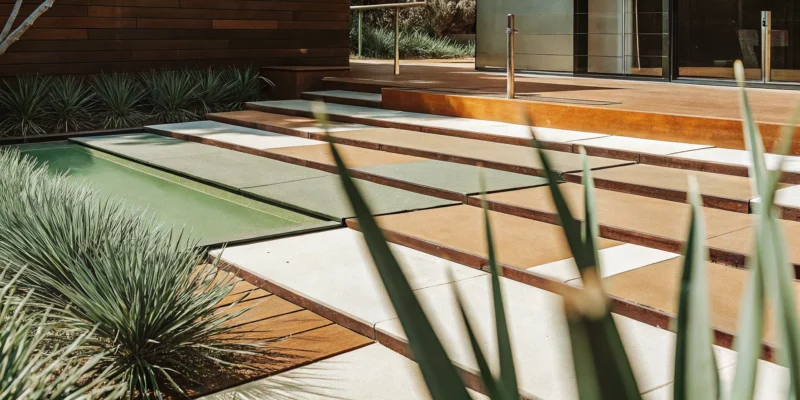
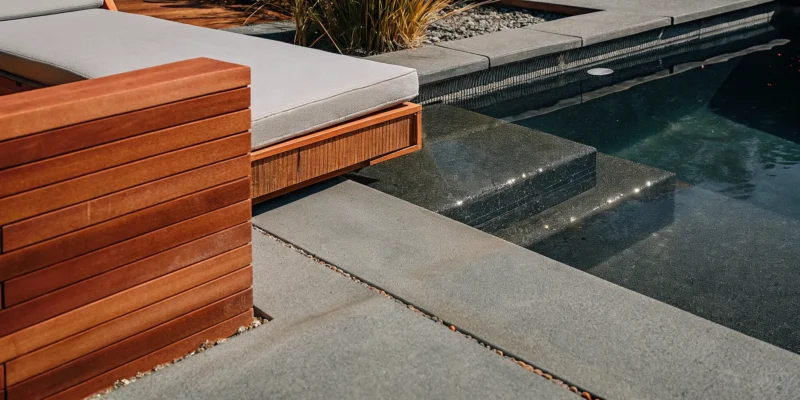
Design Stunning Patios and Pool Decks
A paver patio is the heart of a backyard, creating a perfect spot for morning coffee, family barbecues, or relaxing evenings. Cambridge Pavers allow you to design a surface that complements your home’s architecture and your personal style. For homes with a pool, these pavers are an excellent choice for the surrounding deck. Their durable, non-slip surface provides a safe and beautiful area for lounging and entertaining. A professionally installed paver deck from a swimming pools company can transform your pool area into a true resort-like oasis, giving you a seamless and elegant space to enjoy all summer long.
Create Welcoming Driveways and Walkways
Your driveway and front walkway make the first impression on every guest who visits your home. Swapping out cracked asphalt or plain concrete for Cambridge Pavers instantly adds curb appeal and value. Thanks to their ArmorTec technology, these pavers are engineered to withstand the weight of vehicles and the rigors of Long Island’s freeze-thaw cycles without cracking or fading. Our expert masonry services ensure your driveway and walkways are not only beautiful but also built to last, creating a warm and welcoming path to your front door.
Build Your Dream Outdoor Kitchen and Entertainment Space
Think beyond just the ground you walk on. Cambridge Pavers are the ideal foundation for a complete outdoor living room. You can use them to build a dedicated floor for an outdoor kitchen, a cozy fire pit area, or even a multi-level patio with built-in seating walls. The design possibilities are endless. Pavers can define different “zones” in your yard, creating a distinct area for cooking under a pergola, dining with family, or playing on a nearby turf lawn. By integrating pavers with other features like pavilions and pergolas, you can build a fully functional and stylish outdoor entertainment space.
How to Choose a Cambridge Pavers Installer on Long Island
Selecting the right installer for your Cambridge Pavers is just as important as choosing the pavers themselves. The most beautiful stones can fail if the foundation beneath them is weak. A great contractor ensures your new patio, walkway, or driveway not only looks stunning on day one but also withstands Long Island’s changing seasons for years to come. Your investment deserves expert hands. Finding a qualified professional means looking beyond a simple price quote and evaluating their credentials, experience, and process. Here’s what to focus on to find a reliable Cambridge Pavers installer for your home.
Look for Certifications and Manufacturer Credentials
A great starting point in your search is to look for installers who are recognized by Cambridge. While Cambridge provides a tool to find a professional installer, they also make it clear that you are responsible for vetting the contractor’s quality of work. Think of a certification as a sign that the installer has a strong relationship with the manufacturer and is familiar with their specific products and installation guidelines. It shows a level of commitment to their craft. However, it shouldn’t be your only criteria. Use it to create a shortlist of potential candidates, then continue your research from there to ensure they meet your standards for quality and service.
Review Their Experience and Local Portfolio
You wouldn’t hire an artist without seeing their paintings, so don’t hire a paver installer without seeing their work. Ask for a portfolio of completed projects, paying close attention to jobs that are similar to what you have in mind. A top-tier installer will have a robust gallery of local Long Island projects. This proves they have experience with the area’s specific soil conditions and weather patterns. Gappsi showcases a wide range of completed masonry projects that demonstrate our expertise. Don’t hesitate to ask for addresses of recent installations you can drive by to see the quality of their work in person. An experienced contractor will be proud to share their successes.
Confirm They Are an Authorized Product Source
This is a simple but critical step. Make sure your installer sources their materials from an authorized Cambridge distributor. This guarantees you are receiving genuine, first-quality Cambridge Pavers that are covered by the manufacturer’s warranty. Asking this question protects you from contractors who might try to substitute a lower-quality, look-alike product to cut costs. A reputable installer will be transparent about their supply chain and will order your materials promptly after you sign a contract. Working with a company that values high-quality materials, from natural stone pavers to composite decking, ensures the integrity and longevity of your entire project.
Know the Red Flags to Avoid
Trust your gut, but also know the common warning signs of a less-than-reputable contractor. The biggest red flag is an unusually low price. While it might seem tempting, a bargain bid often means the contractor is cutting corners on essential steps like base preparation, using subpar materials, or hiring unskilled labor. These shortcuts can lead to a failing patio or driveway that costs much more to fix in the long run. Also, be wary of anyone who pressures you for a quick decision, asks for a large cash deposit, or is unwilling to provide a detailed written contract, license, or proof of insurance. A true professional will offer a clear, comprehensive plan for your home improvement project.
Clearing Up Myths About Paver Installation
When you’re planning a big project like a new patio or driveway, it’s easy to get tangled up in conflicting advice. Pavers are a fantastic investment for your Long Island home, but a few common myths can cause confusion and lead to costly mistakes. Let’s clear the air on some of the biggest misconceptions about paver installation so you can move forward with confidence. Knowing the facts will help you protect your investment and ensure you get the beautiful, long-lasting results you’re looking for.
Myth: Any Contractor Can Install Them
This is one of the most dangerous myths out there. While many contractors might offer paver installation, the quality of the work can vary dramatically. The long-term success of your patio or driveway depends far more on the installation technique than on the brand of paver you choose. A proper installation requires a solid, well-compacted base, the right type of sand, and secure edge restraints to prevent shifting. An inexperienced installer can cut corners on these critical steps, leading to sinking, separating, and an uneven surface down the road. Your best bet is to work with a team that has deep masonry experience and a proven track record.
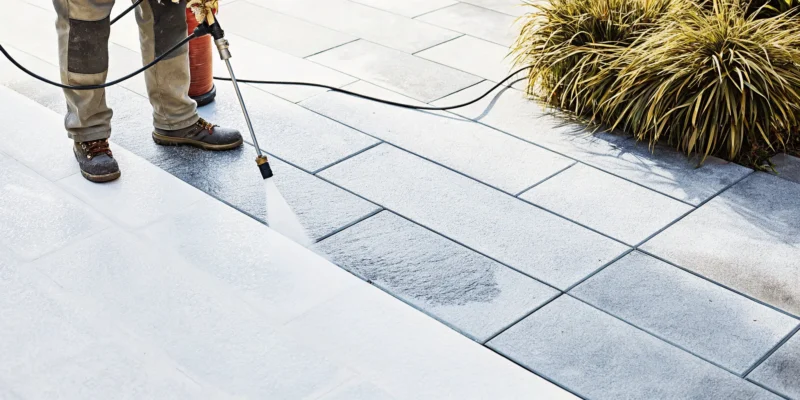
Myth: Pavers Need Zero Maintenance
While pavers are incredibly durable, they aren’t completely maintenance-free. Think of it like any other valuable part of your home; it needs a little care to stay in top shape. Over time, dirt and organic matter can accumulate, and weeds might try to sprout in the joints. Regular cleaning with a broom and a simple rinse can make a big difference. To keep your pavers looking brand new and protect them from stains and weathering, it’s also a good idea to have them professionally cleaned and sealed every few years. These simple restoration and sealing services are a small investment that protects the beauty and integrity of your hardscape for years to come.
Myth: You Always Have to Remove the Old Surface
Many homeowners assume that installing pavers means a full demolition of their old concrete driveway or patio. That’s not always the case. In some situations, pavers can be installed directly over an existing concrete surface, which can save you significant time and money on the project. This method, called an overlay, is only possible if the underlying concrete is stable, level, and free of major cracks. A professional installer can assess your existing surface to determine if it’s a suitable base. This flexibility is a great benefit of working with porcelain and natural stone, but getting an expert opinion first is essential to ensure the job is done right.
How Much Does Cambridge Paver Installation Cost on Long Island?
Talking about cost is one of the most important parts of planning any home project. While it’s impossible to give a one-size-fits-all price without seeing your space, we can walk through the different elements that contribute to the final cost of a Cambridge paver installation. Understanding these factors will help you set a realistic budget and know what to expect when you get a quote. On Long Island, several local conditions influence pricing, from labor rates to the ground beneath your feet. A professional installation is an investment in your home’s beauty and function, and knowing where your money is going is the first step. Let’s break down the costs so you can feel confident in your decisions.
What Factors Affect Your Project’s Cost?
The total price of your paver project depends on more than just the square footage. Costs on Long Island are often higher than national averages because of factors like local labor rates, material delivery fees, and specific town regulations. The unique geology of our area, including high water tables and sandy soil, means your contractor needs to do extra work to create a stable foundation. Our harsh winters, with their constant freeze-thaw cycles, also demand a more robust installation process to prevent shifting and cracking. The complexity of your design, such as intricate patterns, curves, or multiple levels, will also influence the labor involved. A quality masonry project accounts for all these variables from the start.
Understanding Material vs. Labor Costs
Many homeowners are surprised to learn that the pavers themselves are not the biggest part of the budget. The material cost for Cambridge pavers is very similar to other major brands on Long Island, typically falling between $4 and $10 per square foot. Where the costs really differ is in the labor and preparation. The final project cost is more dependent on the design’s complexity, the amount of excavation and site prep required, and the skill of the installation team. Choosing a simple pattern versus a complex one can significantly change the labor hours needed. This is why focusing solely on the price per paver can be misleading. Instead, it’s better to consider the total value of a durable, well-crafted installation.
Why Proper Site Prep Is So Important
You can have the most beautiful porcelain and natural stone pavers, but if the foundation is weak, the project is destined to fail. The base of your patio, walkway, or driveway is the most critical part of the entire installation. If it’s not done right, the surface won’t last, no matter how high-quality the pavers are. Proper site preparation involves excavating to the right depth, laying and compacting a sub-base of aggregate, and ensuring proper drainage. This process prevents the pavers from sinking, shifting, or becoming uneven over time, especially with Long Island’s weather. Skipping these steps might lower the initial price, but it will almost certainly lead to expensive repairs down the road.
Why Choose Gappsi for Your Cambridge Paver Project
Choosing the right installer is just as important as choosing the right paver. You need a team with the technical skill to ensure your investment lasts and the creative vision to bring your dream yard to life. At Gappsi, we combine decades of hands-on experience with a comprehensive approach to outdoor design, making us a trusted partner for homeowners across Long Island. We handle every detail, so you can focus on enjoying the beautiful results.
Our Decades of Masonry and Paving Experience
When you’re installing a new patio or driveway, you want it done right the first time. With a foundation in masonry and paving that dates back to 1987, our team has the deep expertise required for a flawless Cambridge Paver installation. We understand the specific challenges of Long Island’s soil and climate, ensuring your project is built on a proper base that prevents shifting and settling. Our long-standing reputation is built on quality craftsmanship and a commitment to using the best materials. We don’t just lay pavers; we build lasting outdoor spaces designed to be enjoyed for generations.
Visualize Your Project with Custom 3D Designs
It can be hard to picture how different paver styles, colors, and patterns will look in your own yard. That’s why we offer custom 3D design services to take the guesswork out of the process. We can create a detailed, realistic rendering of your project, allowing you to see exactly how your new patio, walkway, or pool deck will integrate with your home and landscape. You can experiment with different options and make confident decisions before any work begins. Our design portfolio shows how we turn initial ideas into stunning, functional realities for our clients.
Go Beyond Pavers with Our Full Outdoor Services
Your paver project is often just one piece of a larger outdoor vision. Instead of juggling multiple contractors, you can rely on Gappsi for a completely cohesive design. We are a full-service home improvement company offering everything from landscape design and swimming pools to outdoor kitchens and pavilions. Our integrated approach ensures every element of your backyard works together beautifully. We can build a Cambridge Paver patio that flows seamlessly into a lush garden, a custom pool area, or a fully equipped outdoor entertainment space, creating a unified and polished look for your entire property.
Proudly Serving Homeowners Across Suffolk and Nassau County
We are a Long Island company through and through. For over 30 years, Gappsi has been proud to serve homeowners throughout Suffolk and Nassau County, from the North Shore to the South Shore. Our team lives and works in the same communities as our clients, giving us a unique understanding of local styles, needs, and regulations. We’ve built a strong reputation by consistently delivering high-quality work and exceptional service to our neighbors. When you work with us, you’re partnering with a local expert who is committed to improving our shared community one beautiful backyard at a time.
Related Articles
- Cambridge pavers problems long island – Gappsi Group
- Cambridge vs. Belgard – Pavers and walls Long Island – Gappsi Group
- Cambridge vs. Anchor – Pavers and walls Long Island – Gappsi Group
- Users reviews on Cambridge pavers and walls long island – Gappsi Group
- Cambridge vs. Nicolock | Pavers and Walls Long Island – Gappsi Group
Frequently Asked Questions
How long will my Cambridge Pavers last, and what kind of maintenance do they need? With a professional installation, your Cambridge Pavers are built to last for decades. The real key is the solid foundation prepared underneath them. As for upkeep, it’s much simpler than you might think. Regular sweeping and an occasional rinse with a hose will handle most of the cleaning. To keep the color vibrant and protect against stains, we recommend having your pavers professionally cleaned and sealed every few years. It’s a small step that protects your investment and keeps your patio or driveway looking brand new.
What’s the real difference between Cambridge and other paver brands like Nicolock? Both Cambridge and Nicolock are excellent, high-quality brands that we trust and use often. They are very similar in terms of strength and durability. The main difference usually comes down to your personal taste. One brand might offer a specific color blend or a unique texture that perfectly matches the vision you have for your home. The most important decision isn’t the brand name on the paver, but the quality of the hands that install it.
Why is the installation so much more important than the paver brand I choose? You can have the most expensive, beautiful paver in the world, but if it’s put on a weak base, it will fail. The long-term success of your project depends entirely on the preparation of the ground beneath it. A proper installation involves excavating the soil to the correct depth and building a compacted base that won’t shift during Long Island’s freeze-thaw cycles. This is what prevents sinking, wobbling, and weeds, ensuring your investment looks great for a lifetime.
Can I really install pavers over my old concrete patio or driveway to save money? Sometimes, yes. This process is called an overlay, and it can be a great way to reduce project time and cost. However, it’s only an option if your existing concrete is in very good shape, meaning it’s level, stable, and has no major cracks. An expert needs to evaluate the surface to see if it’s a suitable foundation. If it’s not, attempting an overlay will only lead to problems down the road.
I’m worried about picking the wrong color or style. How can I be sure I’ll love the final look? This is a completely valid concern, especially with so many beautiful options available. Looking at photos and samples is a great start, but it can still be hard to imagine the full picture. This is why we use 3D design software. We can create a realistic rendering of your home with the new pavers, allowing you to see exactly how different colors, patterns, and styles will look. It takes all the guesswork out of the decision, so you can feel completely confident in your choice.