When you decide to build a tennis court, you can either hire a handful of different specialists or you can choose a single, full-service partner. Juggling separate teams for excavation, surfacing, fencing, and lighting can quickly become a headache of missed calls and conflicting schedules. A much simpler approach is to work with one expert team that handles everything. This ensures a smooth process and a cohesive final result. Finding the right tennis court builder contractors Long Island NY who offer this comprehensive service is key. We’ll show you the benefits of an all-in-one approach and how it guarantees your project is managed efficiently from start to finish.
Key Takeaways
- A lasting court starts with a solid plan: Before construction, focus on the essentials that guarantee longevity. This means orienting the court north-south to avoid sun glare, preparing a stable foundation, and installing proper drainage to handle Long Island’s weather.
- Choose a partner, not just a price: The right contractor is a long-term partner for your property. Look beyond the lowest bid to find a licensed and insured professional who offers a detailed contract, manages the entire project from permits to completion, and provides ongoing maintenance support.
- Maintenance is key to long-term play: Keep your court in top shape with a simple but consistent care routine. Regularly clean off debris, have the surface professionally sealed to protect it from weather, and plan for resurfacing when you notice fading or cracks to ensure safety and playability.
What Services Do Tennis Court Builders Offer?
When you decide to add a tennis court to your property, you’re not just hiring someone to pour concrete and paint lines. A professional tennis court builder is a partner who brings a project from a simple idea to a fully realized space for sport and leisure. Their expertise covers every stage of the court’s life, from initial design to long-term care. A great builder ensures your court is not only beautiful and functional on day one but also safe and playable for years to come. They understand the nuances of Long Island’s climate and soil, planning for proper drainage and using materials that will withstand the seasons.
Think of it as a comprehensive service. These specialists handle the technical aspects of construction, like site preparation and drainage, and help you select the perfect surface for your playing style. They also offer crucial aftercare, including repairs, resurfacing, and routine maintenance. Many, like Gappsi, go even further by integrating the court into your landscape with custom fencing, lighting, and surrounding design. This holistic approach guarantees your investment is protected and your backyard is transformed into the ultimate destination for recreation. Choosing the right builder means you get a single point of contact for the entire project, simplifying communication and ensuring a cohesive final result.
Building a New Court
The most obvious service a builder offers is constructing a brand new court from the ground up. This process starts with a detailed consultation to understand your vision and assess your property. Professionals will help you choose the best type of court for your needs, whether it’s a classic hard court, a soft clay court, or a modern synthetic turf surface. They manage every step, from excavating the land and laying the foundation to applying the final surface layers and painting the lines. A quality builder provides expert guidance on materials and design, ensuring your new court meets your performance expectations and complements your home’s aesthetic.
Resurfacing and Repairs
Over time, even the best-built tennis court will show signs of wear. Sun, rain, and the freeze-thaw cycles of Long Island winters can lead to cracks, fading, and uneven spots. This is where resurfacing and repair services come in. Builders can fix structural issues, fill cracks, and apply a fresh surface layer to make your court look and play like new again. This isn’t just about aesthetics; it’s a matter of safety. A smooth, even surface prevents trips and falls and ensures a predictable ball bounce. Regular restoration and sealing can significantly extend the life of your court and keep it in prime playing condition.
Maintaining Your Court
To protect your investment, ongoing maintenance is key. Many builders offer maintenance plans to keep your court in top shape season after season. These services typically include power washing to remove dirt and mildew, clearing debris, and checking for any early signs of damage. For clay courts, this might involve re-compacting the surface and replenishing the material. For all courts, it means ensuring the net is in good condition and the lines are crisp and visible. Proactive maintenance prevents small issues from becoming costly problems and ensures your court is always ready for a match.
Custom Fencing, Lighting, and Landscaping
A tennis court is more than just a playing surface; it’s a feature of your property. Top-tier builders offer services to complete the entire environment. This includes installing custom fences and netting to keep balls in play and provide privacy. They can also install lighting systems for nighttime games, extending your playing hours well into the evening. To fully integrate the court into your backyard, many builders provide landscape design services, creating beautiful and functional surroundings with plantings, pathways, and seating areas. This turns your court into a true backyard destination.
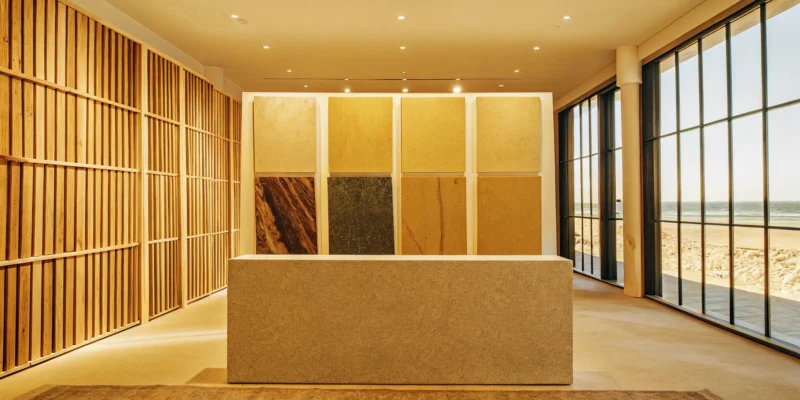
What Type of Tennis Court Is Right for You?
Choosing the right surface for your tennis court is a big decision. It affects how you play, how much maintenance is needed, and the overall look of your backyard. Each type has its own personality and benefits, so it’s all about finding the perfect fit for your family, your playing style, and your home. Let’s look at the most popular options here on Long Island to help you decide.
Hard Courts
If you’re looking for a classic, reliable tennis experience, a hard court is a fantastic choice. They are incredibly popular, and for good reason. According to Long Island Tennis Magazine, “Hard courts are a popular choice for many players due to their durability and consistent playing surface.” They can be built with materials like Deco-turf or classic turf rubber, which gives you a dependable and low-maintenance court. This means less time on upkeep and more time playing. The consistent ball bounce makes it a great surface for players of all levels to practice and perfect their game. It’s a durable, all-around performer for your backyard.
Clay Courts
For players who prefer a slower, more strategic game, a clay court is the perfect match. These surfaces are much softer underfoot compared to hard courts. As noted by the experts at Court Order Inc., “Clay courts, such as Har-Tru, are favored for their softer playing surface, which can be easier on the joints.” This unique surface slows the ball down and creates a higher bounce, leading to longer, more tactical rallies. While they do require a bit more maintenance to keep in top condition, many tennis purists believe the superior playing experience and joint-friendly surface are well worth the effort. It’s an elegant choice for the dedicated player.
Synthetic Turf Courts
What if you could have the classic look and feel of a grass court without the constant maintenance? That’s where synthetic turf courts come in. These modern surfaces offer incredible versatility. As one Long Island publication points out, “Synthetic turf courts, like Nova Synthetic Turfs, offer a versatile playing surface that can mimic the feel of grass while providing excellent drainage and durability.” This is a huge plus for our Long Island weather. The surface is comfortable, provides great traction, and can be customized to your exact playing preferences. It’s a smart, durable, and beautiful option that gives you a professional-level playing experience right at home.
Multi-Use Game Courts
Why limit yourself to just one sport? If you want to get the most out of your outdoor space, a multi-use game court is the ultimate solution for family fun. These versatile Sports Games Courts are designed to accommodate a variety of activities. As local builders explain, “Multi-use game courts are an excellent option for those looking to maximize their outdoor space. These courts can accommodate not only tennis but also basketball, bocce, and even putting greens.” Imagine a space where you can play a set of tennis in the morning and shoot hoops with the kids in the afternoon. It’s the perfect way to create a hub of activity and entertainment for everyone to enjoy.
How Much Does a Tennis Court Cost in Long Island?
Let’s talk numbers. Adding a tennis court is a fantastic investment in your home and lifestyle, but it’s also a significant project. The final cost can vary quite a bit, depending on whether you’re starting from scratch or giving an existing court a facelift. Understanding the main cost factors will help you set a realistic budget and make informed decisions for your Long Island home. Let’s break down what you can expect.
Cost to Build a New Court
Building a brand new tennis court is an exciting project, but the cost isn’t one-size-fits-all. The price can change significantly based on the materials and design you choose. For example, the type of surface you select plays a huge role. Options like classic Har-Tru, a versatile all-weather hard court, or a modern hydro court each come with different price points for installation. As specialists in tennis court construction note, the surface is one of the biggest decisions affecting your budget. A full-service partner like Gappsi can walk you through the pros and cons of each material, helping you find the perfect fit for your playing style and property.
Cost to Resurface
If you already have a court that’s seen better days, resurfacing is a great way to bring it back to life. For a standard resurfacing job in Long Island, you can generally expect the cost to fall between $8,000 and $12,000. This price can shift depending on the court’s current condition and the quality of materials you choose for the new surface. A court with just a few minor cracks will cost less to repair than one with significant damage. Getting a professional assessment is the best way to get an accurate quote for your specific tennis court resurfacing needs.
What Affects the Final Price?
Several key factors determine the final price tag for your tennis court project, whether it’s a new build or a repair. The existing surface condition is the biggest variable; issues like widespread cracks, moss, or poor drainage require more prep work. The base material, whether it’s asphalt or concrete, also influences the cost. Beyond the surface itself, you’ll need to budget for any additional repairs to fences, nets, or lighting systems. A detailed breakdown of potential costs can help you see how these elements add up. Think of it as a complete system, where every part contributes to the longevity and playability of your court.
How to Build a Tennis Court That Lasts
A tennis court is a significant investment, and you want it to provide years of enjoyment, not constant headaches. Building a court that stands the test of time starts long before the first serve. It involves making smart choices about materials, preparing the site correctly, and understanding the demands of our local Long Island climate. A durable court isn’t just about avoiding cracks; it’s about ensuring consistent playability, safety, and lasting value for your home. When you focus on a quality build from the ground up, you spend more time playing and less time worrying about repairs.
Choosing the Right Surface Material
The surface you choose has the biggest impact on your game and your court’s maintenance routine. Hard courts, often made with an acrylic topcoat over asphalt or concrete, offer a fast-paced game with a true, predictable bounce. Clay courts, like the classic Har-Tru, are softer on the body and slow the ball down for longer rallies, but they require more daily upkeep. For a great balance of comfort and durability, many homeowners are turning to synthetic turf. These surfaces mimic the look of grass, are easy on the joints, and require minimal maintenance, giving you a professional-feeling court right in your backyard.
The Importance of Site Prep and Drainage
You can’t build a great court on a poor foundation. Proper site preparation is the most critical step for ensuring your court’s longevity. This process begins with a thorough evaluation of the ground to create a stable, compacted base. Without this, your court is vulnerable to shifting, sinking, and cracking. Equally important is a well-designed drainage system. Water is the biggest enemy of any paved surface. An effective drainage plan prevents water from pooling on or under the court, which is essential for avoiding surface damage and foundation erosion. A strong masonry foundation and proper grading are key to a court that lasts for decades.
Building for Long Island’s Climate
Long Island’s weather, with its humid summers and freeze-thaw cycles in winter, can be tough on outdoor structures. A court built to last must use materials and techniques specifically chosen to withstand these conditions. This means selecting high-quality, durable surface materials and ensuring the construction process meets or exceeds standards set by organizations like the USTA. A professional builder will account for temperature fluctuations that cause expansion and contraction, preventing premature cracking and wear. Applying the right protective coatings is also vital, which is why you should plan for regular restoration and sealing to shield your investment from the elements and keep it looking its best.
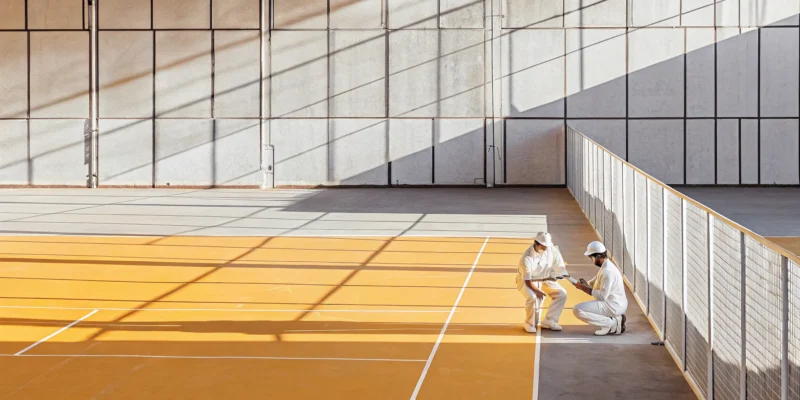
Where Should You Build Your Tennis Court?
You’ve decided on the perfect surface and have a vision for your dream tennis court. Now comes a question that’s just as important: where exactly should it go? The location of your court affects everything from your playing experience to the court’s longevity. A little planning goes a long way in making sure you get it right. It involves more than just finding a flat piece of land. You need to think about the sun, the wind, the ground beneath your feet, and even your town’s local rules. Let’s walk through the key factors to consider when choosing the perfect spot on your property. A well-placed court is a joy to play on and a lasting investment in your home.
Sunlight, Wind, and Court Orientation
Have you ever tried to serve with the afternoon sun directly in your eyes? It’s not fun. That’s why the orientation of your court is so important. The best orientation for a tennis court is a north-south alignment. This setup ensures that neither player has to stare directly into the rising or setting sun during a match. You should also think about wind. A court placed in a wide-open, windy area can make for a tricky game. We can help you find a naturally sheltered spot or use strategic landscaping and fencing to create a windbreak, ensuring the ball goes where you want it to.
Checking Soil and Drainage
A tennis court is only as good as the foundation it’s built on. Before we even think about laying the surface, we have to talk about soil and drainage. Poorly drained soil can lead to puddles on the court after it rains, which can damage the surface over time and limit your playing days. The key is ensuring proper drainage from the start. A professional site evaluation, including a soil test, tells us exactly what we’re working with. This allows us to prepare the ground correctly, creating a stable base that will keep your court in great shape for years to come.
Understanding Local Zoning and Permits
Building a tennis court isn’t just a construction project; it’s also a legal one. Before breaking ground, it’s essential to understand your local regulations. Each town in Long Island has its own set of rules about things like how close the court can be to your property line, the maximum height for fencing, and whether you can install lights. You’ll want to check with your local zoning board to ensure your plans are compliant. This might sound like a headache, but it’s a critical step to avoid fines or future issues. As a full-service partner, we handle the permit process for our clients, making sure everything is done by the book.
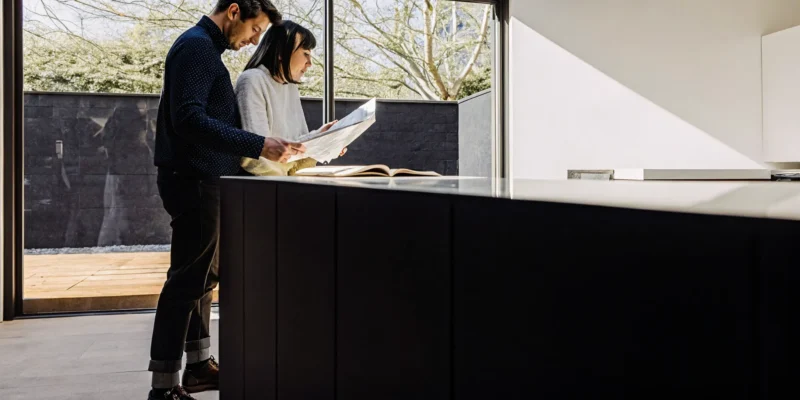
Key Questions to Ask Your Tennis Court Contractor
Choosing a contractor for your tennis court is a big decision. This isn’t just another backyard project; it’s a significant investment in your home and lifestyle. To make sure you find a partner who can bring your vision to life, you need to ask the right questions. Going into conversations prepared will help you evaluate each candidate thoroughly and find a builder you can trust. Think of it as an interview where you’re hiring a long-term partner for your property. A great contractor will welcome your questions and provide clear, confident answers.
This process helps you find a team that not only has the technical skills but also shares your commitment to quality. The goal is to build a relationship with a company that will stand by its work for years to come. Start by asking about their experience with sports game courts to ensure they have the specific expertise you need.
Experience and Past Projects
When you first meet with a potential contractor, start by asking about their background. How long have they been building tennis courts in the Long Island area? A company with deep roots in the community often has a better understanding of local soil conditions, weather patterns, and zoning laws. Ask to see a portfolio of their completed projects. A picture is worth a thousand words, but a video is even better. Seeing their work in action on their YouTube channel or website can give you a real feel for their craftsmanship and style. Don’t be shy about asking for references from past clients, either. Hearing directly from other homeowners is one of the best ways to gauge a contractor’s reliability and quality.
Certifications and Affiliations
Next, inquire about their professional credentials. Is the contractor affiliated with any industry organizations, like the American Sports Builders Association (ASBA)? Membership in these groups isn’t just for show; it means the builder is committed to staying current with the latest construction standards and best practices. It shows they invest in their education and are serious about their craft. A certified builder is more likely to use high-quality materials and proven techniques, which results in a court that performs better and lasts longer. This commitment to quality is a key indicator that you’re working with a true professional who takes pride in their work.
Licensing, Insurance, and Quotes
This part is non-negotiable. Always confirm that your contractor is fully licensed and insured to work in Long Island. This protects you from any liability in case of an accident on your property during construction. Ask for copies of their insurance certificates and don’t hesitate to verify them. You should also request a detailed, itemized quote in writing. A vague estimate can lead to unexpected costs later. The quote should clearly outline the scope of work, materials, labor costs, and a project timeline. Also, ask about warranties. A reputable contractor will stand behind their home remodeling and construction projects with a solid warranty, giving you peace of mind in your investment.
Ongoing Support and Maintenance Plans
A tennis court requires regular care to stay in top condition. Before you sign a contract, find out what kind of ongoing support the builder offers. Do they provide seasonal maintenance plans or repair services? A contractor who offers long-term support is invested in the longevity of your court, not just the initial build. This is especially important in Long Island, where seasonal weather changes can take a toll on outdoor surfaces. Knowing you have a trusted partner for future needs, like professional restoration and sealing, makes maintaining your court simple and stress-free. It’s a sign of a company that builds relationships, not just courts.
Mistakes to Avoid When Hiring a Tennis Court Builder
A new tennis court is a significant investment in your home and lifestyle. Choosing the right builder is the most critical step in the process. To help you find a reliable partner, here are a few common mistakes to watch out for when you start your search. Avoiding these pitfalls will ensure your project runs smoothly and results in a court you’ll enjoy for years to come.
Don’t Just Focus on Price
This is a classic piece of advice for a reason. While it’s tempting to go with the lowest bid, a cheap quote can signal cut corners, low-quality materials, or an incomplete scope of work. A professional contractor’s estimate will account for many factors, especially for resurfacing projects. They will assess the condition of the existing surface, look for peeling paint, and identify problems like cracks or drainage issues. A lower price might not include necessary repairs for fences, lighting, or the court’s foundation, leading to more expensive problems down the road. A thorough quote reflects a thorough plan.
Check for Licensing and Insurance
Before you sign anything, do your homework on the contractor’s credentials. A reputable builder will be fully licensed and insured, which protects you from liability in case of accidents on your property. You can also look for affiliations with professional organizations. For example, builders who follow standards set by the American Sports Builders Association (ASBA) demonstrate a commitment to quality and industry best practices. These credentials show that a company is serious about its craft and accountable for its work, giving you peace of mind that your project is in capable hands.
Read the Fine Print
A contract is your best friend during a big construction project. Always ask for a detailed, written quote that outlines the full scope of work. Make sure you understand every line item, from the payment schedule and project timeline to the specific materials being used. A vague contract leaves room for misunderstandings and unexpected costs. A professional company will provide a clear agreement and be happy to walk you through it. This document protects both you and the builder, ensuring everyone is on the same page before the construction work begins.
Don’t Underestimate Site Prep
The long-term performance of your tennis court depends entirely on what’s underneath it. Proper site preparation is not the place to cut costs. A skilled builder will start by evaluating the ground conditions and creating a stable base. This process often involves excavation, grading, and ensuring proper drainage to prevent future cracks and surface warping. Top professionals use modern tools like laser-controlled graders to achieve the precise slope needed for water runoff. A strong foundation is the key to a durable, playable court, so make sure your contractor has a solid plan for your landscape and site preparation.
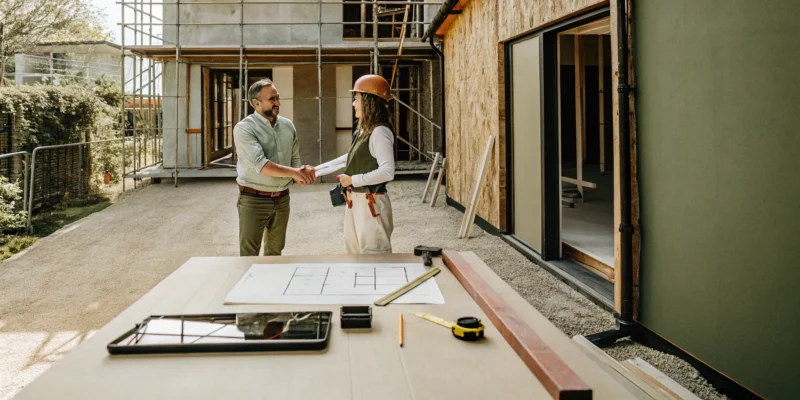
Finding the Right Tennis Court Builder in Long Island
Finding the right builder for your tennis court is one of the most important decisions you’ll make. You could hire separate specialists for excavation, surfacing, fencing, and lighting, but managing multiple teams can be a real headache. Juggling different timelines, contacts, and invoices often leads to miscommunication and delays. A much smoother approach is to find a single, full-service partner who can handle every aspect of the project from start to finish.
When you work with an integrated team, you get a single point of contact and a cohesive plan. This ensures every detail, from the initial site prep to the final landscaping touches, aligns with your vision. A company that offers comprehensive turf and sports games courts services will have the experience to foresee potential issues and manage the entire process efficiently. They also bring invaluable local knowledge. A Long Island-based builder understands our unique climate and soil conditions, which is critical for constructing a court that will last for years. This expertise means your court is built right the first time, saving you from costly repairs down the road.
Why Choose a Full-Service Partner Like Gappsi
Choosing a full-service partner like Gappsi simplifies the entire process of building your dream tennis court. Instead of coordinating with multiple contractors, you have one dedicated team managing everything from design and construction to lighting and fencing. With decades of experience on Long Island, we understand how to build durable courts that stand up to our local weather. We work with you to customize every detail, ensuring the final result perfectly fits your space and playing style. Our commitment doesn’t end when the court is finished; we also provide ongoing restoration and sealing services to keep your court in pristine condition for years of enjoyment.
Completing Your Space: What to Pair With Your Tennis Court
A tennis court is a fantastic centerpiece for your backyard, but the features surrounding it are what truly transform it into a complete outdoor destination. Thinking about fencing, seating, and landscaping ahead of time ensures the final result is functional, beautiful, and perfectly integrated into your property. A full-service partner can help you design a cohesive space that includes all the elements you need for the ultimate home court experience.
Fencing and Netting
Proper fencing is a non-negotiable for any tennis court. It keeps the game contained, prevents stray balls from causing damage, and ensures the safety of players and spectators. For optimal function, the American Sports Builders Association provides tennis court fencing guidelines, which often suggest a height of at least 10 feet. At Gappsi, we design and install custom fences and netting that not only meet safety standards but also complement the style of your home and landscape.
Synthetic Turf and Sports Game Courts
Why stop at just tennis? Surrounding your court with high-quality synthetic turf creates a lush, green look without the constant upkeep of natural grass. This surface is also perfect for creating multi-use sports games courts. You can easily add a basketball hoop or markings for other activities, making your backyard the go-to spot for family fun. The Synthetic Turf Council highlights the versatility and durability of turf for various sports. We can help you design a custom turf and game court area that maximizes your outdoor space.
Pavilions and Pergolas
Give players and spectators a comfortable place to relax with a custom-built pavilion or pergola. These structures provide essential shade on sunny Long Island days and create an inviting atmosphere for socializing after a match. A well-placed pavilion can serve as an outdoor living room, complete with seating and a spot for refreshments. Adding one of these outdoor living spaces enhances comfort and adds significant value to your property. Gappsi specializes in designing and building beautiful pavilions and pergolas that feel like a natural extension of your home.
Landscape Design
Thoughtful landscape design is the final touch that ties your entire backyard together. The right plants, trees, and pathways can define the court area, add privacy, and soften the hard lines of the court and fencing. According to the American Society of Landscape Architects, good landscape design basics can greatly enhance the enjoyment of your outdoor environment. A cohesive plan from Gappsi’s landscape design team will ensure your new tennis court blends seamlessly with its surroundings, creating a stunning and functional outdoor oasis.
How to Keep Your Tennis Court in Top Shape
Your tennis court is more than just a place to play; it’s a significant investment in your home and lifestyle. To protect that investment and ensure it remains a source of enjoyment for years, consistent maintenance is key. Proper care keeps the surface safe, playable, and looking its best. From routine cleaning to seasonal prep, here’s how to maintain your court’s condition and protect it from the elements. A well-cared-for court not only enhances your property but also provides a reliable space for recreation and fitness, right in your backyard.
Regular Cleaning and Sealing
Think of regular cleaning as essential housekeeping for your court. Leaves, dirt, and other debris can hold moisture, which encourages mold and mildew growth and can stain the surface. A simple sweep or blow-off every week or two goes a long way. For a deeper clean, professional power washing is a great option. It’s also wise to have your court sealed periodically. A quality sealant protects the acrylic surface from UV rays and weather, preserving its color and integrity. We recommend hiring a specialized contractor who understands court construction, as they provide expert restoration and sealing services that a general paving company might not.
When to Resurface Your Court
Over time, every court shows its age. You might notice the color fading, the lines blurring, or small cracks starting to appear. These are all signs that it’s time to consider resurfacing. Resurfacing involves applying a new acrylic topcoat, which restores the court’s appearance, texture, and playability. In Long Island, this process can range from $8,000 to $12,000, depending on the court’s condition. While it’s a significant project, having your court resurfaced is crucial for correcting surface wear and preventing minor issues from turning into major, more expensive problems. A fresh surface also ensures proper ball bounce and player safety.
Seasonal Maintenance for Long Island Weather
Long Island’s weather, with its humid summers and freezing winters, presents unique challenges for tennis courts. The freeze-thaw cycle is particularly tough, causing the ground to expand and contract, which often leads to surface cracks. Addressing these issues promptly is vital. An experienced local contractor will know how to properly repair these cracks using specialized fillers and flexible sealants designed for our climate. Preparing your court for winter by clearing debris and addressing any drainage issues can also prevent damage. Come spring, a professional inspection can help you get the court ready for a new season of play.
Related Articles
- Tennis Courts Designers in Nassau and Suffolk County, Long Island
- Custom Tennis Court Installers NY: Build Your Dream Court
- Pro Tennis Court Repair Long Island: Built to Last
- Laykold Tennis Court Installation in Long Beach, NY | Gappsi Inc
Frequently Asked Questions
How much space do I actually need for a tennis court? A standard tennis court requires a significant amount of space, so it’s a great question to ask first. The total recommended area for a regulation court, including the necessary runoff space around the playing lines, is 60 feet by 120 feet. This gives you enough room for safe play without running into fences. Of course, the best way to know for sure what works for your property is to have a professional site evaluation. We can assess your specific landscape to determine the ideal placement and size.
How long does it take to build a new tennis court from start to finish? The timeline for building a new court can vary quite a bit, but you can generally plan for it to take several weeks. The biggest factors are site preparation and weather. If your property needs extensive excavation and grading, that will add time. The permit process with your local town can also affect the start date. Once construction begins, we need cooperative weather, especially for pouring the foundation and applying the surface layers, which need time to cure properly.
Can I use my tennis court for other sports like basketball or pickleball? Absolutely, and this is a fantastic way to get the most out of your investment. We can design a multi-use Sports Games Court that incorporates lines for pickleball or other games directly onto the tennis surface. We can also install features like adjustable basketball hoops at the court’s edge. This turns your tennis court into a versatile hub for all kinds of family activities and sports without needing a separate area for each one.
What is the biggest difference in maintenance between a hard court and a clay court? The maintenance commitment is the main difference between these two popular surfaces. A hard court is relatively low maintenance; it just needs to be kept clean of debris and periodically power washed and resealed every few years. A clay court, on the other hand, requires more frequent, almost daily attention. To keep it in top playing condition, you’ll need to sweep, water, and roll the surface regularly to keep it perfectly smooth and compacted.
What is the very first step I should take if I’m seriously considering a tennis court? The best first step is to schedule a consultation and site evaluation. A professional needs to walk your property to understand your vision and assess the practical details, like potential court orientation, soil conditions, drainage, and access for construction equipment. This initial meeting is so important because it helps you get a realistic understanding of the project’s scope, potential challenges, and budget before you get too far into planning.