Building on Long Island presents unique challenges. Our coastal weather, with its humid summers and freezing winters, is notoriously tough on outdoor surfaces. The freeze-thaw cycle can cause concrete to crack, heave, and spall if it’s not installed by someone who understands our specific climate. This is why local experience isn’t just a bonus; it’s a necessity. You need a team that uses the right materials and techniques to ensure your project can withstand the elements. This guide will help you identify the professionals who have a proven track record of building durable, long-lasting projects, making your search for qualified concrete contractors on Long Island, NY, much simpler.
Key Takeaways
- Confirm the Non-Negotiables First: Before discussing designs, verify that any potential contractor is fully licensed and insured. This simple step protects you and immediately separates the true professionals from the rest.
- Put Your Project Plan in Writing: A verbal agreement is not enough. Insist on a detailed contract that clearly outlines the project scope, materials, timeline, and payment schedule to ensure everyone is on the same page.
- Seek a Design Partner, Not Just a Pourer: The best contractors offer more than just labor; they provide design expertise. Look for a professional who can suggest creative solutions, like decorative finishes, that align with your home’s overall style.
What Does a Long Island Concrete Contractor Do?
When you think of a concrete contractor, you might picture someone pouring a simple gray sidewalk. While that’s part of the job, a skilled Long Island contractor does so much more. They are craftsmen who work with one of the most versatile building materials available to create functional, beautiful, and lasting additions to your home. From foundational structures to intricate decorative patios, their work forms the backbone of many home improvement projects. Understanding the full scope of their services will help you find the right professional for your vision.
Driveways, Patios, and Walkways
The most common projects for a concrete contractor involve creating essential outdoor surfaces. They install durable driveways that can handle daily traffic and Long Island’s changing seasons, welcoming patios for outdoor gatherings, and safe, clean walkways connecting your spaces. A great contractor ensures these installations are properly graded for drainage and built to last, preventing cracks and heaving. They combine function with form, creating surfaces that not only serve a purpose but also add to your home’s curb appeal. This foundational work is crucial for any masonry project and sets the stage for your entire landscape.
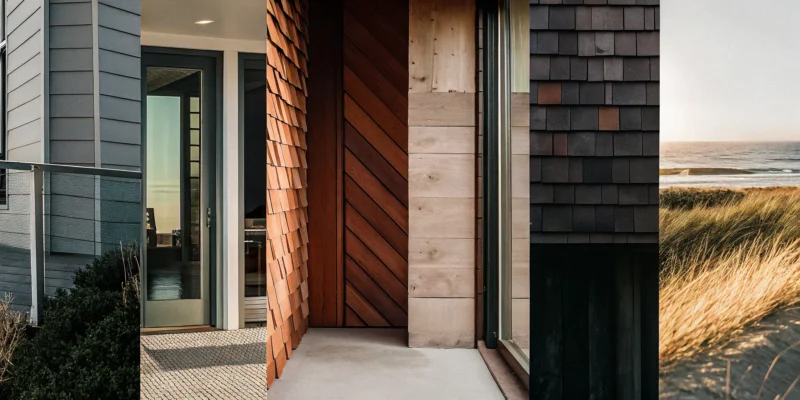
Decorative and Stamped Concrete
This is where a concrete contractor’s artistry really shines. Instead of plain gray concrete, you can opt for decorative finishes that transform the look of your surfaces. Stamped concrete, for example, can be made to look like natural slate, cobblestone, or even wood planks, giving you a high-end aesthetic at a more accessible price point. Contractors can also add color, textures, and unique patterns to your concrete. This customization allows you to perfectly match your patio or walkway to your home’s style. It’s a fantastic alternative if you love the appearance of natural stone pavers but are working with a different budget.
Masonry and Outdoor Living Spaces
Many concrete contractors are also skilled masons who can build entire outdoor living environments. Their work goes beyond flat surfaces to include constructing the core structures for your dream backyard. This could mean building a sturdy base for an outdoor kitchen, creating a custom fire pit for cozy evenings, or pouring the perfect surround for a new swimming pool. By integrating concrete work with stone and brick, they create cohesive and functional spaces. A contractor with this range of skills can help you design and build a complete outdoor oasis, from the patio floor to the seating walls and beyond.
Structural and Commercial Projects
Beyond the backyard, experienced concrete contractors handle critical structural work for both homes and commercial properties. This includes pouring solid foundations for new home additions, garages, and even entire buildings. They have the technical expertise to tackle complex jobs, like creating retaining walls on sloped land or performing structural repairs to existing concrete. Hiring a contractor who is proficient in this type of work ensures that even the most ambitious home remodeling projects are built on a solid, reliable base. This level of skill is a strong indicator that you are working with a true professional who understands construction from the ground up.
How Much Does a Concrete Contractor Cost on Long Island?
Figuring out the budget for your concrete project is one of the first, and most important, steps. The truth is, there’s no single price tag. Costs on Long Island can vary quite a bit based on what you want to build, the materials you choose, and the complexity of the job. A simple concrete slab will cost much less than an intricate, custom-stamped patio with multiple colors.
Understanding the different factors that go into a contractor’s quote will help you plan your budget and feel confident when you review estimates. From the type of finish you select to the time of year you schedule the work, several key elements will shape the final price. Let’s walk through what you can expect to pay and what drives those costs, so you can make an informed decision for your home.
Standard vs. Decorative Concrete Pricing
The biggest factor in your project’s cost is the type of concrete you choose. A standard, broom-finished concrete surface for a simple patio or walkway is the most budget-friendly option. On Long Island, you can generally expect this to cost between $1.50 and $3.50 per square foot. If you’re looking for something with more personality, decorative concrete is the way to go. This includes techniques like stamping, staining, or embedding other materials. Because it requires more skill and specialized materials, decorative concrete can range from $3 to $12 per square foot, or even more for highly detailed masonry work.
Key Factors Influencing Your Price
Beyond the basic material choice, several other details will influence your final quote. The overall size of the project is a major component; larger projects cost more in total but often have a lower price per square foot. The complexity of the design also matters. A simple square patio is more straightforward than one with curves, multiple levels, or intricate patterns. Other factors include site preparation, such as grading or removing old materials, the thickness of the concrete slab, and any necessary reinforcements. A contractor will consider all these elements when creating a custom quote for your home remodeling project.
Long Island’s Climate and Material Needs
Living on Long Island means dealing with a unique climate, from humid summers to freezing winters. This freeze-thaw cycle can be tough on concrete, causing it to crack and spall over time if not installed correctly. An experienced local contractor understands this and will use the right materials to ensure your investment lasts. This might involve using a specific concrete mix with air-entrainment additives, which create tiny air pockets to give water a place to expand when it freezes. While these superior materials might slightly increase the initial cost, they are essential for long-term durability. Proper installation and protection are key, which is why ongoing restoration and sealing services are also important.
How to Get an Accurate Estimate
To get a truly accurate estimate, you need to give contractors as much detail as possible. Before you start calling, try to have the project’s dimensions, your desired finish, and any photos or sketches of your idea ready. When you receive a quote, make sure it’s a detailed, written document, not just a number scribbled on a card. A professional estimate should break down the costs for labor, materials, permits, and any other expenses. It’s always a good idea to get a concrete estimate from a few different reputable companies to compare their offerings and pricing structures.
Finding Seasonal Promotions
The construction industry has its busy seasons and its slower periods. On Long Island, demand for outdoor projects is highest in the late spring and summer. If your project timeline is flexible, you might find better pricing by scheduling work during the off-season, like early spring or late fall. Some contractors offer promotions to keep their crews busy during these times. It never hurts to ask if a company has any current specials or package deals, especially if you are planning multiple projects. You can sometimes find great deals on products and materials at the Gappsi Store that can be incorporated into your project.
What to Look For in a Concrete Contractor
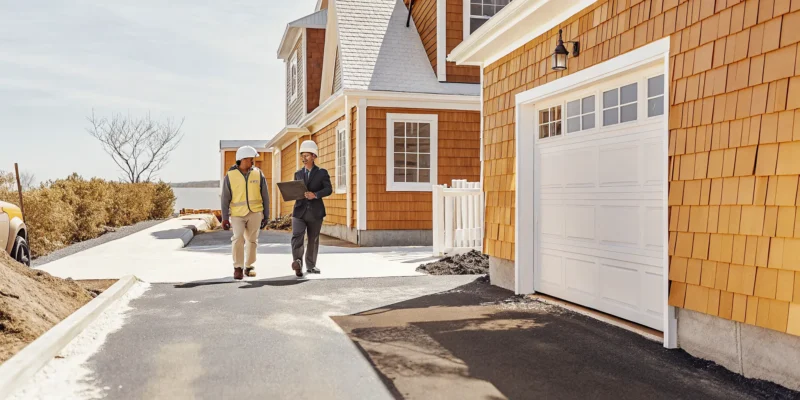
Choosing the right concrete contractor is one of the most important decisions you’ll make for your home improvement project. This isn’t just about finding someone to pour concrete; it’s about finding a skilled partner who can turn your vision for a new driveway, patio, or pool deck into a beautiful and durable reality. The right professional brings not only technical skill but also peace of mind, ensuring your project runs smoothly from start to finish. A great contractor communicates clearly, respects your home, and stands by their work.
To find this ideal partner, you need to do a little homework. It’s tempting to just go with the lowest bid, but that can often lead to headaches down the road. Instead, focus on finding a contractor who demonstrates professionalism, experience, and a genuine commitment to quality. By evaluating a few key areas, you can confidently select a company that will deliver exceptional results that you and your family will enjoy for years. We’ll walk through exactly what to look for, from credentials and portfolios to contracts and customer reviews, so you can feel prepared and empowered in your search.
Licensing, Insurance, and Bonding
Before you even start talking about design, make sure any contractor you consider is fully licensed and insured. This is the absolute baseline for any professional working on your property. A valid license proves they meet state and local requirements to perform the work. Insurance, specifically liability and worker’s compensation, protects you from any financial responsibility if an accident happens on your property. Think of it as a critical safety net. A reputable company will have no problem providing you with proof of their credentials. If a contractor is hesitant to share this information or dismisses its importance, that’s a major red flag to walk away.
Experience, Portfolio, and Quality Materials
Experience is what separates a good contractor from a great one. A team with years of hands-on work in Long Island has seen it all, from navigating local soil conditions to understanding which materials hold up best to our specific climate. Ask to see a portfolio of their completed projects. Look for work that is similar in scope and style to what you have in mind. This gives you a real sense of their craftsmanship. Also, ask about the materials they use. A quality contractor will use high-grade porcelain and natural stone and other materials to ensure your project not only looks fantastic but also lasts for decades.
A Commitment to Customer Satisfaction
A concrete project is a collaboration, so you want a partner who listens to your ideas and is dedicated to your satisfaction. This commitment shows up in many ways. Does the contractor take the time to answer all your questions thoroughly? Do they offer creative solutions or suggestions to improve your project? A company that prioritizes customer happiness will focus on the small details, maintain a clean worksite, and communicate with you throughout the process. You can often get a feel for this by watching how they present their work and talk about past clients. Their passion for creating beautiful, functional spaces should be clear.
Verified Reviews and Local References
What past customers have to say is one of an honest indicator of a contractor’s quality and reliability. Look for verified reviews on trusted websites, and pay attention to what homeowners in the Long Island area are saying. Go beyond the simple star rating and read the comments. Are clients happy with the final result? How was the communication? Did the project stay on schedule and on budget? Don’t hesitate to ask a potential contractor for local references. A confident masonry professional will be happy to connect you with previous clients who can speak to their experience.
A Clear, Written Contract
Once you’ve found a contractor you trust, the final step before work begins is to get everything in writing. A clear, detailed contract is your project’s blueprint, and it protects both you and the contractor. It should outline the full scope of work, a list of materials, a payment schedule, and an estimated start and completion date. A professional will provide a free, no-pressure estimate and will walk you through the contract to ensure you understand every detail. This document eliminates confusion and sets clear expectations, paving the way for a successful and stress-free project.
Common Mistakes to Avoid When Hiring
Hiring a concrete contractor is a big decision, and a few common missteps can lead to frustration, unexpected costs, and a finished product that doesn’t meet your expectations. Knowing what to watch out for can help you find a true professional who will bring your vision to life. By avoiding these simple mistakes, you can ensure your project runs smoothly from the initial handshake to the final walkthrough.
Skipping Credential and Reference Checks
It might feel like extra homework, but verifying a contractor’s credentials is one of the most important steps you can take. Always confirm that any contractor you consider is fully licensed to work in Long Island and carries both liability insurance and workers’ compensation. A license shows they meet local requirements, while insurance protects you from financial responsibility in case of accidents or property damage. A reputable company will have no problem providing this documentation. This simple check separates the professionals from the rest and gives you essential peace of mind before any masonry work begins.
Accepting the First Quote You Get
It’s tempting to go with the first contractor who gives you a quote, especially if you’re eager to get your project started. However, it’s always wise to get at least three detailed estimates. This isn’t just about finding the lowest price; it’s about understanding the market rate and seeing what each contractor includes in their proposal. Comparing quotes helps you spot any that are unusually high or suspiciously low. A detailed estimate should break down the costs for labor, materials, and any other fees. This process empowers you to make an informed financial decision for your project.
Not Defining the Project Scope and Timeline
A vague plan leads to vague results. Before work begins, you and your contractor need to agree on a detailed project scope and a realistic timeline. This document should outline every aspect of the job, from site preparation and material choices to the final finish and cleanup process. When you clearly define the project, you create a shared understanding of the final goal, which helps prevent misunderstandings and delays. A professional contractor will work with you to map out every detail, ensuring your new gravel driveway or patio is exactly what you envisioned.
Failing to Get Everything in Writing
A verbal agreement or a handshake is not enough when it comes to a significant home improvement project. A comprehensive, written contract is your best protection. This legally binding document should include the detailed project scope, a full breakdown of costs, the payment schedule, the specific materials to be used, and the projected start and completion dates. It should also outline the process for handling any changes or unexpected issues that may arise. Insisting on a thorough contract ensures that both you and the contractor are on the same page and committed to the same terms.
Red Flags to Watch For
Choosing a concrete contractor is a big decision, and you deserve to feel confident in your choice. While most professionals are honest and hardworking, knowing a few common red flags can help you avoid potential problems down the road. Think of this as your guide to spotting issues before they start, ensuring your project is handled by a true expert who values quality and transparency. A great contractor will make the process feel collaborative, not confusing.
When you’re investing in a significant home improvement, like a new patio or driveway, you want a partner you can trust. Paying attention to how a contractor communicates, presents their pricing, and showcases their past work will tell you a lot about what you can expect. If something feels off, it probably is. Trust your instincts and look for a company that provides clear answers and has a solid reputation for excellent masonry and concrete work right here on Long Island.
Unusually Low Bids or Pressure Tactics
If a bid seems too good to be true, it often is. An unusually low price can be a major red flag, signaling that the contractor might be cutting corners with cheap materials, using inexperienced labor, or planning to add surprise fees later. A professional contractor can justify their pricing with high-quality materials and expert craftsmanship. Don’t be swayed by a bargain that could cost you more in repairs later.
Equally concerning are high-pressure sales tactics. A reputable contractor will give you a detailed estimate and the space to make an informed decision. If you feel rushed or pressured to sign a contract on the spot, take a step back. A confident professional knows their work speaks for itself and won’t need to force a sale.
No Written Contract or Clear Timeline
A verbal agreement is simply not enough for a construction project. A professional contractor will always provide a detailed, written contract before any work begins. This document is your protection, and it should clearly outline the full scope of the project, the specific materials being used, the total cost, a payment schedule, and an estimated timeline for completion.
Without a contract, you have no recourse if the work isn’t completed as promised or if the final bill is much higher than the initial quote. A missing contract suggests a lack of professionalism and accountability. For any major project, from a simple walkway to a full home remodeling job, a clear contract is non-negotiable.
A Lack of Local References or a Portfolio
Past performance is the best indicator of future results. A trustworthy contractor will be proud to show you their work and connect you with satisfied clients. Ask for a portfolio with high-quality photos or videos of completed projects. Even better, ask for local references in Nassau or Suffolk County that you can contact or drive by to see the work for yourself.
If a contractor is hesitant to provide a portfolio or can’t offer any local references, consider it a serious warning sign. It could mean they are new to the business, have a poor track record, or aren’t actually based on Long Island. A strong portfolio, like a detailed YouTube channel, shows a history of quality and a commitment to their craft.
Using Undisclosed Subcontractors
When you hire a company, you’re hiring them for their specific expertise and reputation. Be wary of contractors who plan to use undisclosed subcontractors for key parts of the job. You have no way of vetting these third-party workers, and it can lead to major issues with quality control and accountability. If something goes wrong, it can become a frustrating blame game between the contractor and their subcontractor.
Always ask who will be performing the work on your property. A reliable company will have its own trained teams for critical tasks, ensuring consistency and quality from start to finish. This is especially important for specialized projects like installing swimming pools or intricate stonework, where in-house expertise makes all the difference.
How to Find a Reliable Concrete Contractor on Long Island
Finding the right contractor for your concrete project can feel like a big task, but with a little research, you can find a reliable partner to bring your vision to life. The key is to know where to look and what to ask. By combining online searches with local recommendations and careful vetting, you can confidently choose a professional who will deliver quality results for your Long Island home.
Using Online Search and Review Sites
Your search for a great contractor often starts online. Use specific search terms like “concrete driveway contractor in Suffolk County” or “stamped concrete patio Nassau County” to find local experts. As you browse websites, look for companies that clearly outline their experience and commitment to service. A good online presence often includes a professional website, a gallery of past work, and detailed service descriptions. You can also find contractors who showcase their craftsmanship on platforms like YouTube, giving you a better feel for their process and the quality of their finished projects. Review sites like Google, Yelp, and Houzz are also valuable resources for gathering initial impressions and creating a shortlist of potential candidates.
Asking Your Local Community
Don’t underestimate the power of a good old-fashioned recommendation. Talk to friends, family, and neighbors who have recently had concrete work done. Local community Facebook groups can also be a great place to ask for suggestions. You might discover a trusted, family-run business that has built a strong reputation in your area through years of reliable service and skilled craftsmanship. Getting a referral from someone you trust often means you can see the contractor’s work firsthand and hear about their experience from start to finish. This kind of local insight is invaluable for finding a reputable masonry professional who understands the specific needs of Long Island properties.
How to Analyze Customer Reviews
When you look at customer reviews, go beyond the star rating. Read through the comments to find patterns and specific details. A review that says a contractor was “precise, honest, and hardworking” tells you much more than a generic “they did a good job.” Look for feedback that describes the entire customer journey, from the initial phone call to the final cleanup. Pay attention to how the contractor communicated, if they stuck to the timeline, and how they handled any unexpected issues. A few negative reviews aren’t always a dealbreaker, especially if the contractor responded professionally, but consistent complaints about communication or quality are a clear red flag.
Questions to Ask Before You Hire
Once you have a shortlist, it’s time to start making calls. Being prepared with the right questions will help you compare contractors and make an informed decision. Start by asking for proof of licensing and insurance. Inquire about their experience with projects similar to yours and ask to see a portfolio. A great contractor will offer a free, no-pressure estimate and be transparent about their pricing. You should also ask about their project timeline, payment schedule, and what kind of materials they plan to use. Finally, ask who will be on-site managing the project and if they use subcontractors. Getting clear answers to these questions will help you build trust and set expectations from the very beginning.
Why Choose Gappsi for Your Long Island Concrete Project?
Choosing a contractor for your concrete project is a big decision, and local expertise is essential. For over 30 years, Gappsi has been a trusted partner for homeowners across Long Island. We understand the specific soil conditions, weather patterns, and building codes in Nassau and Suffolk counties. This deep local knowledge means your project isn’t just beautiful, it’s built to last, avoiding common issues that can arise from a lack of regional experience. Our team is dedicated to creating durable and stunning concrete surfaces that stand the test of time.
Our expertise goes beyond just concrete. We are complete outdoor living designers, which means we see your concrete patio, walkway, or driveway as part of a larger vision for your home. Whether you’re dreaming of a simple, elegant surface or an intricate stamped concrete design that complements a new swimming pool or outdoor kitchen, our team handles it all. This integrated approach ensures a seamless process and a cohesive final look, saving you the stress of coordinating multiple contractors.
At the heart of every project is a commitment to quality craftsmanship and your complete satisfaction. We use only high-grade materials and proven techniques to deliver stunning, durable results. Our team works closely with you from the initial design to the final walkthrough, ensuring your vision is brought to life perfectly. We believe our portfolio of masonry and concrete work speaks for itself, showcasing the care and precision we bring to every Long Island home.
Related Articles
- The Ultimate Guide to Outdoor Living Contractors in LI
- Paving Stone & Pool Patio Contractor East Northport NY | Gappsi Inc
- Borders Design & Driveway Paving Services Long Island | Gappsi Inc
- Award-Winning Paving & Pool Patio Projects in East Northport | Gappsi Inc
- Art-Inspired Outdoor Living & Pool Design Services | Gappsi Inc
Frequently Asked Questions
How long should my new concrete patio or driveway last? A professionally installed concrete surface on Long Island should last for decades, often 30 years or more. The key is proper installation that accounts for our freeze-thaw cycles, using the right concrete mix, and ensuring correct grading for drainage. Regular maintenance, like cleaning and sealing it every few years, will protect it from stains and weather, keeping it looking great for a long time.
I like the idea of stamped concrete, but does it look fake or feel slippery? This is a great question. Modern stamped concrete is incredibly realistic and can convincingly mimic materials like natural slate, cobblestone, or even wood planks. A skilled contractor uses high-quality stamps and coloring techniques to create authentic texture and depth. As for slipperiness, a non-slip additive can be mixed into the sealer to provide extra grip, making it a safe and beautiful choice for pool decks and walkways.
How long does a typical concrete project take from start to finish? The timeline really depends on the project’s size and complexity. A simple, small patio might only take a few days for preparation, pouring, and finishing. A larger, more intricate project like a stamped concrete driveway could take a week or more. Weather is also a factor, as concrete needs specific conditions to cure properly. Your contractor should give you a clear, estimated timeline in your contract before any work begins.
Do I need to hire a separate mason if I want a fire pit or seating wall built on my new patio? Not necessarily. Many experienced concrete contractors are also skilled masons who can handle the entire project. Hiring one company that can pour the concrete patio and then build integrated features like a fire pit, outdoor kitchen base, or seating walls is a huge advantage. It ensures a cohesive design and saves you the headache of coordinating different work crews and schedules.
When I get a price per square foot, what does that usually include? The price per square foot typically covers the cost of the concrete itself, the labor for installation, and the standard finishing. However, it’s important to clarify what else is included. Things like extensive site preparation, demolition of an old surface, complex grading, special colorants, or decorative stamping are often additional costs. A professional estimate will break down all these expenses clearly so you know exactly what you are paying for.