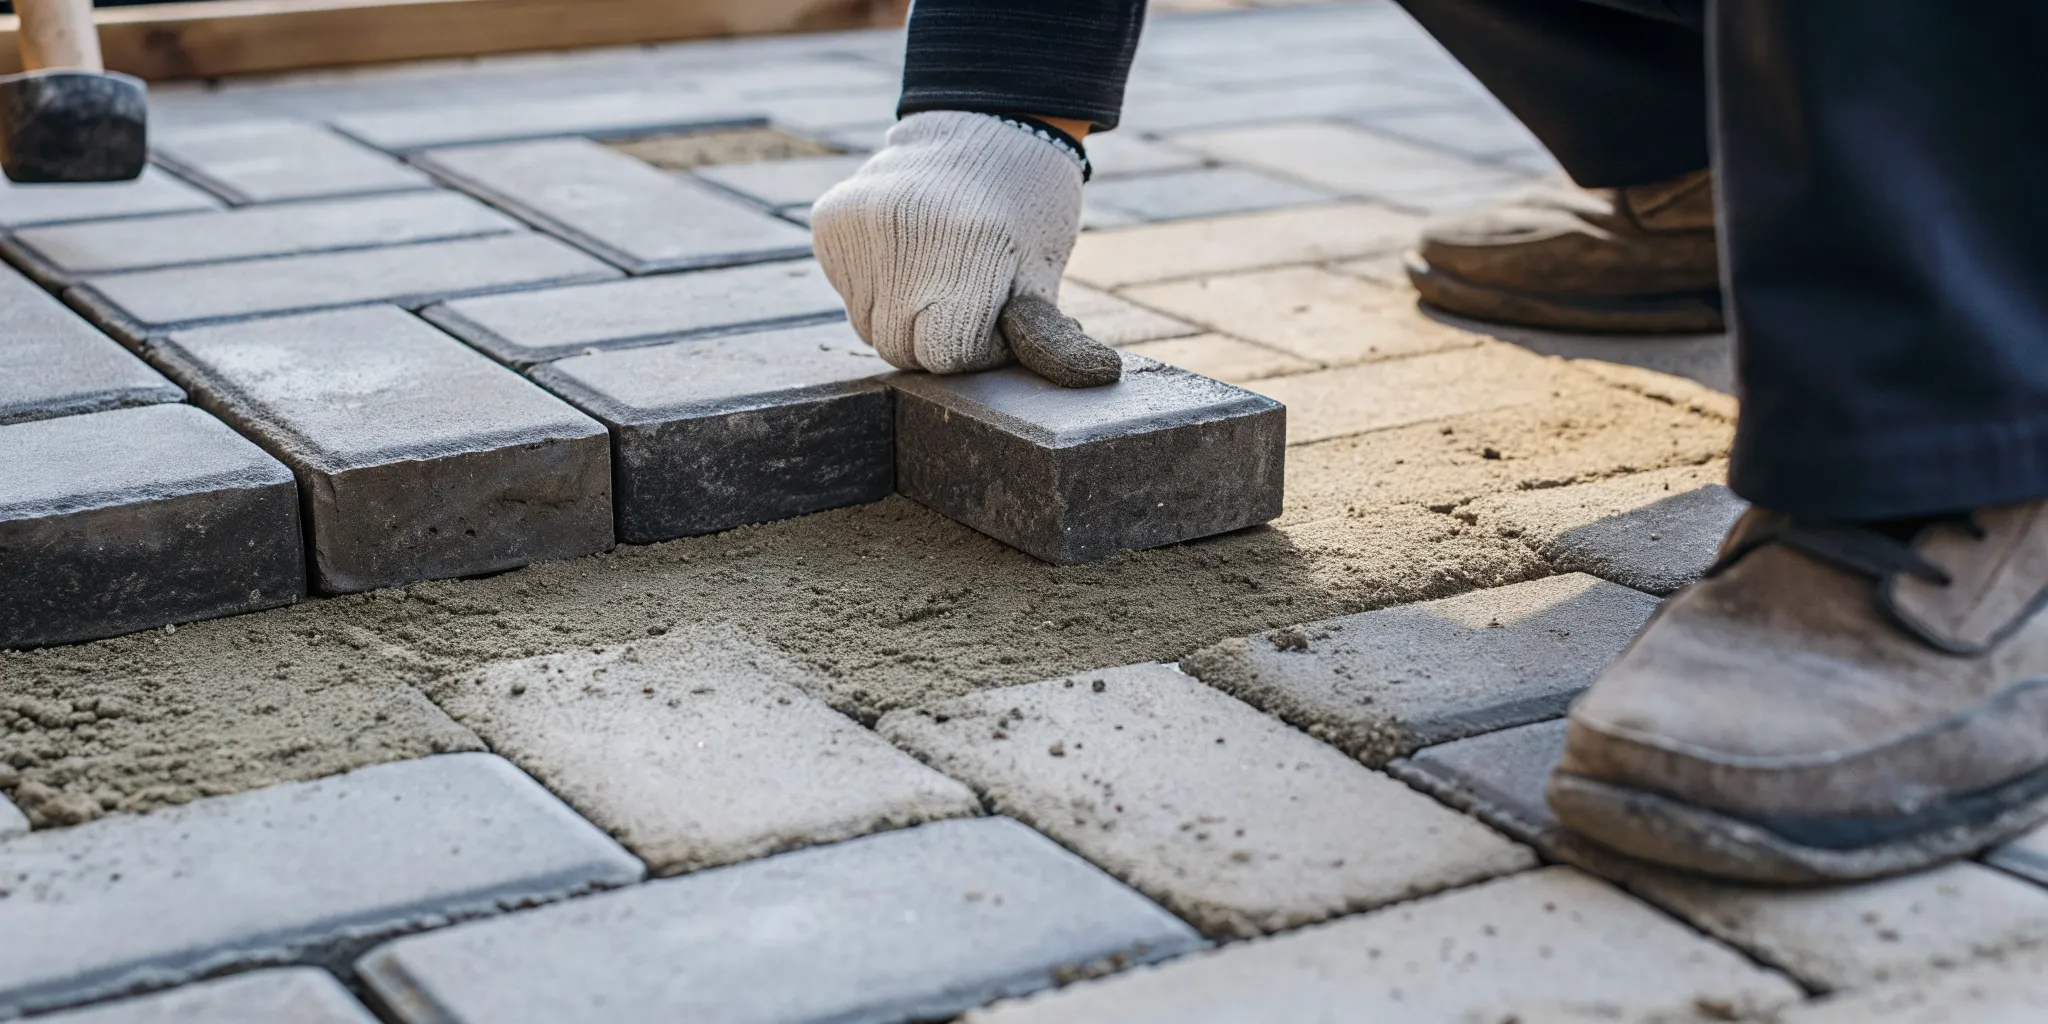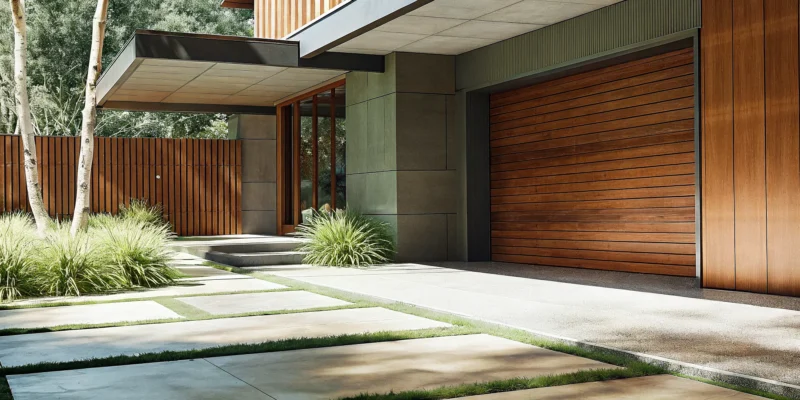
Elegant stone retaining wall ideas for a sloped driveway with integrated landscaping.

8 Elegant Retaining Wall Ideas for Your Driveway

A retaining wall doesn’t have to be a boring, functional structure. Think of it as a canvas for creativity at the entrance of your home. That slope next to your driveway is an opportunity to build something truly special, like terraced garden beds overflowing with flowers, a curved wall with integrated lighting for nighttime drama, or even a structure with built-in seating. By combining function with thoughtful design, you can turn a simple necessity into a stunning focal point. We’ve gathered our favorite retaining wall ideas for driveway projects to show you how to add personality, style, and unique character to your landscape.

Key Takeaways

  • It’s more than a pretty wall: A retaining wall is a structural workhorse, preventing soil erosion and managing water to protect your driveway’s foundation while also reclaiming sloped, unusable yard space.
  • Match the wall to your home’s style: Your choice of material, from natural stone to modern concrete blocks, should complement your home’s architecture, and you can customize the look with features like built-in lighting, curves, or integrated planters.
  • Build it right or not at all: A lasting retaining wall requires a solid, compacted foundation and a well-planned drainage system to prevent failure, so for any wall over a few feet high, hiring a professional is the best way to protect your investment.

Why Add a Retaining Wall to Your Driveway?

A retaining wall might seem like a purely functional feature, but it’s one of the most transformative additions you can make to your property. It’s a perfect example of how smart design can solve practical problems while creating a beautiful, polished look for your home’s entrance. Whether your driveway is on a steep hill or just has a gentle slope, a retaining wall offers structural, spatial, and aesthetic benefits that make a huge difference.

Prevent Erosion and Manage Water

If your property has any kind of slope, you’ve probably dealt with soil erosion. Heavy rain can wash away valuable topsoil, create ruts along your driveway, and expose plant roots. A professionally installed retaining wall acts as a powerful barrier, holding soil in place and protecting your landscape. This is especially important for protecting the foundation of your driveway itself. By controlling the landscape, you also manage water runoff, directing it away from areas where it could cause damage. This simple addition provides long term stability for your entire front yard.

Add Structural Support and Gain Usable Space

That tricky slope next to your driveway doesn’t have to be wasted space. A retaining wall can turn an unusable incline into a series of flat, functional tiers. This is your chance to get creative and reclaim parts of your yard you thought were lost. Imagine adding a terraced garden filled with flowers, a small, level patch of grass, or even a stone-lined landing for your recycling bins. By creating structure, you gain valuable real estate for landscape design and make your property feel more expansive and thoughtfully planned.

Enhance Curb Appeal and Property Value

A retaining wall is a major upgrade to your home’s curb appeal. It creates a clean, defined edge for your driveway, giving your entrance a grand and intentional feel. When built with high quality materials like natural stone or elegant concrete blocks, it becomes a stunning architectural feature that complements your home. This kind of permanent, beautiful improvement isn’t just for you to enjoy; it also adds real, measurable value to your property. A well-designed landscape with structural integrity is a huge selling point that makes your home stand out.

Choosing the Best Material for Your Retaining Wall

Selecting the right material for your retaining wall is a big decision. It affects not just the wall’s appearance but also its durability, maintenance needs, and overall cost. Your choice should complement your home’s architecture and the surrounding landscape while also meeting the structural demands of the project. From the timeless elegance of natural stone to the modern look of gabion walls, each material offers a unique set of benefits. Let’s walk through some of the most popular options to help you find the perfect fit for your Long Island home.

Natural Stone for Timeless Durability

If you’re looking for a retaining wall that is both beautiful and incredibly strong, natural stone is an unbeatable choice. Its classic appearance blends perfectly with any landscape, creating an organic and high-end feel that instantly improves curb appeal. Because each stone is unique, your wall will have a one-of-a-kind character. Gappsi offers a wide selection of natural stone that is built to last, easily withstanding harsh weather for decades. While it can be a bigger initial investment, the longevity and timeless beauty of a natural stone wall make it a valuable addition to any property.

Concrete Blocks for Versatility and Value

Concrete blocks are a go-to material for a reason. They offer incredible versatility and are a cost-effective solution for creating strong, reliable retaining walls. These blocks come in a huge variety of shapes, sizes, colors, and textures, allowing you to mimic the look of more expensive materials like stone or brick. This flexibility means you can easily design a wall that matches your home’s specific style. Concrete blocks are engineered for consistency and are relatively easy to install, which can help manage project timelines and budgets. Their durability ensures your wall will remain a functional and attractive feature for years to come.

Brick for Classic, Low-Maintenance Charm

For a traditional and elegant look, brick is a fantastic option. A brick retaining wall adds a sense of history and classic charm that complements many architectural styles, from colonial to contemporary. Bricks are known for their uniform shape and color, which creates a clean, polished finish. Beyond their good looks, bricks are also extremely durable and require very little maintenance over their long lifespan. Well-built brick masonry projects can stand for generations, making them a dependable and beautiful choice for defining your driveway and landscape.

Timber for a Natural Look on a Budget

Timber retaining walls are an excellent choice if you love a rustic, natural aesthetic and are working with a specific budget. Wood, such as railroad ties or treated lumber, can create a warm and inviting look that integrates beautifully with garden beds and wooded areas. It’s a particularly good fit for shorter, terraced walls along a sloped landscape. While timber is more affordable than stone or brick, it’s important to use properly treated wood to prevent rot and insect damage. With the right installation and materials, a timber wall can be a charming and cost-effective solution for your property.

Gabion Walls for Modern Style and Great Drainage

For a modern and unique look, consider a gabion wall. These are essentially wire cages or baskets filled with rocks, stones, or even recycled concrete. Gabion walls provide an industrial-chic aesthetic that makes a bold statement in any landscape. One of their biggest functional advantages is excellent drainage, as water can easily pass through the gaps between the stones, preventing hydrostatic pressure from building up. Gabion systems are also surprisingly affordable and can be a fun project if you’re inclined to DIY. They offer a creative way to add texture and structure to your outdoor space.

8 Retaining Wall Ideas for Your Driveway

Once you have a vision for your retaining wall, it’s time for the fun part: design. A retaining wall doesn’t have to be a simple, functional structure. It can be a beautiful focal point that defines your home’s entrance. These ideas can help you imagine what’s possible for your own driveway.

1. Create Tiers on a Sloped Driveway

If your driveway has a significant slope, a single tall wall can feel imposing. A better approach is to create a series of shorter, tiered walls. This design breaks up the slope into manageable levels, creating a beautiful terraced effect. Each tier provides a perfect pocket for planting flowers, shrubs, or groundcover, adding layers of color and texture to your front yard. This method is not only visually appealing but also excellent for soil retention and managing water runoff. It turns a challenging incline into a stunning landscape design feature that guides the eye upward toward your home.

2. Add Curves and Contours

Straight lines can feel rigid and formal. For a softer, more natural look, consider designing a retaining wall with gentle curves and contours. A curved wall can create a graceful, flowing line that complements the organic shapes in your garden and softens the hard edges of the driveway pavement. This approach makes the entrance to your home feel more welcoming and dynamic. Our expert masonry designers can help you plan a layout that flows beautifully with your property’s unique landscape, creating a custom look that feels both intentional and effortlessly elegant.

3. Integrate Lighting for Safety and Style

Don’t let your beautiful retaining wall disappear after sunset. Integrating low-voltage lighting is a brilliant way to add drama and style while also improving safety. Lights can be installed under the capstones to cast a warm, downward glow that highlights the wall’s texture. You can also place them strategically to illuminate steps or the edge of the driveway. This not only prevents trips and falls but also creates a sophisticated ambiance. Well-placed lighting transforms your driveway into a welcoming beacon at night, showing off your home’s best features and adding a layer of security.

4. Design a Living, Planted Wall

Turn your retaining wall into a vertical garden by designing it as a living wall. This involves creating pockets or crevices within the wall structure that can be filled with soil and plants. It’s a fantastic way to introduce more greenery, especially if you have limited garden space. Choose cascading plants that will spill over the edges, or use a mix of succulents and ornamental grasses for a modern, low-maintenance look. A living wall softens the structure’s appearance, helps it blend into the landscape, and creates a unique, eco-friendly statement right at your curb.

5. Use a Porcelain or Stone Face

For a look of timeless elegance and unmatched durability, nothing compares to a wall built from or faced with natural stone. Whether you prefer the rustic charm of fieldstone or the clean lines of cut limestone, a stone wall adds texture, character, and significant curb appeal. An equally stunning and modern alternative is using large-format porcelain veneers. These can mimic the look of natural stone, wood, or concrete but offer incredible resistance to stains and weather. Using high-quality porcelain and natural stone ensures your retaining wall is not just a functional element but a lasting piece of art.

6. Build in Steps and Seating

Make your retaining wall do double duty by incorporating functional elements like steps and seating. If your wall navigates a change in elevation between the driveway and your yard or walkway, building wide, inviting steps into the design is a natural fit. You can also extend the wall’s capstone to create a built-in bench, a perfect spot to rest or set down groceries. This clever design trick adds immense value and utility to your outdoor space without taking up extra room. It’s a smart way to merge hardscaping with everyday living, creating a more interactive and useful landscape.

7. Combine Gabion Wire with Natural Stone

For a modern and textural look, consider a gabion wall. These are wire cages filled with rocks, stones, or even recycled concrete. Gabion walls offer a unique industrial-chic aesthetic that pairs surprisingly well with both modern and rustic homes. They are also highly effective for drainage, as water can easily pass through the fill material. You can customize the look by choosing specific types and colors of stone for the filling. Gappsi offers Gabion systems that provide a durable and stylish solution, creating a retaining wall that is both an engineering feature and a sculptural statement.

8. Top Your Wall with a Fence

If you need extra privacy or safety along your driveway, adding a fence on top of your retaining wall is an excellent solution. This combination creates a clear and secure boundary for your property. The style of the fence can dramatically change the overall look. A classic white picket fence adds a touch of traditional charm, while a sleek aluminum or composite fence offers a more modern feel. This layered approach adds height and visual interest, and it’s a practical way to keep kids and pets safely in the yard. Gappsi provides a variety of fencing options that can be perfectly integrated with your retaining wall design.

How to Build a Retaining Wall Correctly

Building a retaining wall is a significant undertaking that requires precision and an understanding of physics. A properly constructed wall can last for decades, but one that’s built incorrectly can fail quickly, leading to costly repairs. Whether you’re planning a DIY project or want to understand what goes into a professional installation, following these steps is key to creating a structure that is both beautiful and secure. For a project of this scale, working with experienced masonry professionals ensures every detail is handled correctly from the ground up.

Step 1: Review Local Codes and Property Lines

Before you even think about digging, you need to do some homework. First, confirm your property lines to ensure your wall is built entirely on your land. Next, contact your local building department in Nassau or Suffolk County. They will provide crucial information on regulations for wall height, required setbacks from property lines, and necessary permits. Ignoring these rules can lead to fines or even an order to tear down your completed wall, so this step is non-negotiable. It’s all about starting your project on the right foot and avoiding headaches later.

Step 2: Prepare the Base

The strength and longevity of your retaining wall depend entirely on its foundation. Start by digging a trench for the base. A good rule of thumb is to bury at least 10% of the wall’s total height, which means the first course of blocks will be completely underground. After digging the trench, you’ll need to add and compact a base layer of crushed stone. Using a hand tamper isn’t enough for this job; you need a plate compactor to create a solid, level foundation that won’t shift over time. A weak base is the number one cause of a failing wall.

Step 3: Lay the First Course

With your base perfectly compacted and level, it’s time to lay the first layer, or course, of blocks. This is the most critical step in the entire building process. Take your time to ensure every block is perfectly level, both front-to-back and side-to-side. Use a rubber mallet to make small adjustments. If this first course isn’t solid and perfectly aligned, every subsequent layer will be off, compromising the structural integrity of the entire wall. A little extra patience here will pay off for years to come.

Step 4: Install Drainage and Backfill

Water is the biggest enemy of a retaining wall. Without proper drainage, hydrostatic pressure can build up behind the wall and cause it to bulge or collapse. To prevent this, place a perforated drain pipe behind the first course, making sure it has an outlet to drain water away. Then, backfill the space behind the wall with at least a foot of ¾-inch clean gravel. As you add more courses, continue backfilling with soil in 6 to 8-inch layers, compacting each layer as you go. You can see examples of this detailed work on our Gappsi YouTube channel.

Step 5: Add Finishing Touches

Once all your courses are stacked and the area is backfilled, you can add the finishing touches. The final step is typically to secure the top row of capstones with a strong construction adhesive. These caps give the wall a clean, finished look and help hold the underlying blocks together. If your wall has curves, you will need to carefully cut the capstones to fit the arc. This final detail is what separates a good wall from a great one, often using beautiful natural stone or porcelain to complement your home’s aesthetic.

Common Mistakes That Ruin Retaining Walls

A retaining wall is a serious structural project, and even small mistakes during construction can lead to big problems like bulging, cracking, or total failure. Building a wall that lasts means avoiding some common pitfalls that can compromise its strength and appearance. From managing water to using the right materials, getting the details right from the start is the key to a wall that stands strong for years. Here are the five most common mistakes we see and how to avoid them.

Poor Drainage

Water is the number one enemy of a retaining wall. When soil becomes saturated, it gets heavy and exerts immense hydrostatic pressure on the wall. Without a way for that water to escape, the pressure will eventually cause the wall to lean, bulge, or collapse. A professional installation always includes a drainage system. This involves placing a perforated drain pipe, often called a weeping tile, at the base of the wall and backfilling with clean, crushed gravel. This combination gives water an easy path to drain away, relieving the pressure and keeping your wall stable through every Long Island storm. Proper masonry techniques are essential for ensuring this system works correctly.

Using the Wrong Materials

Choosing the right materials is about more than just looks; it’s about structural integrity. A common error is using lightweight garden blocks for a driveway retaining wall. These blocks simply aren’t designed to handle the heavy surcharge pressure from vehicles. For a driveway, you need commercial-grade, heavy-duty blocks or a reinforced design that can withstand constant loads. Whether you’re using concrete, brick, or natural stone, the materials must be rated for retaining wall construction. Using the wrong blocks is a recipe for failure, so it’s important to select materials that are as strong as they are beautiful.

Ignoring Building Codes and Weight Limits

Many homeowners don’t realize that retaining walls, especially those over a certain height, are subject to local building codes and regulations. These rules exist for safety and ensure the wall is built to last. Before starting any project, it’s crucial to contact your town’s building department to learn about requirements for wall height, setbacks from property lines, drainage, and even appearance. A professional team will handle all the necessary permits and ensure your project complies with all local ordinances. This step protects your investment and prevents potential legal headaches or the need for a costly tear-down and rebuild.

A Weak Foundation

A retaining wall is only as strong as the ground it sits on. Building directly on topsoil is a critical mistake, as the loose dirt will shift and settle, causing the wall to become unstable. A proper foundation starts with excavating a trench that gets past the topsoil and down to solid, undisturbed subsoil. This trench is then filled with a layer of compacted crushed stone to create a solid, level base. The first course, or row, of blocks should be partially buried below grade to anchor the entire structure. This solid footing prevents shifting and ensures your wall has the support it needs to do its job.

Forgetting Reinforcement

For taller walls or those supporting the weight of a driveway, simple stacking isn’t enough. These walls require reinforcement to safely handle the immense pressure from the soil and any vehicles. This is typically done by installing layers of a synthetic material called geogrid. The geogrid mesh is laid between courses of blocks and extends back into the soil, effectively tying the wall to the earth behind it. This creates a stronger, more cohesive structure that can resist the forces pushing against it. Forgetting this step on a tall or load-bearing wall is a major safety risk and almost guarantees future failure.

How to Choose the Right Retaining Wall

Selecting the perfect retaining wall involves more than just picking out pretty stones. It’s about finding a solution that fits your property’s needs, your home’s aesthetic, and your budget. A well-chosen wall can solve practical problems like soil erosion while adding significant value and beauty to your home. Thinking through a few key factors before you start will help you make a choice you’ll be happy with for years to come. It’s a balance of function, style, and smart planning. By considering your landscape, the look you want to achieve, and when to ask for help, you can ensure your new retaining wall is a successful and lasting addition to your driveway and home.

Consider Your Property and Budget

Before you get lost in design ideas, take a practical look at your property and your budget. A driveway retaining wall is a fantastic investment that improves your home’s appearance and provides essential support, but costs can vary widely. The size of the wall, the materials you choose, and the complexity of the installation will all influence the final price. It’s also incredibly important to know exactly where your property lines are to avoid any issues with neighbors. A simple survey can save you from major headaches down the road. Thinking about these details first helps you set a realistic foundation for your project and ensures the landscape design process goes smoothly from the start.

Match the Wall to Your Home’s Style

Your retaining wall should feel like a natural part of your home, not a random addition. The right material can tie your entire landscape together with your home’s architecture. Think about the style you’re aiming for. Do you want a timeless, rustic look? Natural stone might be the perfect fit. For something more modern and versatile, concrete blocks offer a clean and consistent appearance. You can also use a wall as a beautiful backdrop for a garden, turning a functional structure into a stunning design feature. The goal is to select porcelain and natural stone pavers or other materials that complement your home’s existing character, creating a cohesive and polished look for your property.

Know When to Call a Professional

While some smaller, decorative walls can be a weekend DIY project, most retaining walls require professional expertise. If your wall needs to be over three feet high or will be holding back a significant amount of soil, it’s time to call in an expert. A professional will ensure the wall has a proper foundation, adequate drainage, and the right reinforcement to stand strong for decades. They also handle the complexities of local building codes and permits. Hiring a professional masonry construction company gives you peace of mind, knowing your investment is built safely and correctly, protecting your property and preventing costly failures in the future.

Related Articles

Frequently Asked Questions

Do I really need a permit to build a retaining wall? This is a great question, and the answer depends on your specific project and location. In many towns across Long Island, a permit is required for walls over a certain height, typically around three or four feet. Because your wall will support a driveway, it’s almost always best to check with your local building department. They can give you the exact rules for your area, which helps you avoid any fines or future problems.

What is the single biggest cause of retaining wall failure? The number one reason retaining walls fail is improper water drainage. When rain soaks the soil behind a wall, it creates immense pressure that can push the wall outward, causing it to bulge or even collapse. A professionally built wall always includes a drainage system, like a perforated pipe and a layer of gravel, to give that water a safe path to escape and relieve the pressure.

How do I know which material is right for my home’s style? Think of the retaining wall as an extension of your home’s architecture. If you have a classic or rustic home, the unique character of natural stone is a perfect match. For a more traditional or colonial style, the clean lines of brick create a timeless look. If you want maximum versatility to match a specific color or texture, concrete blocks offer endless options that can complement nearly any home design.

Can I build a retaining wall myself, or should I hire a professional? For a small, decorative garden wall that’s only a foot or two high, a DIY approach can be a fun weekend project. However, any wall that needs to hold back a significant slope or support the weight of a driveway should be handled by a professional. These projects require precise engineering, a proper foundation, and reinforcement to ensure they are safe and will last for decades.

How can I make my retaining wall more than just a plain wall? A retaining wall is a perfect opportunity to add both style and function. You can integrate low-voltage lighting under the capstones to create a beautiful glow and improve safety at night. If the wall connects different levels of your yard, building in wide, inviting steps is a great idea. You can even extend the top capstone to create a built-in bench for extra seating.
Share this page:
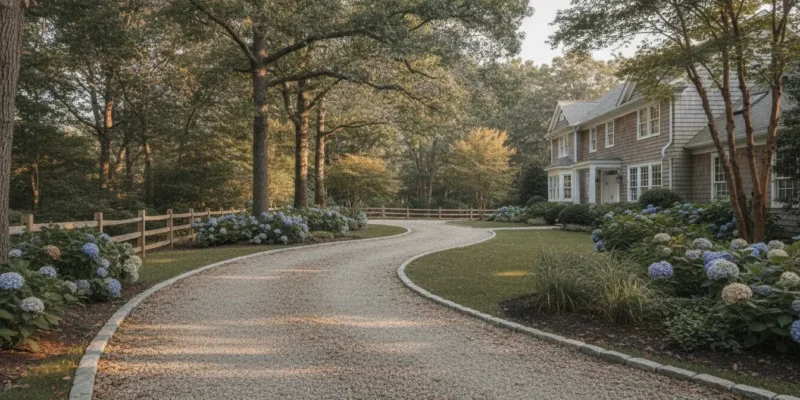
Curved gravel driveway with stone edging at a Long Island home

Gravel Driveway Pros and Cons for Long Island Homes

Choosing a driveway material is not only an appearance decision. The right surface must handle vehicle traffic, heavy rain, freeze-thaw cycles, snow removal, and the way your property drains. These gravel driveway pros and cons can help Long Island homeowners decide whether loose stone is a practical fit, or whether a more structured surface makes better sense.

Contact Gappsi through our contact page

What Are the Main Gravel Driveway Pros and Cons?

In brief: Gravel is often a flexible, permeable, and visually natural driveway material that can suit long drives and properties where stormwater movement matters. Its tradeoffs are recurring raking, stone migration, weeds, dust, and more difficult snow removal. Performance depends on the aggregate, base, slope, edging, drainage, and maintenance plan.

Potential advantage. Potential drawback. What changes the outcome.
Permeable surface. Can wash or rut. Grading, base preparation, and runoff control.
Natural color and texture. Loose stone can track. Angular aggregate, edging, and driveway layout.
Flexible to ground movement. Needs periodic top-dressing. Traffic volume, drainage, and maintenance timing.
Works well on long drives. Snow removal needs care. Plow technique, equipment, and edge restraint.

This is why a gravel driveway should be evaluated as a complete surface system, not just as a truckload of stone. A well-planned base and controlled edges can prevent many common problems. Poor grading or a shallow, unprepared base can make even attractive gravel frustrating to own.

Why Can Gravel Be a Good Choice for a Long Island Driveway?

Gravel can be a good choice when a homeowner values permeability, a natural look, flexible repairs, and a surface that works across a long or irregular driveway. It can also be useful where tree roots, changing grades, or stormwater patterns make a rigid surface less practical. The material still needs proper site preparation.

  • Drainage potential: Open spaces between stones allow water to move through the surface instead of shedding all runoff to one edge.
  • Flexible appearance: Gravel can complement wooded properties, traditional homes, and informal landscapes with several aggregate colors and textures.
  • Spot repair: A damaged area can often be graded and replenished without replacing the entire surface.
  • Adaptability: Loose aggregate can respond to modest ground movement more easily than a rigid slab.
  • Long-driveway practicality: The material can make sense for extended approaches where a continuous hard surface would require more extensive construction.
  • Traction: Angular stone with a well-compacted base can provide useful grip for vehicles in wet conditions.

Those benefits are most meaningful when the driveway has a defined drainage path and the stone is selected for the way the property will be used. Rounded decorative gravel may look appealing but can move more readily under tires. Angular crushed stone generally interlocks better, especially when the driveway receives frequent traffic.

Homeowners considering the construction side can review Gappsi Group’s gravel driveway installation service page for a better understanding of how design, preparation, and installation fit together.

What Are the Main Disadvantages of a Gravel Driveway?

The main disadvantages are movement, maintenance, dust, weeds, and winter care. Gravel can migrate toward lawns and roads, form ruts under repeated traffic, and collect organic debris. These issues are manageable, but they require more attention than many homeowners expect when they first focus on the material’s lower-maintenance reputation.

  • Ruts and potholes: Concentrated tire paths, soft subgrade, and poor drainage can create low spots that hold water.
  • Stone migration: Tires, rain, snowmelt, and plows can move aggregate beyond the driveway edges.
  • Weed growth: Windblown soil and leaves can create enough organic material for weeds to establish over time.
  • Dust and tracking: Fine particles may be visible in dry weather, while loose stones can reach nearby walkways or garage floors.
  • Uneven walking: Loose aggregate is less comfortable for people using strollers, wheelchairs, carts, or mobility aids.
  • Snow removal challenges: A plow set too low can collect stone, damage edges, or push gravel onto landscaping.

The most important question is not whether gravel has drawbacks. Every driveway material does. The question is whether the homeowner is willing to maintain the surface and whether the site can be designed to control the predictable problems.

Contact Gappsi through our contact page

Which Type of Gravel Is Best for a Driveway?

For most driveways, angular crushed aggregate that can compact and interlock is more stable than very round, loose stone. The best selection still depends on the desired appearance, traffic, slope, drainage, and how comfortable the surface needs to be for walking. “Gravel” describes a family of materials, not one uniform product.

Angular crushed stone and quarry process

Angular particles fit together more securely than rounded particles. A blend containing smaller fines can compact into a firmer driving surface, while larger aggregate may provide drainage and visual texture. The right blend should be selected with the base and surface layers in mind, not as an isolated color choice.

Pea gravel and rounded decorative stone

Rounded stone can create a softer, more decorative appearance, but it is more likely to shift under tires and foot traffic. It may be appropriate for a lightly used lane or a landscape border, yet it is not automatically the best top layer for a frequently used driveway.

Stabilized gravel systems

Where rutting, erosion, steep grades, or heavy traffic are concerns, a grid or other restraint system can hold aggregate in place. Gappsi’s gravel driveway grid system guide explains how stabilization can support drainage and reduce movement. It is a solution to a defined site condition, not a requirement for every gravel driveway.

How Do Long Island Weather and Drainage Affect Gravel Driveways?

Long Island weather makes drainage and grading central to gravel driveway performance. Heavy rain can expose low spots, while freeze-thaw movement can loosen weak areas. Snow removal can displace aggregate at the edges. A permeable surface helps only when water has somewhere to go and the underlying layers remain stable.

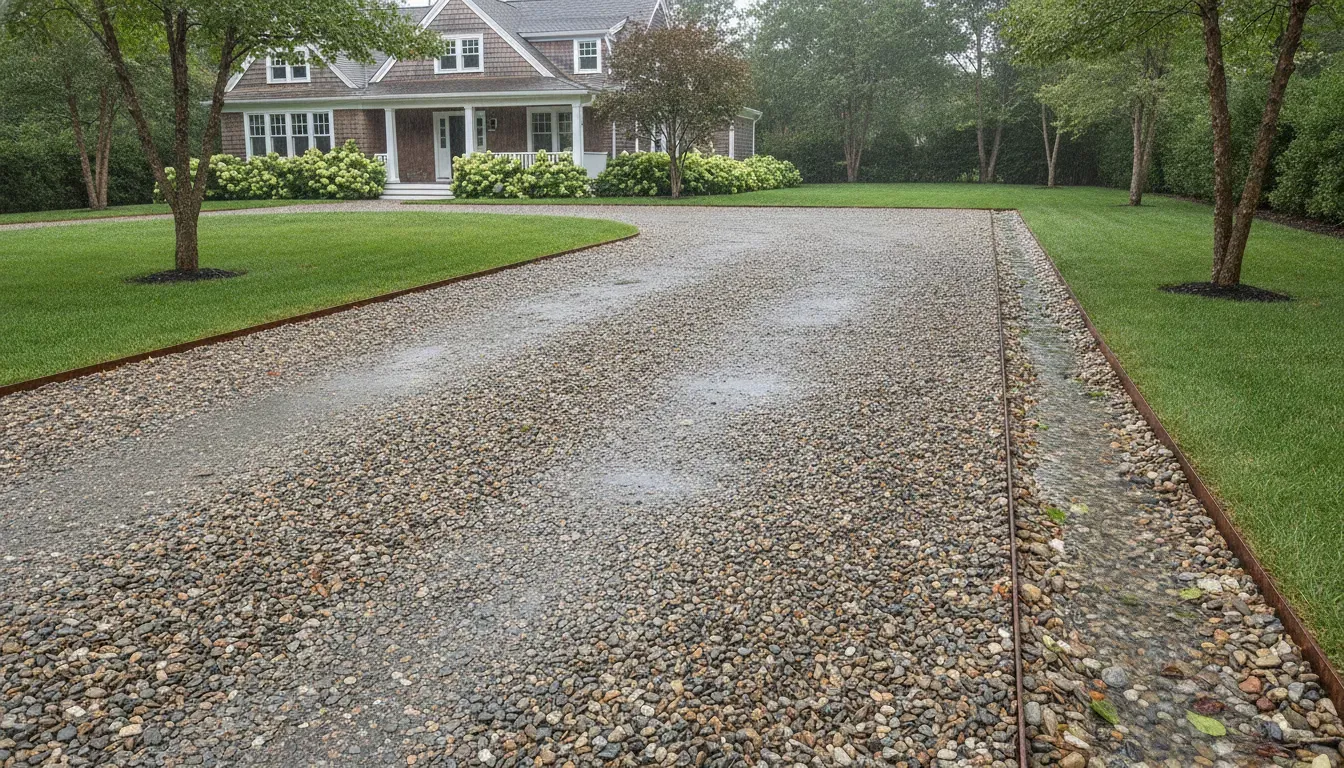
Rainwater moving across a graded gravel driveway with defined edging

Before choosing gravel, look for low points, roof runoff, uphill drainage, driveway crossings, and soil that stays wet. A driveway can be permeable and still experience washout if water is concentrated in one channel. Depending on the property, solutions may include adjusted grading, swales, drains, stabilized shoulders, or a redesigned connection to the street.

Coastal exposure and sandy or shifting soils can also change the recommendation. These conditions do not automatically rule out gravel, but they increase the importance of a compacted base, edge restraint, and a maintenance plan that addresses migration before it becomes a larger repair.

For a local example, Gappsi’s Long Island gravel driveway installation example shows why a steep, heavily used approach may need more than loose stone placed over existing ground.

When Do You Need Edging, a Grid, Gabion, or Retaining Work?

Edging is useful when the driveway borders lawn, planting beds, walkways, or a drop in grade. Grid, gabion, or retaining work becomes more relevant when the site has concentrated runoff, a steep slope, erosion risk, or a need to hold back soil. These features solve different problems and should not be treated as interchangeable decorations.

  • Edging: Defines the driving lane and helps keep surface stone from spreading into planting areas.
  • Grid restraint: Locks aggregate into cells to reduce rutting and migration on selected slopes or high-traffic areas.
  • Gabion work: Uses stone contained in wire baskets to support a bank, manage erosion, or create a durable transition at a grade change.
  • Retaining work: Holds back soil where a driveway cut or slope would otherwise move material toward the lane.

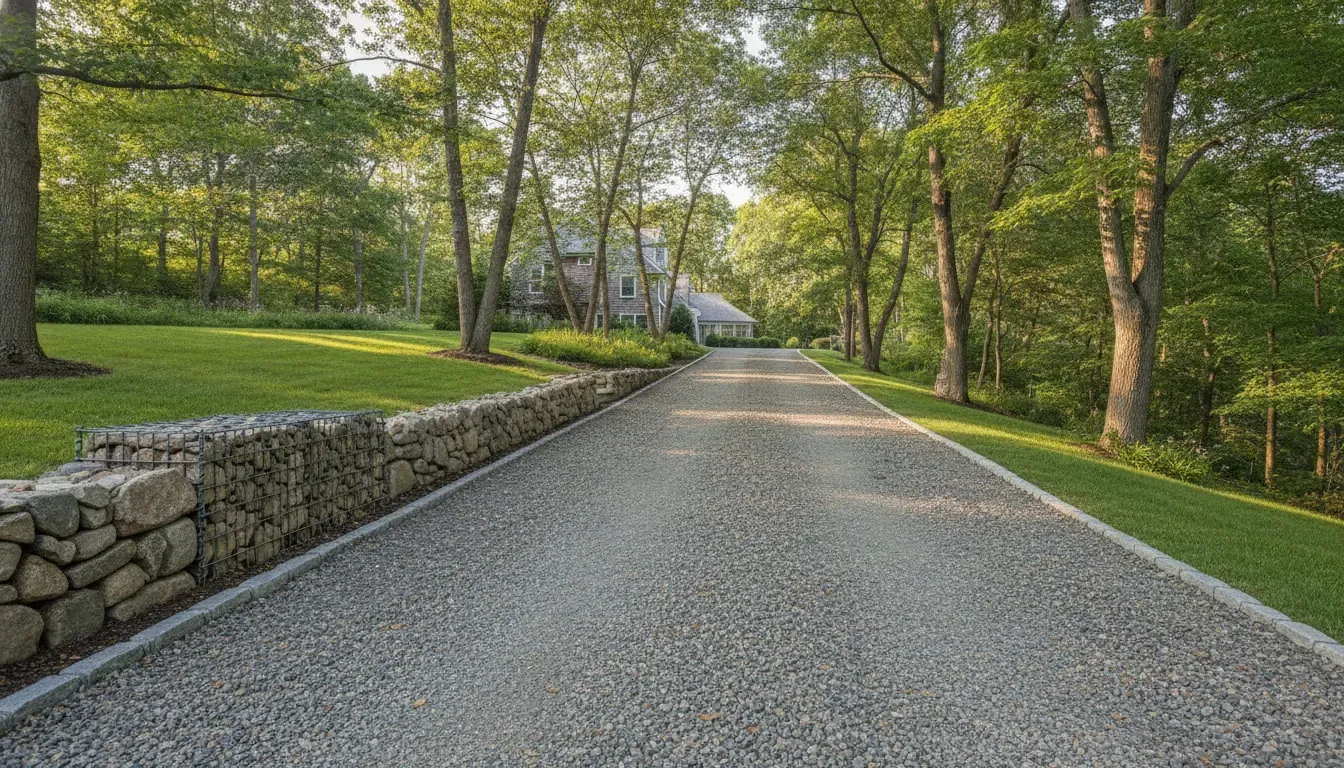
Sloped gravel driveway beside a stone retaining wall and gabion structure

A property may need only simple edging, or it may need a coordinated grading, drainage, and retaining plan. Warning signs include repeated washouts after storms, soil sliding into the driveway, water crossing the lane, exposed base material, or a slope that cannot be safely maintained with ordinary equipment.

How Much Maintenance Does a Gravel Driveway Need?

Gravel driveways need periodic inspection and surface maintenance, especially after major rain, snowmelt, and winter plowing. The exact schedule depends on traffic and site conditions. The goal is to correct small changes before they become deep ruts, broad washouts, or edge failures that require substantial regrading.

  1. Walk or drive the surface after major storms and note standing water, channels, and displaced stone.
  2. Repair potholes while they are small instead of filling only the visible depression with loose stone.
  3. Rake displaced aggregate back into the driving lane and keep shoulders clear.
  4. Remove leaves and organic debris before they decompose into a soil layer that supports weeds.
  5. Control vegetation at the edges without sending soil or mulch into the driveway.
  6. Plan periodic top-dressing or regrading when the surface becomes thin, uneven, or difficult to drain.

Snow removal deserves a separate plan. A snow blower can throw gravel, and a plow can push it into the lawn. Operators may need to raise the blade slightly, mark the edges, and leave a protective layer rather than scraping directly against the surface. If snow service is contracted, discuss the driveway material before winter begins.

Gappsi’s Gravelfix gravel driveway stabilization system article is a useful next read when recurring ruts, migration, or washout are the deciding concerns.

How Does Gravel Compare With Pavers, Asphalt, and Concrete?

Gravel generally offers a more informal appearance and a flexible, permeable surface, while pavers, asphalt, and concrete provide a firmer and more predictable driving and walking experience. The better option depends on the desired appearance, maintenance tolerance, drainage plan, traffic, snow routine, accessibility needs, and the property’s grade.

Surface. Often suits. Tradeoff to consider.
Gravel. Long drives, natural landscapes, flexible drainage goals. More movement and routine surface care.
Pavers. Defined patterns, structured curb appeal, easier individual-unit repairs. Requires a carefully built base and joint maintenance.
Asphalt. Smooth vehicle travel and familiar snow clearing. Less informal, with its own weathering and repair needs.
Concrete. Firm surface and clean edges. Rigid material can show cracking and requires deliberate drainage planning.

For readers comparing a firm surface with loose aggregate, Gappsi’s paver driveway installation guide covers a different construction approach. A separate paver driveway cost guide for Long Island can help frame the questions to ask about base preparation, access, materials, and site work without treating one project as a universal quote.

Contact Gappsi through our contact page

Frequently Asked Questions

What are the biggest advantages of a gravel driveway?

The biggest advantages are permeability, design flexibility, a natural appearance, adaptability to some ground movement, and the ability to repair or replenish sections. Gravel can be especially practical for long drives or properties where a softer landscape character matters. It still needs suitable aggregate, a prepared base, controlled runoff, and defined edges.

What are the biggest disadvantages of a gravel driveway?

The main disadvantages are ruts, potholes, stone migration, weeds, dust, uneven walking, and careful snow removal. These problems are more likely when the base is weak, water crosses the lane, the stone is too rounded, or the edges are not contained. Routine inspection and timely regrading can reduce the severity of many issues.

Is gravel good for drainage?

Gravel can support drainage because water can pass through open spaces between stones. It does not solve drainage by itself. The driveway still needs a stable base, appropriate slope, and a plan for water arriving from roofs, hillsides, or adjacent pavement. Low spots and concentrated runoff can cause pooling or washout on any surface.

What type of gravel is best for a driveway?

Angular crushed aggregate that compacts and interlocks is usually more stable for vehicle traffic than very rounded stone. The correct blend depends on the driveway layers, traffic, slope, appearance, and drainage goals. A material that looks attractive in a sample may perform poorly if it does not match the base or the property’s grade.

Can a gravel driveway handle snow removal?

Yes, but snow removal requires more care than on a smooth rigid surface. Mark the edges, avoid scraping too deeply, and use equipment settings that reduce stone displacement. Plan for replenishment near the shoulders after winter. A steep or heavily used driveway may benefit from additional edging, stabilization, or a different surface.

When should I consider a retaining wall or gabion structure?

Consider retaining or gabion work when the driveway cuts into a slope, soil is moving toward the lane, water is eroding the shoulder, or a grade change cannot be managed with surface gravel alone. The correct solution depends on soil, drainage, height, and site conditions. Have the full slope and runoff relationship evaluated before construction.

Contact Gappsi through our contact page

Share this page:

Resin Bound Stone Displays at the Gappsi Showroom on Long Island, NY

View Gappsi’s YouTube Channel to view Resin Bound Stone Displays at the Gappsi Showroom on Long Island, NY

When choosing materials for a new driveway, walkway, patio, pool surround, or outdoor living area, seeing a material in person can make all the difference. At Gappsi, we understand that homeowners want to see, touch, and experience the materials before investing in their property. That is why we recently completed a new resin-bound stone display at the Gappsi showroom in Smithtown, Long Island, NY.

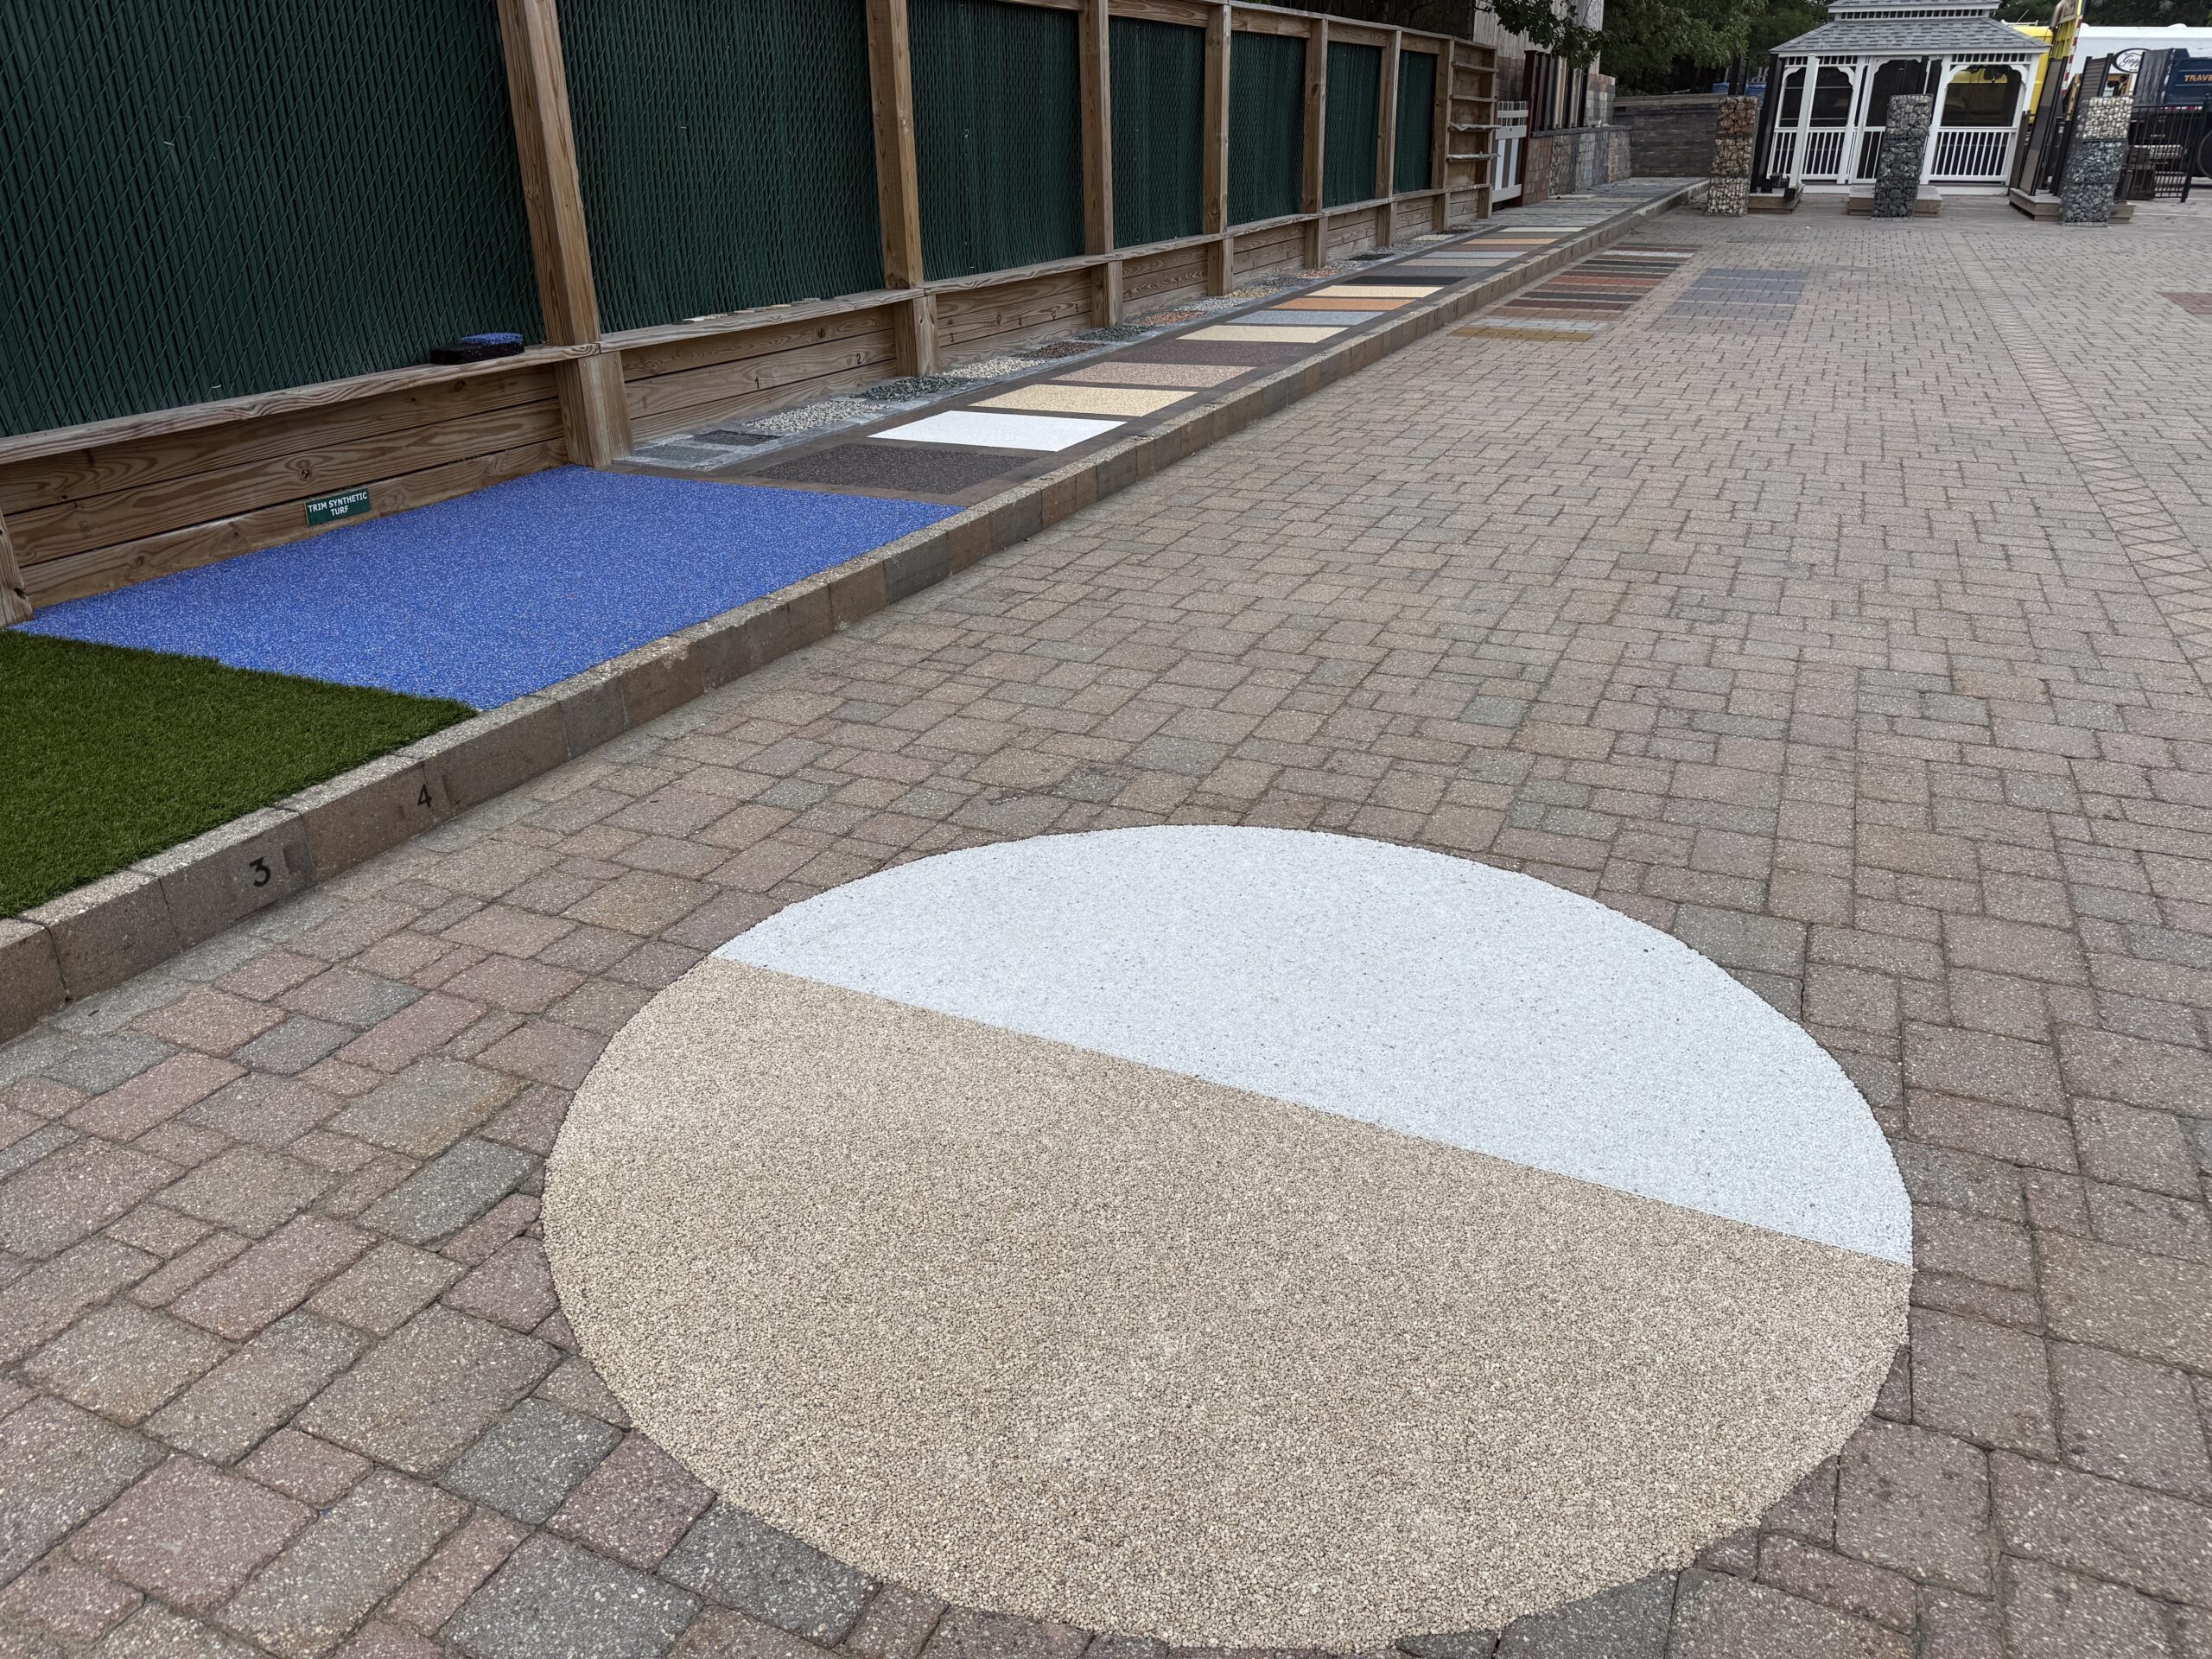
Our new showroom display gives customers the opportunity to see the many colors, stone sizes, textures, and applications available with resin-bound stone systems. With 21 different natural stone color options on display, homeowners can get a much better idea of how this unique surface can look when installed on their own property.

What Is Resin Bound Stone?

Resin-bound stone is a decorative surfacing system that combines natural aggregate stones with a specially formulated resin. The stone and resin are thoroughly mixed together before being installed, creating a durable, attractive, and relatively seamless surface.

Unlike loose stone surfaces, resin-bound aggregate is held together by the resin. This creates a stable walking and driving surface while still providing the natural appearance of stone.

At Gappsi, the resin used for our stone systems is manufactured in Italy, while we import the natural stones used for our projects. The combination allows us to offer homeowners a wide selection of colors and aggregate options for different applications.  The result is a surface that can be both functional and decorative.

Our New Resin Bound Stone Display in Smithtown

We recently completed two circular resin-bound stone displays in the parking lot at our Smithtown showroom. These displays serve an important purpose beyond simply showing customers what the material looks like.

We designed the circles so that cars and trucks can drive over them.

This gives us the opportunity to demonstrate and test the strength and durability of the resin-bound stone surface under real-world conditions. Customers visiting our showroom can see firsthand that this material is not simply a decorative surface intended for light foot traffic.

Depending on the system and application, resin bound stone can be used for a variety of residential and commercial projects.

Seeing the surface in an actual driving area allows homeowners to better understand how the material performs when subjected to everyday use.

21 Different Natural Stone Colors

One of the most exciting parts of our new showroom display is the collection of different stone colors.

We created individual square displays to showcase 21 different colors of natural aggregate that are available for projects. Each display allows customers to compare colors side by side rather than choosing a stone color from a small photograph or catalog.

Natural stone can have variations in color and appearance, and seeing the aggregate in person can make the selection process much easier.

Homeowners can compare lighter and darker tones, warmer and cooler colors, and different combinations of natural stone to find an appearance that complements their home and outdoor environment.

The stone can also be mixed in different combinations to create a custom appearance.

resin-bound-stones---display---showrooms---long-island---ny

Different Stone Sizes for Different Looks

Color isn’t the only choice when designing a resin-bound surface.

The natural aggregate is also available in different sizes, allowing homeowners to achieve different visual effects depending on the project.

Smaller aggregate can create a more refined appearance, while larger stone can provide a more pronounced natural-stone look. The appropriate size depends on the application, the desired appearance, and the overall design of the property.

At the Gappsi showroom, customers can see examples of the different aggregate options and discuss which type may be appropriate for their particular project.

This is especially helpful when coordinating a new surface with an existing patio, pool area, landscaping, driveway, or architectural features.

Resin Bound Stone for Driveways

One potential application for resin bound stone is a residential driveway.  A driveway needs to withstand considerably more abuse than a decorative walkway. Vehicles constantly travel over the surface, and the material needs to be installed properly for the intended use.  That is one of the reasons our showroom driving displays are so valuable.  Instead of simply looking at a sample board, customers can see resin bound stone installed as an actual surface and watch vehicles drive over it.

For homeowners considering alternatives to traditional concrete, asphalt, or other driveway materials, a resin bound system can provide a more decorative option while incorporating natural stone into the design.

Walkways, Patios and Pool Areas

Resin bound stone isn’t limited to driveways. The material can also be considered for walkways, patios, pool surrounds, entrances, courtyards, and other outdoor areas.

Because there are numerous color and aggregate combinations available, resin bound stone can be incorporated into a variety of landscape designs.

For example, a homeowner may choose a natural-looking aggregate that complements the stonework around a swimming pool. Another customer may prefer a contrasting color for a walkway that helps define the path through a landscaped yard.

The design possibilities make the material particularly interesting for homeowners who want something different from a standard concrete surface.

Resin Bound Stone for Play Areas

Another interesting application demonstrated at our showroom is the combination of resin bound stone with a rubber resin material to create a softer surface for playground areas.

This display provides customers with a cross-section showing how different materials can be used for different applications.

Playground surfaces have different requirements than driveways or patios. A softer rubberized surface can provide a more appropriate solution for areas where children are playing.

By displaying these materials at our showroom, we can show customers how the composition and installation approach can change depending on the intended use.

Why Visit the Gappsi Showroom?

Selecting outdoor materials from photographs can be difficult.  Colors can look different depending on lighting, photography, computer monitors, and surrounding materials. A color that appears perfect online may look completely different when placed next to your home’s siding, brick, pavers, landscaping, or other outdoor features.

That’s why we encourage homeowners to visit the Gappsi showroom in Smithtown, NY.  You can see our resin-bound stone options in person, compare the 21 available colors, look at different aggregate sizes, and see actual installed examples.

Our showroom helps you better understand the materials before deciding which direction you want to take with your project.

Natural Stone Imported for Gappsi Projects

The aggregate used in our resin-bound stone systems consists of natural stone, giving each surface its own character and appearance.

Gappsi imports these stones for use in our projects, providing customers with access to a broad selection of materials and colors.

The stones can be selected and combined according to the look the homeowner wants to achieve. Whether the goal is a subtle, natural appearance or a more distinctive decorative surface, there are multiple options to consider.

Our team can help you determine which stone, size, and color combination makes sense for your property and the intended application.

See Resin Bound Stone in Person on Long Island

Our new resin bound stone showroom display is designed to do more than showcase colors. It demonstrates the versatility of the material and gives homeowners a chance to see how resin bound stone can be used in real-world applications.

From driveways and walkways to patios, pool areas and specialty surfaces, resin-bound stone offers an opportunity to incorporate natural aggregate into an attractive outdoor design.

With 21 different colors, multiple aggregate sizes, and different application possibilities, homeowners have plenty of options to explore.

If you’re considering resin-bound stone for your Long Island property, visit the Gappsi showroom in Smithtown, NY to see the materials for yourself. Walk through the displays, compare the colors and stone sizes, and talk with our team about your project.

Seeing the material in person can make it much easier to envision what the finished surface could look like at your home.

Gappsi serves homeowners throughout Long Island and specializes in custom outdoor living, hardscaping, landscaping, sports courts, patios, pool areas, and specialty outdoor surfaces. Contact Gappsi to learn more about resin-bound stone and other options for transforming your outdoor space.

Contact Gappsi Today

📍 Serving all of Long Island, NY — Nassau & Suffolk Counties
🌐 https://www.gappsi.com/
📞 Call now for a free consultation and estimate

SCHEDULE A MEETING TODAY WITH GAPPSI

Share this page:
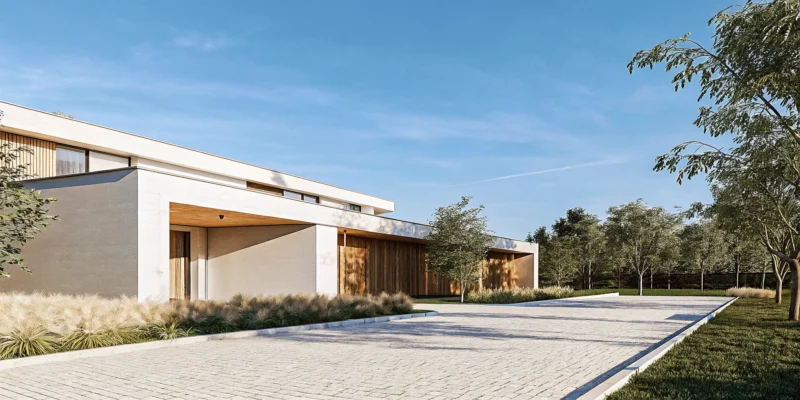
Modern paver driveway design idea with minimalist landscaping.

15 Paver Driveway Design Ideas to Transform Your Home

Your home is a reflection of your personal style, so why should your driveway be any different? Moving beyond a generic slab of concrete is your chance to create a custom entrance that truly feels like your own. Pavers offer limitless creative freedom, allowing you to mix and match colors, textures, and patterns to design a one-of-a-kind look. Whether you prefer the timeless elegance of natural stone or the sleek lines of modern porcelain, the possibilities are endless. We’ve gathered our favorite paver driveway design ideas to spark your imagination and help you create a driveway that perfectly complements your home and showcases your unique taste.

Key Takeaways

  • Choose Pavers for Smarter Durability: Pavers are a wise investment because their interlocking system is stronger than poured concrete and better at handling weather changes. Best of all, if a paver gets damaged, you can replace just one stone, making repairs simple and invisible.
  • Design a Driveway That Complements Your Home: Your driveway is a huge part of your home’s first impression, so select paver colors and patterns that harmonize with your house’s architecture and landscape. A cohesive design creates a polished, welcoming look that adds significant curb appeal.
  • Protect Your Investment with Proper Installation and Care: A beautiful paver driveway is only as good as its foundation, so professional installation with proper drainage is essential. Keep it looking new by cleaning it regularly and having it sealed every three to five years to protect it from stains and weather.

Why Choose Pavers Over Asphalt or Concrete?

When you’re planning a new driveway, it’s easy to default to traditional choices like asphalt or poured concrete. They’re familiar and seem straightforward. But taking a moment to consider pavers can completely change how you view your driveway, transforming it from a purely functional slab into a beautiful and durable design feature. Unlike monolithic surfaces that crack and stain, paver driveways offer a unique combination of strength, style, and long-term value that is hard to beat.

Choosing pavers is an investment in your home’s curb appeal and resilience. They provide a high-end look that asphalt and concrete simply can’t match, with endless possibilities for customization. From classic brick patterns to modern large-format stones, you can create a look that perfectly complements your home’s architecture. Beyond aesthetics, pavers are engineered to handle vehicle traffic, weather, and time with grace. Gappsi offers a stunning selection of porcelain and natural stone pavers that provide a superior alternative for your Long Island home.

Long-Lasting Durability

One of the biggest advantages of pavers is their incredible strength. Professionally installed interlocking pavers create a flexible yet powerful surface that is significantly stronger than poured concrete. This means your driveway can easily withstand the weight of cars and daily use without the cracking and crumbling you often see with other materials. While asphalt requires regular sealing and concrete is prone to large, unsightly cracks, a paver driveway is built to last for decades. This durability makes them a smart, low-maintenance choice for any homeowner looking for a reliable and long-lasting solution. Our expert masonry services ensure your paver driveway is installed with precision for maximum longevity.

Simple, Stress-Free Repairs

Life happens, and driveways can get stained or damaged. With asphalt or concrete, a single oil leak or a heavy impact can mean a costly and messy repair that leaves a permanent patch. Pavers solve this problem beautifully. Because the driveway is made of individual, interlocking stones, you can simply lift out the damaged paver and replace it with a new one. The repair is seamless, quick, and inexpensive. This modular design means your driveway can look pristine for years to come, without the stress of dealing with major resurfacing projects. This ease of maintenance is a key reason so many homeowners prefer the practicality of pavers.

Better Drainage to Prevent Flooding

Puddles on the driveway after a rainstorm are more than just an annoyance; they can lead to water damage and create hazardous icy spots in the winter. Permeable pavers offer an elegant and effective solution. These pavers are installed with small gaps between them, which are filled with a special aggregate. This design allows rainwater to drain directly through the surface and into the ground below. This prevents runoff, reduces the risk of flooding, and helps replenish natural groundwater. It’s an eco-friendly choice that provides a practical benefit, keeping your driveway dry, safe, and puddle-free year-round.

Stands Up to Long Island Weather

Long Island weather can be tough on outdoor surfaces. The freeze-thaw cycles of winter put immense pressure on driveways, causing concrete to crack and asphalt to heave. Pavers have a distinct advantage here. The joints between each paver allow for tiny, almost invisible movements, so the surface can expand and contract without breaking. High-quality pavers are also resistant to the de-icing salts we rely on during icy winters, which can corrode and degrade concrete and asphalt over time. Choosing pavers means you’re getting a driveway that is specifically equipped to handle our local climate, ensuring it stays beautiful through every season. We can even help restore and seal your pavers to keep them looking their best.

What Types of Pavers Work Best for Driveways?

Choosing the right paver is the first step in creating a driveway that is both beautiful and built to last. Each material offers a unique combination of style, durability, and maintenance needs. From the classic charm of brick to the modern elegance of porcelain, there’s a perfect paver for every Long Island home. Understanding the key differences will help you select an option that not only enhances your curb appeal but also stands up to daily use and the local climate. Let’s explore some of the best paver types for driveways.

Concrete Pavers

When you think of a strong, reliable driveway, concrete pavers should come to mind. These aren’t your average concrete slabs. High-quality pavers are engineered to be incredibly dense and durable, often two to three times stronger than poured concrete. This means they can handle the weight of vehicles day in and day out without cracking under pressure. What I love most about them is the sheer variety. They come in countless shapes, sizes, and colors, allowing you to create patterns that perfectly match your home’s style. Whether you want a classic look or something more modern, concrete pavers offer a versatile and long-lasting masonry solution.

Brick and Clay Pavers

There’s something so warm and inviting about a brick driveway. It has a timeless, classic appeal that never goes out of style. Brick pavers bring a sense of history and character to your home’s entrance, creating a welcoming first impression. While they are perfect for traditional homes, you can also use them to create modern designs by playing with different colors and laying patterns. For example, mixing light and dark gray bricks or using oversized blocks can give a fresh, contemporary feel. Their rich color is baked all the way through, so it won’t fade over time, giving you a beautiful driveway for years to come.

Natural Stone Pavers

If you want to add a touch of luxury and elegance to your home, natural stone pavers are the way to go. Materials like granite, bluestone, or travertine offer a unique, high-end look because no two stones are exactly alike. Your driveway will have its own distinct character, full of natural variations in color and texture. Beyond their beauty, natural stone pavers are incredibly durable and low-maintenance. Granite, for instance, can last for decades and stands up well to temperature changes without cracking. It’s a beautiful investment that adds significant curb appeal and value to your property.

Porcelain Pavers

For a sleek, modern aesthetic combined with amazing performance, porcelain pavers are a fantastic choice. They are engineered to be extremely dense and non-porous, which makes them resistant to stains, water, and frost. This is a huge plus for driveways, where spills and weather are common concerns. Porcelain can mimic the look of other materials, like natural stone or even wood, giving you plenty of design flexibility without the maintenance. If you want a driveway that looks pristine with minimal effort, porcelain pavers offer a sophisticated and practical solution that will look great for years.

Permeable Pavers

Permeable pavers are a smart and eco-friendly choice that more and more homeowners are turning to. These pavers are installed with small gaps between them, which are filled with a fine gravel material. This design allows rainwater to drain directly into the ground below instead of running off into storm drains. The benefits are huge: it reduces puddles and ice on your driveway, helps prevent local flooding, and recharges the natural groundwater supply. With options like GravelFix, you can get these environmental advantages without sacrificing style, making it a responsible and attractive option for any home.

Find the Right Design Style for Your Home

Your driveway is one of the first things people see, so it’s a great opportunity to show off your home’s personality. The right design can tie your entire property together, from the front curb to the front door. But with so many options, how do you choose a style that feels right for you? Think about the architectural style of your house and the overall vibe you want to create. Are you drawn to clean, modern lines or the timeless charm of a classic estate? Let’s walk through a few popular design styles to help you find the perfect match for your Long Island home.

Modern and Minimalist

If your home has a contemporary look, a modern and minimalist driveway will complement it perfectly. This style is all about clean lines, simple geometry, and a clutter-free appearance. Think large-format pavers with smooth surfaces that create a sleek, unified look. For colors, grey or white pavers are a popular choice for modern homes. You can also use different types of porcelain and natural stone pavers to create subtle borders or accents without making the design feel too busy. The goal is to achieve an understated elegance that feels both fresh and sophisticated.

Traditional and Classic

For a look that feels timeless and inviting, a traditional design is the way to go. This style often draws inspiration from historic estates, using materials and patterns that have been loved for generations. You can achieve a classic, traditional look with heritage stones and designs that feel like they belong on an old English estate. Think about using pavers that mimic the look of cobblestone or arranging them in a classic herringbone or basketweave pattern. Warm, earthy tones work beautifully here, creating a welcoming path to your home. This approach adds a touch of elegance and character that will never go out of style.

Rustic and Natural

A rustic design is perfect if you want your driveway to blend seamlessly with the natural beauty of your landscape. This style moves away from plain concrete and embraces the unique character of natural stone. Using real stone or pavers with varied textures, irregular shapes, and a rich, earthy color palette can make your driveway feel like an organic part of your property. This approach adds a layer of elegance and requires little care, all while creating a strong connection between your home and its surroundings. It’s an ideal choice for homes that are nestled among trees or feature lush gardens.

Transitional (A Blend of Styles)

Can’t decide between modern and traditional? You don’t have to. A transitional design thoughtfully blends elements from both styles to create a look that is balanced and unique. The key is to ensure your driveway flows nicely into your front walkway or entrance. You can achieve this by using similar colors and patterns to make these areas look connected and beautiful. For example, you might pair a classic paver shape with a modern, monochromatic color scheme. Or, you could add a simple, clean-lined border to a more traditional paver pattern. This flexible approach allows you to create a custom look that reflects your personal taste while complementing your home’s architecture.

How Do Color and Pattern Affect Curb Appeal?

A paver driveway is more than just a place to park your car; it’s a major design element of your home’s exterior. The colors and patterns you choose play a huge role in tying everything together. Think of it as the first impression your home makes. Getting the color and pattern right can transform a simple driveway into a stunning feature that reflects your personal style and makes your entire property shine. It’s all about creating a cohesive and intentional look that feels welcoming from the moment you pull up.

Pick a Color Palette That Complements Your Home

Your driveway shouldn’t compete with your house, it should complement it. The best approach is to select paver colors that harmonize with your home’s existing exterior. Look at the color of your siding, roof, trim, and any brick or stone accents. Choosing pavers in similar or complementary tones creates a seamless, polished look. For example, warm, earthy tones might pair beautifully with a traditional brick home, while cool grays could be perfect for a modern house with dark trim. Exploring a wide range of porcelain and natural stone options will help you find the perfect match to create that unified aesthetic you’re looking for.

Explore Popular Paver Patterns

The pattern of your pavers adds texture, character, and even strength to your driveway. While a simple running bond pattern is classic, exploring other designs can add a lot of visual interest. A herringbone pattern, for instance, is a fantastic choice for driveways. Its interlocking design is not only beautiful and dynamic, but it also helps the pavers stay in place under the weight of vehicles, making it incredibly durable. Other options like basketweave or circular patterns can create focal points and a more custom feel. The right masonry design and installation brings these intricate patterns to life, ensuring they look great for years.

Create a Custom Look by Mixing Colors and Sizes

If you want a driveway that truly stands out, don’t be afraid to mix things up. Combining different paver colors, sizes, and even textures is a great way to create a one-of-a-kind design. You could use a darker color to create a border, or you could randomly mix two or three complementary shades throughout the driveway for a more natural, blended look. Using a combination of large and small pavers can also break up the surface and add sophisticated detail. This approach allows you to express your personality and create a driveway that is uniquely yours. Visiting the Gappsi Store can give you a better sense of the endless combinations available.

Frame Your Driveway with Borders and Edging

A border is the finishing touch that can take your paver driveway from nice to stunning. Think of it as a frame for your masterpiece. Adding a decorative edge in a contrasting color or material clearly defines the driveway and gives it a crisp, polished appearance. Borders do more than just look good; they also serve a practical purpose by holding the main pavers securely in place and preventing them from shifting over time. This small detail makes a huge impact on your home’s curb appeal and is an essential part of a comprehensive landscape design that connects your home to its surroundings.

Paver Driveway Ideas to Inspire You

Your driveway is one of the first things people see, so why not make it a stunning design feature? A paver driveway is a canvas for creativity, offering endless possibilities to reflect your personal style and enhance your home’s curb appeal. It’s your chance to create a grand entrance that feels both welcoming and unique. Whether you prefer a look that’s sleek and modern or classic and charming, the right design can completely transform your property. Ready for some inspiration? Here are a few of our favorite paver driveway ideas to get you started.

Use Contrasting Colors

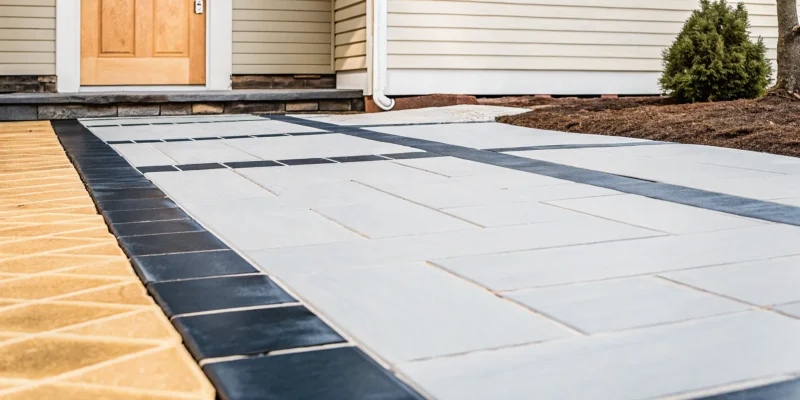
A simple yet powerful way to make your driveway stand out is by using contrasting colors. Think beyond a single shade and consider creating a dynamic look with a mix of light and dark pavers. For example, a dark gray or black border around a field of lighter gray or tan pavers creates a crisp, defined edge that draws the eye. You can also use color to create patterns, like a checkerboard or diamond inlay, for a truly custom feel. Exploring different paver styles and colors from our extensive porcelain and natural stone collection is the perfect way to find a combination that makes your entrance inviting.

Incorporate Curves and Circles

If your property is full of straight lines and sharp angles, introducing curves into your driveway design can add a sense of softness and flow. A gently curving driveway feels more organic and natural, guiding visitors gracefully toward your home. You can also incorporate circular or fan-shaped patterns as a focal point, perhaps where the driveway meets the front walk or expands near the garage. These elegant details break up the monotony of a large paved surface and make the driveway feel seamlessly connected to your overall landscape design.

Mix and Match Materials

For a look that’s rich in texture and character, don’t be afraid to mix and match different materials. Combining the smooth surface of concrete pavers with the rustic charm of natural stone or the classic appeal of brick can create a truly one-of-a-kind driveway. For instance, you could use brick as an accent border or create an “apron” of cobblestone where the driveway meets the street. This approach allows you to pull in different materials from your home’s exterior, creating a cohesive design. Our expert masonry team can help you blend these elements beautifully.

Go for a Classic, Heritage Look

There’s something undeniably charming about a driveway that looks like it’s been there for generations. You can achieve this timeless, heritage feel by using pavers that mimic old-world cobblestones or antique tumbled stones. This style is perfect for traditional homes, giving your property the feel of a classic English estate. But a classic look doesn’t mean you have to settle for old-fashioned performance. We can pair these beautiful pavers with modern drainage systems, ensuring your driveway is as practical as it is picturesque and ready to handle anything Long Island weather throws its way.

Connect Your Driveway to Your Landscape

Your driveway shouldn’t feel separate from the rest of your yard. Instead, think of it as a key part of your front yard’s landscape. Choose pavers with colors and textures that complement your home’s siding, roofing, and any existing stone or brickwork. You can take this a step further by integrating landscaping directly into the driveway’s design. Consider adding low garden walls, built-in planters, or subtle landscape lighting along the edges. These finishing touches help frame the driveway and create a polished, unified look that ties your entire property together.

Popular Paver Driveway Design Trends

Your driveway is one of the first things people see, so why not make it a statement piece? The latest design trends are all about blending beautiful aesthetics with smart functionality. Homeowners are moving away from plain, uniform surfaces and embracing designs that add personality and value to their property. It’s about finding that perfect balance between a look you love and features that make life easier, like better drainage and durable materials.

Whether you lean toward a sleek, modern vibe or a timeless, classic feel, there’s a trend that will fit your home’s architecture and your personal style. From oversized pavers that create a sense of grandeur to eco-conscious options that help manage rainwater, today’s driveway designs are more thoughtful than ever. Exploring these popular styles can give you the inspiration you need to create an entrance that is both welcoming and impressive. Let’s look at a few of the top trends we’re seeing right now.

Large-Format Pavers for a Modern Look

If you love clean lines and a sophisticated, uncluttered aesthetic, large-format pavers are a perfect choice. These pavers, which are typically 24 inches or larger, create a smooth and expansive look that complements modern and contemporary homes. Their grand scale results in fewer joint lines, which gives your driveway a seamless appearance and makes the space feel larger. Many homeowners are choosing neutral colors like light and dark gray to create a subtle, chic pattern. Beyond their visual appeal, large pavers can often be installed more quickly than smaller ones, which can streamline your project timeline. You can explore a variety of porcelain and natural stone options to find the right large-format style for your home.

Eco-Friendly Permeable Pavers

Functionality is just as important as style, and permeable pavers deliver on both fronts. This eco-friendly trend is especially relevant for Long Island homeowners, as these pavers are designed to let rainwater soak through the surface and into the ground below. This process helps prevent water from pooling on your driveway and reduces stormwater runoff, which can protect local waterways. By allowing for natural water absorption, a permeable system can help prevent flooding and erosion around your property. Solutions like GravelFix stabilize loose gravel to create a durable, permeable surface that is both beautiful and environmentally responsible, saving you potential headaches and costs associated with poor drainage.

Classic Stone with Modern Drainage

Do you love the romantic look of a historic estate? You can capture that timeless charm by using classic or antique-looking stones for your driveway. This trend combines the rustic beauty of cobblestone or weathered natural stone with the benefits of modern drainage technology. The result is a driveway that feels like it has been there for generations but performs like a brand-new installation. An expert masonry designer can help you achieve this look, creating a classic, traditional feel while ensuring your driveway is practical and built to last. It’s the perfect way to get an old-world aesthetic without sacrificing modern convenience and environmental responsibility.

Creative Paving with Varied Colors and Sizes

Your driveway doesn’t have to be one-note. One of the most exciting trends is the move toward creative, custom designs using a mix of paver colors, sizes, and textures. You can create a truly unique look by combining different materials or laying pavers in an intricate pattern. For a subtle touch, try a simple border in a contrasting color. For a bolder statement, you could design a stunning mosaic or herringbone pattern. While gray and white pavers remain popular for modern homes, don’t be afraid to play with warmer tones or varied shades to complement your home’s exterior and landscape. This approach allows you to express your personal style and create a one-of-a-kind entrance.

Should Your Driveway Match Your Home’s Architecture?

Absolutely. Think of your driveway as the first handshake your home offers to visitors. It’s a major part of your property’s curb appeal, and making sure it complements your home’s style creates a polished, intentional look. A mismatched driveway can feel jarring, while one that flows with your home’s design feels welcoming and complete. The right paver material, color, and pattern can tie everything together, from your siding and roof to your front door.

Whether your Long Island home is a sleek modern build or a classic colonial, the driveway design should feel like a natural extension of its character. This doesn’t mean it has to be an exact copy of your home’s materials, but the overall feeling should be harmonious. A thoughtful masonry design considers the big picture, ensuring your new driveway enhances your home’s best features instead of competing with them. By aligning your driveway with your home’s architecture, you create a cohesive aesthetic that adds value and makes a stunning first impression.

What to Pair with a Modern Home

Modern homes are all about clean lines, simple forms, and a neutral color palette. To match this aesthetic, opt for pavers that reflect that same minimalist spirit. Large-format pavers in shades of gray, white, or charcoal are excellent choices because they create a smooth, uncluttered surface. Geometric patterns, like a running bond or a stacked layout, reinforce the clean geometry of modern architecture. You can also use different paver types to create subtle borders or accents without adding too much visual noise. Sleek and durable porcelain pavers are a fantastic option for achieving that crisp, contemporary finish that holds up beautifully over time.

What to Pair with a Traditional Home

For traditional homes, like a classic Cape Cod or a stately Colonial, the goal is to create a warm and timeless entrance. Your paver choice should complement the existing materials of your home, such as brick accents or a stone facade. Pavers that mimic the look of classic cobblestone or traditional red brick work wonderfully. Warm, earthy tones like tans, reds, and browns will harmonize with the classic look. Consider patterns like herringbone or basketweave to add a touch of historic charm and texture. The key is to choose pavers that feel like they’ve always been a part of your home’s story, creating an inviting and established feel.

Match Your Driveway to Your Landscape

Your driveway doesn’t exist in a vacuum; it’s a key part of your overall landscape. A great design ensures your driveway flows seamlessly into your front walkway, garden beds, and entryway. Using the same or similar pavers for your walkway creates a beautiful, connected path that guides the eye directly to your front door. You can also use border pavers along the driveway that match the edging of your garden beds. A well-integrated driveway feels purposeful and helps your entire front yard look professionally designed. Thoughtful landscape design ensures every element, including your driveway, works together to create a stunning and unified outdoor space.

How to Keep Your Paver Driveway Looking Its Best

A paver driveway is a beautiful and durable investment for your home, and with a little routine care, you can keep it looking brand new for decades. Unlike asphalt or concrete, which can require major overhauls, paver maintenance is straightforward and manageable. Keeping up with simple cleaning, sealing, and minor repairs will protect your driveway from the elements, prevent stains, and preserve its stunning curb appeal. Think of it as protecting your investment. A well-maintained paver driveway not only looks fantastic but also holds its value for years to come. Following a simple maintenance schedule is the key to ensuring your driveway remains a standout feature of your home’s exterior.

Simple Cleaning Tips

Keeping your paver driveway clean is easier than you might think. For general upkeep, regularly sweeping away leaves, dirt, and debris will prevent stains from setting in. For a deeper clean, you can use a power washer on a low setting with a wide-angle nozzle to wash away grime. A soft-bristled broom is great for scrubbing any stubborn spots without scratching the paver surface. Just be sure to avoid wire brushes, as their harsh bristles can damage the pavers and the joint sand. For tougher oil stains or seasonal deep cleans, professional restoration and sealing services can bring your pavers back to their original glory.

Know When to Reseal Your Pavers

Sealing your paver driveway is like applying a protective topcoat. It creates a barrier that defends against stains, UV rays, and moisture, which helps prevent weed growth and algae. Generally, it’s a good idea to reseal your driveway every three to five years. The Long Island climate, with its hot summers and icy winters, can be tough on outdoor surfaces, and a quality sealant offers crucial protection against salt damage and freeze-thaw cycles. This simple step not only extends the life of your pavers but also enhances their color and finish. If you want a professional application, our team offers expert cleaning and sealing to protect your investment correctly.

How to Handle Minor Repairs

One of the biggest advantages of a paver driveway is how simple it is to repair. Unlike a solid slab of concrete or asphalt that requires patching or complete replacement when it cracks, damaged pavers can be fixed individually. If a paver gets chipped, cracked, or badly stained, you can simply lift it out and replace it with a new one. This makes repairs quick, affordable, and practically invisible. While some handy homeowners might tackle this themselves, ensuring the new paver is perfectly level and secure is key to a lasting fix. For a seamless result, our expert masonry team can handle any repairs, making your driveway look flawless again.

Plan Your Paver Driveway Like a Pro

A great paver driveway doesn’t happen by accident. It starts with a solid plan that considers your home’s style, your personal taste, and the practical demands of a high-traffic surface. Your driveway is the first thing people see, so thinking through the details beforehand ensures you get a final result that not only looks incredible but also lasts for decades. From choosing the right materials to planning for proper drainage, a little preparation goes a long way. Here’s how you can approach your project like a seasoned pro.

Match Your Driveway to Your Home’s Style

Your driveway should feel like a natural extension of your home, not an afterthought. The best way to achieve this is by choosing pavers that complement your home’s existing architecture and color palette. Take a look at your siding, roofing, and trim colors. Do you have warm, earthy tones or cool, modern grays? Selecting porcelain and natural stone pavers in a complementary shade will create a harmonious and polished look. Think of your driveway as the welcome mat to your property. A cohesive design instantly makes your home feel more inviting and thoughtfully put together, significantly enhancing its curb appeal from the moment someone pulls up.

Explore Patterns and Borders

This is where you can really let your creativity shine. Pavers come in countless shapes, sizes, and colors, allowing for unique patterns that reflect your personal style. A classic herringbone pattern is always a great choice because its interlocking design adds strength and stability, which is perfect for handling the weight of vehicles. You can also mix different paver sizes to create a more organic, random look. Don’t forget to frame your design with a border. A contrasting color or material used as an edge not only adds a beautiful finishing touch but also helps lock the main pavers in place. Our masonry experts can help you design a pattern that’s both stunning and structurally sound.

Don’t Forget the Foundation

A beautiful paver driveway is only as good as the base it’s built on. Proper installation is the most critical factor for longevity, so it’s important to focus on what’s happening underneath the surface. This involves excavating the area correctly, laying a stable sub-base of gravel, and ensuring the plan includes proper drainage to channel water away. Without good drainage, you risk pavers shifting, sinking, or becoming uneven over time. Once the pavers are installed, applying a sealant is a final, crucial step. Professional restoration and sealing protects your investment from stains, weather, and wear, keeping it looking new for years to come.

Related Articles

Frequently Asked Questions

Are paver driveways more expensive than concrete or asphalt? Initially, a paver driveway can be a larger investment than a basic asphalt or concrete slab. However, it’s important to think about the long-term value. Pavers are incredibly durable and don’t require the frequent sealing that asphalt does, nor are they prone to the large, unfixable cracks that plague concrete. When you factor in the lower repair costs (you can replace single pavers instead of the whole surface) and the significant boost to your home’s curb appeal, many homeowners find that pavers provide better value over time.

How do pavers handle Long Island’s snow and ice? This is a great question, and it’s where pavers really shine. Because a paver driveway is made of individual units with joints, it can flex slightly during freeze-thaw cycles, which prevents the cracking you see with solid concrete. High-quality pavers are also made to resist damage from de-icing salts. As for snow removal, you can use a snowblower or a plow with a rubber-tipped blade to avoid scratching the surface. The texture of many pavers can also provide better traction than a slick concrete surface.

Do I really need to seal my paver driveway? While it’s not strictly required, I highly recommend it. Think of sealant as a protective shield for your investment. It helps lock in the joint sand, which keeps the pavers from shifting and discourages weeds from popping up. More importantly, it creates a barrier against stains from oil, dirt, and leaves, and it protects the pavers from fading due to UV rays. Sealing your driveway every three to five years is a simple step that keeps the colors looking rich and makes cleaning much easier.

What happens if a few pavers sink or become uneven over time? This is one of the best features of a paver system. If an area settles, it’s almost always an issue with the base underneath, not the pavers themselves. A professional can carefully lift the pavers in the affected section, add or adjust the base material to make it level again, and then put the same pavers back in place. The repair is seamless and much less expensive and disruptive than trying to fix a sunken section of concrete or asphalt.

How long does a paver driveway installation take? The timeline for a paver driveway project depends on several factors, including the size of the driveway, the complexity of the design, and the weather. However, a typical residential driveway can often be completed within a week. The process involves excavating the old surface, preparing and compacting the new base, laying the pavers, and finishing the joints and edges. While it’s a detailed process, a professional team works efficiently to minimize disruption and deliver a beautiful, lasting result.

Share this page:
A newly installed interlocking concrete paver driveway in front of a Long Island home

Driveway Pavers on Long Island: Cost, Materials, Design

Harsh Long Island winters will crack standard concrete and asphalt driveways within just a few years. Shifting to driveway pavers prevents this costly damage because they move with the freezing soil.

Driveway pavers are interlocking concrete or stone blocks that make a strong, beautiful path for cars. On Long Island, a new paver driveway usually costs between $15 and $40 per square foot. This price depends on the material type, the size of your yard, and the design pattern you choose. Homeowners can choose durable materials like natural bluestone, travertine, or concrete blocks. Unlike solid concrete, these individual pieces shift naturally with the freezing soil so they do not crack during cold winters. Permeable designs also help drain stormwater and prevent ice puddles from forming on the surface. Using a professional design-build company ensures proper excavation, base prep, and edge restraints so the driveway lasts for decades.

Before starting your project, you need to understand the planning steps and the financial investment for your home. You must consider the size of your driveway and the materials you want to use. To start planning your budget, let us examine What Does a Paver Driveway Cost on Long Island?

What Does a Paver Driveway Cost on Long Island?

A new driveway is a major home update that adds curb appeal and value. If you want to use paver patio and driveway services to install driveway pavers, you must first plan your budget. On Long Island, the final price depends on several local factors and your choice of materials. Contact Gappsi through our contact page

Key cost factors for paver driveways

Your choice between concrete and natural stone often depends on budget, upkeep, and the look you want. Concrete pavers offer a highly uniform fit and cost less. Natural stone looks unique and beautiful but costs more to buy and install. Three main things drive the cost of your project. These are the type of stone or concrete, the design complexity, and the total area size. Precast concrete paver installation costs include all labor, equipment, and material transport as shown in state specs. Selecting simple layouts and local materials can help keep your costs low.

Square foot pricing on Long Island

To budget properly, you need to understand the costs for different project sizes. A small two-car space of 20×20 feet is 400 square feet. Basic concrete pavers for this size cost between 6,000 and 12,000 dollars, which covers subbase prep, sand, and pavers. If you select natural stone, the cost for this small area can rise to 16,000 dollars or more due to higher material prices and extra labor. For larger estate properties, a 2,000 square foot driveway is common. A driveway of this size using concrete pavers will usually cost between 30,000 and 60,000 dollars. If you choose natural stone, the price can exceed 80,000 dollars. These larger projects also need more excavation, soil removal, and base gravel, so you must always work with a skilled team.

Necessary permits and construction add-ons

Beyond the pavers and labor, you must budget for specific local rules and construction add-ons. For example, if you build in the Town of Huntington, you will need a permit. You must also submit a hold harmless agreement with Suffolk County as shown on the town portal. This is because installing pavers in a public right-of-way can alter public land, but filing early prevents delays. Another common add-on is a concrete apron where the road meets your driveway. This apron is often needed to protect the strength of both the road and your driveway. A solid apron prevents the edge of your new paver driveway from shifting under the weight of heavy cars turning in from the street. These details may add minor costs, but they ensure your investment lasts for decades.

Is It Cheaper to Choose Pavers or Concrete for a Driveway?

Choosing a new driveway is a big choice for Long Island homeowners. Many people focus only on the upfront price when they start. But a smart property owner looks at the overall value over many years. While some materials cost less on day one, others save you money on upkeep and repairs down the road.

Upfront installation costs

Standard concrete or asphalt often has a lower price tag when you first build it. Precast concrete paver installation costs include labor, tools, and hauling materials to your yard. According to state guidelines, concrete paver installation costs cover all of these steps as a package deal. Because of this first work, driveway pavers need a larger investment at the start than poured concrete or asphalt. But the first price tag is not the whole story. You must also consider how long each option lasts. To help you choose, here is a quick breakdown of how these materials compare across key areas.

Material Upfront cost Lifespan Durability & aesthetics Maintenance Repair ease Freeze-thaw
Concrete pavers Higher initial cost 30 to 50 years Very high durability, clean look Occasional sand top-off Easy to swap single units Excellent, shifts with ground
Poured concrete Moderate initial cost 20 to 30 years Good but prone to cracking, plain Sealing every few years Hard, patches are visible Poor, rigid slabs crack
Standard asphalt Lowest initial cost 15 to 20 years Low durability over time, dark look Frequent seal coating Easy to patch but looks uneven Moderate, softens in heat

Material durability and ground movement

Concrete pavers offer superior durability and clean looks when you compare them to basic blacktop. In cold Long Island winters, the soil below your driveway freezes and thaws. Rigid materials like solid concrete often crack under this pressure because they cannot bend. But interlocking driveway pavers are different. These systems adapt to minor ground movement without cracking because the joints between them are flexible. Sturdy materials combined with a solid setup give you a long-lasting driveway that outperforms standard asphalt in the long run. If one stone gets stained or damaged, you can just swap out that single piece for a new one. To find the right look for your home, you can read our guide on how to choose the best driveway pavers for your project. Proper paver maintenance and sealing also keeps colors bright and shields the surface from oil stains. If you want a beautiful, long-lasting entrance to your home, we can help. Contact Gappsi through our contact page

The Best Paver Materials for a Long Island Driveway

Choosing the right materials for your new driveway is a big choice. Long Island homes need durable surfaces that look great and last for decades. Before you look at colors or styles, you must focus on strength. Not all stones are made for cars, so you must pick the right products to avoid cracks and shifting.

Why vehicular-rated pavers matter

A driveway has to support tons of moving weight every single day. Because of this, the installation of heavy-duty pavers made for car traffic is needed for driveways. This is different from thin slabs used for foot paths, which will crack under a car. Choosing heavy-duty best driveway pavers for your project keeps your driveway safe. These thick pavers resist shifting and sinking when cars turn. If you use thin stones, they will break within a year because they are not made to handle wheel loads. Instead, heavy-duty units distribute weight across a thick bed of stone and sand. This layout stops rutting and keeps your driveway flat.

Interlocking concrete pavers

For most homes on Long Island, concrete blocks are the top choice. These units are a solid pick because they are manufactured to be uniform in size and shape. This high level of detail ensures a tight, consistent fit during installation. They fit together like a puzzle to spread out the load from heavy trucks. Concrete blocks also give you great design choice. These concrete pavers come in a range of colors and textures that can mimic brick or natural stone. You can get the look of old brick or granite without the high price. The New York State DOT rules show that these precast blocks must meet strict limits for public roads.

Interlocking concrete driveway pavers laid in a herringbone pattern with sand-filled joints
Interlocking concrete pavers laid in a herringbone pattern stay locked under heavy vehicle loads.

Natural stone and clay brick

If you want a classic look, natural stone is a top option. Natural stone pavers like bluestone or travertine give a unique, upscale look that fits classic and modern home designs. Bluestone offers rich blue and gray tones, while travertine gives warm beige colors. Both materials are dense and strong when you buy the correct thick cut. Clay brick is another traditional path. Genuine clay bricks are made from baked earth and hold their color for decades. You can also mix natural stone with concrete borders to get a custom design. This blend gives you a custom look that stands out.

How to choose the best material

Your choice between concrete and natural stone pavers often depends on budget, care needs, and how you want them to look. Concrete blocks cost less to buy and install, and they are also easy to clean. Natural stone costs more but adds rich style. Think about how much time you want to spend on sealing and cleaning before you buy. Concrete needs regular seal coats to block oil stains. Natural stone needs less care but can be harder to install. Talk with a local design-build expert to see which stone works best for your home. Making the right choice now will keep your driveway looking beautiful for many years.

How a Driveway Paver Installation Is Built to Last

Building a driveway that can handle heavy trucks takes careful work. Every step must be done right to make sure your driveway pavers do not sag or shift. The weight of cars can easily push stones out of place if the soil is weak. The work starts with a deep plan for the dirt beneath the stone.

The role of a strong base

Before the first stone is set, crew members must dig out the old driveway. They remove the soft topsoil to reach the hard earth below. In public road works, the State of New York bills excavation and subbase course work as distinct tasks. This shows how key these steps are for any road or driveway build. A solid base is the main thing that stops a driveway from sinking. If you skip this step, the stones will shift when the ground freezes and thaws in the cold winter. To keep your stones flat for years, you must prepare the ground well.

Why edge and apron support matters

A great driveway does not just sit on the ground. It must connect to the street with a strong, safe edge. Many towns have strict rules about how you link your driveway to the road. A poor edge lets the pavers slide out when cars turn on them. Using concrete support near the street keeps the whole system locked tight. This makes sure the borders of your new driveway stay in place for a lifetime.

The key steps of the build

To build a strong path, you should follow this clear process:

  1. Digging the site: Crews dig down to a set depth to make space for the base layers and your driveway pavers. This dig gets rid of soft dirt that cannot hold heavy loads.
  2. Geotextile fabric stabilization: Laying a geotextile fabric over the raw soil keeps the dirt from mixing with the gravel base. This step helps make the base strong and stops weeds from growing up.
  3. Compacted gravel subbase: Packing down a thick gravel layer is the most vital step of the build. This compacted gravel subbase supports heavy vehicle traffic without shifting.
  4. Bedding layer placement: A thin, flat layer of clean sand is spread over the packed gravel to form a smooth bed. See our guide on the best driveway pavers for your project to pick the right stone type.
  5. Laying vehicular pavers: Workers place the thick stones close together in your chosen pattern. Using tough vehicular pavers ensures they will not crack under the weight of large trucks.
  6. Edge restraints and concrete apron: Strong edge restraint pieces are set along the sides to lock the stones in place. A concrete apron where the driveway meets the street is also a common rule to keep the structure strong.
  7. Polymeric sand joint filling: Sweeping polymeric sand into the joints blocks weeds and locks the stones in place. For more care tips, see our guide on paver maintenance and sealing.

How Driveway Pavers Stand Up to Long Island Winters

Long Island winters bring harsh freezing and thawing cycles. Standard asphalt and concrete often crack under these cold weather stresses. But interlocking driveway pavers bend with the ground to prevent damage. This flexible design stops the surface from cracking when the soil freezes. On Long Island, freeze-thaw damage is a constant threat to driveways. When water gets into tiny pores in asphalt or concrete, it expands as it freezes. This creates pressure that leads to deep cracks and surface crumbling over time.

Freeze-thaw cycle protection

Expert installers use setting beds, joint materials, and sealers that meet state standards. For example, the New York State Department of Transportation sets standards for precast concrete block pavers and sealers. These state installation rules ensure the materials can handle heavy winter loads. Applying a proper sealer is a key step in protecting your stone. Sealing driveway pavers helps to lock in their rich color and block oil or gas stains. Also, a good seal keeps water from soaking into the stone. This protects the driveway from winter cracking. Unlike solid concrete slabs, interlocking systems use many small stones. The joints between the stones let them shift slightly without breaking. This means the driveway can adjust to minor ground movements when the soil freezes and shifts in winter.

Drainage and ice prevention

Winter weather often leaves pools of water on driveways that turn into slick ice sheets. Paver driveways solve this problem because they drain water well. They work even better when you use permeable joints. Choosing permeable pavers is a smart way to handle heavy rain. These stones let rain and melting snow flow straight down into the soil. This fast drainage keeps water from pooling and forming slick ice patches. When you shovel or plow snow, the flat surface of the stones makes the job simple. You do not have to worry about catching on deep cracks as you would with old concrete. Permeable joints let water drain straight into the base below. This stops water from running off the driveway and flooding your yard. It also prevents ice from forming on the edges of your property where melting snow piles up.

Ongoing maintenance and easy repair

Even with great care, winter wear can sometimes damage a driveway. If a standard concrete driveway cracks, you often must replace the entire slab. But pavers are much easier to fix. You can remove and replace single stones if they get stained or broken. Taking care of these stones is very easy compared to other driveway types. You do not need to patch cracks with ugly black tar. If a single stone is damaged by a plow, an installer can swap it out quickly. Keeping your driveway in top shape through the winter needs very little work. Regular care mostly means sweeping, power washing, and adding new sand to the joints. Keeping up with paver maintenance and sealing will make sure your driveway looks great and lasts for decades.

Design and Value: Making Driveway Pavers Work for Your Home

Your driveway is the first thing guests see when they visit your house. Choosing driveway pavers can turn a plain front yard into a charming entrance. These stone or concrete blocks enhance home value and visual appeal, which makes them a smart choice for people on Long Island. A custom layout lets you match your yard to your own taste.

Choosing Your Layout Pattern

You can choose from many different ways to lay your stone. The pattern options range from a classic herringbone layout to modern, geometric layouts. A herringbone pattern holds up well under the weight of heavy cars because the blocks lock in place. This keeps the stones from shifting when you drive on them daily. Geometric layouts use clean lines and neat angles to give your yard a fresh, sleek style. If you have a curved driveway, these stones fit with ease. Skilled builders can arrange the pieces to follow smooth curves without making too many messy cuts. This curved style gives your yard a softer, more natural look. You can also mix other shapes to make a style that is unique to your home. To make the edges stand out, you can add border stones with accent colors. Many homeowners add borders or dark colors to define the edges of their drive and add visual appeal. These borders frame the driveway and make the pattern in the middle pop. They also guide the eyes of your guests toward your front door.

Built-In Lighting and Edges

Good design is about more than just the stones. Expert planning can build light fixtures and plant beds right into the border of the drive. Placing small lights along the edge makes the driveway safe to use at night and shows off the path. Solid stone borders also keep your lawn soil from washing onto the driveway when it rains. This keeps your yard looking neat after big storms. Before you build, you must check local rules. For instance, if you plan to lay paver blocks in a town right-of-way, you must follow local laws. In the Town of Huntington, you need a permit if you use pavers near the road. You must also sign a hold-harmless deal with Suffolk County. Knowing these rules early keeps your job on track and avoids legal delays.

Matching Your Whole Yard

To get the best results, your new drive should match the rest of your outdoor space. Skilled builders like Gappsi offer full landscape design and installation to make sure your new driveway fits your whole yard. A single plan links your walkways, patio, and drive into one great space. Working with one team for design and setup keeps the project simple. The builders will make sure the stones fit your home shape, house color, and garden beds. This approach boosts your street appeal and increases your home value. Contact Gappsi through our contact page

Frequently Asked Questions

Do paver driveways need a concrete base?

No, a concrete base is not needed. Instead, a strong driveway relies on a deep, packed gravel subbase and a geotextile fabric layer. This base lets the interlocking pavers shift slightly during freeze-thaw cycles and under heavy vehicle weight. According to Gappsi, this design lets the surface absorb soil movement without cracking, unlike standard poured concrete.

How long do paver driveways last?

When built with proper care, a paver driveway can last thirty to fifty years. This lifespan far outperforms standard asphalt. Their long life comes from strong stone and easy repairs. If a single block gets stained, you can remove and replace just that piece. Regular cleaning and paver maintenance and sealing will also protect the colors from winter frost and vehicle oil.

Do you need a permit for a paver driveway on Long Island?

Yes, you often need a permit if your project touches public property. For example, installing driveway pavers in a town right-of-way, like in Huntington, needs a permit. You must also submit a hold harmless agreement to Suffolk County. According to the Town of Huntington, this rule applies to any custom pavement like pavers or stone blocks. Always check with your local town hall before you start work.

How long does it take to install a paver driveway?

Most driveway paver projects take about three to seven days to complete. The exact time depends on the size of your driveway and the design you choose. First, the team must excavate the old surface and pack the gravel base. Laying the stones goes fast once the base is ready. Finally, the team fills the joints with polymeric sand and seals the surface. Bad weather can also add a few days to the job.

Ready to design and build a better paver driveway?

An old asphalt or cracked concrete driveway does more than hurt your home’s curb appeal. Leaving a cracked or broken driveway through next winter lets water sink deep into the soil. When this water freezes, it expands and shifts the dirt under the driveway. This ruins the base support and makes building a new paver driveway cost much more. If you start your project now, you can avoid these costly issues and secure your booking. Gappsi handles the full design-build process from expert excavation and base prep to placing the final stone borders. Our team will help you select the best driveway pavers for your project and complete the layout before the harsh cold weather arrives. Ready to start? Contact Gappsi through our contact page to schedule a free paver driveway consultation.

Share this page: