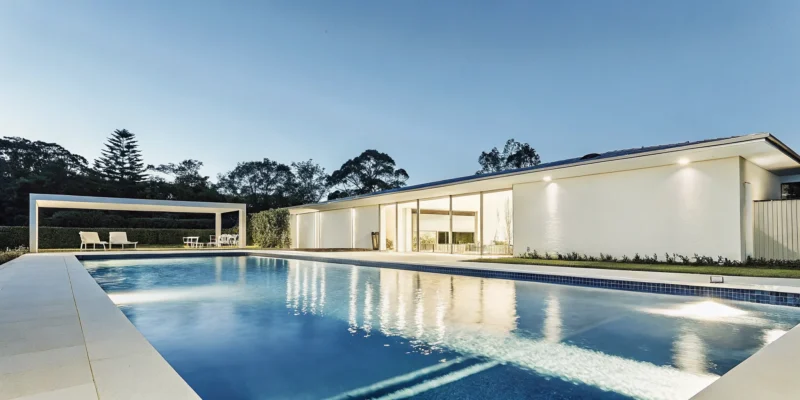
A new swimming pool is the heart of a dream backyard, but creating a truly stunning outdoor oasis involves more than just the water. It’s about how the pool integrates with your patio, your landscaping, and your home’s overall style. Juggling different contractors for masonry, design, and installation can be a major headache. That’s why we offer a complete, all-in-one solution. As a full-service design and construction company, we see the bigger picture. Our dedicated team, East West Pools, Gappsi Group Swimming pool Division, specializes in crafting the perfect pool while our other in-house experts design the surrounding environment, ensuring every element works together in perfect harmony for a cohesive and beautiful result.
Key Takeaways
- Work with One Expert Team for Everything: Gappsi provides a single, reliable partner for your entire project. Our specialized pool division handles the water, while our comprehensive teams design the surrounding patio, landscaping, and other features for a seamless result.
- Customize Your Pool to Fit Your Lifestyle: You can choose the right pool type for your family, whether it’s a flexible gunite, versatile vinyl, or low-maintenance fiberglass design. We then help you integrate custom features like waterfalls or safety covers to create a space that is uniquely yours.
- Enjoy a Stress-Free Construction Process: We manage the entire project from start to finish, which includes securing all necessary permits and providing a clear timeline. This allows you to relax and watch your vision come to life without the usual headaches.
What is East West Pools?
If you’ve been researching pool builders on Long Island, you may have come across the name East West Pools. Simply put, East West Pools is the dedicated, expert swimming pool division of Gappsi. It’s our specialized team of designers, builders, and technicians who live and breathe pool construction. When you partner with us for a pool project, you get the focused expertise of the East West Pools team, backed by the comprehensive home improvement power and reputation of the entire Gappsi family. This structure allows us to provide an incredibly specialized service while still offering a seamless, all-in-one solution for your entire backyard transformation. You get the best of both worlds: a dedicated pool expert and a master backyard contractor.
This approach means you don’t have to juggle multiple companies for one project. Your pool construction is managed under one roof, ensuring clear communication and a cohesive design that integrates perfectly with your patio, landscaping, and other outdoor features. We created East West Pools to give our clients a boutique experience focused solely on creating the perfect pool, while still providing the stability and wide-ranging capabilities that Gappsi is known for. It’s our way of guaranteeing that every detail of your pool, from the initial sketch to the first swim, is handled with the highest level of professional care and attention.
Meet Gappsi’s Expert Pool Division
Our East West Pools team is who you’ll work with to bring your dream pool to life. We design and build custom swimming pools for clients all across Long Island, New York. The process is entirely collaborative. Our expert team works closely with you to create a design that is a perfect fit for your property’s unique layout and your family’s lifestyle. Whether you’re dreaming of a serene retreat for quiet afternoons or a vibrant hub for summer parties and family fun, we tailor every element to match your vision. We handle everything, ensuring your new pool is a beautiful and functional centerpiece for your home.
Over 30 Years of Pool Building Excellence
Experience matters, especially with a project as significant as a new pool. Gappsi has been creating beautiful and functional outdoor living spaces since 1987. With over three decades in the industry, we have established a solid reputation for quality, artistry, and craftsmanship in pool building. This long history means we’ve seen it all and have refined our processes to deliver outstanding results every time. Our commitment has always been to enhance the homes and lives of our clients. That legacy of excellence is the foundation upon which every single Gappsi pool is built, giving you peace of mind and a backyard you’ll love for years.
What Types of Pools Do We Build?
Choosing the right type of pool is one of the biggest decisions you’ll make for your backyard. At Gappsi, we want you to have all the information you need to pick the perfect fit for your family, lifestyle, and property. We specialize in three main types of in-ground pools: gunite, vinyl liner, and fiberglass. Each one offers unique benefits, from complete design freedom to speedy installation and easy upkeep. Our team is here to walk you through the options and help you find the pool that will bring your backyard vision to life. Let’s explore what makes each type special.
Custom Gunite Pools
If you can dream it, we can build it with gunite. These pools are constructed with a rebar framework and a sprayed concrete mixture, giving you unlimited possibilities for shape, size, and depth. This flexibility makes gunite the ideal choice for complex, high-end projects. We often design our custom swimming pools to seamlessly integrate with other backyard features, like attached spas, cascading waterfalls, tanning ledges, and even outdoor kitchens. Gunite pools are incredibly durable and built to last, creating a permanent, beautiful centerpiece for your outdoor living space that will be enjoyed for generations.
Versatile Vinyl Liner Pools
Vinyl liner pools are a fantastic and popular option, offering a great balance of beauty, comfort, and value. These pools are built with a durable vinyl membrane that fits perfectly into a prepared structure, providing a silky-smooth surface that’s gentle on your feet. One of the best things about vinyl liners is the sheer variety of colors and patterns available, allowing you to customize the look of your water. We not only build new vinyl liner pools but also specialize in pool renovations, which can include converting an older gunite pool to a modern vinyl liner system. They are a versatile choice for any Long Island backyard.
Low-Maintenance Fiberglass Pools
For homeowners who want a stunning pool without the extensive upkeep, fiberglass is an excellent choice. These pools are crafted from a pre-molded fiberglass shell that is delivered to your home and set in place, making for a remarkably fast installation, often in just a few days. The smooth, non-porous surface of a fiberglass pool is its superpower. It naturally resists algae growth, which means you’ll spend less time cleaning and more time swimming. This surface also requires fewer chemicals to maintain water balance. You can see examples of our efficient installations on our YouTube channel, where we showcase our projects from start to finish.
Why Choose Gappsi for Your Pool Project?
Choosing the right partner to build your swimming pool is one of the most important decisions you’ll make for your home. It’s not just about digging a hole and filling it with water; it’s about creating a beautiful, functional, and safe centerpiece for your backyard that will bring joy for years to come. A pool is a significant investment, and the process can feel overwhelming. You need a team you can trust to handle every detail with care, from the initial design concepts to the final, sparkling finish. At Gappsi, we understand this completely. We’ve spent over 30 years helping Long Island homeowners create their dream backyards, and we know what it takes to deliver an exceptional experience. We combine our deep expertise with a genuine passion for design and an unwavering commitment to quality that sets us apart. Our approach is built on four key pillars: custom design, seamless project management, high-quality materials, and superior workmanship. By focusing on these areas, we make the entire process smooth, transparent, and rewarding for you. We don’t just build pools; we build relationships and create outdoor living spaces where memories are made.
Custom Designs and Full Backyard Transformations
Your backyard should be a reflection of your lifestyle, and your pool is the main attraction. We don’t believe in one-size-fits-all solutions. Instead, we specialize in creating custom swimming pools that are perfectly tailored to your space and your family’s needs. Whether you envision a classic rectangular pool for swimming laps or a freeform oasis with cascading waterfalls, our design team works with you to bring that dream to life. We look at the bigger picture, designing complete backyard transformations that integrate your new pool with patios, landscaping, and outdoor living areas. The result is a cohesive and stunning environment where every element works in harmony.
Seamless Project Management and Permitting
One of the biggest challenges of any major home improvement project is coordinating different contractors. With Gappsi, that stress disappears. We are a comprehensive design and construction company, which means our in-house teams handle everything from the initial excavation and masonry to the final landscaping touches. This integrated approach ensures a smooth workflow, consistent quality, and a single point of contact for you throughout the project. We also manage the entire permitting process, which can often be complex and time-consuming. Our experience with local regulations means we can secure the necessary approvals efficiently, keeping your project on track and saving you the headache.
High-Quality Materials and Automated Safety
A beautiful pool should also be a safe and efficient one. We build with only the highest quality materials, from durable gunite and vinyl liners to elegant porcelain and natural stone pavers for your pool deck. Our commitment to quality extends to the features we recommend, especially when it comes to safety. We are strong advocates for automatic retractable safety covers, which provide peace of mind for families with children and pets. These covers not only secure your pool when it’s not in use but also help conserve heat, reduce water evaporation, and minimize chemical usage, saving you money in the long run.
Lasting Durability and Superior Workmanship
A Gappsi pool is an investment in your home and your family’s happiness, and we build it to last. With over 30 years of experience, our team’s craftsmanship is second to none. We pride ourselves on our meticulous attention to detail and our unwavering commitment to building structures that stand the test of time. Our clients consistently praise our professionalism, trustworthiness, and the quality of our work. We combine proven construction techniques with modern technology to deliver a pool that is not only beautiful on day one but remains a source of pride and enjoyment for decades.
What Other Services Does Gappsi Offer?
While we’re known for creating stunning swimming pools, our expertise doesn’t stop at the water’s edge. We see your home as a complete canvas, and our goal is to help you create a seamless, beautiful, and functional space both inside and out. Think of us as your single partner for a total home transformation. From lush garden designs to cozy indoor retreats, we offer a full range of services to bring your entire vision to life, ensuring every element works together in perfect harmony.
Landscaping and Outdoor Living
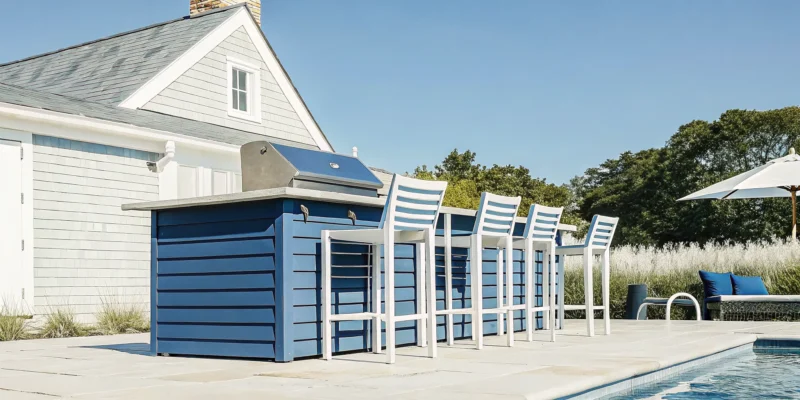
A beautiful pool deserves an equally beautiful setting. We specialize in creating cohesive backyard environments where the pool is the centerpiece of a larger outdoor living area. Our team can design and build everything you need to complete your oasis, including elegant patios perfect for lounging and custom outdoor kitchens for entertaining. We handle all the details of your landscape design, from planting lush gardens to installing ambient lighting, ensuring your new backyard is a true extension of your home. A thoughtful landscape not only frames your pool beautifully but also creates distinct zones for dining, relaxing, and playing.
Home Remodeling and Masonry
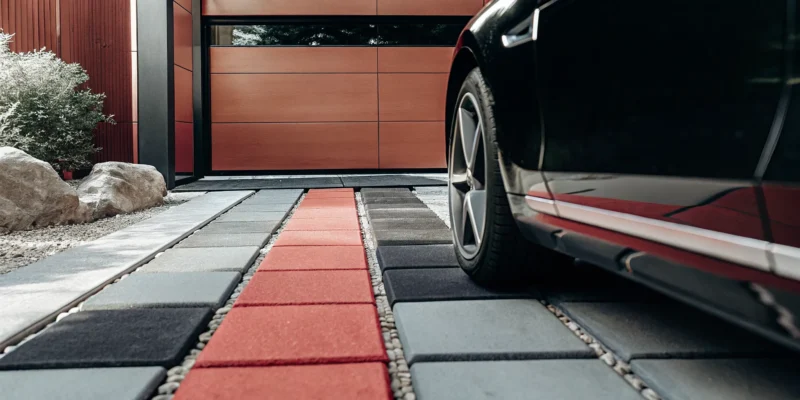
Our passion for design and quality craftsmanship extends into your home. We offer comprehensive home remodeling services to create a smooth transition from your indoor spaces to your outdoor retreat. Whether you’re dreaming of a new kitchen that opens onto the patio or a bathroom that feels like a spa, we can make it happen. Our expert masonry team also crafts stunning stone features, including fireplaces, walkways, and retaining walls that add timeless character and value to your entire property. This unified approach ensures the style of your home flows effortlessly from the inside out.
Game Courts and Pavilions
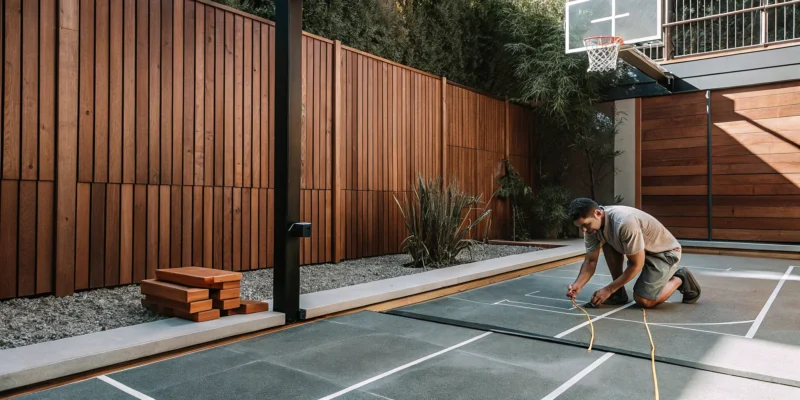
Ready to make your backyard the ultimate destination for fun and relaxation? We design and install custom Sports Games Courts for families who love to stay active, providing a perfect space for everything from basketball to pickleball. To round out your entertainment options, consider adding one of our beautiful pavilions or pergolas. These structures offer a stylish, shaded retreat for hosting gatherings, dining outdoors, or simply relaxing by the pool. They create a defined “outdoor room” that makes your yard more versatile and enjoyable for family and friends throughout the seasons.
Saunas and Restoration
Bring the spa experience home with a personal sauna. We offer a variety of options, from traditional outdoor barrel saunas to modern indoor infrared models, creating a perfect sanctuary for wellness and relaxation right on your property. Beyond new installations, we are also here to care for your existing outdoor features. Our restoration and sealing services can breathe new life into weathered patios and pool surrounds. We also handle major projects like converting gunite pools to vinyl, ensuring your backyard investments remain beautiful and functional for years to come.
How Does Our Pool Construction Process Work?
Bringing a new swimming pool to life is an exciting process, and our goal is to make it as smooth and enjoyable as possible for you. We’ve refined our construction process over decades to ensure every project is managed with precision, transparency, and a deep respect for your home and vision. From the first sketch to the first swim, we handle every detail so you can focus on the fun parts. Our approach is built on clear communication and collaboration, ensuring you’re informed and confident at every stage.
We break the journey down into three main phases: design, planning, and installation. It all starts with a conversation where we listen to your ideas and help shape them into a functional, beautiful design. Next, our team manages all the technical details, including securing permits and creating a realistic project timeline. Finally, our skilled craftsmen get to work, building your pool with the highest quality materials and attention to detail. As a full-service home improvement company, we see your pool as the centerpiece of a complete backyard transformation, and our process reflects that holistic vision. We coordinate everything, so you have one trusted partner from start to finish.
Your Initial Consultation and Design
Everything begins with your vision. During our initial consultation, we sit down with you to understand exactly what you’re looking for in a backyard pool. We discuss how you plan to use the space, your aesthetic preferences, and your budget. As a company that designs and builds custom swimming pools across Long Island, we specialize in creating unique designs tailored to your property and lifestyle. Our designers will help you visualize the final result with detailed plans, showing you how the pool will integrate with your home and landscape. This is also when we’ll explore materials, from the pool’s interior finish to the beautiful porcelain and natural stone options for your patio and coping.
Handling Permits and Project Timelines
One of the most complex parts of any major home improvement project is dealing with the paperwork. We take that entire burden off your shoulders. Our experienced team handles the process of securing all necessary building permits from your local town or village, ensuring your project complies with all safety codes and regulations. Once the permits are approved, we establish a clear and detailed project timeline. We believe in keeping you informed every step of the way, so you’ll always know what’s happening and what to expect next. Our project managers provide regular updates, making the entire process feel organized and completely under control.
Final Installation and Quality Checks
This is where your vision truly comes to life. Our construction crews are masters of their craft, and they work efficiently and respectfully to build your pool to the highest standards. From the initial excavation to the final plumbing and electrical work, every step is executed with precision. Because we are a full backyard design company, we ensure the pool installation fits perfectly within the larger landscape design. Before we consider the project complete, we conduct a series of rigorous quality checks to ensure every feature is working perfectly and the entire installation is flawless. We’ll walk you through your new pool, show you how to operate the equipment, and make sure you are 100% satisfied.
What Pool Features and Upgrades Can You Add?
A swimming pool is the heart of your backyard, but the features you add are what truly bring it to life. Think of your pool as the foundation and the upgrades as the details that reflect your personal style and how you want to live. At Gappsi, we don’t just build pools; we create complete, cohesive outdoor environments. We see every project as an opportunity to design a space that flows seamlessly from your home to your patio and into the water. Whether you dream of a serene, spa-like retreat or a fun-filled family resort, the right features can make all the difference.
From the soothing sound of a waterfall to the convenience of a fully automated system, we can help you explore all the possibilities. We specialize in integrating custom elements that enhance both the beauty and functionality of your swimming pool. This includes everything from dramatic lighting and integrated spas to practical additions like heaters and automatic safety covers. Our design process is all about understanding your vision and then bringing it to life with high-quality materials and expert craftsmanship. We can incorporate unique finishes, built-in sundecks, and even thrilling slides to match your family’s lifestyle. Let’s look at some of the most popular features you can add to create your perfect backyard oasis.
Water Features and Custom Lighting
Water features and lighting are what transform a beautiful pool into a breathtaking one. Imagine the gentle sound of a waterfall cascading over natural stone, or sleek deck jets creating elegant arcs of water across the surface. These elements add movement, sound, and a touch of luxury to your backyard. We can design anything from a thrilling waterslide for the kids to a tranquil sundeck for lounging.
Custom lighting extends the enjoyment of your pool long after the sun goes down. Modern LED systems can illuminate your pool with a spectrum of colors, allowing you to set the mood for a quiet evening swim or a lively backyard party. By combining these features with thoughtful landscape design, we create an immersive experience that feels like your own private resort.
Pool Heating and Automation
Why limit your swim season to just a few months? A pool heater is one of the most practical upgrades you can make, allowing you to comfortably enjoy the water from early spring through late fall. It maximizes your investment and gives you more time to make memories with family and friends.
Pool automation adds another layer of convenience, making pool ownership simpler than ever. With a modern control system, you can manage everything from your smartphone or tablet. Adjust the temperature, turn on the lights, activate the spa jets, and monitor your water chemistry with just a few taps. This technology takes the daily work out of owning a swimming pool, so you can spend less time on maintenance and more time relaxing.
Automatic Safety Covers
An automatic safety cover is one of the most important features you can add to your pool, offering both peace of mind and long-term savings. For families with children or pets, it provides an essential layer of protection by creating a barrier that completely seals off the water’s surface when the pool is not in use.
Beyond safety, these covers are a smart financial investment. They significantly reduce water evaporation, which saves on water bills. They also help retain heat, lowering your heating costs and keeping your pool warmer naturally. By keeping leaves, dirt, and other debris out, an automatic cover reduces the time you spend cleaning and the amount of chemicals you need. It’s a feature that protects your family and your investment.
What Are Our Customers Saying?
Choosing a partner for a major home project like a new pool is a big decision. While we can tell you all about our process and quality, sometimes the most helpful insights come from homeowners who have already worked with us. We’re proud of the relationships we build and the backyards we transform. Here’s what some of our clients have to say about their experience with the Gappsi team.
Our Quality and Attention to Detail
When you invest in a custom pool, you want every detail to be perfect. We believe that exceptional results come from a hands-on approach. Our clients often tell us they appreciate this focus. One homeowner shared, “What was most impressive about working with Gappsi was the level of attention to detail Giuseppe personally put into while his company had many big jobs.” This commitment means we treat every project, big or small, with the same high standard of care, ensuring your final oasis is exactly as you envisioned it. You can read more customer testimonials to see what others have experienced.
Our Commitment to Service and Reliability
A smooth and stress-free process is just as important as the final product. We aim to provide clear communication and dependable service from your first consultation to the final walkthrough. A happy customer noted, “If you’re looking for a company that delivers top-notch workmanship, fair pricing, and exceptional customer service, I highly recommend The Gappsi Group.” For us, great service means being a reliable partner you can trust to bring your vision to life. We manage all the moving parts so you can simply get excited for your new swimming pool.
Ensuring Your Long-Term Satisfaction
Your backyard is meant to be enjoyed for years, so we build our pools and patios to last. We use high-quality materials and proven construction techniques to ensure your investment stands the test of time. One of our long-time clients said, “Gappsi installed my patio and pool deck about 15 years ago and it still looks as good as the day it was installed.” This kind of lasting quality is our goal for every project. We want you to feel confident that your beautiful new space will be the backdrop for family memories for many seasons to come.
How Much Does a Gappsi Pool Cost?
One of the first questions on everyone’s mind is, “What will my new pool cost?” While there isn’t a single price tag, understanding the factors that shape the final cost helps you plan your budget. The total investment for your Gappsi swimming pool depends entirely on your vision. Everything from the pool’s size and shape to the materials for the surrounding patio and any custom features will play a role. We believe in complete transparency and want you to feel confident and informed. Our team is here to guide you through the process, ensuring your project aligns with your financial comfort zone.
What Determines Your Pool’s Price?
Your pool’s final price is a reflection of your personal choices. Key factors include the type of pool you select, its dimensions, and the design’s complexity. The materials for your patio and coping also have a big impact. Beyond the pool itself, the equipment you choose is a significant part of the budget. For instance, Gappsi can provide you financing on all your pool equipment from our house brand, Jandy. Another option to consider is using home equity to fund your project. These choices give you control over the final cost and functionality of your new backyard.
Our Financing and Payment Options
We know a new pool is a significant investment. To make the process more manageable, we offer flexible payment solutions. As we often explain to our clients, Gappsi offers financing options for pool and home improvement projects. This financing allows you to get started on your project without paying the full cost up front. Our goal is to help you bring your vision to life on a timeline and budget that feels comfortable for you and your family, so you can start enjoying your new space sooner.
Ask About Current Promotions
Before finalizing your plans, it’s always a great idea to check in with us about any special offers. We encourage you to ask about current promotions when you connect with our design team. These specials can provide extra savings or unique financing opportunities that make adding that extra feature, like custom lighting or a waterfall, even more attainable. We’re always happy to share the latest deals to help you get the most value from your investment in a beautiful Gappsi pool project.
Do You Offer Pool Maintenance and Renovations?
Absolutely. A swimming pool is a long-term addition to your home, and our relationship with you doesn’t end once the construction is complete. We’re here to help you keep your pool in pristine condition for years to come, whether that means giving it a modern facelift or providing guidance on seasonal upkeep. We believe in protecting your investment and ensuring your backyard oasis remains a source of joy and relaxation for your family.
Pool Renovations and Conversions
Is your existing pool showing its age or no longer matching your style? We specialize in comprehensive pool renovations that breathe new life into outdated designs. We can transform your space with modern features, new finishes, and even structural changes. For example, we can convert an old gunite pool to a beautiful, low-maintenance vinyl liner pool, giving you a fresh look without a complete rebuild. A renovation is also the perfect opportunity to reimagine your entire backyard. We can integrate your updated pool with a stunning new patio, an outdoor kitchen, or lush landscaping to create a completely cohesive and functional outdoor living area.
Seasonal Care and Equipment Service
Proper care is essential for protecting your pool and keeping it clean and safe through every season. We highly recommend automatic retractable safety covers, which are fantastic for keeping out leaves and debris, reducing your cleaning time significantly. They also provide an essential layer of security for your family. To ensure your pool weathers the winter months, it’s important to check on your cover about once a month. Make sure snow or water isn’t accumulating too heavily, and double-check that the cover’s pump is working correctly to drain excess moisture. This simple, proactive approach helps prevent damage and ensures your pool is ready to go when warm weather returns.
Related Articles
- Long Island Swimming Pool Design & Construction NY | Gappsi
- Custom Pools & Luxury Backyard Transformations | Gappsi Inc
- East Islip Pool & Outdoor Living Experts | Gappsi Inc
- pool builders long island Archives – Gappsi Group
Frequently Asked Questions
Do I work with Gappsi or East West Pools for my project? You get the expertise of both. East West Pools is our dedicated swimming pool division, so you’ll work directly with these specialists to design and build your perfect pool. At the same time, your project is managed under the Gappsi name, giving you access to our full range of services and the assurance of our 30-year reputation. This structure provides the focused skill of a boutique pool builder with the comprehensive power of a full-service home improvement company.
How do I choose the right type of pool for my family? The best choice really depends on your priorities. If you want complete creative freedom for a one-of-a-kind shape with features like built-in spas or tanning ledges, a gunite pool is your answer. For a great balance of design variety and value with a smooth, comfortable surface, a vinyl liner pool is a fantastic option. If your main goals are a speedy installation and the lowest possible maintenance, a pre-molded fiberglass pool is an excellent choice.
Why is it better to have one company handle my pool, patio, and landscaping? Using one company for your entire backyard transformation creates a seamless and stress-free experience. It ensures a cohesive design where your pool, patio, and plantings all work together beautifully. More importantly, it means you have a single point of contact. You won’t have to coordinate schedules between a pool builder, a mason, and a landscaper. Our integrated team handles everything, which prevents delays and communication issues, leading to a smoother project from start to finish.
What does the timeline for a pool project typically look like? The total timeline can vary depending on the type of pool you choose, the complexity of the design, and the local permitting process. The initial design and approval phase is the first step. Once permits are secured, the actual construction can begin. A fiberglass pool installation can be quite fast, while a custom gunite project will take longer. We provide a clear and detailed timeline for your specific project once the design is finalized so you know exactly what to expect.
What are the main benefits of an automatic safety cover besides security? While providing peace of mind is its most important job, an automatic cover offers incredible practical benefits. It saves you money by significantly reducing water evaporation and chemical use. It also acts like a giant solar blanket, retaining heat to lower your heating costs and naturally keep the water warmer. Finally, it keeps your pool much cleaner by preventing leaves and debris from falling in, which means you’ll spend a lot less time skimming and more time swimming.