Your backyard should be a reflection of your family’s personality and passions. A custom sports game court offers a unique opportunity to create a space that is truly your own. You can go far beyond a standard setup by choosing your favorite team’s colors, adding a family monogram to the center court, and including lines for multiple games like basketball, pickleball, and volleyball. The possibilities for personalization are nearly endless. This is where skilled custom sports court builders come in. They work with you to translate your ideas into a functional and beautiful design that fits your specific space and budget. From selecting the right high-performance surface to adding features like lighting and fencing, they help you craft a one-of-a-kind court that becomes the centerpiece of your outdoor life.
Key Takeaways
- Partner with a full-service builder for a stress-free process: A professional handles every detail, from initial design and site preparation to installing the final surface, ensuring your project is managed correctly from start to finish.
- Customize every detail to create your ideal playing space: Go beyond a standard design by choosing your court’s surface, colors, and layout, and adding features like lighting or custom logos to match your family’s needs and style.
- Protect your investment with smart planning: A successful project depends on doing your homework, which means thoroughly vetting your builder’s experience, understanding all cost factors, and learning about long-term maintenance from the start.
What Does a Custom Game Court Builder Do?
Thinking about adding a game court to your backyard is exciting, but the thought of managing a big construction project can feel overwhelming. That’s where a custom game court builder comes in. A professional builder handles the entire process for you, from the first sketch to the final bounce of the ball. They act as your single point of contact, coordinating every detail so you can focus on picturing all the fun you’re about to have. Let’s walk through what a dedicated builder does at each stage of the project.
From Concept to Design
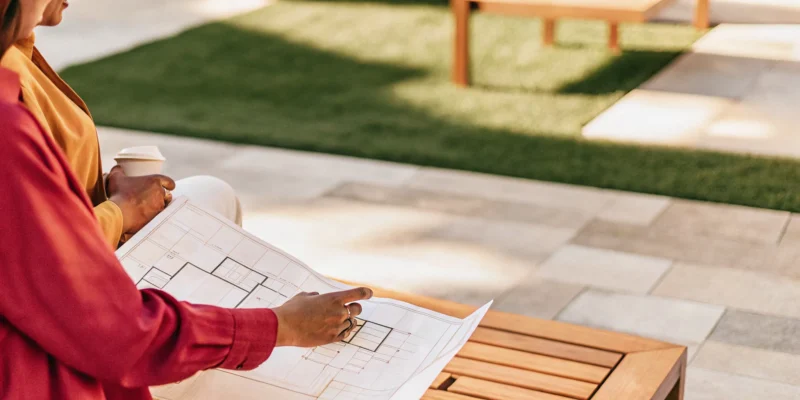
This is the fun part, where your vision starts becoming a reality. Your builder’s first job is to listen. They’ll ask about the sports your family loves, who will be playing, and what your dream setup looks like. From there, they translate your wishes into a professional design. This process involves more than just drawing lines on a blueprint. They’ll help you select features like adjustable hoops, rebounders, and even player benches. A thoughtful design also considers how the court integrates with your landscape and plans for practical elements like proper fencing and netting. They manage all the planning, ensuring the final layout is safe, functional, and a beautiful addition to your home.
Preparing Your Property
Before any construction starts, your property needs to be ready. A professional builder conducts a thorough site assessment to find the perfect spot for your new game court. They analyze your yard’s slope, soil type, and existing drainage to prevent future problems like puddles or an uneven surface. This step is crucial on Long Island, where managing water runoff is key to a lasting installation. By handling the complex work of excavation and grading, they create a perfectly level, stable base. This careful preparation is the literal foundation for a durable and high-performing custom sports games court that your family can enjoy for years.
Building the Foundation and Surface
With the site prepped, it’s time to build. Your builder will construct a strong foundation, usually with concrete or compacted stone, to provide a solid base for the playing surface. This is a non-negotiable step that guarantees your court’s stability and performance. Once the base is ready, they install your chosen surface. Whether you want the consistent ball response of modular tiles or the cushioned feel of synthetic turf, an expert ensures a flawless installation. They use high-quality materials and precise techniques to create a safe, professional-grade playing area that can handle everything from friendly games to intense competition, all while standing up to Long Island’s weather.
Providing Long-Term Care
A great builder’s commitment doesn’t end when the last line is painted. Reputable professionals stand by their work by offering long-term care to keep your court in top shape. This includes guidance on routine cleaning, seasonal inspections for wear and tear, and professional repairs if needed. Over time, even the best surfaces can show their age. When that happens, your builder can make your court look and feel new again with resurfacing. Having a trusted partner for maintenance gives you complete peace of mind. You can simply enjoy your court, knowing that expert restoration and sealing services are available to protect your investment for the long run.
Popular Game Courts for Long Island Homes
Choosing the right game court for your backyard is about matching your family’s favorite activities with your available space. A custom court can become the centerpiece of your outdoor life, a place for everything from serious practice to casual weekend fun with friends and neighbors. Whether you envision a space for one specific sport or a versatile area for multiple games, there are fantastic options that can be tailored to fit your Long Island home perfectly. Let’s look at some of the most popular choices homeowners are making.
Basketball Courts
A backyard basketball court is a timeless classic. It’s a perfect spot for kids to practice their shots, for you to get in a quick workout, or for hosting a friendly neighborhood tournament. Modern basketball courts are highly customizable, so you don’t have to settle for a one-size-fits-all design. You can select team colors, choose a size that fits your yard, and even add a personal logo to the center. This level of personalization ensures your court not only provides endless entertainment but also complements your home’s overall aesthetic. Gappsi specializes in creating custom synthetic turf and sports game courts that are built to last and designed just for you.
Tennis Courts
For those who love the game, a private tennis court offers a touch of luxury and a serious athletic outlet right at home. It’s a significant addition that can add real value to your property while providing a dedicated space for fitness and recreation. Professional builders can construct various types of courts, from classic clay to low-maintenance hard courts, each offering a different playing experience. Because a tennis court requires a substantial, level foundation, it’s a project that integrates well with broader landscape design and construction, ensuring it feels like a natural part of your property from day one.
Pickleball Courts
Pickleball has quickly become one of the most popular sports in the country, and for good reason. It’s easy to learn, fun for all ages, and incredibly social. Because a pickleball court is smaller than a tennis court, it’s a practical choice for many Long Island backyards where space might be a consideration. The growing demand means that dedicated pickleball courts are now a common request, turning underused parts of a yard into vibrant hubs of activity. It’s a fantastic way to bring family and friends together for some lighthearted competition.
Multi-Sport Game Courts
If your family has a wide range of interests, a multi-sport game court is the ultimate flexible solution. Why choose just one game when you can have several? You can design a primary court, like basketball, and add lines for other activities such as volleyball, badminton, or pickleball. This approach maximizes the utility of your outdoor space, ensuring there’s always a new game to play. A multi-sport court is a smart investment that keeps your backyard exciting and accommodates everyone’s favorite pastimes, making it the most versatile playground you can imagine.
How to Customize Your Game Court
Building a custom game court is your chance to create a space that’s perfectly suited to your family’s favorite activities. From the playing surface to the final details, every element can be tailored to your vision. Here’s how you can personalize every detail to design the backyard game court of your dreams.
Choosing Your Surface
The surface you choose sets the stage for your entire playing experience. Think about the sports you’ll play most. Are you dreaming of a fast-paced basketball game or a friendly match of pickleball? We can help you select the perfect material, whether it’s classic acrylic hard courts or versatile modular tiles that offer great performance and shock absorption. For a softer feel underfoot, you might even consider synthetic turf, which is great for multi-sport fun and has a lush, green look. Each option has its own benefits for ball bounce, player comfort, and durability, so we’ll walk you through the best fit for your home and activities.
Adding Colors, Lines, and Logos
This is where your personality really gets to shine. You can move beyond standard green and design a court that reflects your family’s style. Choose from a wide palette of colors to match your home’s exterior, show off your favorite team’s colors, or create a bold, unique design. We can add crisp, professional-grade lines for any sport you can imagine, from basketball and tennis to pickleball and four square. You can even add a custom logo, like a family crest or monogram, right in the center. A professional design makes your court not just a place to play, but a true centerpiece of your backyard.
Deciding on Size and Layout
You don’t need a massive estate to enjoy a custom game court. One of the biggest advantages of a custom build is its flexibility. We design courts that work with your specific property, not the other way around. Modular tiles can be configured to fit almost any dimension, allowing us to create a functional and fun playing area in the space you have available. Whether you have a compact side yard or a sprawling lawn, we can help you design a layout that maximizes playability. Our team will work with you to map out a custom sports game court that fits your ideas and your budget.
Selecting Fencing, Netting, and Lighting
A great game court is more than just the playing surface. The right features ensure your court is safe, functional, and ready for action anytime. Thoughtful lighting means a game of hoops doesn’t have to end when the sun goes down. Proper fencing and netting keep stray balls from ending up in your neighbor’s yard or your garden beds, making playtime safer and more convenient for everyone. As a full-service builder, we handle every aspect of the project, from the initial site prep to installing these essential finishing touches. This comprehensive approach ensures your court is fully equipped and seamlessly integrated into your landscape.
How to Choose the Right Game Court Builder
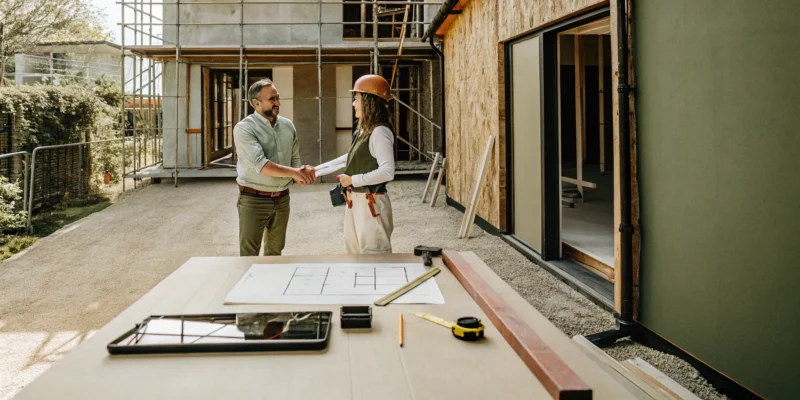
Building a custom game court is a significant investment in your home and your family’s fun, so choosing the right partner for the job is the most important first step. The right builder doesn’t just lay down a surface; they bring your vision to life, manage the project professionally, and deliver a final product that stands the test of time. A great contractor ensures the entire process is smooth and stress-free, from the initial design conversation to the first game you play.
When you start your search, you’ll find that the best builders stand out in a few key areas. They have a proven track record, they operate with full transparency, and they make communication a priority. Focusing on these qualifications will help you find a team that not only has the technical skills but also provides the support you need for a major home improvement project. Gappsi has been designing and installing custom turf and sports games courts for years, giving us a deep understanding of what makes a project successful from start to finish.
Review Their Experience and Portfolio
A builder’s experience is your best indicator of future success. Look for a company with a long history of building sports games courts specifically on Long Island. A seasoned team understands local zoning, soil conditions, and how to build a court that withstands our specific weather patterns. Go beyond their “About Us” page and ask to see a portfolio of their completed work. A quality portfolio should showcase a variety of projects, giving you a clear idea of their craftsmanship and design capabilities. You can often find project videos and galleries on a company’s YouTube channel, which provides a dynamic look at their work.
Verify Licenses, Insurance, and Warranties
This step is all about protecting your investment and your property. Before signing any contracts, confirm that your builder is fully licensed and insured to work in your area of Long Island. This is non-negotiable, as it protects you from liability in case of an accident on your property. A professional company will readily provide this documentation. Equally important is the warranty. Ask about the warranties offered on both the materials and the labor. A strong warranty, for example, a 15-year warranty on the court surface, shows that the builder stands behind their work and is committed to quality. This is a standard practice for any major home remodeling project.
Assess Their Communication and Support
You’re not just hiring a crew; you’re entering a partnership. The construction process can take weeks, so you want a team that is responsive, respectful, and easy to work with. Pay close attention to how they communicate during your initial consultation. Do they listen to your ideas and answer your questions clearly? A reputable builder will guide you through the entire process, from design choices to site preparation, ensuring you feel informed and confident at every stage. They should provide a clear timeline and be upfront about how they will handle any potential issues. This level of support is a hallmark of a true masonry designer and construction company, where client collaboration is key.
Is This Builder the Right Fit for You?
Once you have a shortlist of potential builders, the consultation is your chance to find the perfect partner for your project. Think of this meeting as a two-way interview. While they’re assessing your property and project scope, you should be evaluating their expertise, process, and whether they’re the right fit for your family. A great builder will welcome your questions and provide clear, confident answers. This initial conversation sets the tone for the entire project, so it’s important to feel comfortable and heard from the very beginning.
Coming prepared with a specific set of questions will help you compare builders and make an informed decision. You’re not just buying a product; you’re investing in a long-term relationship and a significant addition to your home. The right builder will make you feel like a valued partner, guiding you through each step with transparency and professionalism. They should be just as invested in bringing your vision to life as you are. A builder who understands the unique demands of constructing sports games courts on Long Island will be able to anticipate challenges and deliver a final product that exceeds your expectations.
Key Questions to Ask During Your Consultation
Your consultation is the perfect time to dig into the details. Don’t hesitate to ask specific questions that reveal a builder’s experience and process.
Start by asking about their background. How many years have they been building sports games courts in the Long Island area? A long track record often means they have a deep understanding of local soil conditions, weather patterns, and permitting requirements. Next, inquire about customization. Can you choose specific colors, add custom logos, or design a unique layout? A quality builder should offer a wide range of options beyond a standard kit. Also, clarify if they are a full-service company. Will they handle everything from excavation and base preparation to installing fences and netting? Finally, ask about the materials and warranty, as this reflects their confidence in the court’s durability.
Warning Signs to Watch For
Just as important as asking the right questions is knowing which answers to watch out for. A few red flags can help you steer clear of a difficult or disappointing experience.
Be cautious if a builder seems unfamiliar with Long Island’s specific building codes or environmental factors. A contractor without local knowledge may run into unexpected delays or structural issues. Another warning sign is a lack of flexibility. If they push a one-size-fits-all solution or seem reluctant to discuss your custom ideas, they may not be the right partner for a personalized project. Pay close attention to their communication style. A builder who is dismissive of your questions or provides vague answers during the consultation will likely be difficult to work with later. You want a team that prioritizes customer service and is committed to keeping you informed, as this shows they value your partnership and satisfaction.
What to Expect During Installation
Once you’ve finalized the design for your new sports games court, the construction phase begins. This is where your vision starts to become a reality, and it’s helpful to know what the process looks like from the ground up. A professional builder follows a meticulous process to ensure your court is not only beautiful but also safe and durable for years of enjoyment. From preparing the ground to painting the final lines, each step is handled with precision. At Gappsi, we manage the entire project, so you can relax and watch the transformation happen. We believe in clear communication, keeping you informed at every stage of the build. The installation journey involves several key stages: preparing the site, building a stable base, managing water drainage, installing the surface, and adding all the finishing touches. Understanding these steps can help you appreciate the craftsmanship that goes into creating a high-performance court that will last for decades. Our team coordinates everything, ensuring a smooth and efficient process from start to finish, so your backyard is disrupted for the shortest time possible.
Site Prep and Base Construction
The first step in building your dream sports games court is preparing the site. Think of this as creating the perfect canvas. Our team will start by clearing the designated area of any grass, rocks, or debris. Next, we grade the land to create a perfectly level surface, which is essential for proper play and drainage. Once the area is clear and level, we construct a solid base. This usually involves laying a foundation of crushed stone that is compacted to create a stable and supportive layer. Proper site preparation is the most important factor in the longevity and performance of your court, preventing issues like cracking or sinking down the road.
Managing Drainage on Long Island
Here on Long Island, we know how quickly a heavy rain can turn a backyard into a pond. That’s why effective drainage is a non-negotiable part of our installation process. Without it, water can pool on the surface, damaging the court and making it unsafe for play. We design our courts with a slight, almost imperceptible slope that directs water away from the playing area. Depending on your property’s specific needs, we might also install a French drain system or use permeable materials around the court. Our approach to landscape design ensures that water is managed effectively, protecting your investment and keeping your court ready for action, rain or shine.
Surface Installation and Finishing
With a solid and dry base in place, it’s time for the main event: installing the playing surface. Whether you’ve chosen asphalt, concrete, or a synthetic tile system, our crew installs it with expert precision. Each material has its own requirements for installation and curing, and we follow manufacturer guidelines to the letter to ensure a flawless finish. After the surface is installed and has had adequate time to cure, we add the finishing touches. This includes painting crisp, accurate lines for the sports you’ll be playing, adding any custom logos you’ve designed, and applying a protective sealant. Our restoration and sealing services ensure your court’s surface is durable and vibrant from day one.
Understanding the Cost of a Custom Game Court
Talking about budget is one of the most important parts of any home improvement project, and building a custom game court is no different. The final price tag can vary quite a bit because every project is unique. The total cost depends on your vision, your property, and the features you choose. Breaking down the expenses can help you create a realistic budget and understand exactly where your investment is going. Let’s walk through the main factors that influence the cost of bringing your dream court to life.
How Size and Surface Affect Price
The two biggest factors that will shape your budget are the court’s size and the surface material you select. A smaller half-court for basketball will naturally cost less than a full-size tennis court. When you consult with a builder, they will help you determine the best dimensions for your space and how you plan to use it.
The surface itself is the next major consideration. While a basic asphalt or concrete court is an option, many homeowners opt for high-performance surfaces designed for safety and playability. Gappsi offers a variety of synthetic turf and sports game courts options that provide better shock absorption and consistent ball bounce. The material you choose will have a direct impact on the price, so it’s important to weigh the upfront cost against long-term durability and performance.
The Cost of Site Preparation
Before any surface can be installed, your property needs to be properly prepared. This is a critical step that ensures your court will be stable, level, and well-drained for years to come. Site preparation can involve several tasks, including clearing the land, grading the soil to create a flat base, and ensuring proper drainage solutions are in place.
The complexity of this work depends entirely on your property’s current condition. A relatively flat, clear yard will require less work than a sloped area with trees or other obstacles. This phase can add a few thousand dollars or more to the project, but it’s an essential investment in the court’s longevity. Our expertise in landscape design and construction ensures this foundational work is done right.
Pricing for Custom Features
This is where you can truly make the court your own. Custom features are what transform a simple playing surface into a complete backyard destination. Popular additions include professional-grade lighting for evening games, containment fencing or netting, and adjustable-height basketball hoops. You can also add custom colors and logos to show off your favorite team or add a personal touch.
Each of these elements comes with its own price. For example, quality LED lighting can range from a couple thousand to several thousand dollars, while custom fences and netting will vary based on the height and materials. While these features add to the total cost, they also significantly enhance the court’s usability and aesthetic appeal.
Budgeting for Extras
When planning your budget, it’s wise to set aside a little extra for incidentals and future needs. A good rule of thumb is to add a contingency of about 10% to 20% to your total estimated cost. This buffer can cover any unexpected site challenges that might arise during construction.
This extra budget also accounts for things you’ll need once the court is finished, like new basketballs, tennis rackets, or a ball machine. It’s also smart to think about long-term maintenance. While our courts are built to last, occasional cleaning or future restoration and sealing will keep your court in top condition. Planning for these costs from the start helps ensure there are no surprises down the road.
Common Pricing Myths
One of the biggest myths about custom sports games courts is that they are always overwhelmingly expensive. While a high-end, multi-sport complex is a significant investment, a more modest court can be more attainable than many homeowners think. The final cost is not a fixed number; it’s a flexible total based on the choices you make.
By working with an experienced builder, you can explore different options for size, materials, and features to align the project with your budget. Opting for a simpler design or a phased approach, where you add features like lighting later on, can make the project more manageable. Don’t let assumptions about price stop you from exploring the possibilities. A professional consultation can give you a clear, accurate picture of what it would take to build your family’s new favorite hangout spot.
Mistakes to Avoid When Hiring a Builder
Hiring a builder for your custom sports game court is a major step, and you want to feel confident in your choice. Making the right decision from the start ensures a smooth process and a final product you’ll love for years. To help you feel prepared, let’s walk through a few common mistakes homeowners make during the hiring process, so you can sidestep them completely. By being aware of these potential pitfalls, you can find a partner who will bring your vision to life without any surprises.
Prioritizing Price Over Quality
It’s tempting to go with the lowest bid, but when it comes to a project like this, price shouldn’t be the only factor. A quote that seems too good to be true often is. Lower prices can mean subpar materials or rushed labor, leading to a court that cracks, fades, or becomes uneven sooner than you’d expect. Investing in a builder who uses high-quality materials and has proven expertise will save you money on repairs and replacements down the road. A well-built court is a durable, safe, and lasting addition to your home, making the initial investment in quality synthetic turf and sports games courts worthwhile.
Skipping the Vetting Process
In the excitement of starting a new project, it can be easy to rush the hiring decision. However, failing to thoroughly vet your builder is a risk you don’t want to take. Take the time to dig into their background. A reputable builder will proudly share a portfolio of their work and connect you with past clients. You can see examples of completed projects to get a feel for their craftsmanship and style. Check online reviews and make sure they have a solid reputation in the Long Island community. This due diligence ensures you’re partnering with a professional who consistently delivers quality results and has a history of satisfied customers.
Forgetting About Long-Term Maintenance
Your new sports game court will be the star of your backyard, but it needs a little care to stay in top condition. Many homeowners forget to discuss long-term maintenance before the project even begins. Ask potential builders what kind of upkeep their courts require. Do they offer maintenance plans or services? Understanding the routine cleaning, seasonal care, and potential for future repairs helps you protect your investment. For example, professional cleaning and sealing services can extend the life of many outdoor surfaces, and it’s good to know your options from day one.
Ignoring the Warranty and Support Plan
A warranty is your safety net. It’s a builder’s promise to stand behind their work, protecting you from material defects or installation issues that might pop up after the crew has packed up. Before you sign any contract, make sure you have a clear understanding of the warranty. What does it cover, and for how long? What is the process for making a claim? A builder who offers a strong, transparent warranty and a clear support plan shows confidence in their work and a commitment to your long-term satisfaction. This is a key part of any home remodeling project, big or small.
Underestimating the Risks of DIY
While taking on a DIY project can be rewarding, building a sports game court is a complex job that’s best left to the pros. The risks of a DIY installation are significant, from an uneven playing surface to improper drainage that can cause major damage over time. Professionals understand local building codes, soil conditions, and the precise techniques needed for a safe and durable foundation. Hiring an experienced masonry and construction company ensures the job is done right the first time, giving you a high-performance court that’s built to last and safe for your family to enjoy.
How to Maintain Your New Game Court
Your new custom sports games court is a fantastic addition to your home, and you’ll want to keep it in top shape. The good news is that maintenance is straightforward. A little regular care protects your investment, ensures the surface is safe for play, and keeps it looking great for years of family fun and friendly competition. Here’s how you can easily maintain your new court.
Simple, Regular Cleaning
Start with the basics. Keeping your court clean is the easiest way to extend its life. Leaves, twigs, and other debris can hold moisture and lead to stains or mildew. Make it a habit to sweep the surface regularly. For a deeper clean, the American Sports Builders Association suggests using a mild detergent with water. This simple routine prevents grime from building up and affecting the court’s performance. If you ever feel it needs a professional touch, our team offers expert restoration and sealing services to bring back that brand new look.
Inspecting for Wear and Tear
Once a month, take a quick walk around your court to check for any changes. You’re looking for small issues before they become big problems. Pay attention to the surface, looking for any small cracks, bubbling, or areas of significant wear. Check the painted lines to see if they are fading or chipping. Catching these things early can prevent more extensive repairs down the road and is a key part of court maintenance and safety. If you spot something concerning, it’s always best to have a professional from our sports games courts team take a look.
Seasonal Care for Long Island Weather
Living on Long Island means we get to experience all four seasons, and your court needs care that adapts to the changing weather. During our winters, it’s important to clear snow and ice promptly to prevent damage from the freeze-thaw cycle. Avoid using metal shovels or harsh chemical de-icers, which can harm the surface. In the summer, a regular rinse can wash away pollen and dust. Following these seasonal maintenance tips ensures your court can handle everything the local climate throws at it, keeping it ready for play year-round.
Knowing When It’s Time to Resurface
Even with perfect maintenance, every court surface will eventually show its age. Knowing the signs that it’s time to resurface is key to maintaining usability and safety. According to the International Tennis Federation, major indicators include widespread cracks, significant wear patterns in high-traffic areas, and a noticeable loss of traction that makes the surface feel slippery. Resurfacing isn’t just about looks; it restores the court’s safety and playability. When the time comes, our team can guide you through the process of giving your sports games court a fresh, high-performance surface.
Complete Your Backyard With Other Outdoor Features
Your new sports game court is more than just a place to play; it’s the anchor for your entire outdoor living space. Instead of just dropping a court into your yard, think about how it can connect with other features to create a complete backyard destination for family and friends. This approach, sometimes called “sportscaping,” is all about designing a cohesive environment for activity, relaxation, and entertainment. It’s how you turn a simple backyard into your family’s favorite hangout spot, with seamless flow from one area to the next.
Imagine having a comfortable, shaded spot for spectators or for taking a break between games. A custom pavilion or pergola provides just that, creating an elegant transition from the court to a relaxation zone. Proper fencing and netting are also essential, not just for keeping the ball in play but for defining the space and ensuring safety. We can help you choose materials that match your home’s aesthetic while providing the durability you need for years of fun.
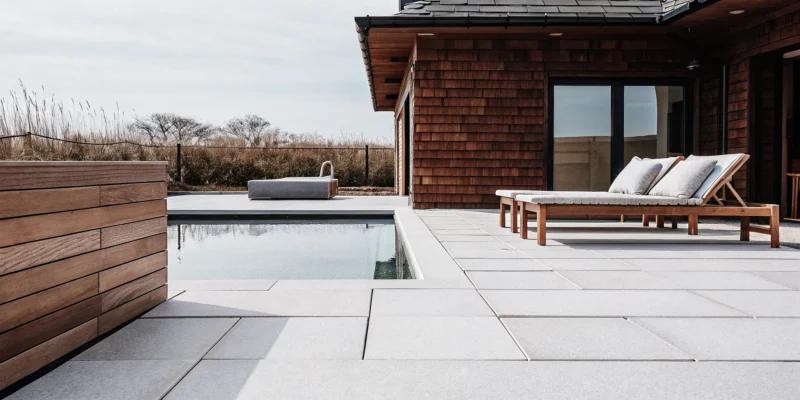
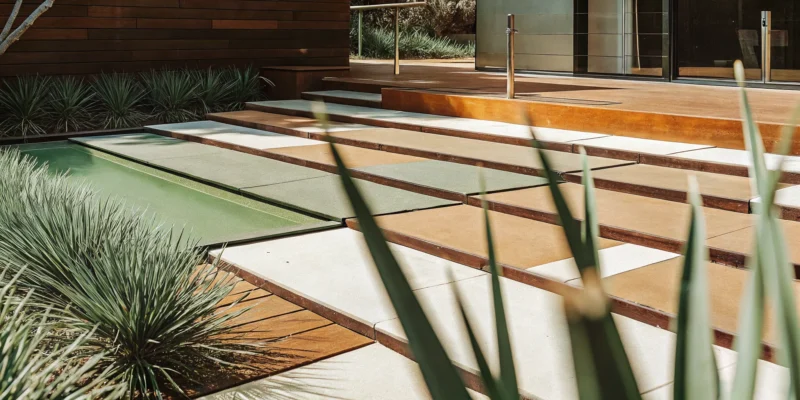
Why stop with just the court? You can create the ultimate activity hub by adding a personal putting green with our high-quality synthetic turf. Or, you could connect your new court to a beautiful patio with elegant walkways made from porcelain or natural stone, perfect for setting up a barbecue area. For the ultimate resort-like feel, you could even add a swimming pool for a post-game cool-down or a relaxing sauna to soothe sore muscles. By integrating these elements, your backyard becomes a versatile space that offers something for everyone.
Related Articles
- Long Island outdoor courts Archives – Gappsi Group
- Basketball Game Courts Long Island – Custom Design by Gappsi Inc
- Volleyball Sport Game Courts – Gappsi Group
- Basketball Courts in Long Island: Custom Design & Build | Gappsi Inc
- Basketball Court Design and Construction on Long Island | Bridgehampton NY – Gappsi Group
Frequently Asked questions
How much space do I really need for a custom game court? This is one of the most common questions I get, and the answer is always: it depends on your vision. You don’t need a huge property to create a fun, functional playing area. We design courts that fit your specific yard, whether that means a compact pickleball court, a half-court for basketball practice, or a smaller multi-sport layout. The beauty of a custom build is that we can tailor the dimensions to work with the space you have.
How long does the entire process take, from design to completion? The timeline can vary based on the project’s size, complexity, and even the weather, but a general estimate is usually a few weeks to a couple of months. The design and planning phase might take a week or two. After that, the actual on-site construction, including site preparation and surface installation, typically takes another two to four weeks. We always provide a clear, detailed timeline before we begin so you know exactly what to expect.
What’s the difference between a custom-built court and a DIY kit? While a DIY kit might seem like a good way to save money, building a sports games court is a complex construction project. A professional installation guarantees that the crucial foundation work, like grading and drainage, is done correctly. This prevents future problems like cracking, puddles, or an uneven surface. Our expertise ensures your court is safe, durable, and built to withstand Long Island’s weather for years of play.
Can I really play multiple sports on one court? Absolutely. Multi-sport game courts are one of our most popular requests because they offer incredible versatility. We can design a primary court, like basketball, and then add permanent lines for other games such as pickleball, volleyball, or even four square. This approach maximizes the fun you can have in your backyard and ensures there’s an activity for everyone in the family.
How do I keep my new game court looking and playing its best? Modern sports games courts are designed to be low-maintenance, but a little care goes a long way. The most important thing you can do is keep the surface clean by regularly sweeping away leaves and debris. It’s also a good idea to give it a gentle rinse with a hose periodically. We build our courts to last, and we’ll give you simple, specific care instructions to ensure your court stays in top condition for years to come.