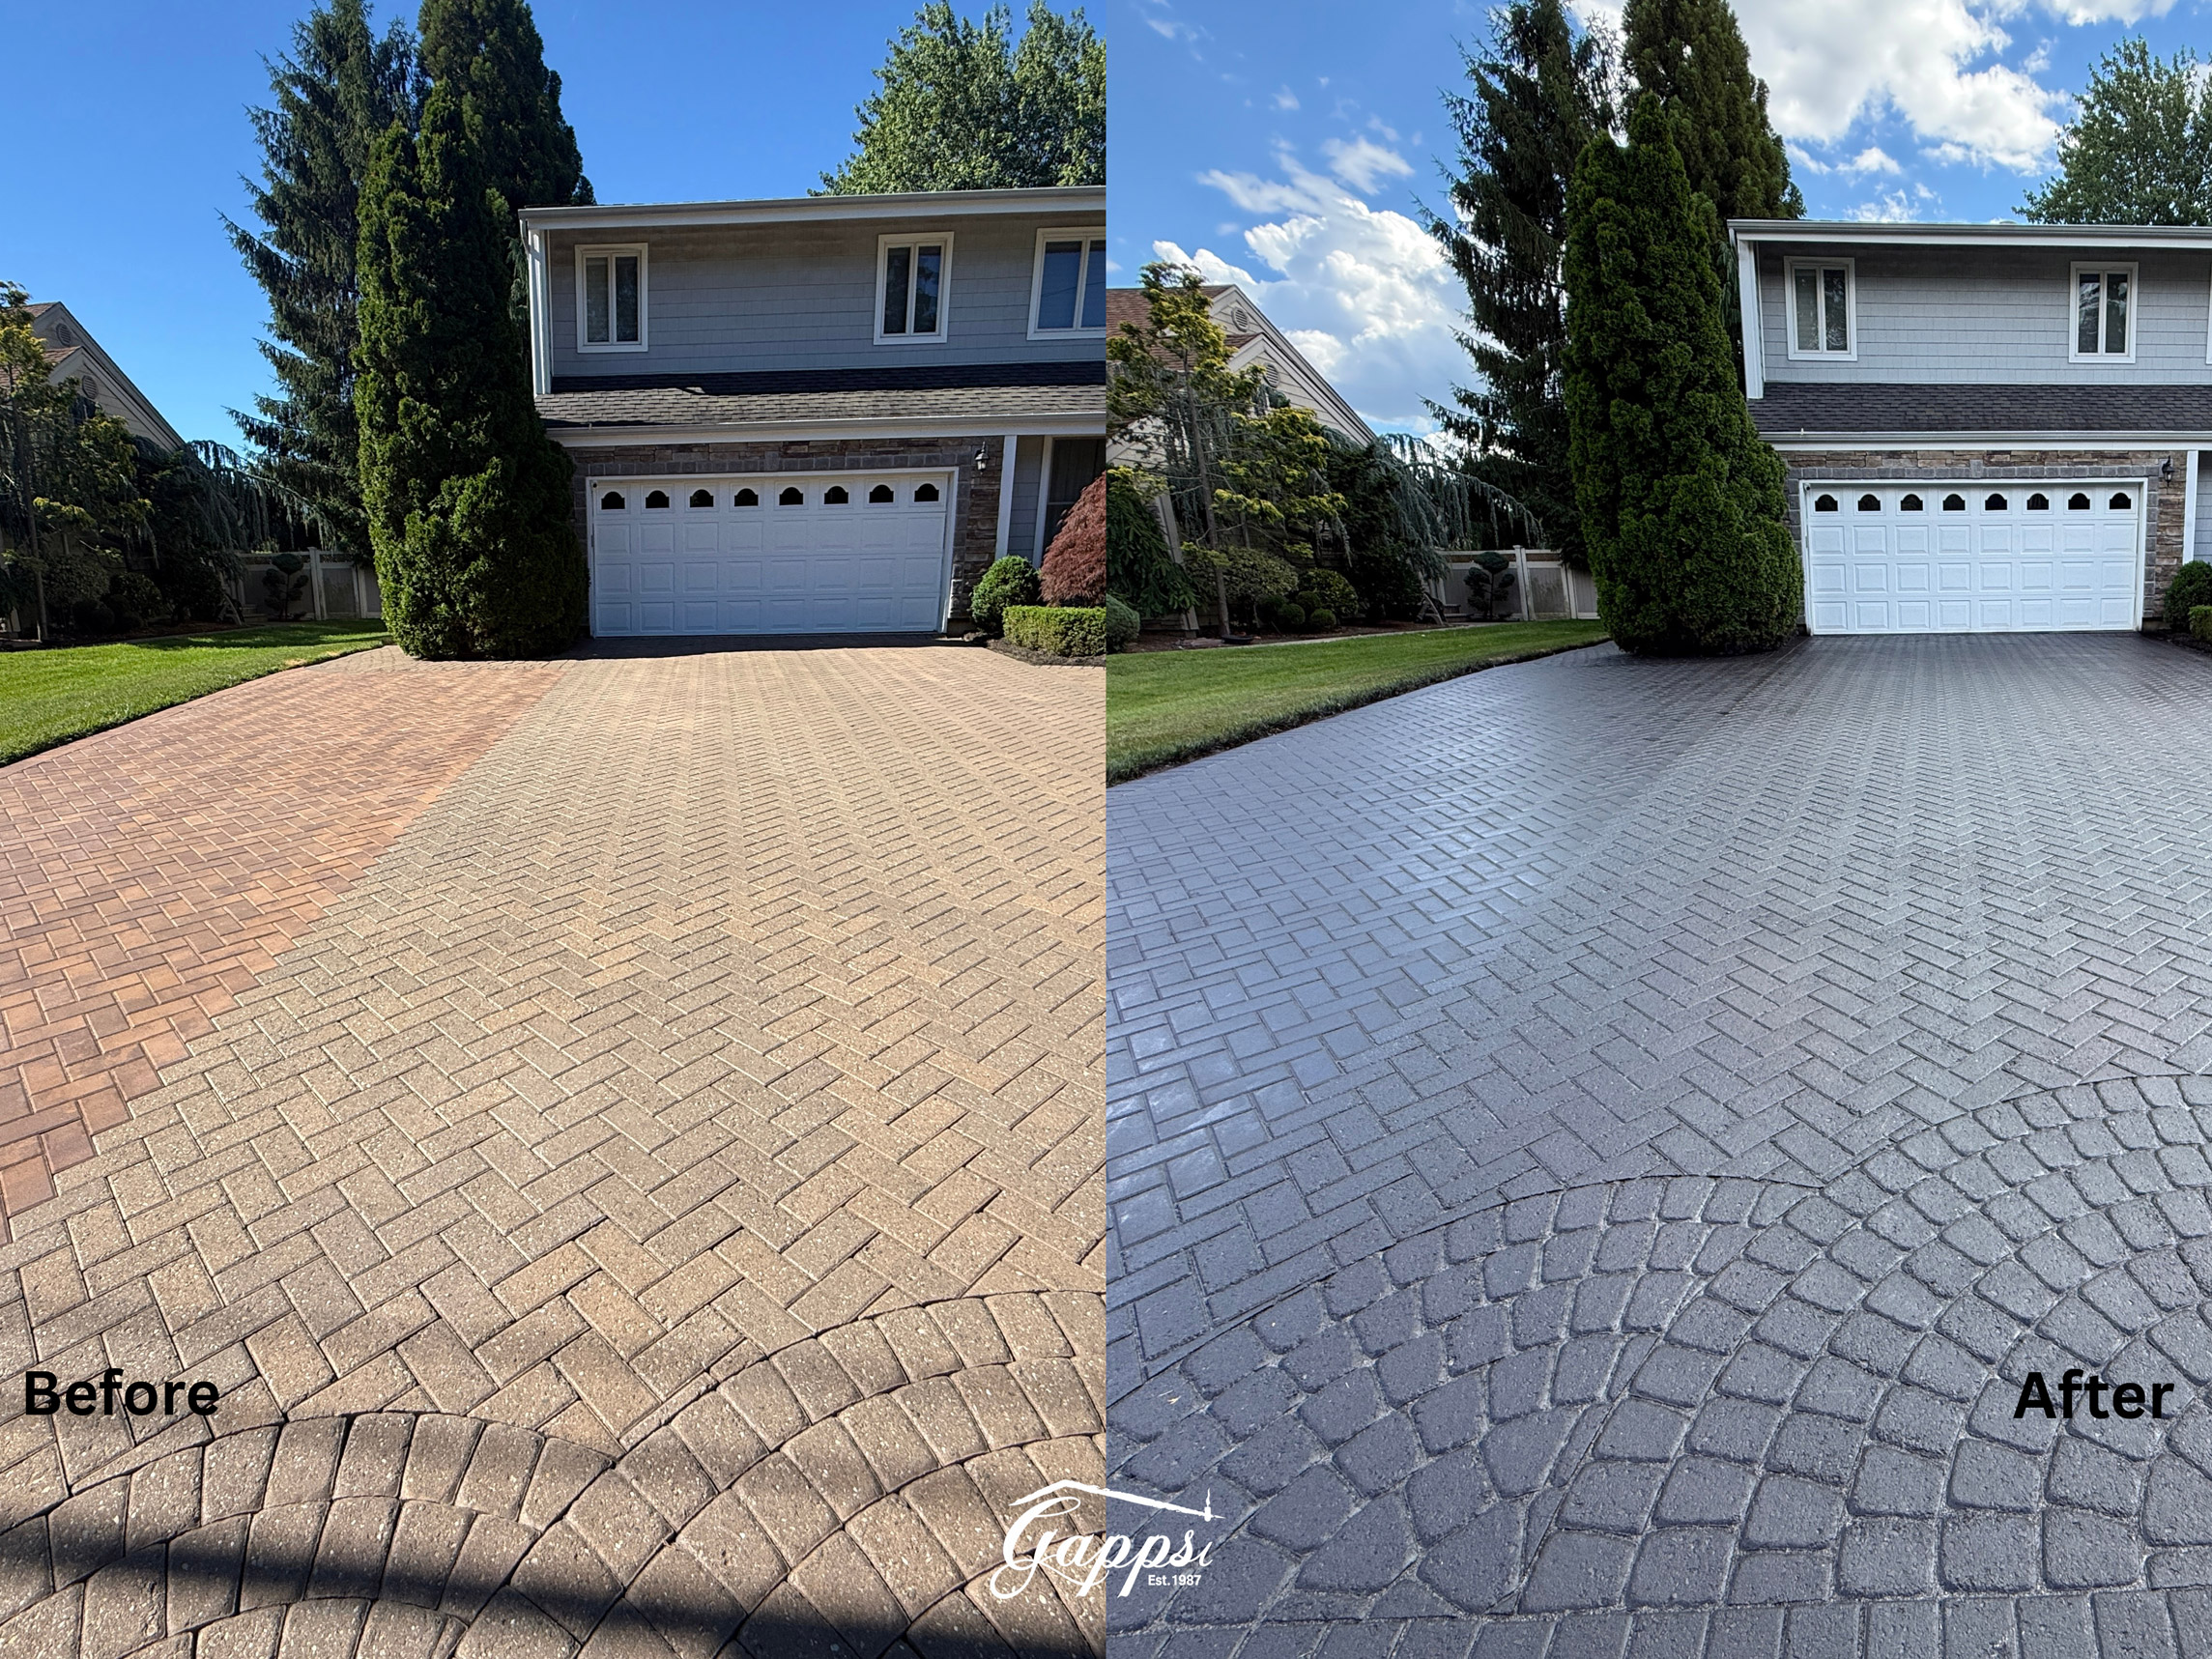
A Homeowner’s Guide to Flamed Granite Pavers

The finish on a paver is just as important as the stone itself, especially when it comes to safety and appearance. You may have heard of polished or honed stone, but the term “flamed” describes a special process. By applying a high-temperature flame to the surface of granite, the individual grains burst, creating a beautiful, rough texture. This process results in flamed granite pavers, a material celebrated for its excellent grip and organic feel. This guide explains everything you need to know, from installation best practices to long-term care, so you can decide if it’s the right fit.

Flamed Granite Pavers For Driveways

Flamed Granite pavers driveway

Why should you use Granite Pavers when paving your driveway?

Granite is a very common type of rock, flamed granite is another hard-wearing granite paver you can use. The flamed finish provides that extra grip surface. The flames granite is very dense because it has been torched with a flame to cause an exfoliated finish, commonly known as a “Flamed” finish.  The flamed finish provides the stone with a high grip surface, hence its popularity for domestic and commercial jobs.

Gappsi’s Flamed Granite Pavers are widely used in the home, on patios, decks, and around commercial properties. Granite has been used in construction for tens of thousands of years now. It is a popular stone also due to its very tough and durable nature along with an abundant stone.  Most granite deposits are massive making the cost lower compared to some of the other types of stone used in construction. Granite is quite beautiful and is often preferred in areas where style is the primary concern as opposed to the functionality of the area the stone is used in.

What is the texture & color of granite?

Granite has a coarse to medium texture and can come in a wide range of colors including shades of pink and grey. The color depends entirely on the chemistry and different minerals making up the stone. Generally, different areas will have stones of a slightly different shade and a common feature is the different colors within any slab of stone. The overall hue will usually range from gray to pink, but within are shades of both pink and gray are tan, black, and white as well as a clear or shiny crystal.

Granite Pavers Used In Construction

Most projects are completed and installed over a recycled concrete base (RCA) then the flamed granite pavers are installed over one inch of sand with Surebond polymeric sand to fill the joints between the pavers. Additionally, gray granite Belgian blocks are used to retain the earth next to driveway borders.

We created a compass star aligned with the door, to highlight the entrance to the house. It’s a circular driveway with a separate driveway for the garage doors. The color of the pavers matches the roof tiles of the house, a combination of beige maroon rust and the blue limestone for the aprons of all the entrances of the driveway. The installation of the driveway started with the excavation of the soil and the installation of the RCA base.

Flamed Granite Pavers Driveway

The driveway in the pictures above was constructed using a 10-inch RCA base, and granite:

  • The pavers were installed on one inch of fine sand
  • Paving stone sizes were 6”x 9” with a flamed and tumbled texture finish.
  • The flamed granite pavers are 1-1/4” thick
  • Flamed granite pavers are a great choice because they can be used for pedestrian and vehicular trafficked areas.
  • The joints in between the pavers were filled with polymeric sand, then compacted with a mechanical vibratory plate and sealed.

Comparing Flamed Granite to Other Stone Finishes

Choosing the right stone is only half the battle; the finish you select plays a huge role in the final look, feel, and function of your space. A flamed finish is created by heating the granite’s surface to a high temperature, which causes the individual grains to burst and create a rough, textured feel. This process not only changes the stone’s appearance but also significantly improves its slip resistance. Understanding how this finish compares to others can help you decide if it’s the right fit for your project, whether you’re dreaming of a new patio or a safe and stylish pool surround.

Flamed vs. Polished Finish

A polished finish gives granite that classic, mirror-like shine you often see on kitchen countertops and indoor flooring. It’s smooth to the touch and does a fantastic job of bringing out the stone’s deepest colors and patterns. However, that sleek surface becomes very slippery when wet, making it a poor choice for outdoor areas. In contrast, a flamed finish provides a highly textured surface that offers excellent traction. This makes it the superior option for outdoor applications like walkways, driveways, and patios, especially here on Long Island where we see our fair share of rain and snow.

Flamed vs. Honed Finish

A honed finish is like the quieter sibling of a polished finish. It’s smooth but lacks the high-gloss shine, resulting in a modern, matte look. Honed surfaces are better at hiding minor scratches and are less slippery than polished stone, but they still don’t offer the same level of grip as a flamed finish. While a honed finish can work in some covered outdoor spaces, flamed granite is the go-to choice for areas exposed to the elements. Its rugged texture is specifically designed for safety and durability in high-traffic outdoor environments, making it a reliable foundation for your family’s outdoor living space.

Flamed vs. Sandblasted Finish

Sandblasting creates a lightly textured surface by blasting the stone with fine particles, resulting in a finish that is more uniform and less coarse than a flamed finish. A sandblasted finish is versatile and can be used in a variety of settings, but for outdoor areas that demand maximum slip resistance, flamed granite is still the top contender. The intense heat treatment creates a more pronounced, uneven texture that provides superior grip underfoot. This makes it the ideal choice for pool decks and other areas where safety is the number one priority, ensuring peace of mind without sacrificing style.

Key Characteristics of Flamed Pavers

Flamed pavers are more than just a safe choice; they offer a unique combination of beauty, durability, and practicality that makes them a favorite for all kinds of home improvement projects. Their distinct texture is just the beginning. From a surprisingly wide range of colors to their ability to withstand harsh weather, these pavers have several key characteristics that set them apart. Whether you’re planning a complete backyard makeover or a simple walkway upgrade, understanding these features will show you why flamed pavers are such a smart and stylish investment for your home.

Expanded Color Palette

When you think of granite, you might picture classic shades of gray, but flamed pavers are available in a much wider spectrum of colors. You can find them in soft whites, deep charcoals, warm earth tones, and even some more vibrant hues. This expanded color palette opens up a world of design possibilities, allowing you to create a look that perfectly complements your home’s exterior. At Gappsi, we love helping homeowners select the perfect porcelain and natural stone to bring their vision to life, and the variety within flamed granite makes it a versatile and exciting option.

Frost and Moisture Resistance

Living on Long Island means dealing with freezing winters and humid summers, so outdoor materials need to be tough. Flamed granite pavers are an excellent choice for our climate because they are naturally frost-resistant and can handle cold weather without cracking or deteriorating. The flaming process also makes the stone less porous, which helps it resist moisture absorption. This durability ensures that your patio, walkway, or driveway will maintain its integrity and appearance for years to come, standing up to whatever weather comes our way while requiring minimal upkeep.

Application on Other Stone Types

While granite is the most common material to receive a flamed finish, the technique isn’t exclusive to it. The flaming process can be applied to other types of natural stone as well, such as certain types of limestone or basalt. This versatility allows you to achieve that desirable slip-resistant, textured finish on different materials if you have a specific color or stone type in mind for your project. It’s another way to customize your outdoor space, ensuring you get the exact look and feel you want with the added benefit of enhanced safety and durability.

Design and Application Versatility

One of the best things about flamed pavers is how adaptable they are. Their unique combination of rugged texture and natural beauty allows them to fit into a wide range of design schemes, from rustic to contemporary. They aren’t just for patios, either. Their practical benefits and aesthetic appeal make them suitable for a surprising number of applications, both outside and inside the home. This versatility gives you the freedom to create a cohesive and functional design that flows through different areas of your property, tying everything together beautifully.

Popular Uses for Flamed Pavers

The rugged, non-slip surface of flamed pavers makes them a natural fit for almost any outdoor project. They provide a safe and beautiful foundation for everything from sprawling patios to winding garden paths.

Patios, Walkways, and Pool Decks

Flamed pavers are most popular for patios, walkways, and especially pool decks. Their excellent slip resistance is a game-changer around water, providing a secure surface for bare feet and helping to prevent accidents. A professionally installed flamed granite deck is a perfect complement to one of Gappsi’s custom swimming pools, creating a safe, durable, and incredibly stylish backyard oasis for your family to enjoy all summer long.

Indoor Flooring, Backsplashes, and Bathrooms

While they shine outdoors, flamed pavers can also make a bold statement inside. Their textured surface can add a rustic, organic element to indoor flooring, particularly in entryways or mudrooms. They can also be used as a unique backsplash in a kitchen or as a feature wall in a bathroom, providing a rugged yet sophisticated look. If you’re considering a unique touch for your next project, incorporating flamed stone could be the perfect solution for your home remodeling needs.

Creating Design Contrast

Great design often comes from contrast, and the rugged look of flamed pavers provides the perfect opportunity to play with textures. Imagine pairing a flamed granite patio with smooth, modern outdoor furniture or placing it alongside a sleek water feature. The juxtaposition of the rough stone with smoother materials creates a dynamic and visually interesting space. This contrast highlights the unique qualities of each element, making your overall design feel more intentional and sophisticated. It’s a technique our designers at Gappsi often use to add depth and character to an outdoor living area.

Available Shapes and Patterns

Flamed pavers are not limited to standard square or rectangular shapes. They come in various forms, allowing for creative and customized installations that go beyond a simple grid.

Cubes and Irregular Shapes

For a more old-world or rustic feel, you can find flamed pavers in the form of cobblestone-like cubes or irregular, organic shapes. These options are perfect for creating winding garden paths or charming, cottage-style patios. Using non-uniform shapes adds a layer of natural beauty and character to the hardscape, making it feel as if it has been part of the landscape for years.

Fan and Versailles Patterns

If you prefer a more formal and elegant look, flamed pavers can be laid in classic patterns like the fan or Versailles. These intricate designs add a sense of grandeur and timelessness to driveways, courtyards, and patios. A skilled masonry team can use these patterns to create a stunning focal point for your property, turning a simple paved surface into a work of art.

Installation and Long-Term Maintenance

A beautiful flamed paver patio or driveway is a fantastic investment, and with the right installation and care, it will last for decades. The process isn’t overly complicated, but following best practices from the start is key to ensuring a durable, long-lasting result. Once installed, maintenance is surprisingly straightforward, allowing you to spend more time enjoying your space and less time working on it. Here are a few essential tips for getting the installation right and keeping your flamed pavers looking their best year after year.

Pre-Installation Best Practices

A successful paver project begins before the first stone is even laid. Taking a couple of simple steps upfront can prevent major headaches down the road and ensure a beautiful, uniform finish.

Inspecting Pavers for Defects

Before installation begins, it’s crucial to inspect your pavers for any noticeable defects, like cracks or significant chips. Natural stone will always have some variation, but you’ll want to set aside any pieces that are clearly damaged. A professional installer will always perform this check as part of their process.

Blending Pavers from Different Boxes

Since granite is a natural product, slight variations in color and pattern can occur from one batch to another. To achieve a consistent and natural-looking surface, it’s best to blend pavers from several different boxes during installation. This mixes the variations together, preventing noticeable patches of color and ensuring a harmonious final look.

The Importance of Sealing the Stone Surface

Although flamed granite is dense and durable, it is still a natural stone and can be susceptible to stains from things like oil, fallen leaves, or spilled wine. That’s why it is highly recommended to seal your flamed pavers after installation. A quality stone sealer creates a protective barrier on the surface, preventing liquids and dirt from penetrating the stone. This makes cleaning much easier and helps protect your investment from permanent stains. For homeowners on Long Island, Gappsi offers professional restoration and sealing services to ensure your pavers are properly protected from day one.

Routine Cleaning Methods

Keeping your flamed pavers looking fresh is simple. With their textured surface, a little routine cleaning is all it takes to prevent dirt buildup and maintain their natural beauty.

General Cleaning with Mild Soap

For most day-to-day dirt and grime, regular cleaning with a simple solution of mild soap and water is all you need. Just use a stiff-bristle brush to scrub the surface and then rinse it thoroughly with a garden hose. This is usually enough to keep your patio or walkway looking great throughout the year.

Using a Specialized Stone Cleaner

For tougher stains like oil, rust, or algae, you may need to use a specialized stone cleaner designed for granite. Be sure to choose a product that is safe for natural stone and follow the manufacturer’s instructions carefully. It’s always a good idea to test the cleaner on a small, inconspicuous area first.

How to Manage Natural Imperfections

It’s important to remember that granite is a product of nature, and part of its beauty lies in its unique imperfections. You will see variations in color, veining, and texture from one paver to the next. These are not defects but rather characteristics that give the stone its personality and ensure that no two projects are exactly alike. Embracing these natural variations is part of the joy of using authentic stone in your landscape design, creating a truly one-of-a-kind space.

Purchasing and Sourcing Flamed Pavers

Once you’ve decided that flamed pavers are the right choice for your project, the final step is figuring out where to get them and what to expect. From understanding costs to the importance of seeing samples, a little knowledge can make the purchasing process much smoother. Sourcing high-quality stone is key to a successful project, and knowing your options will help you make an informed decision. Here’s what you need to know as you prepare to buy the materials for your new outdoor space.

Typical Cost per Square Foot

The cost of flamed pavers can vary depending on the specific type of granite, its thickness, and where you purchase it from. Generally, you can expect material prices to range from about $5.59 to $12.99 per square foot. Keep in mind that this price is for the pavers themselves and does not include the cost of base materials, delivery, or professional installation. When budgeting for your project, it’s important to account for these additional expenses to get a complete picture of the total investment.

Why You Should Order Samples

Photos online can be helpful, but they can never fully capture the true color and texture of natural stone. That’s why it’s so important to order samples before making a final decision. Holding a sample in your hand allows you to see how it looks in the natural light of your own backyard and feel its texture. You can visit the Gappsi store to see a wide variety of stone options in person, which is a great way to ensure the pavers you choose are the perfect match for your home and design vision.

Understanding Your Sourcing Options

When it comes to sourcing flamed pavers, you have a few options. You can purchase them from local stone yards, big-box home improvement stores, or online suppliers. Each has its pros and cons regarding selection, price, and convenience. However, working with a full-service company like Gappsi simplifies the entire process. We handle everything from sourcing the highest quality stone from reputable suppliers to expert design and installation. This ensures you get top-tier materials and craftsmanship without the hassle of coordinating with multiple vendors, making your project seamless from start to finish.

To learn more about Gappsi products, please contact us at 631-543-1177 or visit our showroom.

That is not to say there are not a number of advantages though: 1. Granite is durable, it is a very hard stone and will last for years with little or no wear. In fact, many who carve monuments have begun switching from marble to granite due to increased acid rain, which over years will degrade the marble more so than granite. 2. Granite is beautiful because it comes in a wide range of shades, plus polished granite can be a truly stylish addition to nearly any home or building. 3. Granite compared to other stones is more affordable due to its abundance.

Feel free to take a look at our Granite Pavers Gallery.

SCHEDULE A MEETING TODAY WITH GAPPSI

Gappsi Group offers the following residential and commercial services to the public: Home RemodelingSwimming PoolsPaver Cleaning and Sealing, Sports Game Courts, Epoxy FlooringLandscape, and Masonry Design, and Construction. Our latest division is the manufacturing of clay brick ovens, made from the best materials on earth. We distribute all these ovens throughout North America, we also display them at the showroom and have weekly demonstrations on how to use the ovens.

VIEW OUR VIDEO OF FLAMED GRANITE PAVERS

https://youtu.be/MkgJVKPDoVo Our showroom display also includes the most beautiful and unique imported natural stones for patios, walkways, and driveways. We provide these services in the following areas of Nassau and Suffolk County. (Glen Cove, Hempstead, North Hempstead, Oyster Bay, Babylon, Huntington, Islip, Smithtown, Commack, Lake Grove, Centereach, Brookhaven, Southampton, Riverhead, East Hampton, Southold, Old Brookville, Old Westbury, Mill Neck, Nissequogue, Lloyd Harbor, Muttontown, Coldspring Harbor, and East Norwich). Gappsi’s knowledgeable and experienced personnel can help you create the yard of your dreams!

Frequently Asked Questions

What makes flamed granite different from other paver finishes? A flamed finish is created by applying intense heat to the granite’s surface, which causes the grains to burst and form a rough, textured feel. This process is different from a polished finish, which is smooth and glossy, or a honed finish, which is smooth but matte. The primary benefit of the flamed texture is its excellent slip resistance, making it a much safer choice for outdoor areas like pool decks, walkways, and driveways.

Are flamed granite pavers a good choice for Long Island weather? Yes, they are an excellent option for our climate. Flamed granite is naturally resistant to frost, so it can handle our freezing winters without cracking. The flaming process also makes the stone less porous, which helps it resist moisture. This durability means your patio or driveway will hold up well against rain, snow, and humidity with minimal maintenance.

Can I use flamed pavers for anything other than patios and driveways? Absolutely. While their non-slip surface makes them perfect for outdoor areas like pool decks and walkways, their versatility extends indoors as well. They can add a unique, rustic texture to an entryway floor, a kitchen backsplash, or even a bathroom feature wall. The design possibilities are quite broad, allowing you to create a cohesive look that flows from your outdoor spaces to your indoor ones.

How do I keep my flamed granite pavers clean? Maintenance is surprisingly simple. For general upkeep, you can just use a stiff-bristle brush with mild soap and water to scrub away dirt, then rinse thoroughly. For more stubborn stains, like oil or rust, you can use a specialized stone cleaner formulated for granite. We also highly recommend sealing the pavers after installation to protect them from stains and make cleaning even easier.

Will all my flamed granite pavers look exactly the same? No, and that’s part of their natural charm. Because granite is a natural stone, you will see variations in color, veining, and pattern from one paver to the next. These are not defects but unique characteristics that give the stone its personality. To ensure a beautiful, blended appearance, it’s standard practice to mix pavers from several different boxes during installation.

Key Takeaways

  • Flamed granite offers superior safety: The flaming process creates a rough, textured surface that provides excellent slip resistance, making it an ideal choice for outdoor areas like pool decks, walkways, and driveways exposed to weather.
  • It combines durability with design versatility: Beyond its toughness and resistance to frost, flamed granite is available in a wide range of colors, shapes, and patterns, allowing for creative designs that can complement any style, from rustic to modern.
  • Proper installation and care are simple but crucial: To ensure a long-lasting result, blend pavers from different boxes during installation, seal the stone to protect against stains, and perform routine cleaning with mild soap and water.

Related Articles

  • Natural Stone Pavers & Veneers for Pools, Patios & Driveways | Gappsi Inc
  • Flamed Granite Pavers: The Ultimate Driveway Choice
Share this page:

A Guide to Driveway Paving in East Northport

Cracks spreading like a spiderweb, puddles that never seem to drain, and weeds pushing through the surface—these are common frustrations for many homeowners. These issues aren’t just eyesores; they’re signs that a driveway wasn’t built to withstand the demanding Long Island climate. The constant freeze-thaw cycles and coastal air require a higher standard of construction. This guide is your roadmap to avoiding those problems. We’ll cover the essential steps, from building a proper foundation to selecting the right materials, so your project for driveway paving in East Northport results in a durable, beautiful surface that solves drainage issues and stands strong for years.

Award Winning Paving Stone & Pool Patio East Northport NYThrow Back Time 2003

Location: East Northport, NY Award Presented Giuseppe Abbrancati/Gappsi It is finally here! Long waited 2003 and what a better way for this Harley Davidson fan to celebrate the arrival of his 2003 Hundred Years Anniversary Edition. The Harley Davidson fat boy over his brand new state of the art Paving stone installed driveway. An array of colors creates the autumn blend laid on the field of the driveway. Marble blend a mix of gray and white was used for the borders and to create the unique driveway design & patterns. 10,000 sq.ft. of driveway and pool patio were installed over 12″ of recycled concrete base and 1″ of sand. The Gappsi® Edge Restraint System® secured the border of the pavement

A Guide to Driveway Paving in East Northport

Choosing to pave your driveway is a significant upgrade for your home’s curb appeal and functionality. But here in East Northport, a new driveway needs to be more than just beautiful—it has to be tough. Our Long Island weather brings a unique set of challenges, from harsh, freezing winters and road salt to humid coastal air. A driveway that isn’t built to withstand these specific conditions will require constant repairs and won’t last. The key to a long-lasting driveway is starting with a solid plan and understanding what your property needs to handle the local climate, ensuring your investment looks great for decades.

The secret to a durable driveway lies beneath the surface. Proper site preparation is non-negotiable, and for our area, that means digging deep—typically 8 to 10 inches—to create a robust base layer that can handle freeze-thaw cycles without shifting or cracking. While asphalt is a common choice for its affordability, many homeowners are opting for the superior durability and design flexibility of paving stones. Materials like natural stone or porcelain pavers not only offer a more custom, high-end look but also provide incredible strength. When installed correctly over a proper foundation, a paver driveway can be the last one you’ll ever need.

Beyond the base and materials, thoughtful design plays a critical role in your driveway’s longevity. Proper drainage is essential to prevent water from pooling on the surface, which can lead to erosion, stains, and ice patches in the winter. A well-designed layout will direct water away from your home and the driveway itself, protecting your investment. It’s also wise to plan your project for the right time of year. Paving work is best done from late spring to early fall when temperatures are consistently above 50 degrees and the weather is dry, allowing all materials to set and cure properly for a flawless, lasting finish.

Driveway Contractor East Northport Long Island NY

Understanding Driveway Paving Costs

Budgeting for a new driveway is one of the first steps in the process, and it helps to know what to expect. While the final price tag depends on several variables, most homeowners find that paving a driveway costs between $2,500 and $7,300. The biggest driver of this cost is the material you select, but other factors like the size of your driveway, its current condition, and the complexity of the design also play a significant role. For example, a standard 400-square-foot asphalt driveway might cost anywhere from $2,000 to $4,800. Understanding these components will help you create a realistic budget and make informed decisions as you move forward with your project.

Average Cost Breakdown

When you receive a quote from a contractor, it will typically be broken down by the square foot. This pricing model helps standardize costs across different project sizes. For asphalt, you can generally expect to pay between $5 and $12 per square foot. This price usually includes the cost of materials, labor, and basic site preparation. Keep in mind that this is a baseline figure. If your project requires extensive excavation, grading, or the removal of an old driveway, these services will add to the overall cost. It’s always a good idea to get a detailed estimate that outlines every expense so you know exactly what you’re paying for before the work begins.

Factors That Influence the Price

Beyond the basic cost per square foot, several key factors can affect your final bill. The size of your driveway is the most obvious—a larger surface area will naturally require more materials and labor. The current condition of the space is also critical; a project on a clear, level plot of land will be less expensive than one that requires tearing out an old, cracked concrete slab. The specific materials you choose, from budget-friendly asphalt to high-end natural stone pavers, will have the most significant impact on the price. Finally, even the time of year can influence costs, as demand for paving services tends to be higher during peak seasons.

Removing an existing driveway

If you already have a driveway, removing it is the first step in the replacement process. This task adds to the overall project cost because it involves extra labor and equipment. Breaking up and hauling away old asphalt or concrete requires heavy machinery and proper disposal, which contractors factor into their quotes. While it might be tempting to pave over an existing surface to save money, it’s often not the best long-term solution. Paving over a cracked or unstable base can lead to premature failure of the new surface, meaning you’ll be facing more repairs and expenses down the road. A fresh start ensures a solid foundation and a longer lifespan for your new driveway.

Driveway layout and slope

The shape and slope of your driveway also play a part in the final cost. A simple, straight, and flat driveway is the most straightforward and affordable to install. However, if your design includes curves, a circular layout, or multiple branches, the complexity increases, and so does the price. Similarly, a sloped or steep driveway requires more extensive grading and site preparation to ensure proper drainage and a stable surface. According to some estimates, a curved or sloped driveway can cost 15% to 30% more than a standard rectangular one due to the additional labor and precision required for the installation.

Time of year

Believe it or not, the season in which you schedule your paving project can affect the price. The peak season for paving contractors typically runs from late spring through early fall when the weather is warm and dry. During these months, demand is high, and contractors’ schedules fill up quickly, which can lead to higher prices. If you have some flexibility, consider scheduling your project during the shoulder seasons, like early spring or late fall. You might find that contractors have more availability and are able to offer more competitive pricing. Just be sure to consult with your contractor to ensure the weather conditions are still suitable for a quality installation.

Optional Features and Add-ons

Beyond the basic surface, you can incorporate several features to enhance your driveway’s functionality and appearance. Custom borders using contrasting paving stones or bricks can create a polished, high-end look. For Long Island winters, a heated driveway system that automatically melts snow and ice is a popular luxury upgrade. You can also add integrated lighting for improved safety and curb appeal at night. Other options include decorative patterns, custom coloring or staining for concrete, and permeable paver systems that help with drainage. These add-ons will increase the initial investment but can add significant value and enjoyment to your home.

Choosing the Right Driveway Material for Your Home

Selecting the right material is about balancing aesthetics, durability, and budget. Your driveway is one of the first things people see, so you want it to complement your home’s style. At the same time, it needs to withstand daily traffic, changing seasons, and the specific climate here on Long Island. From the classic appeal of asphalt to the unmatched elegance of paving stones, each option has its own set of benefits and maintenance requirements. Taking the time to understand these differences will help you choose a material that not only looks great on day one but also holds up beautifully for years to come.

Asphalt

Asphalt is a popular and cost-effective choice for many homeowners. It’s known for its flexibility, which allows it to handle freeze-thaw cycles better than more rigid materials, reducing the likelihood of cracking. Asphalt driveways are typically less expensive to install than concrete or pavers, with costs often ranging from $3 to $6 per square foot. They also offer a smooth, uniform black surface that provides a clean look. Maintenance involves periodic sealcoating every few years to protect the surface and fill any small cracks that may appear. With proper care, an asphalt driveway can be a durable and budget-friendly option for your home.

Asphalt vs. Blacktop

You might hear the terms “asphalt” and “blacktop” used interchangeably, but they are slightly different. Both are made from crushed stone and bitumen (a sticky, black petroleum product), but the recipe varies. Blacktop contains a higher percentage of stone and is heated to a higher temperature during production. This makes it a bit more pliable and suitable for residential driveways and play areas. True asphalt is stronger and more durable, making it the standard for major highways and roads. For your driveway project, your contractor will likely use a blacktop mix, but it’s commonly referred to as asphalt in the industry.

Concrete

Concrete driveways are known for their strength, longevity, and design versatility. While the initial installation cost is typically higher than asphalt, a properly installed concrete driveway can last for decades with minimal maintenance. Concrete offers a clean, modern look and can be customized with various finishes, colors, and patterns. For example, stamped concrete can mimic the appearance of stone, brick, or other more expensive materials. It’s also a great choice for warmer climates as its light color reflects heat. However, concrete can be prone to cracking in the harsh freeze-thaw cycles of the Northeast and can be susceptible to salt damage during the winter.

Paving Stones

For a truly custom and elegant look, paving stones are an excellent choice. Pavers come in a vast array of shapes, colors, and materials, including natural stone, brick, and concrete. This allows for endless design possibilities, from intricate patterns to simple, classic layouts. Paving stone driveways are incredibly durable and, if a stone ever cracks or becomes stained, you can simply replace the individual paver instead of redoing the entire surface. The interlocking system provides a strong, flexible pavement that can handle vehicle loads and adapt to ground movement, making it a long-lasting investment that significantly enhances your home’s curb appeal.

Gappsi offers a wide selection of high-quality porcelain and natural stone pavers, perfect for creating a unique and durable driveway that complements your home’s aesthetic.

At Gappsi, we specialize in creating stunning driveways with high-quality paving stones. Our extensive selection includes everything from durable porcelain pavers to timeless natural stones like granite and bluestone. These materials not only provide superior strength and longevity but also offer a level of beauty and sophistication that other materials can’t match. Our design team works with you to select the perfect pavers and create a custom layout that reflects your personal style and enhances your home’s architecture. A Gappsi-installed paver driveway is more than just a place to park your car—it’s a statement piece for your landscape.

Chip Seal

Chip seal, also known as tar-and-chip, is a more rustic and affordable paving option often used for long, rural driveways. The process involves spraying a layer of hot liquid asphalt onto the ground, followed by a layer of small, crushed stones that are compacted into the asphalt. The result is a textured, natural-looking surface that provides good traction. Chip seal is less expensive than traditional asphalt and requires less maintenance, as it doesn’t need to be sealed. However, it has a rougher surface, which can make snow removal more challenging, and it may not offer the polished look that suits every home style.

The Paving Process: From Foundation to Finish

Installing a new driveway is a multi-step process that requires precision and expertise from start to finish. It’s much more than just pouring asphalt or laying stones on the ground. A successful installation begins with thorough site preparation, including excavation and grading, to create a stable base. Proper drainage solutions are then put in place to prevent water damage. Finally, the chosen material is installed, compacted, and finished. Understanding these stages helps you appreciate the craftsmanship involved and ensures you know what to look for in a quality contractor. A well-executed process is the key to a driveway that is not only beautiful but also built to last.

Building a Solid Foundation

The most critical part of any driveway installation is the foundation. A strong, stable base is essential for preventing sinking, cracking, and heaving over time. The process begins with excavating the area to the proper depth, removing topsoil, rocks, and debris. Then, a sub-base of crushed stone or gravel is laid down and compacted thoroughly to create a solid layer. As one expert notes, “proper excavation and base preparation is key for a driveway to last 20 years instead of just a couple.” This foundation provides the necessary support for the final surface and ensures that your investment stands the test of time.

Managing Drainage in East Northport

Here on Long Island, managing water is a crucial aspect of any outdoor construction project. Proper drainage is essential for protecting your driveway from water damage, erosion, and ice formation in the winter. A skilled contractor will grade the driveway with a slight slope to direct water away from your home’s foundation and into appropriate drainage areas. In some cases, installing French drains, channel drains, or a permeable paver system may be necessary to handle heavy runoff effectively. Given our coastal conditions, addressing drainage isn’t just a good idea—it’s a necessity for ensuring the longevity and safety of your driveway.

Ideal Paving Season and Timelines

The best time for paving in our region is during the warmer, drier months, typically from late spring to early fall. Asphalt and concrete need specific temperature ranges to cure properly, and working in mild weather ensures a stronger, more durable result. A typical driveway installation can take anywhere from a few days to a week, depending on the size, material, and extent of site preparation required. For example, a simple asphalt overlay might be done in a day or two, while a custom paver driveway with extensive excavation could take a week or more. Your contractor will provide a more specific timeline based on your project’s details.

Maintaining Your Driveway for Long-Lasting Results

Once your beautiful new driveway is installed, a little routine maintenance will go a long way in keeping it looking its best and extending its life. Different materials have different needs, but some general principles apply to all. Keeping the surface clean, addressing stains promptly, and being mindful of what you park on it are good starting points. Regular inspections for small cracks or weeds can help you catch minor issues before they become major problems. Proactive care is the most effective way to protect your investment and ensure your driveway remains a source of pride for years to come.

Sealing and Curing Times

After installation, most driveway materials need time to cure and settle. For asphalt, it’s generally recommended to wait at least 24 to 48 hours before walking on it and a few days to a week before driving on it. Concrete can take even longer, often requiring a week before it can handle foot traffic and up to a month for full curing. For asphalt driveways, applying a sealant is a key maintenance step. You should seal the driveway after about one year and then every two to three years after that. This protective layer shields the surface from sun, water, and oil stains, preserving its color and integrity.

Proper Winter Care

Winter on Long Island can be tough on driveways. To minimize damage, it’s important to use proper snow and ice removal techniques. Avoid using metal shovels or plows with steel blades, as they can scrape and gouge the surface. Opt for a plastic shovel or a snow blower with a rubber-tipped blade. When it comes to de-icing, be cautious with rock salt, especially on concrete, as it can cause surface damage over time. Calcium chloride or magnesium chloride are generally safer alternatives. Taking these precautions will help your driveway survive the winter unscathed and ready for spring.

The Importance of Timely Repairs

Addressing small problems as soon as you notice them is the most cost-effective way to maintain your driveway. Small cracks in asphalt or concrete can allow water to seep underneath, and when that water freezes, it expands and can turn a small crack into a large pothole. Pulling weeds that sprout between pavers prevents them from displacing the stones and compromising the interlocking system. As one expert puts it, “Fixing problems early on is simple and cheap, but repair costs go up as the damage gets worse.” If you notice any issues, our team at Gappsi also offers professional restoration and sealing services to keep your driveway in top condition.

How to Hire a Paving Contractor in Long Island

Choosing the right contractor is just as important as choosing the right material for your driveway. A qualified and experienced professional will ensure the job is done correctly, from the foundation to the final finish. You want to find a company with a solid reputation, a portfolio of quality work, and a commitment to customer satisfaction. Taking the time to research and vet potential contractors will give you peace of mind and result in a driveway that you’ll be happy with for years. Look for local experts who understand the specific challenges of building on Long Island, from soil conditions to local regulations.

Get at Least Three Detailed Quotes

One of the most important steps in the hiring process is to gather multiple quotes. It’s a good practice to get at least three detailed estimates from different contractors. This allows you to compare not just the final price, but also the scope of work, the materials proposed, and the project timeline. A vague, one-line estimate is a red flag. A professional quote should be itemized, detailing the costs for materials, labor, excavation, and any other services. This transparency helps you make an apples-to-apples comparison and ensures there are no surprises down the line.

Verify Credentials and Warranties

Before you sign a contract, make sure the company you’re considering is properly licensed and insured. This protects you from liability in case of accidents or property damage during the project. Ask for proof of their license and insurance certificates. It’s also important to inquire about warranties. A reputable contractor will stand behind their work with a warranty that covers both materials and labor. This shows that they are confident in the quality of their installation and are committed to addressing any issues that may arise after the project is complete.

A reputable company like Gappsi will always be licensed and insured, with a long history of successful projects across Long Island.

When you work with an established company like Gappsi, you can be confident that all the necessary credentials are in place. We have been serving homeowners across Long Island since 1987, and our reputation is built on quality craftsmanship and professional integrity. We are fully licensed and insured, and we provide clear warranties for all our work. Our extensive portfolio of masonry and paving projects showcases our commitment to excellence. Choosing an experienced and reputable contractor means you can relax, knowing your project is in capable and reliable hands.

Check Local Permits and HOA Rules

Depending on where you live, your driveway project may require a permit from your local town or village. Additionally, if you live in a community with a Homeowners Association (HOA), there may be specific rules regarding driveway materials, colors, and designs. A professional local contractor should be familiar with the permitting process and local regulations. They can often handle the permit application for you. It’s always a good idea to check with your HOA beforehand to ensure your planned project complies with their guidelines to avoid any potential issues or fines.

Key Questions to Ask Potential Contractors

When you meet with potential contractors, having a list of questions ready can help you make a confident decision. Here are a few to get you started:

  • How long have you been in business in this area?
  • Can you provide a portfolio of recent projects and a list of references?
  • Who will be the project manager, and will they be on-site during the installation?
  • What is the thickness of the base and the final surface layer?
  • How do you handle drainage and water management?
  • What is your process for site cleanup after the project is finished?
  • What does your warranty cover and for how long?

Smart Ways to Save on Your Driveway Project

A new driveway is a significant investment, but there are ways to manage the cost without compromising on quality. With some careful planning and smart choices, you can achieve a beautiful result that fits within your budget. It often comes down to simplifying the design, being flexible with your timing, and exploring all your material options. A good contractor can also be a great resource for cost-saving ideas, helping you find the sweet spot between your vision and your budget. Thinking strategically about your project can lead to significant savings in the long run.

Keep the Design Simple

One of the easiest ways to control costs is to stick with a simple design. As we discussed earlier, complex layouts with curves, multiple colors, or intricate patterns require more labor and materials, which drives up the price. A straightforward, rectangular driveway is the most economical option. If you’re using pavers, choosing a standard, readily available style and a simple laying pattern will be more affordable than opting for a rare material or a complex herringbone design. A simple, classic look can be just as elegant and will stand the test of time.

Consider a Neighborhood Project

If you have neighbors who are also considering a new driveway, you may be able to save money by coordinating your projects. Contractors often offer a discount for booking multiple jobs in the same area. This is because it saves them time and money on transporting equipment, materials, and crews. They can move from one job to the next efficiently, and they may pass those savings on to you. It’s worth having a conversation with your neighbors to see if you can team up and negotiate a group rate with a contractor.

Schedule During the Off-Season

As mentioned earlier, timing can play a role in the cost of your project. The peak season for paving is during the warm summer months when demand is highest. If you can be flexible with your timeline, scheduling your installation during the less busy shoulder seasons—like early spring or late fall—can sometimes result in a lower price. Contractors may be more willing to negotiate when their schedules aren’t as packed. Just be sure to confirm with them that the weather conditions are still appropriate for a high-quality installation of your chosen material.

Ready to Transform Your Curb Appeal?

A new driveway does more than just provide a place to park; it completely transforms the entrance to your home, boosting curb appeal and adding value. From the durable and affordable appeal of asphalt to the timeless elegance of natural stone pavers, there’s a perfect solution to match your home’s style and your family’s needs. By understanding the costs, materials, and process, you’re now equipped to make a confident decision for your property. A well-built driveway is an investment that pays off in beauty, function, and enjoyment for decades.

If you’re ready to take the next step, the team at Gappsi is here to help. With decades of experience serving homeowners across Long Island, we have the expertise to design and build the driveway of your dreams. We invite you to explore our portfolio of driveway projects and see the quality and craftsmanship that goes into every job we do. Contact us today to schedule a consultation and let’s start planning your home’s stunning new entrance.

Frequently Asked Questions

How long can I expect a new driveway to last in East Northport? The lifespan of your driveway really comes down to two things: the material you choose and the quality of the installation. A properly installed asphalt driveway can last around 15 to 20 years with regular sealing. However, a paving stone driveway built on a solid, well-drained foundation can last for 30 years or even longer. The key is that the base underneath is built to handle our specific freeze-thaw cycles, which prevents the shifting and cracking that shortens a driveway’s life.

Is it a good idea to just pave over my existing driveway to save money? While it might seem like a tempting shortcut, paving over an old, cracked driveway is almost never a good long-term solution. Any cracks, instability, or drainage issues in the original surface will eventually transfer to the new layer, causing it to fail much sooner. You’ll end up with the same problems all over again in just a few years. The best approach is always to remove the old surface and build a new, solid foundation from scratch.

Are paving stones really worth the higher initial cost compared to asphalt? Think of it as an investment in your home’s long-term value and curb appeal. While asphalt has a lower upfront cost, paving stones offer superior durability and a much wider range of design options to create a truly custom look. A huge advantage is the ease of repair; if a stone gets stained or cracked, you can replace that single piece. With asphalt, you’re often looking at a less attractive patch. Over decades, the longevity and lower repair costs of pavers often make them a more valuable choice.

What’s the best material for handling Long Island’s harsh winters? Both asphalt and interlocking pavers perform well in our winter weather, but for different reasons. Asphalt has some flexibility, which helps it accommodate the ground’s expansion and contraction during freeze-thaw cycles. Paving stones, with their interlocking system, create a strong yet flexible surface that can move slightly without cracking. Pavers have a slight edge when it comes to snow removal, as they are less susceptible to damage from rock salt and can be replaced individually if one is ever chipped by a snowplow.

How much disruption should I expect during the installation process? A typical driveway replacement can take anywhere from a few days to a week, depending on the size and material. You should plan on not having access to your driveway or garage for that entire period. There will be noise from excavation equipment and the presence of a work crew. A professional contractor will keep the site as tidy as possible and give you a clear timeline so you know exactly what to expect and when you can start enjoying your beautiful new driveway.

Key Takeaways

  • A Lasting Driveway is Built from the Ground Up: The most critical part of your project is the unseen foundation. For Long Island’s climate, this means insisting on a deep, properly compacted base and a smart drainage plan to prevent future cracks and heaving.
  • Look Beyond Upfront Costs When Choosing Materials: While asphalt is budget-friendly, paving stones often provide better long-term value due to their durability and simple repairs. Weigh the initial price against future maintenance and curb appeal to make the best investment for your home.
  • Hire a Pro with a Proven Local Track Record: Your project’s success depends on the installer. Protect yourself by getting multiple detailed quotes, verifying their license and insurance, and asking for a warranty that covers both materials and labor.

Related Articles

Share this page: