


Thinking about adding a pergola to your yard? It’s a fantastic project, but it’s easy to feel overwhelmed by the details. From choosing the right location and materials to navigating local building codes, there’s a lot to consider before you even break ground. A little bit of planning goes a long way. This guide is your roadmap. We’ll break down exactly how to design a pergola, starting with the foundational steps like setting a budget and assessing your space. With this step-by-step advice, you can move forward with your project confidently and avoid common mistakes.
Key Takeaways
- Lay the right groundwork: A successful pergola project begins with solid planning, which includes setting a budget, understanding local building codes, and selecting the perfect size and location for your space.
- Select materials for looks and longevity: Consider how much maintenance you are willing to do; wood offers timeless charm but needs sealing, while metal and vinyl provide a durable, low-effort alternative.
- Finish with function in mind: Make your pergola a go-to spot by adding a solid paver foundation, installing lighting for evening use, and choosing furniture that creates an inviting atmosphere for relaxing and entertaining.
What Is a Pergola and Why Do You Need One?
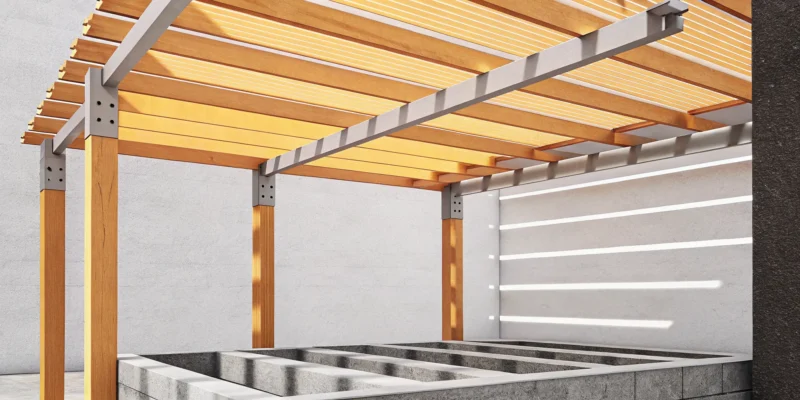
If you’ve ever wished for a more defined and inviting outdoor living area, a pergola might be exactly what you need. Simply put, a pergola is an outdoor structure featuring posts or columns that support an open, slatted roof of beams and rafters. Unlike a gazebo with its solid roof, a pergola offers a perfect balance of sun and shade, creating a comfortable, airy atmosphere. It’s the ideal way to frame an outdoor space, turning a simple patio or deck into a true outdoor room for dining, relaxing, or entertaining guests.
Beyond just providing shade, a pergola adds significant architectural interest and value to your home. It creates a focal point in your backyard, drawing the eye and anchoring your outdoor design. Imagine a beautifully crafted structure over your stone patio, next to your swimming pool, or nestled in your garden. It’s a versatile addition that extends your living space and allows you to enjoy your Long Island backyard more often. Gappsi offers a stunning selection of custom pavilions and pergolas that can be tailored to fit your home’s unique style and your family’s needs, transforming your property into a personal retreat.
Freestanding vs. Attached: What’s the Difference?
When planning your pergola, one of the first decisions you’ll make is whether it should be freestanding or attached to your house. A freestanding pergola is a standalone structure that can be placed anywhere in your yard. This makes it a great option for creating a destination, like a quiet seating area in a garden or a poolside cabana. Because it isn’t connected to another building, it requires a solid foundation with four or more posts properly anchored into the ground or a masonry patio to ensure it’s stable and secure.
An attached pergola, on the other hand, connects directly to your home on one side. This design creates a seamless transition from your indoor living space to your outdoor deck or patio, making it feel like a natural extension of your house. It’s an excellent choice for covering the area just outside your back door, providing shade and a sense of enclosure for your primary outdoor entertaining spot. The best option for you depends entirely on your property’s layout and how you envision using the space.
Modern vs. Traditional: Finding Your Style
Pergolas come in a wide range of styles, but they generally fall into two main categories: modern and traditional. A modern pergola is defined by its clean lines, simple geometry, and minimalist aesthetic. It typically features squared-off beams and rafters without any decorative flourishes. This sleek, uncluttered look pairs beautifully with contemporary homes and landscapes, often incorporating materials like metal or smooth, finished wood. The focus is on form and function, creating a sophisticated and understated outdoor feature.
A traditional pergola embraces more classic architectural details. You’ll often see decorative ends on the beams and rafters, such as scrolled or curved cuts, along with more ornate posts or columns. This style complements classic Long Island homes, from charming Colonials to stately Tudors. The choice of style should harmonize with your home’s existing architecture and the materials you use for your hardscaping, like the porcelain and natural stone pavers that form your patio floor.
First Things First: Planning Your Pergola
Before you start dreaming of lazy afternoons under a vine-covered roof, a little planning goes a long way. Getting these foundational steps right ensures your pergola project goes smoothly from start to finish. Think of this as your pre-construction checklist. It’s all about setting a clear budget, understanding local rules, and getting to know your space. Taking the time to plan now will save you from headaches later and help you create a structure that you’ll love for years. A well-planned pergola not only adds beauty but also becomes a functional extension of your home.
Set a Realistic Budget
Let’s talk numbers. Before you get too attached to a specific design, it’s smart to set a realistic budget. The cost of a pergola can vary quite a bit depending on the materials you choose, with prices ranging from affordable to premium. Don’t forget to account for the little things like fittings, fasteners, and any custom features you might want. While larger pergolas can sometimes be more cost-effective per square foot, it’s important to have a clear financial picture. Gappsi offers a wide selection of pavilions and pergolas to suit different styles and budgets, helping you find the perfect fit without any surprises.
Check Long Island Building Codes
This step is a big one, especially here on Long Island. Before you break ground, you absolutely need to check with your local building department and your homeowner’s association (HOA). Every town in Nassau and Suffolk County has its own set of rules, and you might need a permit for your project. These regulations can dictate the size, height, and even the placement of your pergola. Following these guidelines from the start is the best way to avoid fines or having to make costly changes down the road. Working with an experienced team can make this process much simpler.
Assess Your Outdoor Space
Now for the fun part: grab a tape measure and head outside. Take a good look at where you envision your pergola. How will it relate to your house, your patio, or your garden? One common mistake is not considering the scale of the structure in relation to the rest of the yard. A pergola that’s too big can overwhelm a small space, while one that’s too small might look out of place in a large yard. Visualize how it will integrate with your existing landscape design to create a cohesive and inviting outdoor living area.
How Do You Choose the Best Location?
Finding the perfect spot for your pergola is just as important as choosing the right design. The location determines how you’ll use the space, how much you’ll enjoy it, and how it connects with the rest of your home and yard. Think of it as creating a new room, but outdoors. Do you want a convenient extension of your kitchen for dining al fresco, or a secluded retreat at the far end of your garden? A well-placed pergola can define an outdoor living area, create a beautiful transition between spaces, or become a stunning focal point.
Before you start digging, take some time to walk around your property and visualize the possibilities. Consider how the structure will look from different angles, including from inside your house. The right location will make your pergola feel like a natural and intentional part of your home’s design. At Gappsi, we help homeowners find the ideal placement for their pavilions and pergolas, ensuring the final result is both beautiful and functional for years to come. The key is to balance sun exposure, airflow, and the existing layout of your landscape.
Consider Sunlight and Shade
One of the main reasons to build a pergola is to create comfortable shade, so it’s crucial to understand how the sun moves across your yard. Spend a day observing your property. Note where the sun hits in the morning, at midday, and in the late afternoon. This will help you decide the best placement for your needs. If you envision a shady spot for lunchtime gatherings, a location that gets direct sun at noon is perfect. If you prefer a warm, sunny spot for your morning coffee, look for an area that catches the early light. The orientation of the overhead rafters can also be adjusted to control how much sun gets through, giving you a perfect balance of light and shade throughout the day. This is a key part of a thoughtful landscape design.
Plan for Proximity and Airflow
When planning an attached or nearby pergola, it’s important to think about its distance from your house. We recommend building at least three to five feet away from your home’s exterior. This small gap is essential for maintaining good airflow, which prevents moisture from getting trapped against your siding and helps keep the area under the pergola cool and breezy. You should also consider convenience. Placing a pergola just off your kitchen or living room makes it an easy-to-use extension of your indoor space. A beautiful masonry patio can serve as the perfect foundation, seamlessly connecting your home to your new outdoor room.
Integrate with Your Landscape
A pergola should feel like it belongs in your yard. Look for ways to integrate it with your existing landscape features to create a cohesive and harmonious design. You can use a pergola to define an outdoor living space on a patio, frame a beautiful view of your garden, or create an inviting entryway over a walkway. Placing it next to a swimming pool can create a chic and shady lounge area for relaxing after a swim. The goal is to make the structure a natural part of the environment. You can see many examples of how we blend structures into the landscape on the Gappsi YouTube channel.
Pergola Materials: Which Is Right for You?
The material you choose for your pergola is a big decision. It defines the structure’s look, durability, and how much time you’ll spend on upkeep. Whether you love the warmth of natural wood, the clean lines of metal, or the easy-care nature of vinyl, there’s a perfect fit for your Long Island backyard. Let’s walk through the most popular options to help you find the right one for your style and lifestyle.
The Classic Choice: Wood
Wood is the traditional choice for a reason. It offers a classic, organic beauty that blends seamlessly into any landscape design. You can stain it to highlight the natural grain or paint it to match your home’s exterior. However, wood requires a commitment to maintenance. To protect it from Long Island’s humid summers and snowy winters, you’ll need to apply sealants regularly. This prevents rot, insects, and splintering, and our restoration and sealing services can help keep your wooden pergola looking beautiful for years.
The Sleek Option: Metal
If you prefer a modern, sleek look with minimal fuss, a metal pergola is a fantastic option. Aluminum is especially popular because it’s lightweight, strong, and naturally resistant to rust and rot. Unlike wood, it won’t warp or crack over time. Metal pergolas come in various colors and can even be finished to look like wood, giving you design flexibility without the maintenance. A simple cleaning now and then is all it takes to keep it looking sharp. Gappsi offers a variety of custom pavilions and pergolas to fit this exact style.
The Low-Maintenance Pick: Vinyl and Composite
For the ultimate low-maintenance solution, consider vinyl or composite materials. These man-made options give you the look of painted wood without any of the upkeep. Materials like cellular PVC (cPVC) are completely resistant to moisture, rot, and insects, making them incredibly durable. They won’t split, warp, or ever need a new coat of paint unless you decide you want a color change. This makes them a practical and long-lasting choice for busy homeowners who want to spend more time enjoying their backyard and less time working on it.
How to Design Your Pergola Step-by-Step
With the initial planning done, you can now focus on the creative part: designing the pergola itself. This is where your vision starts to take shape. Breaking the design process into smaller, manageable steps will help you create a structure that is both beautiful and functional. Think about how you want the final space to feel and work through each detail, from the basic footprint to the finishing touches. Let’s walk through how to design a pergola that perfectly suits your Long Island backyard.
Sketch Your Layout
Grab a pencil and paper, or use a simple design app, to sketch out your ideas. First, decide on the exact location and orientation. It’s wise to keep the structure about three to five feet away from your house to allow for airflow and maintenance access. Pay close attention to the sun’s path throughout the day. Orienting the overhead rafters correctly will help you control how much shade the pergola provides. A rough sketch helps you visualize the final result and identify any potential issues before you start building.
Choose Your Roof Style
The roof is a key element that defines your pergola’s function and style. A traditional slatted roof offers partial shade, creating a lovely dappled light effect. For more control, a louvered roof has adjustable slats so you can switch between sun and shade. If you want protection from rain, a fixed or retractable canopy is an excellent choice. These options allow you to enjoy your outdoor space even when the weather is less than perfect. The right roof turns your pergola into a versatile extension of your home, and our team can help you explore all the pavilions and pergolas options available.
Plan Post Placement and Support
Proper post placement is critical for a stable and well-proportioned pergola. Start by measuring the total area you want the structure to cover. The width is determined by the length of the beams, and the projection is the length of the rafters. To figure out the exact placement, measure from the center of where one column will be to the center of the next. This measurement helps you calculate the final dimensions and ensure the posts are evenly spaced for support. Strong footings are essential, a task where professional masonry expertise makes all the difference.
Plan for Lights, Curtains, and Plants
The final details are what truly bring your pergola to life. Think about how you’ll use the space day and night. Adding string lights creates a warm, inviting glow for evening gatherings. Flowing outdoor curtains can provide privacy and a touch of softness. You can also integrate the structure into your garden by encouraging climbing plants like wisteria or roses to grow up the posts and across the top. These elements make the pergola feel like a natural part of your overall landscape design and turn it into your favorite outdoor retreat.
Solve Common Construction Challenges
Even the most carefully planned project can hit a few snags during construction. Building a pergola involves working with heavy materials and requires a good deal of precision. Don’t worry, these challenges are completely normal. Knowing how to approach them ahead of time will make the process smoother and ensure your final structure is beautiful and secure. Here are a few tips for handling some of the most common hurdles you might face.
Set Your Posts Straight
Getting your pergola posts perfectly vertical is non-negotiable for both stability and appearance. A post that’s even slightly off can compromise the entire structure. To get it right, you’ll need a 4-foot level. As you set each post, “use a 4-foot level to make sure posts were perfectly straight up and down in all directions.” This is called making the posts “plumb.” To keep them in position while the concrete sets, attach temporary wooden braces to the post and stake them into the ground. This simple step ensures your beautiful new pergola starts with a perfectly straight and sturdy foundation.
Handle Large Lumber Safely
Pergola beams and posts are long, heavy, and awkward to manage on your own. Trying to lift and position large pieces of lumber by yourself is not just difficult, it’s a safety risk. The best advice is simple: “get help.” Ask a few friends or family members to lend a hand for the day. An extra set of hands makes lifting beams into place much easier and safer. Plus, building something together can be a really rewarding experience. If the scale of the project feels too big, remember that our professional team has the experience and equipment to handle all aspects of heavy construction safely.
Cut and Attach Beams with Precision
The strength of your pergola depends on how well the beams and rafters are connected. Precise cuts and secure attachments are key. For straight cuts on large beams, a circular saw is a great tool. When it comes to attaching the main beams to your posts, you’ll want to use heavy-duty hardware like “3.5-inch structural screws with Simpson Strong-Tie washers” for a solid connection. To prevent the wood from splitting, always pre-drill your holes. For an even stronger and cleaner look, you can cut a groove, or “dado,” into the posts for the beams to sit in. This level of detail is what defines quality home remodeling and construction.
Let the Concrete Cure
After you’ve set your posts in concrete and made sure they are perfectly plumb, it’s time to be patient. It can be tempting to jump ahead to the next step, but the concrete needs time to do its job. You should “let the concrete dry and harden for at least 24 hours before you remove the braces and string lines.” This curing period is essential for creating a solid anchor that will keep your pergola stable for years to come. Rushing this step could cause the posts to shift, undoing all your hard work. Proper masonry work is all about building a solid base, and giving concrete time to cure is a critical part of that process.
Common Pergola Design Mistakes to Avoid
Building a pergola is an exciting project, but a few common missteps can turn your dream design into a bit of a headache. Getting it right from the start saves you time, money, and frustration. Think of it like baking a cake; if you miss a key ingredient or skip a step, the final result just won’t be what you hoped for. The same goes for your outdoor structure. To help you create a beautiful and lasting addition to your home, let’s walk through some of the most frequent design mistakes and, more importantly, how to avoid them. Paying attention to these details will ensure your pergola is a source of enjoyment for years to come.
Choosing the Wrong Size
One of the most common mistakes is getting the size wrong. A pergola that’s too small for your patio will look out of place and won’t provide enough functional shade or space for your furniture. On the other hand, a structure that’s too large can completely overwhelm your backyard and dwarf your home. It’s all about scale and proportion. Before you commit, mark out the proposed footprint in your yard with stakes and string. Place your outdoor furniture inside the outline to see how it feels. This simple step helps you visualize the final size and ensure it complements your home and landscape perfectly. Our gallery of pavilions and pergolas can give you a better sense of how to match a structure to a space.
Skipping the Foundation
A beautiful pergola is only as good as its foundation. Insufficient planning here is a critical error that can compromise the entire structure. A solid foundation is essential for stability and longevity, especially with Long Island’s changing seasons. Without proper footings, your pergola can shift, sink, or become unstable over time. The foundation needs to be correctly sized and dug below the frost line to prevent heaving during the winter. This is one area where professional expertise really pays off. Expert masonry services ensure your pergola has the support it needs to stand strong and secure for decades, no matter what the weather brings.
Underestimating Maintenance
Your pergola is an investment, and like any investment, it needs a little care to keep it in top shape. A frequent mistake is underestimating the maintenance required. While some materials are lower maintenance than others, no pergola is completely maintenance-free. Wood structures need to be cleaned and resealed or stained every few years to prevent rot and weather damage. Metal may need occasional checks for rust, and even vinyl requires regular cleaning to look its best. Failing to perform this upkeep can lead to deterioration and costly repairs. Planning for routine restoration and sealing from the start will protect your pergola and keep it looking beautiful year after year.
How to Finish Your Pergola
With your pergola built, the real fun begins. The structure itself is just a frame; the finishing touches are what transform it into a true outdoor retreat. By carefully selecting your flooring, adding functional amenities, and styling the space with furniture and plants, you can create an inviting extension of your home. Here’s how to bring your pergola to life.
Pair It with Stone Pavers
The right flooring grounds your pergola and defines it as a distinct outdoor room. Laying a patio with porcelain and natural stone pavers is an excellent way to create a durable and elegant foundation. A solid surface not only provides a stable base for furniture but also adds significant visual appeal and value to your property. You can choose from a variety of materials, from classic bluestone to modern porcelain tiles, to complement your home’s style. A beautiful paver patio under your pergola creates a seamless transition from your home to your garden, making the entire space feel more cohesive and intentional.
Add Lighting and Heaters for Year-Round Use
Don’t let a sunset or a cool evening send everyone inside. Integrating lighting and heating can extend the time you spend in your pergola. String lights are a popular choice for creating a warm, festive ambiance, while built-in recessed lighting offers a sleeker, more modern look. For warmth, consider adding freestanding propane heaters or permanently installed infrared heaters. These additions make your pergola a comfortable spot for dining and relaxing through the spring, summer, and fall. Thoughtful planning allows you to enjoy your outdoor space well beyond the warmest days of the year, maximizing your investment and your enjoyment.
Incorporate Furniture and Greenery
The final step is to furnish and decorate your space. Choose comfortable, weather-resistant furniture that suits how you plan to use the area, whether it’s a large dining table for family meals or a cozy sectional for lounging. An outdoor rug, pillows, and curtains can add softness and a pop of color. To truly integrate your pergola with its surroundings, incorporate greenery. You can train climbing plants like wisteria or grapevines to grow up the posts and over the beams, creating a lush natural canopy. Potted plants and hanging baskets also add life and texture, helping to soften the structure and make it feel like a natural part of your landscape design.
How to Maintain Your Pergola
A pergola is a beautiful addition to your backyard, but like any outdoor structure, it needs a little TLC to stay in top shape. Consistent maintenance protects your investment from the elements and keeps it looking as stunning as the day it was built. A simple routine can prevent costly repairs down the road and ensure your pergola remains a safe, inviting retreat for years to come. Here are a few key tasks to add to your home maintenance checklist.
Clean, Inspect, and Reseal Regularly
To keep your pergola looking fresh, give it a gentle cleaning every few months. A simple solution of soapy water and a soft-bristle brush is usually all you need to wash away dirt, pollen, and bird droppings. For stubborn stains on wood, a mild bleach solution can work wonders. While you’re cleaning, take the opportunity to inspect the structure for any signs of wear. If you have a wood pergola, plan to re-stain or reseal it every few years to protect it from moisture and sun damage. If the thought of sanding and sealing sounds like too much work, our team offers professional restoration and sealing services to handle it for you.
Manage Foliage and Weather Damage
Climbing vines and overhanging tree branches can add a romantic touch to your pergola, but they need to be managed. Regularly trim back any foliage that is growing directly on the structure to prevent moisture from getting trapped against the wood or metal, which can lead to rot or rust. It’s also wise to keep nearby tree limbs pruned to avoid damage during high winds or storms. Use a soft broom to sweep away fallen leaves, twigs, and other debris from the top of your pergola. This simple step keeps it looking tidy and prevents buildup that can strain the roof. Proper landscape design can integrate plants beautifully without compromising your pergola’s integrity.
Prepare for Long Island Weather
Living on Long Island means dealing with a mix of everything: hot, humid summers, icy winters, and the occasional nor’easter. Your pergola needs to be ready for it all. Before the start of each season, give your pergola a thorough inspection. Check for loose bolts, cracked wood, or signs of water damage. For wood structures, a fresh coat of waterproof sealant before winter provides a critical barrier against snow and ice. For metal pergolas, check for any scratches in the finish and touch them up to prevent rust. We design our pavilions and pergolas to handle local weather, but proactive maintenance is the best way to ensure they last a lifetime.
When to Call the Professionals
While taking on a DIY pergola project is rewarding, knowing when to call for backup is just as important. If you find yourself feeling overwhelmed by the scale of the project, it might be time to bring in a professional. This isn’t about giving up; it’s about making a smart investment to ensure your new outdoor feature is beautiful, safe, and built to last. A professional team can handle the complexities, leaving you free to enjoy the final result without the stress.
One of the clearest signs you need an expert is when you’re dealing with complex designs or local regulations. If your vision involves intricate cuts, multi-level structures, or integration with an existing deck, the technical skill required increases significantly. Furthermore, navigating Long Island’s building codes can be a project in itself. Professionals understand the local requirements for things like frost line footings and proper structural support, ensuring your pergola is not only compliant but also secure. A poorly planned foundation is one of the most common and costly mistakes, and an expert can perform a proper site analysis to avoid it.
Ultimately, hiring a professional is the right move if you want a seamless process from start to finish. An experienced team brings design and construction expertise to the table, helping you refine your ideas and avoid common pitfalls. They manage everything from sourcing high-quality materials to coordinating the build, ensuring your project stays on track. If you want a stunning outdoor structure without the headache, consider partnering with experts who specialize in creating custom pavilions and pergolas.
Related Articles
- What You Should Know About Pergolas on Long Island
- Custom Pavilions, Pergolas & Gazebos in Long Island, NY
- PVC Pergolas and Railings | Long Island, NY
- pergolas Archives – Gappsi Group
Frequently Asked Questions
What’s the real difference between a pergola and a pavilion? That’s a great question, as the terms are often used interchangeably. The key difference is the roof. A pergola has a slatted or latticed roof that allows for a mix of sun and shade, creating an open, airy feel. A pavilion, however, has a solid, continuous roof that provides complete protection from both sun and rain. Think of a pergola as defining an outdoor room, while a pavilion creates a fully covered outdoor shelter.
Do I really need a permit for a pergola on Long Island? While it can feel like an extra step, the short answer is almost always yes. Most towns in Nassau and Suffolk County consider a pergola a permanent structure, which means you’ll likely need a permit. These regulations exist to ensure the structure is safe, properly anchored, and correctly placed on your property. It’s always best to check with your local building department before you begin, as skipping this step can lead to fines and headaches later.
Can a pergola be built on my existing patio? Yes, it’s definitely possible to install a pergola on an existing patio, and it’s a popular way to enhance a space you already love. The most important factor is the condition and strength of your current patio. We would need to assess whether the existing foundation is strong enough to support the weight of the posts. In some cases, we may need to cut into the patio to pour new concrete footings to ensure the structure is secure for the long term.
Which pergola material holds up best against Long Island’s weather? Given our humid summers and snowy winters, material choice is key. While classic wood is beautiful, it requires consistent sealing to protect it from moisture and prevent rot. For a lower-maintenance option that stands up well to our coastal climate, consider aluminum or high-quality vinyl. These materials are fantastic because they won’t rust, rot, or warp, meaning you can spend more time enjoying your pergola and less time maintaining it.
How much shade does a pergola actually provide? The amount of shade is surprisingly customizable. A standard pergola with wide-set rafters will provide partial shade, creating a lovely dappled light effect that changes throughout the day. If you want more coverage, we can design it with the rafters placed closer together. For maximum flexibility, you could also add a retractable fabric canopy or encourage climbing plants to grow over the top, which creates a dense, natural roof.