


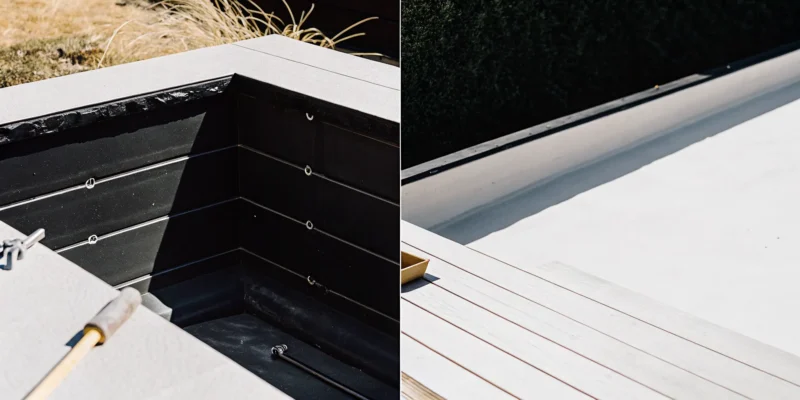
After decades of building outdoor living spaces across Long Island, we know that a successful pool project is all about the details. Homeowners often ask us what it really takes to build a pool that will last for years to come. The answer is a combination of high-quality materials and expert technique, especially when it comes to the installation itself. A perfect vinyl liner pool installation ensures a smooth, wrinkle-free finish and a watertight seal that protects your investment. We created this guide to share our process with you, breaking down each step so you can understand what goes into creating a truly exceptional backyard pool.
Key Takeaways
- Budget for the Complete Project: A realistic budget goes beyond the pool’s initial price. Remember to factor in long-term costs like liner replacements, plus immediate needs such as safety fencing, permits, and surrounding features like a patio or landscaping.
- Success Lies in the Small Details: A flawless, wrinkle-free finish depends on careful preparation. This means ensuring the pool surface is perfectly smooth, taking precise measurements for a custom fit, and always using new gaskets to prevent future leaks.
- Hire a Pro for a Stress-Free Process: Installing a vinyl liner is a complex job where small mistakes can lead to big problems. An experienced team handles every step with precision, from site planning to the final fill, giving you a beautiful pool without the headache.
What Is a Vinyl Liner Pool?
If you’re dreaming of a backyard pool, you have likely come across the term “vinyl liner.” So, what exactly is it? Think of a vinyl liner pool as a two-part system. First, we build a sturdy frame, typically using steel or polymer wall panels, to create the pool’s shape and structure. Then, a custom-fitted sheet of durable vinyl is placed inside this frame. This liner is the smooth, waterproof surface you see and feel, and it’s what holds the water. It’s a brilliant design that combines structural integrity with a flexible, comfortable finish.
Installing a vinyl liner is a precise process that our team has perfected. After the pool structure is in place, we carefully clean the floor and walls. The new liner is then set, and we use a special vacuum to suck out all the air between the liner and the pool walls. This ensures a wrinkle-free, perfect fit before we begin filling it with water. This method allows for a huge range of shapes and sizes, making it one of the most versatile swimming pools you can choose for your Long Island home. Whether you want a classic rectangle or a freeform lagoon, a vinyl liner can make it happen.
Vinyl vs. Concrete and Fiberglass: What’s the Difference?
When choosing a pool, you’ll mainly decide between vinyl, concrete (also called gunite), and fiberglass. Vinyl liner pools have the lowest initial installation cost, typically ranging from $25,000 to $65,000. The trade-off is that the liner needs to be replaced every 5 to 15 years. In contrast, concrete pools have a higher upfront cost and require more maintenance, including resurfacing. Fiberglass pools are pre-molded shells with a higher initial price than vinyl but very low long-term maintenance. Each has its pros and cons, but vinyl often hits the sweet spot for many homeowners. Gappsi’s expertise in masonry also allows us to create stunning patios and features to complement any pool type you choose.
Why Long Islanders Love Vinyl Liner Pools
There’s a reason vinyl liner pools are so popular here on Long Island. They offer the best of both worlds: customization and value. You can get a gorgeous, custom-shaped backyard oasis without the premium price tag of a gunite pool. The design possibilities are nearly endless, allowing us to create a pool that fits your yard and your vision perfectly. Plus, the smooth surface of a vinyl liner is gentle on your feet, making it a comfortable choice for families with kids. With today’s beautiful patterns and colors, a vinyl liner pool can be the stunning centerpiece of your entire landscape design.
Breaking Down the Cost of a Vinyl Liner Pool
Understanding the full financial commitment of a new pool is the first step toward making your backyard dream a reality. Vinyl liner pools are often a more budget-friendly option compared to concrete or fiberglass, but the total price involves more than just the initial installation. From the pool itself to long-term upkeep and essential add-ons, a clear budget will help you plan a project without any surprises. Let’s break down the numbers so you know exactly what to expect when investing in a vinyl liner pool for your Long Island home.
The final cost of your swimming pool depends on your vision. A simple, standard-sized pool will have a different price tag than a large, freeform design with custom steps and lighting. At Gappsi, we work with you to design a pool that fits both your lifestyle and your budget, ensuring every dollar is well spent. We believe in transparency, which is why we lay out all the potential costs from the very beginning. This approach helps you make informed decisions and feel confident in your investment for years to come.
Cost of a New Installation
When you start pricing out a new inground vinyl liner pool, you’ll find a fairly wide range. A basic installation can start around $25,000, while a large, custom-designed pool with high-end features can exceed $120,000. For most homeowners, the final cost typically lands somewhere between $45,000 and $75,000. This variation comes down to your specific choices in size, shape, and features. A simple rectangular pool will cost less than a custom shape with built-in benches, waterfalls, or advanced lighting systems. Think of it as building a custom piece for your home; the more unique the design, the more it will influence the final price.
Cost of a Liner Replacement
One of the key long-term costs associated with a vinyl liner pool is the liner itself. Over time, exposure to sun and chemicals will cause the liner to fade and wear out. You can generally expect to replace your pool’s vinyl liner every 5 to 15 years. The cost for this replacement typically ranges from $3,000 to $7,500, depending on the size of your pool and the quality of the new liner. While it’s an added expense to plan for, it’s also an opportunity to give your pool a fresh look. Proper maintenance and water chemistry can help extend your liner’s life, but it’s wise to factor this eventual replacement into your long-term pool budget.
Don’t Forget These Hidden Costs
Beyond the pool itself, several other expenses are necessary to complete your project. Local permits and inspections can add anywhere from a few hundred to a thousand dollars to your total. Fencing is another major consideration; it’s often required by law for safety and can cost between $1,000 and $12,000 or more. Then there are the features that transform your pool from a simple swimming hole into a true backyard oasis. Things like masonry patios, surrounding landscaping, an automatic pool cover, or a heater can add $5,000 to $30,000 or more to the project. Planning for these elements from the start ensures your budget covers the entire vision for your outdoor space.
Gathering Your Tools and Materials
Getting your tools and materials in order before you start is one of the most important steps for a smooth installation. Think of this as your pre-project checklist to make sure you have everything you need on hand. A well-organized project is a successful project, and taking the time to gather these items now will save you from frustrating mid-installation trips to the store. From the liner itself to the smallest tube of sealant, each component plays a crucial role in creating a beautiful and long-lasting pool. Let’s walk through exactly what you’ll need to get the job done right.
How to Choose the Right Vinyl Liner
Your vinyl liner is the star of the show, so choosing the right one is key. A high-quality, precision-fit liner can last 10 to 15 years, keeping its smooth surface and vibrant color for seasons to come. When you’re selecting a liner, focus on the thickness (measured in mils) and the quality of the vinyl. Thicker liners generally offer more durability and puncture resistance. At Gappsi, we help homeowners select the perfect liner that not only fits their aesthetic but is also built to withstand years of fun in the sun. Our expertise in swimming pools ensures you get a product that’s both beautiful and durable, giving you peace of mind.
Essential Wall and Support Materials
Beyond the liner itself, you’ll need a few key materials to protect it and ensure a perfect fit. Pool wall foam is a great addition, as it provides a soft, cushioned layer between the liner and the pool walls, preventing rust and corrosion from affecting the vinyl. You’ll also want a liner pad for the pool floor to protect against punctures from any rocks or roots underneath. Most importantly, always buy new gaskets and faceplates for your skimmer, returns, and drains. Reusing old ones is a common cause of leaks, so starting fresh is a must for a watertight seal. Proper restoration and sealing techniques are vital here.
Your Must-Have Installation Toolkit
Having the right tools on hand will make the installation process much easier. Your basic toolkit should include a submersible pump to drain the old pool, a shop vacuum to help set the new liner, and a utility knife for trimming. You’ll also need screwdrivers, duct tape, a broom, and a garden hose. For getting the liner bead into the track, a specialized liner installation tool can be a lifesaver, especially when paired with a hairdryer to make the vinyl more pliable. You can often see our teams using these tools on our Gappsi Group YouTube channel. Gathering these items ahead of time ensures you’re ready for every step of the process.
How to Prepare Your Pool Site
Before you can even think about that first cannonball, you need to get your backyard ready. Proper site preparation is the single most important factor for a pool that lasts for decades. It’s not the most glamorous part of the process, but getting the groundwork right prevents major headaches down the road. A perfectly level base, good drainage, and a smooth surface are the unsung heroes of a flawless pool installation. Taking the time to prepare your site correctly ensures your investment is built on a solid foundation.
Select, Grade, and Level the Site
Choosing the right spot for your pool is your first big decision. You’ll want an area with plenty of sunlight that’s also clear of trees to minimize leaves and debris. Once you’ve picked the perfect location, the ground needs to be professionally graded and leveled. This is a critical step that ensures your pool structure is stable. During excavation, a professional team will dig out the area, often creating a small 6-inch ledge around the inside edge. This gives the crew room to work and set up the forms that will shape your pool. A perfectly flat and compacted base is essential for the wall panels to sit correctly and for the pool floor to be smooth under the liner.
Manage Drainage and Soil Issues
What’s happening underground is just as important as the work you see on the surface. Long Island soil can vary, and poor drainage can put pressure on your pool walls, causing them to bulge or even crack over time. A professional assessment of your yard’s soil and grading is a must. If your property has drainage challenges, a French drain or other system might be installed around the pool’s perimeter to channel water away from the structure. Proper masonry work, like a small retaining wall, can also help manage sloped yards. Addressing these issues from the start prevents unexpected and costly problems once construction is underway.
Inspect and Repair the Pool Surface
If you’re replacing an old liner, this step is for you. Before the new liner goes in, the pool’s existing shell needs a thorough inspection. Carefully check the walls and floor for any cracks, rust, rough patches, or other damage. Even small imperfections can be felt underfoot and can potentially puncture your new liner over time. Any issues should be repaired with pool-specific cement or patches to create a completely smooth surface. Taking care of this ensures your new liner fits snugly and has a clean slate. For older pools, considering professional restoration and sealing services can bring the underlying structure back to pristine condition before the new liner is installed.
Your Step-by-Step Installation Guide
Seeing your dream pool come to life is an exciting process, but it involves several precise steps to get it right. While this guide breaks down the technical side of a vinyl liner pool installation, turning your backyard vision into a reality requires skill, the right equipment, and a deep understanding of how all the pieces fit together. From the initial dig to the final fill, each stage builds upon the last. A small mistake early on can lead to bigger headaches down the road.
That’s why many Long Island homeowners choose to work with a professional team. At Gappsi, our swimming pool experts manage the entire project, ensuring every detail is handled with care. We coordinate everything from the excavation and plumbing to the final landscaping touches that make your pool a true backyard oasis. Understanding the installation process will help you feel confident and informed, whether you’re planning the project with us or just exploring your options. Let’s walk through the key stages of building a beautiful and durable vinyl liner pool.
Step 1: Excavate and Lay Out the Ground
The first major step is digging the space for your new pool. This isn’t just about creating a hole; it requires precision to ensure the pool’s structure is sound. The excavation needs to be slightly larger than the pool itself, creating a 6-inch ledge, or “lip,” around the inside edge. This extra space is crucial because it gives the installation team room to properly set up the concrete forms for the walls. Accurate digging and leveling at this stage prevent structural issues later on. Our team at Gappsi handles all the necessary site preparation and grading, ensuring the foundation for your pool is perfectly established from the very beginning.
Step 2: Install the Wall Panels and Frame
Once the ground is excavated, it’s time to build the pool’s skeleton. This involves setting up the wall panels and frame that will form the shape of your pool. The process starts by carefully laying out the forms for the pool steps, followed by the wall forms for both the inside and outside perimeter. These panels create the rigid structure that will support the entire pool and hold the vinyl liner in place. Getting the alignment and securing of these panels just right is essential for a straight, sturdy pool. This framework is the backbone of your installation, providing the strength needed for years of enjoyment.
Step 3: Add Wall Foam and Cove
With the walls in place, the next step is to prepare the interior surface for the vinyl liner. To do this, a layer of wall foam is applied to the concrete or steel panels. This foam acts as a protective cushion between the liner and the hard wall structure. It creates a smoother surface, which helps prevent punctures or abrasions and can extend the life of your liner. At the base of the wall, a “cove” is created. This is a gentle, curved transition from the floor to the wall, which prevents the liner from stretching into a hard 90-degree angle and becoming damaged over time.
Step 4: Set and Secure the Vinyl Liner
This is the step where your pool really starts to look like a pool. The custom-fitted vinyl liner is carefully unfolded and draped into the pool structure. The top edge of the liner, known as the “bead,” is clipped into a track that runs along the top of the pool walls. To get that perfectly smooth, skin-tight fit, a heavy-duty shop vac or a specialized liner vac is used. The vacuum’s hose is placed between the liner and the wall, sucking out all the air. This pulls the liner snugly against the walls and floor, removing wrinkles before any water is added.
Step 5: Connect Plumbing and Filtration
Before the surrounding area is finished with concrete or pavers, it’s critical to install and double-check all the plumbing. This includes the water inlets, skimmers, main drains, and any housing for underwater lights. Ensuring every connection is secure and properly sealed at this stage is vital for the pool’s long-term operation. A small leak or a poorly placed fitting can be a major problem to fix once the pool is filled and the deck is complete. Our Gappsi team meticulously handles all plumbing and filtration connections, making sure your pool runs efficiently from day one.
Step 6: Fill the Pool and Make Final Adjustments
With the liner secured by the vacuum and the plumbing in place, you can finally start filling the pool with water. The vacuum should keep running until the water is at least a foot deep in the shallow end, as the water’s weight will then be enough to hold the liner in place. As the pool fills, you can install the faceplates for the skimmer, returns, and lights. Once the water level is correct, you can shut off the vacuum and cut out the vinyl inside the faceplates. This final step completes the installation, leaving you with a perfectly fitted liner and a pool that’s ready for its first swim.
Common Installation Mistakes to Avoid
Installing a vinyl liner pool can be a rewarding project, but it’s one where small mistakes can lead to big headaches. A flawless installation is the key to a beautiful, long-lasting pool, and avoiding common pitfalls is half the battle. Whether you’re tackling this yourself or just want to know what to watch for, understanding these potential errors will help you get the best possible result. From preparing the ground to managing your budget, a little extra care at each stage makes all the difference.
Many homeowners are drawn to vinyl liners for their affordability and design flexibility, but a successful outcome depends heavily on the quality of the installation. A poorly installed liner can lead to wrinkles, leaks, and a significantly shorter lifespan, turning your dream pool into a source of frustration. By familiarizing yourself with the most frequent missteps, you can ensure your project goes smoothly. We’ll walk through everything from the importance of a perfectly prepped surface to the critical step of vacuum-sealing the liner, giving you the insights needed for a professional-grade finish.
Skipping Surface Preparation
Think of your pool’s walls and floor as the canvas for your new liner. If that canvas is bumpy, rough, or damaged, the final picture will be flawed. Before you even think about unrolling the liner, the pool surface needs to be perfectly smooth and clean. This means repairing any cracks, patching rust spots, and sanding down any rough areas. Any debris or imperfections left behind can be felt underfoot and may even puncture the liner over time. Taking the time for proper masonry repairs and surface smoothing ensures your liner fits snugly and lasts for years.
Getting the Measurements Wrong
When it comes to vinyl liners, precision is everything. An “almost right” measurement can result in a liner that’s too loose, causing wrinkles, or too tight, putting it under constant strain and shortening its lifespan. Many pools, especially older ones, aren’t perfectly symmetrical. You need to measure everything: the length, width, depths, and the specific radius of each corner. A liner that is custom-made to your pool’s exact dimensions will install more easily and look professionally finished. This is one area where hiring an expert for your swimming pool installation can save you from a costly ordering mistake.
Ignoring Temperature During Installation
Vinyl is a material that responds to temperature, and this can work for or against you during installation. If you try to install a liner on a cold day, the vinyl will be stiff and difficult to stretch into place. If the weather is too hot, the liner can become overly pliable and may stretch too much, leading to a loose fit once the pool is filled and the water cools. Most professionals aim for a temperate, sunny day, typically between 70 and 80 degrees Fahrenheit. This temperature range makes the liner flexible enough to work with but not so soft that it overstretches.
Neglecting to Use a Vacuum When Setting the Liner
You can’t just hang the liner in the pool and start filling it with water. A critical step for achieving a smooth, wrinkle-free finish is using a shop vacuum or a specialized liner vac. By placing the vacuum hose behind the liner and sealing off the skimmer openings, you can suck all the air out from between the liner and the pool walls. This suction pulls the liner tightly against the pool structure, creating a perfect fit. As the air is removed, you can work from the center out, smoothing any remaining wrinkles by hand or with a soft push broom before you add any water.
Underestimating Your Budget
While the initial cost of a vinyl liner is often lower than other pool types, it’s easy to overlook the additional expenses that come with a full installation. Your budget should account for more than just the liner itself. You’ll need to factor in costs for excavation, potential retaining walls, electrical work for the pump and filter, and water to fill the pool. Don’t forget about the finishing touches, like creating a beautiful patio or landscape design around your new oasis. A comprehensive plan will help you avoid surprise costs and ensure your project stays on track financially.
How to Handle Common Installation Challenges
Even with the most careful planning, you can run into a few bumps during a pool installation. The key is knowing how to handle them without letting them derail your project. From a stubborn wrinkle in the liner to unexpected soil issues, most challenges have a straightforward solution, especially when you have experience on your side. Think of these as puzzles to solve rather than project-ending problems.
Successfully managing these issues often comes down to having the right techniques and tools ready before you even start. A professional installer anticipates these potential hurdles and builds the solutions right into their process. Whether you’re tackling this yourself or working with a team, understanding how to fix common problems will give you peace of mind and ensure a beautiful, long-lasting pool. We’ll walk through a few of the most frequent challenges and how to solve them.
Fixing Wrinkles, Gaps, and Misalignment
Seeing wrinkles in your brand-new liner can be disheartening, but it’s usually a fixable issue. The secret is to remove the air between the liner and the pool walls. You can do this with a heavy-duty shop vac or a specialized liner vac. Place the vacuum hose behind the liner to suck out the air, which will pull the material tight against the pool’s structure.
As the air is removed, you can use your hands or a soft push broom to gently smooth the liner against the walls and floor, working any remaining wrinkles out. This step is critical for achieving that sleek, professional finish. Getting the liner perfectly smooth ensures it wears evenly and looks great for years to come.
Dealing with Tricky Soil Conditions
The ground in Long Island can be unpredictable, but tricky soil doesn’t have to stop your pool project. A smart excavation technique can make all the difference. When digging the pool area, creating an extra six-inch ledge, or “lip,” around the inside edge gives your team room to work. This space is essential for setting up the concrete forms that create the pool’s foundation.
Once the main structure is in place, this extra ledge is simply cut away as the deep end of the pool is shaped. This bit of foresight prevents issues with unstable soil and ensures your pool’s walls are secure and perfectly aligned. It’s a professional touch that makes the entire masonry and construction process much smoother.
Solving Plumbing and Equipment Issues
Your pool’s plumbing and filtration system are its lifeline, and getting this part right is non-negotiable. Because these systems are complex and vital to your pool’s function, we always recommend engaging professional contractors for the job. Improperly installed plumbing can lead to leaks, poor water circulation, and equipment failure down the road.
A great pro tip is to install foam padding on the pool walls before placing the liner. This simple step provides an extra layer of protection for your liner, preventing potential damage from the wall panels and improving its overall longevity. When you hire an experienced team for your swimming pool installation, they handle these critical details to ensure everything works perfectly from day one.
Pro Tips for a Flawless Installation
Getting the big steps right is crucial, but the difference between a good installation and a great one often comes down to the details. After years of building beautiful swimming pools across Long Island, we’ve learned a few tricks that ensure a perfect, long-lasting finish. These are the pro tips that prevent common headaches and help you get the most out of your new pool liner. Think of this as insider knowledge to help you achieve a truly flawless result. Paying attention to the weather, properly sealing your liner, and replacing a few small parts can save you a lot of time and money down the road.
Plan Around Weather and Seasonal Conditions
Timing your installation day is more important than you might think. Vinyl liners are best installed on a warm, sunny day with temperatures between 70 and 80 degrees Fahrenheit. The warmth makes the vinyl more pliable and flexible, allowing it to stretch smoothly into place without wrinkles. Trying to install a liner when it’s too cold can make the material stiff and difficult to work with, increasing the risk of a poor fit. On the other hand, extreme heat can make the liner too soft and easy to overstretch. We often schedule installation days around this ideal temperature range to get the best fit and finish.
Seal Edges and Check for Leaks Before Filling
Once your liner is in place, take a moment to secure the edges before you start filling the pool. After the liner is set in the coping track, you can install a liner lock. This is a thin plastic strip that wedges into the track over the liner bead, holding it securely and preventing it from popping out later. It’s a simple step that adds extra peace of mind. Before you completely fill the pool, carefully inspect all the fittings for leaks. Check around the skimmer, return jets, and lights to ensure every seal is watertight. It’s much easier to fix a small drip now than to deal with water loss later.
Always Replace Gaskets and Faceplates
When you’re installing a new liner, always replace the gaskets and faceplates on your skimmer, return jets, and main drain. It might be tempting to reuse the old ones if they look like they’re in decent shape, but this is a risky shortcut. Over time, gaskets compress and lose their ability to create a perfect seal. Reusing them is one of the most common causes of slow, hard-to-find leaks behind the liner. New gaskets and faceplates are inexpensive and provide the best defense against future water loss. We recommend replacing them with every liner change to ensure a proper seal and extend the life of your new liner.
When to Replace Your Vinyl Liner
A vinyl liner is the heart of your pool, giving it that smooth finish and beautiful color. While modern liners are built to last, they don’t have an infinite lifespan. Knowing when it’s time for a replacement is key to protecting your pool’s structure and keeping your backyard oasis looking its best. Waiting too long can lead to leaks that may damage the pool walls or wash out the supportive base, turning a straightforward liner swap into a much bigger project.
Think of it like any other major component of your home, it requires attention and eventual replacement to prevent more significant issues down the road. Being proactive and recognizing the early warning signs will save you time, money, and stress. If your liner is getting on in years or starting to show its age, it’s smart to begin planning for a replacement. Our team at Gappsi can help you assess your current liner’s condition and guide you through the process of choosing and installing a new one, ensuring your swimming pool remains a source of enjoyment for years to come.
Signs It’s Time for a New Liner
The most straightforward indicator is age. A high-quality vinyl liner, when installed correctly, can last between 10 and 15 years. If your liner is approaching this age range, it’s time to start paying closer attention. You should also look for visible signs of wear and tear. Significant fading or stubborn staining from chemicals and sun exposure can indicate the vinyl is breaking down. More critically, watch for any cracks or tears, no matter how small, as these will inevitably lead to leaks. If you notice the liner feels brittle, is pulling away from the corners, or has developed wrinkles it didn’t have before, it’s losing its plasticity and fit. And of course, if you find yourself constantly adding water, you likely have a leak that needs immediate attention.
How Liner Quality Affects Its Lifespan
Not all vinyl liners are created equal, and the quality of the material directly impacts how long it will last. A premium, thicker liner made from 100% virgin vinyl will resist fading, tearing, and chemical damage far better than a lower-grade alternative. While a top-tier liner might have a higher upfront cost, it often proves more economical over time. The lifespan can vary widely, with some liners needing replacement in as few as five years, while others last for 15. Considering a full replacement can cost several thousand dollars, investing in a durable, professional-grade product from the start means you’ll be replacing it less frequently. This is why we prioritize using only the most durable materials for our pool installations, giving you peace of mind and a longer-lasting, beautiful pool.
Why You Should Hire a Pro for Your Long Island Pool
While a DIY project can be satisfying, installing a vinyl liner pool is a massive undertaking with a lot of moving parts. A small mistake can lead to costly repairs and major headaches down the road. Hiring a professional team ensures your investment is protected and the final result is a backyard oasis, not a source of stress. Think of it as the difference between simply having a pool and having a perfectly crafted outdoor experience. A professional swimming pool installation brings a level of precision and coordination that guarantees a beautiful, long-lasting result.
Expertise in Planning and Coordination
A successful pool installation begins long before the first scoop of dirt is moved. Professionals start with a detailed planning phase, which includes everything from site assessment and securing permits to coordinating with electricians and plumbers. Homeowners often underestimate just how many steps are involved. An experienced team manages this entire process, making sure every detail is accounted for. This level of preparation helps prevent unexpected setbacks once construction begins, keeping your project on schedule and within budget. It’s this comprehensive oversight that sets a professional job apart.
Flawless Execution and Attention to Detail
The difference between an amateur and a professional installation often comes down to the small details. A pro knows exactly how to prepare the pool floor for a smooth finish and how to position the liner perfectly to avoid wrinkles and stretching. This careful attention to detail is what creates that polished, high-end look. Professionals also use specialized equipment, like vacuums, to hold the liner tightly against the walls while the pool fills, ensuring a secure fit. This meticulous workmanship not only enhances the pool’s appearance but also contributes to the liner’s longevity, which you can see in our project showcases.
A Stress-Free Process from Start to Finish
Let’s be honest, your goal is to relax by the pool, not spend your summer managing a complex construction project. When you hire a professional, you can enjoy the process without the stress of overseeing every step. You get to focus on the fun decisions, like choosing your liner pattern or planning your new patio furniture, while the experts handle the logistics. A professional team provides peace of mind, allowing you to sit back and watch your dream backyard come to life. This lets you enjoy the benefits of a thoughtfully constructed pool without the burden of managing it all yourself.
Related Articles
- Long Island Vinyl Pool Builder: Your 2026 Cost Guide
- Choosing a Vinyl Pool Contractor on Long Island
- Inground Vinyl Liner Pool Replacements: Key Considerations
- Hiring a Vinyl Pool Builder on Long Island: A Guide
- Gunite vs. Vinyl Pool for Long Island: Which Is Best?
Frequently Asked Questions
How long does the entire vinyl liner pool installation process take? From the first day of excavation to the final fill, a typical installation can take anywhere from two to five weeks. The exact timeline depends on a few factors, like the complexity of your pool design, the time it takes to secure local permits, and of course, the weather. We coordinate every step to make the process as efficient as possible, but we never rush the critical stages like site preparation and plumbing.
Are vinyl liners durable enough for a family with kids and pets? Absolutely. Modern vinyl liners are surprisingly tough and designed to handle the wear and tear of an active family. The smooth surface is comfortable for feet and paws, and it resists algae growth, which is a nice bonus. While you should still be mindful of very sharp objects, a high-quality liner can easily withstand years of splashing, games, and fun.
Besides replacing the liner, what kind of regular maintenance does a vinyl pool need? Maintaining a vinyl liner pool is quite straightforward. Your main tasks will be testing and balancing the water chemistry weekly to keep it safe and clean. You will also need to skim the surface, vacuum the floor, and brush the walls regularly to prevent debris buildup. It’s also a good habit to periodically check the area around your skimmer and jets to ensure there are no small leaks.
Can I really get a custom-shaped pool with a vinyl liner? Yes, and that’s one of the biggest advantages of choosing vinyl. Because the pool’s structure is built on-site with wall panels, we can create almost any shape you can imagine. Whether you want a classic rectangle, a curvy freeform lagoon, or a unique design with built-in benches and tanning ledges, a vinyl liner can be custom-made to fit it perfectly.
Why is the temperature so important on installation day? The temperature plays a huge role in getting a perfect, wrinkle-free fit. Vinyl becomes stiff and hard to work with when it’s too cold, making it difficult to stretch into place. In extreme heat, the material can become too soft and may overstretch, leading to a loose fit later on. An ideal, sunny day between 70 and 80 degrees makes the liner just pliable enough for our team to achieve that flawless, skin-tight finish.