


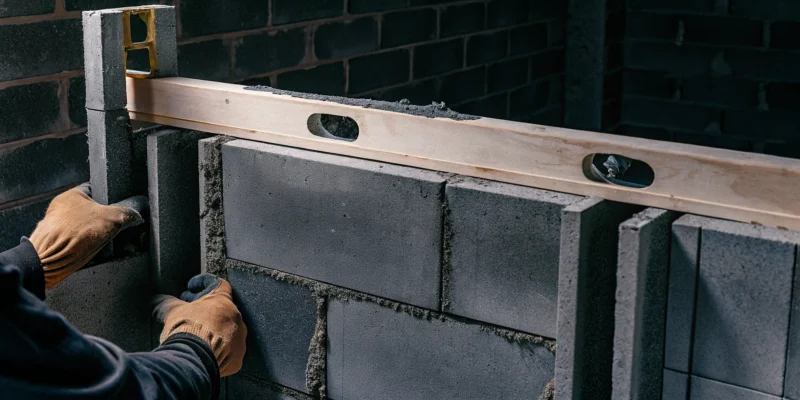
Here on Long Island, our properties face unique challenges, from shifting sandy soil to the annual freeze-thaw cycle that can wreak havoc on outdoor structures. When you’re building a wall with concrete blocks, you have to account for these local conditions to ensure your work lasts. A wall that stands strong in a warmer climate might not survive a single Nassau or Suffolk County winter without the right preparation. This guide is written with our local environment in mind. We’ll cover the critical steps, like digging a proper footing below the frost line and planning for drainage, to ensure your new wall is a lasting investment in your home.
Key Takeaways
- A Solid Foundation is Non-Negotiable: Your wall’s stability starts with its footing. Ensure you dig a trench below the local frost line and pour a concrete base that is wider than your blocks, allowing it to cure completely before you begin building.
- Strength Comes from the Details: A strong wall is more than a stack of blocks; it’s a complete system. Pay close attention to details like mixing mortar to the right consistency, staggering joints in a running bond pattern, and adding steel rebar for reinforcement.
- Know When to Call a Professional: For safety and structural integrity, consider hiring an expert for complex projects. This includes any retaining wall, a wall taller than four feet, or any project that requires a building permit to ensure it’s built correctly and to code.
What Tools and Materials Do You Need?
Getting your project started on the right foot means gathering all your supplies before you lay the first block. Having everything on hand makes the process smoother and helps you avoid last minute trips to the store. Think of it as your pre-project checklist. We’ll walk through the blocks, mortar, and tools you’ll need to build a sturdy and beautiful wall.
Choose the Right Concrete Blocks
First things first, you need to pick the right blocks for your project. Not all blocks are created equal, and your choice will depend on what you’re building. Concrete blocks are the go-to for most outdoor projects, like retaining walls or foundations, because they are incredibly strong and durable. Cinder blocks are a lighter option but aren’t as tough, making them better for interior, non-load-bearing walls. For a more modern approach, Autoclaved Aerated Concrete (AAC) blocks are lightweight and offer great insulation. For any project involving structural walls, Gappsi’s masonry experts can help you select the perfect materials.
Select Your Mortar and Reinforcement
Your wall is only as strong as the mortar that holds it together. You’ll want to use a type S mortar mix, which you can find at most hardware stores. The key is to mix it with water until it has a thick, peanut butter-like consistency, just sticky enough to cling to your trowel when you turn it sideways. For load-bearing walls, reinforcement is non-negotiable. This means adding steel rods, or rebar, into the footing before it dries and then placing more rebar vertically into the block cores as you build. This internal skeleton gives your wall the extra strength it needs to stand the test of time.
Gather Your Essential Tools
With your materials sorted, it’s time to round up your tools. You don’t need a massive workshop, but a few key items are essential for a professional-looking job. You’ll need a masonry trowel for applying mortar, a wheelbarrow or mixing tub, and a hoe for mixing. To keep your lines straight, grab a mason’s line, line blocks, and a 4-foot level. A measuring tape and a stiff brush will also come in handy. Most importantly, don’t forget your safety gear. A good pair of gloves and safety glasses are a must to protect yourself from scrapes and debris while you work.
Safety First: How to Prepare for Your Project
Before you mix a single bag of mortar or lay the first block, let’s talk about safety. I know it’s tempting to jump right into the exciting part, but a little preparation here goes a long way. Taking these steps will not only protect you from injury but also ensure your project starts on the right foot, saving you from headaches down the road. While a DIY project can be incredibly rewarding, it’s not worth risking your well being or creating a structure that isn’t sound. Think of this prep work as the most important part of your foundation.
Wear the Right Personal Protective Equipment (PPE)
Working with concrete and mortar can be messy and tough on your body. Always protect yourself with the right gear. At a minimum, you’ll need safety glasses to shield your eyes from dust and splashes. Waterproof gloves are also a must, as wet cement can irritate your skin. I also recommend wearing long sleeves, pants, and closed-toe, sturdy boots to protect yourself from scrapes and spills. Investing in good personal protective equipment isn’t just a suggestion; it’s a crucial step for a safe and successful DIY project.
Check Local Building Codes and Permits
This step is so important, and skipping it can lead to major problems. Before you even dig, you need to check your local building codes. Rules for structures like retaining walls can vary significantly between towns, even within Long Island. A quick call or visit to your local municipal website can tell you if you need a permit and what specific requirements your wall must meet, like height restrictions or setback distances. Getting this sorted out first ensures your hard work is fully compliant and won’t need to be torn down later. It’s always better to be safe than sorry.
Use Proper Lifting Techniques
Let’s be honest: building a block wall is physically demanding. Concrete blocks are heavy, and so are bags of mortar. To avoid straining your back, always use proper lifting techniques. Bend at your knees and hips to pick up heavy items, not with your back. Keep the load close to your body and your back straight as you lift. Don’t try to carry too much at once. If a block feels too heavy, get help. Pacing yourself is key. This is a marathon, not a sprint, and injuring yourself on day one will bring your project to a halt.
How to prepare the site and foundation
A strong, stable wall starts with a solid foundation. This is the most critical part of the project, and skipping or rushing these steps will almost certainly lead to problems later on. Preparing the ground correctly ensures your wall can withstand the elements and the test of time. It involves carefully marking your layout, excavating a proper trench, and pouring a concrete footing that is perfectly level. While it requires some muscle, getting the foundation right is straightforward if you follow the process. For complex or large-scale projects, the expertise of a professional masonry designer can be invaluable in ensuring your foundation is built to last. Proper site preparation is the key to a successful build, setting you up for a smooth and rewarding construction process from the ground up.
Mark and excavate the area
First, you need to outline exactly where your wall will go. Use wooden stakes and a string line to create a straight guide for your trench. Once you’re happy with the placement, it’s time to start digging. Before you break ground, you must call 811 to have any underground utility lines marked. This is a free service and a crucial safety step you can’t afford to miss.
Your trench should be about twice as wide as the concrete blocks you’re using. For example, if you have 8-inch blocks, dig a 16-inch wide trench. The depth is even more important, as you’ll need to dig below the local frost line to prevent your wall from shifting during the winter. This ensures your foundation rests on stable ground that won’t move during freeze-thaw cycles.
Pour and cure the footing
The footing is a concrete base at the bottom of your trench that provides a stable platform for your wall. For most block walls, you should pour a concrete footing that is at least 8 inches thick. If you are building a structural or load-bearing wall, you will also need to place vertical steel reinforcement bars, or rebar, into the wet concrete. This adds significant strength and stability.
After pouring the concrete, you need to let it cure properly. This isn’t a step to rush. Give the footing at least two to three days to harden completely before you start laying any blocks on top of it. A well-cured footing is essential for the long-term durability of your wall, as explained in this guide to building a block wall.
Account for the frost line
Here in Long Island, we know how cold our winters can get. That cold penetrates the ground, causing moisture in the soil to freeze and expand, a process known as frost heave. If your wall’s footing is above the frost line, this movement can cause it to shift, heave, and crack over time. To prevent this, your trench must be excavated deep enough so the footing sits below the frost line on undisturbed soil.
The depth of the frost line can vary, but for Nassau and Suffolk counties, you should plan for a depth of at least 36 to 48 inches. Always check your local building codes to confirm the exact requirements for your area. This is a non-negotiable step in professional landscape construction for a reason: it guarantees a stable, long-lasting structure.
Check for level and alignment
With your footing cured, it’s time to ensure your first course of blocks is perfectly straight and level. Any errors here will be magnified as you build upward. Snap a chalk line on the footing to mark both the inside and outside edges of where the wall will be. This gives you a clear visual guide to follow.
Start by setting the corner blocks first. Apply mortar to the footing, press the corner blocks firmly into place, and use a level to check them from side to side and front to back. Gently tap them with a rubber mallet to make any adjustments. Once your corners are perfect, run a mason’s string line between them. This line will act as your guide to keep every block in the first course perfectly aligned and level.
A Step-by-Step Guide to Laying Concrete Blocks
With your foundation ready, you can start the most rewarding part of the project: building the wall itself. Laying concrete blocks is a methodical process that transforms a line on the ground into a solid structure. Taking your time on these steps will ensure your wall is strong, straight, and built to last. Let’s walk through how to lay each course correctly, from mixing the perfect mortar to finishing the corners like a pro.
Mix Mortar to the Right Consistency
Your wall is only as strong as the mortar holding it together, so getting the mix right is essential. You’ll want to use a type S or mason mortar for this kind of project. The goal is to achieve a smooth, firm consistency, similar to peanut butter. A great way to test your mix is to scoop some onto your trowel and turn it sideways; the mortar should stick without sliding off. If it’s too wet, it will be sloppy and weak. If it’s too dry, it won’t bond properly to the blocks. Take your time to mix the mortar with water until you get that perfect texture.
Lay the First Course
The first course, or layer, of blocks sets the standard for the entire wall, so precision is key. Start by spreading a 1-inch thick bed of mortar along the chalk lines on your footing. With your trowel, make a shallow V-shaped furrow down the middle of the mortar. This helps the mortar spread evenly when you set the block. Begin by pressing the corner blocks into the mortar first. Use a level and a rubber mallet to gently tap them until they are perfectly level and plumb. Then, run a mason’s string line between the corners to guide the rest of the blocks, ensuring a straight and solid foundation for your wall.
Stagger Joints and Keep Courses Level
For a strong and stable wall, you must stagger the vertical joints between blocks. This pattern, known as a running bond, prevents weak points from lining up. To achieve this, start your second course with a half-block at the corner. As you build upward, continue to use a mason’s line stretched between the corners as your guide. This simple string line is your best friend for keeping each course straight and level. Before placing each new block, check the alignment with the string and use your level often, both horizontally on top of the block and vertically on its face.
Build Around Corners and Ends
Corners are the backbone of your wall, so you’ll want to build them up first. Lay a few courses at each corner, creating “leads” that will guide the rest of your wall. Carefully place each corner block, checking that it is level in both directions and perfectly plumb (vertically straight). This ensures your corners are a true 90 degrees. When you reach the end of a wall that isn’t a corner, use a half-block with a smooth, flat end facing out. This gives the end of your wall a clean, professional appearance instead of leaving an open core exposed.
How to Reinforce and Finish Your Concrete Block Wall
Once your blocks are laid, you’re on the home stretch. But don’t rush this part, because reinforcing and finishing are what transform a stack of blocks into a strong, long-lasting structure. These final steps add critical strength, protect your wall from the elements, and give it that clean, professional look you’re after. Taking the time to do this right ensures your hard work will stand the test of time.
Place Rebar for Strength
To give your wall serious backbone, you need to add steel reinforcement bars, or rebar. This is especially important for any wall that will bear a load or hold back soil. Before you pour your concrete footing, you should place vertical rebar pieces that stick up at least six inches. As you lay your blocks, you can then slide longer pieces of rebar down through the hollow cores, tying them to the pieces in the footing. A good rule of thumb is to place rebar in every other core for robust support. This internal steel skeleton is what gives the wall the tensile strength to resist pressure and prevent cracking. For complex projects, our masonry experts can help design the right reinforcement plan.
Fill Cores with Grout
With your rebar in place, the next step is to fill the hollow cores of the blocks with grout or a high-strength concrete mix. This process, called grouting, effectively turns your wall into a solid, unified mass. The grout flows around the rebar, locking it into place and bonding the entire structure together from the inside out. You can pour the grout in stages, or “lifts,” as you build the wall higher. Use a funnel or a grout bag to pour carefully, making sure to fill every designated core completely. This step is non-negotiable for creating a wall that is truly strong and durable, capable of handling whatever you throw at it.
Plan for Drainage with Weep Holes
If you’re building a retaining wall, managing water is one of the most important things you can do for its longevity. Water pressure building up behind a wall is a powerful force that can cause it to bow or even fail. To prevent this, you need to give the water an escape route by creating weep holes. These are small gaps in the mortar joints of the first course of blocks, spaced every few feet. You can create them by simply leaving the mortar out of a vertical joint or by placing a small plastic tube or rope in the joint and removing it after the mortar sets. Proper landscape drainage is a science, and these simple holes are a key part of a successful system.
Tool and Clean the Mortar Joints
For a wall that looks sharp and sheds water effectively, you’ll want to finish, or “tool,” the mortar joints. Wait until the mortar is “thumbprint hard,” meaning you can press your thumb into it and leave an impression without the mortar sticking to your skin. At this point, use a concave jointer or a similar tool to press and smooth the joints. This compacts the mortar, making it denser and more water-resistant, while creating a clean, uniform appearance. As you work, use a trowel or stiff brush to scrape away any excess mortar that has squeezed out onto the face of the blocks. It’s much easier to clean it now than after it has fully cured.
Add Cap Blocks for a Polished Finish
The perfect finishing touch for any block wall is a row of cap blocks. These flat, solid blocks sit on top of your final course and serve two main purposes: they give the wall a completed, professional look and they protect the open cores from collecting water, snow, and debris. You can find cap blocks that match your wall blocks, or you can choose a contrasting material like a beautiful natural stone paver for a more decorative flair. Secure the cap blocks in place with a layer of mortar or a strong construction adhesive, ensuring they are level and evenly spaced for a flawless finish.
Seal the Wall for Long-Term Protection
After all your hard work, the final step is to protect your new wall with a quality sealer. A good masonry sealer will create an invisible barrier that repels water, prevents stains from dirt and mildew, and protects the color from fading due to sun exposure. Applying a sealer is a simple process, usually done with a roller or a garden sprayer, but it makes a huge difference in the long-term appearance and durability of your wall. This is an easy way to keep your wall looking fresh for years to come. If you want to ensure maximum protection, our professional restoration and sealing services can provide a durable, long-lasting finish.
Common Mistakes to Avoid
Building a concrete block wall can be an incredibly rewarding project, but a few common missteps can turn your hard work into a structural headache. Even small errors in the beginning can lead to big problems down the line, like cracking, leaning, or even a total collapse. Taking your time and paying close attention to the details will ensure your wall is not only beautiful but also strong enough to last for decades. From the foundation to the final touches, each stage builds upon the last, so a mistake in one area can compromise the entire structure.
Before you get started, it helps to know what to watch out for. Many DIY projects go wrong when a key step is rushed or misunderstood. It’s about more than just stacking blocks; it’s about creating a cohesive, stable structure that can withstand weather, pressure, and time. Understanding the physics of how a wall stands and what forces act upon it is half the battle. If you find the process feels a bit overwhelming, remember that professional masonry services are always an option to guarantee a perfect result. Let’s walk through the most frequent mistakes so you can avoid them on your project.
Rushing or Skipping the Footing
Think of the footing as the foundation for your wall. It’s a solid base of poured concrete that provides stability and prevents the structure from sinking or shifting over time. One of the biggest mistakes you can make is rushing this step or skipping it entirely. Every block wall needs a strong footing that is at least twice as wide as the blocks you’re using. It also needs to be deep enough to sit below the frost line, which is crucial for preventing damage from the ground freezing and thawing during Long Island winters. This is the one part of the project where cutting corners will almost certainly lead to failure.
Getting the Mortar Mix Wrong
The mortar is the glue that holds your entire wall together, so getting the consistency right is non-negotiable. If your mix is too dry, it won’t create a strong bond between the blocks. If it’s too wet, it will squeeze out of the joints and result in a weak, messy finish. The perfect mortar should be like a thick paste, able to stick to your trowel when you hold it at a 90 degree angle. It takes a little practice to get the feel for it, but this step is essential for the structural integrity of your wall. A proper mix ensures your blocks will lock together into a single, solid unit.
Forgetting Drainage and Reinforcement
If you’re building a retaining wall, you have to plan for water. The pressure from water-saturated soil building up behind a wall can easily push it over. Proper drainage is your best defense. This involves installing weep holes in the base of the wall and backfilling with gravel to give water an escape route. For taller walls, reinforcement is just as important. Placing steel rebar vertically inside the block cores and adding a special mesh called geogrid between courses gives the wall the internal skeleton it needs to resist immense pressure. These elements work together to create a durable wall that can stand up to the elements.
Ignoring Alignment and Joint Staggering
As you lay your blocks, it’s easy to focus so much on one block that you lose sight of the bigger picture. But even a slight misalignment at the bottom will become a very noticeable problem by the time you reach the top. To avoid this, you must stagger the joints by offsetting each course, much like a brick pattern. This running bond pattern distributes weight evenly and adds significant strength. Use a mason’s line stretched taut from end to end and check every single course with a level. This meticulous attention to detail is what separates a professional looking wall from an amateur one.
When Is It Time to Call a Professional?
There’s a special kind of pride that comes from completing a DIY project. But it’s just as important to know when a project is better left to a professional. When it comes to building with concrete blocks, the line between a manageable task and a potential hazard often comes down to the project’s scale and purpose. A small, decorative garden border is one thing, but a wall that needs to be structurally sound is another story entirely. Getting it wrong can lead to a wall that cracks, leans, or even collapses, creating a safety risk and a costly problem to fix.
If you’re a first-timer, working with mortar can be surprisingly difficult. It takes practice to get the right consistency and apply it correctly for a strong bond. The complexity grows with the size of the wall. For example, if your wall will be taller than three or four feet, you will likely need a building permit and possibly an engineer’s design to meet local codes. This is especially true for retaining walls, which are designed to hold back soil and bear a significant amount of weight. The physics involved in these structures are complex, and a mistake can have serious consequences.
For these more demanding projects, it’s wise to work with an experienced masonry designer and construction company. A professional team handles everything from securing permits and ensuring structural integrity to delivering a polished, durable final product. Consider calling a professional if:
- The wall needs to function as a retaining wall.
- The planned height is over four feet.
- Your project requires a building permit or engineering plans.
- You are not completely confident in your ability to build a safe and level wall.
Ultimately, hiring a professional gives you peace of mind. You can trust that the job will be done correctly, safely, and in compliance with all local regulations, ensuring your new wall stands strong for years to come.
Related Articles
- concrete walls Archives – Gappsi Group
- The Complete Guide to a Privacy Wall Outdoor
- How to Build a Concrete Basketball Court in Your Backyard
- Advantages of Concrete Wall Pools – Gappsi Group
- Sports Game Courts Archives – Gappsi Group
Frequently Asked Questions
How deep does my footing trench need to be for a Long Island winter? For us here on Long Island, this is a critical question. You need to dig your trench deep enough so the bottom of your concrete footing sits below the frost line. A safe bet for our area is a depth of at least 36 to 48 inches. This prevents the ground from freezing under your wall and heaving it upward, which can cause major cracks and instability over time. It seems like a lot of digging, but it’s the only way to guarantee your wall stays put through the winter.
What is the real difference between mortar and concrete? This is a great question because they look similar but do very different jobs. Think of concrete as the foundation of your project; it’s incredibly strong and used for creating mass, like your footing. It contains larger aggregates like gravel. Mortar, on the other hand, is the glue that holds your blocks together. It uses finer sand and is designed to be a bonding agent. You cannot use them interchangeably, so be sure to pour your footing with concrete and lay your blocks with mortar.
How do I cut a concrete block in half? You’ll definitely need half blocks to stagger your joints correctly. The most straightforward way for a DIY project is to use a masonry chisel and a small sledgehammer. First, use the chisel to score a line about one eighth of an inch deep all the way around the block where you want it to break. Then, place the chisel back in the scored line and give it a single, sharp strike with the hammer. The block should split cleanly along your line. Always wear your safety glasses for this step.
Realistically, how much time should I set aside for this project? The timeline really depends on the size of your wall and your experience level. For a small, straightforward wall, you should plan for at least two full weekends. The first weekend would be for preparing the site, digging the trench, and pouring the concrete footing. You then need to let the footing cure for several days. The second weekend would be for mixing mortar and laying the blocks. Rushing any of these steps, especially the foundation work, is a recipe for problems, so give yourself plenty of time.
Do I always need a concrete footing, even for a very small wall? For any wall that is retaining soil or is more than a single course high, the answer is yes, you absolutely need a proper concrete footing. It’s the only thing that provides the stable base required to prevent sinking, shifting, and cracking. If you are building a very small, decorative border for a garden bed that is only one block high and isn’t holding back any weight, you might get away with a compacted gravel base. However, for any structure meant to last, the concrete footing is not a step you should ever skip.