


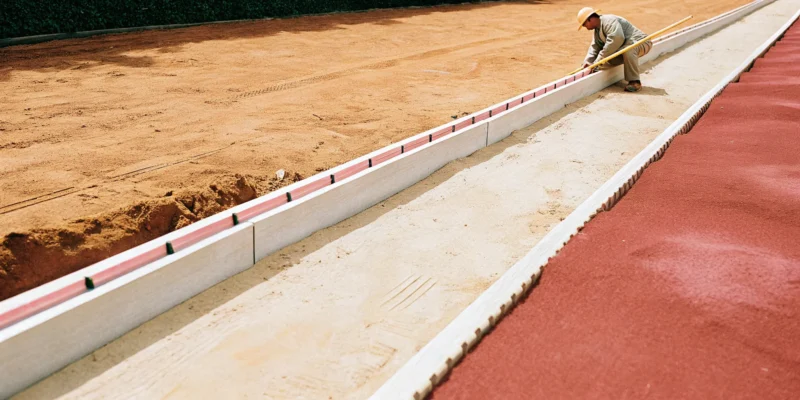
A retaining wall is in a constant battle with gravity and water. Its entire purpose is to safely manage the immense pressure exerted by the soil behind it, a job that requires smart engineering. A successful wall isn’t just about stacking blocks; it’s about the unseen systems working behind the scenes. This includes a compacted gravel base that prevents settling, a robust drainage system that relieves hydrostatic pressure, and, for taller walls, geogrid reinforcement that anchors the structure to the earth. Getting these details right is the core of proper retaining wall construction. Skipping these steps can lead to structural failure, turning your beautiful new wall into a dangerous liability. This article will explain these critical engineering principles so you can ensure your project is built for safety and longevity.
Key Takeaways
- Planning Prevents Problems: A successful retaining wall depends on the prep work, which includes creating a solid drainage plan to manage water, understanding your property’s soil type, and checking local Long Island building codes for permits.
- Function and Style Go Hand in Hand: The type of wall you build (like gravity or segmental) depends on your slope and structural needs, while the material you choose (from natural stone to concrete blocks) will define your landscape’s aesthetic and overall budget.
- Build it Right and Know Your Limits: Key construction steps, like creating a level, compacted base and backfilling with gravel for drainage, are essential for a long-lasting wall. While small walls can be a DIY project, you should always call a professional for large projects or if you see signs of failure like bulging or major cracks.
What Is a Retaining Wall?
A retaining wall is a structure built to hold back, or retain, soil. Think of it as a barrier that prevents soil from moving downhill due to gravity and erosion. When your property has changes in elevation, a retaining wall creates a stable, vertical boundary between the different levels. This simple concept is a powerful tool in landscaping, turning sloped, unusable ground into valuable, functional space. Whether you dream of a flat lawn for your kids to play on, a level base for a new patio, or a series of terraced garden beds, a retaining wall makes it possible.
These structures are much more than just a stack of blocks. They are carefully engineered systems designed to withstand immense pressure from the earth behind them. Proper construction is critical for safety and longevity, which is why professional masonry expertise is so important. A well-built retaining wall manages soil and water, protecting your home’s foundation and preventing landscape damage. At the same time, it serves as a beautiful design element that can define the character of your entire outdoor living area, adding depth, texture, and structure to your yard.
The Purpose of a Retaining Wall in Landscaping
A retaining wall serves two main purposes in your yard: it’s both a workhorse and a showpiece. Functionally, its primary job is to prevent soil erosion. On a sloped property, rain can wash away valuable topsoil and cause damage to your landscape. A retaining wall holds everything in place and can even help redirect water runoff to protect your home’s foundation. It also creates flat, usable areas where none existed before, giving you the perfect spot for a patio, garden, or fire pit.
From a design perspective, a retaining wall adds incredible visual appeal. It introduces clean lines, texture, and a sense of order to your landscape. You can use one to create stunning terraced gardens, build a raised flower bed, or frame a walkway. The materials you choose, from rustic natural stone to sleek concrete blocks, help define your home’s aesthetic. A thoughtfully designed wall becomes a central feature of your overall landscape design, not just a structural necessity.
Signs You Might Need One
You might need a retaining wall if you notice a few key issues around your property. The most obvious sign is soil erosion. If you see dirt washing away from hillsides or creating gullies in your yard after it rains, a retaining wall can solve the problem. Another clear indicator is having a sloped yard that is difficult to use or maintain. If you struggle to mow a steep hill or wish you had a level spot for outdoor activities, a retaining wall can reclaim that space for you.
Consider a retaining wall if you want to add new features to your property. Creating a flat surface is often the first step for installing a swimming pool, a patio for entertaining, or even a driveway. If your home is built on a hill and you have concerns about soil pressing against its foundation, a retaining wall can provide crucial protection. It effectively manages the earth and gives your home the support it needs.
Explore the Main Types of Retaining Walls
Retaining walls are not a one-size-fits-all solution. The right type for your Long Island property depends on the height of the slope, soil conditions, and the look you want to achieve. Understanding the main construction styles will help you have a more informed conversation with your contractor and choose a wall that is both beautiful and built to last. Let’s break down the four most common types you’ll encounter.
Gravity Retaining Walls
A gravity wall is the classic workhorse of retaining walls. It uses its own sheer weight and mass to hold back the soil, just as the name suggests. These walls are often built from heavy materials like large boulders, concrete blocks, or even gabions, which are wire cages filled with rocks. Because they rely on mass, they are typically built with a wide base that tapers toward the top. This type of retaining wall is straightforward and effective for walls up to about 10 feet high. We love using beautiful natural stone for gravity walls to create a timeless, organic look that blends perfectly with your landscape.
Cantilevered Retaining Walls
When you need a taller wall without the massive footprint of a gravity wall, a cantilevered design is an excellent choice. These walls are engineered with an L-shaped foundation made of reinforced concrete that extends into the soil behind it. The weight of the backfill on top of this base, or “heel,” helps anchor the entire structure, giving it incredible strength. This design uses steel rebar for reinforcement, making it more efficient than a gravity wall for higher slopes. It’s a sophisticated solution that requires precise engineering, making it a job best left to experienced masonry professionals.
Anchored Retaining Walls
For the most challenging situations, like very tall slopes or tight spaces, an anchored retaining wall provides maximum support. This design works by securing the wall to the earth behind it with a series of cables or rods. These anchors are drilled deep into the soil or rock and mechanically fastened, creating a strong brace against immense pressure. This method allows for thinner, taller walls than other systems might permit. Because of its complexity and the need for specialized equipment, an anchored wall is a project that absolutely requires an expert design and construction team to ensure it is installed safely and correctly.
Segmental Retaining Walls
Segmental retaining walls, or SRWs, are a popular and versatile option for many residential projects. They are built using high-quality, mortarless concrete blocks that interlock with each other. Their stability comes from this interlocking system and their own mass. For taller walls, they are often reinforced with layers of geogrid, a strong polymer mesh, placed in the soil behind the wall. SRWs come in a huge variety of colors, textures, and styles, making them an aesthetically pleasing choice for any landscape design. While smaller versions can be a DIY project, a properly engineered wall is crucial for ensuring long-term stability and safety.
Choose the Best Materials for Your Wall
The material you choose for your retaining wall does more than just hold back soil; it defines the entire look and feel of your landscape. Your decision will influence the wall’s durability, maintenance needs, and overall budget. From the classic beauty of natural stone to the engineered precision of concrete blocks, each option has its own set of benefits and considerations. Let’s walk through the most common materials so you can find the perfect fit for your home.
Concrete Blocks
If you’re looking for a reliable and versatile option, concrete blocks are an excellent choice. Specifically designed for this purpose, Segmental Retaining Wall (SRW) blocks are a popular solution because they are easy to work with, incredibly strong, and built to last a long time. These blocks are engineered to interlock, creating a powerful, unified structure that can handle immense pressure. They also come in a huge variety of colors, textures, and sizes, allowing you to achieve a custom look that complements your home’s style. Gappsi’s masonry experts can help you select a design that provides both structural integrity and aesthetic appeal for your landscape.
Natural Stone
For a truly timeless and elegant retaining wall, nothing compares to natural stone. As some experts note, using stones or boulders “can look very beautiful but can be expensive and hard to install.” Each stone is unique, giving your wall a one-of-a-kind character that blends seamlessly with the natural environment. While the cost and labor are higher than with other materials, the result is a stunning, durable feature that adds significant value and curb appeal to your property. Whether you prefer the rustic charm of fieldstone or the clean lines of cut stone, our team can source and install a wide range of porcelain and natural stone to create your vision.
Timber and Wood
Wood retaining walls, often built from railroad ties or timbers, can offer a rustic look at a lower initial cost. However, it’s important to consider their lifespan. According to retaining wall experts, wood is “often cheap and easy to use at first, but rots and breaks down quickly, so the wall won’t last long.” In Long Island’s climate, with its moisture and seasonal changes, wood is particularly vulnerable to rot, decay, and insect damage. While it might seem like a budget-friendly choice for a quick project, a timber wall will likely require replacement much sooner than one built from stone or concrete, making it a less permanent solution for your landscape.
Poured Concrete
Poured concrete walls, also known as cast-in-place walls, are known for their strength and can be finished with decorative textures or veneers. While they offer a solid and durable structure, they have a key drawback. These walls are very stiff and “don’t move with changes in weather or ground shifts, which can cause cracks.” Unlike segmental walls that have small joints allowing for minor movements, a rigid poured concrete wall can develop significant cracks over time as the ground freezes, thaws, and settles. This makes them a less forgiving option in climates with fluctuating temperatures. A professional can help determine if this is the right choice for your specific site conditions.
What to Plan Before You Build
A successful retaining wall project starts long before the first shovel hits the dirt. Proper planning is the single most important factor in building a wall that is not only beautiful but also strong and long lasting. Taking the time to think through these key details will save you from costly headaches and potential structural failures down the road. Let’s walk through the essential planning steps you need to consider before you begin construction.
Assess Your Soil and Slope
First things first, you need to understand the ground you’re working with. The type of soil and the slope of your yard will dictate much of your wall’s design. Is your soil sandy, or is it dense with clay? Sandy soil drains well but can be less stable, while clay holds water and can put immense pressure on a wall. The slope, or grade, of the land above and below the wall also adds pressure. A professional masonry designer can properly assess these conditions to ensure your wall is built to handle the specific forces of your landscape.
Determine Wall Height and Structural Needs
The height of your retaining wall is a critical decision. A short, decorative garden wall under two feet tall is a relatively simple project. However, as the height increases, so does the pressure behind the wall. Any wall taller than four feet typically requires reinforcement, such as a geogrid mesh. This special material is layered within the backfill to anchor the wall into the earth, creating a stronger, more stable structure. For these taller walls, it’s essential to work with an expert who understands the engineering required to keep your property and family safe.
Create a Drainage Plan
Water is the number one enemy of a retaining wall. Without a proper escape route, water from rain and runoff will collect behind the wall, creating what’s known as hydrostatic pressure. This force is powerful enough to cause a wall to bulge, crack, or even collapse. A solid drainage plan is non negotiable. This usually involves a layer of gravel behind the wall and a perforated pipe at the base to channel water away safely. Skipping this step is one of the most common and costly mistakes, which is why our restoration services often involve fixing walls built without proper drainage.
Review Long Island Building Codes and Permits
Before you start building, you need to do your homework on local regulations. Many towns across Long Island, in both Nassau and Suffolk counties, have specific building codes for retaining walls. Generally, walls over a certain height, often three or four feet, require a building permit and plans from a licensed engineer. Checking with your local village or town building department is a crucial first step. Working with an experienced company like Gappsi ensures that all necessary permits are secured and that your project is fully compliant with local codes from start to finish.
Gather Your Essential Tools and Equipment
Before you break ground, let’s talk tools. Having everything you need on hand before you start makes the entire process smoother, safer, and a lot more enjoyable. Think of it like preparing your ingredients before you start cooking. A well-built retaining wall starts with the right equipment. While you might have some of these items in your garage, others, like heavy-duty compaction equipment, are often worth renting for a day. Getting organized now will save you from making frustrating trips to the store mid-project. Let’s walk through exactly what you’ll need to get the job done right.
Tools for Digging and Excavation
This is where the real work begins, so you’ll want a few key items to handle the digging and soil moving. A round-point shovel is perfect for breaking into compacted earth, while a square-point shovel is better for scooping and moving loose material. A sturdy wheelbarrow is a must-have for hauling away soil and bringing in gravel for your base. You will also need a heavy-duty hand tamper to begin compacting your foundation. These basic tools are the foundation of your project, so make sure they are in good condition before you start.
Tools for Leveling and Measuring
Accuracy is everything when building a retaining wall. Even a small error at the base can become a big problem by the time you lay the top course. Your essential toolkit should include a tape measure, a string line with stakes, and a 4-foot level. These will help you keep your lines straight and your layers perfectly horizontal. If you’re working with concrete blocks or natural stone, you may also need a circular saw with a masonry blade or a hammer and chisel for making precise cuts. This is where professional-grade tools make a huge difference in the final look.
Compaction Equipment
Creating a stable, compacted base is a non-negotiable step for a wall that lasts. While you can use a hand tamper for very small projects, we highly recommend using a plate compactor. You can typically rent one from a local equipment supplier. This machine uses vibration and weight to tightly pack the gravel base, removing air pockets and creating a solid foundation that won’t settle over time. Skipping this step is one of the biggest mistakes DIY builders make, so do yourself a favor and get the right tool for this critical task.
Safety Gear
Last but certainly not least, let’s talk about safety. Construction projects come with inherent risks, but you can protect yourself by using the right personal protective equipment (PPE). At a minimum, you should have sturdy, closed-toe work boots, heavy-duty gloves to protect your hands from blisters and cuts, and safety glasses to shield your eyes from flying debris, especially when cutting blocks or stone. Building a beautiful retaining wall is the goal, but ensuring you do it safely is the most important part of the project. Don’t start working until you have your safety gear ready.
How to Build a Retaining Wall: A Step-by-Step Guide
Building a retaining wall is a rewarding project that can completely reshape your yard, but it requires careful planning and a good amount of physical work. This guide breaks down the construction process into manageable steps. While many homeowners can tackle smaller, decorative walls, remember that walls over a few feet high often require professional engineering and construction to ensure they are safe and long-lasting. For larger or more complex projects, working with an experienced masonry team is the best way to guarantee a beautiful and structurally sound result.
Before you grab a shovel, it’s important to have a solid plan. You should already have your materials selected, your design finalized, and any necessary permits from your local Long Island municipality in hand. Once you have all your ducks in a row, you can get started on the build. We’ll walk through each phase, from digging the first trench to placing the final capstone. Following these steps will help you create a wall that not only looks great but also functions correctly for years to come.
Step 1: Mark and Excavate the Site
First, you need to outline exactly where your wall will go. Use wooden stakes and a string line to create a clear guide for your trench. This simple step ensures your wall will be straight and positioned correctly. Once your outline is set, it’s time to start digging. You’ll need to excavate a trench that is deep and wide enough to hold your gravel base and the first course of blocks. A good rule of thumb is to dig the trench deep enough to bury about half of your first block, which provides a strong anchor. Make sure the bottom of the trench is as level as possible before moving on.
Step 2: Lay the Gravel Base and Foundation
With your trench dug, the next step is to create a solid foundation. This involves laying a base of crushed gravel. This base is critical for both stability and drainage, preventing the ground from shifting and water from pooling. Pour a layer of natural stone gravel, about four to six inches deep, into the trench. Spread it out evenly and then use a hand tamper or plate compactor to pack it down firmly. You need this base to be completely solid and level. Use a carpenter’s level to check it from front to back and side to side, adding or removing gravel as needed until it’s perfect. This is the foundation for your entire wall, so take your time to get it right.
Step 3: Build Up the Wall Courses
Now you can start laying the blocks. Place the first course of blocks directly on your compacted gravel base, making sure each one is level. Gently tap them into place with a rubber mallet. After the first row is set, sweep off any debris before starting the next. For added strength, you should stagger the joints of each new row, similar to a brick pattern. This means the block on top should sit over the seam of the two blocks below it. Depending on the type of retaining wall system you’re using, you may need to apply a concrete adhesive between each course for extra stability.
Step 4: Backfill With Gravel and Compact
As you build your wall higher, you need to backfill the space behind it. This isn’t just about filling a hole; it’s a key part of your wall’s drainage system. Directly behind the wall blocks, add a layer of crushed gravel at least 12 inches wide. This creates a drainage zone that allows water to flow down to the drain pipe at the base. Add the gravel backfill in layers, about six inches at a time, and compact each layer thoroughly. This prevents the fill from settling later, which could put pressure on your wall. Continue this process of building a course and then backfilling until you reach your desired height.
Step 5: Install Your Drainage System
Proper drainage is what separates a wall that lasts for decades from one that fails in a few years. To manage water, you’ll need to install a perforated drain pipe behind the first course of blocks at the base of the wall. Lay the pipe on the gravel base and make sure it has a slight downward slope to direct water away from the wall. You can have it daylight at one end or connect it to another drainage system. Cover the pipe with a filter fabric or “drain sleeve” to prevent soil from clogging the holes. This pipe will collect water that seeps through the backfill and safely carry it away, relieving the hydrostatic pressure that can cause walls to bulge or collapse and require future restoration services.
Step 6: Cap and Finish the Wall
The final construction step is to add the capstones. These are the flat, finished blocks that sit on the very top of your wall, giving it a polished look and protecting the structure below. Before placing them, make sure the top course of your wall is clean and level. Apply a generous amount of high-strength concrete adhesive, which you can find at the Gappsi Store, to the top of the wall blocks. Carefully set each capstone in place, ensuring it’s aligned correctly. The adhesive will secure the caps and tie the whole wall together. After the adhesive has cured, your wall is complete. You can then finish the landscaping around it, like adding topsoil and plants.
How to Maintain Your Retaining Wall
Once your retaining wall is built, a little routine care will ensure it stays strong and beautiful for years to come. Think of it like any other major feature of your home; regular check-ins help you catch small issues before they become big, expensive problems. Proper maintenance protects your investment and keeps your outdoor space safe and functional. Most of these tasks are simple and just require you to pay attention to your wall throughout the seasons. By staying on top of upkeep, you can enjoy the peace of mind that comes with a secure and well-maintained landscape feature.
Inspect Your Wall Regularly
Making a habit of inspecting your retaining wall a few times a year is the single best thing you can do for its longevity. After a big storm or as the seasons change are perfect times for a quick walk-around. Look closely for any new cracks, especially ones that are widening. Check if any part of the wall is bulging outward or seems to be leaning. Also, take note of any stones or blocks that have shifted out of place. Spotting these changes early gives you the chance to address them right away. A small crack is often a simple fix, but if left alone, it can lead to much more serious structural problems down the road.
Keep Drainage Clear and Working
Proper drainage is the secret hero of a long-lasting retaining wall. Its job is to channel water away, preventing pressure from building up behind the wall. When this system gets clogged, that water has nowhere to go, and the resulting force can cause bulging, cracking, or even failure. Check the drainage outlets, like weep holes or pipes, to make sure they are clear of dirt, leaves, and other debris. After it rains, look for areas where water might be pooling at the base or top of the wall, as this can signal a blockage. A simple cleaning with a wire or a blast from a garden hose is often all it takes to keep things flowing freely.
Clean and Seal the Wall’s Surface
Keeping your wall clean not only helps it look its best but also prevents the buildup of moss, mold, or algae that can hold moisture against the surface. For most materials, a simple spray with a garden hose or a gentle scrub with a brush and mild soap is enough. For tougher stains, a pressure washer on a low setting can work wonders. After cleaning, applying a high-quality sealant can provide an extra layer of protection against moisture and stains. Our team offers professional restoration and sealing services to help preserve the integrity and appearance of your stone or concrete wall for the long term.
Avoid These Common DIY Mistakes
While the drive to DIY is admirable, retaining walls are complex structures where small mistakes can have big consequences. Many failures happen because the immense pressure from soil and water is underestimated. Building on an unstable base, forgetting proper backfill, or skipping reinforcement are common errors that may not be obvious at first. These issues often remain hidden until a major bulge or crack appears, leading to repairs that are far more costly and difficult than getting it right the first time. If you notice signs of stress in a wall you’ve built, it’s wise to stop and assess before the problem gets worse.
Know When to Call a Professional
It’s important to know the difference between a simple maintenance task and a problem that needs an expert. If you see significant leaning, large or growing cracks, or widespread bulging, it’s time to call for professional help. These are signs of potential structural failure that go beyond a simple DIY fix. An experienced masonry construction company can accurately diagnose the root cause, whether it’s a drainage failure, a foundation issue, or something else entirely. Trying to fix major structural problems yourself can be unsafe and may lead to a complete collapse. A professional can ensure the repair is done correctly and safely, securing your property for the future.
Related Articles
- Learn About Quality Retaining Walls for Your Long Island Backyard – Gappsi Group
- Three level retaining wall long island – Gappsi Group
- Estimate for reinforced poured concrete footer for retaining walls long island – Gappsi Group
- Top Concrete Block Retaining Wall Contractors Long Island
- Remove retaining walls|rebuild retaining wall|long island – Gappsi Group
Frequently Asked Questions
How high can I build a retaining wall myself? As a general guideline, many homeowners can comfortably build a decorative wall up to about two or three feet high. Once you start planning for a wall that’s four feet or taller, the project becomes much more complex. These taller walls hold back a tremendous amount of weight and pressure, so they almost always require professional engineering, a building permit from your local town, and specific reinforcement like geogrid to be safe and stable.
What is the single biggest mistake to avoid when building a retaining wall? The most common and costly mistake is failing to plan for proper drainage. Water that gets trapped behind a wall creates immense hydrostatic pressure, which is powerful enough to make the wall bulge, crack, or even collapse completely. A correctly installed system, including a gravel backfill and a perforated pipe at the base, is not an optional step; it is absolutely essential for the wall’s long-term survival.
How long should a professionally built retaining wall last? A retaining wall built by an experienced professional using high-quality materials like natural stone or segmental concrete blocks can last for many decades, often for the lifetime of the home. The key factors are a solid, compacted foundation, a well-designed drainage system, and proper construction techniques. In contrast, a material like wood may only last for about 10 to 15 years before it begins to rot and fail.
Can a retaining wall actually increase my property value? Yes, a well-designed retaining wall can certainly add value to your home. Functionally, it can transform a sloped, unusable yard into a flat, valuable space for a patio, garden, or play area. Aesthetically, a beautiful stone or block wall adds significant curb appeal and a high-end, finished look to your landscape. It’s an investment that improves both the usability and the appearance of your property.
My old retaining wall is starting to lean. Can it be repaired? Whether a leaning wall can be repaired depends entirely on the cause of the problem. Sometimes, minor shifting can be corrected. However, significant leaning often indicates a serious, underlying issue with the wall’s foundation or a complete failure of its drainage system. In these cases, a simple fix won’t work, and the wall may need to be rebuilt. The only way to know for sure is to have a professional assess the situation to diagnose the root cause and recommend a safe solution.