


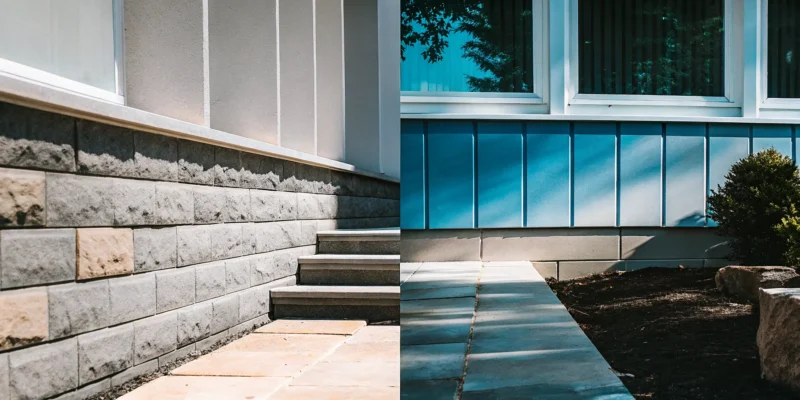
A retaining wall does more than just hold back soil; it adds structure, character, and immense value to your property. It’s a design element that can define outdoor rooms, create stunning terraced gardens, or frame a perfect patio space. From classic natural stone to versatile concrete blocks, the material you choose helps set the tone for your entire landscape. But a beautiful wall must also be a strong one. This guide breaks down the essential steps for how to build a small retaining wall that is both structurally sound and a gorgeous addition to your home, ensuring your hard work results in a feature you’ll be proud of for years to come.
Key Takeaways
- Plan Before You Dig: Before starting, map out your wall’s location, check local Long Island building codes for permit requirements, and choose materials that suit both your style and the project’s structural needs.
- Focus on a Level Base and Proper Drainage: The two biggest factors for a long-lasting wall are its foundation and its ability to manage water. Create a compact gravel base that is perfectly level, and install a drainage system with gravel backfill to prevent water pressure from causing damage.
- Build Methodically from the Ground Up: For a strong and straight wall, ensure your first course is perfectly level. As you build, stagger the joints of each new layer, backfill with gravel as you go, and secure the final capstones with construction adhesive for a polished look.
What Is a Small Retaining Wall?
A retaining wall is a structure designed to hold back soil, turning a sloped, uneven yard into a more functional and beautiful space. Think of it as a hardworking landscape feature. It prevents soil erosion from washing away your precious topsoil and protects your home’s foundation from shifting ground. For many Long Island properties with hilly terrain, a retaining wall is the key to creating level areas for patios, gardens, or even a safe play space for the kids. While they serve a very practical purpose, retaining walls also add incredible visual appeal, defining outdoor rooms and adding texture with beautiful stone or block.
Engineered vs. DIY Walls: What’s the Difference?
The main difference between an engineered wall and a DIY one comes down to height and complexity. For walls under three or four feet, many homeowners can use interlocking segmental concrete blocks that stack without mortar. These systems are designed to be user-friendly. However, once a wall gets taller or has to support a heavy load (like a driveway or patio), you’re entering engineered territory. An engineered wall is designed by a professional to handle significant pressure and requires a deeper understanding of soil mechanics and drainage. While a small garden wall can be a great weekend project, it’s often best to hire a professional for larger, more critical structures to ensure they are safe and built to last.
When Do You Need a Retaining Wall?
You might need a retaining wall if your yard has noticeable slopes or erosion problems. These structures are perfect for properties with steep grades, as they can stabilize the land and protect against shifting soil caused by gravity and water runoff. A retaining wall can also help redirect drainage to protect your home’s foundation or prevent soil from washing over walkways and driveways. Beyond solving problems, they create opportunities. A retaining wall can carve out a flat, usable patio space from a hillside, create terraced garden beds for planting, or build a raised seating area around a fire pit. If you’re looking to add both function and form to your landscape, a retaining wall is an excellent solution.
Know the Rules: Height, Limits, and Permits
Before you even think about digging, it’s essential to understand the local rules. In most areas, any retaining wall over four feet tall requires a building permit and a design from a licensed engineer. This isn’t just red tape; it’s about safety. A poorly built wall can fail under pressure, causing a landslide of soil. You should always check with your local building department for specific codes, as regulations can vary between towns across Long Island. Factors like how close the wall is to a property line or if it supports a structure above it also come into play. This is where working with an experienced team like Gappsi makes all the difference, as we handle the permits and ensure your project is fully compliant and secure.
Step 1: Plan Your Retaining Wall Project
Before you grab a shovel or order a pallet of stone, taking the time to plan is the most important step you can take. A solid plan is the foundation for a retaining wall that is not only beautiful but also strong and long-lasting. This initial phase is all about thinking through your project’s goals, understanding your property’s specific needs, and making key decisions that will guide the entire construction process. It’s where you get to be the architect of your outdoor space, ensuring every detail is considered before any ground is broken.
Thinking ahead helps you avoid common pitfalls, like choosing the wrong materials for your soil type or discovering halfway through that you need a permit. A well-considered plan ensures your project runs smoothly, stays on budget, and results in a feature you can be proud of. From mapping the layout to selecting the perfect style, every choice you make now will impact the final outcome. This is your chance to align your vision with the practical requirements of masonry construction and create a functional, durable addition to your landscape. A little bit of forethought now saves a lot of headache later.
Map Out Your Space
First, walk your property and get a clear picture of where the wall will go. This is more than just a casual glance. Grab a tape measure, some stakes, and string to physically outline the wall’s intended path. This simple exercise helps you visualize the scale of the project and see how it will interact with existing features like trees, patios, or walkways. As you map it out, consider the slope of the land. Are you trying to create a single level tier, or will you need a series of smaller, terraced walls? Thinking about this now helps you estimate the amount of materials you’ll need and understand the complexity of the job ahead.
Pick the Perfect Spot
Choosing the right location is critical. A retaining wall is a permanent structure, and moving it later is a difficult and expensive task. The perfect spot is one that effectively solves your landscaping problem, whether that’s managing a steep slope, preventing soil erosion, or creating a usable flat area for a garden or patio. Think about water flow and drainage across your yard. You don’t want to build a wall that inadvertently creates a dam and causes water to pool against your home’s foundation. Planning the location carefully ensures the wall serves its purpose without creating new problems down the line.
Check Long Island’s Local Building Codes
This step is non-negotiable, especially here on Long Island. Local towns and villages in Nassau and Suffolk counties have specific rules about retaining walls. Generally, any wall over four feet in height requires a building permit and the involvement of a structural engineer. The same often applies to walls built near property lines or those supporting significant weight, like a driveway or patio. A quick call or visit to your local building department’s website will clarify the regulations you need to follow. It’s always better to check first, as building without a required permit can lead to fines and orders to tear down your work.
Select Your Materials and Style
Now for the fun part: choosing the look of your wall. The material you select determines the wall’s aesthetic, durability, and installation process. Concrete blocks are a popular and versatile choice, often designed to stack together easily without mortar. For a more timeless and rugged appearance, natural stone is a top-of-the-line option that offers unmatched durability and character. Your choice should complement your home’s style and the surrounding landscape. Consider visiting a showroom or looking at project galleries to see how different materials look once installed. This will help you find a style that you love and that fits your budget.
Step 2: Gather Your Supplies
With your plan in hand, it’s time to gather your supplies. Getting all your materials and tools together before you start makes the entire process feel much more manageable and efficient. Think of it as setting up your workspace for success. A quick trip to a supplier or our own Gappsi Store can get you everything you need. Let’s walk through your shopping list so you can feel confident heading into the build.
Your Materials Checklist
Before you can start building, you need the right building blocks, literally. Here’s a list of the essential materials you’ll want to have ready.
- Retaining Wall Blocks: Concrete segmental blocks are a fantastic choice for DIY walls. They are specifically designed to stack and interlock without mortar, which makes them strong and relatively easy to work with. They come in a huge variety of colors, textures, and sizes, allowing you to find the perfect style to complement your home and landscape.
- Capstones: These are the flat, finished pieces that sit on the top row of your wall. They provide a clean, professional look, but they also serve the important function of protecting the wall structure from the elements and securing the blocks below.
- Gravel and Drainage Fabric: Proper drainage is the secret to a long-lasting wall. You’ll need enough crushed stone or gravel to create a solid, level base and to backfill behind the wall. This backfill allows water to drain away freely, preventing the immense pressure that can cause a wall to bulge or fail.
- Landscape Adhesive: A strong, construction-grade adhesive is necessary for securing the capstones firmly in place. This is the final touch that locks everything together and gives your wall a durable, polished finish.
The Tools You’ll Need for the Job
Having the right tools can make the difference between a frustrating afternoon and a project you’re proud of. Most of these are standard for outdoor work, but each one plays a key role in getting the job done right.
- Shovel and Mattock: You’ll need these for the initial excavation, digging the trench for your wall’s foundation, and cutting through any stubborn roots you might encounter.
- Wheelbarrow: This is a real back-saver. You’ll be moving a lot of soil, gravel, and heavy blocks, and a wheelbarrow will make the job much easier.
- Level and String Line: A long carpenter’s level is your most important tool. The stability of your entire wall depends on a perfectly flat and level first course. A string line will help you keep your rows straight.
- Hand Tamp: You’ll use this to compact the gravel in your trench, creating a firm, unmoving foundation for your first layer of blocks.
- Rubber Mallet: This is perfect for gently tapping blocks into their final position without chipping or cracking them.
- Safety Gear: Always protect yourself. Heavy-duty gloves will save your hands from scrapes, and safety glasses are a must when cutting or positioning blocks.
Step 3: Prepare the Foundation
With your plan and materials ready, it’s time to get your hands dirty. The foundation is arguably the most important part of your retaining wall. A strong, level base prevents your wall from shifting, settling, or failing over time. Taking your time on this step will save you major headaches later. Think of it as the essential groundwork for any successful outdoor project, whether it’s a simple garden wall or a full-scale masonry installation. A solid foundation ensures your hard work will last for years to come, so let’s get it right from the start.
Mark Your Layout
Before you pick up a shovel, you need a clear guide for where to dig. Use stakes and a string line to mark the path for a straight wall. This creates a perfectly straight line to follow. If your wall has curves, a flexible garden hose or spray paint works well to outline the shape on the ground. Stand back and look at your layout from different angles to make sure you’re happy with the placement and flow. This simple visual check is your last chance to make easy adjustments before the real work begins, ensuring your wall fits perfectly into your overall landscape design.
Dig the Trench to the Correct Depth
Now it’s time to dig. Your trench needs to be deep enough to bury at least half of your first course of blocks, plus about four to six inches for the gravel base. For example, if your blocks are eight inches tall, aim for a trench depth of about eight to ten inches. The width should be twice the depth of your block to give you plenty of room to work. As you dig, use a tape measure to check the depth periodically, ensuring it’s consistent along the entire length of the wall. This creates a stable footing that anchors the wall securely into the ground.
Create a Compact Gravel Base
A wall is only as good as its foundation. Once your trench is dug, fill it with four to six inches of compactable gravel or crushed stone. Spread the gravel evenly and then use a hand tamper to pack it down firmly. This creates a solid, interlocking base that won’t settle over time. After tamping, use a long level to make sure the entire base is perfectly flat, both front-to-back and side-to-side. Add or remove small amounts of gravel as needed to get it just right. This step is critical for the stability of your wall and is a core principle for installing durable porcelain and natural stone patios, too.
Step 4: Build the Wall, Course by Course
Lay a Perfectly Level First Course
Getting this first row right is everything. Seriously, the success of your entire wall depends on it. Before you place a single block, double-check that your gravel base is perfectly flat. Grab a long carpenter’s level and make sure there are no high or low spots. Once the base is level, carefully set your first course of blocks. Check them for level both front-to-back and side-to-side. If a block is off, use a rubber mallet to gently tap it into place or add a little gravel underneath to adjust it. Taking your time here saves you a massive headache later, ensuring your wall is strong and straight. This is the kind of foundational work our masonry experts never rush.
Stack and Stagger the Next Layers
With your foundation set, you can start building upwards. The key to a strong wall is staggering the joints, just like a brick pattern. Each block should sit on top of the seam between the two blocks below it. This running bond pattern distributes pressure evenly across the wall. Many modern retaining wall blocks have a small lip on the back edge that helps lock them into place and creates a consistent setback. As you add each new course, use your level to make sure the blocks are staying even. Small adjustments now are much easier than fixing a major lean later. Choosing the right natural stone can also make this process smoother, as high-quality blocks are more uniform in size and shape.
Backfill With Gravel as You Go
Here’s a pro tip that makes a huge difference: backfill as you build, not all at once at the end. After you lay each course of blocks, fill the space behind it with drainage gravel. A common mistake is to use the dirt you dug out, but soil (especially Long Island’s clay) holds water. Trapped water creates immense pressure that can push your wall over. Using clean, angular gravel creates a drainage zone that lets water flow down to the perforated pipe at the base. This simple step is your wall’s best defense against the forces of nature. For larger projects, specialized solutions like GravelFix can provide even more stability for gravel-based areas.
Cut and Fit Blocks for Corners
Unless your wall is a perfectly straight line, you will eventually need to make some cuts. For clean corners and smooth curves, you’ll need a circular saw with a masonry blade. Always wear safety glasses and a mask when cutting concrete or stone blocks. Measure twice and cut once to ensure a snug fit. Some block systems offer special corner units that make 90-degree turns simple. For curves, you may need to make small angled cuts on the back of several blocks to help them form a gentle arc. This detail work is what separates a DIY project from a professional one and helps integrate the wall into your overall landscape design.
Step 5: Ensure Proper Drainage
This might be the most important step in the entire process. A retaining wall’s biggest enemy isn’t what’s in front of it; it’s the water that gets trapped behind it. When soil becomes saturated, it gets heavy and exerts immense force, known as hydrostatic pressure. This pressure can cause even the most carefully built wall to bow, crack, or completely fail. Proper drainage is your wall’s internal defense system, and skipping it is a recipe for having to rebuild it in a few years.
Creating a path for water to escape is non-negotiable. It involves a simple but critical system of gravel, pipes, and outlets that work together to relieve pressure and keep your wall stable for the long haul. Think of it as giving water a safe and easy exit route so it doesn’t have to push its way through your wall. At Gappsi, we’ve seen firsthand how a well-designed masonry project stands the test of time, and it always starts with managing water correctly.
Install a Perforated Drain Pipe
A perforated drain pipe is your primary tool for collecting water. This is a lightweight plastic pipe with small holes or slits that allow water to enter. After laying your first course of blocks, place the pipe at the back of the wall, resting on the gravel base. To make sure it works correctly, wrap the pipe in a fabric sleeve, or “sock,” to prevent dirt and small bits of gravel from clogging the holes.
The most critical part is ensuring the pipe has an outlet. Water needs somewhere to go. You should slope the pipe slightly (about 1/8 inch per foot) so gravity can carry the water away. Run the end of the pipe out to daylight at the end of the wall or connect it to a larger drainage system on your property.
Use Gravel Backfill to Relieve Pressure
Never backfill your retaining wall with the native soil you dug out of the trench. Soil, especially the clay-heavy types common on Long Island, holds water like a sponge. Instead, you need to create a drainage zone directly behind the wall using clean gravel. As you stack each course of your wall, fill the space behind it with about a foot of 3/4-inch angular gravel.
This gravel layer creates a porous channel. Water moving through the ground will hit the gravel and flow freely down to the perforated pipe at the bottom instead of building up pressure against your blocks. This simple material swap is one of the key differences between a DIY wall that lasts two years and one that lasts twenty.
Manage Runoff With Weep Holes
Weep holes are another great way to help relieve water pressure. They are small openings in the face of the wall that allow trapped water to escape. For a small block wall, creating them is easy. Every few feet along the second or third course, simply leave a small, staggered gap between two blocks. You can also insert a small piece of PVC pipe through a block to create a more defined channel.
While a good gravel backfill and a drain pipe are your main lines of defense, weep holes provide extra insurance. They are especially useful if you expect a lot of water runoff. Over time, these holes can get clogged, so it’s important to keep them clear as part of your regular maintenance, which might include professional cleaning and sealing.
Step 6: Add the Finishing Touches
You’re on the home stretch. Your retaining wall is built, but these final steps are what will give it a polished, professional look and ensure it lasts for years. Taking the time to properly cap the wall, integrate it into your landscape, and perform a final check will make all your hard work shine. It’s the difference between a project that’s just done and one that’s done right. Let’s walk through these last few details to complete your new outdoor feature.
Secure the Capstones With Adhesive
The capstones are the flat, finishing blocks that sit on the very top of your wall. They provide a clean, finished surface and also help hold the top course of blocks together. Before you commit, lay the capstones out to make sure you like the arrangement. Once you have a layout you’re happy with, it’s time to secure them. Apply a generous amount of landscape block adhesive to the top of the wall, then press each capstone down firmly. The adhesive takes a while to set, which gives you a little time to make minor adjustments for a perfect fit. For high-quality capstones and adhesives, you can find a great selection at the Gappsi Store.
Landscape Around Your New Wall
Your retaining wall is more than just a structure; it’s an opportunity to create a beautiful and functional new space. Now that the wall is in place, you can transform the newly leveled area. Consider planting a colorful garden bed along the top or bottom, or use the space to build a cozy patio for outdoor seating. A simple stone pathway can also add a charming touch. This is your chance to get creative and fully integrate the wall into your yard’s design. If you need inspiration or professional help bringing your vision to life, our landscape design team can help you create the perfect setting around your new wall.
Complete a Final Inspection
Before you put your tools away, do one last walkthrough to inspect your work. Check that the wall has a slight backward lean, or batter, into the soil it’s retaining. This is crucial, as a wall that leans into the earth is much stronger against soil pressure. Make sure no blocks are wobbly and that your drainage system is clear and functional. Clean off any dirt or adhesive residue from the face of the blocks. To keep your wall looking its best for the long haul, you might also consider applying a protective sealant. Proper restoration and sealing can prevent staining and weather damage, preserving the beauty of your work.
Common Retaining Wall Mistakes to Avoid
Building a retaining wall can be a rewarding project, but a few common missteps can turn your hard work into a leaning, bulging, or collapsing problem. Even small errors in the early stages can cause major issues down the road. Taking the time to get the details right from the start will ensure your wall is strong, safe, and beautiful for years to come. Let’s walk through the most frequent mistakes so you can steer clear of them.
Skipping a Solid Base
The success of your entire wall rests on its foundation. A common mistake is creating a trench that is too narrow or shallow. A weak base can’t distribute the weight of the wall and the soil behind it, leading to shifting and failure. It’s also critical that the first course of blocks is perfectly level. Any slight imperfection at this stage will become much more noticeable as you build higher. Think of it as the foundation for any quality masonry project; if the base isn’t right, the whole structure is compromised. Take your time to dig a proper trench and create a solid, level base.
Forgetting About Drainage
Water is the number one enemy of a retaining wall. When water gets trapped in the soil behind your wall, it creates immense hydrostatic pressure. This force pushes against the blocks and is a leading cause of bulging, cracking, and total collapse. A frequent error is backfilling the wall with the native soil you excavated, especially if it’s dense clay. This traps water instead of letting it escape. To prevent this, you must create a proper drainage zone with clean gravel behind the wall and install a perforated pipe to channel water away safely. Proper drainage is the secret to a long-lasting wall and helps you avoid costly restoration work later on.
Ignoring Local Building Codes
Before you even dig, it’s essential to check with your local building department for codes and permit requirements, especially for walls taller than three or four feet. These rules aren’t just suggestions; they are in place to ensure safety for you and your property. In many areas on Long Island, a wall exceeding a certain height requires a professional engineer’s approval and a building permit. Ignoring these regulations can lead to fines and an order to tear down your completed wall. Working with an experienced team ensures your project is fully compliant from day one, giving you complete peace of mind.
Choosing the Wrong Materials
Selecting materials based on looks alone is a recipe for trouble. You might underestimate the strength needed for your specific situation, choosing blocks that can’t handle the pressure from the soil they are holding back. The right material depends on your wall’s height, the soil type, and the slope of your yard. Using the wrong type of block or stone can lead to instability and premature failure. At the Gappsi Store, you can find a wide variety of durable porcelain and natural stone options. Consulting with an expert can help you choose a material that provides both the aesthetic you want and the structural integrity your project requires.
Related Articles
- Learn About Quality Retaining Walls for Your Long Island Backyard – Gappsi Group
- Three level retaining wall long island – Gappsi Group
- Estimate for reinforced poured concrete footer for retaining walls long island – Gappsi Group
- Top Concrete Block Retaining Wall Contractors Long Island
- suggestions on a drainage problem|water runoff|long island – Gappsi Group
Frequently Asked Questions
How high can I build a retaining wall before I need to call a professional? A good rule of thumb is to keep any DIY wall under four feet tall. Once you go beyond that height, the amount of pressure the wall has to hold back increases significantly. Most towns on Long Island require you to get a building permit and a plan from a licensed engineer for walls over four feet. This is for your safety, as a tall, improperly built wall can fail and cause a lot of damage.
What is the single most common mistake people make when building a retaining wall? Hands down, the biggest mistake is failing to plan for drainage. It’s easy to focus on how the wall looks, but its real enemy is the water you can’t see. When water gets trapped in the soil behind the wall, it creates immense pressure that can make the wall bulge, crack, or even collapse. Using a gravel backfill and a perforated pipe isn’t just a suggestion; it’s the most important step for ensuring your wall lasts.
Do I really need to use all that gravel for the base and backfill? Can’t I just use the dirt I dug out? I know it’s tempting to reuse the soil you just spent all that time digging up, but you really shouldn’t. The soil you removed, especially if it’s clay-heavy, will hold onto water like a sponge. Gravel, on the other hand, creates a porous zone that allows water to drain away freely, relieving pressure on your wall. A solid gravel base and proper backfill are your wall’s best insurance policy.
My yard has a slope, but how do I know if it’s bad enough to actually need a retaining wall? You might need a wall if you see clear signs of soil erosion, like dirt washing over your walkways after it rains. Another good indicator is if the slope is so steep that it’s difficult or unsafe to mow. Beyond solving problems, think about opportunities. If you dream of having a flat area for a patio, a garden, or a play space for your kids, a retaining wall is the perfect way to create that usable land from an otherwise tricky slope.
What’s the real difference in effort and cost between using concrete blocks versus natural stone? Concrete segmental blocks are generally the more DIY-friendly and budget-conscious option. They are manufactured to be uniform in size and often have interlocking systems, which makes stacking them straight and level a much simpler process. Natural stone offers a beautiful, one-of-a-kind look but is more challenging to work with. The stones are irregular in shape and weight, so fitting them together securely requires more skill, time, and often the expertise of a professional mason, which can increase the overall project cost.