


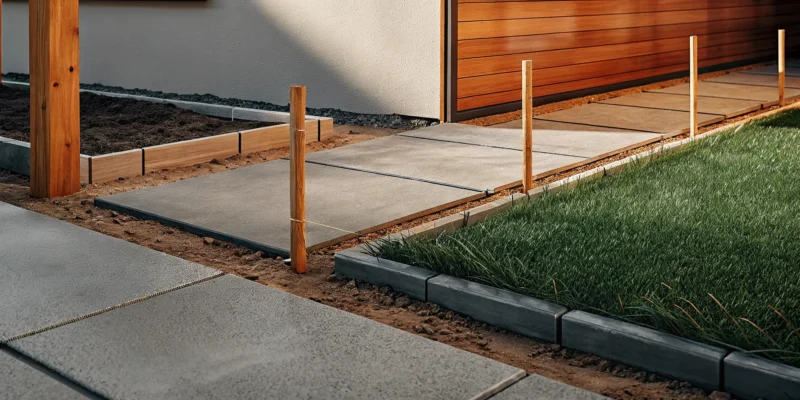
Let’s talk about what you don’t see. While the beautiful pattern and color of your pavers get all the attention, the real hero of a durable walkway is the foundation hidden beneath. So many projects fail because of what’s happening underground. A poorly prepared base is the number one reason for sinking, shifting, and uneven pavers. This guide focuses on getting that crucial first step right. We will show you how to lay pavers for a walkway the correct way, starting with proper excavation and building a rock-solid base that can withstand Long Island’s seasons. This is the secret to a professional-grade installation that prevents future headaches and protects your hard work for decades to come.
Key Takeaways
- Your Foundation is Everything: The most critical step for a lasting walkway is creating a solid base. Properly excavating and compacting the ground in layers is the best way to prevent pavers from sinking or shifting over time.
- Lock Your Pavers in Place: Don’t skip the finishing steps that ensure durability. Installing edge restraints prevents pavers from spreading apart, while filling the joints with polymeric sand locks them together and stops weeds from growing through.
- Design for Longevity and Easy Care: A successful project starts with a smart plan. Ensure your design includes a slight slope for proper drainage, and commit to simple maintenance like regular cleaning and re-sealing every few years to keep your walkway looking its best.
Gather Your Materials and Tools
Before you can bring your beautiful walkway to life, you need to get organized. Having all your materials and tools ready to go makes the entire process smoother and much more enjoyable. Think of it as your project’s prep work, setting you up for success from the very first step. This initial phase is also the perfect time to finalize your design choices and make sure you have everything you need within arm’s reach. Let’s walk through what you’ll need to gather.
How to Choose the Right Paver Material
Your choice of paver is the most exciting part of this step. You’re not just picking a stone; you’re setting the entire mood for your outdoor space. Materials like concrete, brick, and natural stone are all excellent, durable choices for a walkway. At Gappsi, we have a special appreciation for high-quality porcelain and natural stone pavers because they offer an incredible range of colors and textures with unmatched longevity. Think about your home’s style. Are you going for a rustic, charming look with cobblestone, or a sleek, modern path with large format porcelain? Choose a material that you love and that complements your landscape.
Consider Your Climate and Walkway Traffic
Living on Long Island means we get to experience all four seasons, which is something you need to consider for your paver project. Your walkway will face hot sun, heavy rain, and freeze-thaw cycles in the winter. It’s important to select a dense, low-porosity material that can withstand these changes without cracking or shifting. Also, think about how much foot traffic the path will get. A main entrance walkway needs a more robust paver than a decorative garden path. Choosing the right material for your specific climate and use ensures your walkway will stay beautiful for years to come.
Essential Tools for the Project
Having the right tools on hand is a game-changer. It’s the difference between a frustrating weekend and a project you’re proud of. Before you start, make sure you have the basics covered. You will need a digging shovel, a wheelbarrow for moving materials, a tape measure, and a long level. For preparing the base, you’ll want a metal rake, a hand tamper for small areas, and a plate compactor for a truly solid foundation. A straight 2×4 board works perfectly as a screed to level the sand. Finally, have a hammer and chisel ready for any necessary cuts.
Don’t Forget Your Safety Gear
This might be the last point, but it’s one of the most important. Home improvement projects should be rewarding, not risky. Please make sure you have the proper safety equipment before you start digging or laying pavers. A good pair of work gloves will protect your hands from blisters and scrapes. Safety glasses are a must to shield your eyes from flying debris, especially when cutting pavers or compacting the base. Finally, a pair of sturdy, closed-toe shoes or work boots will protect your feet. It’s a simple step that keeps you safe and focused on the job.
How to Plan and Mark Your Walkway
A beautiful paver walkway starts with a solid plan. This is arguably the most important phase, where you make all the key decisions that will guide your project from start to finish. Taking the time to carefully plan and mark your layout now will save you from major headaches and costly mistakes later. Think of it as creating the blueprint for your outdoor space; the more detailed it is, the smoother the construction will be. This is your chance to map out a path that is not only functional but also a beautiful, welcoming addition to your home’s landscape. Before you even think about picking up a shovel, you need a clear vision. Consider how the walkway will integrate with your existing garden, patio, or driveway. Think about the materials, the colors, and the overall feeling you want to create when you or your guests approach your home. A well-planned walkway does more than just get you from point A to point B; it enhances your home’s curb appeal, adds significant value to your property, and sets the tone for your entire outdoor living area. It’s the first impression of your home’s exterior. In this section, we’ll walk through every step of the planning process, from defining the path to ensuring it drains correctly, so you can start your project with total confidence.
Define Your Walkway’s Path, Shape, and Width
First, decide on the journey your walkway will take. Consider the natural flow of foot traffic from your driveway to the front door or through your garden. Do you prefer a formal, direct path, or a more organic, meandering one? A straight walkway creates a sense of formality, while gentle curves can make a yard feel more natural and spacious. Use a garden hose or a long rope to lay out the shape on the ground. This lets you visualize the path and make adjustments easily before you start digging. Also, think about width. A main entrance walkway should be at least 48 inches wide, allowing two people to walk comfortably side by side. For secondary paths, 36 inches is usually sufficient.
Select a Paver Pattern and Design
The pattern you choose for your pavers has a huge impact on the final look and feel of your walkway. Classic patterns like running bond or herringbone are timeless, while a random layout using various paver sizes can create a more modern, dynamic feel. The right pattern can complement your home’s architectural style and your overall landscape design. When selecting your materials, consider the vast options available. High-quality porcelain and natural stone pavers come in many shapes, colors, and textures, giving you the freedom to create a truly custom look that reflects your personal style.
Measure and Mark the Layout
Once you are happy with the path and design, it’s time to make it official. Precision is key here. Start by placing wooden or metal stakes at the beginning and end of the walkway, as well as along any curves or corners. Next, run a tight string line between the stakes to define the edges of your path. For the clearest possible guide, use marking paint to spray a line on the ground directly beneath the string. This painted line will serve as your guide for excavation, ensuring your walkway has clean edges and smooth, consistent curves. Double-check all your measurements before moving on to the next step.
Plan for Proper Drainage
Proper drainage is a non-negotiable part of a lasting walkway. Without it, you risk water pooling, foundation damage, or dangerous ice patches in the winter. Your walkway needs a slight slope, or pitch, to direct water away from your home and other structures. A good rule of thumb is to create a drop of about one-quarter inch for every foot of walkway width. This is subtle enough that you won’t notice it when walking, but it’s very effective at shedding water. Plan for the water to run off into a lawn or garden bed that can absorb it. For more complex properties, a professional landscape design can ensure your drainage is perfect.
Excavate and Prepare the Ground
This is where the real work begins, and honestly, it’s the most important part of the entire project. A beautiful paver walkway is only as good as the foundation it’s built on. Taking the time to properly excavate and prepare the ground will prevent sinking, shifting, and wobbling pavers down the road. Think of it as setting the stage for a project that will look great for years to come. If this step feels a bit overwhelming, remember that getting the foundation right is something our masonry experts focus on for every single project.
How Deep Should You Dig?
Before you grab your shovel, it’s smart to call 811 to have any underground utility lines marked. Once you’re clear, it’s time to dig. For a standard walkway, you’ll need to excavate deep enough to fit all your layers. Plan on digging about 4 to 6 inches for your crushed stone base, another inch for the sand layer, plus the height of your pavers. Most natural stone pavers are between 2 and 3 inches thick. All together, you should aim for a total depth of 7 to 10 inches. This depth ensures your walkway has a sturdy foundation that can handle foot traffic and Long Island’s changing seasons without moving.
Level and Compact the Soil
After you’ve excavated the area, your next goal is to create a perfectly level and solid subgrade. Use a hand tamper for small areas or rent a plate compactor for a larger walkway to make the job easier and more effective. As you add your base material (which we’ll cover next), don’t dump it all in at once. Compaction equipment works best on layers of 3 to 4 inches at a time. Compacting in these thinner layers, or “lifts,” ensures the entire base is solid from the bottom up. Skipping this step is a recipe for a lumpy, uneven walkway later on. You can see pros in action on the Gappsi YouTube channel to get a feel for the process.
What to Avoid Putting Under Pavers
It’s just as important to know what not to use in your base as it is to know what to use. A common mistake is laying down a plastic sheet as a weed barrier. This actually traps water underneath your pavers, which can destabilize the base and lead to more problems. You should also steer clear of using stone dust or limestone screenings for your bedding layer. These materials contain fine particles that hold onto water. During the winter, that trapped water can freeze and expand, causing your pavers to heave and become uneven. Stick with the proper materials, like coarse sand, to ensure your walkway drains correctly and stays put.
Build a Solid Base
Think of the base as the unsung hero of your paver walkway. While the beautiful pavers get all the attention, it’s the solid foundation underneath that does the heavy lifting. A properly built base is your best defense against sinking, shifting, and wobbling pavers down the road. Taking the time to get this step right ensures your walkway will look great and remain stable for years. This process involves creating a sturdy layer of crushed stone followed by a smooth bed of sand.
Building a strong base is a non-negotiable part of any professional masonry project. It provides the necessary support and drainage to protect your investment. While it requires some physical effort, the steps are straightforward. By carefully layering and compacting your materials, you create a durable foundation that can handle foot traffic and weather whatever Long Island seasons throw at it.
Add and Spread the Crushed Stone Base
Your first step is to create the main support layer using crushed stone or a gravel aggregate. Begin by shoveling the material into your excavated trench, spreading it out as you go. Instead of dumping it all in at once, work in layers. A good rule of thumb is to add about 3 to 4 inches of stone at a time. Spreading it evenly is key to avoiding low spots. For even better results, you can lightly mist the stone with a garden hose. The moisture helps the small particles settle and lock together, creating a denser, more stable base for your walkway.
Compact the Base in Layers
Once you have your first layer of crushed stone down, it’s time to compact it. Most plate compactors work best on layers that are 3 to 4 inches thick, so trying to compact a deep layer all at once won’t be effective. Run the compactor over the entire surface until the stone is tightly packed and level. Then, add your next 3 to 4 inch layer of stone and repeat the process. Continuing this layering and compacting method ensures your entire base is uniformly solid from the bottom up, which is a critical step for a lasting installation.
Lay the Sand Bedding
With the crushed stone base fully compacted, you’re ready for the final layer: the sand bedding. This thin layer creates a smooth surface that makes setting the pavers much easier. Spread about 1 inch of coarse sand over the entire base. To get it perfectly level, a technique called “screeding” works wonders. Just lay two parallel 1-inch pipes on top of your stone base, pour the sand between them, and pull a straight 2×4 board across the pipes to level the sand. Once you’re done, carefully remove the pipes and fill in the small trenches left behind.
How to Lay Pavers: A Step-by-Step Guide
Choose a Starting Point
With your base prepared, it’s time for the most satisfying part: laying the pavers. I always recommend starting against a fixed, straight edge, like the foundation of your house or the side of your driveway. This gives you a solid line to build from and helps keep your pattern straight. As you begin, place each paver straight down onto the sand bed. Try not to slide them into place, as this can push the sand around and create an uneven surface. Once a paver is down, give it a gentle but firm tap with a rubber mallet. This helps set it securely into the sand. Getting this first row right is key, as it guides the rest of your project.
Place and Align Each Paver
As you continue laying pavers, your main goal is consistency. Use paver spacers to maintain even gaps between each stone; this ensures your joint lines are uniform and gives the finished walkway a professional look. It’s a good idea to work from several open pallets of pavers at once, mixing them as you go. This helps blend any slight color variations that naturally occur in porcelain and natural stone pavers, resulting in a more balanced and attractive finish. Remember to follow the pattern you chose earlier, placing each paver carefully and tapping it into place. Take your time here, as these details are what create a truly beautiful walkway that you’ll be proud of for years to come.
Cut Pavers to Fit Edges and Corners
Unless your walkway is a perfect rectangle, you will eventually need to cut some pavers to fit along the edges or around curves. This might sound intimidating, but it’s a standard part of the process. For precise cuts, a wet saw with a diamond blade is your best tool. You can often rent one from a local hardware store. For smaller adjustments, a hammer and chisel can also work. Always measure twice and mark your cut line clearly on the paver with a pencil. Wearing safety glasses is a must. Making these custom cuts is what separates a DIY project from professional masonry, as it ensures a snug fit and a clean, polished edge.
Check Your Levels as You Work
As you lay each section of pavers, it’s incredibly important to check that the surface is level. Keep a long level handy and place it across the pavers every few feet. You’re not just checking for levelness from side to side but also for a consistent, gentle slope away from your house to ensure proper drainage. If you find a paver that’s too high or too low, simply lift it out and add or remove a small amount of sand underneath to adjust its height. Tapping it with the mallet will help you fine-tune its position. This constant checking prevents wobbly pavers and puddles, which is essential for the long-term stability and safety of your walkway.
Install Edge Restraints
After laying all your pavers, the next step is to lock them in place with edge restraints. This is a critical step that you absolutely shouldn’t skip. Think of it as building a frame for your walkway. It prevents the pavers from shifting, spreading apart, and creating unsafe gaps over time. Proper edging is what gives a paver project its sharp, professional finish and ensures it stands the test of time against foot traffic and Long Island’s changing seasons. By securing the perimeter, you are protecting the entire interlocking system you just worked so hard to create.
Why Edge Restraints Are Crucial
Edge restraints are the unsung heroes of a durable paver walkway. Without them, the outer pavers will inevitably begin to drift outwards, compromising the tight fit of the entire installation. This movement leads to widening joints, wobbly pavers, and an uneven surface that can become a serious tripping hazard. These restraints, typically made from heavy-duty plastic, aluminum, or concrete, are installed along the sides of the walkway to hold everything together. Taking the time to install them correctly is one of the most important steps for ensuring your walkway looks great and remains stable for years to come. A solid edge is a hallmark of professional masonry work.
How to Secure Your Edge Restraints
Securing your edge restraints is straightforward but requires attention to detail. Once your pavers are laid, place the edging directly against the outer border, making sure it’s snug. You don’t want any wiggle room. Drive 10-inch steel spikes through the holes in the restraint and deep into the compacted base material about every 12 inches. This anchors the entire system and prevents any lateral movement. For curves, you may need to snip the connecting tabs on the back of plastic edging to help it bend smoothly. This step happens right before you sweep sand into the joints, effectively locking in your beautiful porcelain and natural stone pavers from all sides.
Add the Finishing Touches
Your walkway is laid out, and it’s already looking fantastic. Now it’s time for the final steps that will lock everything in place and protect your hard work for years to come. These finishing touches are what separate a good DIY project from a great one. Taking the time to properly fill the joints, compact the surface, and seal the pavers will ensure your walkway remains stable, beautiful, and easy to maintain through every Long Island season.
Fill Joints with Polymeric Sand
Once your pavers are set, you need to fill the gaps between them. For this, you’ll use polymeric sand. This isn’t just regular sand; it contains special polymers that harden when you add water, creating a firm yet flexible joint. This process locks the pavers together, prevents weeds from growing through the cracks, and stops ants from making a home in your new walkway.
To apply it, pour the sand over the dry paver surface and use a push broom to sweep it into every joint. Make sure the joints are completely filled. Then, use a leaf blower on a low setting to gently blow any excess sand off the tops of the pavers. Finally, lightly mist the entire walkway with a garden hose to activate the polymers. You can find all the necessary materials at the Gappsi Store.
Complete the Final Compaction
After filling the joints, the next step is to run a plate compactor over the entire walkway one last time. This final compaction serves two important purposes: it settles the pavers firmly into the sand bedding and helps lock the polymeric sand into the joints. The result is a perfectly even, solid surface that feels secure underfoot and won’t shift over time.
Before you start, make sure you place a protective pad or a piece of plywood over the compactor’s plate. This prevents the machine from scuffing, scratching, or cracking your beautiful new pavers. Go over the entire surface slowly to ensure everything is pressed down evenly. This professional step is a key part of our masonry construction process and guarantees a long-lasting finish.
Decide if You Should Seal Your Pavers
Sealing your paver walkway is an optional step, but it’s one I highly recommend. A quality sealant acts as a protective barrier, shielding your pavers from stains like oil and fallen leaves. It also helps protect against weathering, enhances the natural color of the stone, and makes cleaning much easier. Plus, a sealed surface can further inhibit weed growth and moss.
However, sealing does require some upkeep, as you’ll need to reapply it every few years. If you decide to seal, choose a product designed for your specific paver material and follow the application instructions carefully. If you’d rather leave it to the experts, our team offers professional paver restoration and sealing services to keep your walkway looking its best.
Avoid These Common Paver-Laying Mistakes
Laying a paver walkway is a rewarding project, but a few common missteps can turn your dream path into a future headache. Taking the time to get these key details right will ensure your walkway looks beautiful and lasts for years. Let’s walk through some of the most frequent mistakes so you can sidestep them like a pro.
Forgetting to Compact the Base
This is probably the most critical mistake you can make. The base is the foundation of your entire walkway, and if it’s not solid, nothing else will be. A poorly compacted base will inevitably lead to pavers shifting, sinking, or becoming uneven over time. This creates tripping hazards and allows water to pool, causing even more damage. To avoid this, you must compact the crushed stone base in layers, ensuring each one is firm and level before adding the next. A stable foundation is the key to a long-lasting project, something our masonry experts prioritize in every installation.
Skipping the Weed Barrier
After all your hard work, the last thing you want is to spend your weekends pulling weeds from between your beautiful new pavers. Skipping the weed barrier is a shortcut you’ll regret. This simple layer of fabric, laid down before your sand bed, is essential for preventing weeds and grass from growing up through the joints. It helps maintain the clean, polished look of your walkway and saves you a lot of future maintenance. A well-planned project considers long-term upkeep, which is a core part of creating a sustainable landscape design. Don’t skip this step; your back will thank you later.
Overlooking Proper Drainage
Water is a powerful force, and if you don’t tell it where to go, it will find its own path, often to the detriment of your hardscaping. A perfectly flat paver walkway is a recipe for drainage problems. You need to build in a slight, almost unnoticeable slope (about a quarter-inch drop per foot) to guide rainwater away from your home’s foundation and off the walkway surface. This prevents water from pooling, which can erode the sand in the joints and cause the base to deteriorate. Proper drainage is crucial for preventing future issues that might require professional restoration and sealing.
Using the Wrong Tools
Trying to tackle a paver installation with the wrong equipment will make the job ten times harder and compromise the quality of your results. While a shovel is great, you might need a pickaxe to break up compacted soil or tough roots. More importantly, you need a mechanical plate compactor for the base. Simply tamping it by hand won’t achieve the necessary density. Remember that most compactors work best on layers of about three to four inches at a time. Using the right tools ensures efficiency and a professional finish, which is why our teams at the Gappsi Store always rely on specialized equipment for every project.
Maintain Your New Paver Walkway
You’ve put in the work, and now you have a beautiful paver walkway to show for it. Congratulations! The good news is that pavers are incredibly durable, but a little routine care will keep them looking brand new for years to come. Proper maintenance protects your investment, prevents small issues from becoming big problems, and ensures your walkway remains a stunning feature of your home. From simple sweeping to knowing when a professional touch is needed, we’ll walk you through the essentials of paver care.
Clean and Weed Your Walkway Regularly
Keeping your walkway clean is the easiest way to maintain its beauty. A simple sweep with a stiff broom every week or two will clear away leaves, dirt, and other debris that can stain the surface or make it slippery. You’ll also want to keep an eye out for weeds popping up between the pavers. If you installed a weed barrier, this should be a minor issue. You can typically pull small weeds by hand or use a specialized tool to clear the joints. Regular cleaning not only keeps your walkway looking tidy but also helps maintain the overall appeal of your landscape design. A clean walkway makes the whole property feel more polished.
Know When to Re-Sand and Re-Seal
The sand in the joints between your pavers, called polymeric sand, is essential for locking them together and preventing movement. Over time, this sand can wash away due to rain or pressure washing. Inspect the joints annually. If you see gaps, it’s time to re-sand. Just sweep new polymeric sand into the joints and activate it with water. Sealing your pavers is another key step. A good quality sealant protects the pavers from stains, sun damage, and harsh weather. As a general rule, you should plan on sealing your pavers every three to four years. If you notice the color looks faded or water soaks in instead of beading up, it’s time to apply a new coat. This is a job you can do yourself, or you can hire a service for professional restoration and sealing.
Signs It’s Time to Call a Professional
While most maintenance is straightforward, some problems require an expert eye. If you notice significant issues, it’s best to call a professional before the damage gets worse. Watch for signs of a failing base, such as multiple pavers sinking or shifting, creating an uneven and hazardous surface. Widespread, deep-rooted weeds can also indicate a deeper problem with the base layer. Another major red flag is poor drainage, where water pools on the walkway instead of running off. These issues often point to problems with the initial installation, like improper compaction. A professional masonry contractor can assess the situation and provide a lasting solution to protect your home’s value and safety.
Related Articles
- How to Install Paver Base: A Step-by-Step Guide
- How Much to Install a Paver Driveway? A Guide
- FAQ about Swimming pools, Landscape, masonry, carpentry, natural stone. – Gappsi Group
- floors Archives – Gappsi Group
- patterns Archives – Gappsi Group
Frequently Asked Questions
How deep do I really need to dig for my walkway? The depth can feel like a lot of work, but it is essential for a walkway that lasts. You should plan for a total depth of 7 to 10 inches. This accounts for a 4 to 6 inch compacted stone base, a 1 inch layer of sand, and the height of the pavers themselves, which are typically 2 to 3 inches thick. This deep foundation is what prevents the pavers from sinking and shifting through Long Island’s freeze and thaw cycles.
Is renting a plate compactor absolutely necessary? Yes, I would say it is. While it might be tempting to save the rental fee and just tamp the base by hand, it’s a shortcut that often leads to problems. A plate compactor provides the force needed to create a dense, solid foundation that won’t settle over time. An improperly compacted base is the main reason walkways fail, leading to sunken spots and wobbly pavers. Think of it as a crucial investment in the longevity of your project.
What happens if I decide not to seal my pavers? Sealing is a personal choice, and your walkway won’t fall apart if you skip it. However, unsealed pavers are more porous, meaning they will absorb moisture and are much more susceptible to stains from things like fallen leaves, dirt, or spilled drinks. A sealant also protects the pavers from fading due to sun exposure and can enhance their natural color. If you prefer a lower-maintenance option, sealing every few years is the way to go.
Why is polymeric sand better than regular sand for the joints? Polymeric sand is a game-changer for paver projects. Unlike regular sand, which can easily wash out in the rain, polymeric sand contains a binding agent that hardens when you add water. This creates a firm, durable grout that locks the pavers together, prevents weeds from growing through the cracks, and keeps ants from tunneling through the joints. It’s the key to a stable, clean-looking finish.
A few of my pavers are already wobbly. What did I do wrong? Don’t worry, this is usually an easy fix. A wobbly paver typically means the sand bed underneath it wasn’t perfectly level or has a slight low spot. To fix it, carefully lift the wobbly paver and the ones next to it. Add a small amount of sand to level the area, use a board to smooth it out, and then place the pavers back. A firm tap with a rubber mallet should set them securely in place.