


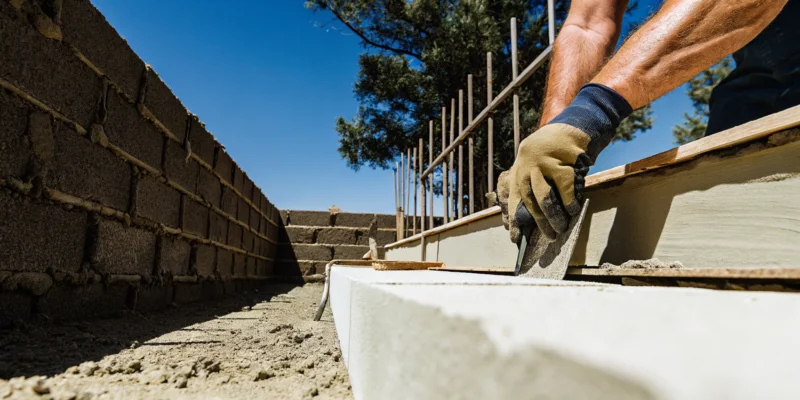
A rock wall project can feel like a huge challenge, but it becomes much more manageable when you break it down into clear, actionable steps. Think of it as a recipe: with the right ingredients and a solid set of instructions, you can create something amazing. This guide is your complete roadmap, designed to walk you through the entire process from start to finish. We’ll cover everything you need to know about how to build a rock wall with cement, including preparing a solid foundation, managing drainage, and arranging stones for stability. Following these steps will help you build a structure that is not only beautiful but also strong enough to stand the test of time.
Key Takeaways
- Focus on Foundation and Drainage First: Your wall’s strength starts below ground. Digging a deep trench and adding a proper drainage system with gravel and a pipe is non-negotiable for preventing future cracks and leaning caused by water and frost.
- Stack Stones Strategically for Stability: Create a strong structure by using your largest stones for the base, overlapping stones to stagger the joints, and filling all gaps with smaller pieces. This technique locks everything together and prevents weak points from forming.
- Don’t Skip the Prep Work or the Follow-Up: Avoid common mistakes by checking local building codes before you start your project. Once your wall is built, perform seasonal inspections to catch and fix small issues, like cracked mortar, before they turn into major problems.
Gather Your Rock Wall Supplies
Before you can start building, you need to go shopping. Think of it as gathering your ingredients before you start cooking; having everything on hand makes the entire process smoother and far more enjoyable. The right supplies are the foundation of a project that not only looks beautiful but also stands strong against the elements for years to come. You’ll be looking for four main categories of items: the rocks themselves, the cement to bind them, the right tools for the job, and the materials needed for proper drainage.
Choosing quality materials is the most important first step. While it might be tempting to cut costs, investing in durable stone and the proper mortar will pay off in the long run, saving you from future repairs. At Gappsi, we source a wide variety of high-quality porcelain and natural stone pavers perfect for any Long Island landscape. Getting this part right ensures your wall has the character and strength to become a permanent, stunning feature of your yard.
Choose the Right Rocks
The star of your project is, of course, the stone. For a classic and sturdy wall, you’ll want to work with natural stones like granite, limestone, or sandstone. These materials are celebrated for their strength and ability to handle Long Island’s changing seasons. A key strategy for a stable wall is to use a variety of stone sizes. Plan on using your largest, heaviest rocks for the base layer to create a solid footing. The smaller and medium-sized rocks are perfect for filling in the upper layers, giving you more flexibility as you build upward. This mix of sizes isn’t just for stability; it also creates a more organic and visually interesting look.
Compare Rock Durability and Looks
When you’re choosing stones, you’re balancing aesthetics with durability. Materials like granite and bluestone are top contenders because they deliver on both fronts, offering incredible strength and a beautiful, timeless appearance. While using premium natural stone can have a higher upfront cost compared to manufactured blocks, it’s an investment in longevity. A well-built stone wall enhances any landscape with a natural elegance that simply can’t be replicated. It’s a feature that will last for decades, adding permanent value and character to your home. Think of it as choosing a solution that you’ll never have to worry about again.
Get Your Cement and Reinforcement
If you’re building a mortared wall, the cement acts as the powerful glue holding everything together. For a structure that needs to be strong, especially if it’s over a couple of feet high, you can’t just use any concrete mix. You’ll want a high-strength masonry mortar mix to ensure your wall has the structural integrity it needs. The standard recommendation is a Type S masonry cement. When you mix one part of this cement with three parts of clean, washed sand, you create a mortar that is strong enough to bond the stones securely and withstand pressure over time.
Essential Tools for the Job
You don’t need a professional workshop to build a rock wall, but having the right tools will make your work easier, safer, and more precise. Think of this as your project toolkit. You will definitely need a sturdy shovel for digging the trench and a wheelbarrow for moving rocks and mixing cement. A mason’s trowel is essential for applying mortar, while a level and measuring tape will help you keep your wall straight and true. Finally, a hand tamper is crucial for compacting the gravel base to create a solid foundation. Having these items ready will help you build your rock wall efficiently and achieve a professional-looking result.
Don’t Forget Drainage Materials
This might be the most overlooked, yet most critical, part of your supply list. Without proper drainage, water can get trapped behind your wall, build up pressure, and eventually cause it to bulge, crack, or even fail. To prevent this, you need to create a path for water to escape. This involves installing a perforated drain pipe at the base of the wall, behind the first layer of stones. You’ll also need enough gravel to backfill the space behind the wall. This layer of gravel allows water to flow down freely to the drain pipe and away from your wall, protecting your hard work from the powerful force of water.
Plan Your Rock Wall
A successful rock wall project starts long before you mix the first batch of cement. Taking the time to plan carefully ensures your wall will be strong, beautiful, and built to last. This planning phase involves defining your goals, choosing the right spot, and understanding local rules.
Define Your Wall’s Size and Purpose
First, think about what you want your wall to accomplish. Is it a short, decorative border for a flower bed, or a tall retaining wall to create a level patio space? Your answer will guide every other decision, from the wall’s height and thickness to the materials you choose. For stability and good looks, selecting the right stone is key. Strong, adaptable options like granite, limestone, and sandstone are excellent choices. You can find a beautiful variety of natural stone to match your home’s style. A good rule of thumb is to use a mix of stone sizes, placing the largest, heaviest rocks at the bottom to create a solid base and using smaller ones as you build up.
Choose the Best Location
Once you know your wall’s purpose, find the perfect spot for it. Walk around your yard and consider how the wall will interact with your landscape. Think about sun exposure, drainage patterns, and how close it will be to your house, driveway, or property lines. If your wall needs to hold back a significant amount of soil or is taller than a few feet, it’s a good idea to get a professional opinion. An expert can assess the slope and soil to ensure your design is safe and effective. Our masonry design team can help you plan a wall that is both beautiful and structurally sound for your specific property.
Check for Local Building Codes
This step is easy to overlook, but it’s one of the most important. Before you dig, you need to know the rules. Many towns on Long Island have specific building codes for retaining walls, especially concerning height and distance from property lines. A permit might be required for walls over a certain height. Checking these regulations ahead of time helps you avoid major headaches, like having to tear down a completed wall. Common construction mistakes often relate to things covered by codes, such as poor drainage or incorrect footing depth. A professional team will handle all the permits and ensure your home improvement project meets every local requirement.
Prepare a Solid Foundation
A rock wall is only as strong as the ground it stands on. Think of the foundation as the most important part of your project, because it is. A weak or shallow base will cause your beautiful wall to shift, lean, or crumble over time, and nobody wants to see their hard work fall apart. Taking the time to prepare a solid foundation ensures your wall will stand strong for years, handling everything from summer rainstorms to winter freezes. This underground support system distributes the immense weight of the rocks evenly and anchors the entire structure to stable ground, preventing movement caused by soil settlement or frost.
This process involves three main steps: digging a proper trench, laying a stable base of gravel, and pouring a concrete footing. While it requires some muscle, getting this part right is non-negotiable for a lasting structure. If digging and pouring concrete feels a bit out of your comfort zone, this is a great point to consider bringing in an expert. A professional masonry designer can ensure your foundation is perfectly level, deep enough for our Long Island climate, and ready to support your wall.
Dig Below the Frost Line
Here on Long Island, we know how cold winters can get. That cold causes the ground to freeze and expand, a process called frost heave. The frost line is the depth at which the soil freezes. If your wall’s foundation isn’t below this line, the seasonal freezing and thawing will push it around, causing it to lean, crack, or fail. For a retaining wall, you’ll want to dig a trench that’s at least a few inches deeper than your local frost line. This gives you room for a gravel base and ensures the footing of your wall rests on stable, undisturbed soil that won’t shift during the winter.
Set Your Gravel Base and Drainage
Once your trench is dug, it’s time to create a stable base. Start by compacting the soil at the bottom of the trench. Then, add a layer of crushed gravel, about four to six inches deep, and compact it firmly. This gravel base serves two key purposes: it provides a level surface for your first course of stones and it helps with drainage, preventing water from pooling around the foundation. You can find a variety of natural stone and gravel options to create a solid base. For the first layer of your wall, use your largest, flattest rocks to create a sturdy footprint directly on the compacted gravel.
Mix Cement to the Right Consistency
For a mortared rock wall, a concrete footing is essential for stability. This footing is a solid slab of concrete poured into your trench that locks the base of the wall in place. A common mix for foundation work is one part cement, three parts sand, and six parts aggregate (small stones). This ratio provides the compressive strength needed to support the heavy wall above it. When mixing, add water slowly until you reach a thick, oatmeal-like consistency. If it’s too watery, it will be weak; if it’s too dry, it will be difficult to work with and won’t bond properly.
Arrange Rocks for Stability and Style
This is where the artistry of building a rock wall truly comes alive. Arranging the stones is a puzzle where each piece contributes to both the strength and the beauty of the final structure. It’s a methodical process that balances the weight and shape of your stones to create a wall that is both stable and stunning. The key is to work patiently, fitting each stone with care. The selection of beautiful, high-quality natural stone you chose will now become the focal point of your landscape, so let’s make sure we place it perfectly.
Start with Large Base Stones
To build a wall that lasts, you need to start with a strong base. Begin by selecting your largest, flattest stones for the first layer, or course. Place these directly on top of the prepared foundation. These heavy, stable stones will act as the anchor for the entire wall, distributing the weight and providing a solid platform for the layers above. Take your time with this step, making sure each base stone is level and sits firmly without rocking. A solid start here prevents a lot of headaches later on and is the most important step for ensuring your wall’s long-term stability.
Stagger Joints and Overlap Stones
Once your base is set, you can begin building upwards. As you lay each new course of stones, think like a bricklayer. You want to stagger the vertical joints, meaning a stone on an upper level should sit across the joint of two stones below it. This overlapping technique is what gives a wall its incredible strength, preventing weak vertical lines where cracks could form. For extra stability, you should also place some longer stones so they run perpendicular to the wall, tying the front and back of the structure together. This method creates a classic, durable pattern that looks professionally built.
Fill Gaps with Smaller Stones
Your larger stones will form the main structure, but you’ll inevitably have gaps and voids between them. This is where your smaller stones come into play. Use these pieces to fill in the spaces, wedging them in tightly. These filler stones, sometimes called shims, are not just for looks; they lock the larger stones in place and prevent them from shifting over time. It’s a bit like solving a jigsaw puzzle. As you work, try to save some of your flattest, most attractive stones for the very top of the wall. These capstones will provide a smooth, finished surface and a polished look.
Reinforce Your Wall When Needed
If you are building a taller wall, especially one that will hold back soil, you may need to add extra reinforcement. For walls over three feet high, simply stacking and mortaring might not be enough to handle the pressure. In these cases, you can embed steel rebar into the concrete foundation and run it up through the mortar joints as you build. This internal skeleton gives the wall the additional strength it needs to stand strong for decades. If this sounds complex, it’s because it can be. This is often the point where calling in a professional masonry service is the smartest move.
Mix and Apply Mortar Like a Pro
Think of mortar as the super-strong glue that holds your entire rock wall together. Getting the mix and application just right is what separates a sturdy, beautiful wall from a crumbly disappointment. It’s a process that requires a bit of patience, but the payoff is a structure that can stand strong for decades. While mixing mortar yourself is a rewarding skill, it’s also where many DIY projects go wrong. If you’re feeling unsure, remember that professional masonry services have the experience to guarantee a perfect, long-lasting bond for your project. But if you’re ready to get your hands dirty, let’s walk through how to do it correctly.
Get the Mortar Ratio Right
The strength of your wall starts with the right recipe. For a classic, durable mortar, a good ratio to follow is one part Portland cement to three parts masonry sand. You can find these materials at any home improvement store. Mix the dry ingredients together thoroughly in a wheelbarrow or on a mixing board before you even think about adding water. This ensures the cement is evenly distributed, which is critical for consistent strength throughout your wall. For an even simpler approach, you can buy pre-mixed mortar bags where you just need to add water.
Add Water Slowly and Check Consistency
This is where you need to pay close attention. Start by adding about two-thirds of the water recommended on the cement bag and begin mixing with a hoe or shovel. Add the remaining water little by little until you reach the perfect consistency. You’re aiming for a thick, buttery texture, similar to peanut butter or stiff oatmeal. It should be able to hold its shape on a trowel without dripping off. A good test is to grab a handful (with gloves on, of course) and squeeze it. If it holds its form without crumbling or oozing water, you’ve nailed it.
Apply Mortar Between Rocks
With your mortar mixed, it’s time to start building. Use your trowel to lay a generous bed of mortar, about one to two inches thick, on top of the previous course of rocks. You can also “butter” the individual stones by applying mortar directly to the sides that will connect with other rocks. Press your next stone firmly into the mortar bed, wiggling it slightly to set it securely. The goal is to fill all the gaps between the stones completely, ensuring there are no air pockets. Scrape away any large chunks of excess mortar that squeeze out from the joints.
Finish the Joints for a Polished Look
Finishing the joints isn’t just for looks; it also compacts the mortar and helps the wall shed water. After the mortar has stiffened for about 30 to 60 minutes, you can finish the joints. Use a striking tool or a small piece of pipe to press and smooth the mortar, creating a clean, concave line. This final step gives your wall a professional appearance and is crucial for its longevity. Once your wall is fully cured, you can protect it further with a quality sealant, a key part of long-term stone restoration and sealing.
Manage Drainage Behind Your Wall
A rock wall is only as strong as its ability to handle water. Without a proper drainage plan, water can get trapped behind your wall, building up immense force known as hydrostatic pressure. This pressure can cause your beautiful wall to bulge, crack, or even collapse over time. It’s one of the most common reasons retaining walls fail. Taking the time to manage drainage isn’t just an extra step; it’s essential for ensuring your hard work stands strong for decades. Whether your wall is made of wood, stone, or concrete, a solid drainage system is your best defense against the power of water.
Why Drainage Is So Important
Think of the soil behind your wall as a giant sponge. When it rains, that sponge soaks up water, gets heavy, and expands, pushing against your wall. This is hydrostatic pressure, and it’s a wall’s worst enemy. Overlooking drainage can lead to serious structural problems that are difficult and expensive to fix later. A well-built wall needs a way to relieve this pressure by giving water an easy escape route. By creating a system that channels water away, you protect your investment and ensure the stability of your entire landscape. This is a principle our professional masonry team prioritizes in every project, because a lasting wall is a dry wall.
Install a Drainage Pipe at the Base
The most effective way to control water is to capture it at the source. This involves installing a perforated drainage pipe at the base of the wall, right behind your first course of stones. A perforated pipe is simply a pipe with small holes or slits that allow water to enter. As water seeps down through the soil, it enters the pipe and is safely channeled away from the wall’s foundation to a lower point in your yard. To make it work, you’ll want to lay the pipe in a bed of gravel and cover it with more gravel, which helps filter out debris and keeps the pipe from clogging.
Use Gravel Backfill to Ease Pressure
What you use to fill the space directly behind your wall is just as important as the wall itself. Instead of packing in dense clay or topsoil, which holds water, you should use a layer of clean drainage gravel. This gravel backfill creates a porous zone that allows water to flow freely down to the perforated pipe at the base. It acts like a vertical drain, preventing water from sitting against the back of your wall and building up pressure. Using the right natural stone and backfill materials is key to a successful project. This simple material choice makes a huge difference in reducing the load on your structure and extending its life.
Add Weep Holes for Water to Escape
Weep holes are another great tool for managing water. They are small gaps left open in the mortar joints near the bottom of the wall that act as an escape hatch for any water that might accumulate. As you build, you can create them by simply poking out some of the fresh mortar from between the stones every few feet. These openings allow trapped water to “weep,” or trickle, out the front of the wall, providing an extra layer of pressure relief. It’s a simple but highly effective technique to ensure no water gets stuck behind your structure. You can see examples of expert masonry techniques like this in action to get a better visual.
Avoid These Common Rock Wall Mistakes
Building a rock wall is an incredibly satisfying project, but a few common missteps can compromise its strength and appearance. Even small errors in the early stages can lead to big problems down the road, like bulging, cracking, or a complete collapse. Taking the time to get the details right from the start will ensure your wall stands strong for years. By avoiding these frequent mistakes, you can build a structure that is not only beautiful but also safe and durable, adding lasting value to your Long Island home.
Skipping the Foundation
The most critical error you can make is rushing or skipping the foundation. A rock wall is only as strong as the base it sits on. Without a proper footing that extends below the frost line, your wall is vulnerable to shifting and settling as the ground freezes and thaws. As experts point out, issues like “inadequate footing depth, incorrect backfill, and ignoring reinforcement” are primary causes of wall failure. A solid, level trench filled with compacted gravel creates a stable platform and is the first step in proper masonry construction. Don’t let your hard work go to waste by cutting corners on this essential first step.
Forgetting About Drainage
Water is the number one enemy of a retaining wall. Soil gets heavy when saturated, and the resulting hydrostatic pressure can easily push a wall over. One of the most frequent problems with retaining walls is related to poor drainage. When water builds up behind the wall without an escape route, it can cause the structure to “bulge, crack, or even collapse.” To prevent this, you must include a drainage system. This involves laying a perforated pipe at the base, using gravel for backfill instead of dense soil, and adding weep holes through the wall itself. This system gives water a path to escape, relieving pressure and protecting your investment.
Using the Wrong Rocks
While it might be tempting to use rocks you already have on your property, they may not be suitable for building a sturdy wall. The material you choose is critical for both strength and longevity. Softer, more porous stones can absorb water and crack during freeze-thaw cycles, while round, smooth river rocks are difficult to stack securely. For a durable and stable wall, it’s best to use strong, adaptable natural stones like granite, limestone, or fieldstone. These materials have flat surfaces and angular shapes that lock together well, creating a much more resilient structure that can withstand the elements.
Building Too High Without Support
It’s easy to underestimate the immense force a wall must hold back, especially as it gets taller. The pressure from the soil increases significantly with height, and a wall that is too tall for its design will eventually fail. Before you start, you must ensure your wall can “withstand the weight of the soil and any other materials it’s supporting.” For walls over three or four feet, you will likely need professional engineering, additional reinforcement like rebar, or a terraced design with multiple shorter walls. Always check local Long Island building codes, as they often have specific height restrictions for walls built without a permit or professional plans.
Rushing the Curing Time
Patience is a virtue, especially when working with cement mortar. The mortar is the glue holding your wall together, and it needs time to cure properly to reach its maximum strength. It’s important to use the concrete mix within about 30 minutes of preparing it and to allow it to harden without disturbance. Applying weight to the wall too soon, exposing it to rain before it sets, or letting it dry out too quickly on a hot day can create weak joints that will crumble over time. Follow the instructions on your mortar mix and protect your new wall from the elements for at least a few days.
Cure, Seal, and Finish Your Wall
You’ve placed the last stone, and your wall is finally standing. It’s a great feeling, but the job isn’t quite finished. These final steps, curing, cleaning, and sealing, are what separate a good wall from a great one. Taking the time to finish your project correctly ensures your hard work will stand strong against Long Island’s weather for years to come. It protects the structure and gives it that polished, professional look you’ve been working toward.
Let Your Cement Cure Properly
Patience is key during this final stage. Your cement needs time to cure, which is a chemical process where it hardens and gains strength. It’s not just about drying out. The right concrete mixing ratio is foundational to this process, as it determines the wall’s ultimate strength and durability. Getting the proportions right helps prevent future cracks and failures. Depending on the weather, curing can take several weeks. Keep the mortar lightly misted with water for the first few days, especially in hot or windy conditions, to prevent it from drying too quickly and cracking. This careful process is a hallmark of professional masonry work.
Clean and Seal for Lasting Protection
Once the mortar is firm but not fully hardened, it’s time to give your wall a clean finish. Carefully poke out any excess mortar from between the stones to a depth of about an inch, then use a stiff brush to sweep away any loose bits. This defines the joints and gives your wall a tidy appearance. After the wall has completely cured (which can take up to a month), you can apply a sealant. A good sealer protects the stone and mortar from water damage, stains, and the freeze-thaw cycles we see on Long Island. This final layer is your wall’s best defense against the elements. If you want a perfect finish, our team offers expert restoration and sealing services to protect your new investment.
When to Call a Professional Mason
Building a rock wall can be a rewarding DIY project, but there are times when calling in an expert is the smartest move. Large-scale projects, retaining walls that need to hold back significant amounts of soil, or walls with complex designs often require the skill and experience of a professional. If you’re feeling unsure about the structural requirements or simply don’t have the time for such a labor-intensive job, a professional mason can ensure your wall is built safely and beautifully.
Signs Your Project Needs a Pro
While some small DIY repairs are manageable, certain issues are clear signals that it’s time to call for help. Cracks are a major red flag. Whether they appear as vertical lines or horizontal splits, cracks can point to deeper structural problems that need a professional assessment. Another sign is bulging or leaning, which suggests the wall is failing under pressure. A professional can inspect your existing structures for signs of weakness and recommend the best course of action, whether it’s a repair or a full rebuild. For existing patios and driveways, our restoration and sealing services can address these issues before they get worse.
What a Long Island Masonry Service Includes
When you hire a professional, you’re getting more than just labor. The process starts with a comprehensive assessment where a mason inspects the site and discusses your vision to understand the full scope of the project. At Gappsi, our masonry design and construction team will answer all your questions and provide insights into the best materials and techniques for your specific needs. We handle everything from securing permits to ensuring the final structure is sound, secure, and perfectly integrated with your landscape. This partnership ensures your project is completed correctly and results in a beautiful, long-lasting addition to your home.
Maintain Your Rock Wall for Years to Come
Your beautiful rock wall is built, but the work isn’t quite over. Proper maintenance is the key to making sure your wall stands strong and looks great for decades. A little attention throughout the year goes a long way in preventing small issues from turning into big, costly repairs. Think of it as protecting your investment and keeping your outdoor space looking its best. By following a simple routine, you can ensure your rock wall remains a durable and stunning feature of your property.
Seasonal Inspection Tips for Long Island
Living on Long Island means your outdoor structures face everything from humid summers to freezing winters. That’s why it’s a good idea to inspect your rock wall twice a year, ideally in the spring and fall. Walk the length of the wall and look closely for any changes. Are there new cracks in the stones or mortar? Do you see any sections that are bulging or leaning? Also, check for damp spots or water stains, which could signal a drainage problem. Catching these things early is the best way to handle a small fix before it becomes a major headache. If you spot something concerning, a professional masonry service can help diagnose the problem.
How to Repoint Mortar and Reseal Stone
Over time, the mortar between the stones can crack or crumble. This is where repointing comes in. It’s the process of removing the old, damaged mortar and replacing it to keep the wall’s structure sound. Before you do that, give your wall a good cleaning to remove any dirt, algae, or moss. A stiff brush and soapy water often do the trick. For tougher grime, a pressure washer on a low setting can work, but be gentle. After any repairs, applying a quality sealant is a great final step. A good sealant protects the stone and mortar from moisture, which helps prevent future damage. Professional restoration and sealing can keep your wall protected from the elements.
Related Articles
- Stone Accent Wall Installation: The Complete Guide
- The Complete Guide to a Privacy Wall Outdoor
- Backyards Archives – Gappsi Group
Frequently Asked Questions
What is the single most important thing to get right when building a rock wall? Without a doubt, it’s the work you do underground. A strong foundation and a smart drainage plan are the two things that will keep your wall standing for decades. You need to dig a trench that goes below the frost line and create a solid base of compacted gravel. This prevents the ground from shifting and pushing your wall around during winter. At the same time, you must give water an escape route so it doesn’t build up pressure behind the wall.
How do I know if I should build this myself or hire a professional? A small, decorative garden border is a great weekend project you can likely handle yourself. You should consider calling a professional mason if your wall will be taller than three or four feet, if it needs to hold back a significant slope of soil, or if you have a complex design in mind. A pro handles the structural engineering, secures the right permits, and ensures the final wall is both beautiful and completely safe.
Do I really need to worry about drainage for a small garden wall? Yes, it’s always a good idea. While a tiny, single-layer border for a flat flower bed might not need a full perforated pipe system, any wall holding back soil benefits from proper drainage. Even a small amount of trapped water can cause a wall to lean or bulge over time. Using gravel for backfill instead of dense soil is an easy step that makes a huge difference in letting water pass through freely, protecting your work.
What kind of maintenance does a rock wall actually need? Maintenance is fairly simple, but it’s important for keeping your wall strong. Plan to walk along your wall in the spring and fall to look for any new cracks, leaning sections, or crumbling mortar. You should also clean off any moss or grime with a stiff brush and check that your weep holes are clear. If you have a mortared wall, resealing the stone every few years is a great way to protect it from moisture and stains.
How tall can I build my wall before I need to worry about permits or extra support? As a general rule, walls over three or four feet tall almost always require extra reinforcement and a building permit, especially on Long Island. The pressure from the soil increases dramatically with height, so taller walls need an engineered design with features like steel rebar to be safe. Before you start any project, it is essential to check the specific building codes for your town, as the rules can vary.