


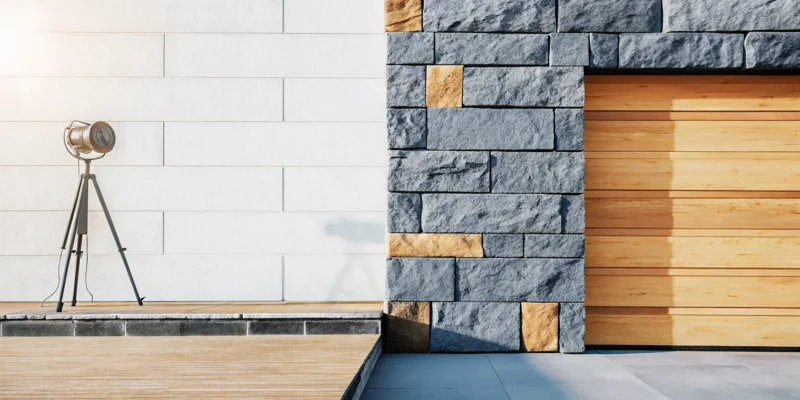
Building with natural stone is part art, part science. Unlike working with uniform bricks, every stone is a unique puzzle piece that contributes to the wall’s final character. The art is in how you fit these pieces together to create a visually pleasing pattern. The science lies in ensuring the structure is strong enough to stand for decades. This is where proper mortared stone wall construction methods become critical. The mortar acts as the binder, but the wall’s true strength comes from solid stone-to-stone contact, a stable foundation, and effective drainage. This article breaks down the entire process, helping you master both the creative and technical aspects of building a wall that is as durable as it is beautiful.
Key Takeaways
- A solid foundation is non-negotiable: Your wall’s strength starts below the ground. This means digging a footing below the frost line and creating a gravel base for drainage to prevent shifting and water damage.
- Build with strength in mind: The way you lay the stones is key to stability. Always stagger the joints between layers, use your largest stones for the base, and build the wall up evenly to ensure it is level and strong.
- Protect your wall after the build: Your work is not done when the last stone is laid. Help the mortar cure properly by keeping it damp for a week, then apply a sealant to protect against moisture and inspect it regularly for small cracks.
Mortared vs. Dry Stone Walls: What’s the Difference?
When you picture a classic stone wall, you might be thinking of one of two very different construction styles: mortared or dry-laid. The main distinction is simple. A dry stone wall gets its strength from the careful placement and friction of interlocking stones, relying on gravity and skill to hold it together. It’s an ancient technique that creates a rustic, natural look that blends seamlessly with the landscape. A mortared stone wall, on the other hand, uses a binding agent, a mix of cement, sand, and water, to essentially glue the stones together into a single, solid structure.
With a mortared wall, the focus is often on creating a beautiful, uniform face. The mortar fills the gaps and holds the form, which allows for more design flexibility. You can use stones of various shapes and sizes without worrying as much about a perfect, load-bearing fit for each one. This method results in a more formal, finished appearance that can complement a wide range of architectural styles, from modern to traditional. Gappsi’s masonry services showcase how versatile and polished these walls can be, from garden borders to grand entryways. The choice between the two often comes down to the desired aesthetic and the structural demands of the project.
Why Mortared Walls Are More Stable
While a well-built dry stone wall can last for centuries, a mortared wall generally offers more structural stability from day one. The mortar acts as a powerful adhesive and sealant between the stones, binding them into a monolithic unit. This prevents individual stones from shifting due to ground movement, freeze-thaw cycles, or other environmental pressures. This unified strength is why mortared walls are often the preferred choice for retaining walls holding back soil or for any wall taller than a few feet.
Even with mortar, the wall’s integrity still depends on good stone-to-stone contact, but the mortar ensures everything stays locked in place. Building a stone wall is a smart way to improve your home with a feature that lasts a long time and often looks even better as it ages. The added stability of mortar just gives you extra peace of mind that your investment will stand strong for years to come.
Best Uses for Mortared Stone Walls on Long Island
On Long Island, mortared stone walls are perfect for adding both function and character to your property. Their strength makes them ideal for creating level tiers in a sloped backyard with retaining walls, building sturdy outdoor kitchen enclosures, or constructing elegant seating walls around a patio. You can also use them to create beautiful, permanent garden beds or define your property lines with a wall that feels both welcoming and substantial.
Using materials like fieldstone is a popular way to create durable walls that add timeless charm and value to your home. You can choose from a wide variety of natural stone options to match your home’s aesthetic, from the rugged look of granite to the warm tones of sandstone. Finishing your wall with flat capstones not only provides a polished look but also helps protect the structure from rain and weather, ensuring your beautiful new wall remains a standout feature of your landscape.
What Materials Do You Need for a Mortared Stone Wall?
Building a mortared stone wall is a bit like baking a cake from scratch. If you don’t have the right ingredients, it just won’t turn out right. For a stone wall, your success depends on three key components: the stone itself, the mortar that binds it together, and the materials you use for drainage. Choosing quality materials is the first and most important step toward creating a structure that is not only beautiful but also strong enough to stand the test of time on Long Island.
The right combination of stone and mortar will give your wall its character and strength, while a proper drainage system will protect it from water damage and pressure buildup, especially for retaining walls. At Gappsi, we source a wide variety of high-quality porcelain and natural stone pavers perfect for any project. Getting these elements right from the start saves you from headaches and costly repairs down the road. Think of it as setting the foundation for a project you can be proud of for years to come. Let’s walk through what you’ll need for each part of the build.
Choosing Your Stone: Granite, Limestone, and Sandstone
The stone you choose is the star of the show, defining your wall’s entire look and feel. Common choices like granite, limestone, and sandstone each have their own personality. Granite is incredibly durable and weather-resistant, making it a fantastic choice for our varied Long Island climate. Limestone offers a classic, softer look but may require more maintenance. Sandstone provides beautiful, earthy tones and is often easier to shape, but its porosity can vary. When you’re making your selection, think about the aesthetic you want to achieve and the structural demands of your wall. A freestanding garden wall has different needs than a tall retaining wall holding back soil.
Getting Your Mortar Mix Right
Mortar is the glue that holds your entire wall together, so getting the mix right is critical for stability. A standard mortar for a wet-laid stone wall is made from a simple mixture of cement and sand. The key is to achieve a consistency that is workable but strong. For heavier stones, you can add stone dust to the mix. This little trick helps the mortar grip the stones more securely, preventing them from shifting as you build. When you apply the mortar, be thorough and make sure every gap is filled to create a solid, unified structure. If you’re unsure about the process, our masonry design and construction team can handle it for you.
Drainage and Reinforcement Materials
You can’t see it, but what’s behind and beneath your wall is just as important as the wall itself. Proper drainage is essential, especially for retaining walls that hold back earth. Without it, water can build up and exert immense pressure, leading to cracks or even failure. To prevent this, you’ll need to incorporate a gravel base, drainage pipes, and “weep holes.” Weep holes are small gaps left in the bottom course of the wall that allow water to escape safely. Ensuring each stone is properly bedded in mortar also reinforces the wall, helping it withstand ground shifts and the freeze-thaw cycles we experience here on Long Island.
What Tools Will You Need?
Before you start stacking stones and mixing mortar, let’s talk about tools. Having the right equipment on hand is the difference between a frustrating project and a rewarding one. While you don’t need a professional mason’s entire truckload of gear, a few key items are non-negotiable for safety and quality. Other tools are simply nice to have, making the work faster and giving your wall a more polished look. Gathering your tools ahead of time ensures you can keep your momentum going once you start building. This preparation is a crucial part of the process, setting you up for a successful build from the very first stone you lay.
Essential Masonry Tools
Building a stone wall is a true work of craftsmanship, and every project starts with the right tools. No two builders will create the exact same wall from the same pile of rock, and your toolset is what allows you to leave your personal mark. For a mortared stone wall, you will absolutely need safety glasses and heavy-duty gloves. You’ll also need a mason’s trowel for applying mortar, a pointing trowel for filling joints, and a brick hammer for splitting and shaping stones. To keep your wall straight, a 4-foot level and a string line with stakes are essential. Finally, you’ll need a wheelbarrow or large tub and a sturdy shovel or hoe for mixing your mortar. These basic tools form the foundation of any masonry project.
Helpful Tools for a Smoother Build
Once you have the essentials, a few extra tools can make the construction process much smoother. An angle grinder with a diamond blade is a game-changer for cutting tough stones or creating clean, flat faces. Using split-face stone with mortar makes it easier to focus on facing the wall first, and a grinder helps you achieve that perfect fit. A jointer tool will give your mortar joints a clean, concave finish for a professional look. You’ll also want a stiff-bristled mason’s brush to sweep away excess mortar before it dries. If you’re tackling a larger wall, a power mixer can save you a lot of time and effort when preparing your mortar. These tools help you work with a variety of natural stones and achieve a more refined result.
How to Plan Your Mortared Stone Wall
A beautiful stone wall starts long before you mix the first batch of mortar. Planning is everything. Taking the time to think through your foundation, design, and local rules will save you from headaches later and ensure your wall is something you can be proud of for years to come. A little prep work now makes the entire building process smoother and helps you create a structure that is both stunning and strong.
Assess Your Foundation and Drainage
Think of the foundation as the anchor for your entire wall. Without a solid base, your wall can shift, crack, or even fail over time. The key is creating a stable footing that also manages water. A base of compacted gravel is an excellent choice because it provides stability while allowing water to drain away. This is especially important on Long Island, where we get our fair share of rain and snow. Water pressure building up behind a wall is one of its biggest enemies, so planning for proper drainage from the start is non-negotiable for a long-lasting structure.
Design for Looks and Strength
Building a stone wall is part art, part science. Unlike a uniform brick wall, a stone wall is like a complex puzzle where you get to fit unique pieces together. The real strength comes from solid, stone-to-stone contact, with the mortar acting as a binder that seals the deal. Your design should reflect your personal style while ensuring the wall is structurally sound. Whether you’re using smooth, uniform stones or rugged, irregular ones, the goal is to create a pattern that is both visually appealing and incredibly durable. A well-designed wall complements your home and landscape, becoming a true feature of your property.
Know Your Local Long Island Building Codes
Before you dig, you need to do your homework on local regulations. Building codes in Nassau and Suffolk County exist to keep everyone safe, and they often have specific requirements for walls, especially retaining walls over a certain height. You may need a permit or even plans from an engineer. This can feel a bit overwhelming, but it’s a critical step. This is where working with an experienced masonry professional can be a huge relief. A team that knows the local codes can handle the permits and paperwork, ensuring your project is built correctly and legally from day one.
How to Build a Mortared Stone Wall: A Step-by-Step Guide
Building a mortared stone wall is a rewarding project that adds timeless character and structure to your property. While it requires patience and a bit of muscle, following a clear process is the key to creating a wall that is both beautiful and durable. This guide breaks down the construction into eight manageable steps, from laying the foundation to adding the final finishing touches. Whether you’re building a small garden border or a stately retaining wall, these instructions will help you get the job done right.
Step 1: Mark Your Layout
First, decide exactly where your wall will go. Use wooden stakes and a string line to mark a straight, clear guide for the wall’s length. This simple step is your best tool for keeping the wall from veering off course. As you plan, think about your stones like pieces of a puzzle. You’ll want to arrange them in a way that looks natural and fits together snugly. A well-planned layout is the foundation of a professional-looking wall. If you’re unsure about the best placement or design, our masonry experts can help you create a plan that complements your landscape perfectly.
Step 2: Dig and Pour the Footing
A strong wall needs a solid base, especially with Long Island’s freezing and thawing cycles. You’ll need to dig a trench for the footing that extends below the local frost line, which prevents the ground from shifting and cracking your wall over time. Once your trench is dug, pour a concrete footing that is at least four to six inches thick. This concrete base provides a stable, level platform for your first layer of stones. Taking the time to create a proper footing is non-negotiable, as it ensures your wall will stand strong for years to come.
Step 3: Prepare the Gravel Base
With your concrete footing cured, the next step is to add a layer of gravel. A base of compacted, crushed rock is essential for promoting proper drainage and adding another layer of stability. Spread a few inches of gravel over the footing and compact it firmly. This base allows water to drain away from the wall’s foundation, preventing pressure buildup and water damage from behind. This is especially important for retaining walls. Proper drainage is a core principle of all our outdoor construction, from patios to gravel driveways, because it is fundamental to longevity.
Step 4: Mix the Mortar
Your mortar is the glue that holds everything together, so getting the mix right is crucial. You can buy a premixed Type N or Type S mortar and just add water. The ideal consistency is similar to thick peanut butter, it should be firm enough to hold its shape but wet enough to spread easily and bond with the stones. Mix the mortar in small batches so it doesn’t dry out before you can use it. A good mortar mix will fill all the gaps between stones, creating a solid, unified structure that can withstand the elements.
Step 5: Lay the First Course of Stone
The first layer, or course, of stone sets the standard for the rest of the wall. Begin by spreading a thick, one-to-two-inch layer of mortar on top of your gravel base. Select your largest, flattest stones for this foundational course, pressing them firmly into the mortar bed. Use your string line as a guide to ensure this first layer is perfectly straight and level. A solid and even first course makes it much easier to build the rest of the wall accurately. You can see examples of our foundational work on the Gappsi YouTube channel.
Step 6: Build Up in Staggered Courses
As you add more layers, remember the classic rule: one stone over two, and two stones over one. Staggering the vertical joints from one course to the next gives the wall immense strength and stability, just like in a brick wall. It’s also best to build up the entire length of the wall at the same time, rather than completing one section before starting the next. This method helps keep the wall level and ensures the structure settles evenly. Apply a consistent layer of mortar for each course and fit the stones together as tightly as possible.
Step 7: Add Weep Holes
If you are building a retaining wall that holds back soil, you must give water a way to escape. This is where weep holes come in. Weep holes are small gaps left in the mortar joints that allow water to drain through the wall, relieving hydrostatic pressure that could otherwise cause it to bulge or fail. You can create them by placing a small-diameter pipe in a joint as you build or simply by leaving a vertical joint free of mortar every few feet. This small detail is a critical feature for the health and durability of any retaining wall.
Step 8: Fill, Level, and Finish the Joints
Once your stones are set, it’s time to finish the joints for a clean, professional look. While the mortar is still workable, use a pointing tool or trowel to press the mortar firmly into the joints. You can strike the joints to be concave, flush, or raked, depending on your preferred style. This step, known as pointing, compacts the mortar and helps it shed water. After pointing, use a stiff brush to clean any excess mortar off the face of the stones before it dries. For long-term protection, consider our restoration and sealing services to keep your new wall looking its best.
Solving Common Construction Challenges
Building a mortared stone wall is an incredibly rewarding project, but it’s not without its challenges. Even with careful planning, you might run into a few common issues along the way. The key is knowing how to handle them so you can keep your project on track and ensure your wall is both beautiful and built to last. From managing water flow to working with tricky stones, here’s how to solve some of the most frequent construction hurdles.
How to Prevent Drainage Problems
Water is a stone wall’s biggest enemy. If water gets trapped behind your wall, the pressure can cause it to bulge, crack, or even fail. This is especially true for retaining walls. To prevent this, you must plan for proper drainage from the start. As the experts at Irwin Stone note, “For retaining walls, it’s very important to plan for water drainage using drain pipes and ‘weep holes.'” These small openings allow water to escape, relieving pressure. For larger or more complex projects, getting the drainage right is critical, which is why many homeowners consult with a masonry professional to ensure the wall’s long-term stability.
Working with Uneven or Irregular Stones
When you’re working with natural stone, no two pieces are exactly alike. This can feel like you’re solving a puzzle, but it’s also what gives your wall its unique character. Instead of getting frustrated, embrace the process. As one stonemason put it, a stone wall “is a combination of learned craft and an individual’s intuitive response to a complex three-dimensional puzzle.” Take your time fitting stones together, using smaller pieces to fill gaps. The beauty of using natural stone is that every wall is a one-of-a-kind work of art reflecting the builder’s personal touch.
Avoiding Mortar Cracks and Stains
The quality of your mortar is just as important as the quality of your stone. A poor mix can lead to cracks and stains that ruin the look of your wall. To avoid this, pay close attention to your materials. A key tip is to “not use dehydrated lime in your mortar mix, as it can stain the stones.” Instead, mix your cement and sand together completely while they are dry, then add water slowly until you have a smooth, workable consistency. This ensures a strong bond and a clean finish. Once your wall is complete, consider protecting it with a quality sealant to prevent future staining and make maintenance easier. Our restoration and sealing services can help keep your stonework looking pristine for years.
Pro Tips for a Stronger, Better-Looking Stone Wall
Building a stone wall is one thing, but building one that looks professionally crafted and stands strong for years requires a few extra tricks. These are the details that make a significant difference in the final outcome, turning a good project into a great one. Paying attention to these steps will help you achieve a beautiful, durable wall you can be proud of.
Use Wedges for Better Adhesion
Here’s a simple trick that makes a huge impact. As you lay your stones, you might find some of them want to shift or sag before the mortar has a chance to set. To prevent this, use small stone chips as wedges. You can tuck these little supports underneath a larger stone to hold it perfectly in place while the mortar cures. This ensures a tight fit and solid adhesion between each layer. It’s a small step that guarantees your stones bond correctly, creating a much stronger wall. This is the kind of detail our expert masons never overlook.
Work in Sections for Better Alignment
It can be tempting to build one part of your wall up high before moving on, but it’s better to work on the entire length of the wall at once. Think of it like putting together a puzzle. You should place stones naturally, fitting them together and building the wall up evenly in courses. This method helps you maintain a consistent height and keeps everything level. It also allows you to step back and see the overall pattern you’re creating, ensuring the finished wall looks balanced and cohesive. You can see this technique in action on many of the projects on our YouTube channel.
Clean Excess Mortar Quickly
A clean finish is key to making your stone wall look sharp. After you’ve laid a section of stones, don’t let the excess mortar dry on the stone faces. Go back with a trowel or pointing tool and carefully scrape out the mortar between the stones to a consistent depth, usually about a half-inch. Then, use a stiff brush to whisk away any loose bits and clean up the joints. This technique, called “raking,” makes the stones pop and gives the wall a clean, defined look. It prevents a sloppy appearance and ensures the beauty of the natural stone is the main focus.
Cure and Protect Your Mortar
Your work isn’t quite finished once the last stone is in place. For mortar to reach its maximum strength, it needs to cure properly, which means it needs to dry slowly. For the next seven to ten days, you should keep the new wall damp. You can do this by gently sprinkling it with water a couple of times a day and covering it with plastic sheeting or burlap. This process, known as moist curing, prevents the water in the mortar from evaporating too quickly. It’s a crucial final step for long-term durability and helps prevent cracks from forming down the road.
How to Make Your Mortared Stone Wall Last
Building a beautiful mortared stone wall is a fantastic achievement, but the work doesn’t stop once the last stone is in place. To make sure your wall stands strong and looks great for decades, you need to give it a little ongoing care. Think of it as protecting your investment. A well-maintained stone wall not only enhances your property’s curb appeal but also adds lasting value. Luckily, keeping your wall in top shape isn’t complicated. It really comes down to a few key practices: protecting the stone from the elements, keeping an eye out for minor issues, and knowing when a problem is best left to the pros.
The biggest enemy of any stone structure, especially here on Long Island with our freeze-thaw cycles, is moisture. Water can seep into the pores of the stone and mortar, and when it freezes, it expands, causing cracks and deterioration from the inside out. That’s why sealing is so important. Regular inspections are also crucial. Catching a small crack early and filling it is a simple fix, but ignoring it can lead to much bigger, more expensive repairs down the road. By following a simple maintenance routine, you can prevent small problems from turning into major headaches and ensure your wall remains a stunning feature of your home for years to come. Our team at Gappsi offers expert restoration and sealing services to help you keep your masonry looking its best.
Seal and Protect Your Stone
Applying a quality sealant is one of the most effective ways to protect your mortared stone wall. A good sealant creates an invisible shield that stops water from soaking into the stone and mortar joints, which is the primary cause of long-term damage. It’s also important to prevent moisture from wicking up from the ground or transferring from other materials. As one expert notes, you should keep any untreated wood from directly touching the stone walls to prevent moisture damage. Sealing your wall every few years helps guard against water penetration, stains, and the damaging effects of freeze-thaw cycles. For professional results, our team provides restoration and sealing that will preserve your wall’s integrity and appearance.
Inspect and Repair Cracks Regularly
Set aside time a couple of times a year, maybe in the spring and fall, to walk the length of your wall and inspect it closely. You’re looking for any small cracks, gaps, or areas where the mortar might be crumbling. Addressing these minor issues right away is key. According to masonry experts, you should “[f]ill any small cracks in the mortar right away to stop water from getting in and causing bigger problems.” A small crack can be an open invitation for water to enter, freeze, and expand, turning a tiny flaw into a major structural issue. Catching these problems early saves you time and money, and it’s a simple step to ensure your wall’s longevity.
Signs Your Wall Needs Professional Attention
While you can handle minor repairs yourself, some issues require an expert eye. If you notice large, deep cracks (wider than a quarter-inch), sections of the wall that are bulging or leaning, or significant areas of crumbling stone or mortar, it’s time to call a professional. Trying to fix major structural problems without the right experience can do more harm than good. As one builder explains, sometimes a task that seems simple, like drilling a hole, is actually quite complex and better left to someone with experience to avoid compromising the wall’s integrity. When you see these warning signs, contacting a professional mason is the safest and most effective way to protect your investment.
When Should You Call a Professional Mason?
While building something with your own hands is incredibly satisfying, some projects are better left to the experts. Knowing when to call for help is a key part of any successful home improvement project, especially one involving heavy materials and structural work. If your mortared stone wall is purely decorative, short, and on level ground, a DIY approach can be a great weekend project. However, if the wall is intended to be structural, hold back soil, or is part of a larger, more complex design, it’s time to consider a professional. A pro ensures the job is done safely, correctly, and beautifully, protecting your home’s value for years to come.
A stone wall is extremely heavy, and its stability depends entirely on a solid foundation designed for Long Island’s specific soil and climate. For walls that are structural, very tall, or built on a slope, the expertise of a professional masonry designer is invaluable. Professionals understand the engineering required to prevent shifting, cracking, or collapse. They see the project as more than just stacking stones; it’s a complex puzzle where each piece must fit perfectly to ensure strength. They also have the experience to work with a wide variety of natural stone, knowing how to shape and place irregular pieces to create a seamless and durable structure.
Retaining walls, in particular, require careful planning around drainage to handle water pressure from the soil behind them. Without proper drainage, your wall could fail under pressure, leading to costly and dangerous problems. A professional mason will incorporate the right drainage solutions from the start. Furthermore, local building codes can be a challenge. Many municipalities have specific rules for structural walls, and a seasoned professional knows how to secure the right permits and ensure your project is fully compliant. Calling a pro isn’t giving up on your vision; it’s making a smart decision to bring it to life correctly and ensure it lasts a lifetime.
Related Articles
Frequently Asked Questions
Why is a mortared wall often a better choice than a dry stone wall? While dry stone walls have a beautiful, rustic charm, a mortared wall provides superior structural integrity right from the start. The mortar binds the stones into a single, solid unit, making it much more resistant to shifting from ground movement or Long Island’s freeze-thaw cycles. This added strength is why mortared walls are the go-to choice for retaining walls, seating walls, or any structure that needs to be exceptionally durable and stable.
What is the single most important step to prevent my wall from failing? The most critical step is creating a proper foundation and drainage system. This means digging a trench below the frost line and pouring a solid concrete footing to provide a stable base. On top of that, you need a layer of compacted gravel and weep holes built into the wall itself. This system prevents water from building up behind the wall, which can create immense pressure and cause it to crack, bulge, or even collapse over time.
Do I really need a permit to build a stone wall on my property? It depends on the wall’s height and purpose. Many towns in Nassau and Suffolk County require a permit for retaining walls over a certain height, usually just a few feet. Because these rules vary and are in place for safety, it’s always best to check with your local building department before you start digging. Working with a professional mason can simplify this process, as they are familiar with local codes and can handle the permit application for you.
My stones are all different shapes and sizes. How do I work with them? Working with irregular stones is part of the art of masonry. Instead of seeing it as a problem, think of it as a three-dimensional puzzle. The key is to take your time fitting the stones together to achieve good stone-to-stone contact. You can use a hammer to chip away small pieces for a better fit and use smaller stones to fill in gaps. The mortar will help bind everything, but the wall’s true strength comes from how well the stones interlock.
How can I keep my new stone wall looking great for years? Long-term care is simpler than you might think. The best thing you can do is apply a quality sealant after the mortar has fully cured. This protects the stone and mortar from water damage and staining. It’s also a good idea to inspect your wall once or twice a year, especially after winter, to check for any small cracks in the mortar. Filling these tiny gaps right away prevents water from getting in and causing bigger problems down the road.