


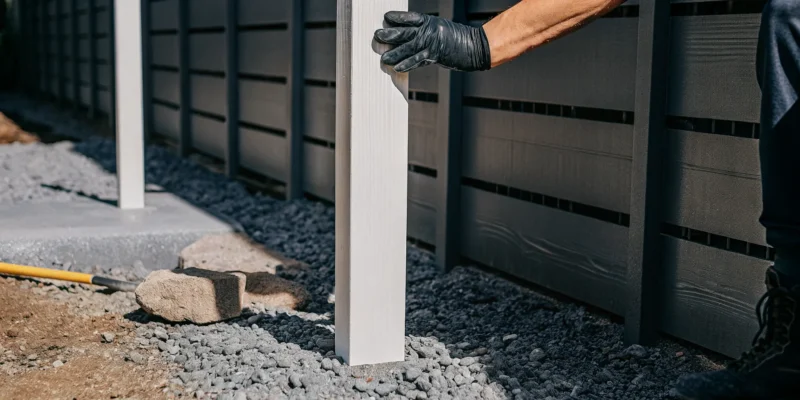
Let’s clear up a common misconception: you do not need concrete to build a strong, durable fence. While it has been the traditional method for decades, modern materials and techniques have created better options. Today, installing vinyl fence posts without concrete is a proven strategy that offers significant advantages in stability and efficiency. By using galvanized steel anchors driven deep into the ground or by properly tamping soil in layers, you can create a foundation that provides incredible holding power. This guide will break down these professional methods, showing you why they are often more effective than concrete for preventing issues like frost heave and leaning, ensuring your fence investment lasts a lifetime.
Key Takeaways
- Skip the Concrete for a Faster Installation: A no-dig vinyl fence installation saves significant time and money by avoiding the mess and cure time of concrete. This approach offers a durable, less invasive, and more eco-friendly way to build your fence.
- Match Your Method to Your Soil: The success of a no-dig fence depends on choosing the right technique for your ground conditions. Use driven steel anchors for dense, firm soil, but opt for the tamped soil method to create stability in looser or sandy areas.
- Proper Technique Prevents Future Problems: A stable, long-lasting fence requires careful installation. Always dig holes to the proper depth (one-third the post height), add gravel for drainage, and compact the soil in layers to create a solid foundation that resists shifting.
Why Install a Vinyl Fence Without Concrete?
When you picture setting a fence post, you probably imagine a wide hole filled with wet concrete. For years, that was the standard. But modern installation methods offer a compelling alternative that skips the concrete altogether. Installing a vinyl fence without concrete is a durable, efficient, and increasingly popular choice for homeowners. This approach, often called “no-dig,” relies on driving steel anchors into the ground or tightly compacting soil and gravel around the post.
This newer technique has some serious advantages. It’s a straightforward process that can save you time, reduce costs, and minimize the mess in your yard. While it might take some time for everyone to get on board with a method that breaks from tradition, the benefits are hard to ignore, especially for certain soil types and project timelines. Before you start mixing cement, it’s worth exploring why a no-dig installation might be the perfect solution for your Long Island property. It simplifies the project without compromising the strength and stability your new fence needs to stand tall for years.
Save Time and Money
One of the most significant benefits of a no-dig fence installation is its efficiency. Mixing concrete is a messy, multi-step process, and after you pour it, you have to wait at least 24 to 48 hours for it to cure before you can even think about attaching fence panels. A no-dig method eliminates this waiting period entirely, letting you set your posts and move on to the next step almost immediately. This can shorten your project timeline by days.
This efficiency also translates to cost savings. You won’t need to purchase bags of concrete mix for every post, which adds up quickly. If you’re hiring professionals, the reduced labor time can also lower your overall installation cost. This straightforward and cost-effective method provides a secure foundation for your fence, making it an attractive option for many home improvement projects.
Choose a More Eco-Friendly Option
If you want to minimize your project’s environmental impact and keep your yard tidy, a no-dig installation is an excellent choice. The production of cement, the key ingredient in concrete, is a major source of carbon dioxide emissions. By skipping it, you’re opting for a greener construction method. The installation itself is also much cleaner. You can forget about messy concrete splatters, hauling heavy bags of mix, or dealing with piles of excavated dirt.
This method preserves the integrity of your lawn and garden. Since you are not digging large holes, the disruption to your existing landscape design is minimal. There are no leftover mounds of soil to dispose of and no risk of concrete runoff damaging your grass or plants. It’s a clean, simple, and less invasive way to get the beautiful, sturdy fence you want.
When is a No-Dig Fence the Best Choice?
A no-dig fence is not just an alternative; it is often the superior choice in specific situations. This method is particularly effective in hard, dense, or clay-like soil, which is common in many parts of Long Island. Digging wide holes for concrete footings in this type of ground can be incredibly difficult and labor-intensive. Driving a narrow steel pipe anchor or digging a smaller hole for a tamped soil installation is much more manageable and just as secure.
This method is also ideal for DIY enthusiasts who may be hesitant to work with concrete. It removes a complicated and messy step from the process, making a professional-quality installation more accessible. Ultimately, whether you have challenging soil conditions or simply want a faster, cleaner project, the no-dig method is a fantastic way to install fences and netting around your property.
First, Assess Your Soil
Before you pick up a single tool, your first job is to play detective with your own backyard. The success of a no-dig fence installation rests entirely on the ground it stands on. Your soil is the foundation, and its ability to grip and hold your fence posts is what makes this concrete-free method possible. Different soil types offer different levels of natural stability, so understanding what you’re working with is the most important step you can take. Think of it this way: you wouldn’t build a house without checking the foundation, and the same principle applies to your fence.
A quick assessment will tell you whether you have the ideal conditions or if you’ll need to use a few extra tricks to create a stable, long-lasting fence. This simple step can save you from a lot of future headaches, like leaning posts or a wobbly fence line after the first big storm. By getting to know your soil first, you can choose the right installation method and materials from the start. This ensures your fence not only looks great on day one but also stays straight and sturdy for years to come. It’s all about setting yourself up for success before the real work begins.
Ideal Soil Types for a No-Dig Fence
In a perfect world, your yard would have hard, dense, clay-like soil. This type of soil is the gold standard for a no-dig fence because it provides an incredible amount of natural stability. When you drive a post into dense clay, the soil compacts tightly around it, creating a firm grip that mimics the holding power of concrete. It’s like putting a stake into a firm block of cheese versus a bowl of pudding; the denser material holds it upright without any help. If you dig a small hole and the soil holds its shape without crumbling, you likely have a great base to work with. Don’t worry if this doesn’t describe your yard, as most soil types can work with the right technique.
What to Do with Rocky, Sandy, or Loose Soil
If your soil is rocky, sandy, or just plain loose, don’t panic. You can still install a beautiful no-dig fence, you just need to give it a little extra support. With looser soil, the key is to create stability where it doesn’t naturally exist. This usually means digging your post holes deeper and making sure they are perfectly straight. A deeper hole provides more surface area for the surrounding earth to press against the post, increasing its stability.
A great pro tip is to add a few inches of gravel to the bottom of the hole before setting your post. This creates a solid base and, more importantly, improves drainage. Proper drainage prevents water from pooling around the post, which can turn the surrounding soil into mud and cause the post to loosen over time. Gappsi’s expertise with gravel driveways shows just how effective the right stone base can be for creating lasting stability.
Understanding Long Island’s Soil Conditions
Living on Long Island, we know our landscape is anything but uniform, and the same goes for our soil. You might find sandy, well-draining soil near the South Shore, while properties further north could have denser, loamy, or rocky ground. Because of this variation, you can’t assume your neighbor’s soil is the same as yours. Before you commit to a no-dig installation, take the time to dig a test hole in a few spots along your proposed fence line. This will give you a clear picture of what you’re up against.
If you find that your soil is very loose or you’re simply unsure how to proceed, it’s always a good idea to consult with a professional. Local experts who specialize in fences and netting understand our unique soil conditions and can ensure your fence is installed correctly to withstand Long Island’s weather for years to come.
Gather Your Tools and Materials
Before you break ground, getting all your tools and materials in one place is the best way to ensure your installation day goes smoothly. Nothing slows down a project like an unplanned trip to the store. The specific items you’ll need depend on whether you’re using steel pipe anchors or tamping the soil directly.
We’ve broken down the lists for each method so you can get organized and start your project with confidence. Having everything ready will make the process much easier, letting you focus on getting each post perfectly straight and secure. Gappsi offers a wide selection of high-quality fences and netting to complete your project with materials you can trust.
For the Steel Pipe Anchor Method
This method relies on a sturdy steel pipe driven deep into the ground to act as a hidden spine for your vinyl post. It’s a fantastic no-dig solution that provides excellent stability without the mess of concrete. Here’s what you’ll need to gather:
- Galvanized Steel Pipe: You’ll need pipes that are 1-5/8 to 2-3/8 inches in diameter. Make sure they are long enough to be driven at least 3 to 4 feet into the ground while leaving the correct height exposed for your post.
- Sledgehammer or Post Pounder: A manual post pounder is often safer and more effective than a sledgehammer for driving the pipes vertically.
- Vinyl Post Sleeves: These are the hollow posts that will slide right over the steel anchors.
- Tape Measure, Level, and Marking Stakes: For accurate placement and ensuring your posts are perfectly plumb.
For the Tamped Soil Method
This traditional technique involves digging a hole and compacting soil around the post for a firm hold. It works especially well in clay or loam soils. For this method, you will need a few different tools to handle the digging and compacting.
Here is your checklist:
- Post Hole Digger or Auger: A manual post hole digger works well, but a power auger can save you a lot of time and effort.
- Shovel and Tamping Bar: You’ll use the shovel for moving soil and the tamping bar for compacting it in tight layers around the post.
- Crushed Gravel: A small bag should be enough. This creates a base for drainage, which is key to preventing rot and frost heave.
- Vinyl Posts, Tape Measure, and Level: For setting the posts and keeping everything aligned. Proper masonry techniques for creating a solid base are essential here.
Method 1: How to Install Posts with Steel Pipe Anchors
If you’re looking for a sturdy, concrete-free installation, the steel pipe anchor method is an excellent choice. This technique uses a galvanized steel pipe driven deep into the ground to act as a hidden backbone for your vinyl post. It’s a popular and reliable method that provides incredible strength without the mess and curing time of concrete. This approach is especially effective for creating a durable fence line that can stand up to the elements. The stability comes from the depth of the anchor, which provides a solid footing that resists frost heave and strong winds, a common concern for Long Island homeowners.
Instead of digging a wide hole and filling it with heavy concrete, you simply drive a narrow pipe into the earth. This makes the process faster, cleaner, and much less physically demanding. The result is a professional-looking fence that appears to float effortlessly on your lawn, yet is secretly anchored by a powerful steel core. By following these steps, you can create a secure foundation for your new vinyl fence that is built to last for years. It’s a smart and efficient way to get the job done right.
Step 1: Mark Post Locations and Call 811
Before you pick up a single tool, your first job is to plan and prioritize safety. Start by marking out your entire fence line with stakes and string to get a clear visual. Then, mark the exact spot for each post. Once your layout is set, you must call 811 at least a few days before you plan to start. This free service alerts local utility companies to come and mark the location of any underground lines, like gas, water, or electrical. Hitting a utility line is dangerous and can lead to costly repairs, so this step is absolutely essential and non-negotiable for any digging project on your property.
Step 2: Drive the Anchor into the Ground
Now it’s time to create the foundation. Using a sledgehammer or a manual post pounder, drive a galvanized steel pipe anchor into the ground at each marked spot. For a standard vinyl fence, a pipe with a diameter between 1-5/8 inches and 2-3/8 inches works best. You’ll want to drive it at least three to four feet deep to ensure it’s secure enough to support your fence. The depth is what gives your post its stability, so don’t cut corners here. Make sure you leave enough of the pipe exposed above ground to properly support the height of your vinyl post.
Step 3: Slide the Vinyl Post Over the Anchor
With the steel anchor firmly in the ground, this next step is quite simple. Take your hollow vinyl post and slide it directly over the pipe. You’ll want to make sure it goes on smoothly and sits straight. To ensure a snug fit and prevent the post from rattling against the metal pipe, you can use post-leveling “donuts” or collars. These small adapters fit inside the vinyl post and grip the steel anchor, keeping everything centered and secure. This simple addition makes a big difference in the final stability of your fence, so it’s a detail worth paying attention to.
Step 4: Secure the Post
To finish the installation, you need to lock the post into its final position. Use four 3-inch self-tapping screws to attach the vinyl post to the internal adapters and the steel anchor. Place two screws near the top of the anchor and two near the bottom. This will secure the post at its final height and prevent it from twisting or lifting over time. Once the screws are in, your post is officially set. If you find the process more challenging than expected, remember you can always contact a professional to ensure your fence is installed perfectly and will last for decades.
Method 2: How to Set Posts by Tamping Soil
If you have the right soil conditions, setting your fence posts by tamping soil is a classic and highly effective method. This technique relies on creating a super-compacted base around the post, which can provide just as much stability as concrete when done correctly. It’s all about careful digging and thorough tamping to create a solid foundation that will hold your fence steady for years. This approach is straightforward and uses the earth itself to secure your posts.
Step 1: Dig the Post Hole
Your first step is to dig a proper hole for each post. For a stable fence, you need to dig each hole to a depth of at least two feet. If you have a taller fence, a good rule of thumb is to make the hole about one-third of the post’s total height. The width of the hole is just as important. Aim for a diameter that is about three times the width of your vinyl post. This extra space isn’t for wiggle room; it’s for the backfill material that will lock the post in place. Using a post-hole digger will make this job much easier and help you create a clean, uniform hole for a professional-quality fence installation.
Step 2: Add a Gravel Base for Drainage
With your hole dug, your next move is to create a base for drainage. Before you place the post, fill the bottom few inches of the hole with gravel. This simple step is critical because it helps water drain away from the bottom of your post sleeve and the ground beneath it. Proper drainage keeps the surrounding soil from becoming overly saturated, which prevents issues caused by Long Island’s freeze-thaw cycles. A solid base of crushed stone or gravel ensures that any moisture has a place to go, protecting the post’s stability over the long term and preventing the ground from heaving and shifting.
Step 3: Set the Post and Backfill
Now, place your vinyl post into the hole, making sure it rests firmly on the gravel base. Use a level to get it perfectly vertical. Once it’s in position, you can start backfilling the hole with the soil you originally dug out. The key to success here is to work in layers. Add about four to six inches of soil back into the hole, then use a tamping bar or a sturdy piece of 2×4 to firmly compact it. This process is crucial for eliminating air pockets and ensuring maximum soil compaction. Repeat this process, adding and tamping soil in layers, until the hole is completely filled. This creates the solid masonry-like foundation your fence needs.
Step 4: Tamp the Soil and Check for Plumb
As you fill the hole, continue to check that your post is plumb (perfectly vertical) with a level. Check it on two adjacent sides to be sure. If you find the post has shifted, you can make small adjustments before the soil becomes too compacted. The final layer of soil should be tamped firmly around the post base. When done correctly, the tightly packed earth will grip the post, holding it securely in place. If you could dig a perfectly straight hole for a snug fit, you wouldn’t need anything else to secure the post. Tamping soil effectively bridges the gap between the post and the earth, creating a solid anchor. For visual guides on techniques like this, you can often find helpful demonstrations on our Gappsi YouTube channel.
Steel Anchors vs. Tamped Soil: Which Method is for You?
Deciding between steel anchors and tamped soil for your vinyl fence posts isn’t just a matter of preference. The right choice depends on your specific property and the type of fence you’re building. Both methods can give you a sturdy, long-lasting fence without the mess of concrete, but they perform differently under various conditions. To make the best decision for your Long Island home, you’ll want to look at three key factors: your soil type, the height of your fence, and your goals for long-term stability. Thinking through these points will help you choose the installation path that ensures your fence stays straight and strong for years to come.
Consider Your Soil Type
The ground beneath your feet is the most important factor in this decision. Steel pipe anchors work best in dense, heavy soils, like clay. The anchor needs to bite into firm ground to create a solid base. If your soil is loose, sandy, or very rocky, driving a steel anchor straight and deep can be difficult, and it may not provide enough grip to hold the post securely. For these looser soil conditions, the tamped soil method is a better choice. Digging a hole and backfilling it with compacted soil and gravel creates a wider, more stable foundation that can properly support the post. Since Long Island has a mix of soil types, from sandy shores to denser inland areas, assessing your yard is a critical first step.
Factor in Fence Height and Weight
Next, think about the fence you’re installing. A short, decorative picket fence has very different support needs than a tall privacy fence. The taller and heavier your fence, the more force it has to withstand from wind and general wear. For standard fences up to about six feet tall, steel anchors are often sufficient, provided your soil is cooperative. However, if you are installing a taller privacy fence or a fence with heavy decorative elements, the tamped soil method generally offers more robust support. Burying a third of the post’s length and compacting the soil around it creates a much stronger anchor point to handle the increased load and prevent leaning. You can find a variety of fences and netting options that suit different needs.
Think About Long-Term Stability
Both methods can create a durable fence when installed correctly, but they achieve stability in different ways. The tamped soil method relies on creating a solid, custom-fit foundation by compacting layers of soil and gravel tightly around the post. This process is essential for keeping the post stable and ensuring a long-lasting installation. Steel anchors are engineered for strength, but their stability depends entirely on a tight fit in the right kind of soil. Over time, factors like freeze-thaw cycles can potentially cause minor shifting if the anchor isn’t perfectly set. For maximum peace of mind, especially with Long Island’s variable weather, proper installation technique is everything. Whichever method you choose, taking the time to get it right will pay off in the end.
How to Keep Your No-Dig Fence Stable
Installing a fence without concrete doesn’t mean you have to compromise on stability. Whether you choose steel anchors or the tamped soil method, the long-term strength of your fence comes down to proper technique and a little bit of planning. A wobbly fence can be a frustrating and costly problem, but you can easily avoid it by paying attention to a few key details during and after installation. These steps will help ensure your fence remains straight and sturdy for years, standing up to Long Island’s weather and the test of time.
Follow Depth and Diameter Rules
A stable fence starts with a solid foundation, even without concrete. For the tamped soil method, it’s crucial to get the post hole dimensions right. A good rule of thumb is to dig each hole to a depth of at least two feet. For taller fences, aim for a depth that is about one-third of the post’s total height. The width of the hole is just as important; make it about three times the width of the post itself. This gives you enough room to add backfill and compact it tightly, creating a firm base that holds the post securely in place and prevents it from leaning under pressure.
Use the Right Adapters and Stabilizers
When using the steel pipe anchor method, you can’t just slide a vinyl post over the pipe and call it a day. To create a truly secure, wobble-free fit, you need the right hardware. Special adapters are designed to connect the round steel anchor to the square vinyl post, ensuring a snug connection that eliminates any gaps. These small but mighty components are essential for transferring the stability of the driven anchor to the fence post itself. Skipping this step can lead to rattling and leaning over time, so always use the manufacturer-recommended stabilizers for your specific fencing system.
Manage Drainage and Moisture
Water is the enemy of a stable fence post. When moisture collects at the base, it can lead to soil erosion and shifting caused by freeze-thaw cycles in the winter. An easy way to prevent this is by adding a few inches of gravel to the bottom of each post hole before setting the post. This simple step creates a drainage layer that allows water to seep away from the post’s base, keeping it dry and secure. Proper drainage is a cornerstone of any quality outdoor construction, from patios to fence lines, and it’s a critical detail for long-term stability.
Plan for Vinyl Expansion and Contraction
Vinyl is a fantastic, low-maintenance fencing material, but it does expand and contract with temperature changes. You have to account for this movement during installation to prevent buckling or warping. High-quality vinyl fencing systems are designed with this in mind, often using a system of notched rails and fasteners that allow panels to “float” slightly within the posts. When installing, make sure you follow the manufacturer’s spacing guidelines precisely. This ensures the fence can adapt to Long Island’s hot summers and cold winters without putting stress on the posts or panels, keeping your fence line straight and strong.
Brace Posts as They Settle
After you’ve set your posts using the tamped soil method, the ground needs time to fully compact and settle. During this period, the posts can be vulnerable to shifting, especially if they are under any lateral pressure from wind or the weight of the panels. To keep everything perfectly plumb, use temporary 2x4s to brace the posts, particularly at corners and gates. Angle one end of the brace against the post and stake the other end firmly into the ground. This simple support system will hold the post vertically while the soil firms up around it, preventing any lean that could compromise the entire fence line.
Perform Routine Inspections
Once your fence is up, a little bit of seasonal maintenance goes a long way. A few times a year, take a walk along your fence line to perform a quick inspection. Look for any signs of leaning, check if any panels or gates feel loose, and examine the base of the posts for soil erosion. Catching small issues early can prevent them from turning into bigger problems. A quick check-up helps ensure your fence remains a beautiful and secure feature of your property, much like the routine care for your patio or driveway keeps them in top shape.
Common No-Dig Installation Mistakes to Avoid
A no-dig fence installation can be a straightforward weekend project, but a few common missteps can turn your dream fence into a wobbly, short-lived headache. Getting the fundamentals right from the start is the key to a structure that looks professional and stands strong for years. Avoiding these five common mistakes will save you time, frustration, and the cost of future repairs.
Mistake #1: Not Digging Deep Enough
A stable fence starts with the right foundation. One of the most frequent errors is not digging the post holes deep enough, especially when using the tamped soil method. A shallow hole simply can’t provide the leverage needed to keep a post upright against wind and time. As a rule of thumb, your hole should be about one-third the height of your post. For a standard six-foot fence, that means digging down at least two feet. Skimping on depth will result in a fence that leans and shifts, especially after a few seasons of Long Island’s variable weather. Taking the extra time to dig properly ensures your fence has the structural integrity it needs from the ground up.
Mistake #2: Forgetting to Level as You Go
It’s easy to get caught up in the rhythm of setting posts and forget one of the most crucial tools: your level. A fence that isn’t plumb, or perfectly vertical, will be noticeable immediately. Even a slight lean in one post can throw off the entire line, creating alignment issues when you install the panels. Make it a habit to check for plumb with a level after you set the post in the hole and again after you’ve tamped down each layer of soil. It’s much easier to make small adjustments as you go than to try and straighten a fully compacted post later. This simple, repetitive check is what separates a DIY look from a professional finish.
Mistake #3: Ignoring Proper Drainage
Proper drainage is essential for the long-term stability of any outdoor structure, and your fence posts are no exception. If water is allowed to pool at the base of your post, it can soften the surrounding soil and compromise its stability. During Long Island’s freeze-thaw cycles, this trapped moisture can expand and shift the ground, causing your posts to heave or lean. The fix is simple: add a few inches of gravel to the bottom of the hole before setting the post. This creates a space for water to drain away, keeping the base secure and dry. This small step is a key part of professional fencing installation.
Mistake #4: Skipping Soil Compaction
When backfilling a post hole, simply dumping the dirt back in is a recipe for a leaning fence. Soil is full of air pockets, and if you don’t compact it properly, it will settle over time, leaving your post loose and wobbly. The correct technique is to add the soil back in small layers, just a few inches at a time. After adding each layer, use a tamping bar or a piece of scrap wood to pack it down firmly. This process removes the air pockets and creates a dense, solid base around the post. It takes more effort, but this thorough compaction is what gives your no-dig fence its lasting strength.
Mistake #5: Using Low-Quality Vinyl
With fencing, you truly get what you pay for. Opting for cheap, thin vinyl posts and panels might save money upfront, but it will lead to problems down the road. Low-quality vinyl is more susceptible to cracking in the cold, warping in the heat, and becoming brittle from sun exposure. It simply doesn’t have the strength to withstand strong winds or the occasional bump from a lawnmower. Investing in high-quality, commercial-grade materials ensures your fence will maintain its color and structural integrity for decades. For a fence that lasts, always prioritize quality materials from a trusted supplier.
Is a No-Dig Fence Right for Your Long Island Home?
Deciding on the right fence installation method involves more than just thinking about your weekend plans. For those of us on Long Island, our unique environment plays a huge role. While a no-dig fence sounds like a dream come true, saving you time and mess, it’s important to consider if it’s the best fit for your property. The good news is that a no-dig installation can be incredibly sturdy and long-lasting, but its success depends entirely on your soil, the local weather, and using the right techniques.
Long Island’s coastal weather brings strong winds, and our winters deliver freeze-thaw cycles that can shift fence posts over time. Your soil could be sandy and loose near the shore or dense and rocky further inland. These are the factors you need to weigh. A no-dig fence, particularly one using driven steel anchors, can often provide the stability you need without the hassle of concrete. This guide will walk you through the key considerations for a Long Island yard, helping you understand how to handle our weather and when it might be time to call in a professional for your fencing project.
Withstanding Long Island’s Wind and Weather
Living on Long Island means preparing for gusty winds, especially during coastal storms. A common concern with no-dig fences is whether they can stand up to that pressure. The answer is yes, as long as the installation is done correctly. The driven post method, where a steel anchor is hammered deep into the ground, creates an incredibly strong foundation. This approach provides excellent resistance to the lateral force of wind pushing against the fence panels.
The key is ensuring the anchor is driven to the proper depth, creating a base that won’t sway or lean. When the vinyl post is sleeved over this secure steel anchor, the entire structure becomes a rigid unit capable of handling significant wind loads. It’s a much stronger and more effective installation than simply setting a post in a shallow hole.
Dealing with Freeze-Thaw Cycles
The dreaded “frost heave” is a real issue in our climate. As the ground freezes and thaws, moisture in the soil expands and contracts, which can slowly push fence posts upward. A no-dig fence has a clever solution for this. When using steel pipe anchors, you can secure the vinyl post to the anchor at the bottom with a screw. This simple connection prevents the post from riding up during a thaw, keeping your fence line perfectly level year after year.
Proper drainage at the base of the post also helps. Even without concrete, adding a layer of gravel at the bottom of your hole allows water to drain away, reducing the amount of ice that can form around the post. With these techniques, a no-dig fence can easily manage Long Island’s winter weather.
Know When to Call a Professional
While no-dig fences are designed to be DIY-friendly, some situations are best left to the experts. The biggest factor is your soil. If you start digging and find the ground is extremely rocky, it’s better to switch to a traditional concrete installation. Driving an anchor through dense rock is nearly impossible, and a professional masonry team has the tools and experience to set posts securely in these conditions.
Gate posts also require special attention. Because they support the weight and movement of a gate, they need extra reinforcement. A professional will often use a longer and heavier-gauge steel post for the hinge side to ensure it remains stable for years to come. If your project involves tricky terrain, multiple gates, or you simply want peace of mind, getting a professional consultation is always a smart move.
Related Articles
- Aluminum Fence vs. Vinyl & Wood: A Comparison
- Aluminum vs. Vinyl Fence Archives – Gappsi Group
- Fencing Archives – Gappsi Group
Frequently Asked Questions
Is a no-dig fence really as strong as one set in concrete? Yes, it absolutely can be. The strength of a no-dig fence comes from proper installation technique. When you drive a steel anchor several feet into dense ground or meticulously compact soil in tight layers around a post, you create an incredibly firm foundation. This solid base is designed to resist wind and the shifting that can happen during Long Island’s freeze-thaw cycles, providing stability that rivals a traditional concrete footing.
How do I know if I should use steel anchors or the tamped soil method? The best method really depends on your soil. Steel pipe anchors are fantastic if you have hard, dense, or clay-like soil because the anchor can get a very firm grip. If your soil is sandy, loose, or rocky, the tamped soil method is usually a better choice. Digging a wider hole and compacting layers of soil and gravel creates a more substantial base that provides the necessary stability in less-than-ideal ground conditions.
What’s the biggest mistake people make with no-dig fences? The most common mistake is not going deep enough. Whether you are driving a steel anchor or digging a hole for a tamped post, depth is what gives your fence its strength. For a standard six-foot fence, the post or anchor needs to go at least two feet into the ground. Skimping on depth will almost always result in a fence that leans or becomes wobbly over time, so it’s the one step you really can’t afford to rush.
Do gate posts need to be installed differently without concrete? Gate posts definitely need extra reinforcement. They support the constant weight and motion of the gate, so they are under more stress than other posts. For a no-dig installation, this usually means using a longer and heavier-gauge steel anchor for the hinge post. If you are using the tamped soil method, you should dig a deeper and wider hole for the gate posts to create an even more robust foundation.
How much time does a no-dig installation really save? The time savings are significant, primarily because you get to skip the concrete curing process. After pouring concrete, you have to wait at least 24 to 48 hours before you can hang fence panels. With a no-dig method, you can set your posts and start attaching panels almost immediately. This can easily shorten your total project timeline by a day or two, not to mention saving you the time and mess of mixing concrete.