


A new paver driveway is a significant investment in your home’s beauty and value, so it’s smart to understand every part of the process, especially the timeline. Homeowners across Nassau and Suffolk counties often ask us, “how long does driveway pavers take to install in Long Island?” The truth is, a quality installation can’t be rushed. The duration depends heavily on careful ground preparation and the specific materials you’ve selected. This article will give you a clear, step-by-step overview of what to expect, helping you appreciate the craftsmanship that goes into building a driveway designed to last for decades.
Key Takeaways
- Plan Your Timeline Around Project Scope: A paver driveway installation can take five days for a small area or more than ten days for a large, complex project; your choice of material also plays a key role, as intricate natural stone takes more time to install than uniform concrete pavers.
- Success Lies Beneath the Surface: A lasting paver driveway depends on crucial preparatory steps like expert excavation and building a solid foundation, which is why weather or poor soil conditions can cause necessary delays to ensure a quality result.
- Partner with Your Contractor for a Smooth Project: Keep your installation on schedule by establishing clear communication from the start, which includes getting a detailed written contract, making timely material selections, and understanding the plan for potential weather delays.
How Long Will My Paver Driveway Installation Take?
So, you’re dreaming of a beautiful new paver driveway, but you’re also wondering how long your home will be a construction zone. It’s a totally fair question, and one we get all the time from homeowners across Long Island. The truth is, the timeline for a paver driveway installation depends heavily on a few key things, with the biggest one being the size of your driveway. A small, straightforward project will naturally be quicker than a large, intricate one that requires more extensive groundwork and detail.
While every property is different, we can give you a general idea of what to expect based on square footage. These estimates cover the entire process, from the moment we first break ground to the final, thorough cleanup. It’s important to remember that things like unpredictable weather, complex patterns, or specific material choices can shift the schedule a bit. For example, a herringbone pattern takes more time to lay than a simple running bond. However, this breakdown will give you a solid starting point for planning your project and understanding the workflow. Our goal is always to work efficiently without ever compromising the quality and durability you expect from a Gappsi installation. We believe in clear communication, so we’ll always keep you in the loop from start to finish.
Small Driveways (Under 1,100 sq. ft.)
If you have a smaller driveway, typically under 1,100 square feet, the entire installation is usually quite efficient. You can expect the project to take about five working days from start to finish. Our team typically spends the first day or two excavating the old surface and preparing the ground for a solid base. The next couple of days are dedicated to carefully installing the pavers and creating the pattern you chose. Finally, we’ll use the last day for joint sanding, compaction, and a thorough cleanup. This efficient timeline ensures minimal disruption while our expert masonry team delivers a durable and beautiful result.
Medium Driveways (1,100 to 2,000 sq. ft.)
For a medium-sized driveway, which we generally classify as being between 1,100 and 2,000 square feet, you should plan for a slightly longer timeline. These projects typically take about five to seven working days to complete. The extra time allows for more extensive ground preparation, which might take around two days. Laying the pavers themselves can take another two to three days, depending on the complexity of the design. We then allocate one or two days for the finishing touches and cleanup, ensuring every detail is perfect before we consider the job done. This steady pace ensures a high-quality foundation and a flawless finish.
Large Driveways (Over 2,000 sq. ft.)
When it comes to large driveways over 2,000 square feet, patience is key to achieving a flawless, long-lasting result. Plan for an installation timeline of at least seven to ten working days, and sometimes longer for very expansive or complex projects. The initial excavation and ground preparation alone can take three to four days to ensure a stable foundation across the entire area. Installing the pavers will likely take another three to four days. We then dedicate about two days to cleanup and final details. This careful, unhurried approach is essential for a high-quality installation that will stand the test of time, especially when using premium materials like porcelain and natural stone.
What to Expect: The Paver Installation Process
A paver driveway installation might seem like a huge undertaking, but it follows a clear and organized path from start to finish. When you work with a professional team, the entire project is broken down into manageable steps. Knowing what’s coming next helps you feel prepared and confident as your vision comes to life. While every project is unique, the core process remains consistent, ensuring a high-quality result that lasts for decades. From the first conversation to the final finishing touches, each phase is designed to be efficient and thorough.
The journey to your new driveway involves five key stages:
- Initial Consultation
- Design and Material Selection
- Ground Preparation
- Foundation Construction
- Paver Laying and Finishing
Understanding this workflow demystifies the construction and lets you see exactly how your investment is taking shape. Our expert masonry team handles all the heavy lifting, so you can simply enjoy watching the transformation unfold. We coordinate everything, from excavation to the final sweep, to create a smooth and seamless experience for you.
Step 1: Your Initial Consultation
This is where your project begins to take shape. The first step is a simple, no-pressure meeting at your home where a Gappsi expert will chat with you about your vision. We’ll take precise measurements of the area and discuss your ideas, style preferences, and functional needs for the driveway. This is the perfect time to ask any questions you have. The on-site visit typically takes about 45 to 60 minutes. Afterward, we’ll put together a detailed and transparent price estimate, which you can expect to receive within 24 hours. This initial conversation ensures we’re all on the same page from day one.
Step 2: Finalizing Your Design and Materials
Now for the fun part: choosing the look of your new driveway. You’ll select the style, color, and pattern of your pavers. With so many beautiful options available, from classic concrete to elegant natural stone, it’s important to see them for yourself. We always recommend visiting a showroom to get a true feel for the textures and colors of different materials. You can explore a wide variety of high-quality porcelain and natural stone at the Gappsi store. This step can take a few days, depending on how quickly you find the perfect match for your home’s aesthetic. Once you’ve made your choice, we’ll finalize the design and order your materials.
Step 3: Preparing the Ground
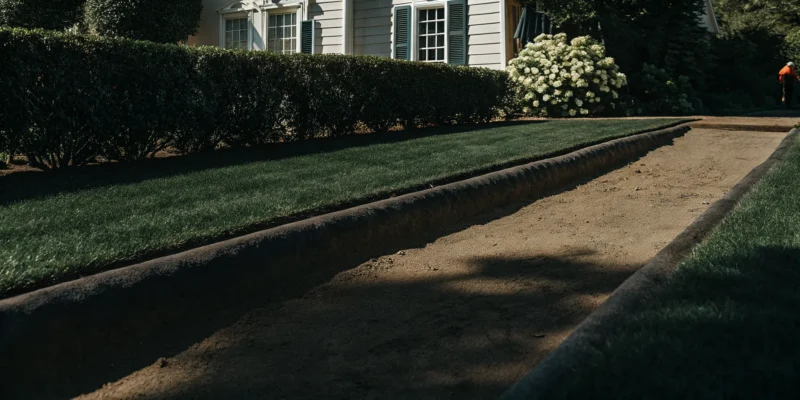
Before we can lay your beautiful new pavers, we have to prepare the canvas. This critical step, known as excavation, involves removing any existing surface, like old asphalt or concrete, along with soil, grass, and roots. We dig down to a specific depth to create enough room for a robust foundation. Proper excavation ensures your driveway has clean, stable boundaries and a solid base that prevents sinking or shifting over time. This is the groundwork that guarantees the longevity and durability of your entire paver system, so we take great care to get it exactly right.
Step 4: Building a Solid Foundation
A paver driveway is only as strong as the foundation it rests on. After excavation, we begin building this crucial base. The process involves laying down several inches of a crushed stone aggregate in layers. Each layer is thoroughly compacted with professional-grade equipment to create a dense, stable, and interlocking base. This multi-layer system is designed to provide excellent drainage and support, preventing water from pooling beneath the pavers and protecting against the freeze-thaw cycles we experience on Long Island. This solid foundation is the unseen hero that will keep your driveway level and beautiful for years to come.
Step 5: Laying and Finishing Your New Driveway
With the foundation set, it’s time to bring your design to life. Our crew will carefully lay each paver by hand, following the pattern you selected. Once the pavers are in place, we install a concrete edge restraint around the perimeter. This border is essential for locking the pavers together and preventing them from shifting outward over time. Finally, we sweep a special polymeric sand into the joints. When activated with water, this sand hardens to lock the pavers firmly in place, resist weed growth, and deter ants. After a final cleanup, your stunning new driveway is ready to enjoy. To keep it looking its best, consider professional cleaning and sealing down the road.
What Factors Can Delay a Long Island Installation?
Even with a perfect plan, some things can shift your project’s timeline. On Long Island, a few specific factors can pop up and cause delays. While a seasoned contractor will anticipate and plan for these possibilities, it’s helpful for you to know what they are so you can set realistic expectations from the start. Understanding these potential hurdles helps you see a delay not as a setback, but as a necessary step to ensure your new driveway is built to last.
From our unique soil conditions to the unpredictability of coastal weather, several elements can influence your installation schedule. Navigating local town permits and waiting on specialty materials can also add time to the process. A transparent contractor will keep you informed every step of the way, explaining why a pause might be needed and how it contributes to the quality of the final result. Let’s look at the most common reasons a paver driveway project might take a little longer than initially planned.
Local Soil and Drainage
The foundation of a durable driveway is, quite literally, the ground it’s built on. Long Island’s soil composition can vary, and some areas have sandy or clay-heavy soil that requires special attention. Before any pavers are laid, a professional crew will assess the ground. If the soil doesn’t drain well, additional site preparation may be needed to prevent future shifting, water pooling, or sinking. This could involve installing specific drainage solutions or adding more base material. While this adds time to the project, it’s a crucial step for ensuring your driveway remains stable and beautiful for years to come.
Long Island’s Unpredictable Weather
We all know Long Island weather can change in a flash. A week of perfect sunshine can be interrupted by a sudden summer thunderstorm or a lingering nor’easter. Heavy rain is one of the most common reasons for a temporary work stoppage. When the ground becomes saturated, it’s impossible to properly compact the base layers, which is essential for a stable surface. A quality-focused team will pause the project for a day or two to let the ground dry out completely. Rushing this step could compromise the entire installation, so a weather delay is a sign that your contractor is prioritizing a high-quality, lasting result.
Handling Local Permits and Rules
Depending on where you live in Nassau or Suffolk County, your driveway project will likely require a permit. Each town and village has its own set of regulations, application processes, and timelines for approval. An experienced local contractor will know exactly what’s required in your area and will handle the entire permit application for you. However, the time it takes for the town to review and approve the permit is out of anyone’s control. This waiting period can vary, so it’s a good idea to factor it into your overall project schedule from the beginning.
Material Sourcing and Delivery Times
The pavers you choose play a big role in your driveway’s final look, but they can also affect the project timeline. While many standard pavers are readily available, custom orders or specialty materials often have longer lead times. It’s also important to remember that spring and summer are the busiest seasons for home improvement. During these peak months, high demand can extend delivery times for even common materials. Finalizing your choice of porcelain and natural stone pavers early in the planning process is a great way to get your order in and keep the project moving forward smoothly.
Common Installation Challenges on Long Island
Even the most straightforward paver installation can hit a few bumps. On Long Island, our properties come with their own unique set of quirks, from mature trees to unpredictable soil. While these challenges might seem daunting, an experienced crew knows exactly how to handle them. Being aware of these potential hurdles ahead of time helps you understand what goes into a professional installation and why cutting corners is never a good idea. A proper installation ensures your driveway not only looks beautiful but also lasts for decades.
Working Around Tree Roots and Tight Spaces
Many Long Island homes are blessed with beautiful, mature trees, but their root systems can pose a real challenge for excavation. Roots can get in the way of creating the deep, stable base your paver driveway needs. If the base is not prepared correctly, you could face sinking pavers and an uneven surface down the road. A professional team knows how to properly excavate around roots without compromising the tree’s health or your driveway’s integrity. We also have the right equipment to work in tight spaces between houses or near delicate garden beds, ensuring your project is completed without disturbing your existing landscape design.
Dealing with Wet or Unstable Ground
Long Island’s coastal geography means we see a lot of sandy or clay-heavy soil, which can complicate things. If the ground is too soft or wet, it cannot properly support the paver base, leading to delays while the site dries out. Unstable soil requires special preparation to prevent your new driveway from shifting or settling over time. Our crews are experts at assessing the ground conditions on your property. We build a robust foundation using the right materials and compaction techniques, creating a solid base that stands up to our local soil and weather, ensuring your investment is protected for years to come.
Demolishing Your Old Driveway
If you have an old asphalt or concrete driveway, it has to go before the new pavers can be installed. This demolition phase is a significant job that adds time and labor to the project. It involves breaking up the old surface, loading tons of heavy debris, and hauling it away for proper disposal. While it can be a noisy and messy process, it is a critical step for creating a clean slate. A professional quote will always account for this work, so you will not have any surprises. Our masonry construction team handles the entire process, leaving you with a perfectly prepared site for your beautiful new driveway.
Uncovering Hidden Utilities
You never quite know what lies beneath the surface until you start digging. While public utilities like gas and electric lines are marked beforehand, private lines for sprinkler systems, landscape lighting, or pool equipment often are not. Hitting an unexpected pipe or wire can stop work immediately and require a specialist to make repairs. An experienced installation team knows to proceed with caution and has the expertise to work around these hidden obstacles. Because we manage all aspects of outdoor living, from swimming pools to lighting, we understand how these systems are integrated and can address them safely to keep your project on track.
Does Paver Material Affect the Installation Timeline?
Yes, the material you choose for your driveway pavers plays a significant role in your project’s timeline. While every installation requires careful preparation, some materials demand more time and specialized skill to lay correctly. Understanding these differences can help you set realistic expectations for your driveway transformation.
Each paver type has its own installation process, from the speed of laying uniform concrete blocks to the artistry required for natural stone. Let’s look at how your choice of concrete, natural stone, or porcelain can influence the schedule.
Concrete Pavers
If you’re looking for the fastest installation, concrete pavers are often your best bet. Because they are manufactured to be uniform in size and shape, our installation team can lay them down in a consistent, efficient pattern. This predictability speeds up the entire process, from planning the layout to making the final cuts. Our expert masonry team can typically complete a concrete paver driveway more quickly than one using other materials, helping you get back to your routine with minimal disruption. This makes them a great choice for homeowners who value both durability and a swift project completion.
Natural Stone Pavers
Natural stone pavers offer a unique, high-end look that’s hard to replicate, but this beauty comes with a longer installation timeline. Unlike uniform concrete pavers, each piece of natural stone is unique in shape, thickness, and size. Our craftsmen must carefully sort and select each stone, often cutting them on-site to create a perfect, interlocking fit. This process is more like putting together a complex puzzle than laying a simple grid. The extra time and artistry involved ensure a stunning, one-of-a-kind result, so it’s important to plan for a more patient approach when selecting natural stone pavers.
Porcelain Pavers
Porcelain pavers are a fantastic, modern option known for their incredible durability and low maintenance. However, their installation is a more technical process that can take longer than a concrete paver project. Porcelain is an extremely dense and hard material, which means it requires specialized diamond-blade saws and careful handling to prevent chipping during cuts. The precision required to achieve clean lines and proper spacing is critical, so our team takes extra time to ensure every paver is set perfectly. This meticulous approach guarantees a flawless finish that will last for decades, making any extra installation time well worth it.
What’s the Best Season for Paver Installation in Long Island?
Timing your paver installation correctly is just as important as choosing the right materials. On Long Island, our weather shifts dramatically from season to season, and this has a big impact on construction projects. Scheduling your installation during the right time of year helps ensure the ground is stable, the materials set perfectly, and your project stays on track without unnecessary weather delays. A well-timed project not only looks better but also lasts longer, giving you a beautiful and durable surface for years to come. Let’s walk through the best times to get started and which seasons you might want to avoid.
Why Spring Is the Ideal Time
Many homeowners find that spring is the perfect season for a paver installation. From April through June, Long Island’s weather is usually mild and cooperative. These moderate temperatures create ideal working conditions for our crews and allow the base materials to be compacted properly. It also ensures the polymeric sand used to lock your pavers in place can cure correctly without being affected by extreme heat or cold. Planning a spring project means your new patio, walkway, or driveway will be ready just in time for you to enjoy it all summer long. If you’re aiming for a spring installation, we recommend starting the design process with a masonry expert during the winter months to secure your spot on the schedule.
Why Early Fall Is a Great Alternative
If you miss the spring window, don’t worry, early fall is another fantastic time for paver work. The period from September to November offers a second chance with comfortable, mild temperatures and typically less rainfall than the spring. The ground is still warm and stable from the summer, making excavation and base preparation straightforward. Since the busy summer season has wound down, you might find more flexibility in scheduling your project. Completing your installation in the fall means your property will look great for the holidays, and your new pavers will have plenty of time to settle in before the winter freeze. It’s also a great time to think about how to protect your investment before the cold weather arrives.
Seasons to Be Cautious Of
While we can work through most conditions, some seasons present more challenges than others. Winter is the most difficult time for paver installation because the frozen ground is nearly impossible to excavate and compact correctly. A compromised base can lead to shifting, sinking, and an uneven surface down the road. Summer can also be tricky. Intense heat waves can be hard on our team and can sometimes affect how certain materials cure. Plus, Long Island’s pop-up summer thunderstorms can cause unexpected delays. While a summer installation is certainly possible, especially for projects like a new swimming pool deck, it requires careful planning and flexibility to work around the weather.
How to Prepare Your Property for Installation Day
Once your paver driveway project is on the calendar, you can take a few simple steps to prepare your home for the installation crew. A little bit of prep work helps our team work safely and efficiently, keeping your project on track from day one. Think of it as rolling out the welcome mat for your new driveway. Taking care of these small details ensures a smooth process for everyone involved and protects your property during the construction. This preparation helps us focus on what we do best: creating a beautiful, durable driveway that you’ll love for years to come.
Clear Your Driveway and Surrounding Area
Before the crew arrives, it’s important to create a clear and open workspace. Please move any cars, bikes, basketball hoops, or other items from the driveway and the immediate surrounding area. We also recommend relocating any potted plants, grills, or outdoor furniture that are close to the work zone. This simple step prevents your belongings from being damaged by dust or equipment and gives our masonry team the space they need to operate safely and effectively. A clear site is the first step toward a flawless installation.
Point Out Sprinklers and Utility Lines
To prevent accidental damage, it’s crucial to let our project manager know the location of any underground lines on your property. This includes irrigation systems, invisible dog fences, and any private utility lines for lighting or septic systems. While public utilities are marked professionally, private installations are your responsibility. If you have a sprinkler system, we may need to cap or move a few heads. For more complex systems, you might need to coordinate with your landscape company before we begin excavation. Clear communication here prevents surprises and keeps the project moving forward.
Prepare for Crew and Material Access
Your paver installation will involve heavy equipment and large deliveries of materials. Our crew will likely use a small digging machine, and materials will arrive on large trucks. Please ensure the street in front of your home is as clear as possible on installation day to allow for parking and unloading. Your driveway will become the primary staging area for the equipment and materials like your new porcelain or natural stone pavers. Understanding this ahead of time helps set expectations for the temporary disruption and ensures our team can get everything in place to begin transforming your property.
How to Keep Your Paver Project on Schedule
You’ve picked your pavers and finalized the design, and now you’re just excited to see your new driveway come to life. While your contractor will manage the day-to-day work, staying involved is the best way to ensure everything goes smoothly and finishes on time. A successful project is a partnership, and clear communication is the foundation of that partnership. By taking a few simple steps, you can help prevent misunderstandings and keep things moving forward. Here are three key strategies to keep your paver installation on schedule, from the initial conversation to the final paver being set.
Ask These Questions Before You Start
One of the most important things you can do is ask your contractor, “How long do you expect this project to take?” right from the start. This simple question opens up a crucial conversation about the timeline and sets a clear benchmark for the entire installation. A professional team will be happy to walk you through their projected schedule. You can also ask about their process for communicating updates or how they handle unexpected discoveries, like buried pipes or difficult soil. Getting these answers upfront helps you and your contractor get on the same page, creating a shared understanding of the project’s flow and the masonry expertise involved.
Get Everything in Writing
To prevent any confusion down the road, make sure every detail of your project is documented in a written agreement. A good contractor will handle this for you, providing a comprehensive contract before any work begins. This document should clearly outline the project’s scope, the specific materials being used, a detailed timeline with key milestones, and the payment schedule. It’s not about a lack of trust; it’s about ensuring total clarity for everyone involved. Having a written record to refer to protects both you and the installation team, making it easy to resolve questions and keep your home improvement project on its intended path.
Plan for Potential Weather Delays
Here on Long Island, we know the weather can be unpredictable. A sudden downpour can make the ground too soft to work on, potentially pausing the project for a day or two. It’s wise to talk with your contractor about their contingency plan for weather delays. An experienced local team will already have this in mind and can explain how they adapt their schedule to account for rain or extreme temperatures. Discussing this ahead of time helps you manage your expectations and understand that some delays are simply out of anyone’s control. This proactive planning ensures that a little rain doesn’t wash away your project’s momentum and highlights the importance of future paver restoration and sealing.
Planning for Long-Term Paver Care
Once your beautiful new driveway is installed, keeping it in top shape is surprisingly simple. Unlike other materials that demand constant attention, pavers are designed for durability and low maintenance. A little care goes a long way in preserving their color, stability, and overall appeal for decades. With a straightforward routine, you can ensure your investment continues to add value and curb appeal to your Long Island home. The key is consistency, not complexity. Following a few basic steps will protect your driveway from the elements and daily wear, keeping it looking as good as the day it was installed.
How to Clean and Seal Your Pavers
Keeping your pavers looking fresh is easier than you might think. A regular sweep to clear away leaves and debris is your first line of defense. For a deeper clean, a simple rinse with a garden hose can wash away accumulated dirt. Every few years, you may need to sweep new polymeric sand into the joints to keep the pavers locked in place. To truly protect your investment, consider applying a sealant every two to three years. This simple step helps shield the pavers from stains and fading. If you prefer a hands-off approach, our professional restoration and sealing services can handle the job for you, ensuring your driveway remains pristine.
Caring for Pavers in a Long Island Climate
Pavers are an excellent choice for Long Island’s varied climate. They are designed to handle everything from hot, humid summers to freezing winters with snow and ice. Unlike a solid slab of concrete that can crack under pressure from freeze-thaw cycles, the joints between pavers allow for slight movement. This flexibility prevents widespread damage. Maintenance is minimal, usually just requiring an occasional cleaning and replenishing the joint sand every five to eight years. The high-quality porcelain and natural stone pavers we use are specifically chosen for their ability to withstand our local weather, giving you peace of mind year after year.
The Simplicity of Paver Repairs
One of the best features of a paver driveway is how simple it is to repair. If a paver ever becomes stained, chipped, or damaged, there’s no need for a massive, expensive overhaul. Unlike asphalt or concrete that requires patching or complete replacement, you can simply lift out the individual paver and replace it with a new one. This process is quick, clean, and incredibly cost-effective. Our expert masonry team can make seamless repairs, ensuring your driveway maintains its flawless appearance. This easy repairability is a major advantage that saves you time, money, and stress over the long run.
Related Articles
- How Much to Install a Paver Driveway? A Guide
- Driveway Paver Installation & Design Guide | Gappsi Inc
- How Much Does a Paver Driveway Cost in 2026?
- paving Archives – Gappsi Group
- Marble Pavers for Pools, Patios & Driveways on Long Island | Gappsi Inc
Frequently Asked Questions
How long will my driveway be unusable during the project? Your driveway will be a construction zone for the entire installation, which can range from five days to two weeks or more depending on its size. Once the crew finishes, you will need to wait another 24 to 48 hours before driving on the surface. This allows the polymeric sand in the joints to fully harden, which is essential for locking the pavers together and ensuring a stable, long-lasting finish.
What happens if it rains during my installation? Rain is a common occurrence on Long Island, and a professional crew will have a plan for it. If heavy rain is expected, we will pause work, especially during the critical foundation-building stage. Working on saturated ground can compromise the stability of the base, so we let the area dry out completely before continuing. This brief delay is a sign of a quality installation, as it ensures your driveway’s foundation is solid and built to last.
Do I need to be home during the entire installation process? You do not need to be home for the whole project. It is most important that you are there for the initial consultation to discuss the design and available by phone in case any questions come up. Our project manager and masonry team are self-sufficient and will manage the site professionally. We just ask that you clear the area of personal items and vehicles before we arrive on the first day.
Why does the foundation preparation seem to take so long? The foundation is the most important part of your paver driveway, and we take the time to build it right. This stage involves much more than just digging; we excavate to a precise depth and then build up a multi-layer base of crushed stone. Each layer is thoroughly compacted to create a dense, stable surface that provides proper drainage and prevents the pavers from sinking or shifting over time. This meticulous process is the unseen key to a driveway that will perform beautifully for decades.
Is it really that easy to repair a single damaged paver? Yes, it truly is one of the biggest advantages of a paver system. Unlike a concrete slab that requires costly patching or a full replacement, a damaged paver can be handled individually. A professional can carefully lift out the single affected paver and set a new one in its place. The repair is seamless and cost-effective, saving you significant time and money over the life of your driveway.