Building a true outdoor kitchen is far more complex than setting up a grill on a patio. A fully functional space requires careful planning for gas lines, electrical wiring, and plumbing, all of which must meet strict local building codes. It also involves expert masonry, proper site grading for drainage, and selecting materials that won’t crack or fade after one Long Island winter. This is where a professional makes all the difference. The most skilled outdoor kitchen designers contractors Long Island NY act as your project’s central command, coordinating every trade and technical detail seamlessly. This guide breaks down what a great contractor actually does, so you can find a partner who can handle the complexity with ease.
Key Takeaways
- Partner with a full-service contractor: The right professional will guide you through every phase, from creating a custom design and handling utility hookups to seamlessly integrating the new kitchen with your existing landscape.
- Focus on long-term value, not just price: Select durable, weather-resistant materials that can handle Long Island’s seasons, and insist on a detailed, itemized quote that accounts for all costs, including permits and utilities, to avoid unexpected expenses.
- Thoroughly vet every potential contractor: Protect your investment by verifying their license and insurance, reviewing a portfolio of their completed outdoor kitchens, and checking recent customer reviews on independent websites before making a final decision.
What Does an Outdoor Kitchen Contractor Actually Do?
Before you hire someone to build your dream outdoor kitchen, it helps to know what a great contractor actually brings to the table. Their job goes far beyond just stacking stones and installing a grill. A true professional manages every detail, from the first sketch to the final cleanup, ensuring your project is beautiful, functional, and built to last. Understanding their full scope of work will help you ask the right questions and find the perfect partner for your Long Island home.
Custom Design and Planning
This is where your vision starts to become a reality. A skilled contractor works with you to create a detailed blueprint for your outdoor kitchen. They’ll help you think through the layout, making sure there’s a natural flow between the grill, sink, prep areas, and seating. They consider everything from the size of your space to how you plan to use it. This collaborative process ensures the final design is not only stunning but also perfectly tailored to your cooking and entertaining style, turning your initial ideas into a workable plan.
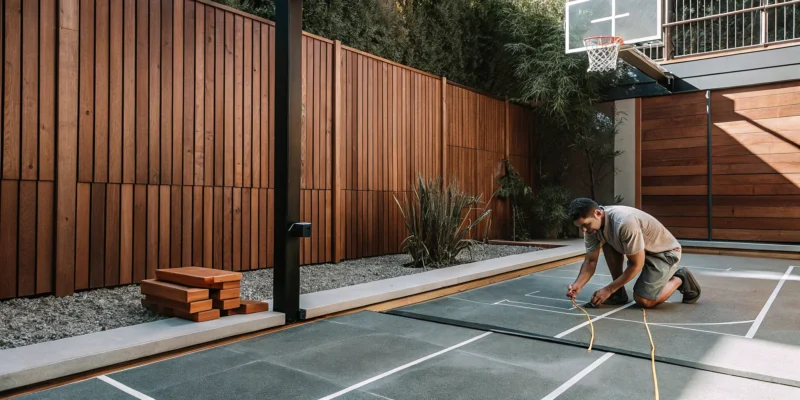
Construction and Installation
Once the design is finalized, your contractor gets to work on the physical build. This phase involves everything from preparing the site and pouring a foundation to constructing the kitchen’s framework. They handle all the masonry work, whether you’ve chosen natural stone, brick, or modern porcelain pavers. A reputable contractor uses expert craftsmanship to ensure every element is level, secure, and built to withstand Long Island’s weather. They manage the entire construction process, coordinating materials and labor to bring the design to life right in your backyard.
Appliance and Utility Hookups
An outdoor kitchen is more than just a pretty structure; it needs power, water, and gas to function. A qualified contractor manages these critical connections safely and correctly. This includes running electrical lines for refrigerators, lighting, and outlets, as well as plumbing for sinks and gas lines for grills and side burners. They understand local building codes and ensure all utility hookups are done to standard, preventing future problems. This technical expertise is non-negotiable, as it guarantees your kitchen is not only convenient but also completely safe for your family and friends to enjoy.
Landscaping and Hardscape Integration
The best outdoor kitchens look like they’ve always been a part of the backyard. A great contractor doesn’t just build a standalone island; they integrate it seamlessly with your existing environment. This means matching new patios and walkways with your current hardscaping and ensuring the kitchen complements your overall landscape design. They can help you choose materials and a layout that create a cohesive outdoor living area. This thoughtful integration transforms your project from a simple cooking station into a true extension of your home.
How to Choose Materials and Features for Your Outdoor Kitchen
Once you have a vision for your outdoor kitchen, the next step is bringing it to life with the right materials and features. This is where function meets style. Your choices will determine not only how your kitchen looks but also how well it holds up to the elements and how much you enjoy using it. Think about durability, your personal cooking style, and the overall aesthetic you want to create in your backyard oasis.
Pick Weather-Resistant Materials for Long Island’s Climate
Living on Long Island means we get to enjoy all four seasons, but our outdoor spaces have to endure them, too. From humid summer days to freezing winter nights, your kitchen materials need to be tough. Opting for weather-resistant surfaces is one of the smartest investments you can make. For countertops, materials like granite, quartzite, and high-quality porcelain pavers are excellent choices because they resist staining, fading, and cracking. The kitchen’s base should be just as durable. A structure built with concrete block and finished with stone veneer is a classic, long-lasting option that our masonry experts often recommend to handle anything our climate throws at it.
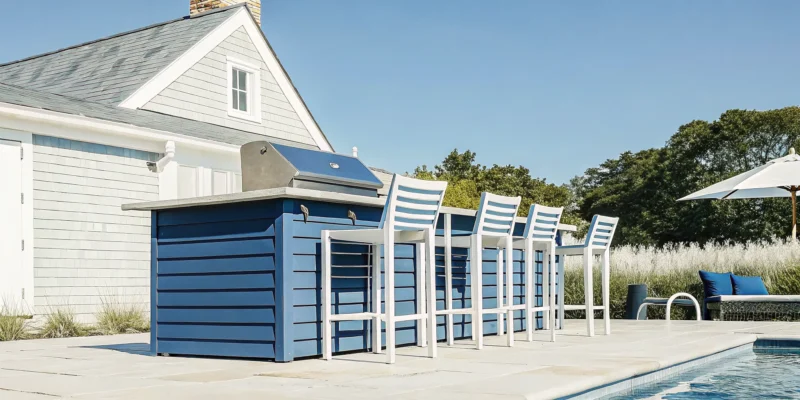
Select Essential Appliances and Features
The heart of any kitchen is its appliances, and an outdoor kitchen is no different. Think about how you love to cook. Are you a classic grill master, or do you dream of pulling a perfect pizza from a wood-fired oven? Your cooking style should guide your appliance selection. A high-performance built-in grill is a must-have for most, but you can also add features like a side burner for sauces, a smoker for ribs, or an outdoor-rated refrigerator to keep drinks cold. Don’t forget practical elements like a sink for easy cleanup and stainless steel drawers for storage. Investing in quality, outdoor-rated appliances from the Gappsi Store ensures they’ll perform beautifully for years to come.
Explore Popular Design Trends and Smart Tech
Your outdoor kitchen should be an extension of your home’s style. A popular trend right now is mixing materials to create visual interest, like pairing sleek stainless steel appliances with the rustic texture of natural stone. You can also incorporate smart technology for added convenience and ambiance. Imagine adjusting your landscape lighting from your phone or playing your favorite playlist through integrated, weatherproof speakers. Even the structures that house your kitchen can make a statement. A custom pavilion or pergola not only provides shelter but also adds an architectural element, creating a true outdoor room that feels both functional and inviting.
Consider Sustainable and Modular Designs
Creating a beautiful outdoor space can also be an eco-conscious choice. Sustainable design is becoming more popular, focusing on using recycled or locally sourced materials and energy-efficient features like solar-powered lighting. Another smart approach is a modular design. Modular outdoor kitchens offer flexibility, allowing you to create a custom layout that perfectly fits your space and needs. This approach can also be more efficient, sometimes reducing construction time and waste. A thoughtful design doesn’t need a massive footprint to be highly functional. With smart planning, even a more compact kitchen can provide all the features you need for incredible outdoor entertaining, reflecting the same care we put into our home remodeling projects.
How to Find the Right Outdoor Kitchen Contractor on Long Island
Choosing the right contractor is the most critical decision you’ll make for your outdoor kitchen project. This is the team that will turn your vision into a reality, so you want to find a partner you can trust. A great contractor brings not only technical skill but also design expertise, clear communication, and a commitment to quality. Taking the time to properly vet your options will save you from headaches down the road and ensure your new space is everything you dreamed it would be. Here’s a straightforward guide to finding the best outdoor kitchen builder for your Long Island home.
Review Their Experience and Portfolio
Before you even pick up the phone, take a good look at a contractor’s past work. A robust portfolio is more than just a collection of pretty pictures; it’s proof of their experience, quality, and design versatility. Look for a wide range of projects that show they can handle different styles and scales. A contractor with a deep portfolio has likely encountered and solved a variety of construction challenges. Also, pay attention to the materials and appliance brands they use. A top-tier contractor will have access to a diverse selection of high-quality porcelain and natural stone and won’t push you toward a single brand just because it’s easier for them.
Verify Licensing and Insurance
This step is non-negotiable. One of the biggest mistakes homeowners make is failing to confirm that a contractor is properly licensed and insured. In New York, specific licenses are required for home improvement contractors, and this ensures they meet local and state standards. More importantly, proper insurance protects you from liability if an accident happens on your property during construction. Don’t just take their word for it. Ask for copies of their license and certificates of insurance, and make sure they are current. You can verify a license with your local county office to be absolutely certain you’re working with a legitimate professional.
Assess Their Communication and Project Style
A successful project depends on clear and consistent communication. From the very first conversation, pay attention to how a contractor interacts with you. Are they responsive to your calls and emails? Do they listen to your ideas and answer your questions thoroughly? A great partner will walk you through their process, set realistic timelines, and be transparent about budget management. During your consultation, ask how they handle unexpected issues or changes to the plan. Understanding their project style and problem-solving abilities upfront will help you feel confident and informed every step of the way. This is especially important for complex home remodeling projects that involve multiple stages.
Read Customer Reviews and Testimonials
Customer reviews offer a real-world glimpse into what it’s like to work with a contractor. While it’s helpful to read testimonials on their website, be sure to check third-party platforms like Google, Houzz, and Yelp for a more balanced perspective. Look for patterns in the feedback. Do clients consistently praise their craftsmanship, professionalism, and reliability? How does the contractor respond to any negative comments? Seeing how they handle criticism can be just as telling as a five-star review. You can also check for video testimonials, which often provide a more personal and detailed account of a client’s experience with projects you can watch on YouTube.
Avoid Common Hiring Mistakes
A great contractor will help you steer clear of common pitfalls. Many outdoor kitchen mistakes stem from poor planning, like underestimating the space needed or choosing materials that can’t withstand Long Island’s weather. A seasoned professional will guide you through these decisions, ensuring you don’t overlook crucial utilities like plumbing, gas, and electrical lines. Be wary of any contractor whose main selling point is an unusually low price. While budget is important, choosing a builder based on the lowest bid often leads to cut corners, subpar materials, and a final product that doesn’t last. Instead, focus on value and expertise to ensure your investment in an outdoor kitchen is a lasting one.
How Much Does an Outdoor Kitchen Cost on Long Island?
Pinning down an exact price for an outdoor kitchen is tricky because every project is unique. The final cost depends on a mix of factors, from the size of your space to the appliances you choose. Think of it like building a custom home, but for your backyard. A simple setup with a built-in grill and some counter space will cost significantly less than a gourmet kitchen with a pizza oven, refrigerator, and sink. At Gappsi, we believe in transparency, which is why we work with you to create a detailed plan that aligns with your vision and your budget, ensuring there are no surprises along the way.
Understand What Affects the Price
The biggest drivers of your outdoor kitchen’s cost are its size, the materials you select, and the appliances you install. A larger kitchen with more counter space will naturally require more materials and labor. High-end finishes like granite countertops or custom stone veneers will also influence the price compared to more standard options. Most outdoor kitchen mistakes stem from poor planning or underestimating costs, especially when it comes to overlooking utilities. We can help you select durable, weather-resistant porcelain and natural stone that looks incredible and stands up to Long Island’s climate, giving you the best value for your investment.
Get Accurate Quotes and Estimates
When you start getting quotes, look for clarity and detail. A vague estimate that doesn’t mention utilities or permits is a major red flag. A trustworthy contractor will provide an itemized proposal that breaks down the costs for every component: labor, materials, appliances, and any necessary site work. This transparency is key to managing your budget effectively. You should always ask to see examples of outdoor kitchens they’ve built. A detailed quote from an experienced masonry designer not only gives you a clear financial picture but also reflects the contractor’s professionalism and attention to detail, setting the stage for a smooth project from start to finish.
Budget for Upgrades and Add-Ons
It’s easy to get excited and want every possible feature, but it’s smart to prioritize. Start by creating a detailed blueprint of your ideal space, considering the placement of essentials like the grill, countertops, and storage. Then, think about the add-ons that would truly enhance your experience. Do you dream of a wood-fired pizza oven or a full-service bar? What about a sound system or custom lighting? You might also want to include a covered structure like one of our custom pavilions and pergolas for shade and comfort. Planning for these upgrades from the beginning, even if you add them later, can save you money on future construction.
Plan for Permits and Utility Costs
Beyond the visible elements like grills and countertops, there are essential background costs to consider. Hooking up gas lines, plumbing for a sink, and electrical wiring for refrigerators and lighting all require licensed professionals and local permits. These are not areas to cut corners on. Proper site preparation is also critical; for example, you need to ensure proper grading to direct water away from the structure. An experienced home improvement company will manage all these details, from securing permits to coordinating with electricians and plumbers, ensuring your outdoor kitchen is not only beautiful but also safe and fully compliant with local codes.
How to Vet Potential Contractors
Once you have a list of potential contractors, it’s time to do your homework. Choosing the right partner for your outdoor kitchen project is just as important as picking the right materials. This vetting process is your chance to look beyond the sales pitch and find a team that is reliable, skilled, and a good fit for your vision. A great contractor will be transparent, experienced, and able to guide you through every step with confidence. Taking the time to thoroughly check their background, ask detailed questions, and look for any potential red flags will save you from headaches down the road and ensure your project is a success. Think of it as building the foundation for a great working relationship.
Use Online Reviews and Local Resources
Before you pick up the phone, start with a simple online search. Reading through online reviews can give you a clear picture of what past clients have experienced. Look for patterns in the feedback. Do people consistently praise the contractor’s communication and professionalism? Did they stick to the timeline and budget? A contractor’s digital footprint is a great first impression. You can also check out their project galleries and videos to see the quality of their work firsthand. Don’t just look at the finished product; pay attention to the details and craftsmanship shown in their YouTube videos and portfolio. This initial research helps you create a shortlist of contractors who have a proven track record of happy clients.
Ask These Questions During Your Consultation
Your consultation is more than just getting a quote; it’s an interview. Come prepared with a list of questions to understand their process and expertise. Ask about their experience building outdoor kitchens specifically on Long Island and what materials they recommend for our climate. A well-versed contractor should be able to discuss the pros and cons of different options, from durable porcelain pavers for your patio to the best countertops for outdoor use. Inquire about their access to different appliance brands and whether they handle all aspects of the project, including plumbing and electrical work. This conversation will reveal their depth of knowledge and help you gauge if they can truly bring your vision to life.
Watch Out for These Red Flags
As you speak with contractors, keep an eye out for warning signs. A major red flag is a contractor who can’t show you a portfolio of outdoor kitchens they’ve personally built. If they’re hesitant to share examples or references, it’s best to move on. Be cautious of vague estimates that don’t break down the costs or fail to mention necessary permits and utility work. High-pressure sales tactics or demands for a large upfront cash payment are also causes for concern. A professional and trustworthy contractor will provide a detailed, transparent quote and will never pressure you into making a quick decision. Trust your gut; if something feels off, it probably is.
Check Their Credentials and References
Finally, always verify a contractor’s credentials. One of the biggest mistakes homeowners make is hiring someone without the proper qualifications. Ask for proof of their license and insurance; this protects you in case of accidents or property damage. Don’t just ask for references, actually call them. Speak to a few past clients about their experience. Were they happy with the final result? Was the project completed on time and on budget? Would they hire the contractor again? A reputable company like Gappsi will be proud to provide this information. This final step confirms you’re hiring a true professional who stands by their work and values their clients.
Related Articles
- Outdoor Kitchen Designer Installer Contractor Long Island NY – Gappsi Group
- Outdoor Kitchen Designer and Build Contractor on Long Island NY – Gappsi Group
- Amazing Outdoor Kitchens Long Island – Gappsi Group
- Outdoor kitchen Contractor Long Island NY – Gappsi Group
Frequently Asked Questions
How long does it typically take to build an outdoor kitchen? The timeline for building an outdoor kitchen can vary quite a bit. A straightforward project might take a few weeks, while a more complex design with custom features and extensive utility work could take a couple of months. Factors like the project’s scale, material availability, and the local permit process all play a role. A professional contractor will give you a realistic schedule upfront so you know exactly what to expect.
What kind of maintenance is involved with an outdoor kitchen? The best part about a well-built outdoor kitchen is that it doesn’t require a lot of upkeep, especially when you use durable materials. Your main tasks will be routine cleaning of countertops and grill grates, just like you would with an indoor kitchen. You will also need to properly winterize the space by covering your appliances and shutting off water lines to prevent freezing. A little seasonal care goes a long way in protecting your investment for years of enjoyment.
Can an outdoor kitchen be built on my existing patio? Yes, it’s often possible to build an outdoor kitchen on an existing patio. The most important step is having a professional assess the patio’s foundation to make sure it can handle the weight of the new structure and appliances. A skilled contractor can also seamlessly integrate the new masonry with your current hardscape, making the kitchen look like it was always part of the original design.
Do I really need permits for an outdoor kitchen on Long Island? In almost every case, yes. Permits are required for projects that involve running new gas, electrical, or plumbing lines, which are essential components of a functional outdoor kitchen. This process isn’t just about following rules; it’s a critical safety measure that ensures all work is done correctly and to code. A reputable contractor will manage the entire permitting process for you, so you don’t have to worry about the paperwork.
What’s the biggest mistake to avoid when planning my outdoor kitchen? The most common mistake is underestimating the importance of a good layout. People often focus on the appliances but forget to plan for adequate counter space, storage, and a natural flow between the cooking, prepping, and social areas. This can lead to a space that looks great but is frustrating to use. Working with an experienced designer ensures your kitchen is not only beautiful but also perfectly functional for how you want to cook and entertain.